Amica AWN712D User manual

WASHING MACHINE
Please read this User Manual carefully before using the appliance!
INSTRUCTION MANUAL
IO 00594/1
(11.2013)
AWN712D

2
CONTENTS
Basic Information.......................................................................................................................3
Notes on Safety..............................................................................................................4
Installing the Washing Machine...................................................................................................6
Understanding the symbols on clothes labels................................................................8
Description of control panel..........................................................................................9
Using the appliance................................................................................................13
Table of programmes.........................................................................................15
Troubleshooting..................................................................................................................17
Maintenance and Cleaning.......................................................................................19
Practical tips on washing.....................................................................................................20
Specification......................................................................................................23
Service and Warranty..................................................................................................23
Product Fiche........................................................................................................24
In accordance with European Directive 2002/96/EC and Polish legislation regarding
used electrical and electronic goods, this appliance is marked with the symbol of the
crossed-out waste container.
This marking means that the appliance must not be disposed of together with other
household waste after it has been used. The user is obliged to hand it over to a waste
collection centre collecting used electrical and electronic goods. The collectors, inclu-
ding local collection points, shops and local authority departments provide recycling
schemes. Proper handling of used electrical and electronic goods helps to avoid
environmental and health hazards resulting from the presence of dangerous components and the
inappropriate storage and processing of such goods.

3
BASIC INFORMATION
From today, washing will be easier than ever before. The Amica washing machine combines
exceptional ease of use with excellent effectiveness. Once you have read the instructions,
operating the washing machine will not be a problem.
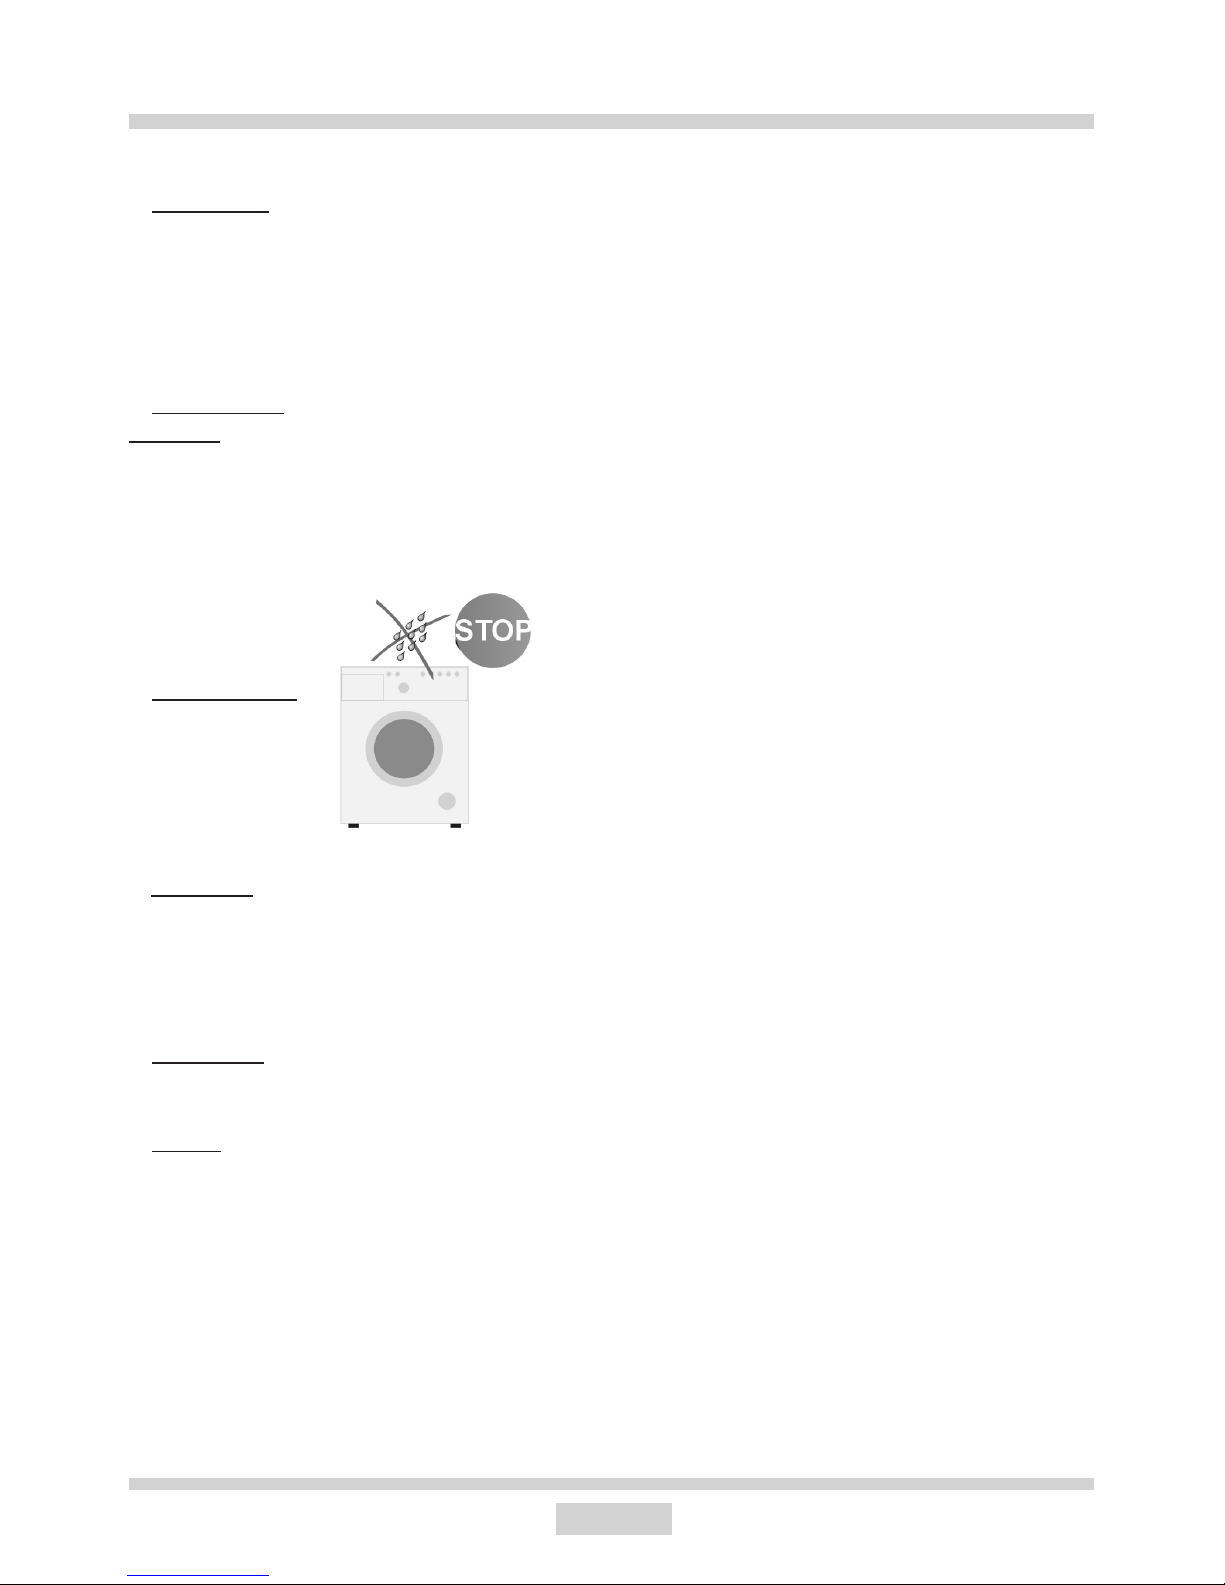
Before being packed and leaving the factory, the safety and functions of this washing machine
were carefully tested. These tests may have resulted in some damp or traces of water being
left inside the machine.
We ask you to read the User Manual carefully before switching on the appliance. Following
the directions in this manual will protect you from any misuse.
Keep this User Manual and store it near at hand. The instructions should be followed carefully
to avoid any unfortunate accidents.
Important!
This washing machine is intended for purely domestic use to wash textiles and clothes
which are designed to be machine washed in a detergent bath.
Before plugging the washing machine into the mains, remove the safety packaging and
ensure the machine is level.
The manufacturer reserves the right to introduce changes which do not affect the operation
of the appliance.
Use
lThe machine should only be used after the instructions below have been read carefully.
lNever use the machine outdoors or anywhere the temperature may fall below freezing.
lThe machine should not be operated by children or anyone who has not read the instruc-
tions.
Important! Temperatures below 0°C can damage the washing machine! In the event of the
machine being stored or transported in sub-zero temperatures, it should be left to acclimatise
in a temperature above zero for 8 hours before being used.
Manufacturer’s Declaration
The manufacturer hereby declares that this product meets the requirements of the follo-
wing European directives:
lLow Voltage Directive 2006/95/EEC,
lElectromagnetic Compatibility (EMC) Directive 2004/108/EEC
lErP Directive 2009/125/EEC
and has thus been marked with the symbol and been issued with a declaration of com-
pliance made available to market regulators.

4
Use only those detergents and additives which are designed for au-
tomatic washing machines, especially when using the TOWELS 95°C
programme.
Do not use any agents containing solvents, as these may damage certain
parts of the machine, or cause them to emit poisonous gases. There may
also be a risk of ignition and explosion.
Ensure no unwanted objects are put inside the appliance. Completely
empty all pockets in the clothing to be washed and fasten buttons and
zips. Place small, loose objects in a washing bag, or inside a pillow case,
as they may be destroyed or else damage the drum or internal tank. Do
not exceed the recommended maximum load of washing.
NOTES ON SAFETY
lDetergents
lLoading the
Machine
lControl Panel
lTransport
lData Plate
Unplug the machine before preparing the machine for transport. Do not
transport the washing machine if drum locking bolts are not in place. See
the chapter INSTALLING THE MACHINE (page 6). Keep the appliance
in upright position when transported.
Data plate indicating basic information about the washing machine is
located at the top part of the rear casing.
The door glass of your washing machine is hot during operation. Do not
allow children in the vicinity of the appliance.
Protect the control panel from water spillage.
Do not put washed clothes on top of the machine!
lBurns

5
Checking stability
Once the washing machine is in position and levelled, it must be checked to ensure it is
standing in a stable position on all four legs.
In order to check this, press down each corner of the appliance in turn to see if it moves. The
safe, long-term and reliable operation of the washing machine depends on it being correctly
positioned and level.
Important! Level the appliance, remove the drum locking bolts and wait 3 hours
before using the appliance for the rst time.
Important! Incorrect levelling, especially instability, may cause the washing machine
to move around during operation.
NOTES ON SAFETY
Withdrawal from Use
To ensure safety, the washing machine must be disabled once its useful life comes to an end.
First unplug it and then cut off the power lead. Scrap the appliance in line with local waste
disposal legislation.
This appliance is not intended for use by persons (including children) with physical, mental
or sensory handicaps, or by persons inexperienced or unfamiliar with the appliance, unless
under supervision or in accordance with the instructions as communicated to them by persons
responsible for their safety.
Ensure that children do not play with the appliance.

6
INSTALLING THE MACHINE
I. Remove the protection used for transporting the appliance (keep the locking bolts
for future use, e.g. when moving house).
lUnscrew the 4 locking bolts with a spanner.
lRemove the rubber and plastic transport
brackets from the sockets along with the wa-
shers and bolts.
The locking bolts MUST be removed before the washing machine is used!
lStop up the holes with the stoppers
enclosed in the accessories bag.
lDo not place the washing machine on a carpet!
lThe oor surface should not be either concave or sloping!
lAttention should be paid to the shape of the surface of the oor, so that the
entire weight of the appliance rests on its legs (not its body)!
II. Positioning and levelling the machine
After positioning and levelling the machine,
check that it is stable by pressing down each
corner and ensuring it does not move!
lPlace the washing machine on a solid, even surface.
lLoosen the plastic washer (2)
lLock with washers (2)
lLevel the machine by adjusting the legs (1)

7
The drain hose is at the back of the
machine. Fix the drain hose so that it
does not move while the machine is
in operation (use the elbow as shown
below). Do not place the hose too deep
into the outlet pipe!
max 100 cm
min 60 cm
III. Connecting the water supply
IV. Water drain
V. Connecting the electric power supply
A water supply hose with seals is inside the drum of the machine.
lOnly plug the machine into a properly installed socket
with an earth pin!
lDo not connect to an adaptor or an extension cord!
lIn the event of the power lead being damaged, it must be
replaced by an authorised technician.
lThe electrical system to which the appliance is to be
connected must be protected with a 10 A fuse.
INSTALLING THE MACHINE
Water pressure min. 0,03 MPa (0,3 bar), max.1 MPa (10 bar). Supply the machine
with cold water
lafter connecting, make sure the hose is not twisted
lafter connecting the hose and the valve, check they are sealed tight
lregularly check the condition of the supply hose.
Use the new hoses sup-
plied with the machine.
Do not re-use old hoses.
lThe appliance’s mains connection (electrical wall socket)
should be in a visible and accessible place!

8
Detergent Drawer
Drum
Pump lter
cover
Door
handle
Control panel
DESCRIPTION OF THE APPLIANCE
Always pay attention to the symbols on garments’ labels
when choosing a washing setting.
I. Washing
II. Chemical cleaning
III. Spin dryer
boiling
temp. 900
normal
temp 600C
normal
temp 400C
DO NOT
wash!
delicate handwash
all
solvents
all
except TRI
petrol
only
DO NOT
dry clean!
normal low high DO NOT
dry!
IV. Ironing
1100C1500C 2000CDO NOT
iron!
UNDERSTANDING THE SYMBOLS ON CLOTHES LABELS
90

9
DESCRIPTION OF CONTROL PANEL
1
23
4
5678910
1. Display
2. Programme selector knob
3. Start / Pause button
4. Temperature button
5. Spin Speed button
6. Pre-wash button
7. Rapid wash button
8. Child Lock
9. Easy Iron button
10. Start delay button

10
DESCRIPTION OF CONTROL PANEL
1. Display
lThe display shows washing temperature, spin speed, the remaining wash cycle time,
selected functions, and additional information about locked/open door.
l Approximate washing time:
Time displayed is an estimate only. It can differ from the actual washing time depending on
temperature, water pressure, quantity of laundry loaded, and quantity of washing powder
used. The time is automatically updated during the wash cycle and it is normal for it to stop
or skip.
lSymbol Pre-wash is displayed to show this function has been selected.
lSymbol Rinse hold is displayed to show this function has been selected.
lSymbol Rapid wash is displayed to show this function has been selected.
lSymbol is displayed to show this function has been selected.
lSymbol Easy Iron is displayed to show this function has been selected.
lSymbol Delay is displayed to indicate the selected programme start will be delayed
by the specic number of hours.
lSymbol is displayed to indicate the door is closed and locked. The door can only be
opened when this symbol is displayed.
Auto dimming: is active after the wash cycle. Display is always on before and during the
wash cycle. About 2 minutes after the wash cycle has ended, washing machine will enter a
power saving mode. Display backlight is dimmed.

11
DESCRIPTION OF CONTROL PANEL
2. Programme selector knob
Choose the appropriate wash programme as required, depending on how dirty the clothes
are, and type and amount of laundry loaded, which ensures better results and more effecti-
ve washing. Once the wash programme is started, turning the programme selector knob to
another position (except ) does not change the previously selected programme.
3. Start/Pause button
Press Start/Pause to start or pause a programme.
The remaining time is displayed and two dots are ashing the during wash cycle.
When you Pause a programme the remaining time is ashing and the dots are displayed
continuously.
The Pause mode can be used to soak the laundry.
Once the selected programme started wait for about 10 minutes and then press the Start/
Pause button. When the laundry is soaked as required, press the Start/Pause button aga-
in to resume the program. Soaking will improve washing results for heavily soiled laundry.
You can Pause a programme to add laundry to the drum during the wash cycle. o add
laundry to the drum during the wash cycle press the Start/Pause button. After a while, the
animated door symbol on the display will indicate that the door can be opened once the
door lock is released. When you see the symbol you can open the door and add laun-
dry. After adding laundry close the door and press the Start/Pause button. The appliance
will resume a wash programme.
Note: If symbol is shown and time is ashing when you press the Start/Pause button,
the laundry cannot be added at this stage of the programme.
4. Temperature button
This button allows the washing temperature to be set. Press this button to display water
temperature settings available for a given programme or an option for washing in cold
water (no heating). Depending on the programme selected, the display shows the following
temperature ° C (cold water) 30°C - 40°C - 50°C - 60°C - 70°C - 80°C - 90°C - 95°C.
5. Spin speed button
Press this button to set the spin speed when water is being pumped out of the washing
machine. Press the button to change the setting. Depending on the programme selected,
the display shows the following values: - - (no spin) - - (rinse hold) - 400 - 600 - 800 -
1000 - 1200.
Note: If you activate rinse hold function, the washing machine holds laundry in water when
programme has ended. Press Start/Pause button to drain water from the drum without
spin-drying cycle.

12
DESCRIPTION OF CONTROL PANEL
10. Start delay button
Press this button to set the delay time for starting washing. The setting range available is
from 30 minutes to 23 hours. Press and hold the button to set the time after which washing
is to commence.
Important! If there is a power outage during Delay Time, countdown will resume immedia-
tely after the power is restored.
6. Pre-wash button
The Pre-wash function is not available for all programmes (see Table of wash program-
mes.
The Pre-wash function extends the wash cycle by approximately 20 minutes. The laundry
is prewashed before the main wash cycle begins. Activation of the Pre-wash function will
allow you to achieve excellent washing results without the need to soak the laundry. Pre-
wash is recommended when washing heavily soiled laundry.
Important! Pour suitable detergent to detergent drawer marked with symbol before the
Pre-wash function is activated.
7. Rapid wash button
The Rapid function reduces the total time saving money while reducing energy consump-
tion and water consumption.
Pre-wash is recommended when washing lightly soiled laundry.
Note: The Rapid function is not available for all programmes (see Table of wash program-
mes.
Note: If partial load of less that half full load is detected, the symbol will light automati-
cally.
8. Child Lock
This function locks the function buttons to prevent settings being changed or the operation
being interrupted by children. To set the Child Lock during a wash cycle, simultaneously
press and hold the and buttons for around 3 seconds (the child symbol will appear
on the display) To release the Child Lock, hold the same buttons down once more for
around 5 seconds.
Note: The Child Lock remains engaged even after the appliance is switched off and on
or there is a power outage. The child lock is automatically released when wash cycle has
ended.
Note: When child lock is engaged, the child symbol will ash if you press any button.
9. Easy Iron button
Easy Iron function reduces creases. The drum is gently rotated at the end of the wash
cycle to reduce creases.
79

13
USING THE APPLIANCE
II. Start delay setting
The delayed start function may be used when, for example, taking advantage of discoun-
ted energy tariffs.
Procedure:
1. Close the door.
2. Set the programme selector knob to the desired programme (see the table further on).
3. Select additional functions or wash cycle parameters as required.
4. Press the Start delay button
5. Select time ranging from 0.5 to 23 hours. The display will show the setting from 30min.
to 23h.
6. Press the [Start/ Pause] button. The appliance will be set in delay mode. Washing will
commence immediately after the delay time has elapsed.
Note: If a delay start time has been set, the display will show only the delay time in hours
and the symbols will be illuminated. Once the delay time has elapsed, the selected
wash programme will start and the display will show the remaining time and the symbol.
III. End of the wash cycle
1. When the wash programme has ended End will be displayed and the symbol.
2. Turn off the water valve
3. Set the programme selection knob to
4. Unplug the appliance from the mains.
5. Open the door and remove the laundry.
IV. Cancelling and changing programme
Set the programme selector knob to position for several seconds to terminate a pro-
gramme. Then select the desired wash programme.
Note: When you cancel a programme when there is water in the drum and turn the pro-
gramme selector knob to a different position, the appliance will drain the water. Then select
the desired wash programme.
I. Programme selection
1. Set the programme selector knob to the desired programme (see the table further on).
2. Change temperature, spin speed or activate available additional functions to modify the
programme to your individual needs.
3. Press the [Start/ Pause] button. The programme will start after about 6 seconds, once
door lock is engaged.

14
I. Baby comfort antiallergic programme
The Baby comfort antiallergic programme is especially recommended for washing childre-
n’s clothing and for people with sensitive skin In this programme an extra rinse is added to
a wash programme.
Additionally, water in each rinse is heated to 30°C.
Note: Antiallergic function is only available in the baby comfort wash programme.
II. The Shirts programme
This programme features a special algorithm designed specically for washing shirts /
blouses.
SPECIAL PROGRAMS

15

16
TABLE OF PROGRAMMES
* - standard programmes for washing cotton fabrics at 60°C and 40°C.
These programmes are suitable for washing normally soiled cotton fabrics. They are simultaneously the most effective pro-
grammes for washing these type of fabrics, taking into account the total energy and water consumption.
Note: Real water temperature may differ from the declared wash cycle temperature.
Use detergent or fabric softener if necessary,
l Detergent required, without which washing will be ineffective
x Do not use detergent or fabric softener
Additional functions available
Easy
Iron
Option
Option
Option
Option
-
-
Option
Option
Option
Option
Option
Option
Option
Option
Option
Rapid
wash
Option
Option
Option
Option
-
-
-
-
-
Option
-
Option
-
Option
Always
active
Prewash
Option
Option
Option
Option
-
-
-
-
-
Option
-
Option
Option
-
-
Max. load
[kg]
7
7
7
3,5
2,5
2,5
7
7
3,5
3,5
3,5
3,5
3,5
2,5
2,5
Max. spin
speed
[rpm]
1200
1200
1200
800
600
600
1200
1200
1200
800
800
600
800
1200
800
Temp.
max.
°C
95
60
40
60
30
40
-
-
20
30
30
60
50
60
30
Programme name
Towels 95
Cottons *
Cottons *
Synthetics
Delicates
Wool
Rinse
Spin
Eco 20
Sport
Mix
Shirts
Baby comfort
Everyday 60’
Quick wash 15’

17
TABLE OF PROGRAMMES
NOTE: Above-mentioned the time is an estimate and may differ from actual wash cycle time, depending on temperature, water pressure,
load size, etc. The time is automatically updated during wash cycle. Displaying the same time for an extended period or abrupt changes
are normal.
Type of laundry
Heavily soiled clothing, or an moderately soiled cotton and linen
for children that requires boiling.
Moderately or heavily soiled cotton clothes, bed linen, table linen,
linen, towels.
Moderately soiled cotton or linen clothes.
Lightly soiled delicate synthetics, or synthetic and cotton com-
positions.
Very delicate fabrics.
Note: Do not machine wash woollen fabrics if the cloth tag
prohibits this.
Rinsing with laundry additives, including. anti-static or softening
additives. Reduce the spin speed when washing very delicate
fabrics.
Spin-drying after hand washing.
Lightly soiled, sweaty cotton and linen clothes.
Wash at 20°C
Sportswear.
Lightly and medium soiled cotton and synthetic clothing.
Moderately soiled cotton and synthetic shirts.
Children’s clothes.
Heavily or moderately soiled cotton and linen clothing washed
at 60°C within 1h.
Lightly soiled, sweaty cotton clothes and linen.
Note: Due to the extra short wash cycle, less detergent is requ-
ired compared to other programmes. The door can be opened
about 2 minutes after the wash cycle has ended (included in the
duration of the programme).
The
number
of rinses
3
2
2
2
3
3
3
*
2
2
2
2
4
1
1
Water
consump-
tion
(l)
86
50
58
52
84
86
51
*
46,1
53
65
49
87
36
36
Energy
consump-
tion
(kWh)
2,82
1,19
0,89
0,84
0,3
0,53
0,13
0,04
0,20
0,3
0,4
1,02
1,3
0,9
0,1
Time
[h:min]
3:33
3:25
3:15
1:42
1:30
1:16
0:42
0:17
1:38
1:15
1:30
1:58
2:21
1:00
0:15
Detergent drawer
Fabric
softener
x
Basic
wash
l
l
l
l
l
l
x
x
l
l
l
l
l
l
l
Prewash
x
x
x
x
x
x
x
x

18
TROUBLESHOOTING
Problem Probable cause/Solution
The washing machine is not
working
- Turn the tap on
Clean the mesh lter on the supply hose.
- Close the door of the appliance.
Press the [Start/ Pause] button.
Water leaks - Connect the water intake properly.
The load in the appliance has not
been spun
- Replace the load evenly in the drum, clean the pump lter.
Unpleasant smell in the drum - Activate the Autoclean cycle without a load
(see the washing programme table).
No water in the drum - Water error is shown on the display . Turn on the tap with the
water supply.
There is water left in the fabric
softener container.
- Firmly press the button in the middle container
Washing not properly rinsed - Use the correct amount of cleaning agent, depending on how dirty
the washing is and the hardness of the water (see the instructions on
the cleaning agent’s packaging).
- Clean the pump lter
The appliance does not ll with
water
- Turn on the water valve
- Check the programme setting
- Check the water pressure
- Reconnect the water supply hose.
- Close the door of the appliance.
- Check the water intake is not bent or blocked.
Simultaneous intake and draining
of water
- Check that the end of the outlet hose is higher than the level of the
water in the appliance (the hose should be at a height of 0.6m to 1m).
Water outow problems - Check the pump lter
- Check the outlet lead
- Check the height of the outlet hose, which should be 0.6m to1m
from the bottom of the washing machine.
Appliance is vibrating - Check that the transport safety devices have been removed.
- Level the appliance
- Secure the legs (tighten the nuts).
Foam from the detergent drawer - Reduce the amount of detergent used.
- Check the water hardness and amount of detergent used, as well
as the type of detergent used in the drum.
The operation of the appliance is
interrupted before the programme
has nished
- Check power supply, water supply and water outlet.
Noise caused by operation of
the outlet pump after water is
removed
- The water has been removed from the drum, but small amounts
remain in the pump and outlet lead. Constant operation of the outlet
pump causes air to be sucked in leading to the characteristic noise,
which does not mean that anything is wrong.
Short breaks during the wash
cycle
- The water in the appliance is being automatically relled.
- Pause caused by removal of excess foam.

19
TROUBLESHOOTING
The fault indicator lights
The washing machine has a system of CODES shown on the display, which helps to locate
minor operating faults and identify their cause.
Fault is indicated by the symbols:
Display
indication
Reason Solution
Low pressure, no
water in the machine
Unscrew the water valve, check the water inlet hose and
lter, check the water pressure.
Improper water
outow
Make sure that drain hose is not clogged, check the
pump and water lter.
Door ajar Check that the door is locked; check that laundry is not
jammed in the door.
Others Try to restart or contact the SERVICE CENTRE
tel. 0844815 8880 / 0818 45 46 46

20
II. Cleaning the water supply valve
lUnplug the appliance from the
mains,
lTurn off the water valve,
lOpen the lter cover by hand
or using a at-head screwdriver.
lTurn on the water supply hose,
lUse forceps to grasp the lter mesh plunger,
lRemove and clean the lter (using a brush).
lUnscrew the lter. lRemove and clean the lter.
To replace the lter
following the pro-
cedure in reverse
order.
III. Cleaning the detergent drawer (at least once a month).
lRemove the drawer (while pressing
the stop).
lClean in running water (or using a
brush or piece of cloth).
lReplace the drawer.
Pump
lter
To replace the lter
following the pro-
cedure in reverse
order.
MAINTENANCE AND CLEANING
I. Cleaning the pump lter Clean the pump lter every 20 washes or so.
Neglecting to clean the lter causes difculties in emp-
tying the machine of water!
Never clean the product’s casing or plastic parts using solvents or strong, abrasive cleaning
agents (e.g. washing powders or creams)! Only use delicate liquid cleaning agents and soft
cloths. Do not use sponges.
Table of contents
Other Amica Washer manuals

Amica
Amica AWP510L User manual

Amica
Amica WA 474 020 User manual

Amica
Amica WA 14661 W User manual

Amica
Amica AWT714S User manual

Amica
Amica WA 14690-1 W User manual

Amica
Amica WA484100W User manual

Amica
Amica AWN912DJB User manual

Amica
Amica WME610 User manual

Amica
Amica AWCT 10L User manual

Amica
Amica WMA612 User manual

Amica
Amica WME712/1 User manual

Amica
Amica WMS914 User manual

Amica
Amica AWE512L User manual

Amica
Amica AWI714S User manual

Amica
Amica AWT714S/1 User manual

Amica
Amica WA 474 030 User manual

Amica
Amica AWI814L User manual

Amica
Amica IO-WMS-0825 User manual

Amica
Amica AWM712D User manual

Amica
Amica AWT714S User manual