Amptek DP4 User manual

DP4 Quick Start Guide Rev A1
Page 1 of 3
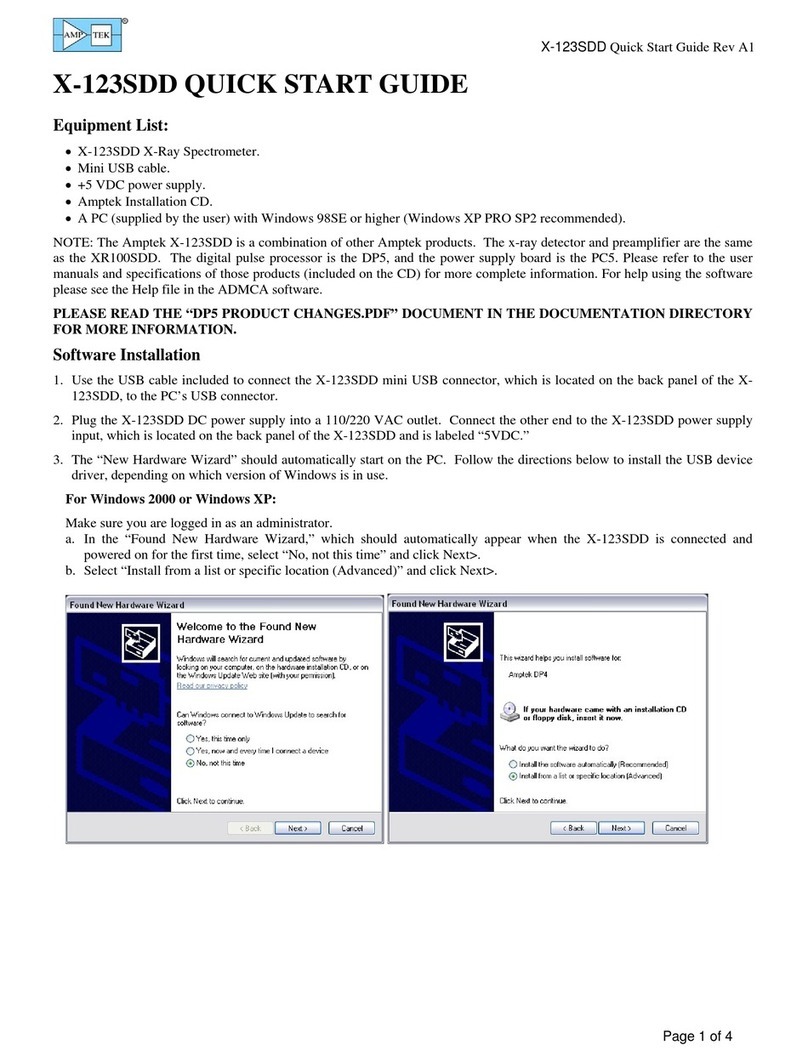
DP4 QUICK START GUIDE
The Amptek DP4 is strictly an OEM product. Please refer to the DP4 User Guide for information on the use and setup of the
DP4. This Quick Start only describes the software setup using a USB connection. The manner in which the DP4 is both
powered and connected to the PC’s USB port varies depending on whether the DP4 is bought stand-alone, with a PC4-2, or
PC4-3. Those connections are not addressed here.
Software Installation
1. Connect the DP4’s USB to the PC’s USB port and apply power to the DP4 system.
2. The “New Hardware Wizard” should automatically start on the PC. Follow the directions below to install the USB device
driver, depending on which version of Windows is in use.
For Windows 2000 or Windows XP:
Make sure you are logged in as an administrator.
a. In the “Found New Hardware Wizard,” which should automatically appear when the X-123 is connected and powered on
for the first time, select “No, not this time” and click Next>.
b. Select “Install from a list or specific location (Advanced)” and click Next>.
c. Select “Search for the best driver in these locations.” Then check the box “Include this location in the search:” Select
“Browse” and navigate to the \USB_driver\Win2K_XP folder of the Amptek Installation CD. Click Next>.
d. Once the driver has been installed you will see the “Completing the Found New Hardware Wizard” screen below. Click
Finish.

DP4 Quick Start Guide Rev A1
Page 2 of 3
Figure 3: Properties dialogue box.
Figure 2: Starting ADMCA
For Windows 98 or Windows ME:
a. The “Add New Hardware Wizard” should automatically appear when the X-123 is connected and powered on for the first
time. Click Next >.
b. Select “Search for the best driver for you device” and click Next >.
c. Select only “Specify a location:”, click “Browse” and navigate to the \USB_driver\Win98_ME folder of the Amptek
Installation CD. Click Next >.
d. Windows is now ready to install the driver. Click Next >.
e. Click Finish. The USB driver should now be installed.
3. Now that the USB driver is installed, the display and control software can be loaded onto the PC. Locate the directory
called “ADMCA” on the Amptek Installation CD and copy the entire directory onto your computer. In that directory is the
“ADMCA.exe” file. Open this file to start the software. You can right-click on the ADMCA.exe file and create a shortcut
which can be placed on your desktop for easy access.
Quick Use of the DP4
1. Connect the DP4 and PC as described in the previous section.
2. Launch the ADMCA software by opening the ADMCA.exe file.
3. When the “Starting ADMCA” box appears as in figure 2, select DP4 and click on
“Connect.” The unit should now be connected to the software. To verify this,
confirm that a serial number is shown at the top right corner of the software. The
USB symbol located at the bottom right corner of the software should be green.
4. Now that the DP4 is connected, the proper configuration must be selected. To
select a configuration select “DP4/PX4 Setup” under the “DPP” dropdown list in
the software or by clicking the “acquisition setup” button on the toolbar. The
dialogue box shown in Figure 3 will appear. The configurations can be selected
through the dropdown menu labeled “Read Amptek Detector
Configuration.”
5. Once the correct configuration is selected from the dropdown menu the
indented grey area above the dropdown menu should read (for
example) “Loaded XYZ configuration.” Click "Show Current
Configuration" to view the settings. A box will appear with the
settings. Click OK to exit the box.
6. To apply the selected configuration, click the “Apply” button. Then
select the “OK” button to exit this dialogue box.
7. Now that the DP4 has the appropriate configuration, an acquisition can
be started. Place a source in front of the detector. To start an
acquisition, press the space bar. The space bar will also stop an
acquisition which is in progress.
oIt may be necessary to adjust some of the thresholds which prevent
low-end noise and other unwanted counts from affecting the
spectrum. Please see the Notes and Troubleshooting section at the
end.
8. A common adjustment is to change the gain of the DP4. This can be
changed in the “Gain & Pole Zero” tab of the properties dialogue box.
It is necessary to readjust the thresholds whenever the gain is changed.
Notes and Troubleshooting:
oBy default, the software accumulates the counts (MCA mode). During set-up it may be convenient to use “DELTA”
mode, where counts are not integrated but are updated every second (i.e. only one second’s worth of data are displayed
every second). Click the toolbar icon marked “MCA/DELTA Mode” to toggle between DELTA and MCA mode.
oIf no spectrum appears, check that the system is acquiring data. The “Status” on the right hand Info Panel should read
“acquiring.”

DP4 Quick Start Guide Rev A1
Page 3 of 3
oSometimes no spectrum will appear if pile-up-rejection (PUR) is enabled and the Fast Threshold is set improperly (in the
Properties-Shaping tab). Turn PUR off and check if the spectrum appears. If it does, then the Fast Threshold needs to be
set correctly as described below.
oThe Fast and Slow Thresholds must be adjusted either automatically or manually. To automatically set the thresholds,
start an acquisition with no source. Then click the tune Slow/Fast button on the toolbar. To manually adjust the
thresholds, first turn off PUR as described above. Then click the cursor to channel 1 and press F8. This will set the Slow
Threshold (LLD) to channel 1. This will show the noise of the system. Click the cursor just to the right of the noise
(where noise counts top) and press F8. Press the “A” key to clear. There should be no noise counts accumulating. Put
the device into “Delta” mode by clicking the Delta button on the toolbar. Open the DPP properties and go to the Shaping
page. Adjust the Fast Threshold until you get roughly 5 to 20 Input Counts per second. Now turn on PUR and click OK.
Click the Delta button to get back to normal MCA mode and put the source back in front of the detector. The Input
Counts should slightly exceed the Counts.
oIf problems persist, there may be a communication or configuration problem. Unplug the DP4 USB cable and whatever
powers the unit and close the software. Then open the software, plug in the USB cable, and apply power. In the bottom
left-hand corner of the software you should see a 1 Detected for the USB connection. Once you see this, click on
Connect. Then go to the DP4/PX4 Properties page and reload the appropriate default configuration as discussed above
and try the acquisition again.
oAlways use a single point earth ground. The power supplies in many laptop computers inject large ground currents.
Isolate these grounds. A 3:2 prong plug is a powerful tool for isolating grounds but make certain that some point is tied
to earth ground.
DP4 Software and Documentation
The “DPP API” directory contains the DP4 Application Programming Interface (API) DLL along with appropriate
documentation and examples.
The “DP4 Additional Software” directory contains
oA VB program (with source code) that was written to control the DP4 without the use of the DLL. This test
application that should be used for troubleshooting and reference if custom code needs to be written on a
non-windows platform.
oAll technical documentation on the DP4.
Table of contents
Other Amptek Measuring Instrument manuals