Steffen 1808945 User manual

Erweiterte Bedienungsanleitung zu 1808945
1. Technische Angaben .............................................................................................................. 2
2. Beschreibung des Gerätes ..................................................................................................... 2
1.1. Tasten-Bezeichnung .................................................................................................... 2
1.2. Display-Anzeige ........................................................................................................... 3
3. Inbetriebnahme ..................................................................................................................... 3
. Funktionsbeschreibung ......................................................................................................... 3
.1. Aktuelle Uhrzeit einstellen ..........................................................................................
.2. Stromkosten pro kWh (1. Tarif) ..................................................................................
.3. Stromkosten pro kWh (2. Tarif) ..................................................................................
. . Treibhausgasemissionen (GHG) .................................................................................. 5
.5. Warnung vor Überlast ................................................................................................. 5
.5.1. Eingabe für den Überlastwert in Watt (W) ....................................................... 6
.5.2. Eingabe für den Überlastwert in Ampere (A) ................................................... 6
.6. Die Messung durchführen ........................................................................................... 6
.7. Messwerte ................................................................................................................... 6
.7.1. Messwerte abrufen ........................................................................................... 7
.7.2. Verbrauchswerte anzeigen ............................................................................... 7
.7.3. Einen bestimmten Messwert anzeigen ............................................................. 7
.7. . Verbrauchsanzeige ............................................................................................ 7
.7.5. Grafische Darstellung des Verbrauchs .............................................................. 8
.7.6. Verbrauchwerte eingeben (kWh) ..................................................................... 8
5. Löschen der Messwerte ........................................................................................................ 9
6. Initialisierung ......................................................................................................................... 9

Seite 2
1. Technische Angaben
2. Beschreibung des Gerätes
1.1. Tasten Bezeichnung
Taste
HISTORY
Taste
VALUE / +
Taste
DISPLAY /
-
Taste
SET / OK

Seite 3
1.2. Display Anzeige
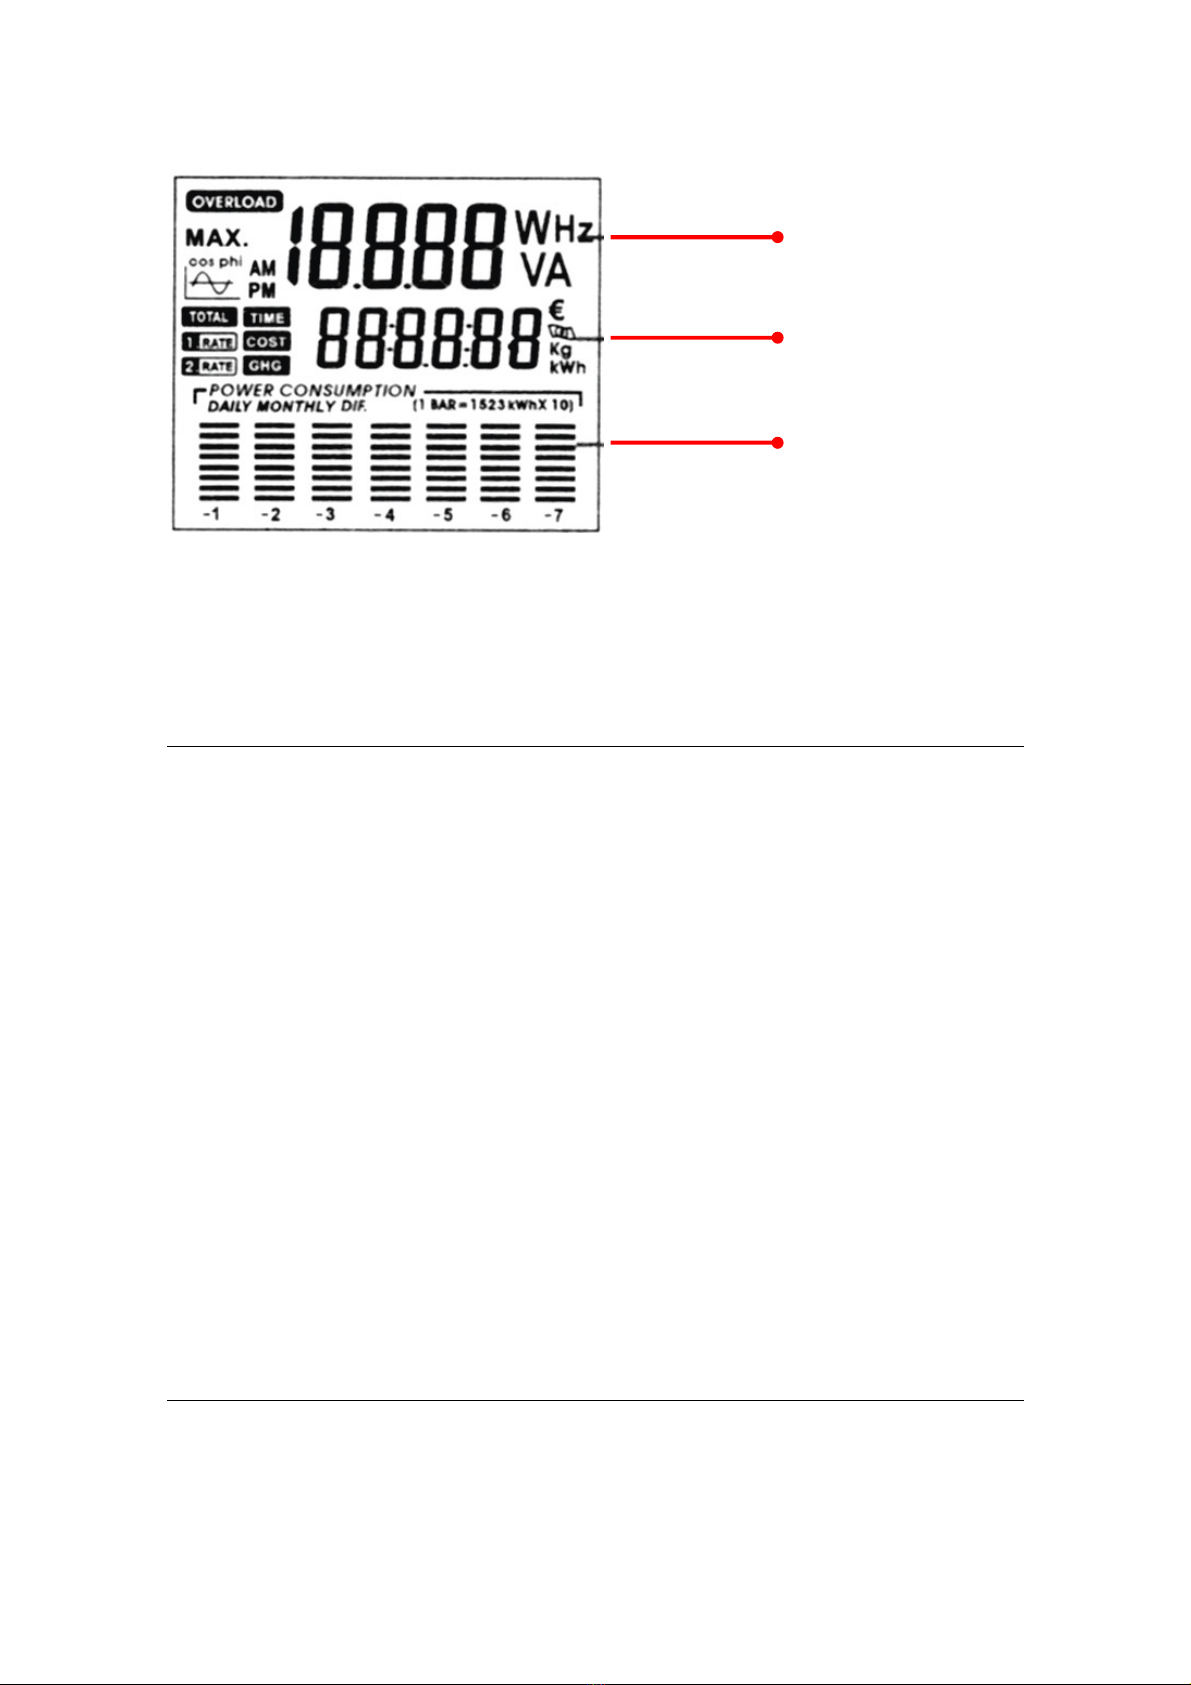
1. Anzeige für Spannung, Strom, Leistung, Frequenz, Leistungsfaktor und Überlast.
2. Anzeige für Uhrzeit, Betriebszeit, Kosten, Treibhausgasemissionen und Stromverbrauch.
3. Grafische Darstellung des Stromverbrauchs der letzten sieben Tage oder Monate.
3. Inbetriebnahme
Die Batterien werden bei der Lieferung des Gerätes eingelegt. Aktivieren Sie diese, indem Sie
die Schutztrennung des Batteriefaches entfernen. Zur Öffnung des Batteriefaches gehen Sie
wie im folgenden Abschnitt beschrieben vor.
Austausch der Batterien:
1. Stellen Sie sicher, dass das Energiemessgerät nicht am Stromnetz angeschlossen ist.
2. Drücken Sie die zwei seitlich, hervorstehenden Stäbchen des Batteriefaches zusammen und
entfernen Sie es aus dem Gerät.
3. Nehmen Sie die alten Batterien heraus und entsorgen Sie diese umweltgerecht.
. Legen Sie zwei neue Batterien in das Fach (Knopfzellen 1,5 V, Typ LR ). Beim Hineinlegen
achten Sie bitte auf die richtige Polarität (+/-), wie sie am Boden des Batteriefaches
gekennzeichnet ist.
5. Schieben Sie das Batteriefach mit den zwei Kontaktstäbchen in den Geräteschlitz ein und
drücken Sie so lange, bis es einrastet.
Durch das Entfernen der Batterie wird die Uhrzeit zurückgesetzt. Die restlichen
Einstellungen bleiben unverändert.
Das Batteriefach kann nur in eine Richtung in das Gerät eingelegt werden. Überprüfen Sie
die Umrisslinie des Gehäuses.
Das Batteriefach muss vor einer neuen Inbetriebnahme komplett eingelegt werden. Wird
das Gerät für längere Zeit nicht benutzt, entnehmen Sie die Batterien, um einen frühzeitigen
Verlust der Batteriekapazität zu verhindern.
4. Funktionsbeschreibung
Um nur die Messungen (ohne Kostenberechnung) durchzuführen, können Sie zu Punkt „ .6 Die
Messung durchführen” weiter gehen.
1.
2.
3.
Seite
4.1. Aktuelle Uhrzeit einstellen
1. Drücken Sie die Taste SET / OK drei Sekunden. Die Stundenanzeige blinkt.
2. Stellen Sie mit der Taste VALUE / + die Stunden vor, mit der Taste DISPLAY / zurück.
3. Rufen Sie mit der HISTORY Taste die Minuten auf. Stellen Sie die Minuten mit der VALUE /
+ Taste (vor) und mit der DISPLAY / Taste (zurück) ein.
. Beim Einstellen der Zeit werden die Sekunden auf "null" gestellt.
5. Mit der Taste SET / OK können Sie die Stunde speichern. Danach können Sie mit den Tasten
VALUE / + oder DISPLAY / die Einstellungen von 12/2 Stunden anpassen. Bei der Eingabe
von 12h erscheint AM für morgens und PM für abends.
4.2. Stromkosten pro kWh (1. Tarif)
1. Nach der Eingabe der Uhrzeit, die die Angabe von 12/2 h beinhaltet, drücken Sie die Taste
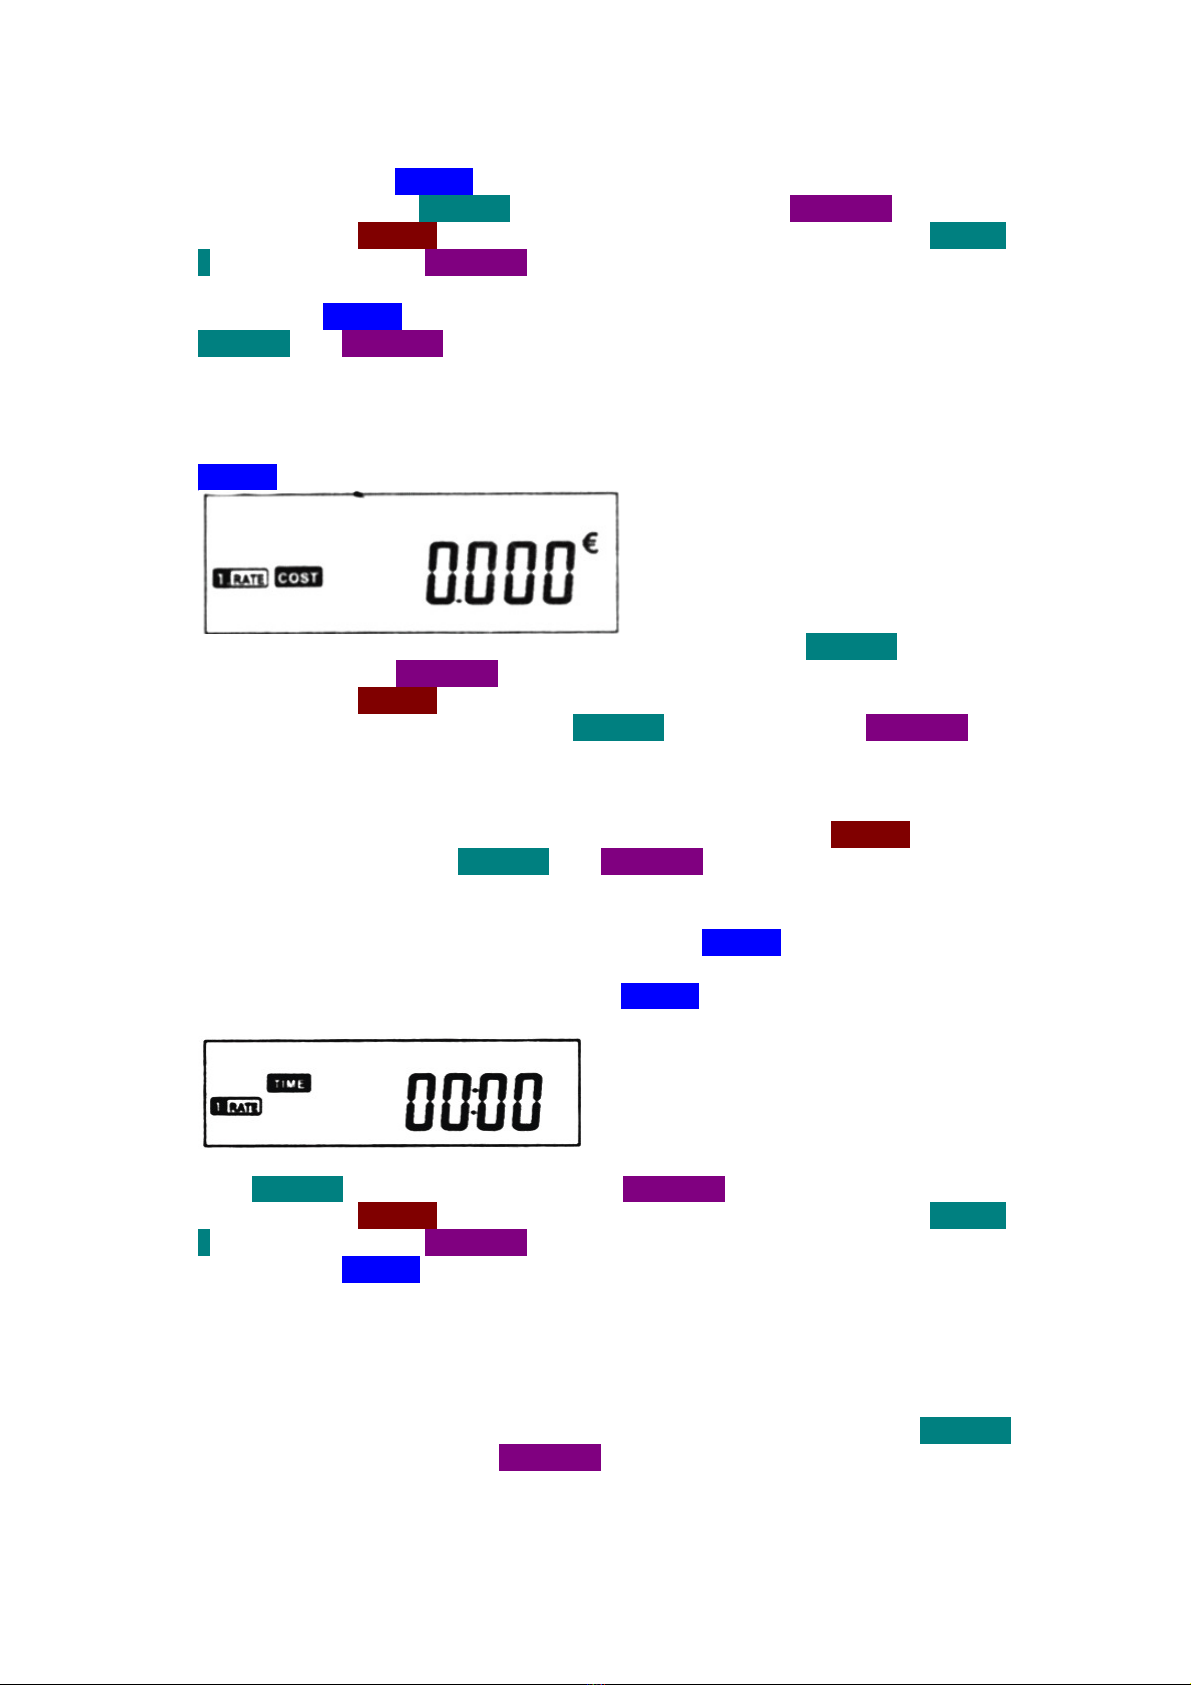
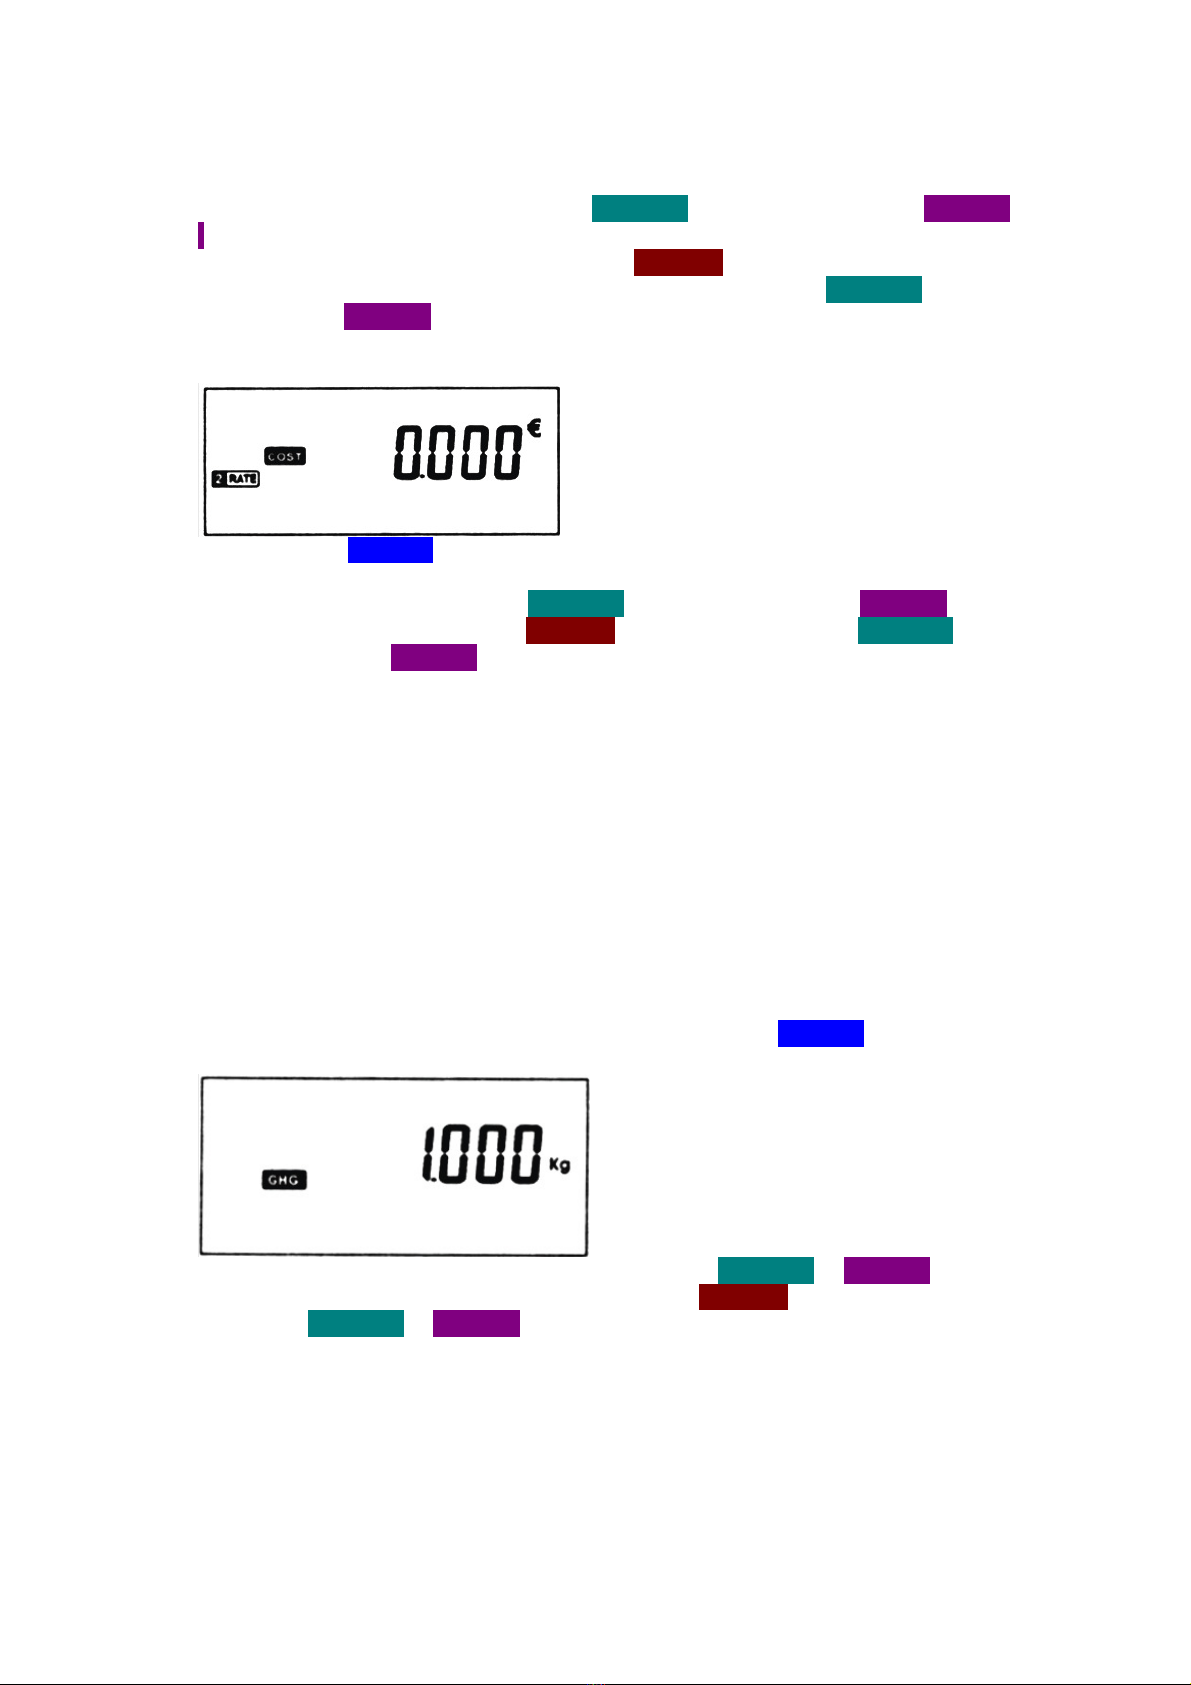
SET / OK. Im Display erscheint "1. RATE / COST".
2. Geben Sie nun die Kosten pro Kilowatt ein. Stellen Sie mit der Taste VALUE / + den Betrag
vor und mit der Taste DISPLAY / zurück.
3. Rufen Sie mit der HISTORY Taste die Cents/Rappen auf. Die erste Stelle der Cents/Rappen-
Eingabe blinkt und die Ziffer kann mit der VALUE / + Taste vor und mit der DISPLAY /
Taste zurückgestellt werden.
. Stellen Sie auf die gleiche Weise die anderen Dezimalstellen der Cents/Rappen-Eingaben
ein (0,185 = 18,5 Cent).
5. Nach Eingabe der letzten Ziffer (Cents/Rappen) drücken Sie erneut die HISTORY Taste. Das
Euro-Zeichen blinkt. Mit den VALUE / + oder DISPLAY / Tasten können Sie das Symbol
einer Banknote auswählen (z.B. für CHF).
6. Wenn Sie nur einen Tarif haben (d.h. keinen Niedertarif) wird die Eingabe der Kosten
hiermit abgeschlossen. Beenden Sie die Eingabe mit der SET / OK Taste bis die normale
Anzeige wieder erscheint.
7. Nach Eingabe der Stromkosten drücken Sie die SET / OK Taste. Im Display erscheint die
Eingabe für die Uhrzeit („1. RATE / TIME“).
8. Geben Sie hier die Uhrzeit an, ab der der 1. Tarif (z.B. Hochtarif) zutrifft. Stellen Sie mit der
Taste VALUE / + die Stunden vor, mit der Taste DISPLAY / zurück.
9. Rufen Sie mit der HISTORY Taste die Minuten auf. Stellen Sie die Minuten mit der VALUE /
+ Taste (vor) und mit der DISPLAY / Taste (zurück) ein.
10.Drücken Sie die SET / OK Taste und im Display erscheint die Anzeige des 2. Tarifs (z.B.
Niedertarif).
4.3. Stromkosten pro kWh (2. Tarif)
Wenn Sie neben dem normalen Tarif auch einen Niedertarif empfangen, gehen Sie wie folgt
vor:
1. Geben Sie nun die Stromkosten pro Kilowattstunde ein. Stellen Sie mit der Taste VALUE / +
den Betrag vor und mit der Taste DISPLAY / zurück.

Seite 5
2. Rufen Sie mit der HISTORY Taste die Cents/Rappen auf. Die erste Stelle der Cents/Rappen-
Eingabe blinkt und die Ziffer kann mit der VALUE / + Taste vor und mit der DISPLAY /
Taste zurückgestellt werden.
3. Stellen Sie auf die gleiche Weise die anderen Dezimalstellen der Cents/Rappen-Eingaben
ein. (Beispiel: 0,185 = 18,5 Cent).
. Drücken Sie die SET / OK Taste und im Display erscheint die Anzeige der Uhrzeit („2. RATE /
TIME“), ab der der Niedertarif zutrifft. Geben Sie hier die Uhrzeit an.
5. Stellen Sie mit der Taste VALUE / + die Stunden vor, mit der Taste DISPLAY / zurück.
6. Rufen Sie mit der HISTORY Taste die Minuten auf, stellen Sie die Minuten mit der VALUE /
+ Taste (vor) und mit der DISPLAY / Taste (zurück) ein.
4.4. Treibhausgasemissionen (GHG)
Bei der Stromerzeugung entstehen Treibhausgase (unter anderem: Kohlendioxid CO2), die die
Umwelt belasten. Mit diesem Gerät können Sie herausfinden, wie viel CO2 der Stromanbieter
im Wert der gemessenen kWh freisetzt. Je nach Energieart gibt es verschiedene CO2-
Äquivalentwerte. Das CO2-Äquivalent gibt an, wie viel eine bestimmte Menge an Treibhausgas
zum Treibhauseffekt beiträgt. Als Vergleichswert dient Kohlendioxid.
Der Faktor der dem CO2 entspricht wird in kg/kWh in das Gerät eingegeben und auch in
kg/kWh angezeigt. Auf Ihrer Stromrechnung, sowie im Internet, in Fachbüchern oder bei Ihrem
Stromanbieter finden Sie Angaben über den CO2-Äquivalenten, den Sie eingeben müssen.
1. Nach der Eingabe der Uhrzeit für den Niedertarif drücken Sie die Taste SET / OK. Im Display
erscheint „GHG“
2. Geben Sie nun einen Faktor für den CO2-Wert mit den Tasten VALUE / + oder DISPLAY /
ein.
3. Mit der HISTORY Taste können Sie die Dezimalstellen ändern und mit den VALUE / + oder
DISPLAY / Tasten den Wert einstellen.
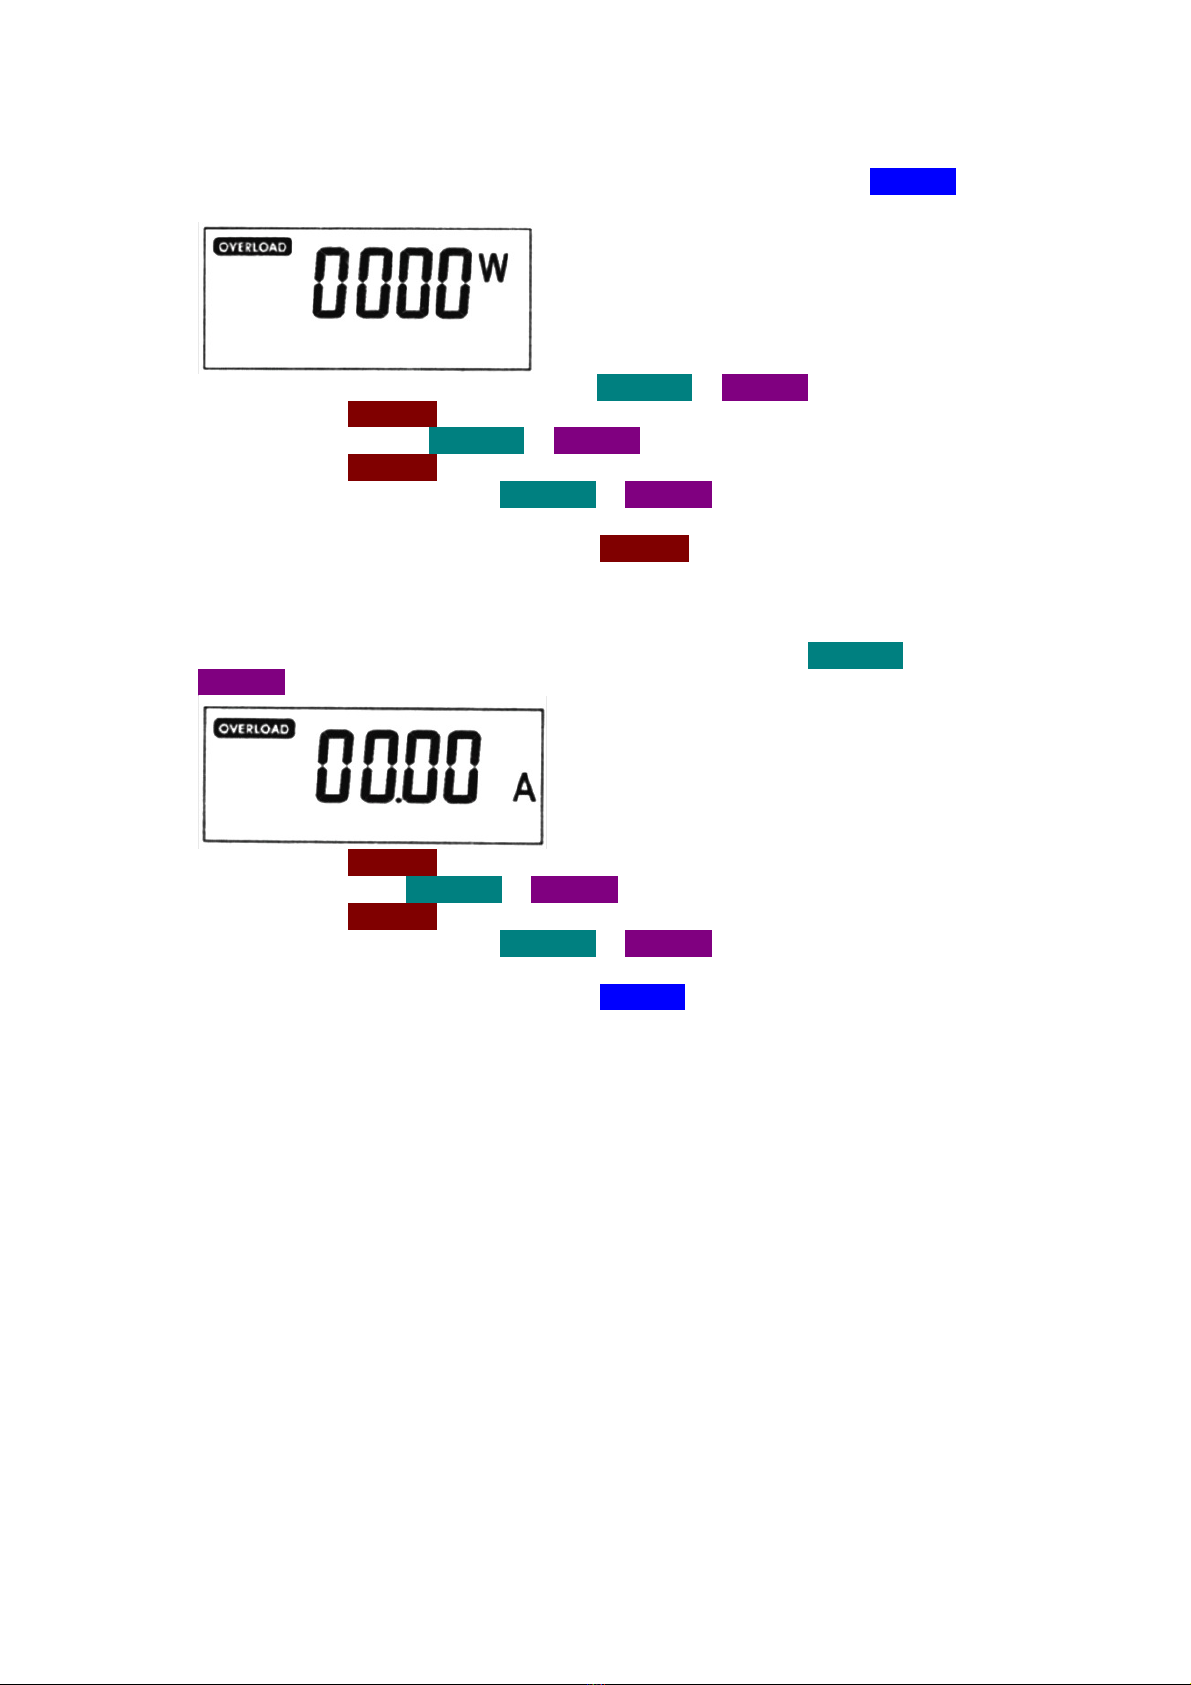
4.5. Warnung vor Überlast
Mit dieser Funktion können Sie bestimmen, bei welchem Stromwert (max. 10 A) und
Leistungswert (max. 2300 W) das Gerät eine Warnung für Überlast ausgeben muss. Wird einer
der Überlastwerte (A steht für Ampere und W für Watt) überschritten, blinkt im Display
„OVERLOAD“ und der entsprechende Wert wird angegeben. Zusätzlich ertönt ein Warnton.

Seite 6
4.5.1. Eingabe für den Überlastwert in Watt (W)
1. Nach der Eingabe des Wertes für den Treibhausgasausstoss, drücken Sie die Taste SET / OK.
2. Im Display blinkt die Angabe für Überlast, W oder A
3. Mit den Tasten VALUE / + oder DISPLAY / können Sie zwischen W und A wechseln.
. Drücken Sie die HISTORY Taste. Im Display blinkt die erste Ziffer. Mit den Tasten VALUE / +
oder DISPLAY / können Sie die gewünschte Ziffer eingeben.
5. Zur Änderung der nächsten Ziffer drücken Sie die HISTORY Taste. Mit den Tasten VALUE / +
oder DISPLAY / können Sie die gewünschte Ziffer eingeben.
6. Geben Sie die weiteren Ziffern ein, so wie in den Schritten und 5 gezeigt, bis der
gewünschte Wert eingestellt wurde.
7. Nach Eingabe der letzten Ziffer drücken Sie die HISTORY Taste. W blinkt.
4.5.2. Eingabe für den Überlastwert in Ampere (A)
1. Mit den Tasten VALUE / + oder DISPLAY / können Sie zwischen W und A wechseln.
2. Drücken Sie die HISTORY Taste. Im Display blinkt die erste Ziffer. Mit den Tasten VALUE / +
oder DISPLAY / können Sie die gewünschte Ziffer eingeben.
3. Zur Änderung der nächsten Ziffer drücken Sie die HISTORY Taste. Mit den Tasten VALUE / +
oder DISPLAY / können Sie die gewünschte Ziffer eingeben.
. Geben Sie die weiteren Ziffern ein, so wie in den Schritten 3 und gezeigt, bis der
gewünschte Wert eingestellt wurde.
5. Nach Eingabe der letzten Ziffer drücken Sie die SET / OK Taste, um die Werte zu speichern
und zur normalen Anzeige zurückzukehren.
4.6. Die Messung durchführen
1. Schliessen Sie das Energiemessgerät an eine Steckdose von 230V an, die
bestimmungsgemäss und sicher installiert ist.
2. Schliessen Sie jetzt den gewünschten Verbraucher an.
Beachten Sie, dass die Gesamtleistung der angeschlossenen Verbraucher 2300W nicht
übersteigen darf. Die Messungen können beginnen, nachdem alle relevanten Daten
programmiert worden sind.
4.7. Messwerte
Das Gerät zeigt Ihnen fortlaufend verschiedene gemessene Werte im Rahmen des Zyklusses
an. Im Display erscheint folgendes:
•V (Netzspannung in Volt)
•A (momentane Stromstärke in Ampere)
•W (aufgenommene Leistung in Watt)
Seite 7
4.7.1. Messwerte abrufen
Der automatische Anzeigemodus kann durch Drücken der VALUE / + Taste unterbrochen
werden. Wird die VALUE / + Taste erneut gedrückt, ist es möglich, die folgenden Werte
auszuwählen:
•V (Netzspannung in Volt)
•A (momentane Stromstärke in Ampere)
•W (aufgenommene Leistung in Watt)
•Hz (Netzfrequenz )
•cos ϕ (Leistungsfaktor)
•A MAX (maximaler Stromwert in Ampere)
•W MAX (maximale aufgenommene Leistung in Watt).
Der Leistungsfaktor cos ϕ gibt die Phasenverschiebung zwischen der Wirkleistung und der
Scheinleistung an. Es handelt sich um eine Messung, um herauszufinden, welcher Teil der
Scheinleistung sich in Wirkleistung umwandelt. Mehr Informationen hierzu finden Sie in
Fachbüchern.
4.7.2. Verbrauchswerte anzeigen
Durch wiederholtes Drücken der DISPLAY / Taste können die gemessenen Verbrauchswerte
aufgerufen werden:
•TIME (aktuelle Uhrzeit)
•TOTAL kWh (Gesamtverbrauch in kWh) Im Display wird der gemessene Gesamtverbrauch in
kWh angezeigt. Anzeige bis 999.999 kWh.
•TOTAL TIME (Zeit der gesamten Messung) Hier wird die Zeit gemessen, während dem ein
Verbraucher angeschlossen ist. Die Sekunden werden bis 99:59:59 hh:mm:ss angegeben.
Nach 100 Stunden werden keine Sekunden mehr angezeigt. Maximale Anzeige bis 9999.59
hhhh.mm.
•TOTAL COST (Kosten der gesamten gemessenen Zeit). Die Gesamtkosten für den
Stromverbrauch werden angezeigt. Hierbei wird auch der Niedertarif miteinbezogen, sofern
dieser programmiert worden ist.
•GHG (CO2-Ausstoss in kg).
4.7.3. Einen bestimmten Messwert anzeigen
1. Unterbrechung des Zyklusmodus mit der VALUE / + Taste.
2. Auswahl eines gewünschten Wertes durch wiederholtes Drücken der VALUE / + Taste.
3. Die Taste SET / OK drücken. Der eingegebene Wert bleibt im Display angezeigt.
. Um in den Zyklusmodus zurückzukehren, drücken Sie die Taste VALUE / +.
4.7.4. Verbrauchsanzeige
Das Energiemessgerät zeichnet den Stromverbrauch eines angeschlossenen Gerätes während
einer längeren Zeitdauer auf. Die beste Weise, um die Werte zu verwerten ist, diese am
gleichen Verbraucher zu messen. Der Verbrauch wird als Balkendiagramm und numerischer
Wert aufgezeichnet. Dies ist für die letzten sieben Tage oder Monate möglich. Die einzelnen
Balken in den Säulen stellen den Verbrauch in kWh dar. Die Skala wird immer im Display
angezeigt als z.B. 1 Balken = 1 kWh oder 2 Balken = 2 kWh usw.; die Skala variiert bezüglich der
Verbrauchsfunktion.

Seite 8
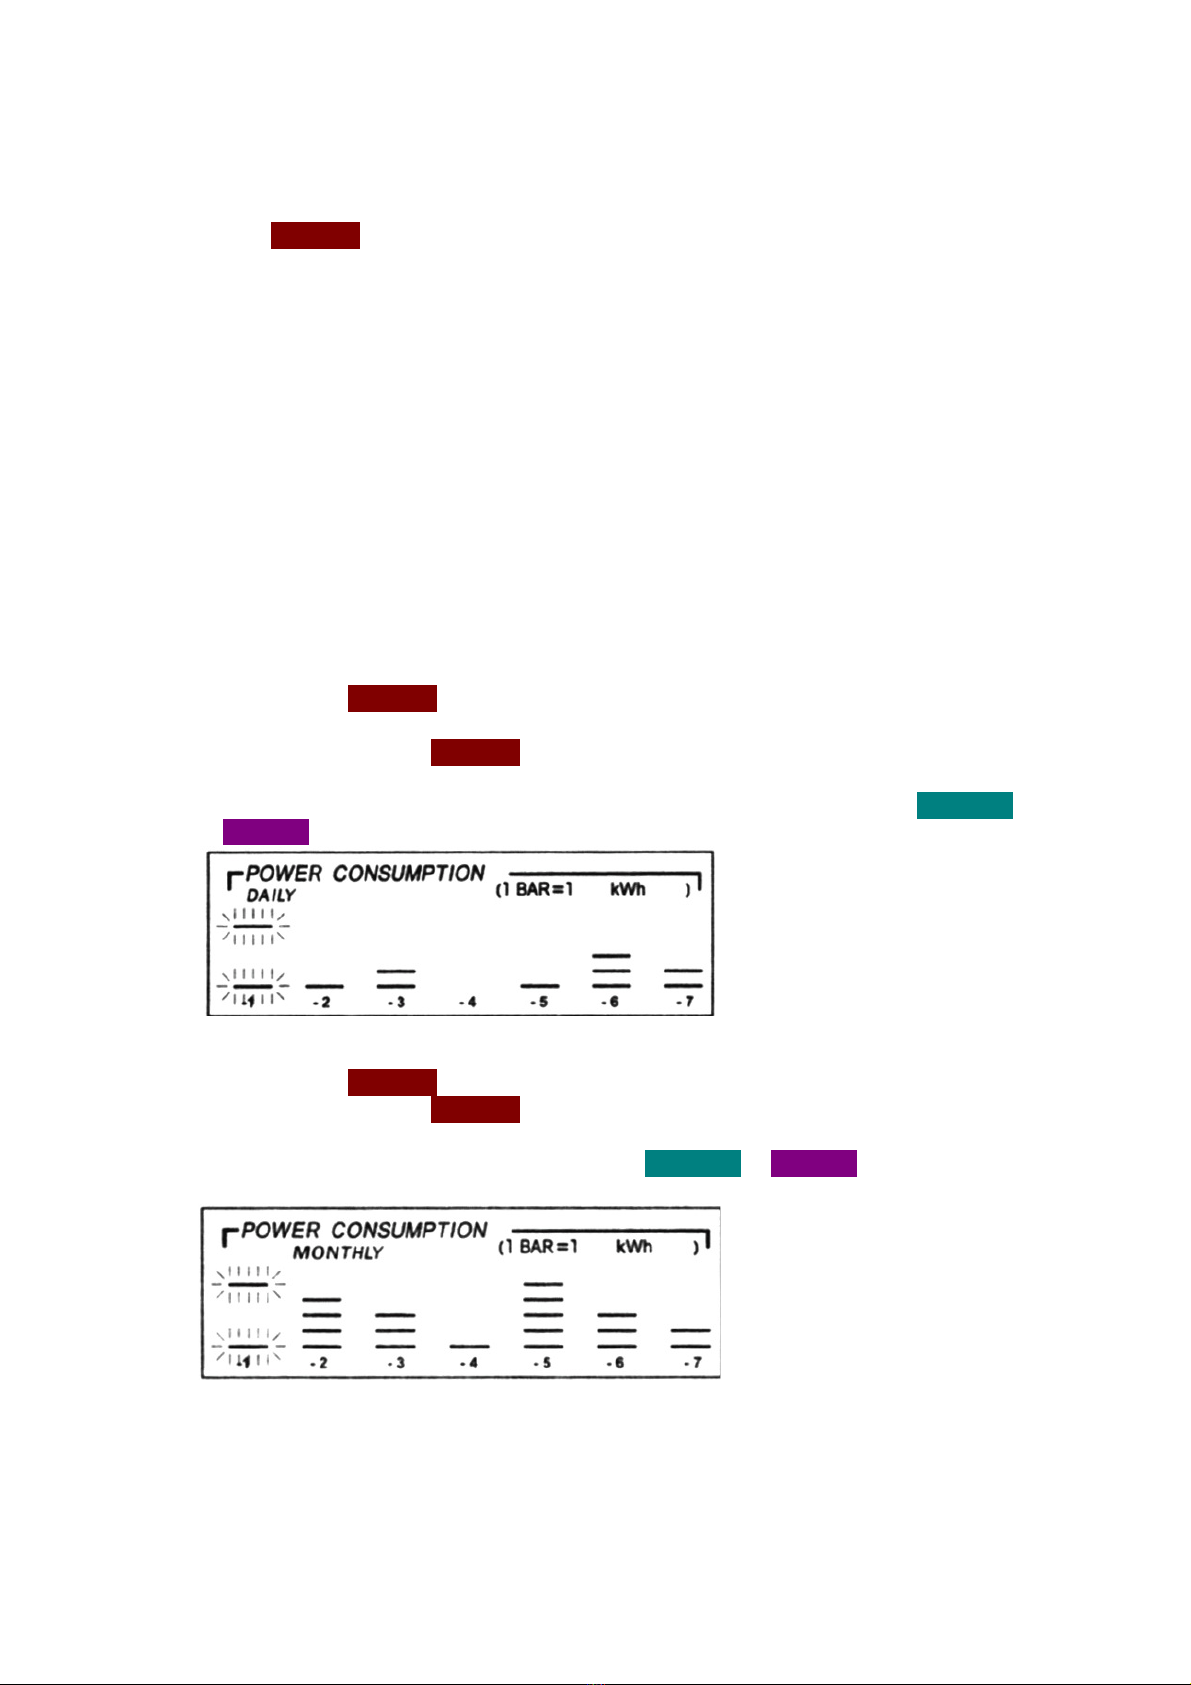
4.7.5. Grafische Darstellung des Verbrauchs
Der Verbrauch wird bildlich mit Balken im unteren Teil des Displays angezeigt. In jeder Säule
wird der Verbrauch für einen Tag oder Monat angezeigt (-1 = vor einem Tag/Monat, -2 = vor
zwei Tagen/Monaten usw. bis -7 = vor sieben Tagen/Monaten). Somit ist es durch die Balken
möglich, den Verbrauch bildlich und schnell für den Stromverbrauch der vergangenen Tage
oder Monate zu bestimmen und diese als Verbrauchswerte anzuzeigen. Wird die HISTORY
Taste erneut gedrückt, werden die folgenden Werte nacheinander angezeigt:
•Der Verbrauch der letzten sieben Tage.
•Der Verbrauch der letzten sieben Monate.
•Der Unterschied des Verbrauchs der letzten sieben Tage. Darstellung der Schwankungen
zwischen den einzelnen Tagen. (Beispiel: werden am ersten Tag 2 kWh gemessen und am
zweiten 3 kWh wird ein Unterschied von 1 kWh angezeigt.)
•Der Unterschied des Verbrauchs der letzten sieben Monate. Darstellung der Schwankungen
zwischen den einzelnen Monaten.
Beachten Sie, dass die Angabe in dem Balkendiagramm einen Durchschnittswert angibt.
Wenn z.B. 1 BALKEN = 1 kWh ist und an einem Tag 2 Balken angezeigt werden kann sich der
wirklich gemessene Wert zwischen 1,01 und 1,99 kWh befinden. Für genaue Messwerte rufen
Sie die Information für Tage oder Monate auf.
4.7.6. Verbrauchwerte eingeben (kWh)
Der individuelle Tages- oder Monatsverbrauch kann auch in absoluten Werten (kWh)
angegeben werden.
Verbrauchswerte für Tage:
1. Drücken Sie die HISTORY Taste bis das Balkendiagramm im Display für den Tagesverbrauch
(DAILY) erscheint.
2. Drücken Sie die HISTORY Taste so lange bis der Wert erscheint und die Anzeige blinkt.
Parallel blinkt auch das jeweilige Balkendiagramm.
3. Mit den VALUE / + oder DISPLAY / Tasten können Sie die Verbrauchswerte der
verschiedenen Tage anzeigen. Wird für den ausgewählten Tag kein Wert angezeigt, blinkt
der obere und untere Balken auf dem Bildschirm.
Verbrauchswerte für Monate:
1. Drücken Sie die HISTORY Taste bis das Balkendiagramm im Display für den
Monatsverbrauch erscheint.
2. Drücken Sie die HISTORY Taste so lange bis der Wert erscheint und die Anzeige blinkt.
Parallel blinkt auch das jeweilige Balkendiagramm. Mit den VALUE / + oder DISPLAY /
Tasten können Sie die Verbrauchswerte der verschiedenen Monate anzeigen.
3. Wird in dem ausgewählten Monat kein Wert angezeigt, blinkt der obere und untere Balken
auf dem Bildschirm.

Seite 9
Die Darstellung der Verbrauchswerte ist nur für den Verbrauch möglich, nicht für die
Angabe der Unterschiede zwischen Tagen und Monaten. Wird keine andere Taste 10 Sekunden
gedrückt, kehrt das Gerät automatisch zur normalen Anzeige zurück.
5. Löschen der Messwerte
Es ist möglich, alle gemessenen und aufgezeichneten Werte zu löschen. Die eingegebenen
Daten wie Uhrzeit, Stromtarife, CO2-Faktor und Überlastwerte bleiben erhalten.
1. Drücken Sie die DISPLAY / Taste und gleichzeitig die VALUE / + Taste drei Sekunden lang
bis das gesamte Display blinkt.
2. Drücken Sie die DISPLAY / und gleichzeitig die SET / OK Taste drei Sekunden lang.
3. Alle Messwerte werden permanent gelöscht!
Wird der Löschvorgang in Schritt 1 nicht komplett beendet, kehrt das Messgerät nach 10
Sekunden auf seinen normalen Anzeigemodus zurück.
Löschen Sie die Messwerte immer mit aufgeladenen Batterien oder wenn das Gerät am
Stromnetz angeschlossen ist.
6. Initialisierung
Erscheint eine ungewöhnliche Anzeige auf dem Display oder es erfolgt keine Reaktion beim
Bedienen der Tasten, muss eine Initialisierung vorgenommen werden:
1. Trennen Sie das Energiemessgerät vom Stromnetz
2. Nehmen Sie die Batterien kurz heraus und legen Sie sie erneut ein, so wie unter "Austausch
der Batterien" beschrieben.
Durch das Entfernen der Batterie wird nur die Uhrzeit zurückgesetzt. Die restlichen
Einstellungen bleiben unverändert.
Manual for item 1808945
1. Technical Details .......................................................................................................... 2
2. Product description ...................................................................................................... 2
2.1. Buttons ............................................................................................................... 2
2.2. L D Display ......................................................................................................... 3
3. Using the device for the first time ................................................................................. 3
4. Settings ........................................................................................................................ 3
4.1. Time ................................................................................................................... 4
4.2 Electricity price per kWh (1st tariff) ..................................................................... 4
4.3 Electricity price per kWh (2nd tariff ) ................................................................... 5
4.4 Greenhouse gas emissions (GHG) ........................................................................ 5
4.5 Overload warning ............................................................................................... 5
4.5.1. Entering the overload value for watts (W) ............................................. 6
4.5.2. Entering the overload value for amps (A) ............................................... 6
4.6 Performing measurements .................................................................................. 6
4.7 Automatic display of measured values ................................................................. 6
4.7.1. Individual display of measured values ................................................... 7
4.7.2. Display of consumption values .............................................................. 7
4.7.3. Setting a specific measured value .......................................................... 7
4.7.4. onsumption history ............................................................................. 7
4.7.5. Graphical representation of consumption .............................................. 7
4.7.6. Displaying consumption values (kWh) ................................................... 8
5. Deleting measured values ............................................................................................. 9
6. Initialisation ................................................................................................................. 9

page 2
1. Technical Details
Display
Power measurement range: 0,23-2300W
Amps measurement range: 0,001-10A
Voltage measurement range: 190-230V
Frequency H : 46–65 H
Power factor Cosine ϕ
Consumption measurement kWh: 0-999,999kWh
Overload warning: max. A/W
Tariff I/II: €/Fr.
Greenhouse gas emissions: 0-999,999kg
Consumption representation: 7 days / 7months
Specification
Input/output voltage: 230V~ / 50H / 10A
Current: max. 2300W
Operating temperature: 10° - 40°C
Measurement accuracy: 0.001
Standby: 0,5W
2. Product description
2.1. Buttons
Button
HISTORY
Button
VALUE / +
Button
DISPLAY /
Button
SET / OK
page 3
2.2. L D Display
1. Display area for voltage, current, output, frequency, power factor and overload
2. Display area for time, operating time, costs, Euros, greenhouse gas emissions and energy
consumption
3. Graphical representation of energy consumption in the last 7 days or 7 months
3. Using the device for the first time
When the device is delivered, the batteries are already inserted. Activate them by removing
the insulation strips in the battery compartment. To open the battery compartment, proceed
as described in the following section.
Changing the batteries:
1. Pull the device out of the socket
2. Push the two side catch springs of the battery compartment together at the same time and
pull the battery compartment out of the device
3. Remove the empty batteries and dispose them of at a collection point for old batteries.
4. Insert 2 new batteries (1.5 V button cells, type LR44/AG13) in the battery compartment.
When inserting the batteries, make sure that the polarity (+/-) is correct as shown on the
bottom of the battery compartment.
5. Insert the battery compartment with the two contact springs in the device slots and push it
until it locks into place
Removing the batteries reset the clock only. Other user settings are remain unchanged.
The battery compartment can only be inserted in the device in one direction.
The battery compartment must be completely inserted before reactivating the device. If
you do not use the device for a prolonged period of time, take the batteries out of the device
to prevent them from becoming empty prematurely.
4. Settings
To exclusively perform measurements (without a cost calculation), you can skip this section
and continue with point “4.6 Performing measurements”
1.
2.
3.

page 4
4.1. Time
1. Depress the button
SET / OK
for 3 seconds. The time display will blink. Pressing the button
several times will access the different input options. Select the time to be entered as the
time.
2. Set the hours ahead with the button
VALUE / +
and back with the button
DISPLAY /
3. Select the minutes with the button
HISTORY
Set them ahead with the button
VALUE / +
and back with the button
DISPLAY /
4. When setting the seconds are set to ero.
5. By pressing the button
SET / OK
you save the time and can now set 12h/24h time display
with the buttons
VALUE / +
or
DISPLAY /
If you select the 12h display, AM will appear for
the morning and PM for the afternoon on the time display.
4.2 Electricity price per kWh (1st tariff)
1. After entering the time including the 12h/24h display, push the button
SET / OK
. "1. RATE /
COST" will appear on the display.
2. Now enter the electricity price per kilowatt hour (generally expressed in pence/cents). Set
the amount ahead with the button
VALUE / +
and back with the button
DISPLAY /
.
3. Access the pence/cent amounts with the button
HISTORY
. The first decimal place of the
pence/cent readout blinks. Set the number ahead with the button
VALUE / +
and back with
the button
DISPLAY /
.
4. Set the other decimal places of the pence/cent readout in the same manner (Example:
0,185 = 18,5 Cent).
5. After entering the last digit of the pence/cent amount, push the button
HISTORY
again.
The currency display will blink. With the buttons
VALUE / +
or
DISPLAY /
. You can select
symbol for a bank note or the Euro symbol.
6. If you only have one tariff (i.e. no night-time current), you have finished specifying the
price. Complete the input process by pressing the button
SET / OK
until the standard
display appears.
7. After entering the current price as described above (daytime tariff), push the button
SET /
OK
. The time will be displays („1. RATE / TIME“).
8. Enter the time here, from when the daytime tariff applies. Set the hours ahead with the
button
VALUE / +
and back with the button
DISPLAY /
.
9. Access the minutes with the button
HISTORY
set them ahead with the button
VALUE / +
+
and back with the button
DISPLAY /
.
10.Push the button
SET / OK
and the night-time current tariff will appear.
page 5
4.3 Electricity price per kWh (2nd tariff )
1. Enter the power price per kilowatt hour (generally expressed in pence/cents). Set the
Pound/Euro amount ahead with the button
VALUE / +
and back with the button
DISPLAY
/
.
2. Access the pence/cent amounts with the button
HISTORY
. The first decimal place of the
pence/cent readout blinks and set the number ahead with the button
VALUE / +
and back
with the button
DISPLAY
.
3. Set the other decimal places of the pence/cent readout in the same manner as described
above. (Example: 0,185 = 18,5 Cent).
4. Push the button
SET / OK
and the time is displayed, from when the night-time tariff
applies. Enter the time here. („2. RATE / TIME“).
5. Set the hours ahead with the button
VALUE / +
and back with the button
DISPLAY
.
6. Access the minutes with the button
HISTORY
set ahead with the button
VALUE / +
and
back with the button
DISPLAY
.
4.4 Greenhouse gas emissions (GHG)
The production of energy releases greenhouse gases (among others carbon dioxide CO2),
which places a burden on the environment. With this device, you are able to determine how
much CO2 is released by an energy supplier with the measured kWh value. There are different
CO2 equivalents depending on the type of energy. The CO2 equivalent indicates how much of
a defined quantity of a greenhouse gas contributes to the greenhouse effect. Carbon dioxide
serves as a comparison value. The factor for the CO2 equivalents is entered in the device in
kg/kWh and displayed accordingly in kg/kWh. You can find information on the CO2 equivalents
to be entered on your power bill and on the internet, technical manuals or by contacting your
energy supplier.
1. After entering the time for the night-time tariff, push the button
SET / OK
. “GHG” will
appear on the display.
2. Now enter a factor for CO2. Set the value with the button
VALUE / +
or
DISPLAY
.
3. Switch to the decimal or comma places with the button
HISTORY
and set the value with
the buttons
VALUE / +
or
DISPLAY
.
4.5 Overload warning
With this function, you can specify the current value (max. 10A), and power (max. 2300W), at
which the device will issue an overload warning. If one of the overload values is exceeded,
“OVERLOAD” blinks on the display and the corresponding value (A for amps or W for watts) is
shown. A warning sound is also issued.
page 6
4.5.1. Entering the overload value for watts (W)
1. After entering the value for the greenhouse gas emissions push the button
SET / OK
.
2. The overload value W or A will blink on the display
3. You can switch from A to W with the button
VALUE / +
or
DISPLAY
.
4. Push the button
HISTORY
. The first digit will blink on the display. You can enter the desired
number with the buttons
VALUE / +
or
DISPLAY
.
5. Push the button
HISTORY
to switch to the subsequent (second) number. You can enter the
desired number with the buttons
VALUE / +
or
DISPLAY
.
6. Enter the other numbers as described in steps 4 and 5 until you have set the desired value.
7. After entering the last digit, push the button
HISTORY
.
4.5.2. Entering the overload value for amps (A)
1. In the overload menu, you can switch from W to A with the buttons
VALUE / +
or
DISPLAY
.
2. Push the button
HISTORY
. The first digit will blink on the display. You can enter the desired
value with the buttons
VALUE / +
or
DISPLAY
.
3. Push the button
HISTORY
to switch to the subsequent (second) number. You can enter the
desired number with the buttons
VALUE / +
or
DISPLAY
.
4. Enter the other numbers ad described in steps 3 and 4 until you have set the desired value.
5. After entering the last digit, push the button
SET / OK
to save the values and return to the
standard display.
4.6 Performing measurements
1. Only connect the device to a properly installed 230V fused socket with earthing contact.
2. Now connect the consumer.
Please note that the total power of the connected consumers may not exceed 2300W.
After you have set everything, you can start the measurements.
4.7 Automatic display of measured values
The device display continually cycles through the different measured values. The following are
displayed:
•V (grid voltage in volts)
•A (present current in amps)
•W (power consumption in watts)

page 7
4.7.1. Individual display of measured values
You can abort the automatic display mode by pushing the button
VALUE / +
. The following
values can be selected by repeatedly pressing the button
VALUE / +
:
•V (mains voltage in volts)
•A (present current in amps)
•W (power consumption in watts)
•H (grid frequency )
•cos ϕ (power factor)
•A MAX (current maximum value in amps)
•W MAX (maximum consumed power in watts).
The power factor cos ϕ indicates the phase shift between the effective power and
apparent power. It is a measure of which part of the apparent power is converted to effective
power. Please consult technical manuals for more information.
4.7.2. Display of consumption values
Measured consumption values can be accessed by pushing the button
DISPLAY
. The following
values can be accessed by pushing the button repeatedly:
•TIME (current time)
•TOTAL kWh (total consumption in kWh). The total measured consumption is displayed in
kWh. Display up to 999.999 kWh.
•TOTAL TIME (total measurement time). The time is measured as long as a consumer is
connected. Seconds are shown up to 99:59:59 hh:mm:ss. No more seconds are shown from
100 hours and more. Maximum display up to 9999.59 hhhh.mm.
•TOTAL COST (costs for the total measurement time). The total costs for the power
consumption are displayed. The consumption for night-time current is also considered (if
entered).
•GHG (greenhouse gas emissions CO2 in kg).
4.7.3. Setting a specific measured value
1. Abort cycle mode with the button
VALUE / +
.
2. Select a desired value by repeatedly pressing the button
VALUE / +
.
3. Push the button
SET / OK
. The displayed value remains on the display.
4. To return to the cycle mode, push the button
VALUE / +
.
4.7.4. onsumption history
Your Power Meter records the energy consumption of a connected device for a prolonged
period of time. The measured values are most usable if they are recorded for the same
consumer. The consumption is recorded as a bar connected. This is possible for the last 7 days
or for the last seven 7 months. The individual bars in the columns represent the kWh
consumed. The scale is always shown on the display, such as (1 Bar = 1 kWh) or 1 Bar = 2 kWh)
etc.; the scale changes depending on consumption.
4.7.5. Graphical representation of consumption
The consumption is shown as a graphic with bars on the bottom of the LCD display, whereupon
each bar represents the consumption for one day and/or a month (-1 = one day/month ago, -2
page 8
= two days/months ago and/or up to -7 = seven days/months ago). This allows you to quickly
access your power consumption over the past days or months graphically as a bar or as
consumption values. The following values are shown one after another by repeatedly pushing
the button
HISTORY:
•The consumption for the last seven days.
•The consumption for the last seven months.
•The difference in consumption over the last seven days. Representation of the differences
between the individual days. (Example: if you measured 2 kWh on the first day and 3 kWh
on the second day, a difference of 1 kWh is displayed.)
•The difference in consumption over the last seven months. Representation of the
differences between the individual months.
Please note that the bar graph readout is approximate. If e.g. 1 BAR = 1 kWh and 2 bars are
shown for one day, the actual measured value may be between 1,01 und 1,99 kWh. Please
access the data for days or months for exact measured values.
4.7.6. Displaying consumption values (kWh)
You can also display the consumption for individual days or months in absolute values (kWh).
Consumption values for days:
1. Push the button
HISTORY
until the bar chart fort he consumption for days appears on the
display (DAILY).
2. Push and hold the button
HISTORY
until the value appears and blinks on the display. The
applicable bar chart will also blink at the same time.
3. You can display the consumption values for the individual days with the buttons
VALUE / +
or
DISPLAY
.
Consumption values for months:
1. Push the button
HISTORY
until the bar chart for months appears on the display.
2. Push and hold the button
HISTORY
until the value appears and blinks on the display. At
the same time, the applicable bar chart will also blink. You can display the consumption
values for the individual months with the buttons
VALUE / +
or
DISPLAY.
3. The applicable bar chart will also blink at the same time.
The display of the consumption values is only available for consumption and not for the
indication of the difference between the days and months. If there is no button activity for 10
seconds, the device automatically switches back to the standard display.

page 9
5. Deleting measured values
You can delete all measured and recorded values. The input data such as times, power prices,
CO2 factor and overload values remain intact.
1. Simultaneously push and hold the buttons
DISPLAY
and
VALUE / +
for three seconds until
the entire display blinks.
2. Simultaneously push and hold the buttons
DISPLAY
and
SET / OK
for three seconds.
3. All measurement results are permanently deleted!
If you do not perform any action after step 1, the monitor returns to the standard display
mode after 10 seconds of inactivity.
Always delete the measurement results with full batteries of if the device is connected to
the grid.
6. Initialisation
If the display has an unusual readout or the buttons do not react when pushed, an initialisation
must be performed:
1. Disconnect the device from the socket
2. Take out the batteries for a short time and then put them back in as described under the
point „charging the batteries“.
Removing the batteries reset the clock only. Other user settings are remain unchanged.
Table of contents
Languages:
Popular Measuring Instrument manuals by other brands

FoxInsights
FoxInsights FoxSonics user manual

halstrup-walcher
halstrup-walcher PU Original instruction manual

Bosch
Bosch Vivatmo me Instructions for use

Endress+Hauser
Endress+Hauser Levelflex FMP50 Brief operating instructions

Mier products
Mier products DA-610TO installation guide

Ponpe
Ponpe 8252 Operation manual


