AMS CT412 BT User manual

FR-2
DE-3
NL-4
ES-5
IT- 6
EN-1
DA-7
PL-8
SV-9
CZ-10
SK-11
OWNER'S MANUAL
CT412 BT/TUNER CT412 BT

EN-1
Safety Information
Safety Information ..................... ..................1
Specifications............................................... 1
Panel Controls..............................................2
Button Tips....................................................3
Bluetooth Functions.................... .................6
USB function Summarization.........................6
Other functio.................................................7
FCC................................................8
Troubleshooting............................................9
Thank you for purchasing this product, please
read the manual carefully before operating,
and reserve it for future reference.
PRECAUTIONS
• Onlyina12-voltDCnegative-ground
electrical system.
• Disconnectthevehicle'snegativebattery
terminal while mounting and connecting
the unit.
• Whenreplacingthefuse,besuretouse
one with an identical amperage rating.
Using a fuse with a higher amperage
rating may cause serious damage to the
unit.
• Makesurethatpinsorotherforeign
objects do not get inside the unit, they
may cause malfunctions, or create safety
hazards such as electrical shock.
• Ifyouhaveparkedthecarforalong
time in hot or cold weather, wait until the
temperature in the car becomes normal
before operating the unit.
• Keepthevolumeatalevelatwhichyou
can hear outside warning sounds (horns
sirens, etc.).
CAUTION
• DONOTopencoversanddonot
repair by yourself. Ask the dealer or an
experienced technician for help.
BEFORE OPERATION
• Donotraisethevolumeleveltoomuch,
as this will block outside sounds, making
driving dangerous.
• Stopthecarbeforeperformingany
complicated operation.
User Safety Code
You need to enter password when power on,
the original password is 1234.
General
Powersupply: 12VDC(10.8V-16V)
Maximumpoweroutput: 4X25W
Suitable speaker impedance: 4ohm
Fusespec: 10A
Weight: 0.7kg
Dimensions(WxDxH): 188x116.3x58.5mm
Note:
1. According to models with different wiring
harnesstoconnectthedenitionofthe
speciccontent,pleaserefertothemodel
label.
2.Specicationsandthedesignare
subject to change without notice due to
improvements in technology.
Specications Contents
FM Stereo Radio
Frequencyrange:76-90Mhz(japanmode)
87.5-108MHz
Signal/noiseratio: 50dB
AUTOStep: 100KHz
AM (MW) Radio
Frequencyrange: 522-1620KHz
Step: 9KHz
backupcurrent: ≤3mA
LW Radio(EURO)
Frequencyrange: 153-280KHz
AUTOStep: 1KHz
EXT (AUX)
JackStereo3.5mm≥300mVauxiliarysource

EN-2
Panel Controls
(1).-Microphone
(2). - Power on (press),
- Mute (short press),
- Adjust volume (rotate)
- Power off (long press)
(3). - Press to toggle the playing Sources:
Radio,
USB (when USB inserted),
AUX IN,
A2DP(when connect Bluetooth),
- Hold it more than 2 seconds to select PTY
mode.
(4).- Band switch:
FM1 -> FM2 -> FM3 -> MW1 -> MW2-> LW
- Auto memory system hold it to Automatically
search station and store the signal strongly
station to 1-6 Preset on the current band.
(5). - At non AUX mode, press SEL and rotate
VOL knob to select EQ preset mode.
- Press to countersign,when selecting the
PTY mode,
- Press SEL and rotate VOL knob to dial
a phone number mode, and to import the
phone number on the BT mode.
(6). - Radio mode:
display PTY info/system clock/
current channel ,
- MP3 mode:
Display clock/ID3 TAG/playing time .
- Hold it to enter setting mode
(7). - Radio mode
Seek backward
Manual tune backward(long press)
- MP3 / BT music mode
Select the previous track
Fast rewind(long press)
(8). - Radio mode
Seek forward
Manual tune forward(long press)
- MP3 / BT music mode
Select the next track
Fast forward(long press)
(9). - USB slot
(10). - Play/pause(when USB / BT music)
- Connect the previous one(when to
turn off BT )
(11). - Program intro play(10 sec.)
(12). - MP3 repeat play
(13). - MP3 random play
(14). - MP3 folder back/Answer/Dial/Call
transfer
(15). - MP3 folder ahead/Hang up/
Disconnect(long press)
(10-15).
-1-6 radio preset
Press to tune in a preset station.
Hold for more than 2 seconds to
store current station.
(16). - AUX
210
14
11
15
12
13
3 4 56 7 89
1
16

EN-3
Button Tips
SETUP
CLOCK
DX/LO DX
TA ALARM TA SEEK
ON OFFREG
TAL VOL
AREA EUROPE USA JAPAN AUSTRA LATIN
TA RETUN RETUNEL RETUNES
VOL LAST ADJ
S-VOL 0 to 30
ON OFF
BEEP
ON OFF
SWRC SET
ON OFF
TIMER
ON OFF
SCROLL
PWD SET
ON OFF
PWD
24HOURS 12HOURS
12/24H
BT VOL 0 to + 7
0 to 30
AF ON OFF
AUDIO
BASS BAS +0
BALANCE 0LEFT 7 RIGHT 7
LOUD ON OFF
CT ON OFF
ST/MONO STEREO MONO
MIC SEL REAR FRONT
AUTO CON ON OFF
AUTO ASW ON OFF
TREBLE TRE +0
OFFTA ON
EQ OFF JAZZCLASSIC ROCKPOP
REAR 7FADER FRONT 70

EN-4
System setting
On the non time display menu:
Holdthe[DSP]toenterthesystemsetup
menu,andpress[ /]buttontoselect:
CLOCK AF(ON/OFF) TA(ON/OFF) DX/
LOCAL TAALARM/SEEK REG(ON/OFF)
TARETURN(LONG/SHORT) TAL VOL
AREA CT(ON/OFF) ST/MONO
MIC/SEL(REAR/FRONT) AUTOCON(ON/
OFF) AUTOASW(ON/OFF) BT VOL
VOLLAST/ADJ(S-VOL) BEEP(ON/OFF)
12/24H SWRCSET(ON/OFF) TIMER(ON/
OFF) SCROLL(ON/OFF) PWDSET
PWD(ON/OFF)
Waitfor1sandrotatetheknobtoadjust.
TA mode
RotatetheknobtochooseTAALARM
orTASEEKmode.IftheTA(traffic
announcements) is turned on and there is no
traffic program identification code received
in the specified time, no TA/TP will display
andeitherTAALARMorTASEEKwillbe
activated.
TA ALARM mode
Alarm is turned on
A beep sounds when you are listening a radio
station that does not broadcast TP info.
TA SEEK mode
TASEEKisautomaticallyactivated.
Note
EUROPEarea:addtoRDSfunction,JAPAN,
AUSTRALIAandUSAarea:noRDSfunction.
TA setting
Button Tips
MP3 Playback
Track skip
Press the /button to go to the previous
or next track.
MP3 track fast search
Holdittoenterfastforwardorreverseback
mode.
Folder select
Pressthe[5F-]/[6F+]buttontoselectMP3
folder back/ahead.
Set Clock
Radiomode:Press[DSP]button,turnandturn
display PTY/Clock/current channel.
MP3playbackmode:press[DSP]button,turn
andturnaboutfoldername/filename/ID3TAG/
Clock
Thenpress[DSP]buttonmorethan2seconds,
‘Clock‘displayed,press[SEL]button,rotate
the[VOL]knobandpress[ /]buttonto
set,press[SEL]toconrm.
Automatic clock setting :
WhilelisteninganFMRDSstation,transmitter
updates automatically time on the radio unit.
Clock format:
Pressseveraltimeson«SEL»buttontoview
“24 hours”.
Rotate volume knob to select “12 hours” mode
(displaysPMorAM).
Rotate[VOL]knobto setON/OFF.
TA VOL mode
Rotate the knob to to adjust TA VOL 10-30.
VOL ADJ mode
RotatetheknobtochooseVOLADJorLAST
mode.
TA RETURN
OntheFMmode,settheTAtimespaceInfoof
autosearchwithRDS.
Settingfor“LONG”,AutosearchtheTAtime
spacefor180sec,Settingfor“SHORT”,auto
searchtheTAtimespacefor45sec.
AREA SETTING
AREAsettingtoselectEUROPE,USA,JAPAN,
AUSTRA,LATIN
Audio setting
Press[SEL]button,andpressthe[ /]
buttontochooseBASS/TREBLE/BALANCE/
FADER/LOUD/EQfunction,rotatethekonbto
adjust.
Radio Operation
Radio seek automatically
Press the /button to auto search the
station tune backward or forward.
Radio tune by step
Hold /button more than 2 seconds, switch
totheMANUALmode,thenshortpress /
button to step search the station tune backward
or forward.
Manual Memory Store
AtFM1/FM2/FM3/MW1/MW2/LWmode,press
andholdbutton1-6tostorecurrentstationin
memory. You can store 36 stations in total.

EN-5
RDS
AF(AlternativeFrequency):Whentheradio
signal strength is poor, enabling the AF
function will allow the unit to automatically
search another station with the same PI,
but with stronger signal strength.
PS (Program Service name): The name of
station will be display instead of frequency.
Press2secondsthe[DSP]buttonand
select [/]tosetAF/TA/REG,rotatethe
[VOL]knobtoopenorcloseAF/TAfunction.
PTY function
Holdthe[SRC]buttontoPTYfunction,rotate
the[VOL]knob,displayNEWSandPOP
program type.
Press 2 second "SRC" button and rotate
the volume knob to choose the type of
station NEWS-AFFAIRS-INFO-SPORT-
EDUCATEDRAMA-CULTURE-SCIENCE-
VARIED-POPM-ROCK M-EASY M-LIGHT
M-CLASSICS-OTHER M-WEATHER
-FINANCECHILDREN-SOCIAL -RELIGION-
PHONEIN-TRAVEL-LEISURE-JAZZ-
COUNTRYNATIONM-OLDIES-FOLK
M-DOCUMENTTEST-ALARM
REGon:AFfunctionwillimplementthe
regional code (of the PI) and only stations in
the current region can be tuned automatically.
REGoff:AFfunctionwillignoretheregional
code(of the PI) and stations in the other
regions can also be tuned automatically.
CT ON/OFF
WhilelisteninganFMRDSstation,transmitter
updates automatically time on the radio unit
Button Tips
BT Audio
To listen to audio from a bluetooth device and
control playback with the unit.
1. Press SRC button repeatedly to select BT
MUSICmode.
2. To play or pause, press 1 ( TOP).
VOL LAST mode
RotatetheknobtochooseVOLLASTorADJ
mode.
OntheADJmode,rotatetheknobtoadjust
S-VOL5-30.
BEEP mode
Rotate the knob to choose button beep sound
on or off.
SCROLL mode
RotatetheknobtochooseSCROLL(IDTag)
mode on or off.
SWRC function
This function allows to control main functions
oftheradio((VOL-/VOL+/Source/SEEK+/
SEEK-/TuneMemory/BT-OFFhangoff)in
USB/BT/A2DP/AUX.
To do so, you need a wired remote to connect
tothefemaleinput3.5,yellowconnectorat
the back of the radio.
Timer ON/Timer OFF
TimerON:when ignition of the car is off, you
canturntheunitonbypressingPOWER
buttion, and it can work for about 2 hours
Timer OFF: when ignition of the car is off, the
unitcan'tworkanymore.
AREA SEL mode
PressDSPbuttonmorethan2seconds,then
press[ /]buttonseveraltimetochoose
REGIONfuntion.Rotatethekonbtochoose
"EUROPE--USA--JAPAN-AUSTRA-LATIN".
LOUD ON/OFF
PressSELandrotateVOLknobtoEQOFF,
thenpress[ /]buttonseveraltimeto
chooseLOUDON/OFFfuntion.Rotatethe
konb to choose loudness on or off .
STEREO/MONO mode
(in Radio mode)
PressDSPbuttonmorethan2seconds,then
press[ /]buttonseveraltimetochoose
ST/MONOfuntion.Rotatetheknobtochoose
FMstereoormono.
LOCAL ON/OFF mode (OFF=DX)
PressDSPbuttonmorethan2seconds,
thenpress[ /]buttonseveraltimeto
chooseLO/DX.Rotatetheknobtochoose
tuner sensitivity local or distant.
MIC
InDefaultsettings,theMICSELis
"REAR"Themicrocablesareconnectedat
therearoftheradio,ifyoudon'tusetherear
micro,pleaseletthemconnectedtodon't
losethem.Youcanusethefrontmicrobutit's
not recommended.On the non time display
menu:
Holdthe[DSP]toenterthesystemsetup
menu, and press [/]button to select
"MICSELandselect"FRONT"ifyoudonot
use the back microphone

EN-6
Bluetooth Functions
Pairing
1.Openthesmartphone'sBTfunction,
2. Search bluetooth equipments by your
smart phone.
3.Selectthemodelnumber(CT412-BT)of
this unit and enter the pairing code: 1234.
Press[6F+]buttonmorethan2sec,the
moblie phone and the unit disconnect.
AUTO CON mode
RotatetheknobtochooseAUTOCONmode
onoroff.Whenitison,itwillautoconnect
the phone.
AUTO ANS
ON>Somemobilephoneswilltransfer
audio from the unit to themselves once the
incoming call is answered.
BT mode selecting
Press[SRC]buttontochooseBTmode.
Press[DSP]buttontodisplaytheA2DP
information.
Dialing
1. Phone dialing
Use your mobile phone dialing, LCD
screen displays dialing information.
2. Unit dialing
Press [SRC] button to switch to A2DP(BT)
mode. Press [5F-] and "DIAL NO" appears
on the LCD, then press [SEL] button to
enter dialing mode. Press [ /] button
and rotate the knob to input dialing
numbers, press [5F-] button to dial out.
Voice switch
Duringthecall,Pressthe[5F-]buttonto
transfer between the unit and your phone.
Hang up/Answer
Press[5F-]buttontoansweracall,
Press[6F+]buttontohangup.
A2DP mode
OnA2DPmusicplayingmode,press[1]
button to pause/play.
Press [ / ] to previous or next track.
InAD2Pmode,ifyourphoneispairedyou
canordervocallyby"SIRI"or"Google"
application to select and call somebody
"Phone bookseparation source BT phone
andA2DPMUSIC(onlyonANDROIDand
depending on version solfware) :
1. Standard Setting (one device phone and
media)with your phone you can receive
and send a call and listen to your music at
your device
2.Doubleconnection(2phoneconnectedat
the same time)
•rstinBT(receiptandphonecall)
•secondinAD2Pmode(listentoyourmusic)
youcanfreemediaconnectionontherst
phone
•onthephone,entertheBluetoothsetting
•positionyourselfontheCT-412BT
•gotothesettingatthisdevice
•uncheckthesetting"audioparameter
Media"
•closetheaccesparameterBT412-BT
therstdevicereceivedantransmitcall,
the second device listening the audio
media, to return to standard parametrage,
ticktheboxoftherstdevicehaving
disconnected the second device
Voice commands
IntheA2DPmode,youcanusevoice
commands to make a telephone call from the
phonebookorwriteaSMS.
“Voice commands” function must be
activated on your telephone and avoid noisy
environment.
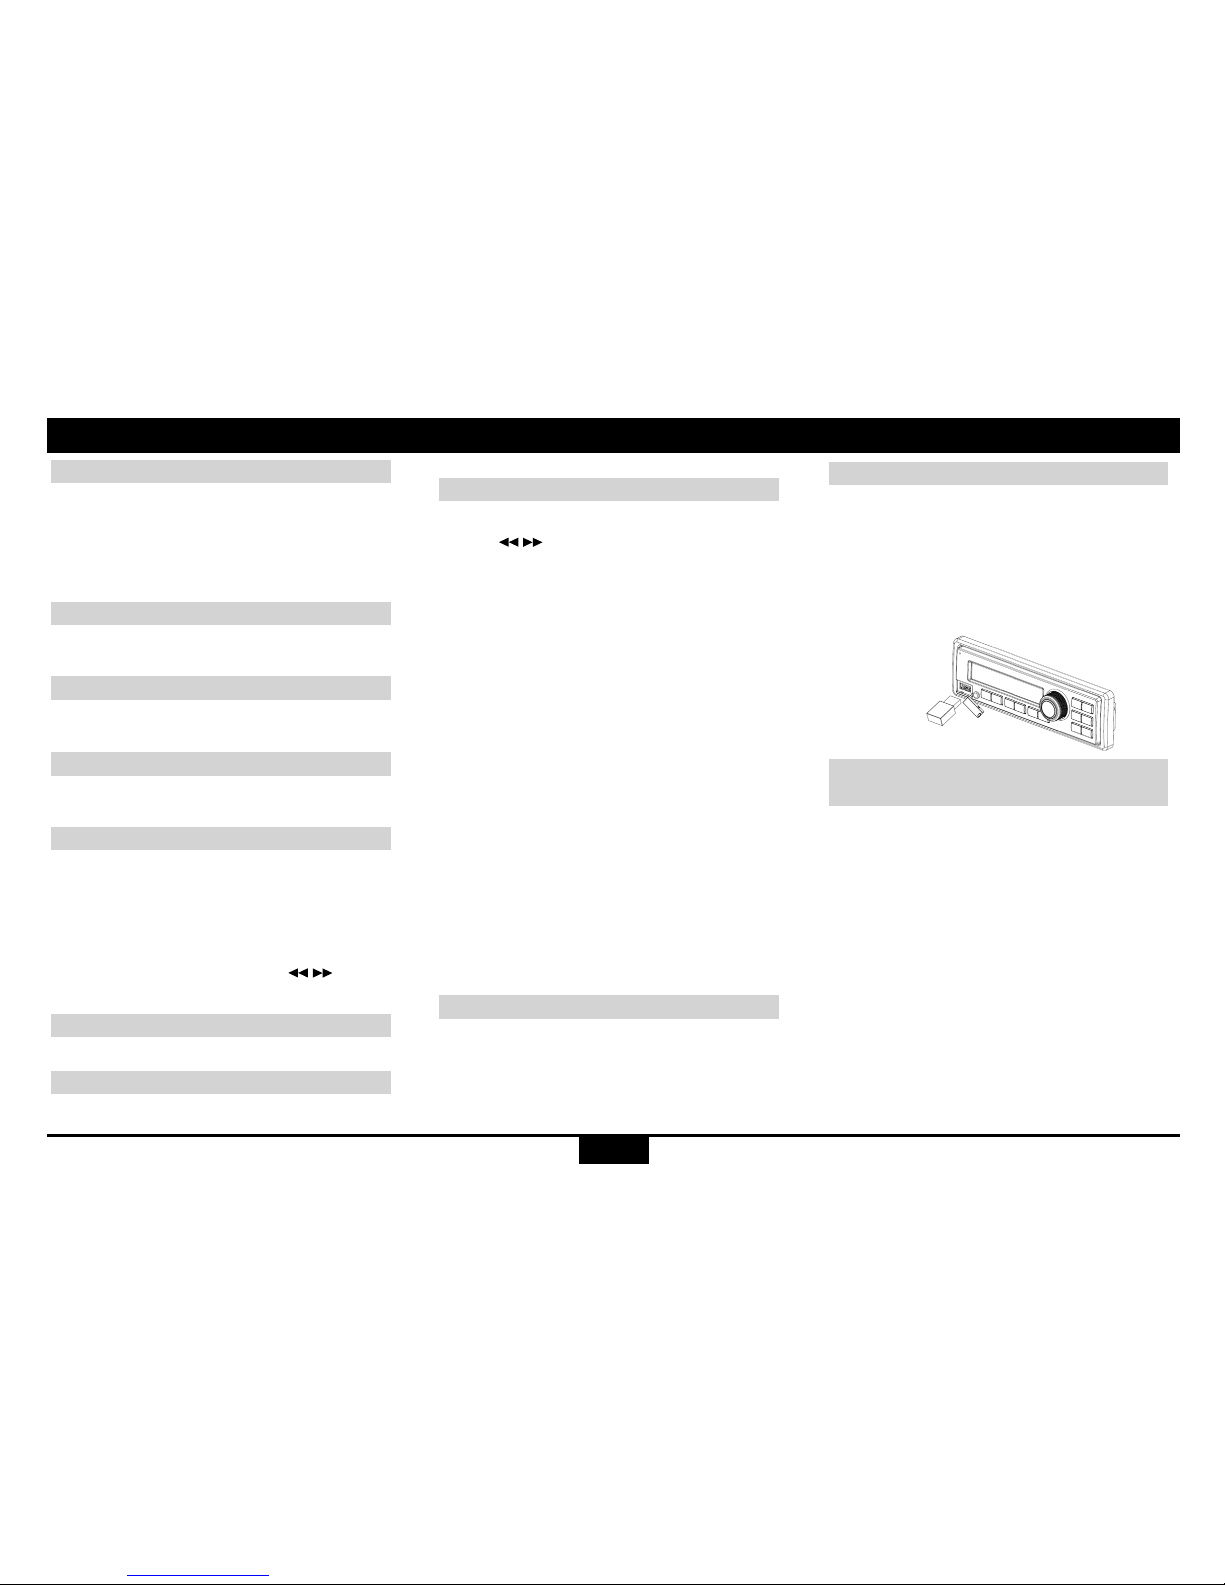
Loading/Take out USB equipment
1. Open the USB cap located on the bottom
left of the unit, insert a USB device into the
connector and the unit will begin to play
automatically.
2. To stop playback of USB device, push the
SRC button to non USB mode and then
remove the USB device.
USB Function Summarization
USB functions
(ash memory type)
1.USBashmemory2in1support
2. FAT 12/FAT 16/FAT 32 format supported.
3. USB 1.1 support, USB 2.0 support (For
2.0,speed performance is as USB 1.1)
4.WMAlessupported
5. Maximum number of MP3 files FAT 32
formatsupportedis65535les.(Maximum
number of MP3 files NTFS supported is
1000les.)
Maximum number of folders is 999.
6. Maximum USB capacity support is cap at
8 GB and best performance with songs
not more than 500, and not exceeding 30
folders.
7. Not all USB devices are compatible with
the unit.

EN-7
AUX mode
1. At Power on mode, the unit will switch to AUX
mode when the Tele-mute signal become low.
And return to previous mode when the
signal become high.
2. At Power off and ACC on mode, the unit will
turn on and switch to AUX mode if detected
Tele-mute signal. And turn off when the signal
become high.
3. At AUX mode, only the POWER, VOLUME
and SRC button can be used.
Timer function
If the device is switched on while the ignition
is on, it then switches off and on again
automatically with the ignition. This is provided
that the A7 contact is connected to the terminal
15 of the vehicle. If the device is switched on
without the ignition by pressing "POWER", it
switches off again after 120 minutes to save the
battery. The device can then be switched on
again with "POWER".
Caution : When the radio is switched on, the
automatic antenna extends.
Therefore always switch off the device when the
situation requires it (e.g. in a station car wash).
You can stop this function in the MENU.
Mode Button (SRC)
Press the SRC button to change between
Other functions
Radio, DISC (when disc is in), USB(when USB
connected), AUX play , BT audio.
Auxiliary Input
To access an auxiliary device:
1. Connect the portable audio player to the
AUX interface.
2. Press the SRC button to select Aux mode.
3. Press SRC again to cancel Aux mode and
go to the next mode
Password entered
Rotate the "VOLUME" knob to choose the
gures,pressthe" " button to enter the next
figure, press the " " button to change the
figure in case of error. Once the password is
fully displayed, press the "SEL" button at least
2 seconds to confirm, the radio switches to
the tuner mode. If the password is incorrect,
"ERROR" appears on the display. Please enter
the password again. If the user code is lost,
contact the After Sales Service.
PWD OFF/ON: Activating/Deactivating the
security code
When the unit is switched on, press the "SEL"
button several times to select "PWD OFF"
(ON) and turn the "VOLUME" knob to select
"ON" or "OFF": the password is activated or
deactivated. When set to "ON", the radio code
will be requested if you have disconnected
the permanent + (B + battery), you will have
to enter the password after each time the
battery is disconnected (the default password
is "1234"). If you only turn off the ignition
(+15/30), the code will not be requested.PWD
NEW: Create a new password
You can set a new password for the unit:
press the "SEL" button several times
to select "PWD >OLD", enter your old
password, press the "SEL" button at least
2secondstoconrm.Iftheoldpasswordis
incorrect,"ERROR" appears on the display,
please enter the password again. If the old
password is correctly entered, "NEW" is
displayed, enter your new password, press
the "SEL" button at least 2 seconds to
conrm."AGN"isdisplayed,enteryournew
password again and press the "SEL" button
at least 2 seconds to confirm; "SET OK" is
displayed: the code has been updated.

EN-8
FCCSTATEMENT
1.ThisdevicecomplieswithPart15oftheFCC
Rules. Operation is subject to the following two
conditions:
(1) This device may not cause harmful
interference,and.
(2) This device must accept any interference
received, including interference that may cause
undesired operation.
2.anyChangesormodicationsnotexpressly
approved by the party responsible for
compliancecouldvoidtheuser'sauthorityto
operate the equipment.
NOTE:Thisequipmenthasbeentestedand
found to comply with the limits for a Class
Bdigitaldevice,pursuanttoPart15ofthe
FCC Rules. These limits are designed to
provide reasonable protection against harmful
interference in a residential installation.
This equipment generates uses and can
radiate radio frequency energy and, if not
installed and used in accordance with the
instructions, may cause harmful interference
toradiocommunications.However,thereis
no guarantee that interference will not occur
in a particular installation. If this equipment
does cause harmful interference to radio or
television reception, which can be determined
by turning the equipment off and on, the user is
encouraged to try to correct the interference by
one or more of the following measures:
Reorient or relocate the receiving antenna.
Increase the separation between the
equipment and receiver.
Connect the equipment into an outlet on a
circuit different from that to which the receiver
is connected.
Consult the dealer or an experienced radio/
TV technician for help.
FCCRadiationExposureStatement
This equipment complies with FCC radiation
exposure limits set forth for an uncontrolled
environment. This equipment should be
installed and operated with minimum distance
20cmbetweentheradiator&yourbody
FCC

EN-9
TROUBLESHOOTING
Problem Possible cause Solution
General
The unit will not
switch on.
Car ignition is not on.
Cable is not properly connected.
Fuse is burnt.
Turn your car key in the ignition.
Check cable connection.
Replace fuse with a new fuse of the same capacity.
Nosound Volume is set at minimum or the mute
function is on.
Check the volume or switch the mute function off.
The unit or screen
does not work
normally.
The unit system is unstable.
ModeTUNER
Unable to receive
stations.
The antenna is not connected properly. Connect the antenna properly.
Poor quality reception
of radio station.
The antenna is not fully extended or it is
broken.
Fully extend the antenna and if broken, replace it with a
new one.
Preset stations are
lost.
The battery cable is not properly connected. Connect the permanent live on the unit to the permanent
live on the vehicle.
ModeUSB
Unable to insert USB
device
The USB device has been
inserted the wrong way round.
Insert it the other way around.
The USB device
cannot be read.
NTFSformatisnotsupported. CheckthatthelesystemisinFATorFAT32format.Due
to different formats, some models of storage devices or
MP3playersmaynotberead.
The following checklist can help you solve some problems which you may encounter when using the unit. Before consulting it, check the connections
andfollowtheinstructionsintheusermanual.Donotusetheunitinabnormalcondition,forexamplewithoutsound,orwithsmokeorfoulsmellcan
causereorelectricshock,immediatelystopusingitandcallthestorewhereyou purchased it.

FR-1
Informations concernant la sécurité
Mercid’avoirachetécetappareil.Lisez
attentivement ce manuel avant toute utilisation
etconservez-leandevousyréféreràl’avenir.
PRECAUTIONS D’EMPLOI
•Utiliserl’appareiluniquementdansuncircuit
électrique12Vccnégatifàlamasse.
•Déconnecterlepolenégatifdelabatterie
pendantl’installationetlaconnexion
del’appareil.
•Lorsduchangementd’unfusible,s’assurer
de le remplacer par un fusible de calibre
identique.L’utilisationd’unfusibledecalibre
supérieurpourraitcauserdesdommages
irréversiblesàl’appareil.
•Veilleràcequ’aucuncorpsétrangerne
pénètredansl’appareil:celapourraitentraîner
des dysfonctionnements ou compromettre
votresécurité(risqued’électrocutionou
d’expositionauxfaisceauxlaser).
•Silevéhiculeestrestégarélongtemps
par temps chaud ou froid, attendre que la
températureduvéhiculerevienneàlanormale
avantdefairefonctionnerl’appareil.
•NEPASréglerlevolumedel’appareilàun
niveau où il couvrirait les bruits venant de
l’extérieur(klaxons,sirènes,etc.).
ATTENTION
•NEPASdémonterl’appareilpourtenterdele
réparervous-même.Demanderconseilà
votreconcessionnaireouàuntechnicien
expérimenté.
Informationsconcernantlasécurité.................1
Spécifications...............................................1
Commandes de façade....................................2
Conseils concernant les boutons....................3
Fonction Bluetooth...................... .................6
Lecture USB....................................................6
Autres fonctions.............................................7
FCC................................................8
Dépannage............................................9
AVANT TOUTE UTILISATION
•Nejamaismonterlesondemanière
excessive: cela couvrirait les bruits
venantdel’extérieuretrendraitlaconduite
dangereuse.
•Arrêterlavoitureavanttoute
opérationdélicate.
Mot de passe
Vousdevrezentrerlemotdepasseàchaque
débranchementdebatterie.(Lemotde
passepardéfautest“1234”).
Généralités
Alimentation: 12VDC(10.8V-16V)
Sortiemax.alimentation:4X25W
Impédanceadmissibleduhaut-parleur:4ohm
Fusespec: 10A
Poids: 0.7kg
Dimensions(LxHxD): 188x116.3x58.5mm
Remarque:
1. Les faisceaux de câblage varient selon
lesmodèles.Pourassocierlabonne
dénitionàuncontenuspécique,se
reporteràl’étiquettedel’appareil.
2.Lescaractéristiquestechniquesainsi
quel’apparencepeuventêtremodiées
sanspréavissuiteàdesaméliorationsde
la technologie.
Spécications Table des matières
Radio FM stéréo
Bandedefréquences:76-90Mhz(japanmode)
87.5-108MHz
Rapportsignal/bruit: 50dB
Pas: 100KHz
Radio AM (MW)
Bandedefréquences: 522-1620KHz
Pas: 9KHz
backupcurrent: ≤3mA
Radio EURO (LW)
Bandedefréquences: 153-280KHz
Pas: 1KHz
EXT (AUX)
SourceauxiliaireenJackStereo3.5mm≥
300mV

FR-2
Commandes de façade
(1).-Microphone
(2). - Mise en marche (press),
- Mute (short press),
- Appui long pour éteindre l’appareil (rotate)
- Tourner le bouton pour régler le volume
(long press)
(3). - Appui long (plus de 3 secondes) pour
réinitialiser:
Radio,
USB (lorsqu’une clé USB est insérée),
EXT: entrée auxiliaire,
Source audio par le
- cable 3.5 femelle arriere
(4).- Sélection de la bande radio :
FM1 -> FM2 -> FM3 -> PO1 -> PO2 -> GO
(EUROPE)
- Appui long pour lancer la recherche de
station automatique et enregistrer les 6
stations présélectionnées avec un
signal fort
(5). - VOL/PTY/AF/TA/BAS/TRE/BAL/FAD/
Changer le mot de passe/"PWD" Activer le
mot de passe / format horloge
- Appui long pour sélectionner le mode EQ
: EQ OFF-CLASSIC-POP-ROCK-FLAT ;
- tourner le bouton VOL pour ajuster la
valeur
(6).-Appuyerpourafcherl'horloge.
-Appuilongpourréglerl'horloge.
- Mode MP3 :
appuyerpourafcherlenomdudossier/
chier/labaliseID3/l'horloge
(7). - Mode Radio
Recherche de station automatique
(fréquences décroissantes)
- Mode MP3
Sélection de la piste précédente
(8). - Mode Radio
Recherche de station automatique
(fréquences croissantes)
- Mode MP3
Sélection de la piste suivante
(9). - Emplacement USB
(10). - Lecture/pause
-Branchezcedernier(lorsdel'arrêtde
BT)
(11). - Lecture intro (10 secondes)
(12). - Lecture MP3 en boucle
(13). - Lecture MP3 aléatoire
(14). - Dossier MP3 précédent
(15). - Dossier MP3 suivant
(10-15).
- Présélection radio 10 à 15
Appuyer pour écouter une station
présélectionnée.
Appui long (plus de 2 secondes)
pour enregistrer la station en cours.
(16). - EXT (aux-in 3.5 source)
210
14
11
15
12
13
3 4 56 7 89
1
16

FR-3
Conseils concernant les boutons
SETUP
CLOCK
DX/LO DX
TA ALARM TA SEEK
ON OFFREG
TAL VOL
AREA EUROPE USA JAPAN AUSTRA LATIN
TA RETUN RETUNEL RETUNES
VOL LAST ADJ
S-VOL 0 to 30
ON OFF
BEEP
ON OFF
SWRC SET
ON OFF
TIMER
ON OFF
SCROLL
PWD SET
ON OFF
PWD
24HOURS 12HOURS
12/24H
BT VOL 0 to + 7
0 to 30
AF ON OFF
AUDIO
BASS BAS +0
BALANCE 0LEFT 7 RIGHT 7
LOUD ON OFF
CT ON OFF
ST/MONO STEREO MONO
MIC SEL REAR FRONT
AUTO CON ON OFF
AUTO ASW ON OFF
TREBLE TRE +0
OFFTA ON
EQ OFF JAZZCLASSIC ROCKPOP
REAR 7FADER FRONT 70

FR-4
AREA>CT(ON/OFF)>ST/MONO>MIC/
SEL(REAR/FRONT)>AUTOCON(ON/
OFF)>AUTOASW(ON/OFF)>BTVOL
>VOLLAST/ADJ(S-VOL)>BEEP(ON/
OFF)>12/24H>SWRCSET(ON/OFF)>
TIMER(ON/OFF)>SCROLL(ON/OFF)>
PWDSET>PWD(ON/OFF)
Attendez 1 seconde et tournez le bouton pour
effectuerleréglage.
Mode TA
Tourner le bouton pour choisir le mode TA
ALARMoulemodeTASEEK.SilemodeTA
(TrafficAnnouncements)estactivéetquel
’appareilnereçoitpasdecode
d’identicationTPentempsvoulu,lamention
TA/TPnes’afchepasetniTAALARMniTA
SEEKnesontactivés.
Mode TA ALARM
L’alarmeestactivée.
Unsignalsonoreretentitlorsquevousécoutez
une station de radio qui ne diffuse pas les
informationstracTP.
Mode TA SEEK
Larecherched’annoncessurletraficest
activéeautomatiquement.
Remarque
ZoneEUROPE:fonctionRDSdisponible
ZonesJAPONAUSTRALIAetUSA:fonction
RDSnondisponible
Réglages TA
Tournezlebouton[VOL]poursélectionner
ON/OFF.
Volume TA mode
Tourner le bouton pour régler le volume TA
VOL : 10-30
Mode VOL LAST/ADJUST
Lecture MP3
Avance rapide
Appuyerpouraccéderàlapisteprécédente
/ suivante.
Recherche rapide de piste MP3
AppuyerpoursélectionnerledossierMP3
précédent/suivant.
Recherche rapide de piste MP3
Appuyersur[5F-]/[6F+]poursélectionnerle
dossierMP3précédent/suivant.
Réglage et format de l’horloge
ModeRadio:Réglagemanueldel’horloge:
AppuyersurleboutonDSPpourafficherle
typedeprogramme/l’horloge/lafréquenceen
cours
ModeLectureMP3:appuyersurlebouton
DSPpourafcherlenomdudossier/chier/la
baliseID3/l’horloge
Réglageautomatiquedel’horloge:Lorsde
écouted’unestationFMRDS,l’émetteurenvoi
lamiseàjoursdel’heureautomatiquementà
l’autoradio.
Formatdel’horloge:
Appuyezplusieursfoissurlebouton“SEL”
pourafcher“24hour”.Tournezleboutonde
volumepoursélectionnerlemode“12hour”
(afchePMouAM).
Réglages
Àpartirdumenuautrequeleréglagedel’heure
:maintenezlebouton[DSP]pourentrerdans
lemenudesréglagessystème,puisappuyez
surlebouton[ /]afindesélectionner
CLOCK>AF(ON/OFF)>TA(ON/OFF)>DX/
LOCAL>TAALARM/SEEK>REG(ON/OFF)
>TARETURN(LONG/SHORT)>TALVOL>
Pour activer le mode VOL.LAST, tourner le
bouton.PourchoisirlemodeVOL.ADJ,tourner
le bouton.
TA RETURN
DanslemodeFM,réglezlesinformationstrac
temps/lieu de la recherche automatique avec
RDS.Leréglageest«LONG»quandvous
appuyezpendant180secondespendantla
rechercheautomatiqued’informationstracTA
;leréglageTAestcourt/«SHORT»quand
vousappuyezpendant45secondes.
Mode AREA SEL
Tournez le bouton pour choisir la zone
EUROPE,USA,JAPAN,AUS,LATIN
Réglages audio
Appuyezsurlebouton[SEL],puispressez
le bouton[/]pour choisir parmi les
fonctionsBASS/TREBLE/BALANCE/FADER/
LOUD/EQ.Tournezleboutonpourrégler.
Tuner
Recherche de station automatique
Recherche de /station automatique par
fréquencesdécroissantesoucroissantes.
Recherche de station pas à pas
Appuyer /pendant plus de 2 secondes
etpasserenmodemanuel;àchaque
nouvel appui /,l’appareilrecherchela
stationsuivante(fréquencescroissantesou
croissantes).
En mode
FM1/FM2/FM3/MW1/MW2/LW,appuyer
longuementsurlesboutons1à6pour
enregistrer la station en cours. Vous pouvez
enregistrerjusqu'à36stationsautotal
Conseils concernant les boutons

FR-5
RDS
AF (Alternative Frequencies) : lorsque le
signal radio est faible et que la fonction
AFestactivée,l’appareilrecherche
automatiquement une autre station
présentantlemêmecode
d’identificationquelastationactuelle,mais
avec un signal plus fort.
PS (Program Service) : le nom de la station
s’afficheaulieudelafréquence.
Appuyez2secondessurlebouton[DSP]et
sélectionnez[ /]pourréglerAF/TA/REG,
tournezlebouton[VOL]pourouvriroufermer
la fonction AF/TA.
Fonction PTY
Maintenezlebouton[SRC]pourlafonction
PTY,tournezlebouton[VOL],afchezNEWS
et le type de programme POP.
Appuyezsurlebouton«SRC»pendant2
secondes et tournez le bouton de volume
afin de choisir le type de station NEWS-
AFFAIRS-INFO-SPORTEDUCATEDRAMA-
CULTURE-SCIENCEVARIED-POPM-ROCK
M-EASY M-LIGHT M-CLASSICS-OTHER
M-WEATHER-FINANCECHILDREN-SOCIAL
-RELIGIONPHONEIN-TRAVEL-LEISURE-
JAZZCOUNTRYNATIONM-OLDIES-FOLK
M-DOCUMENTTEST-ALARM
REGon:LafonctionAFactivelecode
régionaldescodesd’identication.Seules
lesstationsdelarégionpeuventêtreréglées
automatiquement.
REGoff:lafonctionAFignorelecode
régionaldescodesd’identicationetles
stationsdesautresrégionspeuventêtre
égalementrégléesautomatiquement.
Réglage automatique de l’horloge
CT ON/OFF
Lorsdeécouted’unestationFMRDS,
Conseils concernant les boutons
l’émetteurenvoilamiseàjoursdel’heure
automatiquementàl’autoradio.
BT Audio
Pourécouterlamusiqued’unappareil
Bluetooth et contrôler la lecture de cet
appareil.
1. Appuyer plusieurs fois sur le bouton SRC
poursélectionnerlemodeBTMUSIC.
2.Pourlirelesdonnéesaudiooumettre
l’appareilenpause,appuyersur1TOP.
Mode VOL LAST/ADJUST
Pour activer le mode VOL.LAST, tourner
lebouton.PourchoisirlemodeVOL.ADJ,
tournerlebouton.Ensuite,tournerlebouton
pourréglerleniveauduvolume5-30.
Mode BEEP
Tournezleboutonpouractiveroudésactiver
les bips des touches.
Mode SCROLL
Tournezleboutonpouractiveroudésactiver
lemodeSCROLL(IDTag).
Fonction SWRC
Cettefonctionpermetderéglerlesfonctions
principalesdelaradio(VOL-/VOL+/Source
/SEEK+/SEEK-/Mémoirestune/BT-OFF
Raccroché)enUSB/BT/A2DP/AUX.
Pourcela,ilvousfautunetélécommande
filaireàraccorderàlafichefemelle3.5,le
connecteurjauneàl’arrièredelaradio.
Timer ON/Timer OFF
TimerON:quandlemoteurdelavoiture
estcoupé,vouspouvezallumerlaradio
enappuyantsurleboutonPOWER,elle
fonctionnera pendant environ 2 heures Timer
OFF : quand le moteur de la voiture est
coupé,laradionepeutplusêtreallumée.
Mode AREA SEL
AppuyezsurleboutonDSPpendantplusde
2 secondes, puis pressez le bouton[ /]
plusieursfoispourchoisirlafonctionAREA.
Tournez le bouton pour choisir la zone
EUROPE/USA/JAPAN/LATIN/AUS.
LOUD ON/OFF
AppuyezsurSELettournezleboutonVOL
jusqueEQOFF,puispressezlebouton[
/]plusieurs fois pour choisir la fonction
LOUDON/OFF.Tournerleboutonpour
activeroudésactiverlafonctionLOUD.
Mode STEREO/MONO (en mode
Radio)
AppuyezsurleboutonDSPpendantplusde
2 secondes, puis pressez le bouton[ /
]plusieurs fois pour choisir la fonction ST/
MONO.TournerleboutonpourchoisirFM
stéréoouFMmono.
LOCAL ON/OFF mode (OFF=DX)
AppuyezsurleboutonDSPpendantplusde
2 secondes, puis pressez le bouton[ /
]plusieursfoispourchoisirLO/DX.Tournerle
boutonpourchoisirlasensibilitélocaleoula
sensibilitédistantedutuner.
MIC
LeréglagepardéfautdeMICSELest«
REAR».Lescâblesdumicrosontconnectés
àl'arrièredelaradio.Sivousn'utilisezpas
lemicroarrière,veuillezlaisserlescâbles
connectésafindenepaslesperdre.Vous
pouvez utiliser le micro avant mais cet usage
n'estpasrecommandé.Àpartirdumenu
autrequeleréglagedel'heure:maintenez
lebouton[DSP]pourentrerdanslemenu
desréglagessystème,puisappuyezsurle
bouton[ /]afindesélectionner«MIC
SEL»,puis«FRONT»sivousn'utilisezpas
lemicrophonearrière

FR-6
Fonctions Bluetooth
Association
1.OuvrezlacongurationBluetoothdevotre
smartphone,
2.CherchezleséquipementsBluetoothdevotre
smartphone.
3.Sélectionnezlenumérodemodèlede
cetappareil(CT412-BT)etentrezlecode
d'association:1234.
Appuyezsurlebouton[F6+]pendantplus
de2secondespourdéconnecterl'appareildu
téléphonemobile.
Mode AUTO CON
Tournezleboutonpouractiveroudésactiver
lemodeAUTOCON.Lorsqu'ilestactivé,le
téléphoneseconnecteraautomatiquement.
AUTO ANS
ON>Certainstéléphonesportablesrécupèrent
d’eux-mêmeslesfonctionsaudiolorsquel’on
répondà
un appel entrant.
Sélection du mode BT
Appuyezsurlebouton[SRC]pourchoisirle
modeBT.Pressezlebouton[DSP]and'afcher
lesinformationsA2DP.
Composition de numéros
1. Composition par téléphone
Utilisez la composition du numéro à partir de
votretéléphonemobile,l'écranLCDafche
les informations de composition.
2.Compositionparl'appareil
Appuyez sur le bouton [SRC] pour passer
au mode A2DP(BT). Appuyez sur [5F-]
pourafcher"DIALNO"surl'écranLCD,
puispressezlebouton[SEL]and'entrer
dans le mode composition. Appuyez sur
[ / ] et tournez le bouton pour entrer les
numéros à composer, appuyez sur le bouton
[5F-] pour sortir du menu.
Commutateur vocal
Pendantl'appel,appuyezsurlebouton[5F-
]pourcommuterentrel'appareiletvotre
téléphone.
Raccrocher/Répondre
Appuyezsurlebouton[5F-]pourrépondreà
unappel;appuyezsurlebouton[6F+]pour
raccrocher.
Mode A2DP
PendantlemodelecteurdemusiqueA2DP,
appuyezsurlebouton[1]pourmettreenpause
ou lancer la musique.
Appuyez sur [ /] pourreveniràla
chansonprécédenteoupasseràlasuivante.
PendantlemodeA2DP,sivotretéléphoneest
associéàl'appareil,ilestpossibled'utiliser
les commandes vocales des applications «
SIRI»ou«Google»afindesélectionneret
d'appelerquelqu'unoud'appelerdurépertoire
téléphoniquedeBTetA2DPMUSIC(seulement
sousANDROIDetselonlaversiondulogiciel):
1.Réglagestandard(unappareiltéléphone
etmédia)vouspouvezrecevoiretpasserdes
appelsavecvotretéléphoneainsiqu'écouter
delamusiqueparl'appareil
2.Doubleconnexion(2téléphonesconnectésà
la fois)
•lepremierenBT(réceptionetappels
téléphoniques)
•ledeuxièmeenmodeA2DP(écoutervotre
musique)vouspouvezdéconnecterles
médiasdupremiertéléphone
•surletéléphone,entrezlesréglagesdu
Bluetooth
•associezl'appareilàCT-412BT
•allezdansleréglagesurl'appareil
•désactivezleréglage«paramètresaudio
média»
•fermezleparamètred'accèsBT412-BT.Le
premier appareil reçoit et passe les appels, le
Insertion/retrait d'une clé USB
1. Soulever le cache USB et insérer
lacléUSBdansleconnecteur.L'appareil
litautomatiquement les morceaux stockés
surlacléUSBetlamentionUSBs'afche
àl'écran.
2. Appuyer sur le bouton SRC pour passer
enmode NO USB, puis retirer la clé USB.
Remarques sur les dispositifs USB
deuxièmejoueleschiersaudio.Pourrevenir
àlacongurationdedépart,cochezlacase
dupremierappareilaprèsavoirdéconnecté
ledeuxième.
Commande vocale
EnmodeA2DP,vouspouvezcommander
vocalementlelancementd’unappeldu
répertoireouécrireunSMS.
Il faut que la fonction « commande vocale
»soitactivéesurvotretéléphoneetque
l’environnementnesoitpasbruyant.
Fonctions USB (type mémoire
Flash)/lecture de MP3
1. Prise en charge de la mémoire Flash USB
2 en 1
2. Compatibilité FAT 12/FAT 16/FAT 32
3. Prise en charge USB 1.1/2.0 (USB 2.0 à la
vitesse USB 1.1 uniquement)
4.CompatibleavecleschiersWMA
5.NombremaximaldechiersMP3:1000
Nombre maximal de dossiers : 999
6. Utilisation de dispositifs USB
présentant une capacité inférieure à 8
Go et comportant moins de 30 dossiers
recommandée
7. Seuls certains types de clés USB sont
compatiblesavecl'appareil.

FR-7
Mode AUX
1.Enmode«Poweron»,l'appareilpasse
en mode AUX quand le signal « Tele-mute
»,s'affaiblit.L'appareilrepasseaumode
précédent quand le signal revient.
2.Enmodes«Poweroff»et«ACC»,l'appareil
s'allumeetpasseaumodeAUXs'ildétecte
unsignal«Tele-mute».Ils'éteintquandle
signal devient fort.
3. En mode AUX, seuls les boutons POWER,
VOLUMEetSRCpeuventêtreutilisés.
Timer function
Si vous mettez l’appareil en marche alors que
le contact est enclenché, il s’éteindra et se
rallumera automatiquement à chaque fois que
vous mettrez ou couperez le contact. Pour cela,
il faut que le contact A7 soit raccordé à la borne
15 du véhicule. Si l’appareil est allumé à l’aide
de"POWER",contactéteint,ils’arrêteaprès120
minutesandeprotégerlabatterieduvéhicule.
Vous pouvez rallumer l’appareil ultérieurement
en appuyant sur "POWER".
Attention : L’antenne sort automatiquement
lorsque vous mettez la radio en marche.
N'oubliezpasdel'éteindrequandlasituation
l'exige(parexemple:dansunestationdelavage
de voiture).
Bouton de mode (SRC)
Autres fonctions
Appuyer sur le bouton SRC pour passer du
mode radio au mode disque, USB lecture
auxiliaire"EXT"(cablejack3.5àl'arrieredela
radio)Accèsauxappareilsauxiliaires:
1. Connecter le lecteur audio portable à
l’interface EXT.
2. Appuyer sur le bouton SRC pour
sélectionner le mode entrée auxiliaire.
3. Appuyer de nouveau sur le bouton SRC pour
quitter le mode entrée auxiliaire et passer au
mode suivant.
Entrée du mot de passe
Tournez le bouton "VOLUME" pour sélectionner
le numéro appuyez sur " " pour entrer le
prochain numéro, puis appuyez sur le bouton
"" pour changer le numéro précédent. Une
fois le mot de passe affiché complétement,
appuyez sur la touche "SEL" au moins 2
secondes pour le confirmer, la radio passe
alors en mode tuner. Si le mot de passe est
incorrect,"ERROR"apparaîtsurl'afficheur.
Veuillez dans ce cas-là, entrer le mot de passe
à nouveau. Si le code est perdu, contacter le
SAV.
PWD OFF/ON : Activation /Désactivation du
codedesécuritéLorsquel'appareilestallumé,
appuyer sur le bouton "SEL" plusieurs fois pour
choisir "PWD OFF (ON)" et tourner le bouton
"VOLUME" pour choisir "ON" ou "OFF" afin
d'activerlemotdepasseoudeledésactiver.
Lorsqu'ilestréglésur"ON",l'autoradione
demandera le code que si vous avez
débranché le "+ permanent" (B+batterie),
vous devrez alors entrer le mot de passe
à chaque débranchement de batterie (Le
mot de passe par défaut est "1234"). Si
vous coupez le contact, le code ne sera pas
demandé .
PWD NEW: Créer un nouveau mot de passe
Vous pouvez définir un nouveau code pour
l'autoradio.Lorsquel'appareilestallumé,
appuyez sur le bouton "SEL" plusieurs
fois pour choisir "PWD OLD ", entrez votre
ancien mot de passe appuyez sur la touche
"SEL" plus de 2 secondes pour confirmer.
Sil'ancienmotdepasseestincorrect,
"ERROR"apparaîtsurl'afcheur.L'afcheur
marque"PWDNEW",entrezunepremière
fois le nouveau mot de passe et validez sur
la touche "SEL" plus de 2 secondes. "AGN"
apparaît: entrez une seconde fois le nouveau
code et validez sur la touche "SEL" plus de
2 secondes ; "SET OK" apparaît, le code a
bien été changé.

FR-8
FCCSTATEMENT
1.ThisdevicecomplieswithPart15oftheFCC
Rules. Operation is subject to the following two
conditions:
(1) This device may not cause harmful
interference,and.
(2) This device must accept any interference
received, including interference that may cause
undesired operation.
2.anyChangesormodicationsnotexpressly
approved by the party responsible for
compliancecouldvoidtheuser'sauthorityto
operate the equipment.
NOTE:Thisequipmenthasbeentestedand
found to comply with the limits for a Class
Bdigitaldevice,pursuanttoPart15ofthe
FCC Rules. These limits are designed to
provide reasonable protection against harmful
interference in a residential installation.
This equipment generates uses and can
radiate radio frequency energy and, if not
installed and used in accordance with the
instructions, may cause harmful interference
toradiocommunications.However,thereis
no guarantee that interference will not occur
in a particular installation. If this equipment
does cause harmful interference to radio or
television reception, which can be determined
by turning the equipment off and on, the user is
encouraged to try to correct the interference by
one or more of the following measures:
Reorient or relocate the receiving antenna.
Increase the separation between the
equipment and receiver.
Connect the equipment into an outlet on a
circuit different from that to which the receiver
is connected.
Consult the dealer or an experienced radio/
TV technician for help.
FCCRadiationExposureStatement
This equipment complies with FCC radiation
exposure limits set forth for an uncontrolled
environment. This equipment should be
installed and operated with minimum distance
20cmbetweentheradiator&yourbody
FCC

FR-9
DEPANNAGE
Problème Cause probable Solution
Généralités
L’appareilnes’allume
pas.
Lecontactduvéhiculen’estpasmis.Lecâbleest
malbranché.Lefusibleestfondu.
Mettrelecontact.Contrôlerlebranchementducâble.Remplacerlefusiblepar
unfusibleneufdemêmecapacité.
Absence de son Levolumeestrégléauminimumoulafonction
Muetestactivée.
ContrôlerlevolumeoudésactiverlafonctionMuet.
L’appareiloul’écran
ne fonctionne pas
normalement.
Lesystèmedel’appareilestinstable.
ModeTUNER
Aucuneréception L’antenneestmalbranchée. Branchercorrectementl’antenne.
Réceptionde
mauvaisequalité
L’antennen’estpascomplètementdéployéeouest
cassée.
Déployercomplètementl’antenneet,sielleestcassée,laremplacerparune
antenne neuve.
Les stations
présélectionnéesont
étéperdues.
Lecâbledelabatterieestmalbranché. Brancherl’alimentationpermanentedel’appareilsurl’alimentationpermanente
duvéhicule.
ModeUSB
Impossibled’insérer
unecléUSB.
LacartemémoireoulacléUSBaétéinséréedu
mauvaiscôté.
L’insérerparl’autrecôté.
Impossible de lire la
cléUSB.
LeformatNTFSn’estpasprisencharge. VérierquelesystèmedechierUSBestauformatFATouFAT32.Enraison
dedifférencesdeformat,certainsmodèlesdeclésUSBoudelecteursMP3ne
peuventpasêtrelus.
Lalistedecontrôlesuivantepermetderésoudrecertainsproblèmessusceptiblesdesurvenirlorsdel'utilisationdel'appareil.Avantdelaconsulter,vérier
lesbranchementsetsuivrelesinstructionsquigurentdanslemanuelutilisateur.Nepasutiliserl'appareildansdesconditionsanormales,parexemples'il
n'émetaucunson,sidelafumées'enéchappeous'ils'endégageuneodeurdésagréable:vousvousexposeriezaurisqued'incendieoud'électrocution.
Cesserimmédiatementdel'utiliseretappelerlemagasinoùilaétéacheté.

DE-1
Sicherheitsinformationen
Sicherheitsinformationen........... ..................1
TechnischeDaten...........................................1
Bedienelemente..............................................2
HinweisezurVerwendungderTasten..............3
Bluetooth-Betrieb........................ .................6
USBMP3-Wiedergabe.........................6
Andere Funktionen.........................................7
FCC................................................8
Fehlerbehebung............................................9
VielenDankfürdenKaufdiesesProdukts.
LesenSiediesesHandbuchbitte
aufmerksamdurch,bevorSiedasGerätin
Betrieb nehmen, und bewahren Sie es zum
späterenNachschlagenauf.
VORSICHTSMASSNAHMEN
•VerwendenSienurein12-VDC-Bordnetz
mitnegativerErdung.
•TrennenSiedienegative
Batterieanschlussklemme des Fahrzeugs,
bevorSiedasGeräteinbauenund
anschließen.
•ErsetzenSiedieSicherungnurdurch
eine Sicherung mit identischem
Ampere-Nennwert.DurchdieNutzung
einer Sicherung mit einem höheren
Ampere-Nennwertkönnenschwere
SchädenamGerätverursachtwerden.
•SorgenSiedafür,dasskei
neNadelnoderandereFremdkörper
indasGerätgelangen.Diesekönnen
Fehlfunktionen oder Sicherheitsrisiken
verursachen, z. B. einen elektrischen
Schlag oder das Austreten von
Laserstrahlen.
•WennSiedasAutolangeZeitaneinem
heißen oder kalten Ort geparkt haben,
warten Sie, bis sich die Temperatur im Auto
normalisierthat,bevorSiedasGerätin
Betrieb nehmen.
•StellenSiedieLautstärkesoein,dassSie
Warnsignalevonaußen
WARNUNG
•ÖffnenSieNICHTdieAbdeckungen,
undreparierenSiedasGerätnichtselbst.
WendenSiesichbeiProblemenanden
HändleroderaneinenerfahrenenTechniker.
VOR DEM BETRIEB
•StellenSiedieLautstärkenichtsohochein,
dassGeräuschevonaußenübertönt
werden.DieskannzuGefahrenführen.
•HaltenSiedasAutoan,bevorSie
komplizierteBedientätigkeitendurchführen.
Passwort
NachjedemTrennenderBatteriemüssen
Sie das Passwort erneut eingeben (das
Standard-Passwortlautet„1234“).
Allgemeines
Pannungsversorgung: 12VDC(10.8V-16V)
MaximaleLeistungsabgabe:4X25W
GeeigneteLautsprecherimpedanz:4ohm
Fusespec: 10A
Gewicht: 0.7kg
Abmessungen(BxHxT): 182x53x112mm
Hinweis:
1JenachModellgeltenunterschiedliche
Schaltpläne.BeachtenSiebeim
AnschließenderKabelbitte
dieaufdemModelletikettangegebenen
Denitionen.2Änderungenvon
technischenDatenundAusführung
aufgrund von Technologieverbess erungen
vorbehalten.
Technische Daten Inhalt
FM-Stereoradio
Frequenzbereich:76-90Mhz(japanmode)
87.5-108MHz
Signal/Rausch-Abstand: 50dB
Schritt: 100KHz
MW(AM)-Radio
Frequenzbereich: 522-1620KHz
Schritt: 9KHz
backupcurrent: ≤3mA
LW (EURO)-Radio
Frequenzbereich: 153-280KHz
Schritt: 1KHz
EXT (aux-in)
AuxEingangJackStereo3.5mm≥300mV
Table of contents
Languages:
Other AMS Car Receiver manuals