EN-9
TUNER FM OPERATION DAB TUNER OPERATION
Band
While playing FM radio,
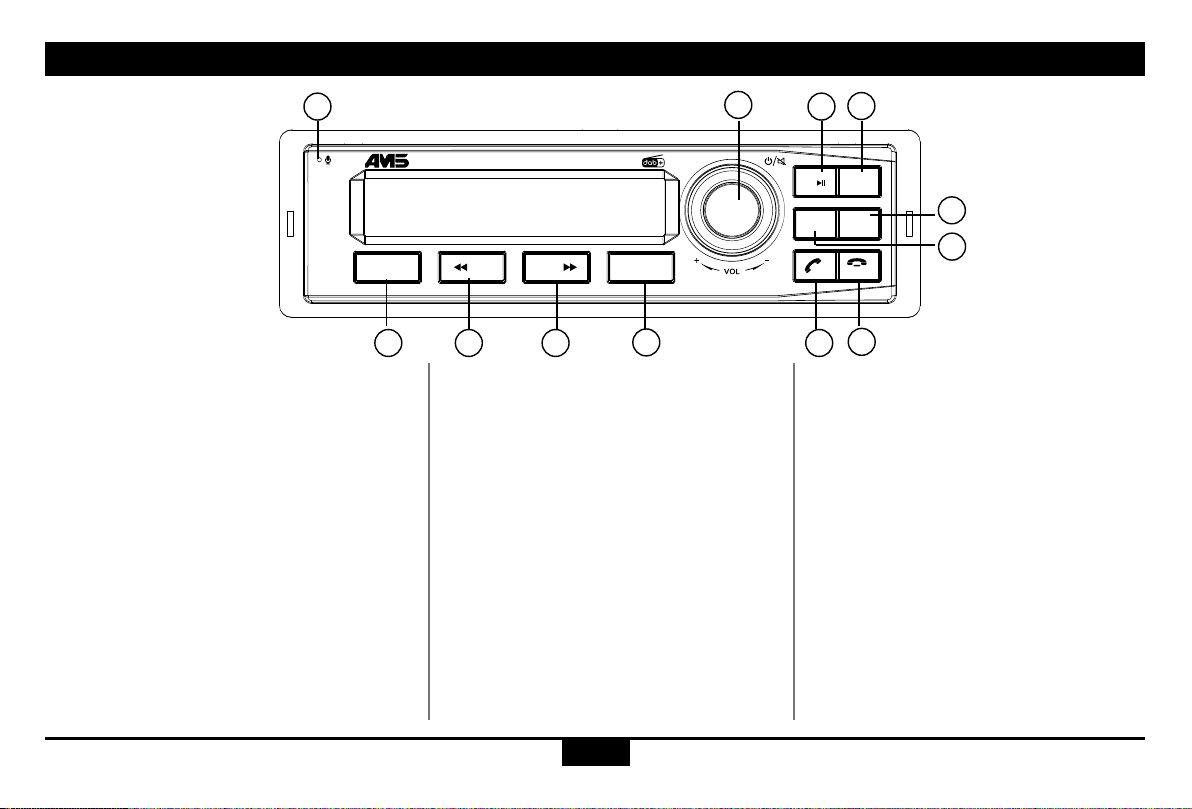
- Waveband change, press the [SRC] button
to choose between DAB1, LW, MW.DAB
bands.
- Search for other FM group, long press the
[SRC] then turn the volume knob to choose
FM1, FM2, FM3 or FM4. this will allow you
access to your other preset stations.
Next frequence
Press the search button [ ] to go to the next
available station.
Previous frequence
Press the search button [ ] to return to the
previous radio station.
Search for stored stations
From FM1 / 2/3 or 4, press " LIST" for 1
second, the memory number ashes, turn the
volume knob, the memories will scroll, once
your choice is made, the corresponding radio
station will be broadcast if present.
Automatic storage
From FM1/2/3 or 4, press "SCAN " for 1
second, the radio will scan the FM band and
automatically store the 6 most powerful radio
stations, you can then view the radios either
by pressing the memory buttons 1 to 6 or by
using the "LIST" function.
Band
While playing DAB radio,
- Waveband change, press the [SRC] button
to choose between FM1, LW, MW.DAB
bands
- Search for other DAB group, press and
hold the [SRC] then turn the volume knob
to choose DAB1,DAB2,DAB3 ou DAB4. this
will allow you access to your other preset
stations.
"SCAN" Function
you can scan the DAB band and update the
list of DAB radio stations received.
Press the " SCAN " button for 1 second,
the radio will start scanning the entire DAB/
DAB+ band (scan XX%), once finished the
display will indicate the number of radios
listed and will broadcast the first (alpha-
numeric classification), if no radio is found,
the display shows "FOUND 00". In this case,
check that you are in an area covered by
the DAB signal or check your antenna (see
chapter "installation of the antenna").
Search for a radio station
(manualy)
Previous/Next frequence
Press the search button [ or ] to go to
the next available station ( By name).
"LIST" search in the list of radios
Press " LIST" for 1 second, "CHN LIST"
appears, turn the volume knob and position
yourself on your radio station, after 2 seconds
your radio will be broadcast.
"ENS LIST" (list of transmitters)
this function allows you at any time to choose
your regional or national transmitter (named
MUX) to search for your station.
Press " LIST" and "SCAN "
simultaneously, "ENS LIST" appears on the
display, then turn the volume knob to search
for your radio group (MUX), once found,
select it by pressing on the volume knob and
turn it to choose your radio in this "MUX"
group.
Recall Stored Favourites
To recall a preset station, briefly press the
desired button (1 to 6) reminder you can
choose 4 groups of 6 memories (DAB1/2/3
and DAB4).