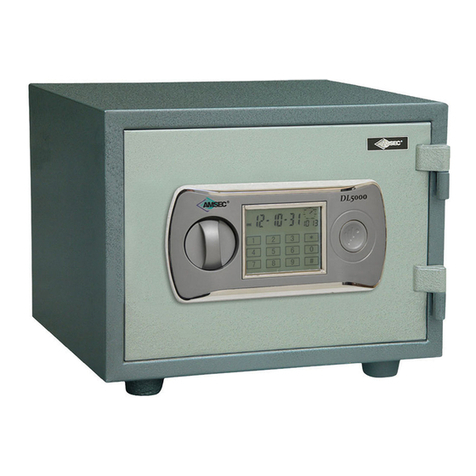
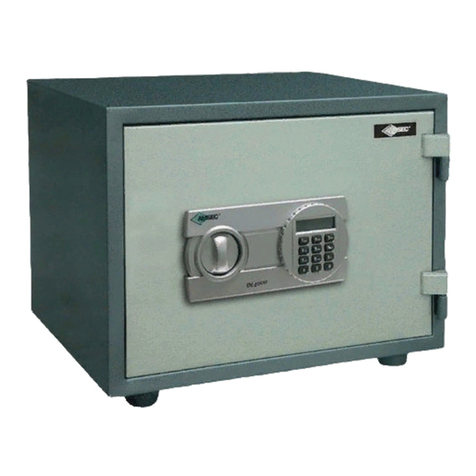
AMSEC DL5000 User manual

Each AMSEC safe is professionally hand-crafted with quality materials and is equipped with a precision-quality, digital
lock. To become familiar with the lock, operate the lock (as outlined below) several times before closing the door and
locking the safe.
OPERATION INSTRUCTIONS:
• Don’t slam the door. Extreme shock can damage the lock or jam the boltwork.
• Don’t shut the door with the boltwork in the locked position. Damage to the boltwork and marring the safe’s
nish may result.
• Don’t stack contents of the safe so that the door must be forced shut. Jamming of the boltwork may result.
• Don’t store the combination card inside the safe.
• Don’t use oil, grease or any other lubricant on the digital lock.
• Keep all moving parts clean and free from obstruction, water and grease.
• If you experience a dierence in the feel of the operation, inconsistency or diculty opening or operating the
safe, DO NOT LOCK THE SAFE. Immediately contact the security store from whom you purchased the safe. If this is
not practical, contact the AMSEC service department at 951-685-9680, Ext. 1036.
KEEP THE EXTERNAL BATTERY BOX IN A SAFE PLACE - BUT NOT IN THE SAFE!
Operating Your Safe
INITIAL SETUP
Install four (4) AA batteries into the power override box and plug connector into the jack on the bottom, right-hand edge of the
safe’s LCD screen. When connected, you will hear several conrmation tones followed by a‘melody’ as the safe initializes, followed
by an ‘All Ready’ word prompt once this is complete. At this point the LCD display should show:
Battery Indicator, Year/Month/Day, Week and Time.
Press #1234# (personal code) or #123456# (administrator code) to unlock safe (the # key awakens the screen from‘sleep’mode).
Upon entering the code successfully the LCD screen will turn blue and display “OPEN.” You will now have 5 seconds to turn Knob
to open safe door before the action times out and relocks. If this happens re-enter either of the above codes, remembering to
turn the knob within 5 seconds.
Before proceeding any further, disconnect breakout box from the front of safe and either remove the batteries from the breakout
box to be used in the battery box on the inside of the safe’s door, or, alternatively, use 4 additional AA batteries. Once the
breakout box is disconnected and the new batteries are in place, power-up sequence will be repeated.
SETTING THE DATE
The time, date, etc., can all be set regardless of whether the safe’s door is open or closed. The date format for the safe is MONTH/
DAY/YEAR. To set the date, rst press *and then press 0to descend or 8to ascend. You will have 6 seconds to make an entry
between elds or the operation will be canceled. If this happens press the *key to again enter time/date mode, skipping to the
last eld of entry using the #. Once the desired year value is reached, press the #to move to the next eld, again using 0or 8 to
reach the desired month, day and so on.
T
urn Knob Keypad
External Battery Plug
LCD Display Time Display
Emergency Ov
erride
Key Hole
Low Battery Indicator
Internal Battery
Compartment
Reset Button/C
ombination
Internal Battery Compartment
Reset Button/Combination
Protected by Lift-Off Cap
LOCATION OF BATTERY COMPARTMENT AND RESET BUTTON
- IMPORTED RESIDENTIAL FIRE SAFES
LOCATION OF BATTERY COMPARTMENT AND RESET BUTTON
- ELECTRONIC SECURITY SAFES
DL5000 LOCK FEATURES
EXTERNAL BATTERY BOX

Once the day is entered, pressing the #will move to the time eld. It’s important to note the time is displayed in military time,
meaning any hour after 12:59 p.m. continues up to the next number sequence, like so: 13:00 (1 p.m.), 14:42 (2:42 p.m.), and so on,
up to 23:59 (11:59 p.m.) with Midnight being 00:00. Thus the time will need to be set accordingly.
QUICK REFERENCE: To quickly compute military time, simply add 12 to any hour after 1 p.m. and up to 11:59 p.m. (minutes
always stay the same). From Midnight to 12:59 p.m., hours remain the same.
The last eld, week, is the day of the week, 1 – 7, where 1 represents Monday, 2, Tuesday, and so on. You can choose what day will
begin the start of the week.
PERSONAL/ADMINISTRATOR CODES
The personal code #1234# and the administrator code #123456# are set up before leaving the factory. For your protection and
security, it is recommended that these generic codes be changed to something familiar and easily remembered, and known only
by the Administrator or owner.
Administrator and personal codes must be entered before creating or changing ANY codes. A personal code simply is a code set
up and given out by the administrator to allow another user limited access.
IMPORTANT NOTE: The administrator has the ability to view an “Open Door” record, which will display the time, date and code of
the last person accessing the safe (more about this later).
ALWAYS KEEP A HARD COPY OF PASSCODES -- BUT NOT IN THE SAFE!
DOOR MECHANISM
Each time the door is opened or closed, and the Knob is left in the ‘unlock’ position, the door will remain unlocked until the Knob
is turned to the ‘lock’ position.
If a code is successfully entered (conrmed in the display by the words“OPEN”) but the Knob is not turned, the operation will
time out in 5 seconds and the safe will remain locked. The code will again have to be entered and the Knob subsequently turned
within 5 seconds to gain access to the safe. If the Knob is turned to the‘lock’ position while the door is open, you will have
to re-enter your code to close the door.
CONCEALING YOUR CODE:
Your code may be hidden from view by others. Press # then * then your code #. The display will only show 0 each time a number
button is pressed.
NOTE: This must be done each time you enter your code to prevent the actual number from appearing on the display as you
enter your code.
TAMPER ALARM:
You may set a Tamper Alarm that will sound if anyone attempts to move or attack the safe.
In the sleep mode, Press 0on the key pad. The key pad display will show BELL ON. To turn alarm o, enter # the current code, and
then # . If no code is entered to clear an alarm, the alarm will clear after 1 minute.
OPEN DOOR RECORD QUERY
At any time you can view the time the safe was accessed, in addition to, who accessed it. The personal code is “PASS1” and the
administrator is “PASS2.”
To access the records, enter either code to open the door. When “OPEN” disappears from the display, but while the blue backlight
is still on, press 0. The screen will rst show the date then the time the safe was accessed followed by the code used to access it.
You can view up to 14 past entries. To do this, press 0when the display screen shows“PASS1” or “PASS2.” It will show open door
records for the last 14 times the safe was accessed and by which code. Example: ##-##-## = Date, ##-## = Time
STEP 1 - OPENING THE SAFE
1Press the # key.
2Enter user code (Factory Personal Code is: 1-2-3-4)
(Factory Administrator Code is: 1-2-3-4-5-6)
3Press the # key.
4The LCD display will turn Blue and show Open.
5Turn the Knob clockwise (Right) and open door.
6If the wrong user code is entered the display will
show “Error”. If the wrong code is entered 3 times
consecutively, an alarm will sound for 1 minute
unless the correct code is entered.
7If you do not want your personal code shown on
the LCD display press the # key followed by the *
key. The LCD display will turn Blue. This function
will be cancelled after each opening.
NOTE: Lock can store 2 user codes.
STEP 2 - CHANGING THE USER CODE
1Open the safe by following step 1.
2While the screen is still blue, press the * key.
3Enter your new user code (1-8 digits).
4Press the # key.
5The LCD display will turn Blue and show INTO.
6Your new user code is now set to open the safe.
7If you forget your new code, remove the
protective cap (if equipped) and press the“Red”
reset button on the back of the door to restore
the Personal and Administrator codes back to the
original factory codes.
CAUTION: Be sure to replace the protective cap back
over the Red reset button (if equipped) to prevent
accidental contact from stored contents.
NOTE: It is highly recommended to leave the safe
door open and practice your new code several
times before closing the door.

EMERGENCY OPENING / EMERGENCY BYPASS KEY:
1There is a key lock located under the Emergency Override Cover (6). Press and turn the Emergency Override Cover to the open
position. Cover will pop out.
2Insert the tubular key provided with the safe and turn clockwise (right).
3Turn the Knob or Handle clockwise (Right) and open door.
NOTE: If the keys are lost, the key number is stamped on the key and on the front of the cylinder. Make sure to log the key
number with your personal combination and store in a safe place.
BATTERY OVERRIDE:
1If the LCD display reads “Lo-BATTE” when opening the safe, it means the batteries are low and should be replaced. The battery
tab will also decrease.
2With the safe open slide the battery cover (10) (located on the back of the safe door) to the left and remove.
3Replace the batteries with a good brand of Alkaline battery. The LCD display will turn Blue and show GOOD. Be sure and
place the (+) end of the battery in each position of the base as indicated by the symbol.
4Once the batteries are removed, the user code will default back to original factory code (1,2,3,4) if not replaced within 10
minutes. Reset the user code as stated under Enrolling procedures.
5If batteries are drained and will not power up the lock, install 4 new AA (1.5 volt) batteries into the “Power Override Box”
supplied with the safe.
6Plug the Power Override Jack into the Power Override Port located on the bottom of the keypad.
7Open the safe by following Step 1 and install new batteries as instructed above.
CAUTION FIRE SAFE CONTENT STORAGE
A re safe contains insulation material, which may cause humidity to be present when closed extended periods of time. It is
recommended that the safe is opened on a regular basis and interior allowed to air out. It is also recommended that documents
sensitive to moisture be kept in a sealed container, I.E Ziplock® or Tupperware®.
MAINTENANCE
Standard Textured nish: Your safe is provided with a durable paint that may be easily cleaned with a mild detergent and a soft
cloth. Do Not use abrasive scouring pads or any chemical uids, which may react and damage the nish.
Door Operating Mechanism: The handle of the safe moves mechanical parts inside the door. After a period of use, if diculty is
experienced in operation, please contact a qualied
locksmith for service.
Door Hinges: If the door becomes hard to open or emits noise, the hinges may need
lubrication. Please contact a qualied locksmith for service.
Caution: AMSEC assumes no liability for nish damage due to the incorrect use of caustic lubricants.
DAMAGE CLAIMS
Freight Damage: All safes are carefully packed for shipment. The manufacturer’s liability ceases when the transportation
carrier accepts the shipment in good condition. The carrier’s liability ceases when you sign for the merchandise. INSPECT YOUR
SHIPMENT BEFORE SIGNING THE DELIVERY RECEIPT. Although unlikely, if damage occurs you have the option of refusing the
shipment or negotiating a settlement with the carrier. To negotiate a settlement follow these steps:
1. Note the extent of the damage on the freight bill and sign your name.
2. Save all cartons and packaging materials.
3. Call the freight carrier immediately and request a damage inspection claim.
All Claims:
1. Contact your dealer immediately.
2. Claims must be led within 15 days.
3. Claims must be accompanied by proof of purchase receipt and photographs.
4. In the event of replacement, the safe must be returned to the dealer/factory in the original packaging.
IMPORTANT NOTICE
This safe must be bolted down using the supplied anchor kit to provide the intended level of security.
«CAUTION!
Liquids can damage the keypad
Table of contents
Other AMSEC Safe manuals

AMSEC
AMSEC TF5517E5 Operating instructions

AMSEC
AMSEC ESF1214 Installation guide

AMSEC
AMSEC BF912 Installation guide

AMSEC
AMSEC EST712 Operating instructions

AMSEC
AMSEC EST914 Installation guide

AMSEC
AMSEC DL4000 User manual

AMSEC
AMSEC ES712 User manual

AMSEC
AMSEC EST813 Installation guide

AMSEC
AMSEC DL6000 User manual