Activation
>
NOTE: Four (4) “C” Cell batteries are factory installed
inside the Automatic Janitor unit. The unit is
shipped from factory with battery tray unplugged
and must be plugged in to activate after desired
flush program is set (See Step 3).
To activate the Automatic Janitor:
Set Flush Program
1 2 3
ON
Flush Program Guide
= Switch
Once installed and before activation, the Automatic Janitor unit must be programmed to flush at a specific interval of time.
The unit can be set to flush once every 1 Hour, 2 Hours, 3 Hours, 4 Hours, 6 Hours, 12 Hours, or 24 Hours.
A Flush Test Setting is included to test for proper installation of the unit. The Flush Test Setting will cause the unit to flush once
every 10 seconds (This setting should only be used to test that the unit is installed and operating properly and then be changed).
NOTE: Once a flush setting is chosen and unit is activated, the flush program begins. To change the flush program
after activation you must unplug the battery connector, set the new program, and re-activate the unit (see Step 4).
To set the flush program:
Remove side cover using battery compartment wrench and refer
to the “Flush Program Guide” diagram for switch settings.
Page 2
+
+
+
+
Battery
Connector
Battery
Tray
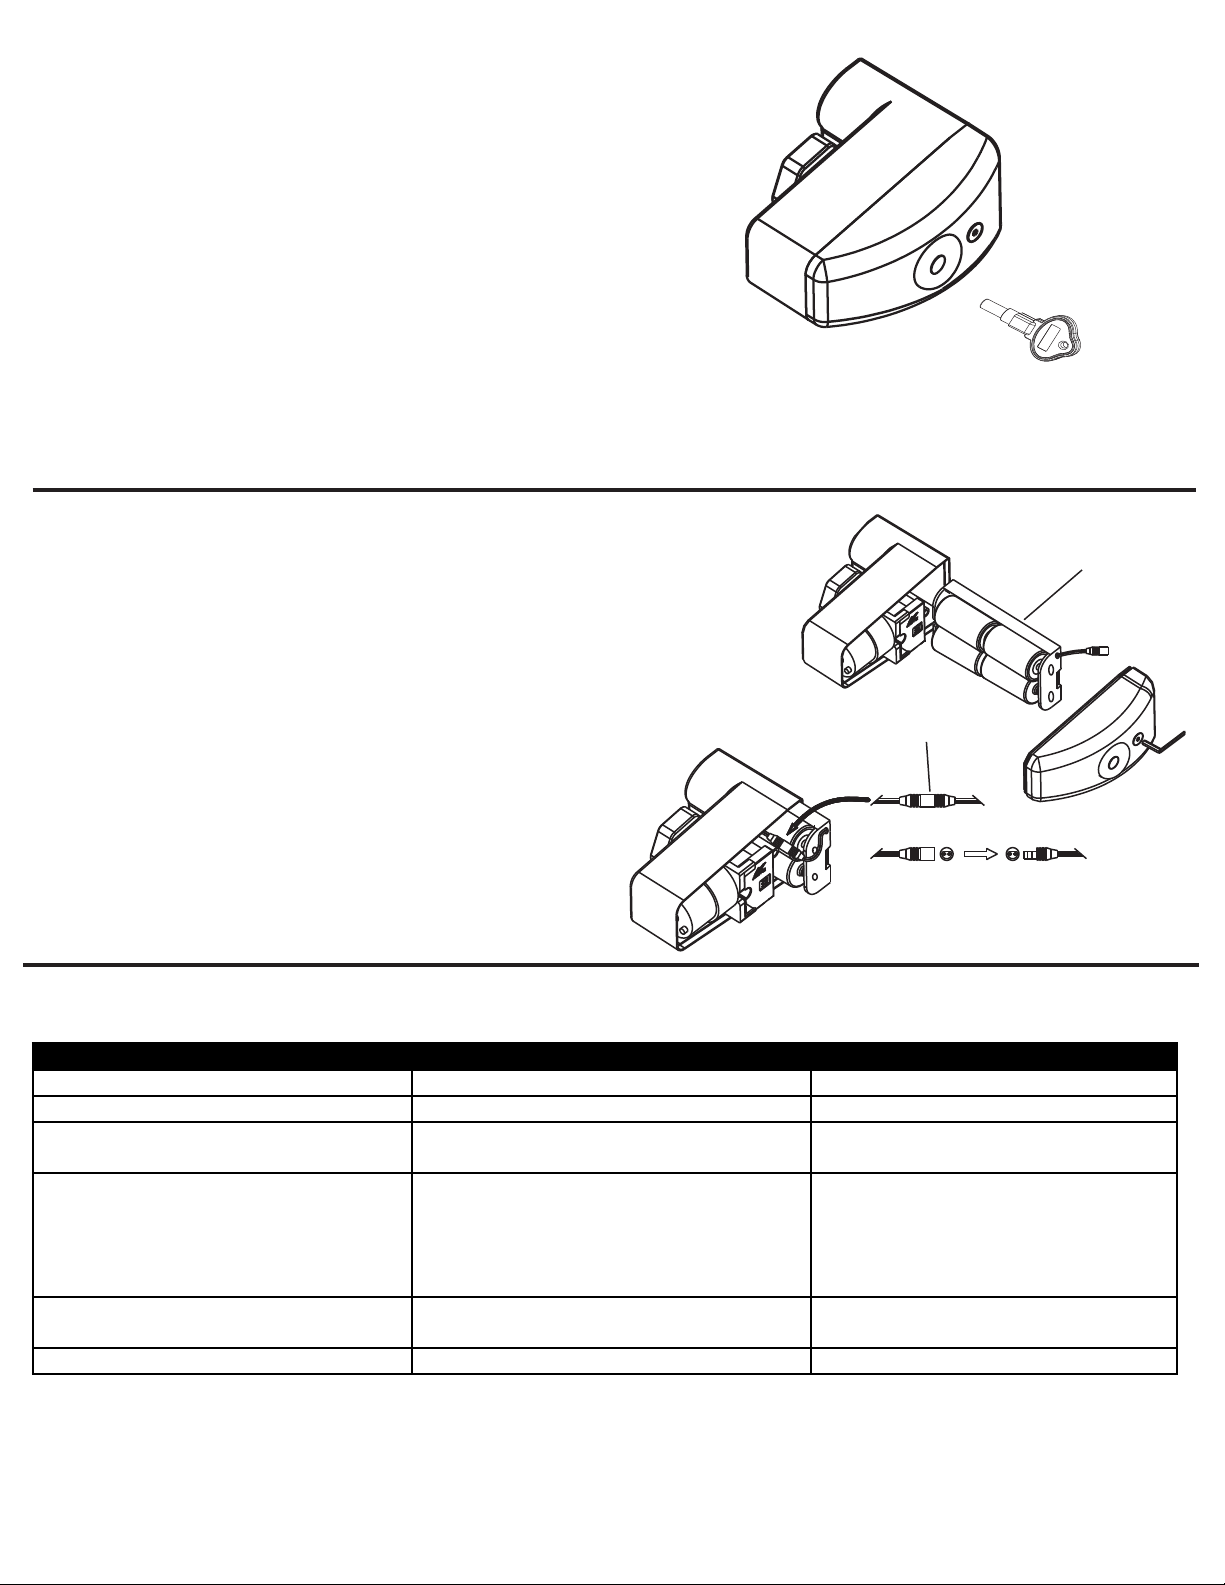
A - Using supplied battery compartment wrench, remove
side cover.
B - Plug in battery connector.
(NOTE: Flush program begins once plug is connected)
C - Reinstall side cover using battery compartment
wrench.
NOTE: Once a flush setting is chosen and unit is activated, the flush program begins. To change the flush program
after activation you must unplug the battery connector, set the new program, and re-activate the unit.
= 10 Seconds (Flush Test Setting)
1 2 3
ON
= Switch
= 1 Hour
1 2 3
ON
= Switch
= 2 Hours
1 2 3
ON
= Switch
= 3 Hours
1 2 3
ON
= Switch
= 4 Hours
1 2 3
ON
= Switch
= 6 Hours
1 2 3
ON
= Switch
= 12 Hours
1 2 3
ON
= Switch
= 24 Hours
?