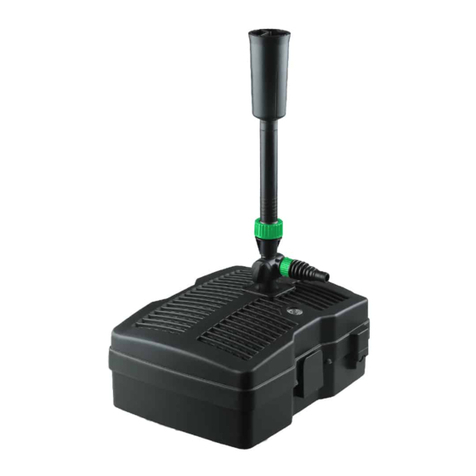
Amtra Prexure User manual


prexure
DE
WICHTIGE SICHERHEITSHINWEISE: dieses Gerät ist ein Filter mit einem selbstreinigenden System und einem UV-C-Sterilisator für Wasser in Zierteichen
und Aquarien. Dieses Gerät funktioniert nur, wenn es an eine Pumpe angeschlossen ist und darf nicht unter Wasser betrieben werden. Die Schutzart
IP44 kennzeichnet das Gerät an einem spritzwasser-geschütztem, überschwemmungssicherem Ort. Jede andere Art der Nutzung ist nicht zulässig und
fällt daher nicht in die Verantwortung des Herstellers. LESEN SIE VOR INBETRIEBNAHME DES GERÄTES DIE GEBRAUCHSANWEISUNG SORGFÄLTIG. DER
HERSTELLER HAFTET NICHT FÜR SCHÄDEN, DIE AUF GRUND DER GERÄT DES GERÄTES VERURSACHT WERDEN, SOFERN DAS GERÄT NICHT ENTSPRECHEND
DER SICHERHEITSVORSCHRIFTEN UND ENTSPRECHEND DES IN DER GEBRAUCHSANWEISUNG AUSGEWIESENEN BESTIMMUNGSZWECKS EINGESETZT WIRD.
ACHTUNG:VOR INBETRIEBNAHME STELLEN SIE SICHER, DASS DER GERÄT ORDNUNGSGEMÄSS INSTALLIERT IST UND LESEN SIE DIE GEBRAUCHSANWEISUNG.
VORSICHT: Dieses Symbol auf dem Produktetikett und auf der Verpackung weist darauf hin, dass diese Bedienungsanleitung sorgfältig gelesen
werden muss, bevor das Gerät in Betrieb genommen oder gewartet wird. Sie können für Schäden, die durch dieses Gerät verursacht werden, veran-
twortlich gemachtwerden,wennSie diese Bedienungsanleitung nicht sorgfältig gelesen und verstanden haben oderwennSie diesenicht befolgt haben.
Beachten Sie zurVermeidung von Unfällen die folgendenWarnhinweise (zusätzlich zu den grundlegenden Sicherheitsvorschriften).‘-WARNUNG: Entfer-
nen Sie oder schalten Sie alle Geräte im Aquarium oder Teich vor der Ausführung vonWartungsarbeiten aus.‘ Wenn der Anschlussstecker eines Gerätes
oder die Steckdose nass ist, schalten Sie den Hauptschalter aus, bevor Sie das Netzkabel des entsprechenden Gerätes ziehen. Das Netzkabel kann nicht
ausgetauscht werden.Wenn das Kabel beschädigt ist, sollte das Gerät verschrottet werden. ‘- Überprüfen Sie die Spannung aufgedruckt auf dem Etikett
des Gerät und stellen Sie sicher, dass diese Ihrer Hauptstromversorgung entspricht. -Wenn das Gerät an das Stromnetz angeschlossen ist, stellen Sie si-
cher, dass der untersteTeil der Zuleitung niedriger als die Steckdose ist, umWasserzuüsse zu vermeiden, die in der Steckdose ießen könnten. Berühren
Sie den Stecker nicht mit den Händen, wenn das Kabel feucht ist.Vor dem Ausschalten des Heizgerätes den Netzstecker ziehen. - Wir empfehlen, dass
Geräte und andere elektrische Aquariengeräte mit einem FI Schalter von 30 mA zu sichern.‘Außenanwendung:Vergraben Sie das Netzkabel nicht unte-
rirdisch, sondern befolgen Sie die örtlichen Installationsvorschriften und wenden Sie sich an einen qualizierten Elektroinstallateur.‘Bei der Installation
oder Wartung des Gerätes sollten Sie dieses nicht am Netzkabel aus dem Teich herausziehen.‘Bevor Sie das Gerät in Betrieb nehmen, vergewissern Sie
sich, dass es richtig installiert ist. ‘Führen Sie niemals eigenhändig Reparaturen oder technische Änderungen am Gerät durch und verwenden Sie nur
Original-Ersatzteile.‘VORSICHT: Direkte Sonneneinstrahlung vermeiden. Nicht bei Frostgefahr verwenden: ImWinter ist es ratsam, das Gerät auszubauen
und nur bei frostfreiemWetter zu verwenden. ‘Das Gerät darf nur im Wasser betrieben werden und nicht trocken laufen. Nicht fürTrinkwasser verwen-
den. Nicht für brennbare, explosive oder korrosive Flüssigkeiten verwenden. Nur für die Behandlung von Teich- oder Aquarienwasser zugelassen.
‘ACHTUNG: Nicht an die öentlicheWasserversorgung anschließen.‘ACHTUNG: Im Außenbereich muss nach der aktuellen Norm IEC 60364-7-7-702 der
minimale Sicherheitsabstand von elektrischen Geräten zu Schwimmbädern oder Schwimmteichen 2 Meter betragen. Stellen Sie das Gerät entsprechend
auf und befestigen Sie es sicher an einem Ort, an dem es vor Spritzwasser und Überutung geschützt ist. Vorprüfung vor Inbetriebnahme: • die Ver-
packung auf Unversehrtheit, Kratzer oder Beulen können ein Hinweis darauf sein, dass das Gerät durch denTransport beschädigt wurde Überprüfen Sie
insbesondere: Prüfung auf Beschädigung: vergewissern Sie sich, dass die verschiedenen Teile des Heizgerätes keine physischen Schäden, insbesondere
durch Stöße, Risse oder Abrieb aufweisen. • die Unversehrtheit der elektrischen Kabel. Schadensermittlungsverfahren Sollten Sie eine Schadstelle ent-
decken, stoppen Sie den Einsatz und melden Sie die Art des Schadens an den Kundendienst des Herstellers.
BEWAHREN SIE DIESE ANLEITUNG SORGFÄLTIG AUF!
WARNUNG: in diesem Gerät ist UV-C-Strahlung vorhanden, die Augen und Haut schädigen kann, unsachgemäßer Gebrauch oder eine Beschädigung
der Schutzvorrichtungen und/oder des Gehäuses kann dazu führen, dass diese Strahlung nach außen dringt. Wenn an diesen Teilen Beschädigungen
festgestellt werden, dürfen sie nicht mehr verwendet und müssen sofort ordnungsgemäß entsorgt werden. ACHTUNG: Es ist verboten, die UV-C-Lampe
außerhalb des Gerätes zu verwenden. WARNUNG: schauen Sie niemals direkt in die UV-C-Lampe, wenn diese eingeschaltet ist. ACHTUNG: Diese Geräte
enthalten Glas, entsprechend vorsichtig handhaben.
Sehr geehrter Kunde, vielen Dank, dass Sie AMTRA PREXURE, einen professionellen Filter für Teiche und Aquarien, gekauft haben. AMTRA PREXURE
kombiniert biologische und mechanische Filtration mit UVC-Sterilisation, um Wasser zu reinigen und pathogene Keime und Schwebe-Grünalgen, die
Wassertrübung verursachen, zu beseitigen. AMTRA PREXURE ist zusätzlich mit einer Rückspülung und einem automatischen System zur mechanischen
Reinigung der Filterschwämme ausgestattet.
SYMBOLE:
Wasserzulauf aus der Pumpe
Rückuss von geltertemWasser an denTeich (FIG.2 F)
Auslass für verschmutztes Rückspülwasser (FIG.2 G)

prexure
DE
BETRIEB:
BETRIEBSDIAGRAMM (ABB.2)
A.Wassereintritt: Die Pumpe muss über einen exiblen Schlauch am Wasser-Einlass Adapter angeschlossen werden.
B.“Vortex”-System: Unter Schwerkraft werden Schwebstoe und Schlamm getrennt.
C. Mechanischer Filter:Wenn dasWasser durch den Schwamm ießt, werden die Schmutzpartikel ausgeltert.
D. Biologische Filtration: Die Poren der Filterschwämme haben eine vergrößerte Oberäche, die von Bakterien besiedelt wird. Die mitgelieferten
Schwämme unterscheiden sich in ihrer Dichte und schaen so Bereiche, in denenWasser mit unterschiedlichen Geschwindigkeiten ießt. Hochusszo-
nen begünstigen die Besiedlung nitrizierender Mikroorganismen (Umwandlung von Ammonium in Nitrat), während Bereiche mit geringer Strömung-
sgeschwindigkeit die Besiedlung denitrizierender anaerober Mikroorganismen begünstigen (Reduktion von Nitrat zu Sticksto). Im unteren Korb sind
Biobälle vorhanden, um die Ansiedlungsäche für Filterbakterien weiter zu vergrößern. E. Sterilisation und Klärung von Wasser: Während das Wasser
abießt, wird es der ultravioletten Strahlung der UVC-Lampe ausgesetzt. Dadurch werden Keime und Bakterien abgetötet und das Wachstum Schwe-
be-Grünalgen gehemmt. E1. Betriebsanzeige der UVC-Lampe F.Wasseraustritt: Das gelterte und geklärte Wasser wird über einen Schlauch oder einen
Bach/Wasserfall in den Teich zurückgeführt. G. Rückspülausgang des Filters: Beim Reinigen des Filters kann an diese Armatur eine Leitung angeschlossen
werden, um das Schmutzwasser abzulassen. H. Funktionswahlschalter: Mit dem Wahlschalter wird die automatische Filterreinigung aktiviert und der
Wasserauslass auf den Ablauf geschaltet. -Wahlschalter orientiert an (FIG.2 F): Wasserltration. -Wahlschalter orientiert an (FIG.2 G): automatische
Reinigung und Rückspülung. I. Motor:Wenn sich der Funktionswahlschalter in der Reinigungs- und Rückspülposition bendet, warnt Sie ein akustisches
Signal, dass die automatische Filterreinigung aktiv ist und das Licht (FIG.2 E1) leuchtet ROT. Nach drei Minuten gibt der Filter ein längeres Geräusch von
sich, um zu signalisieren, dass der Reinigungsprozess abgeschlossen ist. DannWahlschalter wieder auf die Filtrationsposition umstellen.
INSTALLATION UND INBETRIEBNAHME:
Dieser Filter arbeitet mit Wasserdruck und kann daher auch teilweise eingegraben werden. Der Wasserauslass sollte sich mindestens auf gleiche Höhe
mit demWasserspiegel benden. In jedem Fall muss er aber gemäß geltenderVorschriften für elektronische Geräte mindestens zwei Meter vomWasser
entfernt und in einem Bereich aufgestellt werden, der vor Spritzwasser oder Überschwemmungen geschützt ist. Sobald der Filter positioniert ist, verbin-
den Sie den von der Pumpe kommenden Schlauch (Pumpe und Rohr werden nicht mitgeliefert) mit dem entsprechenden Anschluss (FIG.2 A). Schließen
Sie dann eine Leitung an den Auslauf an (FIG.2 F), damit dasWasser ungehindert in denTeich zurückießen kann. Falls erforderlich, schließen Sie bereits
ein Rohr an die Rückspülung an (FIG.2 G). Es ist ratsam, die Rohre mit marktüblichen Schellen festzuklemmen. Stellen Sie sicher, dass sich der Funktion-
swahlschalter (FIG.2 H) sich in der Position Wasserltration bendet. Wenn alles angeschlossen ist, schalten Sie die Pumpe ein und überprüfen Sie das
System auf eventuelle Undichtigkeiten. Erst dann den Netzstecker anschließen, um die UVC-Lampe zu starten, diese sollte im 24 Stunden Dauerbetrieb
laufen. Der Filter muss regelmäßig gereinigt werden. Bei einer Neuinstallation erreicht der Drucklter erst nach wenigenWochen seine volle biologische
Reinigungsleistung. Die bakterielle Aktivität beginnt erst beiTemperaturen über 10 ° C
WARTUNG
AUTOMATISCHES REINIGEN DER AMTRA PREXURE FILTERSCHWÄMME MIT EINEM FUNKTIONSFILTER
Mit der Zeit setzen sich Schmutzpartikel in den Filterschwämmen ab. Bedingt durch bakterielle Flockungen lagert sich auch Klärschlamm ab. Diese Abla-
gerungen reduzieren denWasserdurchuss und damit dieWirksamkeit des Filters. Aus diesem Grund müssen die Filterschwämme regelmäßig, etwa alle
1-2 Wochen, gereinigt werden. Die Reduzierung der Durchussgeschwindigkeit, Austritt von verschmutztem Wasser aus dem Filter, oder ein Aufsteigen
der roten Anzeige (FIG: 2 H) am Funktionswahlschalter sind ein Signal dafür, dass der Filter gereinigt werden sollte.
1. den Funktionswahlschalter (FIG.2 H) im Uhrzeigersinn drehen.
2. Der Filter wird automatisch in den Reinigungsmodus geschaltet. Das Reinigungsgerät beginnt mit dem Zusammendrücken der Schwämme, um eine
mechanische Reinigung zu starten. Der Schmutz wird durch die Rückspülung entfernt.
3. Wenn sauberes Wasser aus dem Rückspülauslass austritt, ist der Reinigungsvorgang abgeschlossen. Drehen Sie den Funktionswahlschalter (FIG.2 H)
gegen den Uhrzeigersinn, um in den Filtrationsmodus zurückzukehren.
4. Wichtig: wenn der Wasserdurchuss durch verstopfte Filterschwämme zu schwach ist und nicht durch automatische Reinigung verbessert werden
kann, müssen Sie diese manuell reinigen oder austauschen. Gehen Sie wie folgt vor:
1. Ziehen Sie den Netzstecker des Filters.
2. Schalten Sie die Pumpe, die den Filter versorgt, aus und ziehen Sie den Netzstecker.
3. Önen Sie die Schließklemme (FIG.1A N ° 16 und FIG.1B N ° 20).
4. Heben Sie die Filterabdeckung an und stellen Sie diese auf den Kopf auf eine saubere Oberäche. Die Filterschwämme zeigen dann nach oben.
5. Entfernen Sie das Schwammbefestigungssystem (FIG.1A N ° 15-14-13) und (FIG.1B N ° 16-15-14-14).
6. Entfernen Sie die zu ersetzenden oder zu reinigenden Filterschwämme.
7. Im Falle einer Reinigung führen Sie denVorgang unter ießendemWasser durch und drücken Sie die Schwämme kräftig zusammen.
8. Reinigen Sie den Korb und die Kunststoteile nur mit einem Wasserstrahl.

prexure
9. Montieren Sie die Schwämme wieder in umgekehrter Reihenfolge.
10. Positionieren Sie den O-Ring (FIG.1A N ° 17 und FIG.1B N ° 21) auf der Oberkante des Behälters, es ist ratsam, diesen zu benetzen um die Montage zu
erleichtern. Legen Sie den Deckel auf und drücken Sie ihn in den Korb.
11. Setzen Sie dieVerschlussklemme (FIG.3) und (FIG.1A N ° 16 und FIG.1B N ° 20) ein und ziehen Sie die Sicherungslasche.
12. Sichern Sie alle Schläuche, indem Sie die Verschraubungen fest anziehen.
13. Starten Sie den Drucklter wieder.
AUSTAUSCH DES UVC-KOLBENS UND REINIGUNG DES QUARZROHRS
Die UVC-Lampe muss nach 8.000 Betriebsstunden ausgetauscht werden, um sicherzustellen, dass der UVC-Filter weiterhin mit maximaler Ezienz arbei-
tet. Es ist sinnvoll, die UVC-Lampe zum Saisonstart vor Beginn der heißen, sonnenstarken Zeit wie folgt auszutauschen:
1. Lösen Sie die vier Schrauben am Deckel (FIG.4).
2. Entfernen Sie den UV-Kopf und reinigen Sie das Quarzrohr AUSSCHLIESSLICH von außen mit einem feuchten Tuch oder einem milden Reinigungsmittel.
Spülen Sie es gründlich unter viel ießendemWasser.
3. Entfernen Sie die Befestigungsmutter am Quarzglasrohr (FIG.1A N ° 7 und FIG.1B N ° 7).
4. Entfernen Sie das Quarzglasrohr und ersetzen Sie die UV-Lampe.
5. Um mit dem Zusammenbau fortzufahren, folgen Sie den obigen Schritten in umgekehrter Reihenfolge, um die Funktion des Quarzrohrs zu überprüfen.
SICHERHEITSHINWEISE:Während des Betriebs gibt AMTRA PREXURE UV-C Strahlung ab, die für die Haut und die Augen schädlich sein kann, schalten Sie
die UVC-Lampe daher nur komplett zusammengebaut ein und überprüfen Sie den Betrieb der Lampe nur durch das spezielle transparente Guckloch.
Ziehen Sie immer zunächst den Netzstecker und prüfen Sie, ob das Quarzglas im transparenten Rohr vor dem Zusammenbau nicht beschädigt wurde. Es
besteht automatischer Schutz, der die Stromversorgung der UVC-Lampe unterbricht, wenn der Deckel geönet wird (FIG.4).
Warnungen:
- Legen Sie AMTRA PREXURE niemals insWasser.
- Schalten Sie das Gerät aus, wenn sich keinWasser im Inneren bendet, um eine Überhitzung zu vermeiden.
WINTERBETRIEB:
Das Gerät sollte nicht einfrieren, bei Frostgefahr sollte es zurVermeidung von Gehäusebrüchen nicht benutzt und gründlich gereinigt an einem frostfreien
Ort gelagert werden.
GARANTIE: Für dieses Produkt wird eine Garantie auf Material- oderVerarbeitungsfehler von 24 Monaten ab Kaufdatum gewährleistet. Das Garantiezerti-
kat muss vom Händler vollständig ausgefüllt und dem Gerät bei der Rücksendung zur Reparatur beigelegt werden. Die Garantie umfasst den Austausch
vondefektenTeilen. Bei unsachgemäßerVerwendung des Gerätesoder für Schäden,die durch Manipulation oder FahrlässigkeitdesVerkäufersverursacht
wurden, gilt diese Garantie nicht. Für Garantieleistungen senden Sie das Gerät zusammen mit dem Kaufbeleg oder gleichwertigem und einer detaillier-
ten Beschreibung des Problems zurück. AlleVerschleißteile sind von der Garantie ausgeschlossen.
• Der Hersteller verpichtet sich, die fehlerhaften oder falsch gefertigten Teile erst nach einer sorgfältigen Überprüfung und Ermittlung der schlechten
Herstellung nach eigenem Ermessen zu ersetzen.
• Bei irrtümlicherVerwendung der Garantiebedingungen gehen dieTransport – und/oder Speditionskosten immer zulasten des Käufers.
•Während der Garantiezeit werden die ausgetauschten Produkte Eigentum des Herstellers.
• Von dieser Garantie kann nur der ursprüngliche Käufer protieren, der die Anweisungen der ordnungsgemäßen Wartung gemäß Handbuch befolgt
hat.Unsere Gewährleistungspicht erlischt, sobald der ursprüngliche Besitzer das Eigentum am Produkt abtritt, oder Änderungen daran vorgenommen
worden sind.
• Das Produktteil des defekten Produktes muss dem Hersteller zum Austausch geliefert werden; andernfalls wird das Ersatzteil dem Käufer belastet.
DAS NICHTEINHALTEN DER EINGRIFFSARTEN UND DER HANDHABUNG DES BELEUCHTUNGSGERÄTES FÜR AQUARIEN, WIE SIE IN DIESEM HANDBUCH BE-
SCHRIEBEN WERDEN (GEBRAUCHS- UND WARTUNGSANWEISUNG), HAT DEN VERFALL DER GARANTEIBEDINGUNGEN ZUR FOLGE. Wenn auch kleine Teile
kaputt gehen, tauschen Sie das Produkt aus.WennTeile des Produkts verschluckt werden, wenden Sie sich an IhrenTierarzt.
‘RECYCLING
Das Gerät ist mit dem entsprechenden Symbol gekennzeichnet, das darauf hinweist, dass das Produkt am Ende seines Lebenszyklus nicht zusammen mit
anderen Haushaltsabfällen entsorgt werden darf, sondern durch getrennte Sammlung von Elektro- und Elektronikgeräten entsorgt werden muss. Um
Umwelt- oder Gesundheitsschäden durch unsachgemäße Entsorgung zu vermeiden, wird der Käufer aufgefordert, dieses Gerät von anderen Abfallarten
zu trennen und verantwortungsbewusst zu entsorgen, um dieWiederverwendung von Reststoen zu ermöglichen.
Private Anwender sollten die zuständige örtliche Behörde für Recycling kontaktieren, um alle Informationen zum Thema Recycling und Recycling für
diese Art von Produkten zu erhalten.
Gewerbliche Nutzer dürfen dieses Gerät nicht zusammen mit Gewerbeabfällen entsorgen, sondern über ein separates Sammelsystem, das mit der eu-
ropäischen Richtlinie 2002/96 / EG kompatibel ist.
Die Entsorgung, die nicht den geltendenVorschriften entspricht, ist strafbar.
DE

prexure
DE
1. Schrauben
2. UVC-Kopf
3. O-Ring
4. UV-C-Lampe
5. O-Ring
6. Quarzrohr
7. Quarzrohrbefestigungsmutter
8. Gummidichtung
9. Filterabdeckung
10. Dichtung
11. Schlauchanschluss (3 Größen verfügbar)
12. Befestigungsmuttern für Rohrverschraubungen
13. Schwämme
14. Stützschwämme
15. Schwammbefestigungsmutter
16. Abschlussklemme
17. O-Ring
18. Filterkorb
21. Unteres Lager
22. Automatisches Reinigungssystem für Schwämme
23. Automatischer Reinigungsmotor
FIG.1A
AMTRA PREXURE 8000

prexure
DE
FIG.1B
AMTRA PREXURE12000
1. Schrauben
2. UVC-Kopf
3. O-Ring
4. UV-C Lampe
5. O-Ring
6. Quarzrohr
7. Befestigungsmutter für Quarzrohr
8. Gummidichtung
9. Filterabdeckung
10. Siegel
11. Schlauchverbindung
12. Durchussanzeige
13. Befestigungsmuttern der Rohrver-
schraubung
14. Schwämme
15. Stützschwämme
16. Untere Plattenschwämme
17. Korb aus biologischem Materialkorb
18. Bio-Ball
19. Korb mit biologischem Material
20. Terminal schließen
21. O-Ring
22. Filterkorb
23. lebt
24. Waschmaschine
25. Unteres Lager
26. Automatisches Reinigungssystem für Schwämme
27. Automatischer Reinigungsmotor

prexure
DE
FIG.2
FIG.3
A B C D
FIG.4

prexure
IT
NORME IMPORTANTI PER LA SICUREZZA:
Il presente apparecchio è un ltro comprensivo di sistema autopulente e di sterilizzatore mediante lampada a raggi UV-C delle acque presenti in laghetti
ornamentali e acquari. Il presente apparecchio funziona solo se collegato ad una pompa e non và assolutamente immerso in acqua. Il grado di protezione
IP44 ne identica l’installazione lontano da schizzi d’acqua e dove non vi sia la probabilità di allagamento. Qualsiasi altro tipo d’uso non è ammesso e con-
seguentemente non è coperto dalla responsabilità del costruttore.‘NOTE: AL RICEVIMENTO DEL DISPOSITIVO, PRIMA DI ESEGUIRE QUALSIASI OPERAZIONE
DI UTILIZZO E DI MANUTENZIONE, LEGGETE ATTENTAMENTE I MANUALI DI USO E MANUTENZIONE, INCLUSI QUELLI DEI SUOI EVENTUALI COMPONENTI. LA
DITTA PRODUTTRICE NON PUO ESSERE RITENUTA IN ALCUN CASO RESPONSABILE DI INCIDENTI O DANNI CONSEGUENTI ALL’USO INAPPROPRIATO DEL DISPO-
SITIVO, NONCHE DALL’INOSSERVANZA ANCHE PARZIALE DELLE NORME DI SICUREZZA E PROCEDURE D’INTERVENTO DESCRITTE NEI MANUALI. ATTENZIONE:
IL DISPOSITIVO PUO ESSERE MESSO IN FUNZIONE SOLO DOPO CHE E’STATO INSTALLATO E COLLEGATO CORRETTAMENTE E CHE L’UTENTE PREVENTIVAMENTE
ABBIA LETTO IL MANUALE.
ATTENZIONE: il presente simbolo riportato sull’etichetta del prodotto e sulla sua confezione indica che è necessario leggere con attenzione questo
manuale di istruzioni prima di mettere in funzione l’apparecchio o di procedere alla sua manutenzione. Il produttore non può essere ritenuto re-
sponsabile di eventuali danni procurati da questo apparecchio se non si è letto con attenzione e capito questo manuale di istruzioni o se non ci si è atte-
nuti a quanto qui prescritto. Onde evitare qualsiasi tipo di infortunio osservare con molta attenzione le seguenti avvertenze (oltre alle più elementari
disposizioni di sicurezza): ATTENZIONE: questo dispositivo può essere utilizzato da bambini di età superiore a 8 anni e persone con ridotte capacità siche,
sensoriali o mentali o mancanza di esperienza e conoscenza solo se sottoposte a supervisione o dopo che abbiano ricevuto istruzioni sull’utilizzo dell’ap-
parecchio in modo sicuro e se comprendono i pericoli che esso implica. I bambini non devono giocare con il dispositivo in quanto lo stesso non è un gio-
cattolo. La pulizia e la manutenzione non devono essere eettuati da bambini senza supervisione. ATTENZIONE: scollegare o spegnere tutti i dispositivi
presenti nell’acquario o nel laghetto prima di eettuare operazioni di manutenzione o di installazione di nuovi dispositivi. ‘Nel caso in cui la spina di
connessione di qualche apparecchio o la presa di corrente fossero bagnate, disinserire l’interruttore generale prima di staccare il cavo di alimentazione
degli apparecchi presenti. Non è possibile sostituire il cavo di alimentazione. Se il cavo è danneggiato, il dispositivo è da smaltire.‘-Controllare il voltaggio
sull’etichetta del dispositivo ed accertarsi che sia corretto rispetto alla tensione di rete. - Il punto più basso del cordone deve trovarsi più in basso rispetto
alla presa di corrente al ne di evitare che gocce d’acqua possano accidentalmente scendere dal cavo ed entrare nella presa. Nel caso il cavo sia bagnato,
non toccare la spina con le mani; prima di scollegare l’apparecchio staccare l’interruttore generale di casa. - E’importante che il dispositivo, come gli altri
apparecchi elettrici, sia protetto a monte da un interruttore dierenziale (salvavita) con corrente di intervento ind 30mA. -Se utilizzato all’esterno non
sotterrare il cavo di alimentazione, ma seguire le regole di installazione previste dalle normi vigenti locali consultando un installatore elettrico qualica-
to. ‘-Durante l’installazione dell’apparecchio o la sua manutenzione evitare di sollevarlo tramite il cavo di alimentazione. -Prima di metterne in funzione
l’apparecchio assicurarsi di averlo installato correttamente. -Non eettuare mai riparazioni o modiche tecniche all’apparecchio ed utilizzare solo ricam-
bi originali.‘-ATTENZIONE: evitare l’esposizione diretta ai raggi solari. Non utilizzare se a rischio gelo: nel periodo invernale è opportuno rimuovere l’ap-
parecchio o farlo funzionare solo se in ambiente protettodal rischio di congelamento.‘-L’apparecchio deve funzionare solo in presenza di acqua e non può
andare a secco. Non usare per acqua potabile. Non usare per liquindi inammabili o esplosivi, abrasivi o corrosivi. Usare solo per il trattamento di acque
di laghetto o acquario.‘-ATTENZIONE: non collegare alla rete idrica pubblica.‘-ATTENZIONE: nell’uso all’esterno secondo la normativa vigente IEC 60364-
7-702 la distanza minima di sicurezza delle apparecchiature elettriche dall’acqua di piscine o laghetti balneabili deve essere di metri 2. Collocare l’appa-
recchio e ssarlo stabilmente in un posto in cui sia al sicuro da schizzi d’acqua e protetto dal rischio di allagamento.
VERIFICHE PRELIMINARI
Controllo di eventuali danni -Vericate che le varie parti del dispositivo non presentino danni sici dovuti ad urti, strappi o abrasioni. Controllate in modo
particolare:
• che non vi siano segni od ammaccature, indicative di urti avvenuti durante il trasporto.
• l’integrità dei cavi elettrici.
• l’integrità dei suoi eventuali componenti
PROCEDURA DI SEGNALAZIONE DANNI
Nel caso si riscontrino dei danni, interrompete la procedura di collegamento e segnalate la natura dei danni riscontrati all’ucio supporto clienti della
ditta produttrice.
CONSERVARE CON CURA QUESTE ISTRUZIONI!
-ATTENZIONE: questi apparecchi contengono un emettitore di raggi UV-C che possono danneggiare occhi e cute. Usi impropri o il danneggiamento delle
loro protezioni ed involucri possono provocare la fuoriuscita di queste radiazioni. Per tale motivo se danneggiati questi apparecchi non vanno usati e
devono essere scartati immediatamente.
-ATTENZIONE: è vietato usare la lampada UV-C all’esterno dell’apparecchio.
-ATTENZIONE: non guardare mai la lampada UV-C quando è accesa.
-ATTENZIONE: questi apparecchi contengono vetro. Maneggiare con cura.
Gentile cliente, grazie per aver acquistato AMTRA PREXURE, un ltro professionale per laghetti ed acquari. AMTRA PREXURE combina la ltrazione bio-
logica e meccanica con la sterilizzazione UVC consentendo di depurare l’acqua e di eliminare i germi patogeni e le alghe verdi sospese che causano
intorbidimento. AMTRA PREXURE è inoltre dotato di controlavaggio e di sistema automatico di pulizia meccanica delle spugne ltranti.

prexure
SIMBOLI:
Ingresso acqua in arrivo dalla pompa
Uscita acqua ltrata verso laghetto (FIG.2 F)
Uscita acqua sporca del controlavaggio (FIG.2 G)
FUNZIONAMENTO:
SCHEMA DI FUNZIONAMENTO(FIG.2)
A. Ingresso acqua: la pompa va collegata all’ingresso dell’acqua mediante un tubo essibile.
B. Sistema“Vortex”: sotto l’azione della gravità, i solidi sospesi ed il fango vengono separati.
C. Filtro meccanico: quando l’acqua passa attraverso la spugna le particelle di sporco vengono fermate.
D. Filtrazione biologica: i pori delle spugne ltranti hanno una elevatisima supercie interna che i batteri possono colonizzare. Le spugne in dotazione
dieriscono per densità creando zone in cui l’acqua può uire a velocità diversa. Zone a usso elevato favoriscono la colonizzazione di microrganismi
nitricanti (convertono l’ammonio in nitrato), mentre zone a bassa velocità di usso favoriscono la colonizzazione di microrganismi anaerobici denitri-
canti (riducono il nitrato in azoto). Nel cestello inferiore sono presenti le bioball per aumentare ulteriormente la supercie di insedamento batterico.
E. Sterilizzazione e chiaricazione dell’acqua: mentre l’acqua deuisce, viene esposta alle radiazioni ultraviolette della lampada UVC. Questo uccide germi
e batteri e inibisce la crescita delle alghe verdi sospese.
E1. Spia controllo funzionamento lampada UVC
F. Uscita acqua: l’acqua ltrata e chiaricata viene reimmessa nel laghetto tramite un tubo essibile o un corso d’acqua / cascata.
G. Uscita controlavaggio ltro: quando si pulisce il ltro è possibile collegare un tubo a questo raccordo per scaricare l’acqua sporca.
H. Selettore di funzione: il seletore viene utilizzato per attivare la pulizia automatica del ltro e commutare l’uscita dell’acqua verso lo scarico.
-Selettore orientato verso (FIG.2 F) : ltrazione acqua.
-Selettore orientato verso (FIG.2 G) : pulizia automatica e controlavaggio.
I. Motore: quando il selettore di funzione è posto in posizione di pulizia e controlavaggio un segnale acustico vi avviserà che è attiva la pulizia automatica
del ltro e la spia (FIG.2 E1) mostrerà il colore rosso. Dopo tre minuti il ltro emetterà un suono prolungato per segnalare che il processo di pulizia è nito.
Riportare quindi il selettore nella posizione di ltrazione.
INSTALLAZIONE ED AVVIO:
Il ltro può essere posizionato parzialmente interrato (attenzione in quanto si deve poter aprire il ltro facilmente ed in qualsiasi momento) oppure
appoggiato su una supercie liscia e solida. Il ltro lavora in pressione quindi non è necessario che sia sopraelevato rispetto al livello dell’acqua ma in
ogni caso secondo la vigente normativa sulle apparecchiature elettroniche deve essere posto ad almeno due metri dall’acqua ed in una zona al riparo da
cadute, schizzi d’acqua o allagamenti.
Una volta posizionato il ltro collegare il tubo proveniente dalla pompa (pompa e tubo non sono in dotazione) al corrispondente raccordo (FIG.2 A). Col-
legare quindi un tubo all’uscita (FIG.2 F) in modo che l’acqua possa tornare senza impedimenti al laghetto. Se necessario collegare già un tubo all’usicta
del controlavaggio (FIG.2 G). E’consigliabile ssare saldamente i tubi mediante fascette comunemente reperibili nel mercato.
Accertarsi che il selettore di funzione (FIG.2 H) sia in posizione di ltrazione acqua. Quando tutto è collegato accendere la pompa e vericare che non vi
siano perdite nel sistema. Solo a questo punto collegare la spina di alimentazione per avviare la lampada UVC che dovrà funzionare in modo permanente,
24 ore al giorno.
Il ltro deve essere pulito regolarmente. In caso di una nuova installazione, il ltro a pressione raggiunge la sua completa ecacia di pulizia biologica solo
dopo alcune settimane. L’attività batterica inizia solo a temperature maggiori di 10°C
MANUTENZIONE
LAVAGGIO AUTOMATICO DELLE SPUGNE DI AMTRA PREXURE CON FILTRO IN FUNZIONE
Le particelle di sporco in sospensione si depositano nel tempo nelle spugne del ltro. Le occulazioni batteriche contribuiscono inoltre alla formazione
dei fanghi di depurazione. Questi depositi riducono la portata dell’acqua e quindi l’ecacia del ltro. Per questo motivo le spugne del ltro devono essere
pulite regolarmente, all’incirca ogni 1-2 settimane. Segnali che le spugne devono essere pulite possono essere una riduzione del usso, uscita di acqua
sporca dal ltro oppure quando l’indicatore rosso posto nel selettore di funzione (FIG.2 H) si alza.
1. Girare il selettore di funzione (FIG.2 H) in senso orario.
2. Il ltro verrà automaticamente commutato in modalità di pulizia. L’ingranaggio di pulizia si avvia comprimendo le spugne per ottenere la pulizia
meccanica delle stesse. Lo sporco viene rimosso attraverso l’azione del controlavaggio.
3. Quando si vedrà uscire acqua pulita dallo scarico del controlavaggio, ruotare il selettore di funzione (FIG.2 H) in senso antiorario per ritornare in moda-
lità di ltrazione. Il ltro è ora pulito. Importante: se il usso d’acqua è troppo debole a causa delle spugne ltranti intasate e non può essere migliorato
attraverso la pulizia automatica bisogna pulirle manualmente o sostituirle. Procedere come segue:
1. Scollegare la spina di alimentazione del ltro.
IT

prexure
2. Spegnere la pompa che alimenta il ltro e scollegare la spina di alimentazione.
3. Aprire il morsetto di chiusura (FIG.1A N°16 e FIG.1B N°20).
4. Sollevare il coperchio del ltro e posizionarlo sottosopra su una supercie pulita. Le spugne del ltro saranno così rivolte verso l’alto.
5. Rimuovere il sistema di ssaggio delle spugne (FIG.1A N°15-14-13) e (FIG.1B N°16-15-14).
6. Rimuovere le spugne del ltro da sostituire o da pulire.
7. In caso di pulizia eettuare l’operazione sotto acqua corrente comprimendo energicamente le spugne.
8. Pulire il cestello e le sole parti plastiche spruzzandoli con un getto d’acqua.
9. Rimontare le spugne ripetendo in ordine inverso quanto fatto nella fase di smontaggio.
10. Posizionare l’O-ring (FIG.1A N°17 e FIG.1B N°21) sul bordo superiore del contenitore. Per un facile montaggio si consiglia di bagnarlo. Posizionare il
coperchio e premerlo nel cestello.
11. Mettere il morsetto di chiusura (FIG.3) e (FIG.1A N°16 e FIG.1B N°20), tirare la linguetta di ssaggio.
12. Fissare tutti i tubi essibili avvitando saldamente i raccordi di unione.
13. Avviare nuovamente il ltro a pressione.
SOSTITUZIONE DELLA LAMPADINA UVC E PULIZIA TUBO IN QUARZO
La lampada UVC deve essere sostituita dopo 8.000 ore di funzionamento al ne di garantire che il ltro UVC continui a funzionare con la massima ecacia.
Indicativamente è buona cosa sostituire la lampadina UVC ogni stagione prima dell’inizio del periodo più caldo e soleggiato.
1. Svitare le quattro viti sul coperchio (FIG.4).
2. Estrarre la testata UV e pulire delicatamente il tubo in quarzo ESCLUSIVAMENTE sulla parte esterna con un con un panno umido o un detergente per
vetri non aggressivo. Risciacquarlo accuratamente in abbondante acqua corrente ESCLUSIVAMENTE sulla parte esterna.
3. Rimuovere il dado di ssaggio sul tubo di vetro di quarzo (FIG.1A N°7 e FIG.1B N°7).
4. Rimuovere il tubo di vetro in quarzo e sostituire la lampada UV.
5. Prma di procedere al rimontaggio seguendo in ordine inverso i punti qui sopra vericare l’integrità del tubo in quarzo.
NORME DI SICUREZZA: Durante il funzionamento, AMTRA PREXURE emana raggi che possono essere dannosi per la pelle e per gli occhi. Durante le ope-
razioni di pulizia non accendere quindi per nessuna ragione la lampadina UVC. Fare funzionare AMTRA PREXURE solo con il coperchio chiuso e controllare
il funzionamento della lampada solo attraverso l’apposito spioncino trasparente. Prima di toccare l’apparecchio, togliere sempre la spina dalla presa
di corrente. Controllare che il tubo trasparente in quarzo non sia crepato prima di rimontarlo. L’apparecchio è dotato di una protezione automatica che
interrompe l’alimentazione elettrica della lampada UVC in caso di apertura del coperchio (FIG.4).
Avvertenze:
• Non mettere mai AMTRA PREXURE in acqua. • Spegnere l’apparecchio se non vi passa acqua all’interno, per evitare il surriscaldamento.
RICOVERO INVERNALE: Se l’apparecchio è esposto al rischio di congelamento, al ne di prevenirne la rottura è consigliabile non utilizzarlo durante il
periodo invernale e riporlo accuratamente pulito in un luogo non soggetto a congelamento.
GARANZIA: Questo prodotto è garantito per un periodo di 24 mesi dalla data di acquisto da difetti di materiale o lavorzione. Il certicato di garanzia
dev’essere compilato in ogni sua parte dal rivenditore e dovrà accompagnare l’apparecchio nel caso in cui venga estituito per la riparazione. La garanzia
consiste nella sostituzione delle parti difettose. Questa garanzia non è valida in caso di uso improprio dell’apparecchio, né risponde di danni causati da
manomissione o negligenza da parte dell’acquirente. Per il servizio in garanzia, ritornare l’apparecchio insieme alla ricevuta d’acquisto o equivalente, con
una descrizione dettagliata del problema. Sono escluse da garanzia tutte le parti soggetti ad usura.
• La Ditta produttrice si assume l’impegno di sostituire a propria discrezione le parti mal funzionanti o di errata fabbricazione, solo dopo un accurato
controllo e riscontro di cattiva costruzione.
• Sono sempre a carico del compratore le spese di trasporto e/o spedizione in caso di errato utilizzo dei termini di garanzia.
• Durante il periodo di garanzia i prodotti sostituiti diventano di proprietà del produttore.
• Di questa garanzia può beneciare solamente l’acquirente originale che abbia rispettato le indicazioni di normale manutenzione contenute nel manua-
le. La nostra responsabilità sulla garanzia scade nel momento in cui: il proprietario originale ceda la proprietà del prodotto, oppure siano state apportate
modiche allo stesso.
• Il prodotto parte del prodotto difettoso deve essere consegnato alla Ditta produttrice per la sostituzione; in caso contrario la parte sostituita verrà adde-
bitata all’acquirente. IL MANCATO RISPETTO DELLE MODALITà DI INTERVENTO ED USO DELL’APPARECCHIATURA DI ILLUMINAZIONE PER ACQUARI DESCRITTI
NELLA PRESENTE DOCUMENTAZIONE (MANUALE DI USO E MANUTENZIONE E MANUALI ALLEGATI) COMPORTA IL DECADIMENTO DEITERMINI DI GARANZIA.
In caso di rottura anche di piccole parti sostituire il prodotto.
RICICLAGGIO
L’apparecchio è contrassegnato con l’apposito simbolo che indica che il prodotto non deve essere smaltito con altri riuti domestici al termine del ciclo di
vita ma tramite separata raccolta dierenziata relative alle apparecchiature elettriche ed elettroniche. Per evitare danni all’ambinete o alla salute causati
da un inadeguato smaltimento dei riuti, si invita l’acquirente a separare questo apparecchio da altri tipi di riuti e di reciclarlo in maniera responsabile
per favorire il riutilizzo delle risorse materiali. Gli utenti domestici potranno riconsegnare l’apparecchio al rivenditore al momento dell’acquisto di un
nuovo apparecchio di tipo equivalente in ragione di uno a uno, o contattare l’ucio locale preposto per tutte le informazioni relative alla raccolta die-
renziata e al reciclaggio per questo tipo di prodotto. Gli utenti aziendali non devono smaltire questo apparecchio unitamente ai riuti commerciali ma
IT

prexure
tramite sistema di raccolta dierenziata compatibile con la direttiva europea 2002/96/EC. Lo smaltimento non conforme alle vigenti normative è punito
con sanzioni amministrative come da vigente legge.
IT
1. Viti
2. Testata UVC
3. O-Ring
4. Lampada UV-C
5. O-Ring
6. Tubo in quarzo
7. Dado di ssaggio tubo quarzo
8. Guarnizione in gomma
9. Coperchio ltro
10. Guarnizione
11. Raccordo per tubi essibili (disponibili 3 misure)
12. Dadi di ssaggio raccordo tubi
13. Spugne
14. Supporto spugne
15. Dado di ssaggio spugne
16. Morsetto di chiusura
17. O-Ring
18. Cestello ltro
21. Cuscinetto inferiore
22. Sistema di pulizia automatica spugne
23. Motore pulizia automatica
FIG.1A
AMTRA PREXURE 8000

prexure
IT
1. Viti
2. Testata UVC
3. O-Ring
4. Lampada UV-C
5. O-Ring
6. Tubo in quarzo
7. Dado di ssaggio tubo quarzo
8. Guarnizione in gomma
9. Coperchio ltro
10. Guarnizione
11. Raccordo per tubi essibili
12. Indicatore di usso
13. Dadi di ssaggio raccordo tubi
14. Spugne
15. Supporto spugne
16. Piastra inferiore spugne
17. Griglia cestello materiale biologico
18. Bio-ball
19. Cestello materiale biologico
20. Morsetto di chiusura
21. O-Ring
22. Cestello ltro
23. Vite
24. Rondella
25. Cuscinetto inferiore
26. Sistema di pulizia automatica spugne
27. Motore pulizia automatica
FIG.1B
AMTRA PREXURE12000

prexure
IT
FIG.2
FIG.3
A B C D
FIG.4

prexure
GB
IMPORTANT SAFETY RULES:
This appliance is a lter that includes a self-cleaning system and a UV-C lamp sterilizer for water in ornamental ponds and aquariums. This appliance
only works if connected to a pump and must not be immersed in water. The IP44 protection rating identies the installation away from water splashes
and where there is no chance of ooding. Any other type of use is not permitted and consequently it is not covered by the manufacturer’s responsibility.
NOTE: BEFORE STARTING ANY OPERATION OF USE AND MAINTENANCE OF THE DEVICE, PLEASE READ THE MANUALS OF USE AND MAINTENANCE. THE
MANUFACTURER CANNOT BE HELD IN ANY CASE RESPONSIBLE OF ACCIDENTS OR DAMAGE RESULTING FROM INAPPROPRIATE USE OF THE DEVICE, ASWELL
AS EVEN PARTIAL FAILURETO OBSERVE THE SAFETY REGULATIONS AND THE INTERVENTION PROCEDURES DESCRIBED IN THE MANUALS. ATTENTION: THE
DEVICE EQUIPMENT CAN BE PUT INTO OPERATION ONLY AFTER IT HAS BEEN CORRECTLY INSTALLED AND CONNECTED ANDTHAT THE USER HAS PREVIOUSLY
READTHE MANUAL.
CAUTION:This symbol on the product label and on its packaging indicates that this instruction manual must be read carefully before the appliance
is started up or serviced. be held responsible for any damage caused by this appliance if you have not read and understood this instruction manual
carefully or if you have not followed this. In order to avoid any type of accident, carefully observe the following warnings (in addition to the most basic
safety regulations).This appliance can be used by children aged from 8 years and above and persons with reduced physical, sensory or mental capabilities
or lack of experience and knowledge if they have been given supervision or instruction concerning use of the appliance in a safe way and understand the
hazards involved. Children shall not play with the appliance. Cleaning and user maintenance shall not be made by children without supervision.
WARNING: Unplug or switch o all appliances in the aquarium or pond before carrying out maintenance. If the connection plug of some appliance or the
socket are wet, turn o the main switch before disconnecting the power cord of the appliances present. The supply cord cannot be replaced. If the cord is
damaged the appliance should be scrapped. - Check the voltage on the device label and ensure it corresponds to the main power supply.
- When the device is plugged to the mains, ensure that the lowest part of the lead is lower than the socket, to avoid any drops of water that are on the
lead owing into the socket. If the cable is wet, do not touch the plug with your hands and before disconnecting the device, turn the mains switch o.
- We recommend that this device and other electrical aquarium devices should be connected to power supplies with ground fault circuit interrrupters
lnd 30 mA.‘Outdoor use: don’t bury the power supply cable, but follow the installation rules provided by the local regulations in force and please consult
a qualied electric installer. ‘During installing the appliance or maintaining it, please don’t lift it using the power cord. ‘Before putting the appliance
into operation, make sure you have installed it correctly.‘Never carry out repairs or technical modications to the appliance and use only original spare
parts.‘CAUTION: avoid direct exposure to sunlight. Do not use if there is a risk of freezing: in winter it is advisable to remove the appliance or operate it
only if it is protected against freezing.‘The appliance must only work in the presence of water and can not run dry. Do not use for drinking water. Do not
use for ammable or explosive, abrasive or corrosive liquindi. Use only for the treatment of pond or aquarium water. ‘CAUTION: do not connect to the
public water supply (public aqueduct).‘ATTENTION: in outdoor use, according to the current IEC 60364-7-702 standard, the minimum safety distance of
electrical equipment from swimming pools or swimming ponds must be 2 meters. Place the appliance and x it permanently in a place where it is safe
from water splashes and protected from ooding.
Preliminary checks
Checking for damage -Verify that the various parts of the device does not display physical damages due to bumps, tears or abrasions.
Check in particular: • That there are no signs or dents, indicative of bumps caused by transport. • The integrity of the the electrical cables.
Damage Reporting Procedure If any damage is discovered, stop the connection procedure and report the nature of the damage to the Customer care
oce of the manufacturer.
KEEPTHESE INSTRUCTIONS CAREFULLY!
WARNING: these devices contain an emitter of UV-C rays that can damage eyes and skin, improper use or damage to their protections and casings can
cause these radiation to escape, so if these devices are damaged they should not be used they must be discarded immediately.
-CAUTION: it is forbidden to use the UV-C lamp outside the appliance.
-WARNING: never look at the UV-C lamp when it is on.
-CAUTION: these devices contain glass. Handle with Care.
Dear Customer, Thank you for purchasing AMTRA PREXURE, a professional lter for ponds and aquariums. AMTRA PREXURE combines biological and
mechanical ltration with UVC sterilization to purify water and eliminate pathogenic germs and suspended green algae that cause turbidity. AMTRA
PREXURE is also equipped with backwash and an automatic system for the mechanical cleaning of the lter sponges.
SYMBOLS:
Water inlet coming from the pump
Output ltered water to the pond (FIG.2 F)
Dirty backwash water outlet (FIG.2 G)

prexure
OPERATION:
OPERATING DIAGRAM (FIG.2)
A.Water inlet: the pump must be connected to the water inlet by means of a exible tube.
B.“Vortex”system: under gravity, suspended solids and sludge are separated.
C. Mechanical lter: when the water passes through the sponge the dirt particles are stopped.
D. Biologicalltration:theporesof thelteringspongeshavean elevatedinternalsurface thatbacteria can colonize.Thesupplied sponges dier in density
creating areas in which water can ow at dierent speeds. High ow zones favor the colonization of nitrifying microorganisms (convert ammonium into
nitrate), while areas with low ow velocity favor the colonization of denitrifying anaerobic microorganisms (reduce nitrate into nitrogen). In the lower
basket, bioballs are present to further increase the surface of bacterial inltration.
E. Sterilization and clarication of water: as the water drains, it is exposed to ultraviolet radiation from the UVC lamp. This kills germs and bacteria and
inhibits the growth of suspended green algae.
E1. UVC lamp operation indicator
F. Water outlet: the ltered and claried water is fed back into the pond by means of a exible pipe or a stream / waterfall.
G. Filter backwash output: when cleaning the lter, a pipe can be connected to this tting to drain the dirty water.
H. Function selector: the selector is used to activate the automatic lter cleaning and switch the water outlet to the drain.
-Selector oriented towards (FIG.2 F): water ltration.
-Selector oriented towards (FIG.2 G): automatic cleaning and backwashing.
I. Engine: when the function selector is in the cleaning and backwashing position, an acoustic signal will warn you that the automatic lter cleaning is
active and the light (FIG.2 E1) will show the red color. After three minutes the lter will emit a prolonged sound to signal that the cleaning process is over.
Then return the selector to the ltration position.
INSTALLATION AND START-UP:
The lter can be placed partially buried (be careful as it must be possible to open the lter easily and at any time) or resting on a smooth and solid
surface. The lter works under pressure so it does not need to be raised above the water level but in any case according to current legislation on electronic
equipment must be placed at least two meters from the water and in an area protected from falls, splashes d‘water or ooding.
Once the lter is positioned, connect the tube coming from the pump (pump and pipe are not supplied) to the corresponding tting (FIG.2 A). Then
connect a pipe to the outlet (FIG.2 F) so that the water can return to the pond without hindrance. If necessary, already connect a pipe to the backwash
use (FIG.2 G). It is advisable to rmly fasten the pipes using clamps commonly available on the market.
Make sure that the function selector (FIG.2 H) is in the water ltration position.When everything is plugged in turn the pump on and check for leaks in
the system. Only then connect the power plug to start the UVC lamp which will have to work permanently, 24 hours a day.
The lter must be cleaned regularly. In case of a new installation, the pressure lter reaches its full biological cleaning eciency only after a few weeks.
The bacterial activity begins only at temperatures higher than 10 ° C
MAINTENANCE
AUTOMATIC WASHING OF AMPO PREXURE SPONGES WITH A FUNCTION FILTER
The particles of suspended dirt settle over time in the lter sponges. Bacterial occulations also contribute to the formation of sewage sludge. These
deposits reduce the ow of water and therefore the eectiveness of the lter. For this reason the lter sponges must be cleaned regularly, approximately
every 1-2 weeks. Signals that the sponges must be cleaned can be a reduction in the ow, the exit of dirty water from the lter or when the red indicator
placed in the function selector (FIG.2 H) rises.
1.Turn the function selector (FIG.2 H) clockwise.
2.The lter will automatically be switched to cleaning mode.The cleaning gear starts by compressing the sponges to obtain mechanical cleaning of the
same.The dirt is removed by the backwash action.
3. When clean water is seen to come out of the backwash outlet, turn the function selector (FIG.2 H) counterclockwise to return to ltration mode.The
lter is now clean.
Important: if the water ow is too weak due to clogged lter sponges and can not be improved through automatic cleaning, you have to clean them
manually or replace them. Proceed as follows:
1. Disconnect the lter power plug.
2.Turn o the pump that supplies the lter and disconnect the power plug.
3. Open the closing clamp (FIG.1A N ° 16 and FIG.1B N ° 20).
4. Lift the lter cover up and place it upside down on a clean surface.The lter sponges will then be facing upwards.
5. Remove the sponge fastening system (FIG.1A N ° 15-14-13) and (FIG.1B N ° 16-15-14).
6. Remove the lter sponges to be replaced or cleaned.
GB

prexure
GB
7. In case of cleaning, carry out the operation under running water, vigorously compressing the sponges.
8. Clean the basket and the plastic parts only by spraying them with a jet of water.
9. Reassemble the sponges repeating in the reverse order what was done during the disassembly phase.
10. Position the O-ring (FIG.1A N ° 17 and FIG.1B N ° 21) on the upper edge of the container. For an easy assembly it is advisable to wet it. Place the lid
and press it into the basket.
11. Put the closing clamp (FIG.3) and (FIG.1A N ° 16 and FIG.1B N ° 20), pull the securing tab.
12. Secure all hoses by tightening the union ttings rmly.
13. Start the pressure lter again.
REPLACINGTHE UVC BULB AND CLEANING THE QUARTZ PIPE
The UVC lamp must be replaced after 8,000 hours of operation to ensure that the UVC lter continues to operate with maximum eciency. Indicatively it
is good to replace the UVC bulb every season before the start of the hottest and sunnyest period.
1. Unscrew the four screws on the cover (FIG.4).
2. Remove the UV head and gently clean the quartz tube EXCLUSIVELY on the outside with a damp cloth or mild detergent. Rinse it thoroughly in plenty
of running water EXCLUSIVELY on the outside.
3. Remove the xing nut on the quartz glass tube (FIG.1A N ° 7 and FIG.1B N ° 7).
4. Remove the quartz glass tube and replace the UV lamp.
5. Prma to proceed with the reassembly, following the steps above, in reverse order to verify the integrity of the quartz tube.
SAFETY INSTRUCTIONS: During operation, AMTRA PREXURE gives o rays that can be harmful to the skin and eyes, so do not turn on the UVC lamp for any
reason during operation. check the operation of the lamp only through the special transparent peephole.First of touching the appliance, always remove
the plug from the socket.Check that in the transparent tube the quartz is not cracked before reassembling it. automatic protection that interrupts the
power supply of the UVC lamp when the cover is opened (FIG.4).
Warnings:
• Never place AMTRA PREXURE in water.
• Switch o the appliance if there is no water inside to avoid overheating.
WINTER RECOVERY:
If the appliance is exposed to the risk of freezing, in order to prevent breakage it is advisable not to use it during the winter period and store it thoroughly
clean in a place that is not subject to freezing.
WARRANTY: This product is guaranteed for a period of 24 months, from date of purchase, against defects in materials or workmanship. The guarantee
certicate must be completed in its entirety by the dealer and must accompany the product in the event that it is returned for repair. The warranty
consists in the replacement of defective parts. This warranty does not apply in case of improper use, nor liable for damage caused by tampering or
negligence by the purchaser. For warranty service, return the device together with the purchase receipt or equivalent, with a detailed description of
the problem. Excluded from warranty are all parts subject to wear and tear. • The manufacturing company assumes the commitment to replace at its
discretion the malfunctioning or incorrect manufacturing parts, only after careful quality control and detection of poor construction. • Always charged
to the buyer are the cost of transport and / or delivery in case of misuse of warranty terms • During the warranty period, replaced products become
property of the manufacturer. • Of this guarantee can only benet the original purchaser who has complied with the normal maintenance instructions
in the manual. Our liability on the guarantee expires when: the original owner sells the product properties, or when changes were made to the same. •
The product that is part of the defective product must be delivered to the manufacturing company for replacement; otherwise, the replaced part will be
charged to the purchaser. FAILURE TO OBSERVE THE MODES OF INTERVENTION ANDTHE USE OF LIGHTING EQUIPMENT FOR AQUARIUMS DESCRIBED INTHIS
DOCUMENTATION (INSTRUCTION AND MAINTENANCE MANUAL AND ATTACHED MANUALS) ENTAILS THE DECAY OF THE WARRANTY TERMS. If even small
parts break, replace the product. If parts of the product are swallowed, contact your vet.
RECYCLING
The appliance is marked with the appropriate symbol which indicates that the product must not be disposed of with other household waste at the end
of its life cycle, but through separate separate collection of electrical and electronic equipment.To avoid damage to the environment or to health caused
by inadequate waste disposal, the purchaser is invited to separate this appliance from other types of waste and recycle it responsibly to facilitate the
re-use of material resources. Domestic users will be able to return the appliance to the retailer when buying a new one-to-one equivalent appliance, or
contact the local oce in charge for all the information regarding recycling and recycling for this type of product. Business users must not dispose of this
appliance together with commercial waste, but through a separate collection system compatible with the European directive 2002/96 / EC. Disposal that
does not comply with current regulations is punished with administrative penalties as per current legislation.

prexure
GB
1. Screws
2. UVC header
3. O-Ring
4. UV-C lamp
5. O-Ring
6. Quartz tube
7. Quartz tube xing nut
8. Rubber seal
9. Filter cover
10. Seal
11. Hose connector (3 sizes available)
12. Pipe tting xing nuts
13. Sponges
14. Support sponges
15. Sponge xing nut
16. Closing terminal
17. O-Ring
18. Filter basket
21. Lower bearing
22. Automatic sponges cleaning system
23. Automatic cleaning motor
FIG.1A
AMTRA PREXURE 8000

prexure
GB
1. Screws
2. UVC header
3. O-Ring
4. UV-C lamp
5. O-Ring
6. Quartz tube
7. Quartz tube xing nut
8. Rubber seal
9. Filter cover
10. Seal
11. Hose connection
12. Flow indicator
13. Pipe tting xing nuts
14. Sponges
15. Support sponges
16. Lower plate sponges
17. Biological material basket grill
18. Bio-ball
19. Biological material basket
20. Closing terminal
21. O-Ring
22. Filter basket
23. Lives
24. Washer
25. Lower bearing
26. Automatic sponges cleaning system
27. Automatic cleaning engine
FIG.1B
AMTRA PREXURE12000

prexure
GB
FIG.2
FIG.3
A B C D
FIG.4

prexure
FR
RÈGLES DE SÉCURITÉ IMPORTANTES :
Cet appareil est un ltre comprenant un système autonettoyant et un stérilisateur par lampe à rayons UV-C des eaux présentes dans les bassins et
aquariums d’ornement. Cet appareil ne fonctionne que s’il est raccordé à une pompe et ne doit pas être immergé dans l’eau. Le degré de protection IP44
identie l’installation loin des éclaboussures d’eau et où il n’y a aucune probabilité d’inondation. Toute autre utilisation n’est pas autorisée et n’est donc
pas couverte par la responsabilité du fabricant. NOTES: AVANT D’EFFECTUER LES OPERATIONS D’UTILISATION ET MAINTIEN DU L’APPAREIL, LISEZ AVEC
ATTENTION LE MANUEL D’UTILISATION ET MAINTIEN. LA SOCIETÉ PRODUCTRICE NE PEUT PAS ÊTRE TENUE RESPONSABLE EN CAS D’INCENDIE, DOMMAGES
CAUSÉS PAR UNE UTILISATION INAPPROPRIÉ DU L’APPAREIL OU NON-RESPECT, MÊME PARTIEL, DE NORMES DE SECURITÉ ET PROCÉDURES D’INTERVENTION
INDIQUÉES DANS LE MANUEL. ATTENTION: L’APPAREIL PEUT ÊTRE MIS EN SERVICE SEULEMENT APRÈS AVOIR ETÉ INSTALLÉ ET CONNECTÉ CORRECTEMENT
SELON LES INSTRUCTIONS DU MANUEL QUE L’UTILISATEUR DOIT LIRE PRÉALABLEMENT.
ATTENTION: Ce symbole sur l’étiquette du produit et sur son emballage indique que ce manuel d’instructions doit être lu attentivement avant la
mise en marche ou l’entretien de l’appareil. être tenu responsable de tout dommage causé par cet appareil si vous n’avez pas lu et compris ce ma-
nuel d’instructions attentivement ou si vous ne l’avez pas suivi. An d’éviter tout type d’accident, observez attentivement les avertissements suivants (en
plus des consignes de sécurité les plus élémentaires).‘- Cet appareil peut être utilisé par des enfants de 8 ans et doivent pas jouer avec l’appareil. Le net-
toyage et l’entretien sont interdits aux enfants sans surveillance. Ne pas remplacer lem câble d’alimentation.‘-AVERTISSEMENT : Débranchez ou éteignez
tous les appareils de l’aquarium ou du bassin avant de procéder aux opérations d’entretien.‘Si la che de raccordement d’un appareil ou la prise de cou-
rant sont mouillées, éteignez l’interrupteur principal avant de débrancher le câble d’alimentation de l’appareil. ‘-Mettre l’appareil au rebut si le câble
d’alimentation est abîmé.‘- Côntroler le voltage sur l’étiquette du l’appareil at s’assures qu’il soit correct.
- Le point le plus bas du cordon doit se trouver au dessous de la prise d’électricité pour eviter que les gouttes d’eau peuvent accidentellement descendre du
câble et pénétrer dans la prise. Si le cable est mouillé, ne touchez pas la che avec les mains; avant de déconnecter l’appareil débrancher le commutateur
principal de votre maison.
- C’est important que l’appareil, comme les autres dispositifs, soit protegé en amont par un interrupteur diérentiel (disjoncteur) avec courant d’in-
tervention ind 30mA. ‘-En cas d’utilisation à l’extérieur, ne pas enterrer le câble d’alimentation, mais suivre les règles d’installation fournies par les
réglementations locales en vigueur, en consultant un installateur électrique qualié.‘-Lors de l’installation ou de l’entretien de l’appareil, ne le soulevez
pas à l’aide du cordon d’alimentation. ‘- Avant d’utiliser l’appareil, assurez-vous qu’il est correctement installé.‘-N’eectuez jamais de réparations ou de
modications techniques sur l’appareil et n’utilisez que des pièces de rechange d’origine.‘-ATTENTION : Éviter l’exposition directe au soleil. Ne pas utiliser
en cas de risque de gel : pendant la période hivernale, il est conseillé de retirer l’appareil ou de ne l’utiliser que s’il se trouve dans un environnement
protégé du risque de gel.‘-L’appareil ne doit être utilisé qu’en présence d’eau et ne doit pas sécher. Ne pas utiliser pour l’eau potable. Ne pas utiliser pour
les liquides inammables ou explosifs, abrasifs ou corrosifs. Utiliser uniquement pour le traitement de l’eau de bassin ou d’aquarium.‘-ATTENTION : ne
pas raccorder à l’alimentation en eau publique.‘-ATTENTION : en cas d’utilisation à l’extérieur selon la norme CEI 60364-7-702 en vigueur, la distance
de sécurité minimale des équipements électriques par rapport à l’eau des piscines ou des bassins de baignade doit être de 2 mètres. Placez l’appareil et
xez-le de façon stabile dans un endroit à l’abri des éclaboussures d’eau et des inondations. Côntroles préliminaires
Côntrolez possibles dommages, vériéz que les diérentes parties du l’appareil ne présentent pas dommages causés par chocs, déchirures ou abrasions.
Côntrolez en particulier: • Qu’il n’y ait pas de signes ou meurtrissures, indicatifs de chocs pendant le transport. • L’integrité des ls électriques. Procédure
de signalisation des dommages.
En cas de dommages, arrêtez la procédure de connexion et signalez la nature des dommages
relevés au bureau service clientèle de la societé productrice.
CONSERVEZ SOIGNEUSEMENT CE MODE D’EMPLOI !
-ATTENTION : Ces appareils contiennent un émetteur UV-C qui peut endommager les yeux et la peau. Une utilisation incorrecte ou l’endommagement de
leurs protections et boîtiers peut provoquer l’échappement de ces rayonnements. Par conséquent, s’ils sont endommagés, ces appareils ne doivent pas
être utilisés et doivent être jetés immédiatement. -ATTENTION : Il est interdit d’utiliser la lampe UV-C à l’extérieur de l’appareil. -ATTENTION : Ne jamais
regarder la lampe UV-C lorsqu’elle est allumée. -ATTENTION : ces appareils contiennent du verre. Manipuler avec précaution. Cher client, merci d’avoir
acheté AMTRA PREXURE, un ltre professionnel pour bassins et aquariums. AMTRA PREXURE combine la ltration biologique et mécanique avec la stéril-
isation UVC en permettant de purier l’eau et éliminer les germes pathogènes et les algues vertes en suspension qui causent la turbidité. AMTRA PREXURE
est également équipé d’un rétrolavage et d’un système de nettoyage mécanique automatique pour les éponges ltrantes.
SYMBOLES :
Entrée d’eau provenant de la pompe
Sortie d’eau ltrée vers le bassin (FIG.2 F)
Sortie d’eau sale du contre-lavage (FIG.2 G)
This manual suits for next models
4
Table of contents
Languages:
Other Amtra Water Filtration System manuals
Popular Water Filtration System manuals by other brands

Hydac
Hydac VarnishMitigation Unit Operating and maintenance instructions

Ilex
Ilex BIODRUM 20 Installation and user manual

Applied Membranes
Applied Membranes UV-SPH Series Operation & installation instructions

SpectraPure
SpectraPure PERFORMANCE PLUS MC-RODI-100-PPLUS Owner's Manual & Installation Instructions

Watts
Watts PWDWLCV2 Pure Water Installation, operation and maintenance manual

Hozelock Cyprio
Hozelock Cyprio Saturn Booster Installation and operating instructions