AND OMNIACE RA3100 User manual

RA3100
Viewer
Instruction Manual
1WMPD4004532

CAUTION
(1) Turn off the power when the operation is abnormal.
If it is impossible to trace the causes of an abnormal operation, please contact our sales
representative.
(2) The contents of this manual are subject to change without notice.
(3) This manual is copyrighted with all rights reserved. This manual may not be reproduced, modified,
or translated without the written permission of A&D Company, Limited. No parts of this manual
may be transcribed without permission.
(4) Please let us know if there are any points that are unclear or missing in this manual.
(5) A&D Company, Limited. will not be held responsible for any damages or loss of income caused by
the operation of this device or any direct, indirect, special, or inevitable damages caused by
defects in the product, even if there is notice that the corresponding damages may occur. We will
also not be held responsible for any third party claims of rights. At the same time, we will not be
held responsible for any loss of data. We will not be held responsible for any of such points as
those indicated in item (4).
2021 A&D Company, Limited.
Omniace is a registered trademark of A&D Company, Limited.
Microsoft Windows, Word, and Excel are trademarks or registered trademarks of Microsoft Corporation
in the United States and other countries.
Intel and Intel Core are trademarks of Intel Corporation in the United States and/or other countries.
Product names and company names in this manual are trademarks or registered trademarks of their
respective owners in Japan and other countries.
Introduction
3
Introduction
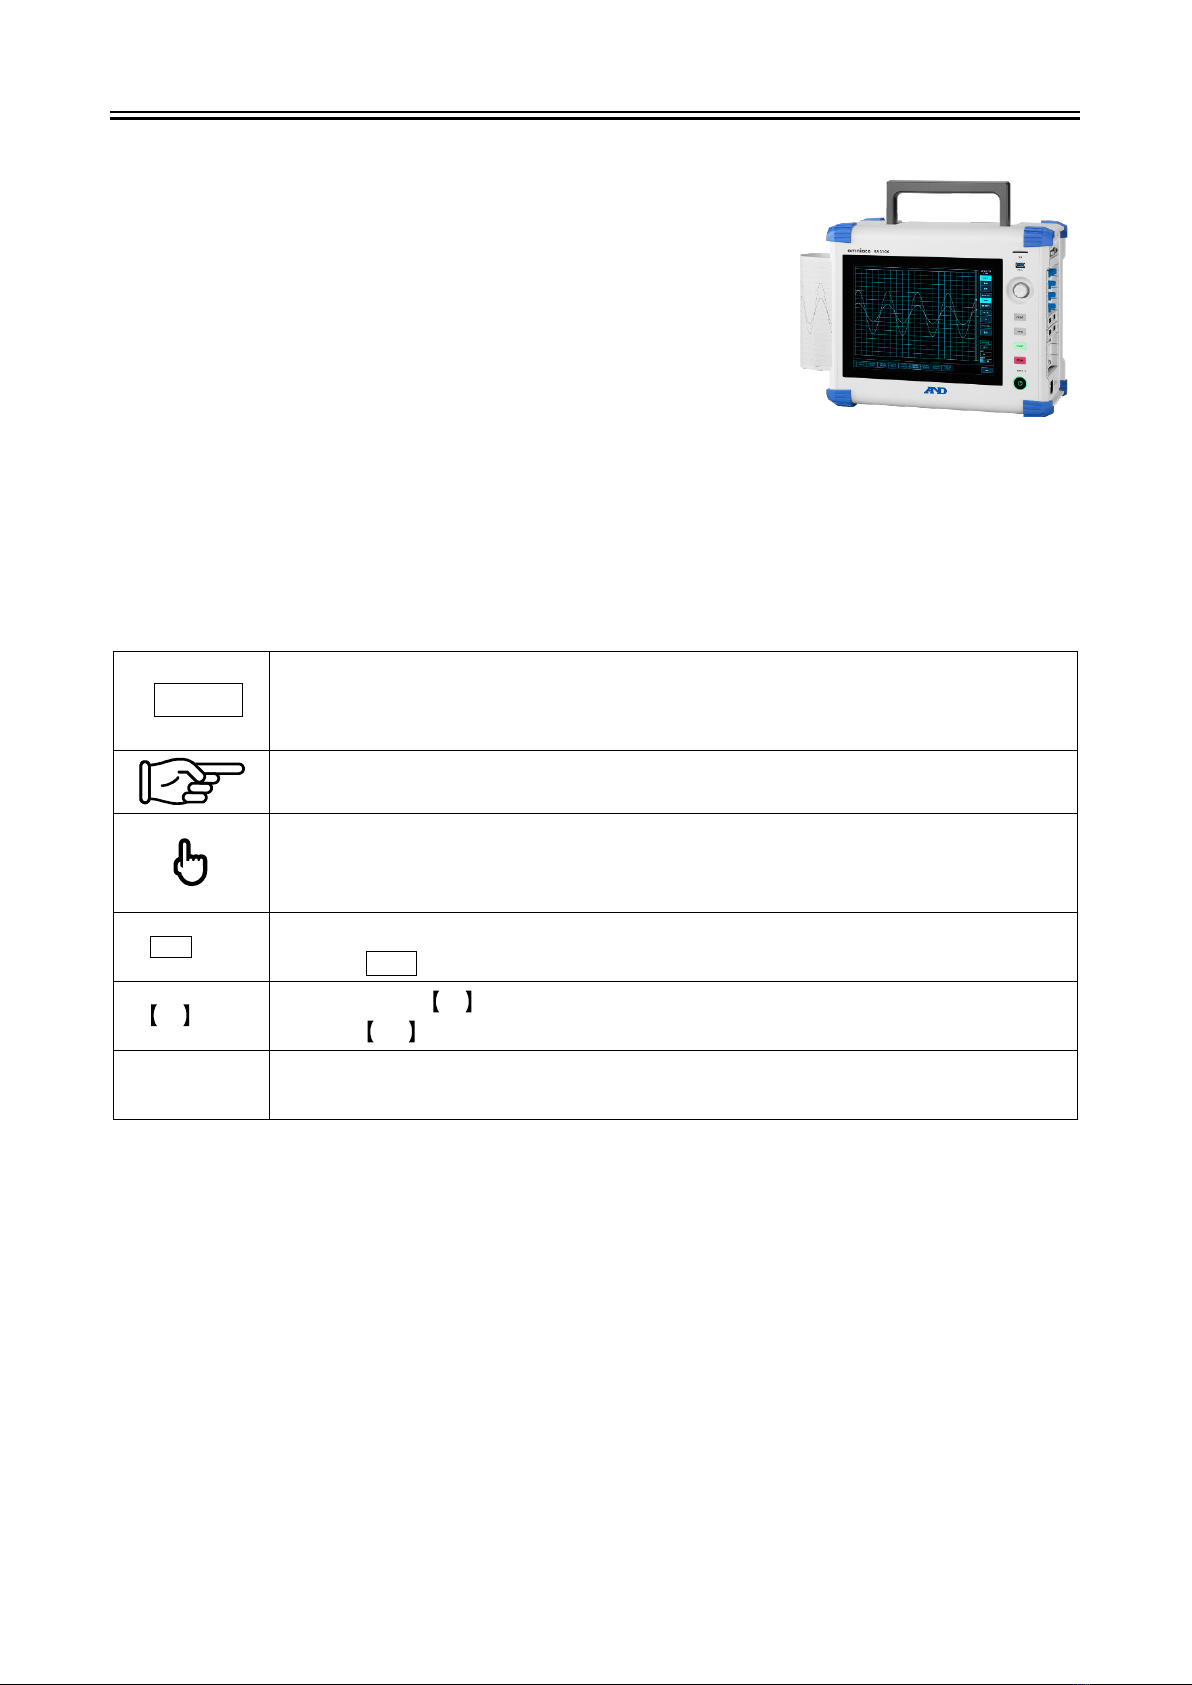
RA3100 Viewer is computer software for displaying the waveforms of
recorded data exported to external media from our data acquisition
product OMNIACE RA3100.
RA3100
Symbols in This Manual
Terms and symbols used in this manual denote as follows.
Note
This indicates a condition or practice that could result in converted files being overwritten
if the software is misused due to neglect of a Note, as well as measurement limitations
and additional explanations.
Reference page
A tap is the act of lightly touching an item such as a key displayed on the screen with a
finger.
Example Used for selecting or setting screen keys.
key Enclosed characters represent a key name on the operation panel.
Example OK key
key Text enclosed in indicates touch panel keys displayed on the screen.
Example CH
key
[ ] screen Text enclosed in [ ] indicates the text of items on the screen.
Example [Main] screen

CONTENTS
4
CONTENTS
Introduction ........................................................................................................................................................ 3
Symbols in This Manual ...................................................................................................................................3
CONTENTS ....................................................................................................................................................... 4
1. Environment ....................................................................................................................................... 5
1.1. System Requirements....................................................................................................................5
1.2. Setup Method .................................................................................................................................5
1.2.1. Windows Settings ........................................................................................................................5
1.2.2. Extracting the ZIP File .................................................................................................................7
1.3. Installation Method .........................................................................................................................8
2. Functions ............................................................................................................................................ 9
2.1. Differences between the RA3100 and RA3100 Viewer .................................................................9
2.1.1. Hamburger Button .......................................................................................................................9
2.2. Mouse Operations (Used as Substitute for the Touch Panel and Jog Dial).................................10
2.2.1. Basic Operations .......................................................................................................................10
3. Usage Method .................................................................................................................................. 12
3.1. Flow of Operations .......................................................................................................................12
3.2. Copying Recorded Data from the RA3100 to a USB Stick ..........................................................13
3.2.1. RA3100 Main Unit .....................................................................................................................13
3.3. Copying Recorded Data on a USB Stick to a Windows PC.........................................................14
3.4. Starting the Software....................................................................................................................15
3.5. Configuring the Recorded Data Folder ........................................................................................15
3.6. Specifying Replay Data................................................................................................................16
3.7. Replay Function and Operations..................................................................................................16
3.8. Capturing and Printing Waveform Images ...................................................................................17
3.9. Saving Display Settings ...............................................................................................................17
3.10. Closing the RA3100 Viewer .........................................................................................................17
1.Environment -1.1.System Requirements
5
1. Environment
This section describes the system requirements and installation procedure.
1.1. System Requirements
Item
Contents
Operating system
Windows 10 x64 (64-bit) (Ver1809 or later)
Japanese, English, Korean, Chinese (Traditional)
For other languages, the software is displayed in English.
CPU
Intel Core i series
Memory
1 GB or more of free memory
Display
Resolution of 1280 x 1024 or higher
Perform installation and execute the RA3100 Viewer using an account with administrator privileges.
The RA3100 Viewer does not support multiple accounts. It does not operate with accounts other than
the account used for installation.
1.2. Setup Method
Download the RA3100ViewerSetup_vx.x.x.zip file from our website.
Japan: https://www.aandd.co.jp/support/soft_download/industrial.html
Overseas: https://www.aandd.jp/support/industrial/soft_download.html
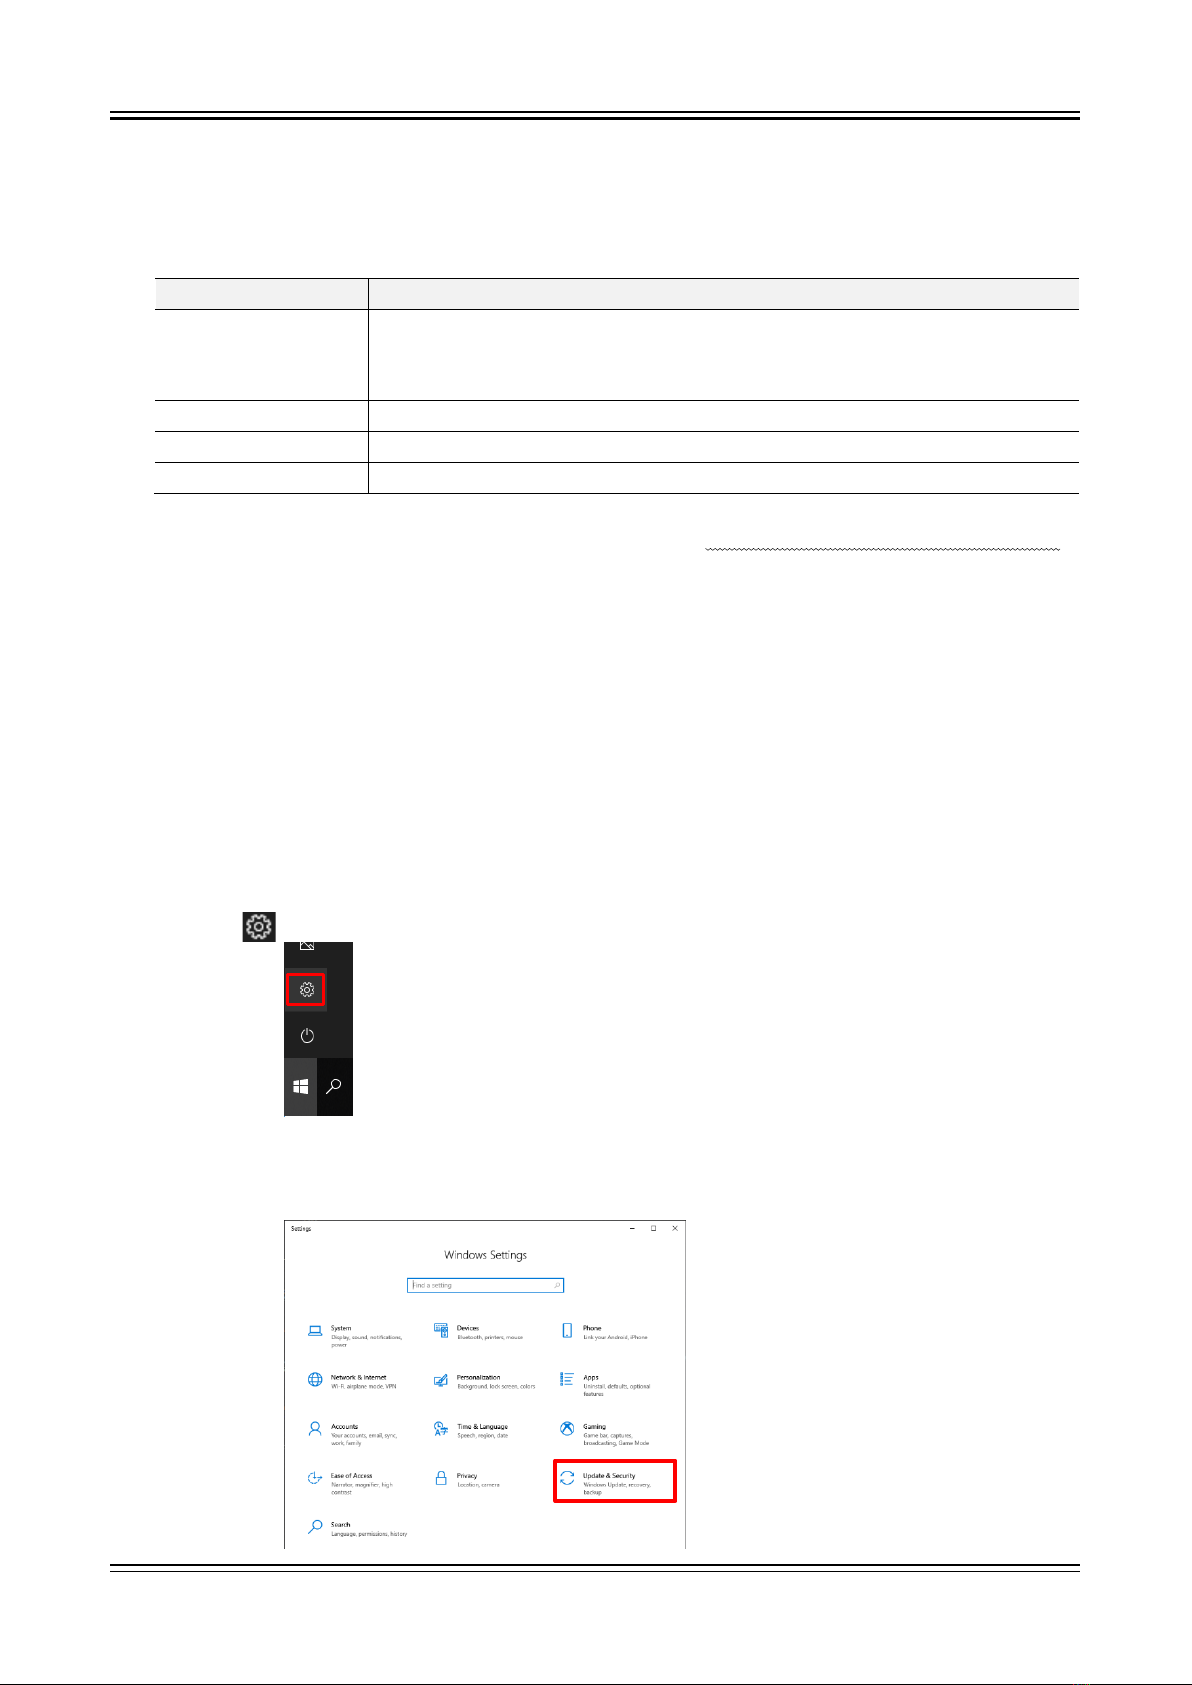
1.2.1. Windows Settings
Windows settings must be configured before installing the software.
Click the button in the Windows Start menu.
The [Windows Settings] screen is displayed.
Click [Update & Security] to open the [Update & Security] screen.

1.Environment -1.2.Setup Method
6
The settings differ according to the version of Windows.
Enable [Developer Mode] or select [Sideload apps].
If [Developer mode] is set instead of [Sideload apps], [Developer mode] is acceptable.
The [Turn on developer mode?] dialog is displayed.
Click the [Yes] button.
If you selected [Sideload apps], the [Turn on app sideloading?] dialog is displayed.

1.Environment -1.2.Setup Method
7
1.2.2. Extracting the ZIP File
Use the standard software of Windows 10 or other compression/extraction software to extract the file.
The procedure for using the standard software of Windows 10 is indicated below.
Right-click the ZIP file in Explorer, and select [Extract All].
The [Extract Compressed (Zipped) Folders] screen is displayed.
Specify the destination by entering a path in the area above indicated in red or clicking the [Browse]
button.
Click the [Extract] button to extract the files.

1.Environment -1.3.Installation Method
8
1.3. Installation Method
Double-click the RA3100ViewerSetup_vx.x.x.exe file extracted in the previous step.
The [Select Setup Language] screen is displayed.
Click the [OK] button.
To create a shortcut on the desktop, select [Create a shortcut on your desktop], and click [Next].
Click the [Install] button to start installation.
When the [Completing the RA3100Viewer Setup Wizard] screen is displayed, installation is complete.
Select [Yes, restart the computer now], and click [Finish].

2.Functions -2.1.Differences between the RA3100 and RA3100 Viewer
9
2. Functions
Operate the playback function of the RA3100 main unit (to perform operations such as displaying
waveforms and searching) on a Windows PC.
For details on the playback function, see the instruction manual included with the main unit.
2.1. Differences between the RA3100 and RA3100 Viewer
An example of displaying the waveform for the same recorded data with the RA3100 and RA3100
Viewer is indicated below.
The differences in functions are as follows.
(1) The RA3100 Viewer has a title bar and hamburger button on the top of the screen.
(2) The touch panel and jog dial operations of the RA3100 are performed using the mouse with the RA3100
Viewer.
RA3100 RA3100 Viewer
2.1.1. Hamburger Button
The part circled in red on the top left of the [RA3100 Viewer] screen is called a "hamburger button".
Click it to display the menu.
Menu
Description
Select Record Folder Selects the recorded data folder.
For details, see "3.5. Configuring the Recorded Data Folder".
Version Displays the version information of this software.
Close
Closes the RA3100 Viewer.

2.Functions -2.2.Mouse Operations (Used as Substitute for the Touch Panel and Jog Dial)
10
2.2. Mouse Operations (
Used as Substitute for the Touch Panel and Jog Dial
)
2.2.1. Basic Operations
The Ctrl, Shift, and Alt keys on the keyboard can be combined with mouse wheel operations to
configure settings and move or enlarge/reduce the waveform.
Press the Z key at the same time to reduce the step for updating. (This enables fine adjustment.)
Example 1) Enlarging the waveform X axis with fine adjustment
Press the Ctrl + Z keys and rotate the mouse wheel up
Example 2) Moving the waveform Y axis with coarse adjustment
Press the Alt key and rotate the mouse wheel down
Note
When the waveform cannot be moved, it means that there is no data that can be displayed.
Action
Mouse operation and behavior
Changing a setting
(mouse wheel)
Click the CH button on the right side of the [RA3100 Viewer] screen to
display the channel settings. Click a setting to change the frame to orange
and enable the setting value to be changed using mouse wheel operations.
For example, selecting [Color] enables the color to be changed and selecting
[Disp. pos.] enables the ratio number of the display width to be changed.
Changing a setting
(dialog)
Right-click a setting to display the dialog corresponding to that setting.
- Selection palette dialog
Select a setting value to reflect the setting and close the dialog. Click
outside the dialog to return without changing the setting.
- Number entry dialog
Operate the buttons on the screen or perform keyboard entry to enter a
number. When performing keyboard entry, press the [Enter] key to reflect
the setting value and close the dialog.
2.Functions -2.2.Mouse Operations (Used as Substitute for the Touch Panel and Jog Dial)
11
Action
Mouse operation and behavior
Changing the X axis
scale of the waveform
Ctrl key +rotate mouse wheel up: Enlarge scale
Ctrl key +rotate mouse wheel down: Reduce scale
Changing the Y axis
scale of the waveform
Shift key +rotate mouse wheel up: Enlarge scale
Shift key +rotate mouse wheel down: Reduce scale
Moving the waveform
in the X axis direction
Rotate mouse wheel up: Move left
Rotate mouse wheel down: Move right
Moving the waveform
in the Y axis direction
Alt key +rotate mouse wheel up: Move up
Alt key +rotate mouse wheel down: Move down
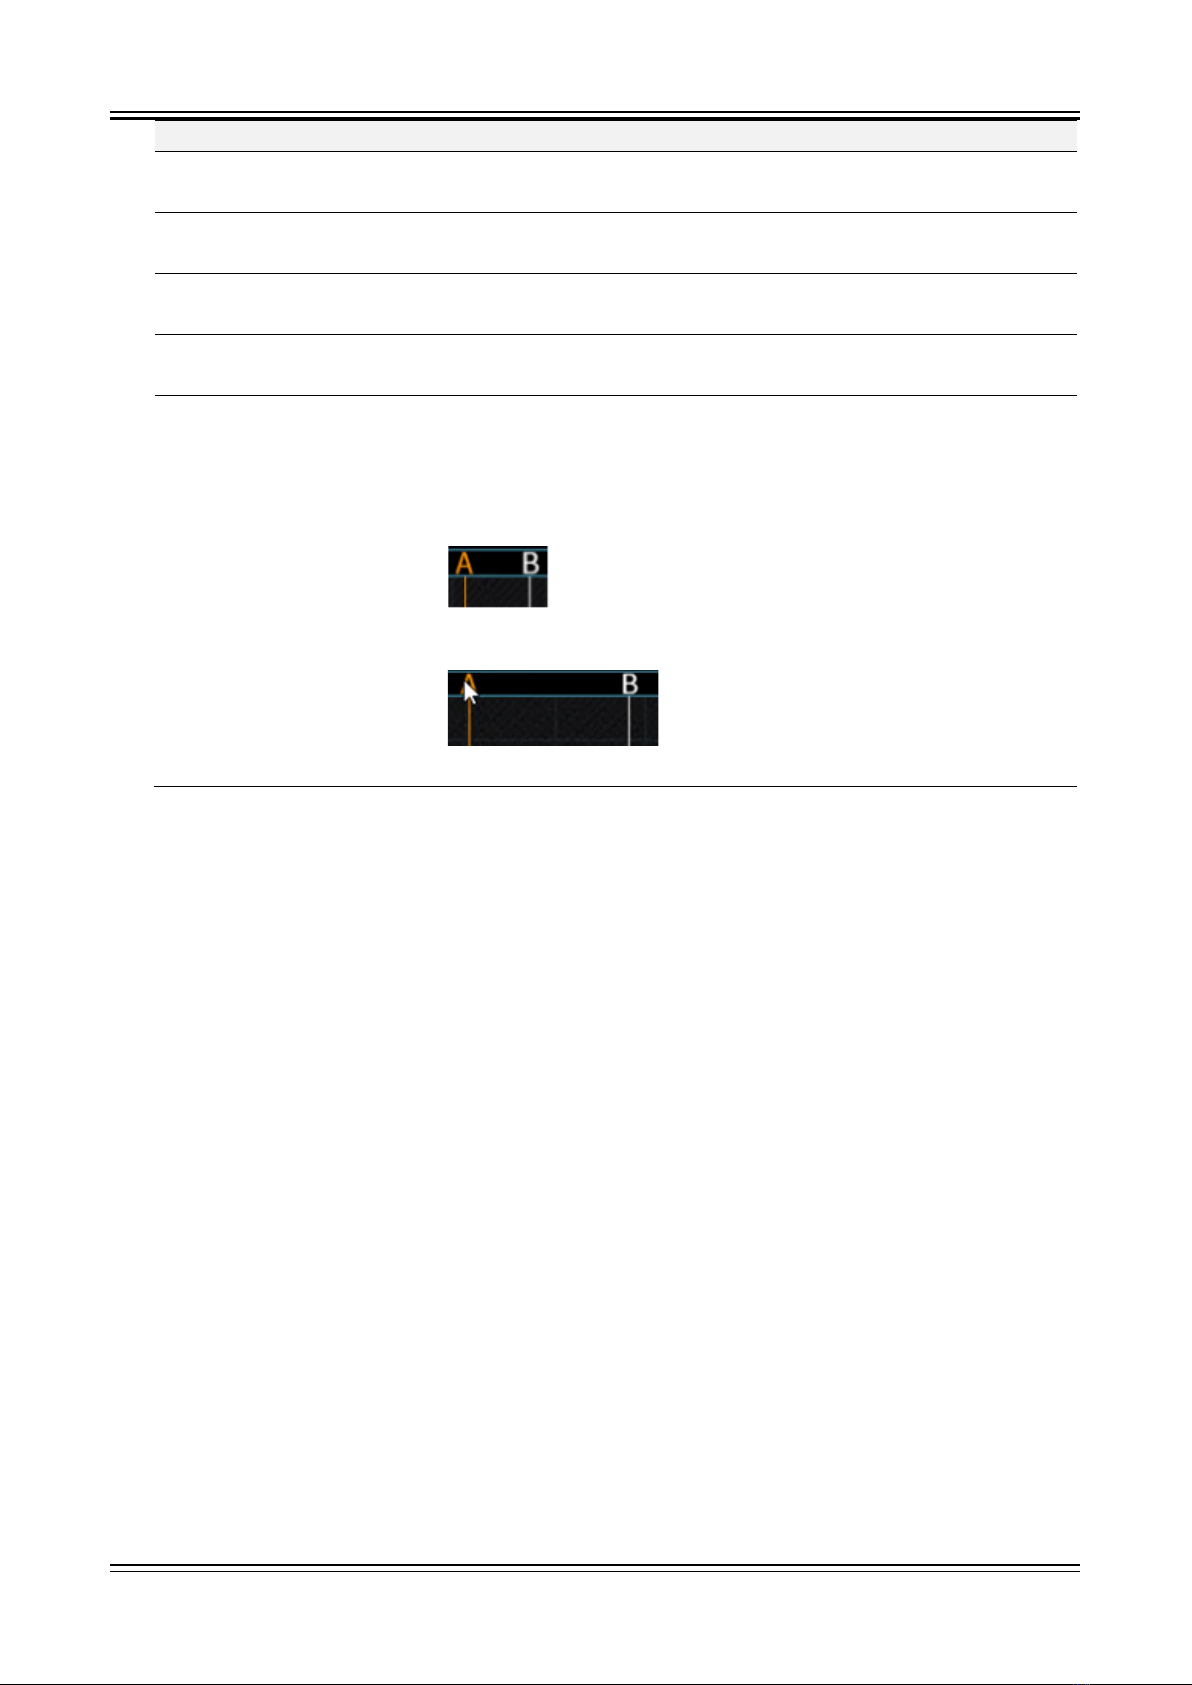
Moving the cursor
Click the cursor A or B mark above the waveform area to change the cursor
line to orange. The specified cursor line can be moved by operating the
mouse wheel.
Rotate mouse wheel up: Move left
Rotate mouse wheel down: Move right
You can also drag the specified cursor line left or right to move it.

3.Usage Method -3.1.Flow of Operations
12
3. Usage Method
3.1. Flow of Operations
Overview
Reference
Operation (1)
This operation is performed on the RA3100 main unit.
The specified recorded data is copied to a USB stick or
an SD memory card on a dedicated operation screen.
"3.2. Copying Recorded
Data from the RA3100 to a
USB Stick"
Operation (2)
This operation is performed on the RA3100 main unit.
The operator inserts the USB stick or SD memory card
into a Windows PC and manually copies the RA3100
folder in Explorer.
Or, executes the software on the USB stick without
copying the files.
"3.3. Copying Recorded
Data on a USB Stick to a
Windows PC"
Operation (3) Start the RA3100 Viewer. "3.4. Starting the Software"
Operation (4) Specify the RA3100 folder from operation (2). "3.5. Configuring the
Recorded Data Folder"
Operation (5) Select the data to replay from the recorded data. "3.6. Specifying Replay
Data"
Operation (6) Perform operations such as enlarging and moving the
waveform.
"3.7. Replay Function and
Operations"
Operation (7) This section describes the procedure for copying the
waveform image to create a report.
"3.8. Capturing and Printing
Waveform Images"
Operation (8) You can change the waveform position and waveform
color and overwrite the settings.
"3.9. Saving Display
Settings"
Operation (9) Closes the RA3100 Viewer. "3.10. Closing the RA3100
Viewer"

3.Usage Method -3.2.Copying Recorded Data from the RA3100 to a USB Stick
13
3.2. Copying Recorded Data from the RA3100 to a USB Stick
Connect external media (such as an SD memory card or
USB stick) to the "3.2.1. RA3100 Main Unit".
Tap the 【Import/Export】key on the bottom right of the
[Record management] screen to display the external media
selection dialog and select the target external media.
Tap the【OK】key to switch to the [Import/Export] screen.
Recorded data list on internal SSD
Recorded data list on external media
Place a check mark (✔)on the data to back up
Place a check mark (✔)in the selection field ofthe data to back up and tap the【Export】key in the
center to export the recorded data.
3.2.1. RA3100 Main Unit
Front view
SD card slot
USB
USB
Right view

3.Usage Method -3.3.Copying Recorded Data on a USB Stick to a Windows PC
14
3.3. Copying Recorded Data on a USB Stick to a Windows PC
Connect the USB stick or SD card that the data was copied to in "3.2. Copying Recorded Data from the
RA3100 to a USB Stick" to a Windows PC.
Copy the entire "RA3100" folder on the USB stick or SD card to a local disk in Explorer.
Drag and drop
3.Usage Method -3.4.Starting the Software
15
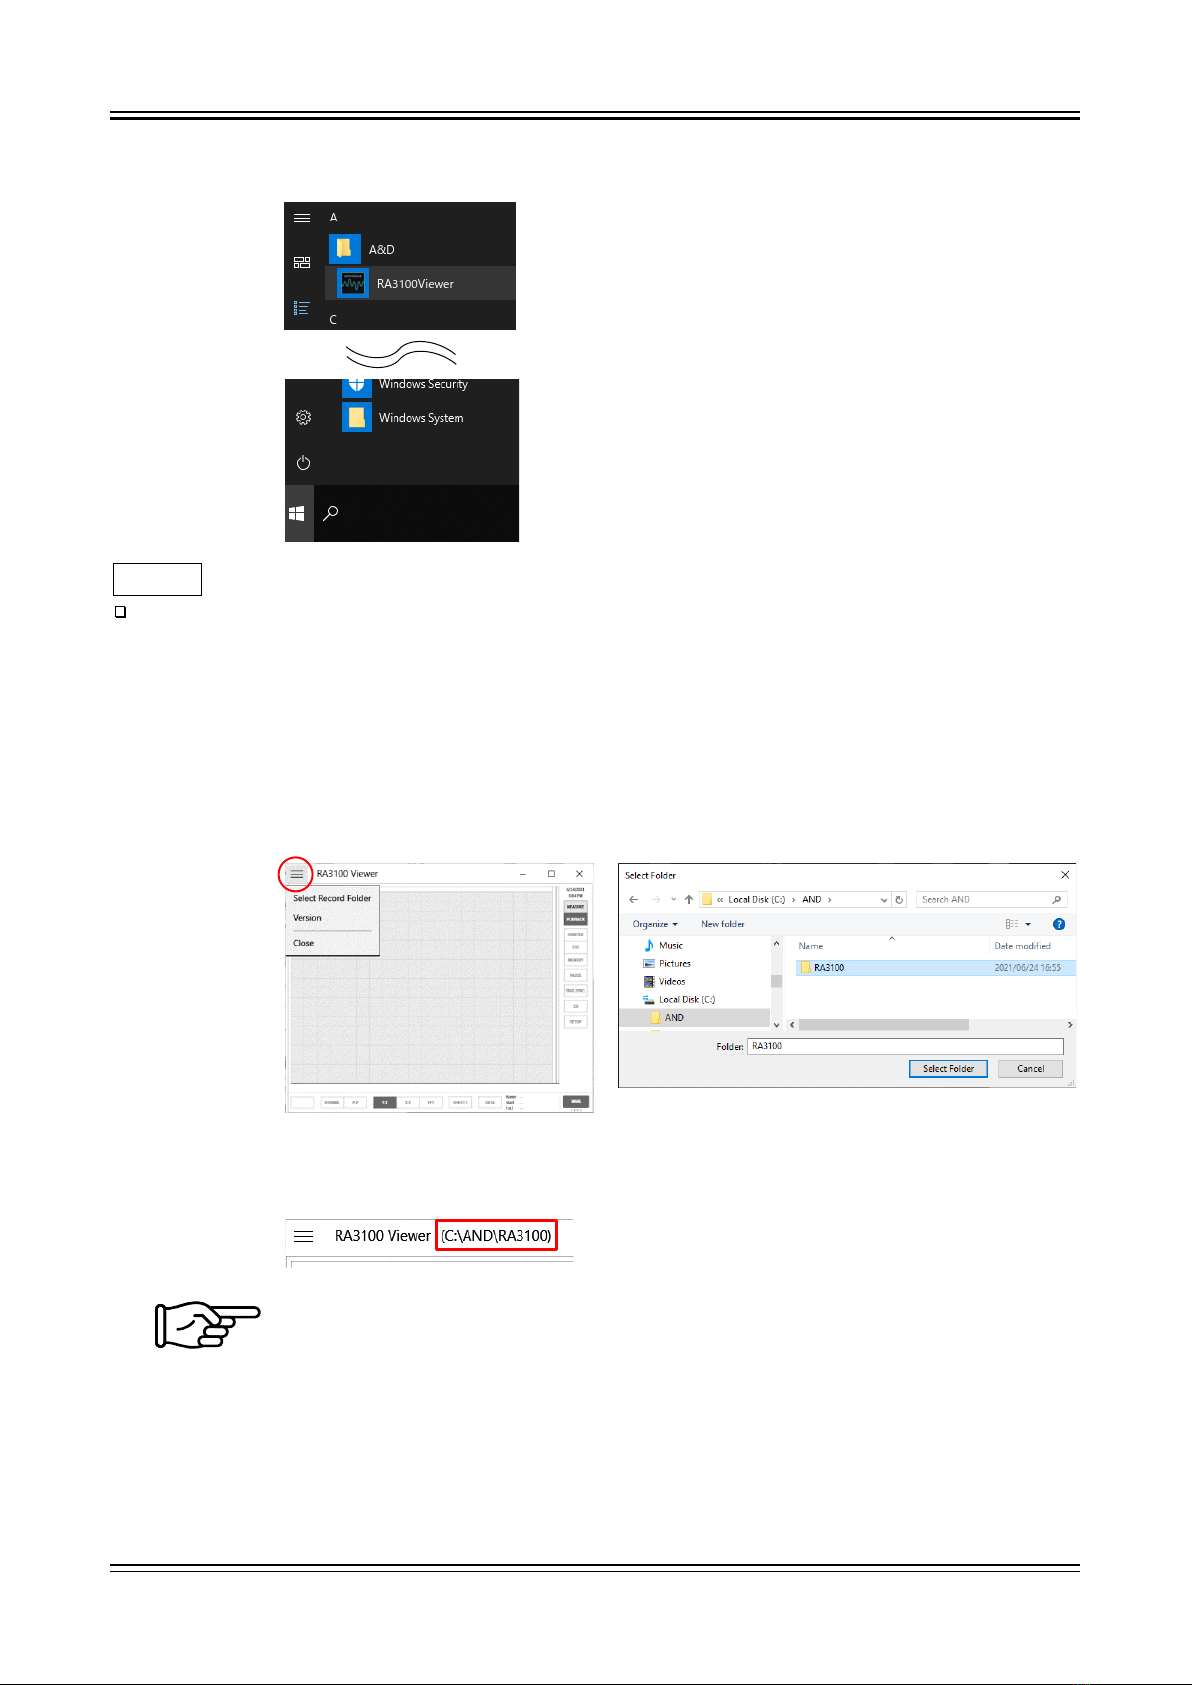
3.4. Starting the Software
Click the [A&D] - [RA3100Viewer] in the Windows Start menu.
Note
The display of the Windows Start menu differs according to the version of Windows and the
environment settings.
3.5. Configuring the Recorded Data Folder
Click the hamburger button (circled in red) on the top left of the [RA3100 Viewer] screen.
Select [Select Record Folder] from the displayed menu to open the folder selection dialog.
Select the RA3100 folder, and press the [Select Folder] button.
The selected path is displayed in the title bar on the top of the screen.
For information on the RA3100 folder, see "3.3. Copying Recorded Data on a USB Stick
to a Windows PC".
3.Usage Method -3.6.Specifying Replay Data
16
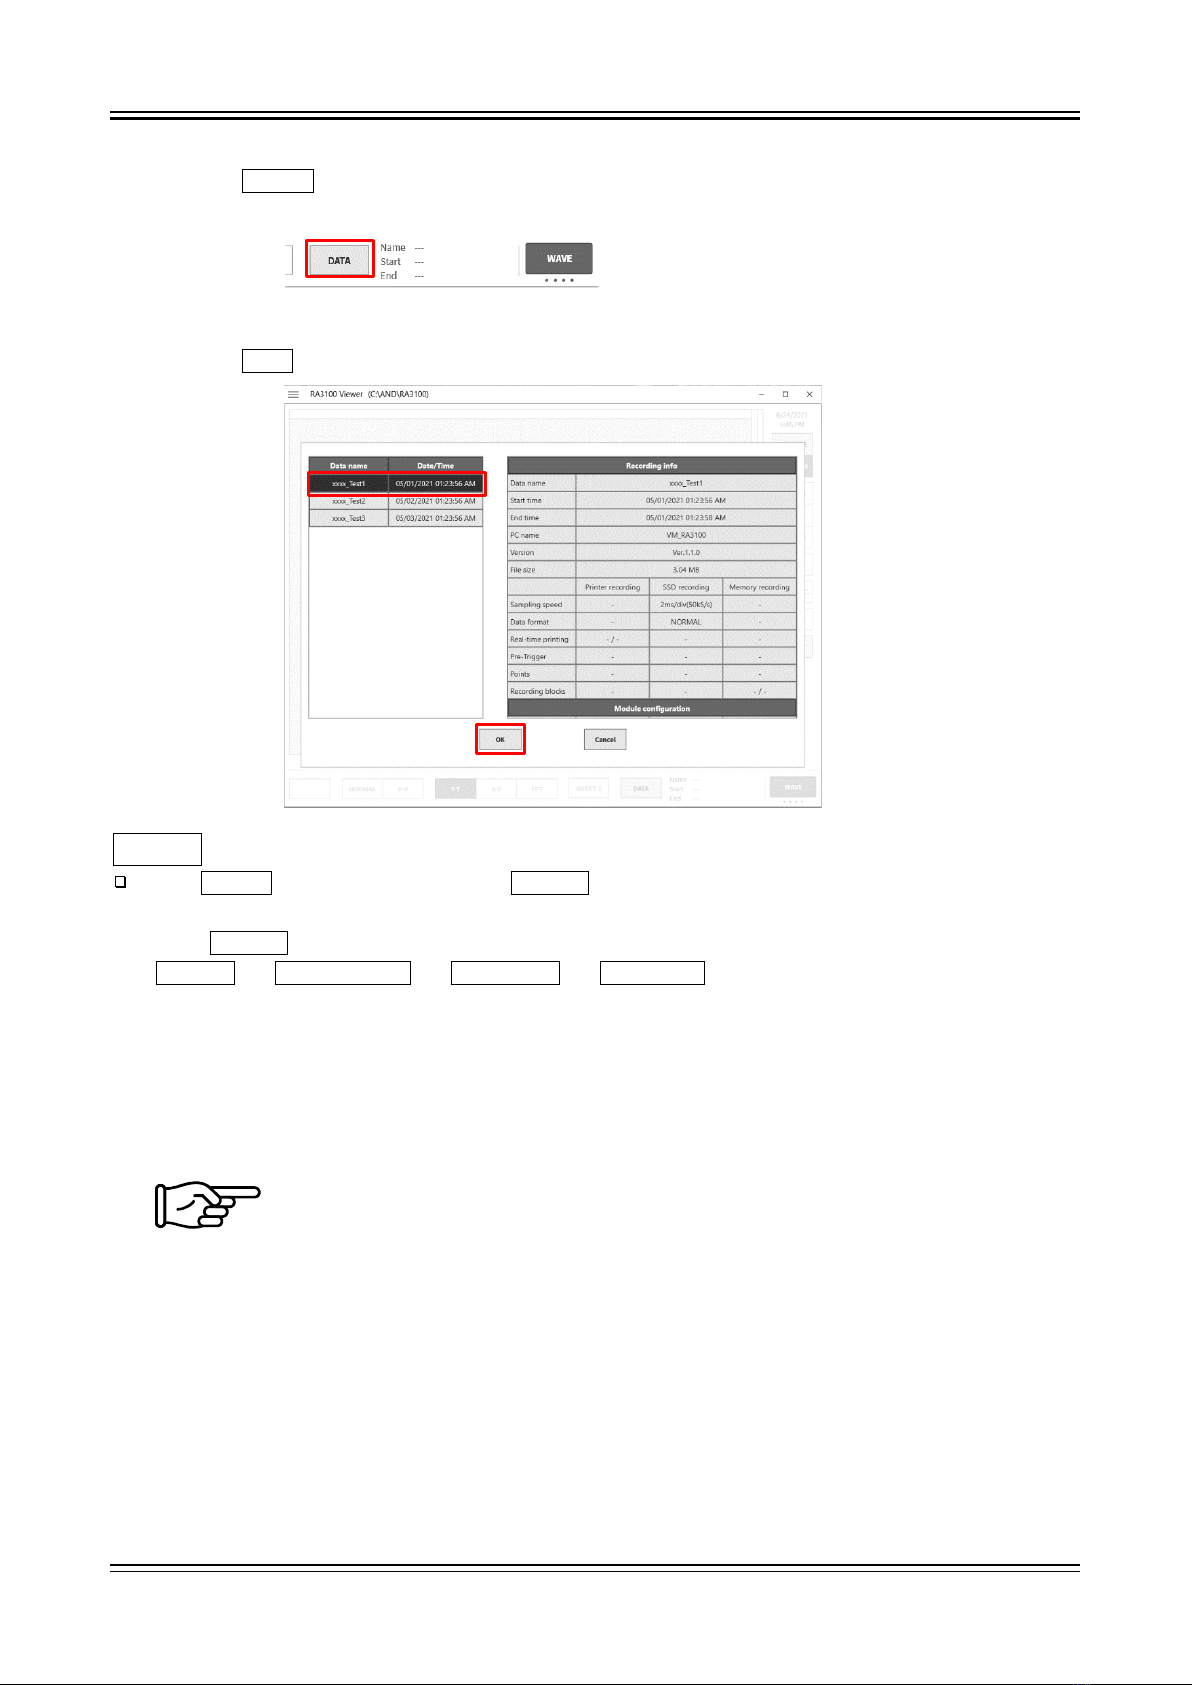
3.6. Specifying Replay Data
Click the DATA button on the bottom right of the [RA3100 Viewer] screen.
The recorded data list is displayed.
Select recorded data from the data names on the left to display the recording information on the right.
Click the OK button to confirm the data to replay.
Note
The DATA button is displayed when WAVE is displayed as the function on the bottom right of the
screen.
Click WAVE to switch the functions in the following order.
WAVE ⇒THUMBNAIL ⇒CURSOR ⇒PENREC
3.7. Replay Function and Operations
The replay function is the same as the RA3100 main unit. See the instruction manual included with the
main unit.
Refer to "2.2. Mouse Operations (Used as Substitute for the Touch Panel and Jog Dial)",
as there are differences between the input device of the RA3100 main unit and the PC.

3.Usage Method -3.8.Capturing and Printing Waveform Images
17
3.8. Capturing and Printing Waveform Images
Use the standard Windows capture function. To print captured images, paste the image to an application
such as Word or Excel and use the print function of that application.
Capture range
Operation
Entire [RA3100 Viewer]
screen
You can press the Alt + PrintScreen keys with the [RA3100 Viewer]
screen on top to copy the entire screen to the clipboard.
Part of [RA3100 Viewer]
screen
Press the Windows + Shift + S keys to specify a range to copy to the
clipboard.
3.9. Saving Display Settings
The save confirmation dialog is displayed when performing the operation in "3.6. Specifying Replay
Data" or "3.10. Closing the RA3100 Viewer".
Click the OK button to overwrite the settings such as the waveform position and waveform color.
3.10. Closing the RA3100 Viewer
Select [Close] from the "2.1.1. Hamburger Button" menu.
Or, click [X] on the top right of the [RA3100 Viewer] screen.

18
MEMO

Viewer
RA3100
Instruction Manual 1WMPD4004532 1st Edition

A&D Company
, Limited
3
-23-14 Higashi-Ikebukuro, Toshima-ku, Tokyo 170-0013,JAPAN
Telephone: [81] (3) 5391
-6132 Fax: [81] (3) 5391-1566
A&D ENGINEERING, INC
.
1756 Automation Parkway, San Jose, California 95131
, U.S.A.
Telephone
: [1] (408) 263-5333 Fax: [1] (408)263-0119
A&D INSTRUMENTS
LIMITED
Unit 24/26 Blacklands Way, Abingdon Business Park, Abingdon,
Oxfordshire OX14 1DY United Kingdom
Telephone: [44] (1235) 550420
Fax: [44] (1235) 550485
A&D AUSTRALASIA PTY LTD
32 Dew St
reet, Thebarton, South Australia 5031,AUSTRALIA
Telephone: [61] (8) 8301
-8100 Fax: [61] (8) 8352-7409
A&D KOREA Limited
한국에이.엔.디(주)
서울특별시
영등포구 국제금융로6길33 (여의도동) 맨하탄빌딩 817 우편 번호 07331
(
817, Manhattan Bldg., 33. Gukjegeumyung-ro 6-gil, Yeongdeungpo-gu, Seoul, 07331 Korea )
전화
: [82] (2) 780-4101 팩스: [82] (2) 782-4264
OOO
A&D RUS OOO "ЭЙ энд ДИ РУС"
Почтовый
адрес:121357, Российская Федерация, г.Москва, ул. Верейская, дом 17
Юридический адрес: 117545, Российская Федерация, г. Москва, ул. Дорожная, д.3,
корп.6, комн. 8б
(
121357, Russian Federation, Moscow, Vereyskaya Street 17 )
тел.:
[7] (495) 937-33-44 факс: [7] (495) 937-55-66
A&D
Instruments India Private Limited
(
509, Udyog Vihar, Phase-, Gurgaon -122016, Haryana, India )
: [91] (124) 4715555 : [91] (124) 4715599
A&D SCIENTECH TAIWAN LIMITED
. A&D台灣分公司 艾安得股份有限公司
台湾台北市中正區青島東路
5號4樓
(
4F No.5 Ching Tao East Road, Taipei Taiwan R.O.C. )
Tel
: [886](02) 2322-4722 Fax : [886](02) 2392-1794
A&D INSTRUMENTS (THAILAND) LIMITED
บริษัท เอ แอนด ดี อินสทรูเมนท (ไทยแลนด) จํากัด
168/16
หมูที่ 1 ตําบลรังสิต อําเภอธัญบุรี จังหวัดปทุมธานี 12110 ประเทศไทย
(
168/16 Moo 1, Rangsit, Thanyaburi, Pathumthani 12110 Thailand )
Tel
: [66] 20038911
Table of contents
Other AND Measuring Instrument manuals


Popular Measuring Instrument manuals by other brands


MKS
MKS Granville-Phillips Mini-Convectron 275... quick start guide

RC Electronics
RC Electronics Eagle manual

RTW
RTW 1204A operating manual

Satec
Satec EM132 Installation and operation manual

International Light Technologies
International Light Technologies ILT 950 installation guide

Kambic
Kambic OB-15/2 BB user manual


