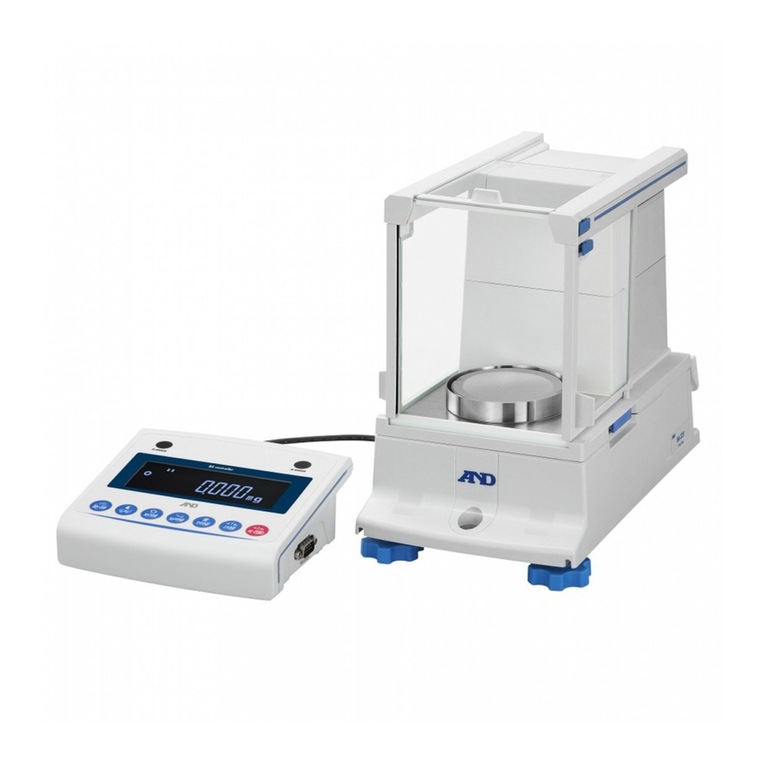
AND GX-L Series User manual

Quick Start Guide
GX-L/GF-L Series
High Capacity Precision Balance .................................................... 3
Guide de Démarrage Rapide
Série GX-L/GF-L
Balance de Précision de Grande Capacité....................................14
Kurzanleitung
Baureihe GX-L/GF-L
Hochleistungs-Präzisionswaage....................................................26
Guía de Inicio Rápido
Serie GX-L/GF-L
Báscula de Precisión de Alta Capacidad....................................... 38
Guida Introduttiva Rapida
Serie GX-L/GF-L
Bilancia di Precisione ad Alta Capacità ......................................... 50
快速入門指南
GX-L/GF-L 系列
高秤量精密天平 .............................................................................................62
1WMPD4004695
English (EN)
Français (FR)
Deutsch (DE)
Español (ES)
Italiano (IT)
中文 (CT)

Note for Precautions
CAUTION A potentially hazardous situation which, if not avoided, may result in personal
injury or property damage.
CAUTION
Describes the points to be careful for appropriate use.
NOTE Describes ‘highly possible to be handled inappropriately’ or ‘general advice in
using the device’
About This Manual
(1) No parts of this manual may be reproduced without permission. This manual may not be copied, modified,
or translated without the written permission of A&D Company, Limited.
(2) The contents of this manual are subject to change without notice.
(3) Please contact A&D if you notice any uncertainty, errors, omissions, etc. in this manual.
(4) A&D bears no liability for direct, indirect, special, or consequential damages due to the operation of this
product, even if advised of the possibility of such damage. Furthermore, A&D assumes no liability for
claims of rights from third parties. Concurrently, A&D assumes no liability whatsoever for data losses
regardless of (3) above.
2023 A&D Company, Limited

EN.
3
1. Introduction
Thank you for purchasing a GX-L/GF-L series precision balance from A&D. This manual describes the basic functions
and operations of the balance. For more details, refer to the manual described in "1-1. List of Functions Explained in a
Separate Manual".
1-1. List of Functions Explained in a Separate Manual
The functions and operating procedures of the balance are explained in detail in documents that supplement this
manual. Download the following from our website, https://www.aandd.jp.
[GX-L/GF-L Series Instruction Manual]
Instruction manual for fully understanding and utilizing GX-L/GF-L series precision electronic balances.
Scan this QR code for the manual.
2. Installation and Precautions
The balance is a precision instrument. Unpack it carefully. The packing contents defer by balance model.
Refer to the images on the following page as you check to make sure all items are present. Keep the packing
materials to use when transporting the balance in the future.

EN.
4
(1) Standard type
GX-12001L/22001L/32001L/32001LD/42001L/62001L/62000L/102000L
GF-12001L/22001L/32001L/62000L
NOTE
When moving the arm, loosen the knob. When fixating the arm, fasten the knob.
CAUTION
Use the dedicated AC adapter for the balance.
Do not use the included AC adapter for other devices.
Using the incorrect AC adapter may cause performance issues in the balance or other devices.
The dustproof and waterproof structure may cause difficulty when inserting the USB cable, so make sure it is
fully plugged in. Put on a cap when not in use.
The dustproof and waterproof structure may cause difficulty when inserting the AC adapter, so make sure it is
fully plugged in.
When using the balance under conditions requiring dustproof and waterproof performance, attach the terminal
cover or use a waterproof RS-232C cable (AX-KO2737-500).

EN.
5
(2) Removable Display Unit Type
GX-32001LS/32001LDS/62001LS/62000LS/102000LS
CAUTION
Use the dedicated AC adapter for the balance.
Do not use the included AC adapter for other devices.
Using the incorrect AC adapter may cause performance issues in the balance or other devices.
If you have multiple balances, make sure the serial numbers of the balances and display you intend to
use are identical before connecting them via the cable. Failure to do so may result in performance issues.
The dustproof and waterproof structure may cause difficulty when inserting the USB cable, so make sure
it is fully plugged in. Put on a cap when not in use.
The dustproof and waterproof structure may cause difficulty when inserting the AC adapter, so make sure
it is fully plugged in.
When using the balance under conditions requiring dustproof and waterproof performance, attach a
terminal cover or use a waterproof RS-232C cable (AX-KO2737-500).
(2)
(1)

EN.
6
2-1. Installation Considerations, Preparation and Precautions
Prepare the following installation conditions in order to ensure optimal balance performance.
The best operating temperature is about 20ºC ± 2ºC at about 45% to 60% relative humidity.
Install the balance in a location that is free of dust.
Install the balance on a firm and horizontal floor (not a soft floor).
The weighing table should be solid (an anti-vibration table or stone table is ideal).
Make sure that the location where the balance is installed is not at an angle.
Avoid vibration. Corners of rooms on the first floor are best, as they are less prone to vibration.
Install the balance where it is not affected by breezes from air conditioners, etc.
Install the balance where it is not exposed to direct sunlight.
Install the balance away from equipment which produces magnetic fields.
Level the balance by adjusting the leveling feet so that the
bubble is centered in the black circle of the bubble spirit level.
Make sure to warm up the balance before use for at least an
hour with the AC adapter connected.
To ensure weighing accuracy, adjust the sensitivity of the balance
with the AC adapter connected before using it for the first time or
after moving it to another location. For how to adjust sensitivity, refer
to "7. Sensitivity Adjustment/Calibration Test" in the separate
instruction manual.
The dustproof and waterproof level of the balance is
equivalent to IP65, and its second digit, "5", corresponds to
"having no harmful influence from direct jets of water."
Washing the balance with high-pressure water or submerging
it in water may cause water to enter the balance, leading to
malfunction.
When installing and using the balance under conditions requiring dustproof and waterproof
performance, make sure that the AC adapter plug is fully inserted into the AC adapter jack and that the
terminal cover is attached to the RS-232C interface or use a waterproof RS-232C cable (AX-KO2737-
500).
If the RS-232C terminal cover is removed or you are not using a waterproof RS-232C cable (AX-
KO2737-500), the balance will not be protected from dust or water.
CAUTION
Do not install the balance where corrosive or flammable gas is present.
Rear of
the main unit
OK
Not OK
Leveling foot
Bubble spirit level

EN.
7
3. Display Symbols and Key Operations
Display symbols
Blinking display contents
No.
Description
1
Processing indicator
2
Stabilization indicator
3
USB connecting indicator
4
Lit: Power source on standby
Blinking: Automatic sensitivity adjustment
5
Displays weighing value, stored data, and item name
6
Units
7
Net indicator
8
Gross indicator
9
Number of static data (statistical calculation mode
)
Data memory number
Displays the percentage of weight data relative to the weighing capacity (capacity indicator)
Displays the setting value of the function settings
10 Response indicators (light for approximately 30 seconds after weighing starts)
11
Comparator indicators
12
Display holding indicator
13
ISD shock indicator
14
Gross zero indicator
15
Lit: Interval memory on standby
Blinking: Interval memory active
16
Preset tare indicator

EN.
8
Key operations
Key operations affect how the balance functions. Normal key
operations during measurement are "press and release the key
immediately" or "press the key". Do not "press and hold the key (for
two seconds) unless specifically required.
Press the key
(Press and release
the key immediately)
Press and hold the key
for 2 seconds
Key When pressed and released
When pressed and held
(for 2 seconds)
Turns the display on and off. Only the standby indicator is displayed when the display is
turned off. Weighing mode is enabled when the display is turned on. When the password
function is enabled, the password input display is displayed. Refer to "16-2. How to Input
the Password at the Start of Weighing" in the separate instruction manual.
This ON:OFF key is always enabled. Pressing the ON:OFF key during operation will
interrupt operation and turn the display off.
Adjusts the sensitivity of the balance using
the internal mass (GX-L series only).
Displays other sensitivity adjustment menu
items.
Switches the weighing unit stored in the
function table.
Enters the self check function mode.
Refer to "6-2. Self Check
Function/Automatic Setting of
Minimum Weighing Value by ECL".
In weighing mode, turns the minimum
weighing value on and off.
In counting or percent mode, enters
sample storing mode.
Enters function table mode. Refer to "9.
Function Table".
Runs the repeatability check function when
pressed and held for another 2 seconds
after the function table menu is displayed
(GX-L series only). Refer to "17.
Repeatability Check Function" in the
separate instruction manual.
Depending on function table settings,
either stores the weighing data or outputs
the data to a printer when the value is
stable (factory default = output).
Enters the mode for changing the unit
mass registration number in counting
mode.
Depending on changes to the function
table:
Outputs "Title block" and "End block" for
GLP/GMP reports.
Displays the data memory menu.
Enters the mode for the density number
in flow measurement.
Sets the display to zero.
Refer to "About zero-point operation", "About tare", "About measurement range" in "4-2.
Basic Operation (g, kg, ct, mom)" in the separate manual.

EN.
9
4. Sensitivity Adjustment
4-1. Automatic Sensitivity Adjustment (GX-L Series Only)
This function automatically adjusts the sensitivity of the balance according to ambient temperature
change, set time or interval time using the internal mass. For details, refer to “7-1. Automatic Sensitivity
Adjustment” in the separate manual.
4-2.
Sensitivity Adjustment Using the Internal Mass (GX-L Series Only)
Sensitivity adjustment using the internal mass can be performed with one key press.
1. Connect the AC adapter and warm up the balance for at least 30 minutes with nothing on the weighing pan.
2. Press the CAL key. The balance displays .
3. The sensitivity of the balance is adjusted using the internal mass. Do not allow vibration or drafts to affect
the balance.
4. After sensitivity adjustment, if GLP output is set, a “sensitivity adjustment report” is output or stored to
data memory.
5. The balance returns to weighing mode automatically.
About the internal mass
The value of the internal mass may change due to factors such as the operating environment and aging.
Correct the internal mass value as necessary. Refer to "7-6 Correcting the Internal Mass Value (GX-L Series
Only)" in the separate manual.
Since the internal mass is about 1 kg, the possibility of error may increase as the weighing value increases.
To maintain the weighing accuracy, perform the sensitivity adjustment using an external weight periodically,
as described in "4-3. Sensitivity Adjustment Using an External Weight".
This indicates that the balance is importing calibration data. Do not allow
vibration or drafts to affect the balance while this indicator is displayed.
After calibration, the balance returns to indicate the previous display.

EN.
10
4-3. Sensitivity Adjustment Using an External Weight
This function adjusts the sensitivity of the balance using an external weight.
1. Connect the AC adapter and warm
up the balance for at least 30
minutes with nothing on the
weighing pan.
2. Press and hold the CAL key for 2
seconds.
3. Continue holding the key until
is displayed. Once
is displayed,
release the key.
4. Make sure that nothing is on the
weighing pan and press the
PRINT key.
5. The balance measures the zero
point. Do not allow vibration and
the like to affect the balance.
6. The balance displays the weight
value (g).
7. Place an external weight on the
weighing pan and press the
PRINT key. The balance
measures the external weight.
8. The balance measures the
sensitivity adjustment value. Do not
allow vibration and the like to affect
the balance.
9. Remove the external weight from the
weighing pan.
10. After sensitivity adjustment, if GLP
output is set, a "sensitivity
adjustment report" is output or
stored to data memory.
11. The balance returns to weighing
mode automatically.
12. Place the external weight on the
weighing pan again to check if it is
within the set value ± 2 digits*1. If it
is not within that range, start over
from the first step of this procedure
in the appropriate ambient
conditions.
Press and hold for
2 seconds
Continue holding
(Displayed only on GX-L series)
Release
When external weight
is changed
When external weight
is not changed
Refer to “7-5. How to Set
the External Weight Value”
in the separate manual.
The zero point is
being measured
The external weight
value is displayed
The sensitivity
adjustment value is
being measured
GLP output
*1 “Digit” is the minimum display unit.
For example, if minimum display is 0.1 g, 1 digit is equal to 0.1 g.

EN.
11
5. Error Codes
Display Error code Description
Internal error
If this error continues to be displayed, please request repair from your
local dealer.
EC, E11
Stability error
The balance is unable to stabilize due to the environment. Check
around the pan. Prevent vibration, drafts, temperature changes, static
electricity and magnetic fields from affecting the balance. Refer to "2-
3. During Use" in the separate manual. To return to weighing mode,
press the CAL key.
Outside of the setting range
The data to be stored is outside of the setting range. Set again within
the setting range.
Balance internal memory element malfunction
If this error continues to be displayed, please request repair from your
local dealer.
EC, E16
Internal mass error (GX-L series only)
Applying the internal mass does not yield a change in the mass value
as specified. Confirm that there is nothing on the pan and perform the
operation from the beginning again.
EC, E17
Internal mass error (GX-L series only)
The internal mass application mechanism does not function properly.
Perform the operation from the beginning again. If the problem
persists, please request repair from your local dealer.
Abnormality in the internal memory data of the balance
If this error continues to be displayed, please ask for repair to your
local dealer.
Balance internal memory abnormality
If this error continues to be displayed, please request repair from your
local dealer.
EC, E20
Sensitivity adjustment weight error (Positive value)
The sensitivity adjustment weight is too heavy. Check around the
pan. Check the mass value of the weight.
To return to the weighing mode, press the CAL key.
EC, E21
Sensitivity adjustment weight error (Negative value)
The sensitivity adjustment weight is too light. Check around the pan.
Check the mass value of the weight.
To return to the weighing mode, press the CAL key.
Overload error
A sample beyond the balance weighing capacity has been placed on
the pan. Remove the sample from the pan. If the problem persists,
please request repair from your local dealer.
Weighing pan error
The mass value is too light. Check that the weighing pan is installed
correctly. Set the weighing pan correctly. Adjust the sensitivity of the
balance.

EN.
12
Display Error code Description
Sample mass error
The sample is too light to be stored as a sample mass for counting
mode or percent mode. Use a larger sample.
Unit mass error
The sample unit mass for counting mode is too light. Storing and
using it for counting will cause a counting error. Add samples to reach
the number indicated and press the PRINT key. Pressing the
PRINT key without adding samples will put the balance in counting
mode, but to ensure accurate counting, be sure to add samples.
Clock battery error
The clock backup battery has been depleted. Press any key and set
the time and date. Even if the clock backup battery is depleted, the
clock and calendar function works normally as long as the balance is
powered with the AC adapter. If this error appears frequently, contact
your local A&D dealer.
Power supply voltage fault
The voltage supplied from the AC adapter is abnormal. Make sure
you are using the AC adapter supplied with the balance.
ECL repeatability error
With the self-check function, the standard deviation (SD) of
repeatability with electronically controlled load (ECL) exceeded 50
digits*1. Check the installation environment of the balance.
ELC repeatability error
ELC minimum weighing value (reference value) error
Refer to "6-2. Self Check Function/Automatic Setting of
Minimum Weighing Value by ELC” in the separate manual.
Full memory
The number of stored weighing values has reached the upper limit. In
order to store new weighing values, it is necessary to delete data.
Refer to "11. Data Memory" in the separate manual.
Full memory
The number of items stored in your sensitivity adjustment/calibration
history has reached 50. When new items are added, older items are
deleted. Refer to "11. Data Memory" in the separate manual.
Level check
Check the bubble level on the main unit. Rotate the leveling feet to
center the bubble in the circle.
Either adjusting the bubble level or pressing any key other than the
ON:OFF key will clear the warning.
Alternate (Blink)
Alternate (Blink)
*1 “Digit” is the minimum display unit.
For example, if minimum display is 0.1 g, 1 digit is equal to 0.1 g (50 digits are 5.0 g).

EN.
13
6. Specifications
GX-L series
(with internal mass)
GX-12001L
GX-22001L
GX-32001L
GX
-
32001LS
GX-32001LD
GX
-
32001LDS
GX-42001L
GF-L series
(general)
GF-12001L
GF-22001L
GF-32001L
Weighing capacity
12 kg
22 kg
32 kg
32 kg
42 kg
Maximum display 12.0084 kg 22.0084 kg 32.0084 kg
32.008 kg
6.2009 kg
*1
42.0080 kg
Readability
0.1 g
1 g / 0.1g
0.5 g
Repeatability
(Standard deviation)
0.1 g 0.5 g / 0.1 g 0.5 g
Linearity
±0.2 g
±1 g / ±0.2 g
±1 g
Accuracy right after
sensitivity adjustment
using the internal
mass
*2
±1.0 g ±1.5 g
Dust and water
protection
Complies with IP65
GX-L series
(with internal mass)
GX-62001L
GX-62001LS
GX-62000L
GX-62000LS
GX-102000L
GX-102000LS
GF-L series
(general)
GF-62000L
Weighing capacity
62 kg
62 kg
102 kg
Maximum display
62.0084 kg
62.084 kg
102.084 kg
Readability
0.1 g
1 g
1 g
Repeatability
(Standard deviation)
0.2 g 0.7 g 1 g
Linearity
±0.5 g
±1 g
±2 g
Accuracy right after
sensitivity adjustment
using the internal
mass
*2
±3.0 g ±5 g ±10 g
Dust and water
protection
Complies with IP65
*1 Weighing is enabled in a precision range, even with high tare values (smart range function).
*2 Values when there are no adverse effects due to abrupt changes in temperature, drafts, magnetic fields or
static electricity (GX-L series only).

FR .
14
1. Introduction
Nous vous remercions d'avoir acheté une balance de précision des séries GX-L/GF-L auprès d’A&D. Ce
manuel décrit les fonctions et les opérations de base de la balance. Pour plus de détails, reportez-vous au
manuel décrit dans « 1-1. Liste des fonctions expliquées dans un manuel séparé ».
1-1. Liste des fonctions expliquées dans un manuel séparé
Les fonctions et les procédures d'utilisation de la balance sont expliquées en détail dans les documents qui
complètent ce manuel. Téléchargez les documents suivants à partir de notre site Web, https://www.aandd.jp.
[Manuel d’instructions des séries GX-L/GF-L]
Manuel d'instructions pour comprendre et utiliser pleinement les balances électroniques de précision
des séries GX-L/GF-L.
Scannez ce code QR pour obtenir le manuel. (EN)
2. Installation et précautions
La balance est un instrument de précision. Déballez-la soigneusement. Le contenu de l'emballage diffère
selon le modèle de balance. Reportez-vous aux images de la page suivante afin de vérifier que tous les
éléments soient présents. Conservez les matériaux d'emballage pour les utiliser lors du transport ultérieur de
la balance.

FR .
15
(1) Type standard
GX-12001L/22001L/32001L/32001LD/42001L/62001L/62000L/102000L
GF-12001L/22001L/32001L/62000L
REMARQUE
Pour déplacer le bras, desserrez le bouton. Lors de la fixation du bras, fixez le bouton.
ATTENTION
Utilisez l’adaptateur secteur dédié pour la balance.
N'utilisez pas l'adaptateur secteur fourni pour d'autres appareils.
L'utilisation d'un adaptateur secteur incorrect peut entraîner des problèmes de performance de la
balance ou d'autres appareils.
La structure étanche à la poussière et à l'eau peut causer des difficultés lors de l'insertion du câble
USB ; veillez donc à vous assurer qu'il est complètement branché. Mettez un capuchon lorsque vous
n'utilisez pas l'appareil.
La structure étanche à la poussière et à l'eau peut causer des difficultés lors de l'insertion de
l'adaptateur secteur ; veillez donc à vous assurer qu'il est complètement branché.
Lorsque la balance est utilisée dans des conditions nécessitant une étanchéité à la poussière et à
l'eau, fixez le cache-bornes ou utilisez un câble RS-232C étanche (AX-KO2737-500).

FR .
16
(2) Type d'affichage amovible
GX-32001LS/32001LDS/62001LS/62000LS/102000LS
ATTENTION
Utilisez l’adaptateur secteur dédié pour la balance.
N'utilisez pas l'adaptateur secteur fourni pour d'autres appareils.
L'utilisation d'un adaptateur secteur incorrect peut entraîner des problèmes de performance de la
balance ou d'autres appareils.
Si vous avez plusieurs balances, assurez-vous que les numéros de série des balances et de l'écran
que vous avez l'intention d'utiliser sont identiques avant de les raccorder par le câble. Si ce n'est pas
le cas, des problèmes de performance peuvent survenir.
La structure étanche à la poussière et à l'eau peut causer des difficultés lors de l'insertion du câble
USB ; veillez donc à vous assurer qu'il est complètement branché. Mettez un capuchon lorsque vous
n'utilisez pas l'appareil.
La structure étanche à la poussière et à l'eau peut causer des difficultés lors de l'insertion de
l'adaptateur secteur ; veillez donc à vous assurer qu'il est complètement branché.
Lorsque la balance est utilisée dans des conditions nécessitant une étanchéité à la poussière et à
l'eau, installez un cache-bornes ou utilisez un câble RS-232C étanche (AX-KO2737-500).
(2)
(1)

FR .
17
2-1. Considérations, préparation et précautions relatives à
l'installation
Préparez les conditions d'installation suivantes afin d'assurer des performances optimales de la balance.
La meilleure température de fonctionnement est d'environ 20 ºC ±2 ºC avec une humidité relative de
45 % à 60 %.
Installez la balance dans un endroit à l'abri de la poussière.
Installez la balance sur un sol ferme et horizontal (pas sur un sol mou).
La table de pesée doit être solide (une table anti-vibrations ou une table en pierre est idéale).
Veillez à ce que l'endroit où la balance est installée ne soit pas incliné.
Évitez les vibrations. Les coins des pièces du rez-de-chaussée sont les meilleurs, car ils sont moins
sujets aux vibrations.
Installez la balance à un endroit où elle n'est pas perturbée par les courants d'air des climatiseurs, etc.
Installez la balance à un endroit où elle n’est pas exposée à la lumière directe du soleil.
Installez la balance loin des équipements qui produisent des champs magnétiques.
Mettez la balance à niveau en ajustant les pieds de réglage de
manière à ce que la bulle soit centrée dans le cercle noir du
niveau à bulle.
Avant d'utiliser la balance, veillez à la réchauffer pendant au
moins une heure avec l'adaptateur secteur branché.
Pour garantir la précision de la pesée, réglez la sensibilité de
la balance avec l'adaptateur secteur branché avant de l'utiliser
pour la première fois ou après l'avoir déplacée dans un autre
emplacement. Pour savoir comment régler la sensibilité,
reportez-vous à la section « 7. Réglage de la sensibilité /
Test d’étalonnage » dans le manuel d'instructions séparé.
Le niveau d’étanchéité à la poussière et à l’eau de la balance
est équivalent à IP65, et son deuxième chiffre, « 5 »,
correspond à « ne subit aucune influence préjudiciable sous
un jet d’eau direct ». Si vous lavez la balance avec de l'eau à
haute pression ou si vous l'immergez dans l'eau, de l'eau
risque d’entrer dans la balance et de provoquer des
dysfonctionnements.
Lors de l’installation et de l’utilisation de la balance dans des conditions nécessitant des performances
étanches à la poussière et à l’eau, assurez-vous que la fiche de l’adaptateur secteur est entièrement
insérée dans la prise de l’adaptateur secteur et que le cache-bornes est fixé à l’interface RS-232C ou
que le câble RS-232C étanche (AX-KO2737-500) est utilisé.
Si le cache-borne RS-232C est retiré ou si vous n'utilisez pas un câble RS-232C étanche (AX-
KO2737-500), la balance ne sera pas protégée contre la poussière ou l'eau.
ATTENTION
N'installez pas la balance dans un endroit où des gaz corrosifs ou inflammables sont présents.
Arrière de
l’unité
principale
Correct
Incorrect
Pied de nivellement
Niveau à bulle d’air

FR .
18
3. Symboles d'affichage et fonctionnement des touchess
Symboles d'affichage
Contenu de l'affichage clignotant
N°
Description
1
Indicateur de traitement
2
Indicateur de stabilisation
3
Indicateur de connexion USB
4
Allumé : source d'alimentation en veille
Clignotant : réglage automatique de la sensibilité
5
Affiche la valeur de pesée, les données enregistrées et le nom de l'élément
6
Unités
7
Indicateur net
8
Indicateur brut
9
Nombre de données statistiques (mode de calcul statistique)
Numéro de la mémoire de données
Affiche le pourcentage des données de poids par rapport à la capacité de pesée (indicateur de
capacité)
Affiche la valeur de réglage des paramètres de la fonction
10 Indicateurs de réponse (allumés pendant environ 30 secondes après le début de la pesée)
11
Indicateurs de comparaison
12
Indicateur de maintien de l'affichage
13
Indicateur de choc ISD
14
Indicateur de zéro brut
15
Allumé : mémoire à intervalles en veille
Clignotant : mémoire à intervalles en veille
16
Indicateur de tare préréglée

FR .
19
Opérations clés
L’utilisation des touches affecte le fonctionnement de la balance.
L’utilisation normale des touches pendant la mesure consiste à
« appuyer et relâcher la touche immédiatement » ou « appuyer
sur la touche ». N’appuyez pas sur la touche de manière
prolongée (pendant 2 secondes), à moins que cela ne soit
spécifiquement requis.
Appuyez sur la touche
(Appuyez et relâchez
immédiatement la
touche)
Appuyez sur la touche
et maintenez-la
enfoncée
pendant 2 secondes
Touche Lorsqu’elle est pressée et relâchée
Lorsqu’elle est pressée et maintenue
(pendant 2 secondes)
Allume et éteint l’écran. Seul l’indicateur de veille s’affiche lorsque l’écran est éteint. Le
mode de pesée est activé lorsque l’écran est allumé. Lorsque la fonction de mot de passe
est activée, l'écran de saisie du mot de passe s'affiche. Reportez-vous à « 16-2. Comment
saisir le mot de passe au début de la pesée » dans le manuel d'instructions séparé.
Cette touche ON:OFF est toujours activée. Si vous appuyez sur la touche ON:OFF en
cours de fonctionnement, vous interrompez le fonctionnement et éteignez l'écran.
Ajuste la sensibilité de la balance en
utilisant la masse interne (série GX-L
uniquement).
Affiche d'autres éléments du menu de
réglage de la sensibilité.
Permet de commuter les unités de pesée
enregistrées dans le tableau des fonctions.
Permet de saisir le mode de fonction d'auto-
vérification.
Reportez-vous à « 6-2. Autocontrôle
Fonction/réglage automatique de
la valeur de pesée minimale par ECL ».
En mode de pesée, active et désactive la
valeur minimale de pesée.
En mode comptage ou pourcentage,
entre en mode de stockage de
l'échantillon.
Accède au mode tableau des fonctions.
Reportez-vous à « 9. Tableau des
fonctions ».
Exécute la fonction de vérification de la
répétabilité lorsque vous appuyez sur
cette touche et la maintenez enfoncée
pendant 2 secondes supplémentaires
après l'affichage du menu du tableau des
fonctions (série GX-L uniquement).
Reportez-vous à « 17. Fonction de
contrôle de la répétabilité » dans le
manuel d'instructions séparé.
Selon les paramètres du tableau de
fonctions, soit mémorise les données de
pesée, soit les transmet à une imprimante
lorsque la valeur est stable (réglage d'usine
= sortie).
Permet de saisir le mode permettant de
changer le numéro d'enregistrement de la
masse de l'unité en mode de comptage.
Selon les changements apportés au
tableau des fonctions :
Édite le « bloc de titre » et le « bloc de
fin » pour les rapports BPL/BPF.
Affiche le menu de la mémoire de
données.
Permet de saisir le mode pour le
nombre de densité dans la mesure du
flux.
Définit l'affichage sur zéro.
Reportez-vous aux sections « À propos du fonctionnement du point zéro », « À propos de
la tare », « À propos de la plage de mesure » dans « 4-2. Opérations de base (g, kg, ct,
mom) » dans le manuel séparé.

FR .
20
4. Réglage de la sensibilité
4-1. Réglage automatique de la sensibilité (série GX-L
uniquement)
Cette fonction permet d'ajuster automatiquement la sensibilité de la balance en fonction des variations de
température ambiante de définir l'heure ou l'intervalle de temps à l'aide de la masse interne. Pour plus de
détails, reportez-vous à la section « 7-1. Réglage automatique de la sensibilité » dans le manuel séparé.
4-2. Réglage de la sensibilité à l'aide de la masse interne (série
GX-L uniquement)
Le réglage de la sensibilité à l’aide de la masse interne peut être effectué en appuyant sur une seule touche.
1. Branchez l’adaptateur secteur et faites chauffer la balance pendant au moins 30 minutes sans rien sur
le plateau de pesée.
2. Appuyez sur la touche CAL . La balance affiche .
3. La sensibilité de la balance est ajustée à l'aide de la masse interne. Ne laissez pas les vibrations ou les
courants d'air affecter la balance.
4. Après le réglage de la sensibilité, si la sortie BPL est définie, un « rapport de réglage de la sensibilité »
est émis ou enregistré dans la mémoire de données.
5. La balance revient automatiquement en mode de pesée.
This manual suits for next models
1
Table of contents
Languages:
Other AND Scale manuals
AND
AND EK-ilEW-i Series User manual
AND
AND PLUS CONNECT UC-350BLE User manual
AND
AND UO-200 Parts list manual
AND
AND HL-200 User manual
AND
AND FG-CWP Series User manual

AND
AND UC-324TMW User manual

AND
AND HR-60 User manual
AND
AND SJ-3000WP/-BT User manual
AND
AND PREMIUM UC-352CNBLE User manual
AND
AND BA-TE Series User manual
