AndyMark Simple Base User manual

www.andymark.com 1
Simple Base User Guide
Specifications and Instructions for
assembling an AndyMark Simple Base
with 8” Mecanum heels

www.andymark.com 2
Contents Page
1. Specifications 2
2. Bill of Material 3
3. Layout Drawing 4
4. Assem ly Instructions for 8” Mecanum Wheel 5
5. Assem ly Instructions for Simple Base 9
6. Encoder Assem ly onto Tough ox Nano 13
1. Specifications
a. Size
i. Length = 35.5 inches
ii. Width = 25.75 inches
iii. Height = 8 inches
b. Weight:
i. 44 pounds
c. Load Capacity
i. 25 pounds, evenly distributed and supported near wheels
d. Motors
i. 2.5” CIM Motors (4), 12VDC, 337 watts power (each)
e. Materials
i. Aluminum side rails and gearbox housing
ii. Steel gears
iii. 7 a durometer rubber rollers
iv. Aluminum wheel side plates
v. Smoked polycarbonate top sheet ( .12 inch thick)
vi. Perforated PVC bottom sheet ( .12 inch thick)
f. Estimated maximum speed:
i. 1 feet/sec
g. Estimated maximum pushing power
i. 11 % of weight (~5 pounds without any load)

www.andymark.com 3
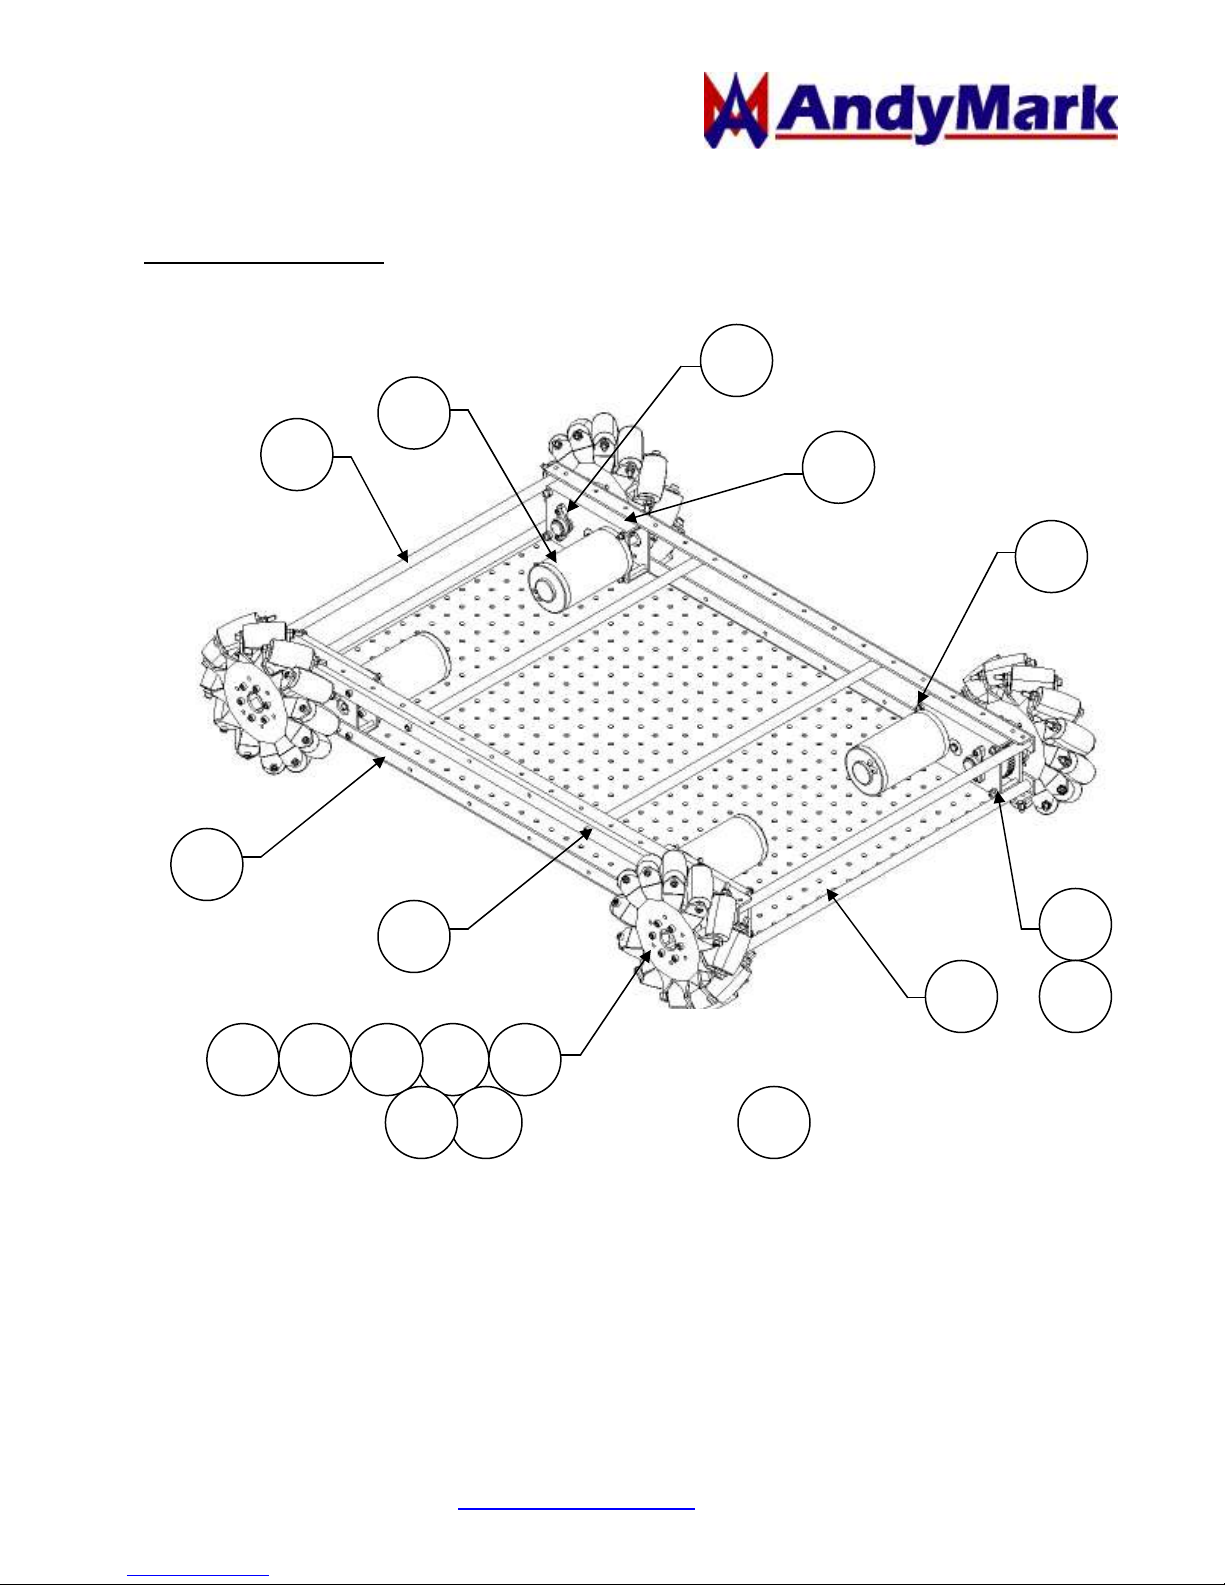
2. Bill of Materials
Item # Component Qty Part Number
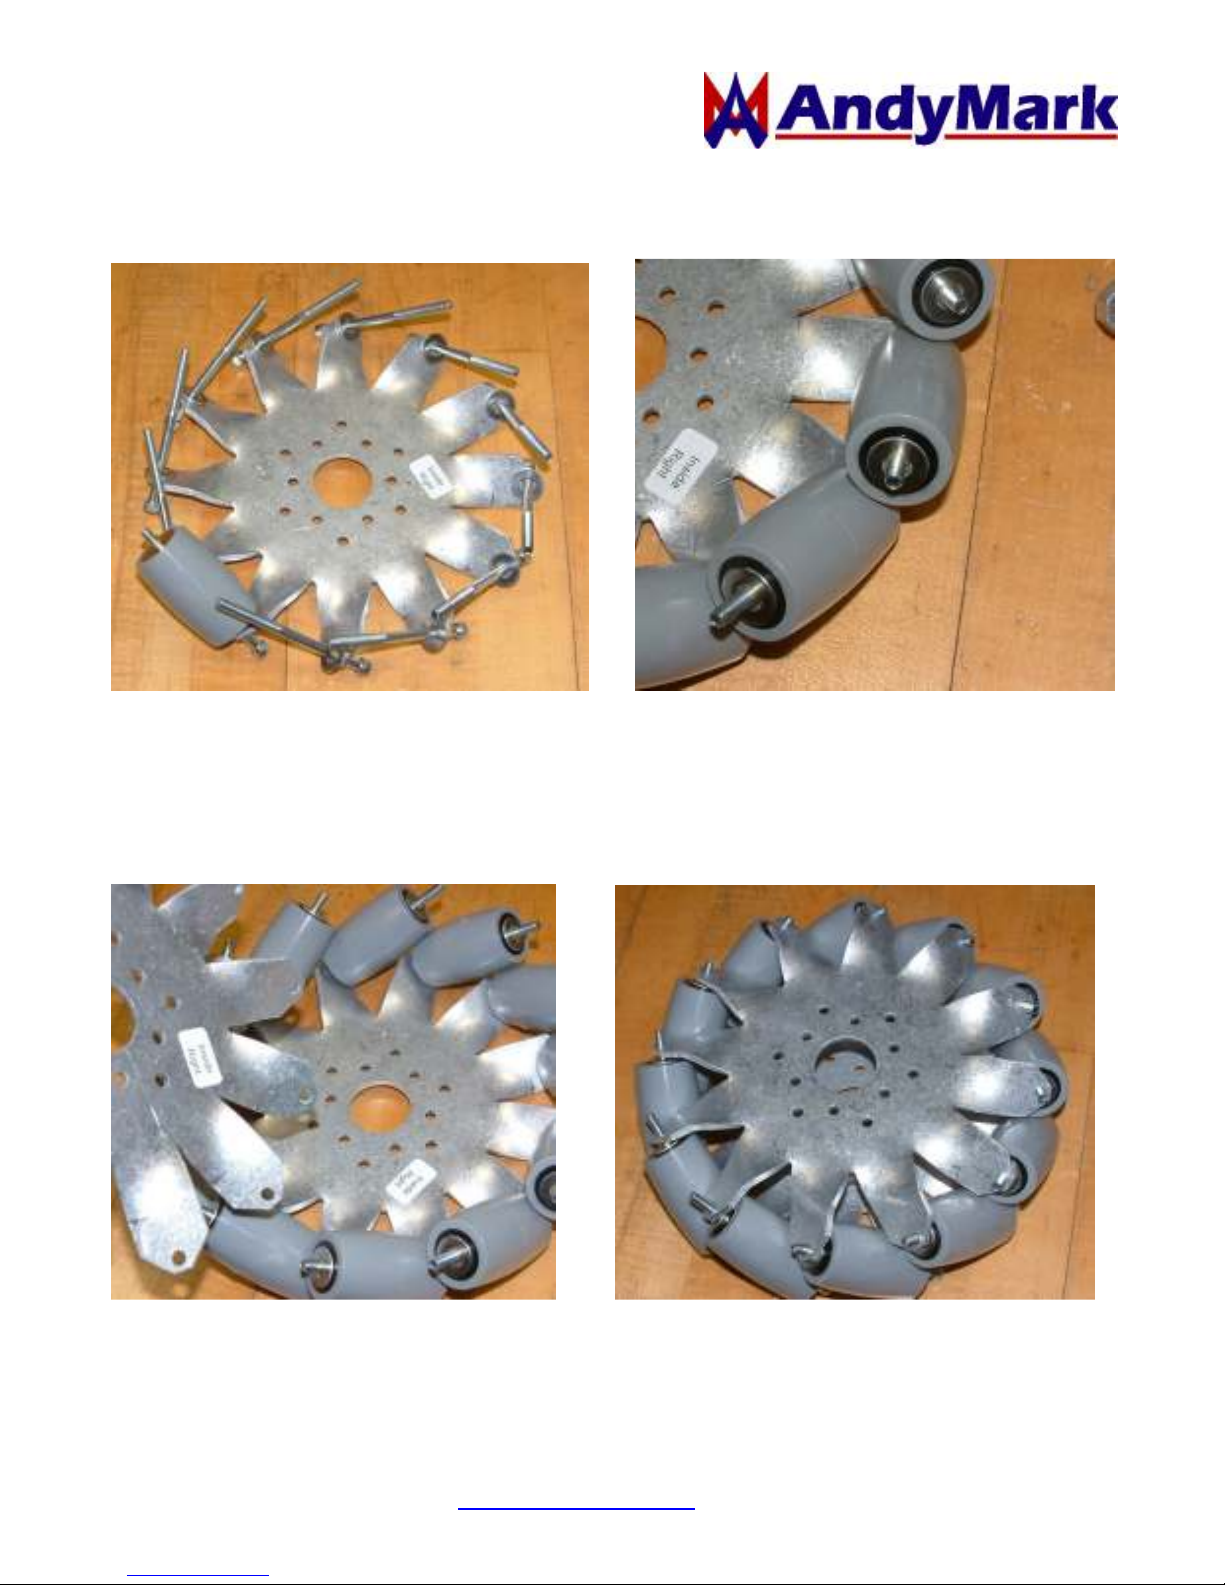
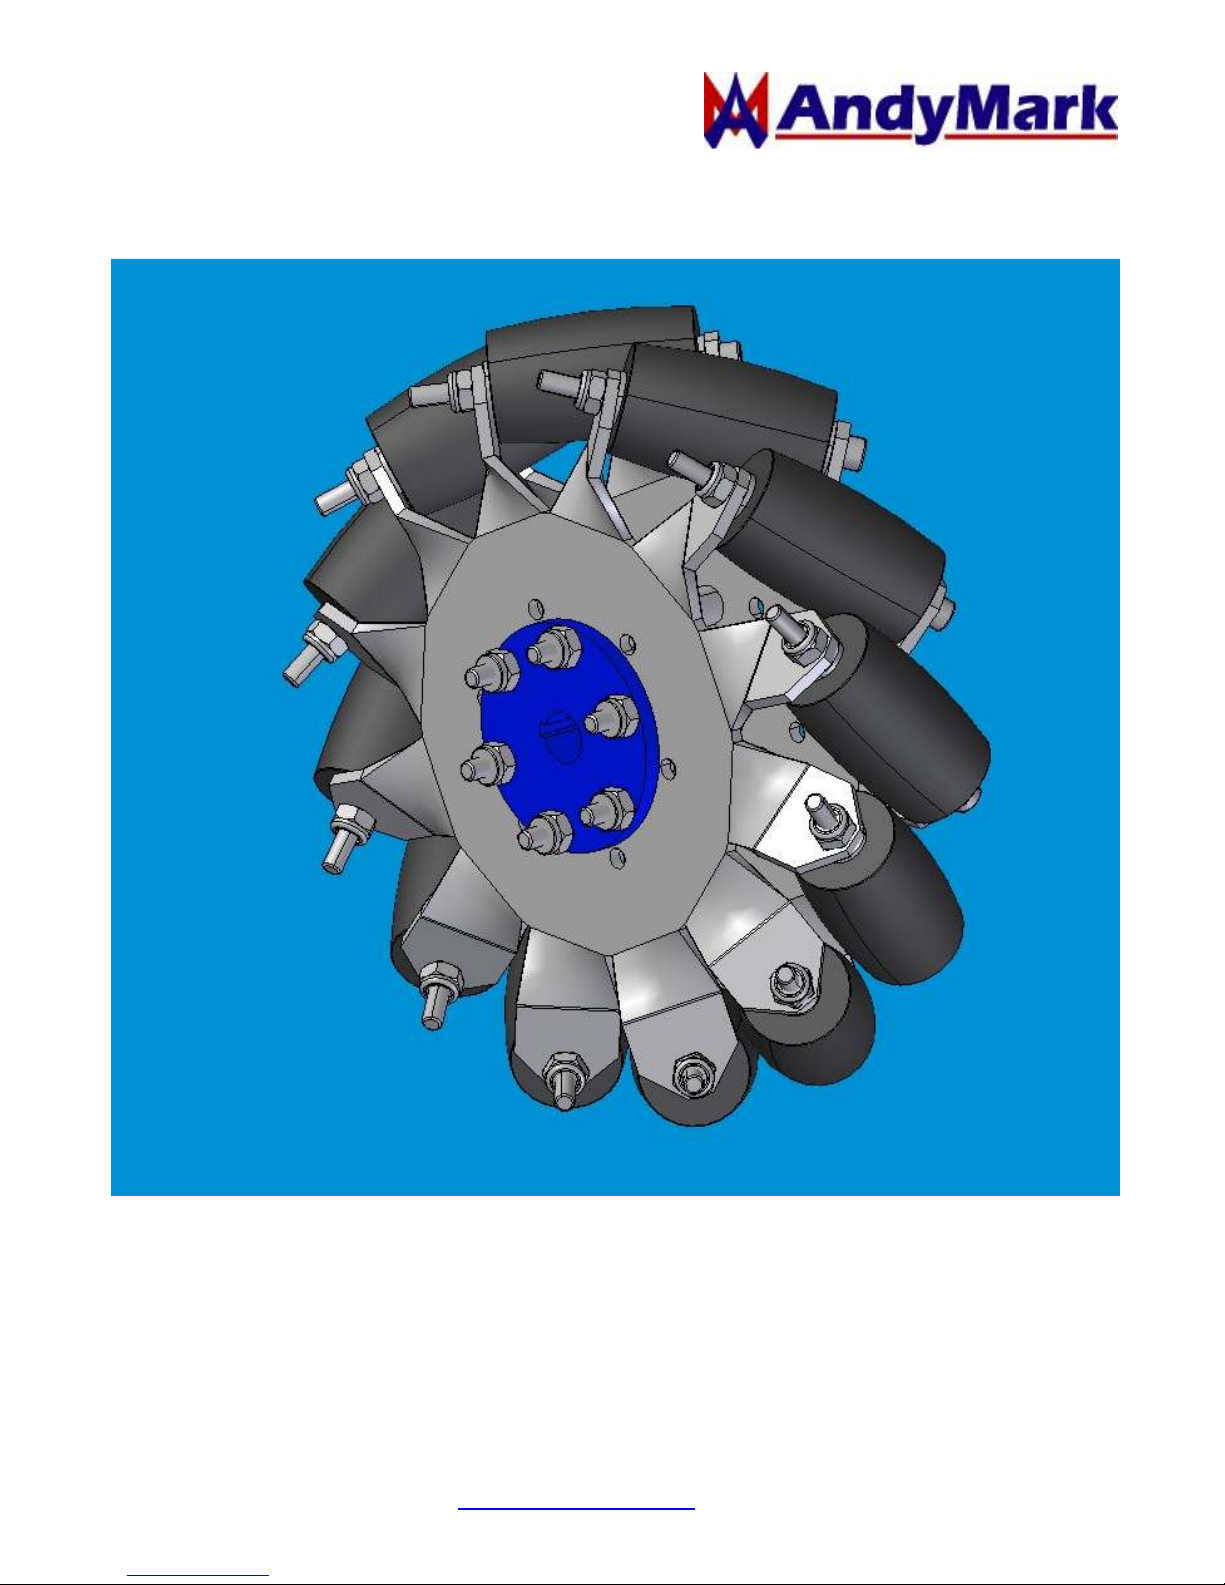
1 8” Mecanum Wheel set (2 Lefts, 2 Rights) 1 am- 83
2 5 Key Huib 4 am- 77
3 Angle Bracket Long 4 am- 638
4 Cross Bar 6 am- 639
5 .373- 5 Plastic Spacer 4 am- 3
6 Smoked Top Sheet (polycarbonate) 1 am- 642
7 Perforated Bottom Sheet (PVC) 1 am- 641
8 2.5” CIM Motor 4 am- 255
9 Toughbox Nano, 5 Key Shaft Version 4 am- 518
1 Encoder Package 4 am- 18
11 1/8x1/8x .7 machine key 4 am-1 43
12 ½ id nylon washer 8 am-1 1
13 M5x .8 Nylock Nut 8 am-1 22
14 1 -32 Nylock Nut 32 am-1 42
15 1 -32 x .75 SHCS 12 am-1 47
16 ¼ id washer 4 am-1 27
17 ¼-2 x .5 BHCS 4 am-1 39
18 1 -32 x 2. SHCS 16 am-1 49

www.andymark.com 4
3. Layout Drawing
10
2
4
12
11
8
6
9
1
3
5
7
13
16
15
14
17
18
Not Shown

www.andymark.com 5
4.
Assem ly Instructions for 8” Mecanum Wheels
Parts to make one (1) Mecanum Wheel:
A: side plate (2)
B: molded roller (12) with black core and two inserted bushings
C: brass tube (12)
D: 1.6 ” long aluminum spacer (6)
E: #1 -32 x 3. inch long screw (12)
F: #1 -32 x 2.5 inch long screw (6) (for hub mount)
G: #1 -32 Nylock nut (18)
H: 1/4” stainless steel washer (24), . 4” thick
Tools needed:
5/32” hex head driver (or allen wrench)
3/8” wrench (or socket)
Cordless drill, set on low torque setting
Wheel Assembly Instructions:
Step 1: Lay one side plate (A) down on the table; with inside face (inside sticker is on one side
of plate). Feed screw (E) from bottom up through perimeter hole. Put washer (G) onto screw
(E), over plate.
Step 1 Step 2
Step 2: Insert brass tube (C) into roller (B), repeat for all rollers.

www.andymark.com 6
Step 3: Put roller (B) onto screw (E). Put washer (G) onto screw (E), on top of roller (B). Place
the washer so that the brass tube is inside the inner hole of the washer.
Step 3 Step 3
Step 4: Place second side plate (A) inside down onto wheel assembly. The “inside” of the
plates should face each other.
Step 4 Step 4

www.andymark.com 7
Step 5: Install nuts (F) on each of the 12 axle screws, but leave them only finger-tight.
Step 6: Place the aluminum spacer (D) between the plates, aligning the spacer on one of the 6
holes closest to the center bore. Insert a screw (E) through the side plate holes and the
spacer, keeping sure that the screw head is on the same side as the screw heads of the axle
screws.
Step 5 Steps 6 & 7
Step 7: Insert 2.5” long screws (F) into the 6 interior holes, each going through a spacer (D).
Step 8: Use the 3/8 wrench and a 5/32 hex driver (or allen wrench), tighten the
perimeter screws, keeping the washers fitted over the brass tubes and not sandwiched
between the tube and the side plate. Don’t tighten the interior screws yet.
Step 8 Step 8
Interior screws shown in this
pict re are 3” long, which are
longer than needed in this
assembly.

www.andymark.com 8
Step 9: Install the 5 Key Hub as shown in CAD pic below. The side showing is the inside of
the wheel.

www.andymark.com 9
5. Assem ly Instructions for Simple Base
Step 1: Install CIM Motor to each of the Toughbox Nano gearboxes. Hardware needed for this
is located in a small baggie, packaged with the Toughbox Nano.
Step 2: Attach the Angle Bracket Long to the Toughbox Nano with the 1 -32 x 2. screws.
This screw comes very close to the CIM Motor, so use the smaller, M5 nut for the screws next
to the motor. Also, install the encoder package (see page 13 for assembly instructions).

www.andymark.com 10
Step 3: Attach two of the Angle Bracket Long pieces to two Toughbox Nanos. Make two sets.
Step 4: Connect the two sets assembled in steps 2 and 3 by attaching Cross Bars as shown in
the picture below. Use 1 -32x .75 screws.
Use 10
-
32 x 0.75
screws and Cross Bars

www.andymark.com 11
Step 5: Slide in the Perforated Bottom Sheet, in the gap between the Toughbox Nano and the
Angle Bracket Long. Place one .373- 5 Spacer and two ½ id washers on each Toughbox
Nano output shaft.
Step 6: Install 1/8x1/8x .7 machine key and slide on the 8” Mecanum Wheels (not shown).
One the end of the drive shaft, put in a ¼” washer and ¼-2 x .5 BHCS screw. This washer
and screw keep the hub/spacer/machine key assembly from sliding off.
0.373
-
0500
Plastic Spacer
½” plastic
washer (2)
¼
-
20 x 0.5 BHCS
¼ Washer

www.andymark.com 12
Step 7: Slide in the Smoked Polycarbonate Top Sheet

www.andymark.com 13
6. Install Encoder on Tough ox Nano
The Encoder Package includes these parts:
US Digital Encoder E4P-25 -25 -D-D-D-B
US Digital CA-MIC4-W4-NC-1 Cable
Encoder Mount Pad
1 -32x1/2 screws (2)
Tools needed: 5/32” hex wrench, small Phillips screwdriver
Step 1: Attach encoder circuit board to circular plastic mount, using small screws to thread into
encoder mount pad.
Step 2: Attach encoder mount pad onto Toughbox Nano with 1 -32 screws.
Step 1 Step 2

www.andymark.com 14
Step 3: Slide on encoder wheel, with 25 count sticker facing the circuit board. Line up the
outside face of the encoder wheel to be flush with the two tips protruding up from the circular
plastic mount.
Step 4: Plug in the cable and install the cap, making sure that both clips are locked in place.
If you have any further questions, email sa[email protected].
Table of contents
Popular Motorized Toy Car manuals by other brands

Jamara
Jamara Lamborghini Sian FKP 37 2,4GHz instructions

VBC Racing
VBC Racing WILDFIRE D09 instruction manual

Motive Power Industry
Motive Power Industry Bugxter BR-150 Service manual

Jamara
Jamara Dakar EP 2,4 GHz Instruction

POLA G
POLA G Opel Blitz with tarpaulin quick start guide

Traxxas
Traxxas 4TEC 2.0 XL-5 owner's manual

Jamara
Jamara 404515 instruction manual

Xpress
Xpress Mini Road Runner II Pro manual

HOLLICY
HOLLICY SX2028 Assembly manual

Fisher-Price
Fisher-Price POWER WHEELS Cadillac N7115 Owner's manual with assembly instructions

Mugen Seiki
Mugen Seiki MTX4R instruction manual

Redcat Racing
Redcat Racing THUNDER EPX DRIFT instruction manual