Anilam 3000M Setup guide

ANILAM
3000M 3 Axis
Training Guide

Navigation Instructions
Bookmarks
Follow the bookmarks at the left side
of the page to navigate to desired topic
Click plus and minus symbols to expand
and compress menu display

3000M CNC Control
Training Guide

Turning the Control ON
1
After the control has been turned ON press F10 to continue.
Then press to select next page
F10
Select

Main Areas of the Display
2
Programmed Position
Machine Position
from Home Machine Status
Message Area Program & Tool
information
Auxiliary Functions
Information

3
Areas of Main Screen
Program Name
Mode of machine
Manual , Single Step or Auto
Condition of machine
Type of move
abs/inc Units
Inch/MM
Type of movement
Rapid or Feed
Halted or Running
Type of Manual movement
Rapid,Feed,100,10 or 1
Spindle Condition
FWD,REV or OFF
Coolant condition
ON or OFF
Number of loops
remaining to be done
Time left
to Dwell
Active Fixture
Offset
Spindle Speed
Number or part
produced
Running Time
Active line in Auto
Active Tool
Actual Feedrate
Posn:
Program or Dist to go
Tool Dia from
Tool Page
Percentage of programmed
Feedrate

4
Keyboard
KeyboardKeyboard
Keyboard
7 and Unit
Inch/MM.
8 and Dwell key
9 and Plane key
XY,XZ & YZ.
Axis keys
4 and Feed key
5 and Tool mount
key
6 and Mcode key
3 and Arc key
2 and Line key
1 and Rapid key
. And RPM key
0 and display
position
Calculalator
Enter
Spindle command
keys
Servo reset key
Start key
Emergency stop
Button
Plus/minus key
Absolute/Increamental key
Cursor movement key
Clear key
Jog Mode Changekey
Axis jog keys
Hold key
Feedrate override knob
All the number key and the decimal point have duel functions as show above.

1
Rapid
Along with the above we have “Hot Keys”
2
Line
3
Arc
6
MCode
Accesses Rapid menus.
Accesses Line menus.
Accesses Arc menus.
Input feedrate.
Tool mount.
Mcode inputs.
Inch/MM
Dwell in seconds
Changes from XY,XZ or YZ.
If * put in front of line in program ignores that line.
Input for spindle speed if available.
5
RPM
0
*
9
Plane
8
Dwell
7
Unit
5
Tool
4
Feed

Function Keys
6
The Function (or F keys) activate the Mode shown directly above on the Display screen.
The meaning of F keys change, depending upon what Mode of operation is selected.
F9
F2 F3 F7F5 F8
F6
An example of how F keys is shown above,this is how it would change when
going from Manual to in Single Step or Auto.
F1 F4 F10

7
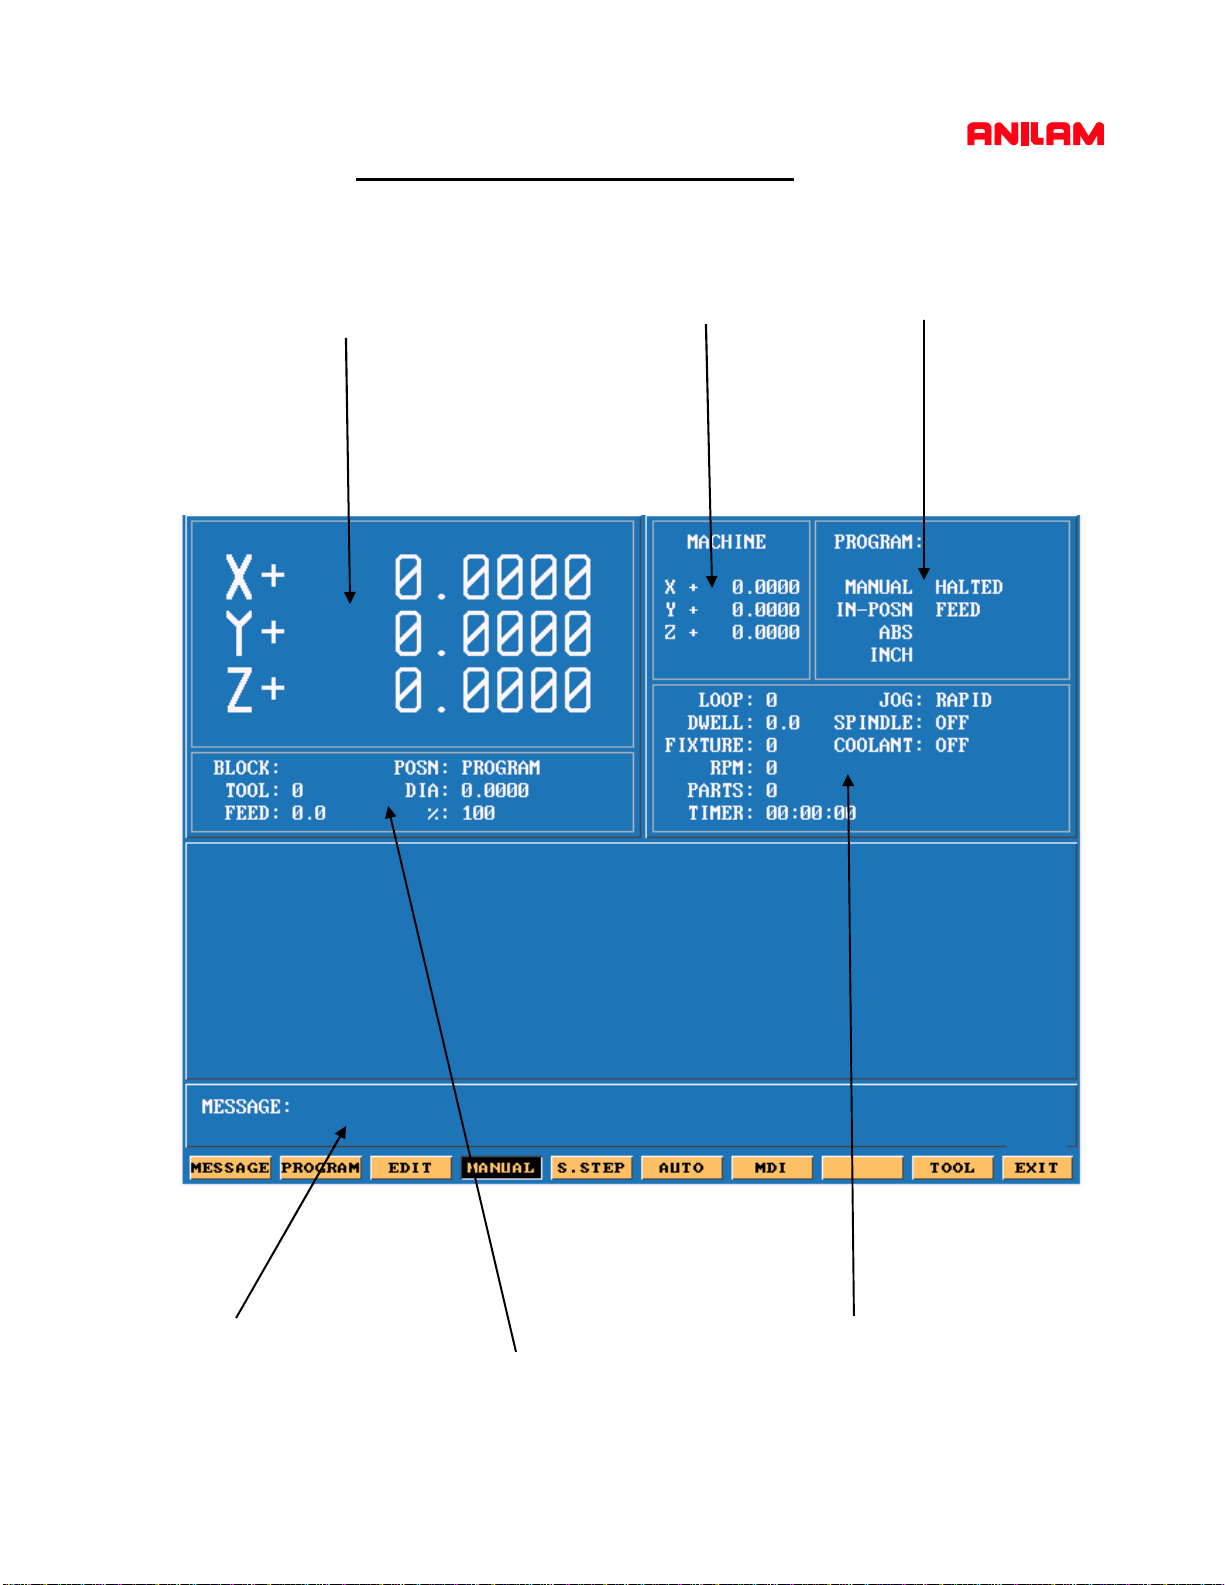
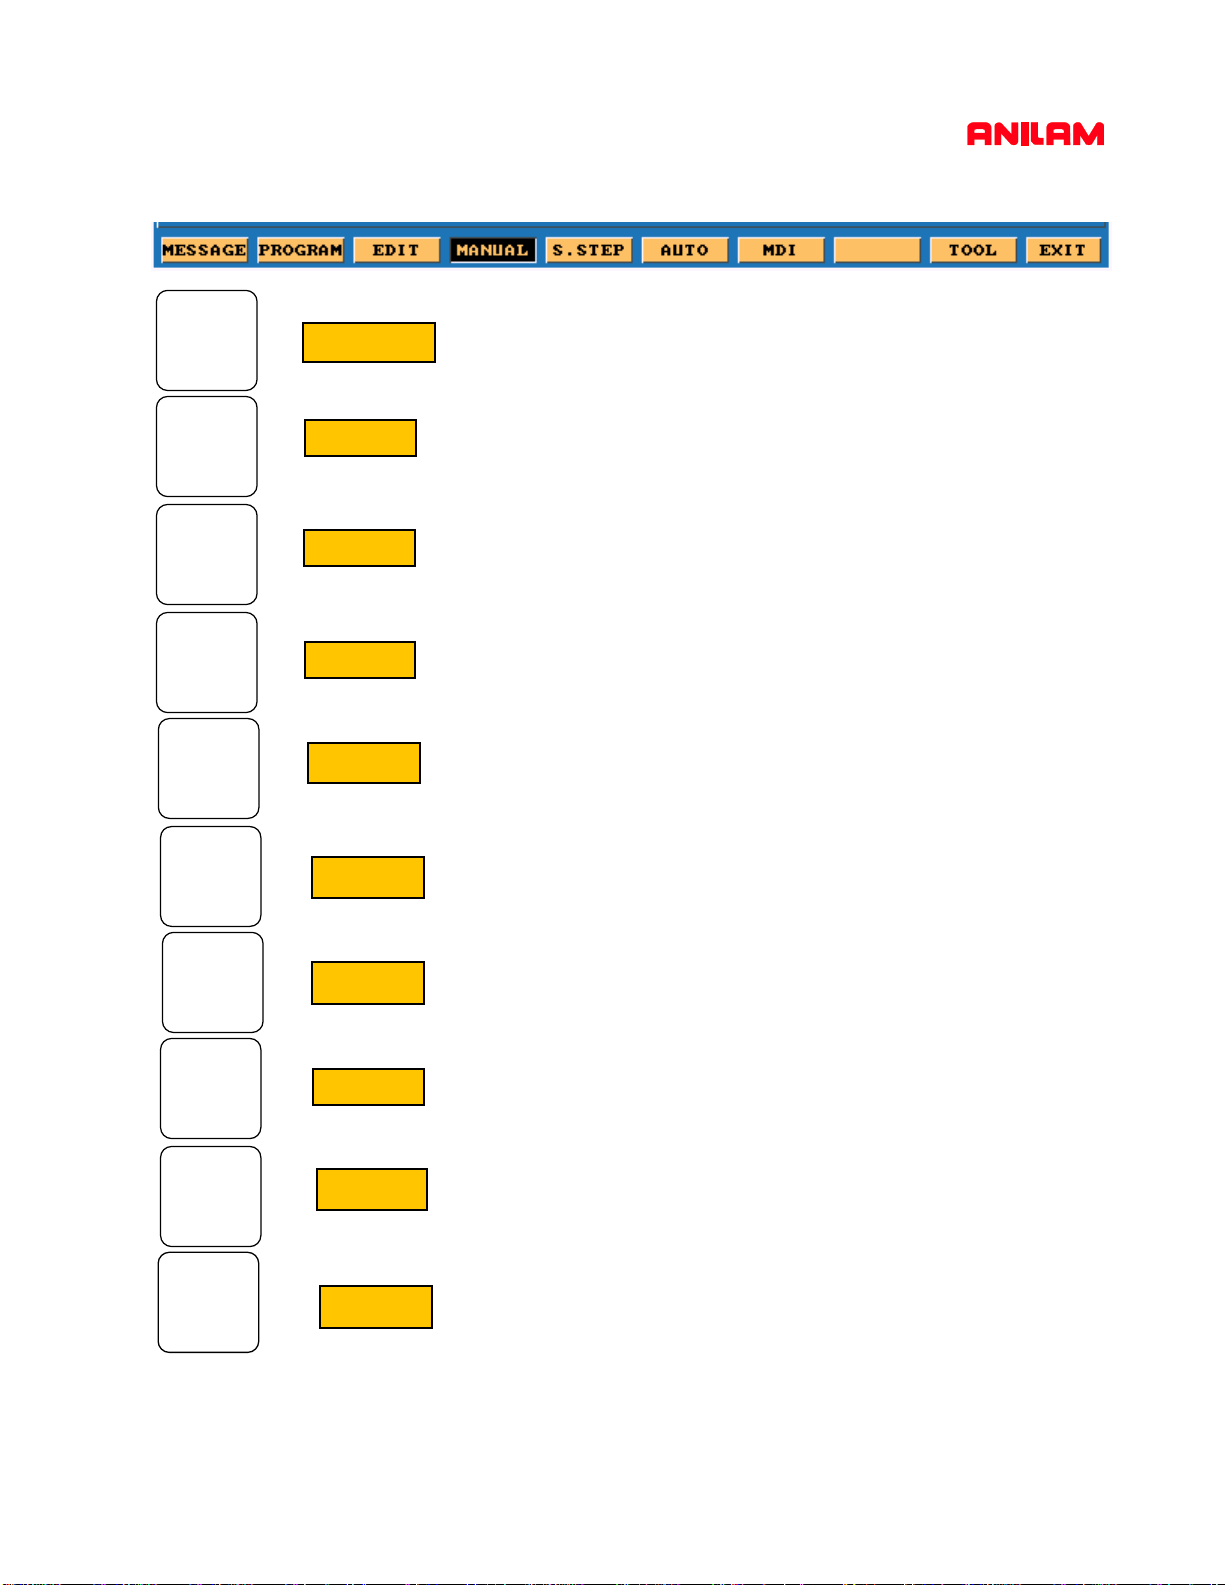
Display last 8 messages that have appeared
Page at which program files are displayed
Go to EDIT from Manual
Manual mode of operation
Single step mode of operation
Auto mode of operation
Manual data input,allow operation without writing a program
Not used
Tool page and Fixture offsets can also be acsessed from Edit
Exits control software
F1
F10
F2
F4
F5
F6
F7
F8
F9
F3
Message
Program
Edit
Manual
S.Step
Auto
M D I
Tool
Exit

8
F1 Message Page
This is how the messages will appear on the screen .
When control is turned off the messages will be erased.
This is useful to tech’s when trouble shooting problems on the control
To enter message page press Message
F1

9
Program Page
Exit
Create
To enter page Press F2 Program
F10
F3
F4
F5
F6
F7
F8
F9
F1
F2
Not used
Delete
Edit
List
Select
Log
Display
Utility
This where new program names are type in.
Delete an existing program.
Programs are written and changed.
Allows you to look at program but no Editing .
Picks program to be run.
Changes disk drive.
Changes how program page display program list
Contains such utility as Copy ,Rename etc.
Return to main screen in Manual Mode

10
E
N
T
E
R
Create
again and press enter, this will put program into the list of programs with .M extension and
Using the arrow keys pick the letters then press the enter key.When complete press ASCII
When ASCII is pressed, this how the soft keys will look and a table will appear as show below
highlight will be on program that was just created.

11
When is press, the screen appear as shown below.
Edit
Edit
List
Pressing allows user to look you to look at program only.

12
Program that is highlighted and then selected will shows up in this area.
A program may be edited without being selected , but not run in Single
step or auto.
Select

13
Display
Normal screen only show .m files
Press display one time it will change to
display all files in directory
Show only .m files but show size of program,
date and time written
Show all in program files but show size of
page program,date and time written

14
F keys there different functions.
Create
First press type in a program name or number.
High light will be on program just created press
Edit
F1
F2
F6
F7
F8
F9
F10
Let user move machine around and record positions.
Draws program be running to see that it is correct.
Access to drilling canned cycles.
Access to pocketing canned cycles.
Access to milling features.
Go to tool Page.
Go to calculators.
Sub more editing features.
Draw
Teach
F3
Drill
F4
Pocket
F5
Mill
Tool
Calc
Sub
Misc
Exit
More editing features.
Exits editing.

15
F6
Tool
Press This will bring up the Tool Page.
Area #! Area #2 Area #3
Area #6 Area #7 Area #8 Area #9 Area #10
Area #11
Area#4
Area #5
Area #1 Machine position relative to part Zero.
Area #2 Machine position relative to machine zero.
Area #3 Tool information , Feed , RPM and Fixture offset.
Area #4 Jog , spindle and Coolant condition.
Area #5 Active line.
Area #6 Tool number.
Area #7 Tool diameter.
Area #8 Tool length offset.
Area #9. RPM’s only input if M-Functions or an inverter is installed.
Area #10 Spindle forward or reverse same conditions as above apply.
Area #11 Coolant on or off must have M-Functions.

16
F1
F2
F6
F7
F8
F9
F10
OFFSET
F3
ClrLine
F4
Find
F5
PgUp
PgDn
Calib Z
Exit
Go to FIXTURE OFFSET page
Not used
Not used
Not used
Clear highlighted line info.
Search for a tool.
Page up
Page down
Calibrate Z axis offset.
Exit to edit page when entered from edit page.
If entered from MANUAL page will exit to MANUAL page .
F10
Exit

17
F1
OFFSET
Press this will take you to offset page.
All entries are taken from Machine Home.
Entries may be entered manually or by using CalibX or CalibY.
When doing manual input , select axis you wise to enter a value , by pressing that axis key
and input number require press ENTER.
Using the Calib key move to required position and press desired calib axis key.
F10
Exit
Press to return to Tool Page
F10
Exit
Press to return to Manual Page
Other manuals for 3000M
2
Table of contents
Popular Industrial Equipment manuals by other brands

woodmizer
woodmizer PD200 Series Safety, Operation, Maintenance & Parts Manual

Hoffmann&Hoffmann
Hoffmann&Hoffmann Dripmaster EDD-4SH user guide

Gema
Gema OptiFlex Pro L Quick reference guide

Delta
Delta LE-412523 user manual

Strack
Strack PowerMax light SN5650-PMOL-0330 operating instructions

Cold Jet
Cold Jet PR750H user manual