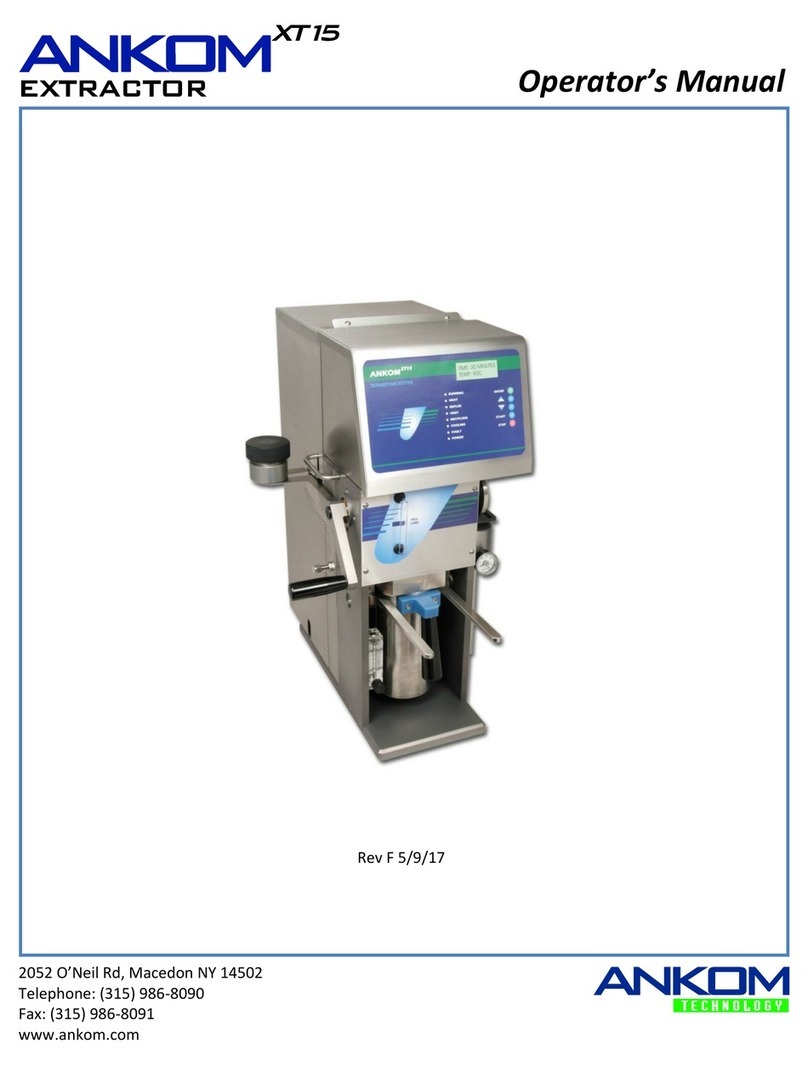
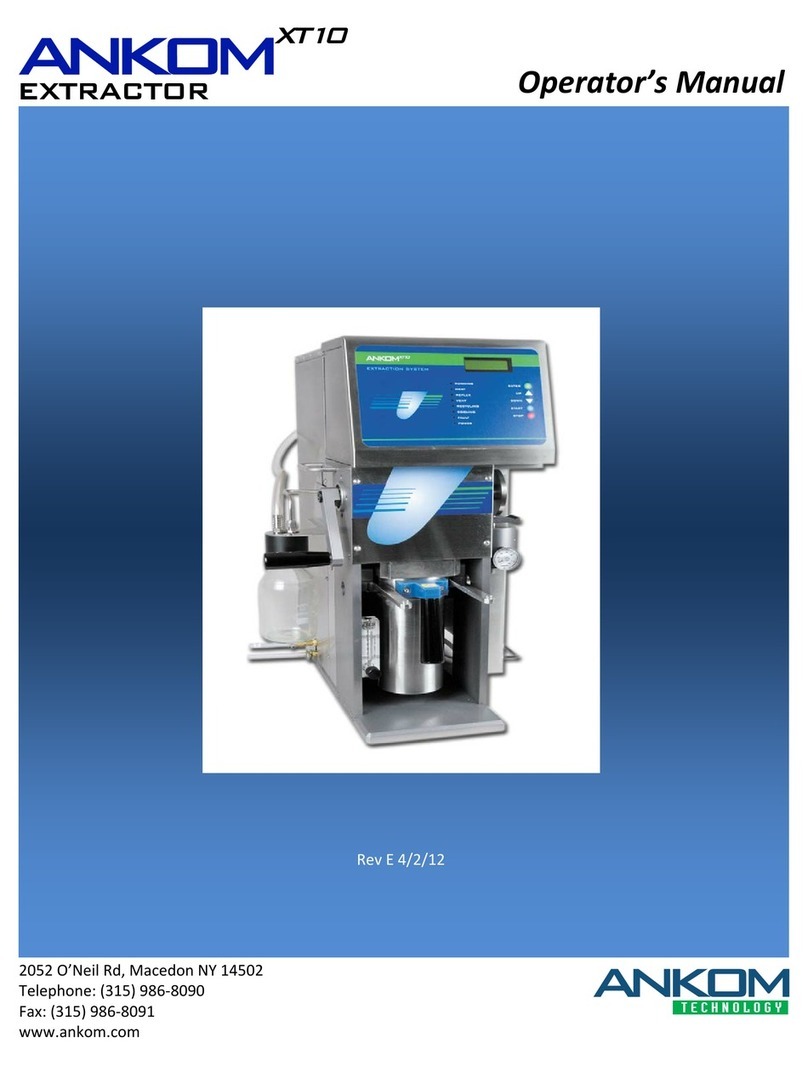
Ankom XT10 User manual

2052 O’Neil Rd, Macedon NY 14502
Telephone: (315) 986-8090
Fax: (315) 986-8091
www.ankom.com
Operator’s Manual
Rev F 6/16/23

This page intentionally left blank

Table of Contents
Introduction..................................................................................................................................................................5
Warranty.......................................................................................................................................................................5
Filter Bags .....................................................................................................................................................................5
Operating Environment ................................................................................................................................................5
Contact Information .....................................................................................................................................................6
Instrument Description.................................................................................................................................................7
Safety Precautions ........................................................................................................................................................8
Instrument Installation and First Run...........................................................................................................................9
Fat Extraction Calculations .........................................................................................................................................13
Fat Extraction Support Items......................................................................................................................................14
Sample Preparation ....................................................................................................................................................15
Fat Extraction step-by-step procedure using the ANKOMXT10 ....................................................................................21
Periodic Maintenance.................................................................................................................................................25
Troubleshooting & Replacement Parts.......................................................................................................................27
Diagnostics..................................................................................................................................................................29
Appendix A - Analytical Procedure .............................................................................................................................33
Appendix B –Electrical Diagram ................................................................................................................................35
This page intentionally left blank

Operator’s Manual
Rev F 6/16/23 pg. 5
Introduction
ANKOM Technology designs, manufactures, and markets instruments and support products used by analytical
laboratories around the world in the environmental, agricultural, biomass, and food industries. ANKOM
Technology can provide you with products for determining or monitoring dietary fiber, detergent fiber, fat,
digestibility, microbial fermentation (anaerobic or aerobic) and more.
Committed to Total Customer Satisfaction, ANKOM designs every product based on a thorough assessment of
customer needs.
Congratulations on your purchase of the ANKOMXT10 Extraction System.We are confident that this product will
effectively serve your needs.
The ANKOMXT10 Extraction System was designed to automate the process of fat extraction. This reduces
technician variation, increasing precision. By carefully following the operating instructions in this manual you will
understand the details of sample and filter bag handling as well as the instrument controls, helping you to achieve
the best possible results.
Please review the entire contents of this manual before you begin operating this
product.
Warranty
ANKOM Technology warrants the ANKOMXT10 Extraction System against any defects due to faulty workmanship
or material for one year after the original date of purchase. This warranty does not include damage to the instrument
resulting from neglect or misuse. During the warranty period, should any failure result from defects in
workmanship or materials ANKOM Technology will, at its discretion, repair or replace the instrument free of
charge.
Extended warranties are available upon request.
Filter Bags
Use only ANKOM Technology filter bags (part # XT4) in your ANKOMXT10 Extraction System. Use of any other
filter mechanism will void the warranty. Filter bags can be purchased from ANKOM Technology or from your local
authorized ANKOM distributor.
Operating Environment
Your ANKOMXT10 Extraction System is designed to operate within the following environments:
•Ambient Temperature Range: 15°−35°C
•Power: 100V−120V ~ 50/60Hz 10A
220V−240V ~ 50/60Hz 5A

Operator’s Manual
pg. 6 Rev F 6/16/23
Contact Information
At ANKOM Technologywe are committed to your total satisfaction and therefore always available to help you get
the most from your ANKOM products. We are also very interested in any comments or suggestions you may have
to help us improve.
For any questions or suggestions regarding your instrument, please contact us at:
For Sales Support: sales@ankom.com or https://www.ankom.com/contact-us
For Technical Support: www.ankom.com/contact/technical-services
For Analytical Support: www.ankom.com/contact/analytical-services
Telephone: (315) 986-8090
Fax: (315) 986-8091

Operator’s Manual
Rev F 6/16/23 pg. 7
Instrument Description
General Description
The ANKOMXT10 Extraction System is designed to extract Crude (Free) Fat using conventional solvents, typically
petroleum ether. The compounds extracted are primarily triacylglycerols together with a small quantity of related
lipids, traditionally termed “Crude Fat.” The analysis is achieved by measuring the loss of mass due to the
extraction of fat/oil from the sample encapsulated in a filter bag. The quantitative isolation of the sample is
accomplished by surrounding the sample in a sealed filter bag with a filtering capacity in the 2 - 3 µm range. The
filter bag has sufficient porosity to permit rapid solvent passage and is composed of polymeric material that is
resistant to the higher temperatures and solvents used in the instrument.
The quantitative isolation achieved by the filter bag permits the ANKOMXT10 Extraction System to automatically
process samples in batches of up to 15. Simply place filter bags with sample in the PTFE Cup, add solvent to the
Extraction Vessel, place the PTFE Cup on top of the solvent in the Extraction Vessel, lock the vessel in place,
select the extraction time and temperature, and press “Start.” The instrument will automatically extract the fat from
the samples and recover the solvent from the Extraction Vessel when the operation is complete.
Below is a detailed view of the ANKOMXT10 Extraction System.
The Reflux Water Flow Control measures and controls the flow of water through
the condenser to rapidly cool the solvent vapors during the extraction process.
The proper water flow is set at the manufacturer. Contact ANKOM at
Keypad
Display
Power Switch (not visible)
Safety Valve Handle
Pressure Gauge
Extraction Vessel
Solvent Recovery Bottle
Main Handle
Reflux Water Flow Control

Operator’s Manual
pg. 8 Rev F 6/16/23
Safety Precautions
Flammable Hazard: Static electricity is to be avoided as it is a spark hazard.
Hot Surfaces: Do not touch the extraction vessel during operation. The surface
can exceed 70°C (158°F). Failure to observe this caution may result in injury.
Hazardous Voltages: Do not operate the instrument with the electrical
compartment open. Hazardous voltages are present during operation. Failure to
observe this caution may result in electrical shock or electrocution.
Hazardous Materials: When adding solvents, follow fill instructions completely
to avoid fire and/or explosion. Waste material will contain small amounts of
volatile solvents. Use caution when discarding. Follow safe laboratory practices
according to both local and federal regulations when installing this instrument
and when handling any organic solvents.
WARNING: Attempts to override safety features or to use this instrument in a
manner not specified by ANKOM Technology voids the warranty and may result
in serious injury or even death.
This system is designed to meet and/or exceed the applicable standards of CE,
CSA, NRTL and OSHA.
Please review the entire contents of this manual before you begin operating this
instrument.

Operator’s Manual
Rev F 6/16/23 pg. 9
Instrument Installation and First Run
Site Requirements
To install and operate the ANKOMXT10 Extraction System you will need the following:
•Adjustable wrench
•Chilled or tap water supply not to exceed 23°C
•Adequate power (see “Operating Environment” section)
•Drain
•Vent Hood
Instrument Installation Procedure
To install the ANKOMXT10 Extraction System, follow the procedure detailed below.
1.
Remove the instrument from the shipping container and place it on a smooth level surface in an area that
is free of dust and excessive moisture and is within 6 ft. of a drain and cold water supply.
2.
Place the instrument either in a Vent Hood or within 6 ft. of one.
The user is responsible for determining if venting of this instrument requires
placement in a hood. Please follow both local and federal regulations when
installing this instrument.
3.
Connect the tube from the top fitting to the water supply.
4.
Connect the tube from the bottom fitting to the drain.
5.
Connect the Solvent Recovery Bottle to the instrument.
Ensure that there are no kinks or bends in any of the tubing connected to the
instrument.
6.
Plug the power cord into a grounded receptacle.
Drain
Water Supply
Vent Tube
Solvent Recovery Bottle

Operator’s Manual
pg. 10 Rev F 6/16/23
7.
7. To complete the installation, run the instrument (without samples) according to the procedure below.
5.1
7.1 Turn the instrument power ON.
The Display will briefly show the software version number
followed by the screen to the right.
The factory default solvent shown on the Display is "Pet Ether." However,
the instrument computer will store in memory the last solvent selection made
and use it as the default solvent shown on the Display screen every time the
instrument is ready for a new run.
5.2
7.2 Select the solvent you want to use.
7.2.1 Press the Down Arrow (v) key on the Keypad until the desired solvent is shown on the
Display.
If using diethyl ether or a solvent mixture that includes diethyl ether (such as
the Mojonnier solution mixture), you will need the O-ring Kit for High
Penetration Solvents (part # X95) to replace the standard O-rings on the top
of the Extraction Vessel and the Valve Kit for High Penetration Solvents
(part # X73).
Warning: Do NOT use Acetone in this instrument because it will cause
damage to the valves.
7.2.2 Press ENTER on the Keypad to complete the solvent
selection.
The Display should now show the screen to the right.
5.3
7.3 Check that the Extraction Vessel is properly installed in the instrument.
7.3.1 Press down the Safety Valve Handle to release the Safety Valve Pin
and rotate the Main Handle upward until it stops.
7.3.2 Use the Extraction Vessel Handle to pull the Extraction Vessel out.
7.3.3 Press ENTER on the Keypad.
The Display should now show the screen to the right.
Select time 60
(^v)... <ENTER>
Remove/Insert
Samples <ENTER>
PET Ether
v <ENTER>

Operator’s Manual
Rev F 6/16/23 pg. 11
7.4 Set the Extraction Time.
7.4.1 Using the arrow keys on the Keypad, set the Extraction time to 20 minutes for the initial
run. (The recommended time is 60 minutes.)
7.4.2 Press ENTER on the Keypad to set the Time.
The Display should now show the screen to the right.
(The temperature shown will be the last temperature
entered.)
7.5 Set the Extraction Temperature.
7.5.1 Using the arrow keys on the Keypad, select the desired Extraction Temperature. (The
recommended maximum temperature is 90°C.)
7.5.2 Press ENTER on the Keypad to set the Temperature.
The Display should now show the screen to the
right.
7.6 Remove the white PTFE Insert from the Extraction Vessel.
7.7 Insert solvent into the Extraction Vessel.
7.7.1 Ensure that the Extraction vessel is cool.
7.7.2 Pour 350ml of solvent directly into the empty Extraction Vessel.
7.8 Put the PTFE Insert into the Extraction Vessel and the Extraction Vessel into the instrument.
7.8.1 Align the PTFE Insert slot with
the Extraction Vessel pin.
•The PTFE Insert O-ring and the Extraction Vessel O-ring must be in
place before running the instrument.
•The PTFE Insert slot must be aligned with the Extraction Vessel pin
before running the instrument.
Insert Solvent
<ENTER>
Select temp 90
(^v)... <ENTER>
PTFE Insert
Bag Holder
PTFE Insert O-ring
Extraction Vessel O-ring
PTFE
Insert slot
and
Extraction
Vessel pin

Operator’s Manual
pg. 12 Rev F 6/16/23
7.8.2 Slide the Extraction Vessel into the instrument ensuring the Extraction Vessel O-ring
stays in place.
7.8.3 Press ENTER on the Keypad.
The Display should now show the screen to the
right.
7.8.4 Pull the Main Handle downward, closing and locking the
Extraction Vessel in place. You will hear a click noise when the
Safety Valve Pin locks in place.
Before running the instrument, verify that the Extraction Vessel is locked in
place by attempting to rotate the Main Handle upward. If it is not locked,
repeat step 7.8.4 above.
7.9 Verify that the water supply is on.
7.10 Run the instrument.
Press START on the Keypad.
The instrument will run through its automatic operation, showing on the Display a time
countdown along with process information.
7.10.1 For future reference, record the countdown time on the screen when the heat reaches
90°C.
7.10.2 After the instrument reaches 90°C, record the reflux water flow in the
flow controller. The value should be between 6 and 7 GPH (4 to 6
GPH if using a chiller). If necessary, turn the front knob on the
controller counterclockwise to increase the value, and clockwise to
decrease the value. The reflux process runs on 90 second cycles. The
reflux controller must be read and adjusted during the first 1 minute
of the cycle.
7.10.3 Verify that the XT10 runs through the drain sequence with no errors.
When the instrument has completed its automatic
operation, the Display will show the screen to the right.
At this time, the only light shining on the Display should be the green
power light.
PET Ether
v <ENTER>
Close Vessel
Water On <START>

Operator’s Manual
Rev F 6/16/23 pg. 13
Fat Extraction Calculations
Crude Fat (Low Fat & Liquid Samples)
Crude Fat (%)=(𝑊2 − 𝑊3)
𝑊1 ∗100
W1Original sample weight (g)
W2Bag after initial drying (g)
W3Bag after extraction and final drying (g)
Crude Fat (High Fat Samples)
Crude Fat (%)=(𝑊2 − 𝑊4 − 𝑊3)
𝑊1 ∗100
W1Original sample weight (g)
W2Bag and weigh tin after initial drying (g)
W3Bag after extraction and final drying (g)
W4Empty dry weigh tin (g)
Total Fat
If hydrolysis is done prior to fat extraction, then the total fat contained within a food or feed sample can be
calculated using the following formula:
Total Fat (%)=(𝑊2 − (𝑊3 + (𝐶1 − 𝐶2)))
𝑊1 ∗100
W1Original sample weight (g)
W2Bag after hydrolysis and drying (g)
W3Bag after extraction and final drying (g)
C1Blank bag weight, after hydrolysis and drying (g)
C2 Blank bag weight, after extraction and drying (g)
The Hydrolysis procedure can be found in the ANKOMHCl Operator's Manual.

Operator’s Manual
pg. 14 Rev F 6/16/23
Fat Extraction Support Items
The following support items are needed to perform the fat extraction procedure:
Item
Recommended Product
Filter Bags
ANKOM #XT4
Bag Weigh Holder (for adding sample to an empty filter bag)
ANKOM #101.2
Heat Sealer (for sealing the filter bags)
ANKOM #HS (120V), #HSi (220V)
Solvent Resistant Marker
ANKOM #F08
Desiccant Pouch or Weigh Tin Desiccator (for drying)
ANKOM #X45, #X49
Diatomaceous Earth (DE) (used with liquid samples)
ANKOM #DE1, DE2
Dryer (capable of temperatures from 60-120°C) - optional
ANKOM #RD (120V), #RDI (220V)
Electronic Balance with four-place readout
Oven (capable of maintaining 102°C±2°) (for drying)
Ventilated oven trays (for sufficient oven air flow)
Weigh Tins (used with samples of > 20% fat)
Sample
Spoon

Operator’s Manual
Rev F 6/16/23 pg. 15
Sample Preparation
Sample Preparation Procedure for Crude Fat –for LOW fat samples
To prepare meat samples with ≤ 15% fat by weight or plant samples with ≤ 20% fat by weight for fat extraction,
follow the procedure detailed below.
The first step in crude fat analysis is drying the sample. If a sample is not dried, weight loss after extraction will be
artificially high because it will include moisture loss.
1.
Label/number all empty filter bags with a solvent resistant marker (SKU: #F08).
2.
Place an empty filter bag in the Bag Holder in an open position. Record the weight
of the empty bag (W0).
3.
Tare the weight of the empty filter bag and the holder together.
4.
Add 1.5 –2g of sample to the filter bag. Keep all particles away from the sealing
area of the filter bag.
5.
Record the weight of the sample (W1) and tare.
6.
Set the Heat Sealer dial to 6. (The setting may vary from sealer to sealer.)
7.
Seal the filter bag within 4mm of its open end. Keep the
sealer arm down for 2 –3 seconds after the red sealer light
turns off (to cool the seal). The seal can be seen as a solid
melted stripe along the top edge of the filter bag (as shown to
the right). If the seal is not strong, re-seal the bag.
8.
Repeat steps 1 –7 for all filter bags that will be used in the ANKOMXT10 Extraction System.
(Up to 15 bags can be processed during one procedure.)
9.
Dry all samples at 102 °C ± 2°C for 3 hours to remove moisture.
10.
Remove the samples from the oven and place them in a Desiccant Pouch.
11.
Allow the samples to cool to room temperature. This should take about 10 –15
minutes.
12.
Weigh each bag immediately after removing from the Desiccant Pouch and record weight (W2).
The samples are now ready for the fat extraction procedure on the ANKOMXT10 instrument.
Seal

Operator’s Manual
pg. 16 Rev F 6/16/23
Sample Preparation Procedure for Crude Fat –for HIGH fat samples
To prepare meat samples with > 15% fat by weight or plant samples with > 20% fat by weight for fat extraction,
follow the procedure detailed below.
The first step in crude fat analysis is drying the sample. If a sample is not dried, weight loss after extraction will be
artificially high because it will include moisture loss.
1.
Label/number all weigh tins and empty filter bags with a solvent resistant
marker (SKU: #F08). Use one weigh tin per filter bag.
2.
Dry all weigh tins in an oven at 102 °C ± 2 °C for 15 minutes.
3.
Remove weigh tins from the oven and place them in a
Weigh Tin Desiccator or in a Desiccant Pouch.
4.
Allow weigh tins to cool to room temperature.
5.
Weigh and record tin weights (W4).
6.
Place an empty filter bag in the Bag Holder in an open position. Record the
weight of the empty bag (W0).
7.
Tare the weight of the empty filter bag and the holder together.
8.
Add 1.5 –2g of sample to the filter bag. Keep all particles away from the
sealing area of the filter bag.
9.
Record the weight of the sample (W1) and tare.
10.
Set the Heat Sealer dial to 6. (The setting may vary from sealer to sealer.)

Operator’s Manual
Rev F 6/16/23 pg. 17
11.
Seal the filter bag within 4 mm of its open end. Keep the
sealer arm down for 2 –3 seconds after the red sealer light
turns off (to cool the seal). The seal can be seen as a solid
melted stripe along the top edge of the filter bag (as shown
to the right). If the seal is not strong, re-seal the bag.
12.
Repeat steps 1 –11 for all filter bags that will be used in the ANKOMXT10 Extraction System.
(Up to 15 bags can be processed during one procedure.)
13.
Place the sealed filter bags in their corresponding weigh tins for pre-drying.
14.
Dry all samples at 102 °C ± 2 °C for 3 hours to remove moisture.
15.
Remove the weigh tins and filter bags from the oven and place them together
in a Weigh Tin Desiccator.
A Weigh Tin Desiccator is recommended because it will hold between 10 and 14
weigh tins with filter bags, depending on the size of the weigh tins. A Desiccant
Pouch will hold about 4.
16.
Allow the samples to cool to room temperature. This should take about 10 –15 minutes.
17.
Weigh and record the weights of each weigh tin (W4) and filter bag (W2) immediately after removing
them from the Weigh Tin Desiccator.
The samples are now ready for the fat extraction procedure on the ANKOMXT10 instrument.
Seal

Operator’s Manual
pg. 18 Rev F 6/16/23
Sample Preparation Procedure for Crude Fat –
f
fo
or
r
L
Li
iq
qu
ui
id
d
s
sa
am
mp
pl
le
es
s
To prepare liquid samples for fat extraction, follow the procedure detailed below.
The first step in crude fat analysis is drying the sample. If a sample is not dried, weight loss after extraction will be
artificially high because it will include moisture loss.
1.
Label/number all empty filter bags with a solvent resistant marker (SKU: #F08).
2.
Place an empty filter bag in the Bag Holder in an open position. Record the
weight of the empty bag (W0).
3.
Tare the weight of the empty filter bag and the holder together.
4.
Add 1.0 –1.5g Diatomaceous Earth (DE) to the filter bag. Using a pencil eraser
(or similar sized utensil), make an indentation in the DE that the sample will later
be placed into. Record the weight of the DE (WDE) and then tare.
5.
Pipette 1.5 –2 g of liquid sample into the indentation in the DE.
(Do NOT use more liquid sample than can be absorbed by the DE.)
6.
Record the weight of the sample (W1).
7.
Set the Heat Sealer dial to 6. (The setting may vary from sealer to sealer.)
8.
Seal the filter bag within 4mm of its open end. Keep the
sealer arm down for 2 –3 seconds after the red sealer light
turns off (to cool the seal). The seal can be seen as a solid
melted stripe along the top edge of the filter bag (as shown
to the right). If the seal is not strong, re-seal the bag.
9.
Repeat steps 1 –8 for all filter bags that will be used in the ANKOMXT10 Extraction System.
(Up to 15 bags can be processed during one procedure.)
Seal

Operator’s Manual
Rev F 6/16/23 pg. 19
10.
Dry all samples at 102 °C ± 2 °C for 3 hours to remove moisture prior to the extraction.
11.
Remove the samples from the oven and place them in a Desiccant Pouch.
12.
Allow the samples to cool to room temperature. This should take about 10 –15
minutes.
13.
Weigh and record the weights of each bag (W2) immediately after removing them from the Desiccant
Pouch.
The samples are now ready for the fat extraction procedure on the ANKOMXT10 instrument.

Operator’s Manual
pg. 20 Rev F 6/16/23
This page intentionally left blank
Other manuals for XT10
2
Table of contents
Other Ankom Scrubber manuals
Popular Scrubber manuals by other brands

Tennant
Tennant CS16 Operator's manual

Nilfisk-Advance
Nilfisk-Advance BA 430S Use and maintenance manual

ServiceMASTER Clean
ServiceMASTER Clean 19300 owner's manual

Nilfisk-Advance
Nilfisk-Advance Aquamatic Selectric 56263500 Operator's manual

Nilfisk-Advance
Nilfisk-Advance ecoflex BA 551D Instructions for use

Tecnosystemi
Tecnosystemi Apply.co 11104029 user manual