I
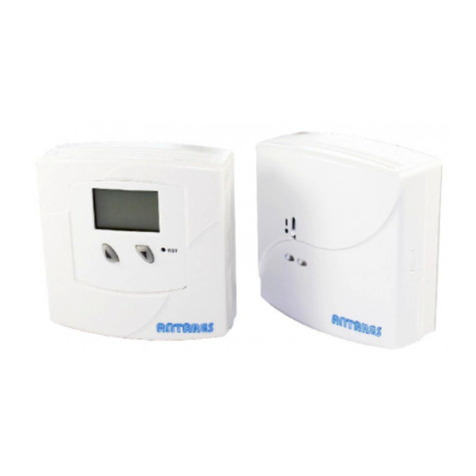
Art. T.009.01
for water & fire
ISTRUZIONI PER IL TERMOSTATO
ELETTRONICO T.009.01
A. INSTALLAZIONE
1. Scegliere un luogo con la temperatura costante
e con la distanza dal pavimento di circa 1.5 mt.,
lontano da: correnti d’aria, calore diretto del sole,
tubazioni nascoste e distante da fonti di calore o
apparecchi per aria condizionata. (vedi g. 1).
2. Attenzione! Ricordare di togliere la corrente
prima dell’installazione del termostato.
3. Rimuovere completamente il coperchio del
termostato usando il cacciavite (vedi g. 2)
premendo sul gancetto posto sopra il termostato e
rimuovere il frontale del termostato (vedi g. 3).
4. Rimuovere le viti site sul coperchio di protezione
dei li di corrente (vedi g. 4-1)
5. Far passare il lo di corrente al di sotto della base
del termostato.Posizionare e ssare la base al muro
(vedi g.4-2).
6. Collegare i li all’interno dell’apposito blocco
rispettando lo schema d’installazione secondo la
disposizione dei li sullo schema. (vedi g. 5)
7. Riposizionare il coperchio assicurandosi che i
gancetti sulla base blocchino il coperchio.
8. Ripristinare la corrente.
B. OPERAZIONI e CONFIGURAZIONE
1. Premere il tasto “▲” o “▼” ed il display visualizza
lampeggiando la temperatura con il simbolo “HEAT
ON” e “TEMPERATURE SET”.
2. Premere di nuovo il tasto “▲” o “▼” per stabilire
la temperatura desiderata. Ogni scatto dei pulsanti
aumenta o diminuisce la temperatura di 1°C.
3. Quando la scelta della temperatura è completata
attendere per 15 secondi che il display smetta
di lampeggiare. Il termostato a questo punto
è operativo e sul display viene visualizzata la
temperatura ambiente con il simbolo “HEAT
ON” nché la temperatura non raggiunge quella
prestabilita. Quindi l’unità opera per mantenere la
temperatura pressata.
MANUEL D’INSTRUCTIONS POUR
LE THERMOSTAT ÉLECTRONIQUE
T.009.01
A. INSTALLATION
1. Choisir un lieu qui ait une température constante
et avec une distance du sol d’environ 1,5 m., loin de:
courant d’air, chaleur directe du soleil, canalisations
cachées et loin de partes ou bouches d’air conditionnées
(voir g.1 ).
2. Attention! Avant d’installer le thermostat couper le
courant.
3. Détacher complètement la partie frontale du
thermostat en utilisant le tournevis (voir g.2), en
pressant sur le crochet situé au dessus du thermostat
et enlever le devant du corps du thermostat (voir g.3).
4. Enlever les vis situées sur le couvercle de protection
pour les ls de courant (voir g.4).
5. Faire passer le l du courant au dessous de la base
du therrnostat. Positionner et xer la base au mur (voir
g.4-2).
6. Raccorder les ls à l’intérieur du thermostat en
respectant le schéma d’installation selon la disposition
des ls sur le schéma (voir g.5)
7. Remonter la partie frontale du thermostat en
s’assurant que les crochets sur la base bloquent bien
le couvercle.
8. Rétablir l’alimentation électrique.
B. USAGE ET RÉGLAGE
1. En appuyant sur les boutons “▲” o “▼” sur
l’écran apparait le symbole qui clignote “HEAT ON” et
“TEMPERATURE SET” .
2. Appuyer de nouveau le boutons “▲” o “▼” pour
xer la température souhaitée. A chaque pression des
boutons, la température varie de 1 °C en hausse ou en
diminution.
BEDIENUNGSANWEISUNG FUR
DEN ELEKTRONISCHEN THERMOSTAT
T.009.01
A. INSTALLATION
1. Einen Platz auswahlen, wo die Temperatur
konstant ist und mit 1,5 m Abstand des Bodens.
Fernhalten von: Durchzug, dirkter Sonne und
versteckten Leitungen. Nicht in Nahe von einer Ture
oder einer Klimaanlage anbrigen (siehe Bild 1 ).
2. Achtung! Bevor der Thermostat installiert wird,
Strom abschalten.
3. Mit Hilfe eines Schraubenziehers an der Oberseite
des Thermostates einen Druck ausuben, damlt sich
die Vorderklappe lost (siehe Bild 3).
4. Die Schrauben auf dem Schutzdeckel aufdrehen
fur die Verbindungskabeln (siehe Bild 4-1 ).
5. Die Drahte durch die Halterung durchfuhren.
Positionieren und befestigen Sie die Halterung an
der Wand (siehe Bild 4-2).
6. Die internen Drahte des geeigneten Blockes ver-
binden, dabei den Schaltplan des Gerates beachten
MANUAL DE INSTRUCCIONES PARA EL
TERMOSTATO ELECTRONICO
T.009.01
A. INSTALACION
1.lnstalarlo en un lugar donde la temperatura sea
constante no menos de 1,5 m. del suelo, lejos de
corrientes de aire, contacto con la luz directa del sol,
tuberias escondidas y lejos de puertas o de la salida
del aire acondicionado (ver gura 1).
2. Atencion!!! Antes de instalar el termostato cortar
la corriente.
3. Desenganchar la parte frontal del termostato
utilizando un destornillador (ver g. 2) presionar
sobre la parte alta del termostato, quitar el frontal
separandolo dal cuerpo del termostato (ver g. 3).
4. Quitar los tornillos de la tapa de proteccion para los
hilos de la corri ente (ver g. 4-1 ).
5. Pasar los cables de la corriente por debajo de la
base del termostato. Fijar la base a la pared (ver g.4-
2).
6. Conectar los cables eléctricos en el interno del
respectivo bloque de terminales respetando el
esquema de la instalacion segun la disposicion de los
cables en el esquema (ver g. 5).
7. Montar la parte frontal controlando que este bien
enganchada a la base.
8. Reponer la alimentacion eléctrica general.
B. USO Y REGULACION
1. Apretar el boton “▲” o “▼” y el display visualizara
titilando la temperatura con el simbolo “HEAT ON” y
“TEMPERATURE SET”.
2. Apretar nuevamente el boton “▲” o “▼” para
estabilizar la temperatura deseada. Cada vez que se
taca el boton aumenta o disminuye la temperatura de
1 °C.
3. Una vez que hemos elegido la temperatura esperar
15 segundos para que el display deje de titilar. A este
punto el termostato ya funciona y en el display se
visualizara la temperatura ambiente con el simbolo
“HEAT ON” hasta que la temperatura no alcance
la temperatura elegida. El aparato funciona para
mantener la temperatura elegida.
3. Lorsque la température est xée, attendre 15
secondes pour que l’écran cesse de clignoter.
Le thermostat est maitenant opératif par conséquent
l’écran indiquera la température d’ambiance avec le
symbole “HEAT ON” jusqu’à ce que la température
souhaitée ne soit atteinte. Ensulte l’unité opère pour
maintenir la température préxée.
und die Aufstellung der Leltungen auf den Schaltplan
(siehe Bild 5).
7. Vorderseite anbringen und uberprufen, dass dies
gut an der Halterung befestigt ist.
8. Strom wieder einschalten.
B. GEBRAUCH UND REGULIERUNG
1. Die Taste “▲” oder “▼” drucken und das Display
zeigt blinkend die Temperatur mit dem Symbol
“HEAT ON” und “TEMPERATURE SET” an.
2. Erneut die Taste “▲” oder “▼” drucken um die
gewunschte Temperatur zu erreichen. Bei jedem
drucken der Taste steigt oder sinkt die Temperatur
um 1 Grad.
3. 1st die gewunschte Temperatur erreicht,
blinkt das Display noch fur 15 Sekunden auf. Der
Thermostat tritt in Aktion und die Anzeige zeigt
die Raumtemperatur mit dem Symbol “HEAT ON”
solange an bis die eingegebene Temperatur erreicht
ist. Dann wird der Thermostat dafur sorgen, dass die
Temperatur beibehalten wird.
F
ES
D
INSTRUCTION MANUAL FOR THE
ELECTRONIC THERMOSTAT MODEL
T.009.01
A. INSTALLATION
1. Look for a location witch has a constant
temperature in the house and not near to the door
entry or air condition outlet (see example on gure
1 ).
2. Warning!! You must remember to turn off
your main power switch before installation of the
thermostat.
3. Disconnect the front cover by using a screwdriver
pressing a hook on the top of the front cover (see
gure 2). Pull the front cover out with your hand
holding on two sides of the cover (see gure 3).
4. Untie the screw to remove the protection cover
(see gure 4-1 ).
5. Mount the base with the wire through the hole of
the base and tighten the base with screws on the
wall (see gure 4-2) .
6. lnstall the wires into the terminal block (see
gure 5). Before wiring, you must check your system
- wiring diagram. lf your system is other than this
type, please check with your local dealer or consult
with a professional electrician.
7. Put the front cover back on the base and make
sure the hooks on the base are locked with front
cover.
8. You can turn on the main power switch for
operation.
B. SETTING & OPERATING
1. Press either “▲” or “▼” and LCD display will
appear a flashing temperature with “Heat On”
symbol and “Temperature Set” symbol.
2. Press again either “▲” or “▼” to set a desired
temperature. Every press on “!” will increase 1 °C and
every press on “Y” will decrease 1 °C.
3. When you complete setting your desired
temperature, please wait for 15 seconds until the
LCD display stops flashing. Then the thermostat
starts to operate and the LCD display on the front
panel of this unit shows room temperature with
“Heat On” symbol until the temperature reaches your
set temperature.
UK
MANUAL DE INSTRUCTIUNI
T.009.01
A. INSTALAREA
1. Alegeți un loc cu temperatura constantă și cu
distanța de la pardoseala de cca. 1.5 m, departe de:
curenții de aer, căldura directă a soarelui, tubulaturi
ascunse i nu aproape de surse sau aparaturi de aer
condiponat (vezi g. 1).
RO


