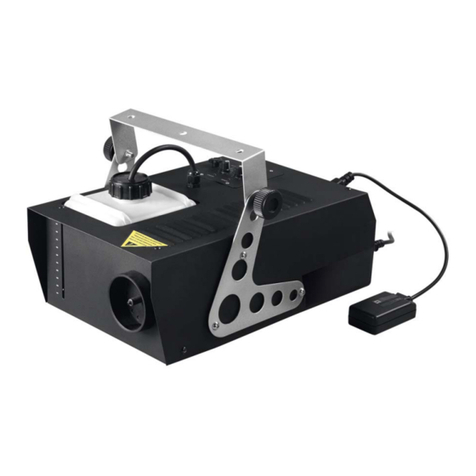
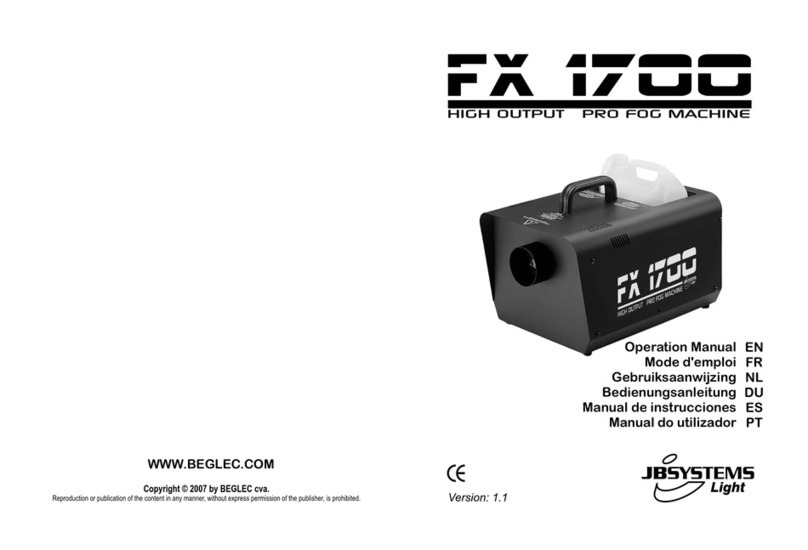
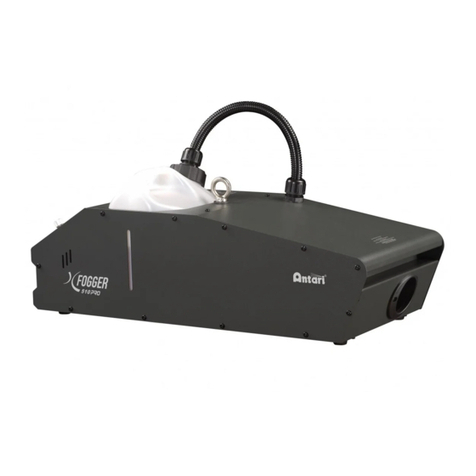
Antari X-310PRO User manual

1
X-310PRO USER MANUAL
English Français Deutsch• • •
2010 Antari Lighting and Effects Ltd.

2

3
Congratulations on the purchase of your new
ANTARI X-310PRO Fazer
-Introduction
Thank you for choosing an ANTARI X-310PRO Fazer. You now own a rugged and powerful
state-of-the-art machine. Besides its ability to operate silently, this new model is user-friendly in
terms of controlling and operating. In addition, for Antari X-310PRO it is W-DMX compatible. Prior
to use, we suggest that you carefully read all of the instructions. By following the suggestions
found in this user manual, you can look forward to the reliable and satisfactory performance of
your ANTARI Fazer Machine for years to come.
Cautions
Risk of electric shock. Disconnect the unit from the electric supply before removing the cover.
Note: there are no user serviceable parts inside. Contact authorized Antari dealers or qualified
technicians for assistance.
Please follow these operation, safety and maintenance instructions to ensure a long and safe life
for your fog machine.
-Important Safeguards
-Danger of Electric Shock
Keep this device dry.
For inside use only. Not designed for outside use.
For all models, machıne must be earthed. Prior to use take care to determine that the unit is
installed at the rated voltage.
Always unplug your ANTARI Fog Machine before filling its tank.
Keep fog machine upright.
Unplug the machine when not in use.
This machine is not water- or splash-proof. If moisture, water, or fog liquid gets inside the
housing, immediately unplug the unit and wipe off the moisture and keep it dry.
-Danger of Burns
Structural modification inside the machine is not allowed at anytime. Please do not attempt
to modify the machine by removing the cover, otherwise burns may result.
For adult use only. Never leave the unit running unattended.

4
Never aim the output nozzle directly at people.
Machine will warm up when operating, locate the fog machine in a well-ventilated area.
Never cover the unit's vents. In order to guarantee adequate ventilation, allow a free air space
of at least 30 cm around the sides and top of the unit.
Never aim the output nozzle at open flames.
Always allow your ANTARI X-310PRO Fazer to cool down before attempting to clean or service
it.
-Danger of Explosion
Never add flammable liquids of any kind (oil, gas, perfume) to the fog liquid.
Use only the high-quality, water-based ANTARI recommended FLG fog liquid. Other fog liquids
may cause clogging or damage the internal parts.
Always make sure there is sufficient liquid in the fog liquid tank. Operating this unit without
liquid will cause overheating.
If your ANTARI Fog Machine fails to work properly, discontinue use immediately.Drain all fog
liquid from the tank, pack the unit securely (preferably in the original packing material), and
return it to your ANTARI dealer for service.
Always drain tank before mailing or transporting this unit.
Never drink fog liquid.If it is ingested, call a doctor immediately.If fog liquid comes in contact
with skin or eyes, rinse thoroughly with water.
Important:
Pay attention to all warning labels and instructions printed on the exterior of your ANTARI
X-310PRO Fazer.
-Unpacking & Inspection
Open the shipping carton and verify that all equipment necessary to operate the system has
arrived intact.
Before beginning initial setup of your ANTARI Fazer Machine, make sure that there is no evident
damage caused by transportation. In the event that the unit's housing or cable is damaged, do not
plug it in and do not attempt to use it until after contacting your ANTARI dealer for assistance.
-Packaging
The shipping carton should include the following items:
1. X-310PRO Fazer machine with power cable
2. X-10PRO Control module
3. Fluid tank
4. User manual

5
Optional Accessories:
1. X-30PRO Wireless Control Module
2. FX-310 X-310PRO Flightcase
-Setup
1. Remove all packing materials from shipping box. Check that all foam and plastic padding is
removed, especially in the nozzle area.
2. Place fog machine on a flat surface and remove fog liquid tank cap.
3. Fill with only Antari Fog Fluid. Antari X-310PRO Fazer only works with uncontaminated Antari
FLG Fog Fluid. Other fluids may cause spitting and serious clogging problem and could result
in the production of an unhealthful fog. The use of other fluids will void the warranty of the
Antari X-310PRO Fazer. When filled, place cap back on liquid tank.
-Operation
1. The plug is at a position that is accessible when the machine is in use.
2. Plug power cord into a grounded electrical outlet. Turn power switch on rear of unit to "
ON" position. Warm-up is complete after approx. 8 minutes when the display on the control
module indicates "Ready to Fazer”.
3. To emit fog, please set the desired settings on your X-10PRO Control Module for interval,
duration, and press the appropriate button on the control module for the desired
length of time.
4. The control unit's display will cycle "Warming up" and "Ready to Fazer" while the machine
re-heats to the proper operating temperature.
5. When the fluid is running low, the LED inside the tank chamber starts blinking for two minutes
and then stops the operation to protect the pump from running dry.
6. The “Fanleaf” design can be adjusted by the pump-type screws on both sides to position the
faze output angle. In general, the haze produced from the X-310PRO Fazer is
semi-transparent due to fan spread. Thus, it is best to position it on the low ground and let it
produce haze upwardly to have ideal coverage.
7. For further information on operating your ANTARI X-310PRO Fazer, see the section titled,
"Control Module Operation" on page 4.
Caution: "Visibility during operation is reduced"
Important:
Always monitor tank fluid level as you are fogging. Running a fog machine with no fluid can
permanently damage the pump.
If you experience low output, pump noise or no output at all, unplug immediately. Check fluid level,
the external fuse, control module connection, and power from the wall. If all of the above appears
to be O.K., plug the unit in again. If fog does not come out after holding the button down for
MANUAL

6
30 seconds, check the hose attached to the tank to make sure there is fluid going through the hose.
If you are unable to determine the cause of the problem, do not simply continue pushing the
control module button, as this may damage the unit. Return the machine to your ANTARI dealer
immediately.
-Antari X-10PRO Control Module Operation
X-10PRO: The X-PRO is a 2-meter wired multifunction remotecontrol module with 5-pin XLR
connector for ANTARI X-PRO series model X-310PRO. Its LCD panel displays all
operation statuses of the fog machine. The interface allows the operator to customize
fog machine functions by adjusting the fogging duration, interval, volume, fan and
heater as well as the DMX address . There are six buttons on the control board. All
current operating parameters are automatically stored in non-volatile memory,
allowing the machine to be powered down without losing function settings.
-Menu Settings With The Button FUNCTION
Setting time intervals for timer operation
Press the button FUNCTION until the display indicates » Interval Set « . Use the buttons UP
and DOWN to adjust the intervals between the individual fog outputs in timer mode
within the range of 1 and 200 seconds.
Setting the output duration for timer operation
- Press the button FUNCTION until the display indicates » Duration Set «. Use the buttons UP
and DOWN to adjust the duration of the fog outputs in timer mode within the range of 1
and 200 seconds.

7
Setting the fog output volume for timer operation
- Press the button FUNCTION until the display indicates » Timer Out «. Use the buttons UP
and DOWN to adjust the fog output volume in timer mode within the range of 1 % and 100
%.
Setting the fog output volume for continuous operation
- Press the button FUNCTION until the display indicates » Volume Out«. Use the buttons UP
and DOWN to adjust the fog output volume in continuous mode within the range of 1 %
and 100 %.
- To set the unit to continuous fog output, select » NON STOP BURST « below a value of 1 % or
above a value of 100 %.
Setting the DMX512 address
- Press the FUNCTION until the display indicates » DMX 512 Add «. Use the buttons UP and
DOWN, to set the machine to the same address as on your DMX controller. Please refer to
the chapter DMX512 settings for more information on DMX operation.
Setting the fan speed
- Press the FUNCTION until the display indicates » LOW>HI «. Use the buttons UP and
DOWN, to adjust the fan speed.
Turning the fan and heater on or off
- Press the FUNCTION until the display indicates » Heater & Fan Open «. Use the button
MANUAL, to switch the fan and the heater on or off.
Continuous operation
- Press the button VOLUME , to activate continuos fog output. The display indicates » Volume «
followed by the value that was set in menu item » Volume Out « or » NON STOP BURST « when
maximum fog volume was selected. To stop the fog output, press the button VOLUME once again.
Manual operation
- For immediate fog output at the maximum volume of fog, keep the button MANUAL
pressed. The display indicates » Manual 100 % «. As soon as you release the button, the fog
output will stop. The manual operation will take priority over the continuous operation and the
timer operation. Even if one of these operating modes is activated, the fog machine will always
emit the maximum volume of fog when the button MANUAL is pressed.
Timer operation
- In the time mode, the fog machine will automatically emit fog. The time intervals, duration and
MANUAL
MANUAL
MANUAL

8
fog volume depend on the corresponding menu settings. Press the button TIMER , to activate
the timer mode. The display indicates the set time interval. The unit counts down to 0 seconds and
emits fog. To deactivate the timer mode, press the button TIMER again.
X-10PRO REMOTE CONTROL EXTERNAL VIEW
01 Thumb Screws.
02 L.C.DScreen.
03 Function Keypad.
04 Cable For Remote
Control (2m/5-pin)
.
-Antari X-30PRO Control Module Operation
X-30PRO Wireless Control Module Operation
All the X-10PRO features plus wireless capability.
The wireless control module X-30PRO consists of a transmitter equipped with two buttons for fog
on and off, and a receiver pre-attached to the panel of each X-30PRO.
* Transmitter:
With the transmitter it is possible to emit fog via radio over a distance of up to 50 meters. The
transmitter is compatible to any receiver of the X-30PRO and can control an unlimited number of
machines in parallel.

9
Press the button “A”, to emit fog. The button “A” has the same function as the button VOLUME on
the control panel, i.e. the fog output depends on the setting of menu item »Volume Out«. The
display indicates »Volume« followed by the defined value or »NON STOP BURST« when continuous
fog output was selected. To stop the fog output, press the button “B”.
* Receiver:
The receiver is tested and pre-attached to the panel of each Z-30PRO. Please do not try to remove
it. The receiver responds to up to 5 different transmitters that are registered with the machine. The
included transmitter has been registered to the machine before shipment. It can be directly
operated without any start-up setting.
-Registering transmitters
To operate the machine with a different transmitter than the included one, or to operate it with up
to 5 different transmitters, each transmitter must be registered first. For this purpose, turn on the
machine. When the display indicates »Wireless Setup«, press the button “A” 1 second on each
transmitter. Thus the previous transmitters are cleared from the memory of the receiver. The
setting must be completed within 15 seconds after switching on the machine. Then the machine
will automatically exit the transmitter setting mode. The display shows »Wireless Setup OK«. At
this point, no further transmitter can be added.
If no transmitter is registered when the machine is switched on, the memory of the receiver will
keep the record of the previous operation.
Setting Example 1:
In order to register several transmitters with a machine, turn on the machine. When the display
indicates »Wireless Setup«, press the button “A” 1 second on each transmitter within 15 seconds
to establish the signal transmission.
Setting Example 2:

10
In order to use 1 transmitter to control 2 or more machines, turn on the machines respectively.
When the displays indicate »Wireless Setup«, press the button “A” 1 second on the transmitter
within 15 seconds to establish the signal transmission.
-Battery change on the transmitter
If the range of the transmitter decreases, the battery is probably exhausted and must be replaced.
For this purpose, take off the housing cover and remove the used battery. Insert a fresh DC 12V
battery as indicated in the battery compartment and refit the housing cover.
Switching the wireless function on and off
Press the button FUNCTION until the display indicates »Wireless On«. Use the buttons UP and
DOWN to deactivate the wireless function (indication »Wireless Off«) and to reactivate it
(indication »Wireless On«).
Note: When warming-up process is completed and wireless function is activated the
LCD screen indicates “Ready To Faze W”. (“W” means Wireless) On the contrary, when
the wireless function is deactivated the LCD screen shows “Ready To Faze” (Without
“W”).
X-30PRO REMOTE CONTROL EXTERNAL VIEW
02 L.C.DScreen.
03 Function Keypad.
04 Cable For Remote Control
(2m/5-pin)
.
05 Receiver.
06 Transmitter.
01 Thumb Screws.
OFF
ON

11
-ANTARI On-Board DMX Module Settings
There are 3-pin and 5-pin male/female DMX control sockets for connecting your selection located
at the rear panel of the X-310PRO fazer. The X-310PRO Fazer has on-board DMX control. This model
uses two channels to control Volume output and Fan speed. Whatever channel you select on the
unit, the channel next to it will automatically be selected for fan volume control. The X-310PRO fan
has three fan speeds: Slow, Medium, and Fast. If the machine was assigned to the DMX address
124 e.g., Channel A would correspond to DMX address 124 and channel 125 will automatically be
selected for fan control.
Please note: Your X-310PRO Fazer and its liquid tank and tube were thoroughly tested and cleaned.
When operating the unit for the time, please press the button MANUAL for 3 to 5 seconds to
let the unit circulate. Please do not try to set the timer function on your first operation. In addition,
it is normal for the machine to produce some pumping sound for about 3 to 5 seconds. After the
machine is operating smoothly you can start to set the desired operating functions. In future, it is
strongly recommended to empty the liquid tank before transporting and follow the methods
mentioned above for machine circulation after each transportation.
Channel A (Fan speed)
MEDIUM
Value Function
86-170
SLOW0-85
FAST171-255
In general, fan speed and fog density are in reverse propotion. For example, if you are operating
at 100% fog output, and fan speed is slow, heavy fog is being produced. When fan speed is high,
fog density is consequently lighter/more transparent.
Channel B (Volume control)
Volume Control (5 % - 100 %)
Value Function
6-255
OFF(0%)
0-5
If Channel B has a value from 0 to 5, the unit is OFF.
Between the values 6 to 255 the volume of fog output is regulated. With 6 being the minimum
volume of fog produced and 255 the maximum. The volume output rises as the DMX value is
increased. The Antari X-310PRO Fazer can produce maximum continuous output.
-Maintenance & Storage
Do not allow the fog liquid to become contaminated. Always replace the caps on the fog liquid
MANUAL

12
container and the fog machine liquid tank immediately after filling. Do not operate the fog
machine without liquid at any time.
Clean with a dry cloth only. Store dry. Cleaning your fog machine regularly will help reduce
costly replacement and repair charges.
Note: All fog machines are prone to clogging due to the thick consistency of fog liquid and the
high temperature at which it vaporizes. It is strongly recommended that after 2,000 hours
of operation, do regular maintenance and services. A properly maintained fog machine
should provide years of reliable use.
It is strongly recommended to test-run the machine on a monthly basis in order to achieve its
best fogging condition. A test-run consists of warming up the machine followed by a few
minutes of emission. Then please cool down the machine.
-Performance Notes
It is recommended that you set Fan output to 100% and Fog Volume output between 15 to
20%. This setting will guarantee continuous output of very fine haze effect. Press button
to set your desired fog effect.
Whenever enormous effect is required, press Manual key to emit faze at 100% output
instantly.
-Specifications
MODEL
Power
Heater
Fog Output
Output
First Heat-up Time
Fluid Consumption Rate
Tank Capacity
Weight
Dimensions(mm)
Pressure
X-310PRO
100/120 VAC, 230/240 V AC
50-60 Hz
1,000W
0.686 pa
10 min
45 min/liter, 2 hr. /Liter
(100% output, 30% output)
2.4 Liter
18 kg
L635 W275 H281
10,000 cu.ft./min
Please read and save these instructions.
MANUAL

13

14
-ANTARI X-310PRO on-board DMX settings
ChannelA
6-255 (5%-100%)
0-5 (OFF)
ChannelB
86-170 (MEDIUM)
0-85 (SLOW)
Volume outputFanSpeed
171-255 (FAST)
The X-310PRO Fazer has on-board DMX control. This model uses 2 channels to control Volume
output operation and Fan operation. Whatever channel you select on the unit, the channel next to
it will be automatically selected for fan volume control. Each channel has a value range of 0 to 255.
Timer functions such as duration and interval can be programmed using the DMX controller or the
DMX control software being used by lighting and effects operator.
If Channel B has a value from 0 to 5,
The unit is OFF.
Between the values 6 to 255 the volume of fog output is regulated. With 6 being the minimum
volume of fog produced and 255 approaching the maximum. The volume output rises as the DMX
value is increased.
Note: If the machine was assigned to the DMX address 124 e.g., Channel A would correspond to
DMX address 124 and channel 125 will automatically be selected for fan control.
The Nonstop Burst Function (continuous fog output) cannot be controlled or set via DMX.

15
ANTARI LIMITED WARRANTY
Thank you for purchasing an Antari product from an authorized Antari dealer. We take great pride
in the highest quality and reliability of our products. Please follow proper operation and storage
procedures outlined in your accompanying user manual.Shall you require any further assistance,
please kindly contact sale[email protected]
Warranty shall be valid only if the product is purchased from Antari’s authorized distributors or
dealers. For warranty service, send the product in original packaging to an authorized distributor or
dealer.
All warranties are void if the product has been modified in any manner; if the product has been
repaired or serviced by unauthorized personnel; or the product is damaged due to improper use or
maintenance as set forth in the instruction manual.
This is not a service contract and does not include standard maintenance or cleaning. All
expendables are not covered by this warranty.
Additional warranties provided at the discretion of the distributor dealers shall remain the sole
obligation of the distributor or dealer.

16
Nous vous félicitons pour l'achat de votre
nouvelle machine à fume
ANTARI X-310PRO.
-Introduction
Nous vous remercions d'avoir choisi une machine à fumée d'ANTARI X-310PRO. Vous êtes en
possession d'un produit robuste et puissant. En vue d'utiliser correctement votre nouvel appareil,
veuillez lire attentivement ce mode d'emploi. Si vous respectez les instructions suivantes, vous
profiterez d'une performance solide et convaincante de votre machine à fumée ANTARI pour de
nombreuses années.
ATTENTION!
Risques d'électrocution. Protéger de l'humidité. Débrancher avant d'ouvrier le boîtier!
L'intérieur de l'appareil ne contient pas de parties nécessitant un entretien. L'entretien et les
réparations sont à faire effectuer par un revendeur autorisé.
Pour assurer la longévité et le bon fonctionnement de votre machine à fumée, veuillez lire
attentivement les instructions suivantes concernant le maniement, la sécurité et l'entretien.
‘
-Instructions de sécurité
-Risques d'électrocution
Protéger de l'humidité.
L'appareil a été conçu pour un emploi dans des locaux clos. Ne pas utiliser à l'extérieur.
Pour touts les modèles, utilisez uniquement des prises de courant à terre à 3 broches. Avant la
première mise en marche, assurez vous que l'appareil soit branché à l'alimentation correcte.
Débranchez l'appareil avant de remplir le réservoir.
Assurez vous d'installer la machine à fumée toujours droit.
Eteignez l'appareil ou débranchez-le du secteur, quand il Est hors d'usage.
Si de l'humidité, du liquide ou du liqide à fumée devait penétrer à l'intérieur de l'appareil,
débranchez immédiatement l'appareil et essuyez-le.
-Danger d'incendie
Pour des raisons leés à la sécurité de l’appareil, la transformation ou la modification de

17
l’appareil parl’utilisateur sont interdites. L’appareil ne doit être ni ouvert.L'appareil n'est prévu
que pour l'usage par des personnes adultes. Installez-le hors de l'atteinte des enfants. Ne
jamais faire marcher sans surveillance.Ne jamais braquer le bec de l'appareil directement sur
des personnes.
Le débit de la machine à fumée est très chaud. Pendant que la machine est en marche,
respectez une distance d'environ 50 cm vis-à-vis son bec.
Installez l'appareil à un endroit bien aéré. Ne jamais couvrir les orifices d'aération. Pour
garantir une aération suffisante, laissez libre un espace de 30 cm autour et au-dessus de
l'appareil.
Ne jamais braquer le bec de la machine sur des flammes.
Laissez refroidir la machine à fumée d'ANTARI avant toute manipulation.
-Risques d'explosion
Ne jamais entremêler des liquides enflammables à Composants gazeuz ou huileux au liquide à
fumée.
Employez uniquement des liquides à fumée de haute qualité à base d'eau recommandés par
votre revendeur. Autres liquides à fumée pourraient causer des problems d'encrassage ou des
crachotements.
Faites attention qu'il y ait toujours suffisamment de liqude à fumée au réservoir. Un emploi
sans liquid pourrait endommager la pompe ou provoquer la surchauffe de l'élément de
chauffage.
Si votre machine à fumée ANTARI ne devait plus travailler correctement, l'éteignez
immédiatement. Videzcomplètement le réservoir, emballez soigneusementl'appareil (au
mieux dans son emballage d'origine) et l'envoyez-le à votre revendeur d'ANTARI.
Toujours vider le réservoir avant d'envoyer ou transporter l'appareil.
Ne jamais avaler le liquide à fumée. Si c'était tout de même le cas, consultez un médecin
immédiatement. En cas de contact avec la peau ou les yeux, rincer à grande eau.
ATTENTION!
Veuillez suivre toute instruction de sécurité appliquée sur le boîtier de votre machine à fumée
d'ANTARI.
-Déballage & inspection
Ouvrez le carton d'extérieur et assurez vous que tous les parts n'aient subi aucun dommage
durant leur transport. Assurez-vous que le carton d'expédition contient les articles suivants:
Avant de faire fonctionner votre machine à fumée, vérifier bien qu'il n'y ait eu aucun dommage dû
au transport. Si l'appareil ou un câble était endommagé, ne branchez pas la machine et n'essayez
pas de l'utiliser sans avoir au préalable contacter votre revendeur d'ANTARI après-vente du
magasin.

18
1. Une unité de machine de fumée X-310PRO avec câble Secteur
2. X-10PRO module de contrôle
3. Réservoir de liquid
4. Mode d’emploi
Accessoire optionnel:
1. X-30PRO module de contrôle sans fil
2. FX-310 Flight Case
-Installation
1. Enlevez tout matériau d'emballage. Assurez vous d'avoir enlevé toute la mousse et le
rembourrage en plastique, sûrtout au bec de la machine.
2. Placez la machine à fumée sur une surface plane et dévissez le couvercle du réservoir du
liquide à fumée.
3. Remplissez le réservor de liquide à fumée ANTARI ou d'un autre liquide à fumée de haute
qualité à base d'eau. Refermez le réservoir.
-Maniement
1. Branchez la fiche d'alimentation de la machine à fume dans une prise de courant avec terre.
Mettez le commutateur d'alimentation à l'arrière de l'appareil à "ON". Le temps de
préchauffage est terminé, dès que l'affichage indique "Ready to Faze".
2. Pour déclencher le jet de fumée, pressez le boutoncorrespondant sur la télécommande.
Continuez à appuyer sur le bouton jusqu'à ce que le débit désiré soit atteint.
3. “Warming up“ sera inscrit sur la affichage LCD à chaque fois que la machine se réchauffe pour
atteindre la température de fonctionnement nécessaire. A ce momnet là, “Ready to
Faze“ s'inscrira.
4. Quand il reste peu de liquide à fumée, la LED à l'interieur du réservoir clignote pendant 2
minutes, puis la machine s'arrête afin d'éviter qu'elle tourne à vide.
5. L'angle du débit de brouillard peut être changé grâce au réglage des deux vis au bec de sortie
amovible. La machine à fumée X-310II produit le brouillard transparent. C'est recommandable
de installer la machine à fumée sur une surface plane. Ainsi le débit du brouillard monte
verticalement pour le meilleur effet possible.
6. Pour des informations complémentaires concernant le maniement de votre machine à fumée
d'ANTARI, voir la Partie intitulée "Maniement avec module de contrôle".
Important
La visibilité est réduite pendant l'utilisation.

19
-Important
Observez toujours le niveau de liquide à fumée au réservoir pendant les jets de fumée. Un emploi
sans liquide à fumée peut endommager la machine.
Si vous apercevez un débit trop faible, un bruit de la pompe ou la manque totale de débit,
débranchez immédiatement votre machine. Vérifiez le niveau de liquide, la fusible externe, la
connection à la télécommande et l'alimentation au secteur. Si tout apparaît être correct, branchez
de nouveau. S'il n'y a aucune production de fumée après que vous avez pressé le bouton sur la
télécommande pendant 30 secondes, vérifiez si le liquide passe par le disperseur qui est attaché au
réservoir. Si vous n'arrivez pas á déterminer la cause du problème, ne ontinuez pas à presser le
bouton de la télécommande. Cela pourrait endommager votre machine. Envoyez la machine à
retour à votre revendeur ANTARI.
-Maniement avec module de contrôle X-10PRO
X-10PRO: La module de contrôle multifonction X-10PRO est reliée à un cordon de 2 m, et est
composée de 5 broches XLR, et peut être connectée aux la machine à fumée X-310PRO. Cette
commande a pour fonction d'ajuster le temps, les intervalles, et le volume de débit. L'écran LCD
des paramètres d'utilisation sont automatiquement munis d'une mémoire constante qui permet à
la machine de ne perdre aucun réglage des fonctions lorsqu'elle est éteinte.
-Réglage de menu avec le bouton FUNCTION
- Réglage de l'intervalle pour le fonctionnement timer
Appuyez sur le bouton FUNCTION jusqu'à l'écran indique » Interval Set « [réglage de l'intervalle].
Utilisez les boutons
UP et DOWN pour ajuster les intervalles entre les dégagements individuels de fumée
pour le fonctionnement timer (plage de réglage : 1 à 200 secondes).

20
- Réglage de la durée pour fonctionnement timer
Appuyez sur le bouton FUNCTION jusqu'à l'écran indique » Duration Set « [réglage de la durée].
Utilisez les boutons UP et DOWN pour ajuster la durée de chaque dégagement de
fumée entre 1 à 200 secondes.
- Réglage de la volume de fumée pour le fonctionnement timer
Appuyez sur le bouton FUNCTION jusqu'à l'écran indique » Timer Out « [réglage du volume de
fumée]. Utilisez les boutons UP et DOWN pour ajuster le volume de fumée pour le
fonctionnement timer entre 1 % à 100 %.
- Réglage de la volume de fumée pour le fonctionnement continu
- Appuyez sur le bouton FUNCTION jusqu'à l'écran indique » Volume Out « [réglage du volume
de fumée]. Utilisez les boutons UP et DOWN pour ajuster le volume de fumée pour
le fonctionnement continu entre 1 % à 100%.
- Pour choisir fumée continu, choisissez
»NON STOP BURST « sous un valeur de 1 % ou au dessus d'un valeur de 100 %.
- Réglage de l'adresse DMX512
Appuyez sur le bouton FUNCTION jusqu'à l'écran indique » DMX 512 Add « [Réglage de l'adresse
DMX512]. Utilisez les boutons UP et DOWN pour régler l'adresse DMX de l'appareil.
Veuillez vous référer au chapitre sur la configuration DMX512.
- Réglage de la vitesse du ventilateur
Appuyez sur le bouton FUNCTION jusqu'à l'écran indique » LOW>HI « [lent>vite]. Utilisez les
boutons UP et DOWN pour régler la vitesse du ventilateur.
-Mettant le ventilateur et l'élément de chauffage en/hors marche
Appuyez sur le bouton FUNCTION jusqu'à l'écran indique » Heater&Fan Open «. Utilisez le
bouton MANUAL pour mettre le ventilateur et l'élément de chauffage en ou hors marche.
-Fonctionnement continu
Pour activer le mode continu, appuyez sur le bouton Volume . En mode continu, l'appareil dégage
tout le temps de la fumée. L'écran indique la valeur ajustée ou Nonstop Burst au menu» Volume
Out « [réglage du volume de fumée]. Pour désactiver le débit de fumée, appuyez sur le bouton
Volume autre fois.
- Fonctionnement manuel
Pour dégager immédiatement manuellement la fumée avec quantité maximale, appuyez et
maintenez le bouton MANUAL. L'écran indique » Manual 100% «. En lâcher le bouton, le
MANUAL
MANUAL
Table of contents
Languages:
Other Antari Fog Machine manuals

Antari
Antari F-2 Fazer User manual

Antari
Antari Z-380 User manual

Antari
Antari FT-50 User manual

Antari
Antari B-100X User manual

Antari
Antari M-5 User manual

Antari
Antari FT-100 Fire Training User manual

Antari
Antari DNG250FE User manual

Antari
Antari M-9 RGBAW User manual

Antari
Antari FT-50 User manual

Antari
Antari MOBILE MB-55 User manual

Antari
Antari W-515 User manual

Antari
Antari FT-100 Fire Training User manual

Antari
Antari Fog cooler DNG-100 User manual

Antari
Antari X FAZER User manual

Antari
Antari HZ-350 User manual

Antari
Antari M-8 User manual

Antari
Antari F-4 Fazer User manual

Antari
Antari X FOGGER User manual

Antari
Antari F-80ZY User manual

Antari
Antari S-100 II User manual