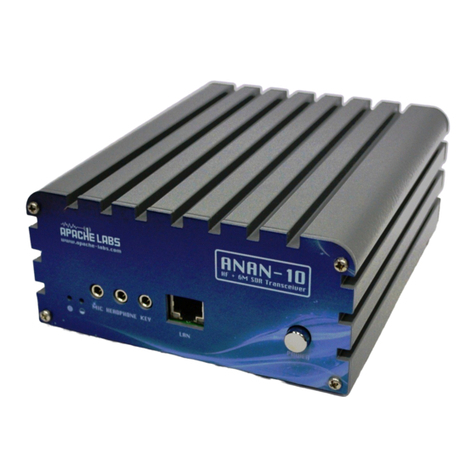
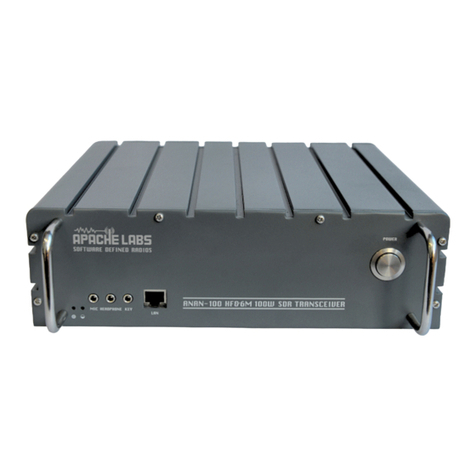
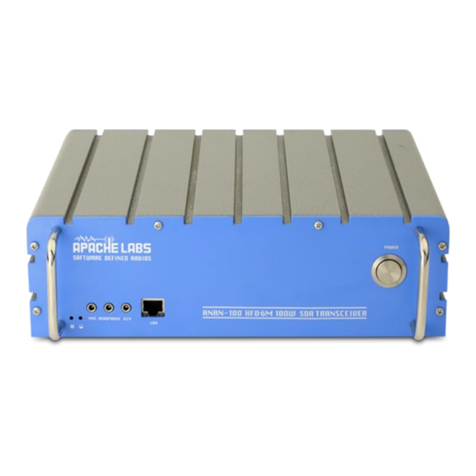
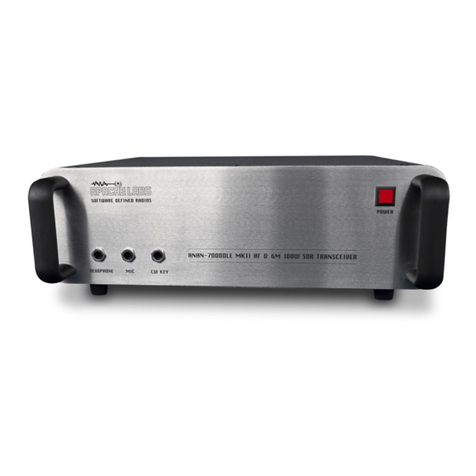
Apache Labs ANDROMEDA ANAN-7000DLE MKII User manual

ANDROMEDAManual Page1of56
openHPSDR
ANDROMEDA/
ANAN‐7000DLEMKII
withIntegratedPC
UserGuide

ANDROMEDAManual Page2of56
ThisdocumentcontainsthewordsApache,ANDROMEDA,ANANinreferencetotheApacheLabs
Transceiverproducts.
http://www.apache‐labs.com
IncooperationwithVK6PH,NRØV,W5WC,K5SO,LA2NI,G8NJJandtheOpenHPSDRHardwareand
SoftwareProjectshttp://openhpsdr.org
AllimagesandmanufacturerdataiscopiedherewithpermissionoftheownerApacheLabs
Note:CustomerisresponsibleforFEDEXshippingandalllocalCustoms,Tariff,VAT,Taxesand
incidentalchargeswithintheirdelivery[address]Country.PleasecontactApacheSupport
support@apache‐labs.comfordetailsregardingyourorderorshippingcharges.
ApacheLabsLLC,Inc.‐DeclarationsofConformity
TheANDROMEDAcomplieswithFCCPart97rulesfortheAmateurRadioService.Ithasbeen
confirmedbytherelevantauthoritiesthattheANDROMEDADOESNOTrequireFCCcertification.
Underrule97Amateurradioequipmentwiththeexceptionofamplifiersandscanningreceiversare
exemptfromcertification,however,mustconformtorule97whichstatesthatharmonicand
spuriousemissionsmustbebelow43dBofthetransmittedoutupto30MHzand60dBbeyondthat.
ApacheLabsProductsCEandRTTECertified
CE&ECRadioandtelecommunicationsterminalequipment[RTTE]Certification.
WearepleasedtoannouncethattheANANseriesHF&6MSDRtransceiversincludingANDROMEDA
isnowCEandRTTEcertifiedasperEUtradedirectives,ANDROMEDAisRoHScompliantaswell,we
ensurethatourproductsareofthehighestqualityandmeetinternationalstandardsofqualityand
compliance.

ANDROMEDAManual Page3of56
Contents
Contents
1KeyFeatures....................................................................................................................................7
1.1Benefits...................................................................................................................................7
1.2Architecture............................................................................................................................8
1.3WritingStyle............................................................................................................................9
1.4ANDROMEDADesignTeam.....................................................................................................9
2FrontPanelFunctions...................................................................................................................10
2.1Touchscreen..........................................................................................................................10
2.2RotaryEncoders....................................................................................................................11
2.2.1VFO................................................................................................................................11
2.2.2RX1AF/RFGain.............................................................................................................12
2.2.3RX2AF/RFGain.............................................................................................................12
2.2.4Drive/Multifunction......................................................................................................12
2.2.5FilterHigh/LowCut.......................................................................................................13
2.2.6DiversityGain/Phase.....................................................................................................13
2.2.7RIT/Unallocated............................................................................................................13
2.3PushbuttonsandIndicators..................................................................................................13
2.3.1Lefthandbuttons..........................................................................................................13
2.3.2Softkeybuttons.............................................................................................................14
2.3.3BandButtons.................................................................................................................14
2.3.4VFOButtons..................................................................................................................14
2.3.5EditingtheFrontPanelcontrolAssignments................................................................15
2.3.6FrontPanelConnections...............................................................................................15
3RearPanelConnections................................................................................................................16
4Installation....................................................................................................................................17
4.1ImportantOperationtips......................................................................................................17
4.2HeatDissipation....................................................................................................................17
4.3QuickStart.............................................................................................................................17
5GettingStarted..............................................................................................................................19
5.1PoweringUp,RunningThetis................................................................................................19
5.2VFOSelection&Tuning........................................................................................................19
5.3BandSelection......................................................................................................................19
5.4ModeSelection.....................................................................................................................19
5.5AF/RFGain............................................................................................................................19

ANDROMEDAManual Page4of56
5.6Panadapterdisplays..............................................................................................................20
5.7MeterMode..........................................................................................................................20
5.8Changingantennas................................................................................................................20
5.9UsingtheSoftkeyMenus......................................................................................................21
5.9.1QuickMenu...................................................................................................................21
5.9.2RXMenu........................................................................................................................21
5.9.3VFOMenu.....................................................................................................................21
5.9.4TXMenu........................................................................................................................22
5.9.5DisplayMenu................................................................................................................22
5.9.6AudioMenu...................................................................................................................22
5.9.7SetupMenu...................................................................................................................22
5.9.8ExtendedMenu.............................................................................................................23
6DetailedOperations......................................................................................................................24
6.1VoiceTransmission...............................................................................................................24
6.1.1TXSettings.....................................................................................................................24
6.1.2MicrophoneSetup........................................................................................................24
6.1.3EnteringTXMode.........................................................................................................25
6.1.4Transmission.................................................................................................................25
6.1.5MoreTXSettings...........................................................................................................26
6.2CWoperation
........................................................................................................................26
6.2.1ConnectingaKey...........................................................................................................26
6.2.2ReceivingCW.................................................................................................................26
6.2.3TransmittingCW...........................................................................................................27
6.2.4CWModesettings.........................................................................................................27
6.2.5QSK................................................................................................................................27
6.3Othermodes.........................................................................................................................29
6.3.1FMOperation................................................................................................................29
6.3.2DigitalModes................................................................................................................29
6.4AdvancedReceiverOperation..............................................................................................29
6.4.1DualRXOperation.........................................................................................................29
6.4.2Attenuation...................................................................................................................29
6.4.3FilterHigh/LowCut.......................................................................................................29
6.4.4NoiseBlanking&reduction..........................................................................................30
6.4.5Diversity........................................................................................................................30
6.5RIT,XIT..................................................................................................................................30
6.6SplitFrequencyOperation....................................................................................................31

ANDROMEDAManual Page5of56
6.7Puresignal..............................................................................................................................31
6.7.1SettingUpPuresignal....................................................................................................31
6.7.2OperatingwithPuresignal............................................................................................32
6.7.3ExternalLinearAmplifier...............................................................................................32
6.8ATU........................................................................................................................................32
7ConfiguringThetisandANDROMEDA...........................................................................................33
7.1ThetisSetupScreen...............................................................................................................33
7.2ANDROMEDASetupscreen..................................................................................................34
7.3ChangingFrontPanelControlAssignments..........................................................................34
7.3.1EncoderTab..................................................................................................................35
7.3.2PushbuttonTab.............................................................................................................37
7.3.3IndicatorTab.................................................................................................................38
7.3.4MenuTab......................................................................................................................39
8ConnectingAccessories.................................................................................................................41
8.1LinearAmplifier.....................................................................................................................41
8.1.1PTTOut..........................................................................................................................41
8.1.2ALC................................................................................................................................41
8.1.3OpenCollectorBCDkeying............................................................................................41
8.1.4Puresignal
......................................................................................................................42
8.2Transverter............................................................................................................................43
8.3CATcontrol............................................................................................................................44
9Specifications................................................................................................................................45
10Maintenance.............................................................................................................................46
10.1PCMaintenance....................................................................................................................46
10.2PCNetworking......................................................................................................................46
10.3FileLocations.........................................................................................................................47
10.4ThetisInstallation..................................................................................................................47
10.5ThetisUpgrades....................................................................................................................51
10.6DatabaseReset.....................................................................................................................51
10.7Reflashingfirmware..............................................................................................................51
10.7.1HPSDRBootloaderv2.0..................................................................................................52
10.7.2AssignStaticIPAddressusingHPSDRBootloader.........................................................53
10.7.3HPSDRProgrammerforProtocol2................................................................................53
10.8BlockDiagrams......................................................................................................................55
11Support......................................................................................................................................56
11.1Warranty...............................................................................................................................56

ANDROMEDAManual Page6of56
11.2References............................................................................................................................56

ANDROMEDAManual Page7of56
1KeyFeatures
TheANDROMEDA/ANAN‐7000DLEMKIIi5/i7AmateurRadioTransceiverisamoderndirect‐down‐
conversion[DDC]receiver,anddirect‐up‐conversion[DUC]transmitter,SoftwareDefinedHF
transceiverplus6Meters.ANDROMEDAhasaproudheritagefromtheTAPRHermesTransceiver
introducedin2012.Itisbasedupontheestablished7000DLEmk2RF,DSPandPC,plusanintegrated
frontpanelwithradiocontrolsandtouchscreendisplay.
TheANAN‐7000DLEMKIIi5/i7modeliswithouttheAndromedafrontpanel,itiscapableofbeing
upgradedwiththeAndromedaFrontpanel.ThismodelsupersedesthepreviousIntegratedPC
ANAN‐7000DLEMKIIandincludesanumberofimprovementsandupgradestothehardware.
ANDROMEDAfirmwareupdatescanbeeasilyinstalledviatheradio’sstandardEthernetconnection,
eliminatingtheneedforspecialmechanicalorprogrammingadapters.Itisnotnecessarytoopen
theANDROMEDAcabinettoupdatethefirmware.A“Bootloader”switchhasbeenaddedtothe
backpaneloftheANDROMEDAforeaseoffutureupdates.
TheANDROMEDAtransceiverhasbeendesignedfortheTHETISPCSoftwareDefinedRadioprogram.
THETIShasthelatestSDRprocessingfromtheOpenHPSDRlineandisbasedontheprovenWDSP
libraries.Ithasfullsupportfordualreceivers,antennadiversityandPureSignalTXlinearization.
However,otherSDRprogramscouldbeusedincludingthosewrittenforWindows®,Linux,
MacOS/X®,Android,RaspberryPi,andotheroperatingsystems.Thecommandinterfacedtothe
frontpanelusessimplepublishedCATcommandsandotherprogramscouldbeadaptedtosupport
it.
1.1 Benefits
ANDROMEDA–Secondtonone!
UsingDirectDownConversionwithanultralowphasenoiseclockyieldsanRMDRof116dB
@2KHzseparation,thismeansthatcloseinweaksignalswillnotbemaskedbythe
receiver’sphasenoise.
Thetransmitterspecificationsarealsooffthechart,useofanew16‐bitDACwithanultra
lownoiseclocksourceresultsintransmitphasenoisebetterthananyotherproduct
availableinthemarket.
UseofLDMOSdriversandanoptimizedfinalAmplifierstagewithadaptivePredistortion
Algorithm(PureSignal)yieldstransmitIMDofbetterthan60dB,thisisatleast20dBbetter
thananyClassAtransmitterandover30dBbetterthanthecompetition.
Useoftwo16‐bitphasesynchronousADCsallowforadvancedapplicationssuchasDiversity
receptionforultimatenoisemitigationandeffectsofsignalfading.
TheANDROMEDAHF&6M100WSDRTransceiverofferstopofthelineperformanceinarugged
package,itisbasedontheworkoftheOpenHPSDRcommunity.
ThenewPAboardincorporatesthefollowingupdatesovertheprevious100Wgeneration:
PAGainredistributionforbetterIMD
ThermallycompensatedBias
Current/Voltage/TempSensors
Temperaturecontrolledinternalfanandoptionforexternalfan
IndependentBPFsand6MLNAsforeachADC;optiontogroundADC2onTX
ImprovedTXSNRandhigherdutycycleTX

ANDROMEDAManual Page8of56
1.2 Architecture
FPGA
THETISonPC
RF
Filters
Variable
Atten‐
uator
Ant,
T/R
Switch
A‐D
Conver‐
ter
VFO
Tune
Band
Digital
Down‐
Convert
Low
Pass
Filters
Linear
Amplifier
D‐A
Conver‐
ter
VFO
Tune
Band
Digital
Up‐
Convert
VFO
Tune
Digital
Down‐
Convert
2Channel
Receiver
DSP
TXAudio
DSP
Keyer
Puresignal
Linear‐
isation
Ethernet Userinterface
Frontpa nel
1
2
3
RF
Filters
Variable
Atten‐
uator
A‐D
Conver‐
ter
VFO
Tune
Band
Digital
Down‐
Convert
RX2
ant Audio
Codec
Ethernet
1. Yourradiohardwareprovidesatransmit/receivepath.TherearetwofullyseparateRXpaths
eachwithitsownsignalconditioning,digitisingandprocessing.
2. Receivedsignalsarefiltered,attenuatedthendigitisedusingtwohighperformance
analogue‐to‐digitalconverter.TheA‐DconverterscoverthewholeHFband.Digital
processingintheFieldProgrammableGateArray(FPGA)convertsapartoftheHFbandto
zerocentrefrequency,andtransfersthedatatothePCviaEthernet.Thebandwidth
providedcanbeselected,butisusuallyintherange48KHz–1.536MHz.
3. ThePCrunstheTHETISprogram.THETIShastwohalves:auserinterface,andPCbased
signalprocessing.
4. THETISconnectstothereceiverdatastreamsandprovidesfurthersignalprocessingto
reducenoise,toselectthesignalsofinterestanddemodulatethem.Itsuserinterface
providesaviewofthebandactivityinthedownconvertedsignalisshown,andcontrolsto
tunetotherequiredsignalanddemodulateitsuccessfully.
5. Receivedaudioisroutedtotheinternalspeakers.AdditionalPCconnectedspeakersarealso
possible.
6. Ontransmit,THETISprovidestheinitialsignalprocessingtooptimisethetransmitsignal.
Audioprocessingisavailabletoenhanceavoicesignal.ACWkeyerisprovided.Sampled
dataissenttotheradiohardwareviaEthernet.
7. TheradiohardwareupconvertstheTXsignaltotherequiredfrequency,setsitssignallevel,
amplifiesandfiltersit.Amplifierlinearizationisavailable:asampleofthesignalfromthe
linearamplifierisdownconvertedbackthroughthereceiver,andcomparedwiththe
“intended”TXsignal.ThedifferenceisprocessedbyTHETIStoapplypre‐distortionsothat
thefinaloutputfromthelinearamplifierhasapproximately20dBlowerspurioussignal
contentthata“normal”HFtransmission.

ANDROMEDAManual Page9of56
1.3 WritingStyle
Inthismanual:
Acontrol/settingnameishighlightedbold
Theusersettingforthatcontrolisunderlined.
Menu>Equalizermeansopenthe“Equaliser”settingontheprogram’smenu
Menu>Setup>DSP>RX2meansopenthesetupformusingSetuponthemenu,thenselect
theDSPtab,RX2sub‐tab
Soforexamplethisinstructionwouldindicateagaincontrolsetting:SettheRX1AFencoderto30.
1.4 ANDROMEDADesignTeam
PhilHarman,VK6PH
DougWigley,W5WC
Dr.WarrenC.Pratt,NR0V
KjellKarlsen,LA2NI
AbhishekPrakash
Dr.JoeMartin,K5SO
JohnMelton,G0ORX/N6LYT
AdamFarsonAB4OJ/VA7OJ
LaurenceBarkerG8NJJ

ANDROMEDAManual Page10of56
2FrontPanelFunctions
Thefrontpanelprovidesthefirstportofcalltocontrolyourradio.Atouchscreendisplayprovidesa
PCdisplayfromthePCcontrolapplication;rotaryencodersandpushbuttonsprovideaccesstothe
mostcommonlyusedcontrols.
2.1 Touchscreen
ThetouchscreenisafullfunctionPCdisplaywithcapacitivetouchsensing.Itprovidesthefront
paneldisplayforThetis.AdditionaldisplayscanbeconnectedviaUSB‐Chubdevicesconnectedto
therearpanelconnectors.
TheThetis“ANDROMEDA”displayscreenlayoutisasfollows:
1. AtthetopisanormalPCapplicationtitlebarandmenubar.
2. Atthebottomofthescreenisastatusbar.Isshowsscreensize,CPUload,powersupply
voltageandcurrent,RXandTXantenna,multifunctioncontrolsettingandthecurrentdata
andtime.
3. Abovethestatusbarisasetof8softkeymenubuttons.Theseprovideaccesstomanyofthe
radio’sfeatures.Theseareactivatedbyclickingthescreenbutton,orthepushbuttonbelow
it.
4. Abovethatarecontrolsforthecentralscreenarea.
5. Thecentralscreenareacanbeuserconfiguredbutnormallyprovideswaterfall,panadapter
oracombinedpanadapter&waterfalldisplay.RX1canbeshownalone,orbothreceivers
canbeshown.
6. Thetopareaprovidesvariouscontrolsanddisplays:
a. Attheleft,buttonsshowsthestatusofseveralmajorfunctions.
b. TheVFOAdisplayshowsthemode,frequency&bandsegmentforVFOAtogether
withRX1noisereduction,AGCandattenuationsettings
c. RIT,XIT,VFOtunestep,VFOsyncandbandsplitaretotherightofVFOA

ANDROMEDAManual Page11of56
d. TheconfigurablemultimeterdisplaycanshowseveralRXandTXindications;the
currentlyselectedRXandTXsettingsareshown.
e. Totherightofthemultimeter,theATUsettingsareshown.Thereisasliderthat
popsupifarotarycontrolisturned,toshowitscurrentposition.
f. FinallytheVFOB/RX2displayisattherightofthebar.
Thetopbarindicationsareasfollows:
VFO
Display
box
LitblueifCLICKTUNE
Currentmode VFOfrequency
Currentbandsegment
IndicatesMUTE
To prow:nosereduction;noiseblanker;
spectralnoiseblanker;ANF
Bottomrow:AGCspeed,attenuation
Centre
Section
RX1/VFOAselected
BlueifVFOA/BSYNC
RX2/VFOBselected
Rotarycontrolposition(auto‐hides)
ATUindicator
RXandTXmetermodes
VFOStep
BlueifSplitRX/TX
Multimeter
2.2 RotaryEncoders
6dualencodersprovidearangeofRXandTXcontrols.
2.2.1 VFO
TheVFOencodercanbeselectedtocontrolVFOAorVFOB.InmostcasesVFOAwilloperateRX1
whileVFOBwilloperateRX2.TheVFOcontrolledbytheencoderisselectedusingtheA/B
pushbutton.TheindicatorbythebuttonislitifVFOAisselected.
Theencoderprovides480stepsperrevolution.With10HzstepsselectedforVFOtuning,that
correspondsto4.8KHzperrevolutionwhichisidealforSSBandCWoperation.

ANDROMEDAManual Page12of56
2.2.2 RX1AF/RFGain
PressingtheupperknobtoggleRX1Muteon/off
TurningtheupperknobadjuststheRX1AFgainor“volume”.Asliderpopsupto
therightofthemulti‐metertoindicatethecurrentposition.
TurningthelowerknobadjuststheRX1AGC,whichbehavessimilarlytoRFgainin
ananaloguereceiver.Agreenbarisnormallyshowninthespectrumview,which
shouldbeadjustedtositjustabovethenoisefloor.Asliderpopsuptotheright
ofthemulti‐metertoindicatethecurrentposition.
&
IftheRX1AFencoderknobispresseddownandturnedwhilehelddown,thePC
displaybrightnessischanged.Thebrightnesssettingwillbesavedandrestored
everytimetheradioispoweredup.
2.2.3 RX2AF/RFGain
PressingtheupperknobtoggleRX2Muteon/off
TurningtheupperknobadjuststheRX2AFgainor“volume”.Asliderpopsupto
therightofthemulti‐metertoindicatethecurrentposition.
TurningthelowerknobadjuststheRX2AGC,whichbehavessimilarlytoRFgainin
ananaloguereceiver.Agreenbarisnormallyshowninthespectrumview,which
shouldbeadjustedtositjustabovethenoisefloor.Asliderpopsuptotheright
ofthemulti‐metertoindicatethecurrentposition.
2.2.4 Drive/Multifunction
Pressingtheupperknobtogglesthemultifunctionknobbetweenselectingthe
valueofasetting,andchoosingwhichsettingisoperated.
Presstheknobtobeginselectinganotherfunction.Turntheknobtochoosethe
functionrequired(itisshowninthestatusbar).Pressagaintoselectthat
function.
Themultifunctionknobcanbeselectedtooperateoneofmanyfunctions.The
currentlyselectedfunctionisshownintheThetisstatusbar.
TurningthelowerknobadjuststheTXDrivelevelsettingthemaximumoutput
power.Thisisexpressedasa%offullpower.Asliderpopsuptotherightofthe
multi‐metertoindicatethecurrentposition.

ANDROMEDAManual Page13of56
2.2.5 FilterHigh/LowCut
Pressingtheupperknobresetsthecentrefrequencyofthefilters.
ThefilterhighcutknobadjuststheupperaudiofrequencypassbandoftheRX
filter.ThisisusefultoremoveQRMfromthepassband.Ifyouhearahighaudio
frequencyinterferingsignal,usethisknobtoremoveit.
ThefilterlowcutknobadjuststheloweraudiofrequencypassbandoftheRX
filter.ThisisusefultoremoveQRMfromthepassband.Ifyouhearalowaudio
frequencyinterferingsignal,usethisknobtoremoveit.
2.2.6 DiversityGain/Phase
Pressingtheupperknobtogglesbetweenfineandcoarseadjustmentofthe
diversitygainandphase.InmostcasescoarsewillbeOK.
Diversityusesbothreceiverswithseparateantennastomaximiseaweaksignal,
ortocancelinterference.TheDiversityGaincontroladjuststhegainofRX2to
optimisetheenhancementofawantedsignalorrejectionofQRM.Openthe
Diversityscreentoseetheeffect.
TheDiversityPhasecontroladjuststhephaseofRX2tooptimisethe
enhancementofawantedsignalorrejectionofQRM.OpentheDiversityscreen
toseetheeffect.
2.2.7 RIT/Unallocated
PressingtheupperknobclearstheRITfrequency.
TheRIT/XITknobselectsafrequencyoffsetforthereceiver(RIT)ortransmitter
(XIT)fromthatdisplayedintheVFOwindow.Commonlyusedtooptimise
receptionofasignalwheretheotheroperatorhasnotexactlymatchedyour
frequency.RITorXITisselectedaccordingtotheRIT/XITpushbutton.
Thisknobisunassigned.Itcanbeassignedtoanyrotaryencoderfunctioninthe
ANDROMEDAsettingseditor.
Anyencodercanbereassignedtoanyfunction,andthe“multifunction”encodercanbesettoany
function.ThefunctionsavailableareMasterAFgain;RX1&RX2AFgain;RX1&RX2stereobalance;
AGClevel(behaveslikeRFgain);attenuation;Filterhigh&lowcut;drive;micgain;VFOaandB
tune;VOXgain;VOXholdtime;CWsidetone;CWspeed;squelch;Diversitygain&phase;COMP
threshold;RIT&XIT;displaypan&zoom.
2.3 PushbuttonsandIndicators
Thefrontpanelpushbuttonsoperateon/offor“presstochange”functions.Allbuttonsexcept
PowercanbereallocatedusingtheANDROMEDAsettingseditorwindow.Somepushbuttonshave
LEDindicatorstoindicatethecurrentstate.
2.3.1 Lefthandbuttons
PowerPresstoturnonpowertotheradio.ThePCwillbootup.
Pressandholdtoturnoffpower.ThisshouldonlybeundertakenafterthePChas
safelyshutdown.
SDROnPresstocommenceexecutionoftheradio’salgorithms.Pressagaintohalt
processing.
MOXTogglesbetweenRXmodeandTXmode.AnindicatorlightsduringTX.

ANDROMEDAManual Page14of56
TUNETogglesbetweenRXmodeandTUNEmode.Intunealowpowercarrieris
transmittedtofacilitateATUmatching.AnLEDindicatorlightsforTUNE.
PSONTurnsonoroffthePuresignalTXlinearizationalgorithm.AnLEDindicatorislitif
Puresignalisenabled.
TWOTONEInitiatesa“twotone”TXtesttoallowPuresignaltooptimiselinearity.
2.3.2 Softkeybuttons
F1‐F8operatethe8“softkey”menubuttonsatthebottomoftheANDROMEDAdisplay.Thesecould
bereconfiguredtootherfunctionsifyouprefertousethetouchscreensoftkeybuttons.
2.3.3 BandButtons
ThegroupofbuttonsabovetheVFOtuningknobcanbeusedas“bandselect”buttonswhen“SHIFT”
isselected.ShiftisactivatedbypressingtheSHIFTbutton,andanindicatorlights.Toselectanew
band,simplypressitsbuttonwhenSHIFTislit.
ThesebuttonsalsohaveotherfunctionswhenSHIFTisnotlit:
Mode
Settings
Opensthe“modedependentsettings”formforquickaccesstosettingsimportant
forthecurrentoperatingmode.
RX2Turnson/offthesecondreceiverchannel.
Mode+Selectsthenexthigheroperatingmode.Pressandholdformorethan2secondsto
openthe“modeselect”form.
Mode‐ Selectsthenextloweroperatingmode.Pressandholdformorethan2secondsto
openthe“modeselect”form.
Filter+Selectsthenexthighervariablebandwidthfilter.Pressandholdformorethan2
secondstoopenthe“filterselect”form.
Filter‐ Selectsthenextlowervariablebandwidthfilter.Pressandholdformorethan2
secondstoopenthe“filterselect”form.
A>BCopiesthesettingsfromVFOAtoVFOB
B>ACopiesthesettingsfromVFOBtoVFOA
SPLITTogglessplitfrequencyoperationon/off.Whensplitfrequencyisactivetheradio
willtransmitononeVFOfrequencyandreceiverontheother.TheTXVFOhasared
“TX”symbol.
User1Availableforuserre‐assignment
User2Availableforuserre‐assignment
User3Availableforuserre‐assignment
2.3.4 VFOButtons
RIT/XITTogglesbetweenRITon,XITon,ornoindependenttuneenabled.Indicatorslightif
RITorXITareselected
A/BSelectswhethertheVFOtuningknobandotherfrontpanelfunctionsoperateVFO
A/RX1orVFOB/RX2.AnindicatorislitifVFOAisselected.
LOCKSelectstheVFO“lock”mode.WhenselectedtheVFOwillnotbetunedforexample
bythetuningknob.Anindicatorislitiflockisselected.
CTUNESelectsthe“clicktune”mode.Inthismodethespectrumdisplaycentrefrequencyis
unaffectedbytuningactionandinsteadtheVFOfrequencyisscrolledleftorright
withinthedisplay.Thismaybeusefulifyouarekeepingawatchoncertain
frequenciesinthespectrumdisplays.IndicatorlitifClickTuneselected.

ANDROMEDAManual Page15of56
2.3.5 EditingtheFrontPanelcontrolAssignments
Thefunctionsforeachencoderandpushbutton(withtheexceptionofthePowerbutton)canallbe
changedbytheuser.AlsothemenubarbuttonsonthePCscreencanbechanged.Seesection7.3
fordetailsofhowtodothis.
2.3.6 FrontPanelConnections
CWKey3.5mmstereojacksocket.ConnectaCW(morse)key:thismaybea“straight”key
oriambickeyer.Donotuseamonojackplug:TXmodewillbecontinuously
asserted!
PhoneConnectstereoheadphones.Thisisastandard3.5mmstereojacksocket.The
internalspeakerswillbemutedwhenconnected.
MICConnectamicrophonewith8pinRJ45connections.
USBAUSBsocketfromtheinternalPC;usefultoconnectmemorysticksetc.
CWKey
Tip=Dit
Ring=Dah
3.5mmStereoJack:
PaddleConnections
Tip=Key
Ring=noconnect
3.5mmStereoJack:
StraightKeyConnections
Mic
BoththeTIPandRingcanbeconfigured
viaThetisforMic/BiasPTT.
PleaseNotethei5/i7Versionwithout
theAndromedaFrontpaneluses
6.25mmAudioBarrelConnectors

ANDROMEDAManual Page16of56
3RearPanelConnections
RF
GNDRFearthingstud
ANT1‐33independentTX&RX1Antennaconnectors
RFBypassRXinputbypassingRXfiltering.PuresignalfeedbackinputforanexternalPA
EXT1RXinputbypassingtheT/Rswitch
XVTRInTransverterRFinput
ADC2RX2Antenna
XVTRLowpowerTXsignaltoTransverter
10MHzin10MHzreferenceinput
PowerExtFanDONOTUSE
13.8VDCPowerPole®13.8VDC,30Apowersupplyinput
PC
3.5mmAudioPC3.5mm“TRRS”audioconnector
USB3,USB‐Cand
Thunderbolt
PCUSB3.1TypeAandTypeCconnectors.Akeyboardandmousecanbe
connected.AUSB3hubwillprovideHDMIforanexternaldisplay
Wi‐FiWi‐Fiantennaconnection
Aux
Radio
OCOut7userconfigurableOpenCollectorOutputs
DigIn1Userdigitalinput1
DigIn2Userdigitalinput2
LLineinLeftTXaudiolineinput
RLineinRightTXaudiolineinput
PTTInPTTInput:shortthissignaltogroundtoinitiatePTT
PTTOutPTToutput:groundedifTXactive(egtokeyexternalequipment)
LSPKConnectionforleftspeaker
RSPKConnectionforrightspeaker
Bootloaderswitch
(topleft)
Whensetto“On”theDSPboardwillbootupafterpowerupintothe“BOOT
Loading”state,andbereadytoreceivefirmwareupdatesusingtheHPSDR
bootloader.Setto“Off”fornormaloperation.
Opencollector
pinouts:
1:GND
2:REF
3:OC7
4:OC6
5:OC5
6:OC4
7:OC3
8:OC2
9:OC1
GND=0V
OC1‐OC7areseparateopencollector
outputs.Eachconnectsto0Vwhenactive.
REFshouldbeconnectedtothehighest
supplyvoltageusedbyOC1‐OC7(typically
5Vor12V)

ANDROMEDAManual Page17of56
4Installation
4.1 ImportantOperationtips
Donotcoverrearorbottomventilationholes.ProperaircirculationthroughouttheANDROMEDA
Transceiverisnecessarytopreventpossibleoverheatingandfailure.
Theradioisfactorycalibratedto100Wintoa50ohmDummyLoad.Operatingathigherlevelswill
damagetheradio.PleasereviewCCWandICASspecifications.
Data/AM/FMandothercontinuousdutymodesmustbeoperatedat30Worlesstoremainwithin
theoperationallimitsoftheradio.
Inputvoltagemustbe13.8vdc+/‐5%,wellregulatedat30APeakandproperPOLARITYmustbe
observed.
DISCONNECTtheAntennaduringThunderstormsorwhennotinuse.
Pleaseensurethatyouselectthecorrecthardwaremodelduringsoftwaresetup:ANAN‐7000DLE.
Installthesuppliedrubberfeetonthebottomofthecaseforpropercooling.
4.2 HeatDissipation
ANDROMEDAusesaheavydutyAluminiumheatsinktodissipateheatwithtemperaturecontrolled
internalandoptionalexternalfan.
ICAS[100W]operation
SSB,CWandallICASmodes[IntermittentCommercial/AmateurService]100WPEP
ThePowerAmplifierMOSFETtransistorhascharacteristicsthatfarexceedtheneedsofnormal
Transceiveroperation.
4.3 QuickStart
Makesurethatyouhavethefollowingequipmentandaccessories:
A13.8v30APowerSupply
50OhmDummyloadcapableofatleast100Wloadcapacity
DCPowerCable(Supplied)
OptionalKeyboard/Mouse(eitherUSBorWireless)
USB3.0HUB
WiththeRadioswitchedoff:
1. ConnecttheKeyboard/MousetooneoftheUSBports,ifrequired
2. ConnecttheDCpowercabletothePowerPoleconnector.PleaseensurethattheREDside
correspondswiththePositivesupply.
3. ConnecttheprovidedUSB3.0hubtotheThunderboltconnectoronthebackpanel,theUSB
HUBhasanHDMI/EthernetandfurtherUSBports.
4. ConnectthemonitortotheHDMIportontheUSB3.0HUB
5. ConnecttheDummyLoadtotheANT1connector.
6. SwitchontheRadio,youshouldseethepowerbuttonlightupandthentheinternalPC
booting.Oncewindows10bootsandisreadydoubleclickontheThetisicontolaunchthe
SDR.
7. TheSoftwareispreconfiguredandthedatabasefileisbackedupin“MyDocuments”.

ANDROMEDAManual Page18of56
8. OnceyouhavetestedbasicfunctionalityyoumayremovetheDummyloadandconnectthe
AntennaensuringgoodSWRbeforeyouarereadytogoonAir!
ItispossibletoconnectadditionalexternaldisplaysifrequiredusingaUSBhubconnectedtothe
rearUSB3connectors.DoweneedtocoverAPIPAsetupfornetworkconnectiontoOrion?

ANDROMEDAManual Page19of56
5GettingStarted
ThissectiongivesasimpleguidetostandardoperationsusingtheThetisprogram.Aswithmany
complexprogramsthereareseveralwaystoachievemostoutcomes.Thismanualconcentrateson
the“frontpanel”functionalityofThetis.MoreinformationisavailableintheseparateThetismanual
whichcoversthewholeapplication.
5.1 PoweringUp,RunningThetis
1. SwitchontheradiobypressingthePowerbuttonmomentarily.Thiswillactivatethepower
supplyandthePCwillboot.Itsdisplaywillappearonthetouchscreen.
2. DoubleclicktheThetisicontoruntheThetisprogram.
3. Clicktheon‐screen“power”buttontostartThetisoperation.
4. Theradiowillspringintolife;audiowillbeheardfromthespeakers.
Topowerdown:
1. ShutdownthewindowsPC
2. PressandholdthePowerbuttonforacoupleofsecondsuntiltheredpowerLEDisunlit.
CheckwhatI’vewrittenforpowerdown!
5.2 VFOSelection&Tuning
TheVFOknobwilloperateeitherVFOAorVFOB,dependingonwhichisselected.Astheknobturns
thetunedfrequencyisdisplayedandthepanadapter/waterfalldisplaywillbeupdated.
ToswitchbetweenVFOAandVFOB,usetheA/Bbutton.TheLEDislitwhenVFOAisselected.
Tuningcanalsobeaccomplishedbyclickingonthetouchscreen.
5.3 BandSelection
Tochangeband,thegroupofbuttonsabovetheVFOencoderhavea“bandselect”function.
1. PresstheSHIFTbutton.Itsindicatorwilllightup
2. Pressabuttoncorrespondingtotherequiredband.Theradiowillchangeband,andselect
theoperatingmodeandfiltersettinglastusedonthatband.
3. TocancelaSHIFT:pressSHIFTagainanditsindicatorwillgoout.
Thereisalsoabandselectformthatcanbeinvokedfromthesoftkeymenus.
Ifthesamebandisselected:theradiowillselectthenextinasequenceofbandstacks.Abandstack
isakindoflocalmemoryfordifferentpartsoftheband.MoredetailswillbefoundintheThetis
manual.
5.4 ModeSelection
Theradio’soperatingmodecanbeselectedfromthefrontpanelintwoways:
1. UsetheMode+orMode–buttonstosequencethroughtheavailablemodes;
2. UsetheModeselectformwhichcanbeinvokedfromasoftkeymenuorbypressingand
holdingMode+orMode‐for2seconds.
5.5 AF/RFGain
TheAFgainandAGCcontrolsareavailableonencodersforbothRX1andRX2.TheAGCcontrolhas
similarbehaviourtoRFgain.Whenitisadjusted,agreenhorizontallineonthedisplaymovesupand
down;itisnormallyadjustedtobejustabovethenoisefloor.

ANDROMEDAManual Page20of56
5.6 Panadapterdisplays
ThecentreofthescreenprovidesaspacetoshowthecurrentspectrumactivityforRX1and,if
enabled,RX2.Thereareseveraloptionsavailablewiththemostpopularbeing:
Panadapter:aspectrumdisplayshowingamplitude(vertical)vsfrequency(horizontal)
Waterfall:atimehistorydisplay.Amplitudeisexpressedbypixelcolour;showstime
(vertical)vsfrequency(horizontal)
Panafall:combinedpanadapter(top)andwaterfall(bottom)
ThecurrentdisplaycanbeselectedusingtheDisplayMenuortheDisplaySettingsForm.
5.7 MeterMode
Themultimeterisdisplayedinthetopcentreofthedisplay.Itcanbeassignedtoseveralsettingsfor
eachofRXandTX.Thecurrentsettingsareshownaboveit.Tochangethesettings:
1. PressthelefthandsoftkeybuttonuntilDisplayMenuisshown.
2. PresstheRX1MetersoftkeyuntilthedesiredRXfunctionisshown.
3. (notethatifVFOBisselected,RX2meterwillbeshown)
4. PresstheTXMetersoftkeyuntilthedesiredTXfunctionisshown.
TheDisplaySettingsFormcanalsobeinvokedfromthedisplaymenuusingtheDisplayFormmenu
key.ComboboxesofferthesettingsforbothTXmeterandRXmeter.
5.8 Changingantennas
Youhavethreeantennaconnectorsavailable.Additionally,RXsignalscanberoutedtotheBypass,
EXT1andXVTRinputs.TheThetisprogramchooseswhichantennatousefromsettingsontheSetup
form“ant/filters”tab.ThisshowstheantennaselectedforRXandforTX,foreachoftheamateur
bands.Ifyouhavedifferentpreferredantennasforsomebands,theycanbeautomaticallyselected
accordingtothesesettings.
Tocanalsoquicklychangeantennasfromthemainscreenintwoways:
Other manuals for ANDROMEDA ANAN-7000DLE MKII
1
Table of contents
Other Apache Labs Transceiver manuals