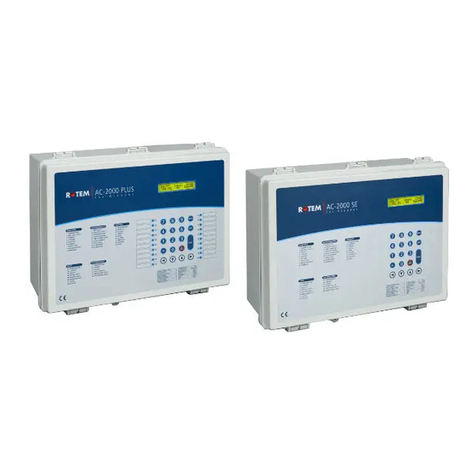
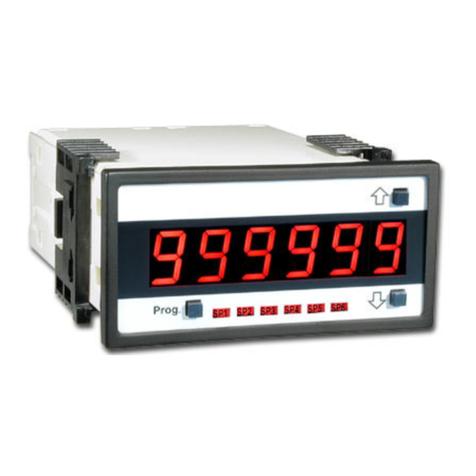
Apex Digital Cleco mPro4000GC User manual

For additional product information visit our website at www.ClecoTools.com
Installation Instructions
P2434JH
2019-08
mPro400GC(D)
Integrating mPro400GC and mPro400GCD

P2434JH | 2019-08 Apex Tool Group
Copyright © Apex Tool Group, 2019
No part of this document may be reproduced in any way or in any form, in whole or in part, or in a natural or
machine-readable language, or transmitted on electronic, mechanical, optical, or other media, without the
express permission of the Apex Tool Group.
Disclaimer
Apex Tool Group reserves the right to modify, supplement, or improve this document or the product without
prior notice.
Trademark
Cleco is a registered trademark of Apex Brands, Inc.
Apex Tool Group GmbH
Industriestraße 1
73463 Westhausen
Germany

Apex Tool Group P2434JH | 2019-08 3
EN
Contents
1 About this Document ............................................................................ 4
2 Distinction of Global Controller types ................................................... 5
3 mPro400GC replaced by mPro400GCD .............................................. 6
3.1 Primary/Master controller ............................................................................................ 6
3.2 Primary/Master controller with existing Secondary controllers.................................... 7
3.3 Primary/Master controller with new Secondary controllers.......................................... 9
3.4 Install Primary/Master controller with Secondary controllers mPro400GC................ 11
3.5 Install Primary/Master controller with Secondary controllers mPro400GCD ............. 11
3.6 Primary/Master controller with two types of Secondary controllers........................... 13
3.7 Primary/Master controller with Secondary controllers and Stack Lights.................... 15
3.7.1 mPro400GC .............................................................................................................. 15
3.7.2 mPro400GCD............................................................................................................ 17

About this Document
4 P2434JH | 2019-08 Apex Tool Group
1
EN 1About this Document
The original language of this document is English.
This document is intended for all persons who replaces mPro400GC-P/-M by mPro400GCD-P/-M.
This document has the following purposes:
• It provides important instructions for safe and effective operation.
• It describes the functions and operations of this equipment.
Other documents
Symbols in the text
Observe the safety instructions listed in the respective hardware descriptions!
Number Name
P2280PM Programming Manual mPro400GC(D)
P2300HW Hardware Description mPro400GCD-P
P2349HW Hardware Description mPro400GCD-S(H)
P2309HW Hardware Description mPro400GCD-M
P2174HW Hardware Description mPro400GC
italic Menu options (e.g., Diagnostics) input fields, check boxes, radio buttons or dropdown
menus.
> Indicates selection of a menu option from a menu, e.g., File > Print
<…> Specifies switches, pushbuttons or the keys of an external keyboard, e.g., <F5>
Courier Filenames and paths, e.g., setup.exe
• List
- List, level 2
a)
b)
Options
→ Result
1. (...)
2. (...)
Action steps
Single action step

Apex Tool Group P2434JH | 2019-08 5
Distinction of Global Controller types
2
EN
2 Distinction of Global Controller types
There are two types of Global Controller:
• mPro400GC: only for analog tools
• mPro400GCD: for analog and digital tools
The controller type can be identified on the bottom side:
• for Series on the type plate
• mPro400GCD-P controller have a second connection for „digital“ NeoTek tools
Comparison of mPro400GC and mPro400GCD
Controller Type mPro400GC mPro400GCD
Primary mPro400GC-P mPro400GCD-P
Master mPro400GC-M mPro400GCD-M
Secondary mPro400GC-S mPro400GCD-S(H)
Fig. 2-1: Primary/Master controller mPro400GC-P Fig. 2-2: Primary/Master controller mPro400GCD-P
Feature mPro400GC mPro400GCD-P/-M mPro400GCD-S(H)
TSnet connection No Yes Yes
ArcNet (System Bus) connec-
tion: Connection to
mPro400GC-S, BTS spindles,
System Bus Accessories
(socket trays, stack lights, I/O
boxes)
Yes Yes No
TSnet connection: Connec-
tion to mPro400GCD-S(H) No Yes Yes
Capability for USB Scanner No Yes Yes
Range of input power 115 V or 230 V 100 – 240 VAC 100 – 240 VAC
→ works globally
→ very tolerant to instable main power
supplies
Power supply GFCI, single-phase Switch mode power supply with PFC, single-
phase
UL certified No Yes Yes

mPro400GC replaced by mPro400GCD
6 P2434JH | 2019-08 Apex Tool Group
3
EN 3 mPro400GC replaced by mPro400GCD
If mPro400GC-P/-M is replaced by mPro400GCD-P/-M, certain things need to be considered. Below are
various scenarios and procedures for exchanging controller types.
3.1 Primary/Master controller
Scenario
• mPro400GC-P/-M is replaced by mPro400GCD-P/-M.
• No Secondary controllers connected.
Conditions for new system layout
Procedure
Save parameters from mPro400GC-P/-M:
1. Select Navigator >Administration > Save parameters.
→ The Save parameters dialog opens.
2. Select the storage location and confirm with <OK>. The parameters can be stored on an internal stor-
age device (CF card) or an connected USB drive.
3. Press <All> to save all parameters.
4. Disconnect mPro400GC-P/-M and connect mPro400GCD-P/-M. See documentation P2300HW or
P2309HW.
Set up mPro400GCD-P/-M:
1. Start mPro400GCD-P/-M.
2. Ensure that hybrid-capable software is used. The software has to be S168813-1.8.0 or newer.
3. Ensure that the current version of the operating system is used. The operating system has to be 2.7 or
newer.
Load parameters from an internal storage device (CF card) or a connected USB drive to
mPro400GCD-P/-M:
1. If the parameters have been saved on the CF card, insert the old CF card into mPro400GCD-P/-M. If
the parameters have been saved on the USB drive, insert the USB drive into mPro400GCD-P/-M
2. Select Navigator > Administration > Load parameters.
→ The Load parameters dialog opens.
3. Select the previously saved parameters and confirm with <OK>.
4. Press <All> to load all parameters.
Old system layout New system layout
Fig. 3-1: Primary/Master controller mPro400GC Fig. 3-2: Primary/Master controller mPro400GCD
Type Indication
Software version mPro400GCD-P/-M: S168813-1.8.0 or newer.
Operating system 2.7
mPro400GC-P/
mPro400GC-M
mPro400GCD-P/
mPro400GCD-M

Apex Tool Group P2434JH | 2019-08 7
mPro400GC replaced by mPro400GCD
3
EN
Adjust Programmable I/O Mapping:
1. Select Navigator > Tool Setup > I/O.
2. Confirm the messages with <Run it> and <Continue>.
→ The Programmable I/O Mapping dialog opens.
3. Re-parameterize the start switch and the tool light. All signals from PM_DIDO have to be changed to
TM_DIDO.
4. Confirm the change with <OK> and <Accept>.
3.2 Primary/Master controller with existing Secondary controllers
Scenario
• mPro400GC-P/-M is replaced by mPro400GCD-P/-M.
• Existing mPro400GC-S used.
Conditions for new system layout
Signal Input/Output PM_DIDO
Bit
TM_DIDO
Bit
Tool Group Start (SA) Input 0 0
Reverse (TM_LL) Input 1 1
Function button 2 Input - 6
Status (Yellow LED) Output 4 4
Tool OK 1 (Green LED) Output 3 3
Tool NOK 1 (Red LED) Output 2 2
Blue LED Output - 5
Old system layout New system layout
Fig. 3-3: Primary/Master controller mPro400GC
with Secondary controller mPro400GC
Fig. 3-4: Primary/Master controller mPro400GCD
with Secondary controller mPro400GC
Type Indication
Software version mPro400GCD-P/-M: S168813-1.8.0 or newer.
mPro400GC-S: S168025-510
Operating system 2.7
Cables mPro400GCD-P/-M to mPro400GC-S.
System Bus Cable: Part number 544196-XXX
System Bus Terminator Only required for mPro400GC-S: Part number 544197PT
mPro400GC-P/
mPro400GC-M mPro400GC-S mPro400GC-S
544196-XXX
544196-XXX
X21 X31 X32 X31
Arcnet Arcnet
mPro400GCD-P/
mPro400GCD-M mPro400GC-S mPro400GC-S
544196-XXX
544196-XXX544196-XXX
X22 X31 X32 X31
X32
544197PT
Arcnet

mPro400GC replaced by mPro400GCD
8 P2434JH | 2019-08 Apex Tool Group
3
EN Procedure
Save parameters from mPro400GC-P/-M:
1. Select Navigator >Administration > Save parameters.
→ The Save parameters dialog opens.
2. Select the storage location and confirm with <OK>. The parameters can be stored on an internal stor-
age device (CF card) or an connected USB drive.
3. Press <All> to save all parameters.
4. Disconnect mPro400GC-P/-M and connect mPro400GCD-P/-M.
Set up mPro400GCD-P/-M:
1. Use cable 544196-XXX to connect mPro400GCD-P/-M and mPro400GC-S. See documentation
P2300HW or P2309HW.Use following inputs and outputs:
- mPro400GCD-P/-M: output X22
- mPro400GC-S: input X31
1. Use cable 544196-XXX to connect additional mPro400GC-S to the previous mPro400GC-S if neces-
sary. Use following inputs and outputs:
- Previous mPro400GC-S: output X32
- Following mPro400GC-S: input X31
2. Connect the System Bus Terminator 544197PT to X32 at the last mPro400GC-S.
3. Start mPro400GCD-P/-M.
4. Ensure that hybrid-capable software is used. The software has to be S168813-1.8.0 or newer.
5. Ensure that the current version of the operating system is used. The operating system has to be 2.7 or
newer.
Load parameters from an internal storage device (CF card) or a connected USB drive to
mPro400GCD-P/-M:
1. If the parameters have been saved on the CF card, insert the old CF card into mPro400GCD-P/-M. If
the parameters have been saved on the USB drive, insert the USB drive into mPro400GCD-P/-M.
2. Select Navigator > Administration > Load parameters.
→ The Load parameters dialog opens.
3. Select the previously saved parameters and confirm with <OK>.
4. Press <All> to load all parameters.
Adjust Programmable I/O Mapping:
1. Select Navigator > Tool Setup > I/O.
2. Confirm the messages with <Run it> and <Continue>.
→ The Programmable I/O Mapping dialog opens.
3. Re-parameterize the start switch and the tool light. All signals from PM_DIDO have to be changed to
TM_DIDO.
4. Confirm the change with <OK> and <Accept>.
Signal Input/Output PM_DIDO
Bit
TM_DIDO
Bit
Tool Group Start (SA) Input 0 0
Reverse (TM_LL) Input 1 1
Function button 2 Input - 6
Status (Yellow LED) Output 4 4
Tool OK 1 (Green LED) Output 3 3
Tool NOK 1 (Red LED) Output 2 2
Blue LED Output - 5

Apex Tool Group P2434JH | 2019-08 9
mPro400GC replaced by mPro400GCD
3
EN
3.3 Primary/Master controller with new Secondary controllers
Scenario
• mPro400GC-P/-M is maintained.
• mPro400GCD-S(H) is added.
Conditions for new system layout
Procedure
Parameterize ethernet interface
1. Select Navigator > Communication > Network settings.
Fig. 3-7: Network settings
2. Enter the ethernet settings in Ethernet Card 2:
Old system layout New system layout
Fig. 3-5: Primary/Master controller mPro400GC Fig. 3-6: Primary/Master controller mPro400GC
with Secondary controller mPro400GCD
Type Indication
Software version mPro400GC-P/-M: S168813-1.8.0 or newer.
mPro400GCD-S(H): S168025-510
Operating system 2.7
Cables mPro400GC-P/-M to mPro400GCD-S(H).
RJ45 to TSnet Cable: Part number S981511(-XX)
mPro400GCD-S(H) to mPro400GCD-S(H).
TSnet Cable: Part number 962037-(XXX)
Parameter Value
IP Address 192 168 245 200
Subnet Mask 255 255 255 0
mPro400GC-P/
mPro400GC-M
mPro400GC-P/
mPro400GC-M mPro400GCD-S(H) mPro400GCD-S(H)
S981511 962037-XXX
X21 X22 X21 X22
TSnet

mPro400GC replaced by mPro400GCD
10 P2434JH | 2019-08 Apex Tool Group
3
EN Set up mPro400GC-P/-M:
1. Use cable S981511 to connect mPro400GC-P/-M and mPro400GCD-S(H). See documentation
P2174HW. Use following inputs and outputs:
- mPro400GC-P/-M: output X21
- mPro400GCD-S(H): input X22 (TSnet in)
2. Use cable 962037-XXX to connect additional mPro400GCD-S(H) to the previous mPro400GCD-S(H) if
necessary. Use following inputs and outputs:
- Previous mPro400GCD-S(H): output X21 (TSnet out)
- Following mPro400GCD-S(H): input X22 (TSnet in)
3. Start mPro400GC-P/-M.
4. Ensure that hybrid-capable software is used. The software has to be S168813-1.8.0 or newer.
5. Ensure that the current version of the operating system is used. The operating system has to be 2.7 or
newer.
Install Secondary controllers:
1. Select Navigator > Tool Setup > Install.
→ The Assign Tool dialog opens.
2. The following settings are required:
3. Confirm with <OK>.
The TSnet cable may not be connected to the infrastructure network.
Home network
mPro400GC-P/
mPro400GC-M mPro400GCD-S(H)
Parameter Description
Group Name Select tool group. It is possible to select up to 16 tool groups.
Name Assign a name to the Secondary.
Type Select Secondary.

Apex Tool Group P2434JH | 2019-08 11
mPro400GC replaced by mPro400GCD
3
EN
3.4 Install Primary/Master controller with Secondary controllers mPro400GC
Scenario
• mPro400GCD-P/-M.
• mPro400GC-S is added.
Conditions and Process
See chapter 3.2 Primary/Master controller with existing Secondary controllers, page 7.
3.5 Install Primary/Master controller with Secondary controllers mPro400GCD
Scenario
• mPro400GCD-P/-M.
• mPro400GCD-S(H) is added.
Conditions for new system layout
Old system layout New system layout
Fig. 3-8: Primary/Master controller mPro400GCD with Secondary controller
mPro400GC
mPro400GCD-P/
mPro400GCD-M mPro400GC-S mPro400GC-S
544196-XXX 544196-XXX
X22 X31 X32 X31
X32
544197PT
Arcnet
Old system layout New system layout
Fig. 3-9: Primary/Master controller mPro400GCD with Secondary controller
mPro400GCD
Type Indication
Software version mPro400GCD-P/-M: S168813-1.8.0 or newer.
mPro400GCD-S: S168025-510
Operating system 2.7
Cables mPro400GCD-P/-M to mPro400GCD-S(H).
TSnet Cable: Part number 962037-XXX
mPro400GCD-P/
mPro400GCD-M mPro400GCD-S(H) mPro400GCD-S(H)
962037-XXX
X22
962037-XXX
X21 X21 X22
TSnet TSnet

mPro400GC replaced by mPro400GCD
12 P2434JH | 2019-08 Apex Tool Group
3
EN Procedure
Set up mPro400GCD-P/-M:
1. Use cable 962037-XXX to connect mPro400GCD-P/-M and mPro400GCD-S(H). See documentation
P2300HW or P2309HW.Use following inputs and outputs:
- mPro400GCD-P/-M: output X21
- mPro400GCD-S(H): input X22
2. Use cable 962037-XXX to connect additional mPro400GCD-S(H) to the previous mPro400GCD-S(H) if
necessary. Use following inputs and outputs:
- Previous mPro400GC-S: output X22
- Following mPro400GC-S: input X21
3. Start mPro400GCD-P/-M.
4. Ensure that hybrid-capable software is used. The software has to be S168813-1.8.0 or newer.
5. Ensure that the current version of the operating system is used. The operating system has to be 2.7 or
newer.
Install Secondary controllers:
1. Select Navigator > Tool Setup > Install.
→ The Assign Tool dialog opens.
2. The following settings are required:
3. Confirm with <OK>.
The TSnet cable may not be connected to the infrastructure network.
Home network
mPro400GCD-P/
mPro400GCD-M mPro400GCD-S(H)
Parameter Description
Group Name Select tool group. It is possible to select up to 16 tool groups.
Name Assign a name to the Secondary.
Type Select Secondary.

Apex Tool Group P2434JH | 2019-08 13
mPro400GC replaced by mPro400GCD
3
EN
3.6 Primary/Master controller with two types of Secondary controllers
Scenario
• mPro400GCD-P/-M.
• mPro400GC-S and mPro400GCD-S(H) are added.
Conditions for new system layout
Procedure
Set up mPro400GCD-P/-M:
1. Use cable 962037-XXX to connect mPro400GCD-P/-M and mPro400GCD-S(H). See documentation
P2300HW or P2309HW. Use following inputs and outputs:
- mPro400GCD-P/-M: output X21
- mPro400GCD-S(H): input X22
2. Use cable 544196-XXX to connect mPro400GCD-P/-M and mPro400GC-S. Use following inputs and
outputs:
- mPro400GCD-P/-M: output X22
- mPro400GC-S: input X31
Old system layout New system layout
Fig. 3-10: Primary/Master controller mPro400GCD with Secondary controller
mPro400GC and mPro400GCD
Type Indication
Software version mPro400GCD-P/-M: S168813-1.8.0 or newer.
mPro400GCD-S: S168025-510
Operating system 2.7
Cables mPro400GCD-P/-M to mPro400GCD-S(H).
TSnet Cable: Part number 962037-XXX
mPro400GCD-P/-M to mPro400GC-S.
System Bus Cable: Part number 544196-XXX
System Bus Terminator Only required for mPro400GC-S: Part number 544197PT
mPro400GCD-P/
mPro400GCD-M mPro400GCD-S(H) mPro400GC-S
962037-XXX
544196-XXX
mPro400GC-S
544196-XXX
X32
544197PT
X22 X21 X22 X31X31 X32
TSnet
Arcnet Arcnet

mPro400GC replaced by mPro400GCD
14 P2434JH | 2019-08 Apex Tool Group
3
EN
3. Use cable 544196-XXX to connect additional mPro400GC-S to the previous mPro400GC-S if neces-
sary. Use following inputs and outputs:
- Previous mPro400GC-S: output X32
- Following mPro400GC-S: input X31
4. Connect the System Bus Terminator 544197PT to X32 at the last mPro400GC-S.
5. Use cable 962037-XXX to connect additional mPro400GCD-S(H) to the previous mPro400GCD-S(H) if
necessary. Use following inputs and outputs:
- Previous mPro400GCD-S(H): output X21
- Following mPro400GCD-S(H): input X22
6. Start mPro400GCD-P/-M.
7. Ensure that hybrid-capable software is used. The software has to be S168813-1.8.0 or newer.
8. Ensure that the current version of the operating system is used. The operating system has to be 2.7 or
newer.
Install Secondary controllers:
1. Select Navigator > Tool Setup > Install.
→ The Assign Tool dialog opens.
2. The following settings are required:
3. Confirm with <OK>.
The TSnet cable may not be connected to the infrastructure network.
Home network
mPro400GCD-P/
mPro400GCD-M mPro400GCD-S(H)
Parameter Description
Group Name Select tool group. It is possible to select up to 16 tool groups.
Name Assign a name to the Secondary.
Type Select Secondary.

Apex Tool Group P2434JH | 2019-08 15
mPro400GC replaced by mPro400GCD
3
EN
3.7 Primary/Master controller with Secondary controllers and Stack Lights
In combination with stack lights, mPro400GC and mPro400GCD controllers cannot be mixed.
3.7.1 mPro400GC
Scenario
• mPro400GC-P/-M and mPro400GC-S are available.
• Stack lights are added.
Fig. 3-11: Primary/Master controller mPro400GC with Secondary controller mPro400GC and stack lights
Conditions for new system layout
Procedure
Set up mPro400GCD-P/-M:
1. Use cable 544196-XXX to connect mPro400GC-P/-M and the first stack light. Use following inputs and
outputs:
- mPro400GC-P/-M: output X21
- Stack light: input Arcnet in
2. Use cable 544196-XXX to connect mPro400GC-S to the stack light. Use following inputs and outputs:
- Stack light: output Arcnet out
- mPro400GC-S: input X31
3. Use cable 544196-XXX to connect additional mPro400GC-S or stack lights.
4. Connect the System Bus Terminator 544197PT to the output at the last stack light.
5. Start mPro400GC-P/-M.
6. Ensure that hybrid-capable software is used. The software has to be S168813-1.8.0 or newer.
7. Ensure that the current version of the operating system is used. The operating system has to be 2.7 or
newer.
Type Indication
Software version mPro400GC-P/-M: S168813-1.8.0 or newer.
mPro400GC-S:S168025-510
Operating system 2.7
Cables mPro400GCD-P/-M to mPro400GC-S.
System Bus Cable: Part number 544196-XXX
System Bus Terminator Only required for mPro400GC-S or stack lights: Part number 544197PT
mPro400GC-P/
mPro400GC-M mPro400GC-S mPro400GC-S
544196-XXX544196-XXX 544196-XXX
544196-XXX 544196-XXX
X21 X31 X31X32 X32 544197PT
Arcnet Arcnet ArcnetArcnet Arcnet
Arcnet
in
Arcnet
out
Arcnet
in
Arcnet
out
Arcnet
in
Arcnet
out

mPro400GC replaced by mPro400GCD
16 P2434JH | 2019-08 Apex Tool Group
3
EN Parameterize stack lights
1. Assign each stack light its own Arcnet address:
The default Arcnet address is printed on the front of the housing, e.g. 101.
If several stack lights are used, screw on the housing and change the Arcnet address at the rotary con-
trols internally with a screwdriver.
2. Select Navigator > Tool Setup > IO > Run it > Continue on the controller.
→ It opens the Programmable I/O Mapping.
3. Parameterize the inputs and outputs of the stack lights.
Fig. 3-12: Programmable I/O Mapping
The inputs are from bit 0 - 7, the outputs are from bit 8 - 15. For more information see ON / OUTPUTS A-OK
BRIDGE in the supplied BUILDING PLAN of the stack lights.
4. Leave the I/O to save the settings.
The two rotary controls are named LOW and HIGH.
The Arcnet address consists of three digits:
• Digit 1: fixed value „1“
• Digit 2: setting of the rotary control „HIGH“
• Digit 3: setting of the rotary control „LOW“
Example:
Rotary control „HIGH“: 0
Rotary control „LOW“: 3
→ Arcnet address: 103
Item Setting
1Select A-IOS.
2Enter Arcnet address.
3Select the desired signal.
4Enter the bit.
0
2
3
4
5
6 7 8
9
1
32
1 4

Apex Tool Group P2434JH | 2019-08 17
mPro400GC replaced by mPro400GCD
3
EN
3.7.2 mPro400GCD
Scenario
• mPro400GCD-P/-M and mPro400GCD-S(H) are available.
• Stack lights are added.
Fig. 3-13: Primary/Master controller mPro400GCD with Secondary controller mPro400GCD and stack lights
Conditions for new system layout
Procedure
Set up mPro400GCD-P/-M:
1. Use cable 544196-XXX to connect mPro400GCD-P/-M and the first stack light. Use following inputs
and outputs:
- mPro400GC-P/-M: output X22
- Stack lights: input Arcnet in
2. Use cable 544196-XXX to connect additional stack lights.
3. Connect the System Bus Terminator 544197PT to X32 at the last mPro400GC-S.
4. Connect mPro400GCD-P/-M and mPro400GCD-S(H). See chapter 3.5 Install Primary/Master controller
with Secondary controllers mPro400GCD, page 11.
5. Start mPro400GC-P/-M.
6. Ensure that hybrid-capable software is used. The software has to be S168813-1.8.0 or newer.
7. Ensure that the current version of the operating system is used. The operating system has to be 2.7 or
newer.
Type Indication
Software version mPro400GCD-P/-M: S168813-1.8.0 or newer.
mPro400GCD-S: S168025-510
Operating system 2.7
Cables mPro400GCD-P/-M to mPro400GCD-S(H).
TSnet Cable: Part number 962037-XXX
mPro400GCD-P/-M to stack lights.
System Bus Cable: Part number 544196-XXX
System Bus Terminator Only required for stack lights: Part number 544197PT
mPro400GCD-P/
mPro400GCD-M mPro400GCD-S(H) mPro400GCD-S(H)
544196-XXX 544196-XXX 544196-XXX
962037-XXX 962037-XXX
X21 X22 X22X21 544197PT
X22
Arcnet Arcnet Arcnet
TSnet TSnet
Arcnet
in
Arcnet
out
Arcnet
in
Arcnet
out
Arcnet
in
Arcnet
out

mPro400GC replaced by mPro400GCD
18 P2434JH | 2019-08 Apex Tool Group
3
EN Parameterize stack lights
1. Assign each stack light its own Arcnet address:
The default Arcnet address is printed on the front of the housing, e.g. 101.
If several stack lights are used, screw on the housing and change the Arcnet address at the rotary con-
trols internally with a screwdriver.
2. Select Navigator > Tool Setup > IO > Run it > Continue on the controller.
→ It opens the Programmable I/O Mapping.
3. Parameterize the inputs and outputs of the stack lights.
Fig. 3-14: Programmable I/O Mapping
The inputs are from bit 0 - 7, the outputs are from bit 8 - 15. For more information see ON / OUTPUTS A-OK
BRIDGE in the supplied BUILDING PLAN of the stack lights.
4. Leave the I/O to save the settings.
The two rotary controls are named LOW and HIGH.
The Arcnet address consists of three digits:
• Digit 1: fixed value „1“
• Digit 2: setting of the rotary control „HIGH“
• Digit 3: setting of the rotary control „LOW“
Example:
Rotary control „HIGH“: 0
Rotary control „LOW“: 3
→ Arcnet address: 103
Item Setting
1Select A-IOS.
2Enter Arcnet address.
3Select the desired signal.
4Enter the bit.
0
2
3
4
5
6 7 8
9
1
32
1 4


0819 | Cleco® is a registered trademark of Apex Brands, Inc. | © 2019
Apex Tool Group, LLC
Phone: +1 (800) 845-5629
Phone: +1 (919) 387-0099
Fax: +1 (803) 358-7681
www.ClecoTools.com
www.ClecoTools.de
POWER TOOLS SALES & SERVICE CENTERS
Please note that all locations may not service all products.
Contact the nearest Cleco® Sales & Service Center for the appropriate facility to handle your service
requirements.
Sales Center
Service Center
NORTH AMERICA | SOUTH AMERICA
DETROIT, MICHIGAN
Apex Tool Group
2630 Superior Court
Auburn Hills, MI 48236
Phone: +1 (248) 393-5644
Fax: +1 (248) 391-6295
LEXINGTON,
SOUTH CAROLINA
Apex Tool Group
670 Industrial Drive
Lexington, SC 29072
Phone: +1 (800) 845-5629
Phone: +1 (919) 387-0099
Fax: +1 (803) 358-7681
MEXICO
Apex Tool Group
Vialidad El Pueblito #103
Parque Industrial Querétaro
Querétaro, QRO 76220
Mexico
Phone: +52 (442) 211 3800
Fax: +52 (800) 685 5560
BRAZIL
Apex Tool Group
Av. Liberdade, 4055
Zona Industrial Iporanga
Sorocaba, São Paulo
CEP# 18087-170
Brazil
Phone: +55 15 3238 3870
Fax: +55 15 3238 3938
EUROPE | MIDDLE EAST | AFRICA
ENGLAND
Apex Tool Group GmbH
C/O Spline Gauges
Piccadilly, Tamworth
Staffordshire B78 2ER
United Kingdom
Phone: +44 1827 8727 71
Fax: +44 1827 8741 28
FRANCE
Apex Tool Group SAS
25 Avenue Maurice Chevalier -
ZI
77330 Ozoir-La-Ferrière
France
Phone: +33 1 64 43 22 00
Fax: +33 1 64 43 17 17
GERMANY
Apex Tool Group GmbH
Industriestraße 1
73463 Westhausen
Germany
Phone: +49 (0) 73 63 81 0
Fax: +49 (0) 73 63 81 222
HUNGARY
Apex Tool Group
Hungária Kft.
Platánfa u. 2
9027 Györ
Hungary
Phone: +36 96 66 1383
FAX: +36 96 66 1135
ASIA PACIFIC
AUSTRALIA
Apex Tool Group
519 Nurigong Street, Albury
NSW 2640
Australia
Phone: +61 2 6058 0300
CHINA
Apex Power Tool Trading
(Shanghai) Co., Ltd.
2nd Floor, Area C
177 Bi Bo Road
Pu Dong New Area, Shanghai
China 201203 P.R.C.
Phone: +86 21 60880320
Fax: +86 21 60880298
INDIA
Apex Power Tool India
Private Limited
Gala No. 1, Plot No. 5
S. No. 234, 235 & 245
Indialand Global
Industrial Park
Taluka-Mulsi, Phase I
Hinjawadi, Pune 411057
Maharashtra, India
Phone: +91 020 66761111
JAPAN
Apex Tool Group Japan
Korin-Kaikan 5F,
3-6-23 Shibakoen, Minato-
Ku,
Tokyo 105-0011, JAPAN
Phone: +81-3-6450-1840
Fax: +81-3-6450-1841
KOREA
Apex Tool Group Korea
#1503, Hibrand Living Bldg.,
215 Yangjae-dong,
Seocho-gu, Seoul 137-924,
Korea
Phone: +82-2-2155-0250
Fax: +82-2-2155-0252
This manual suits for next models
1
Table of contents
Other Apex Digital Controllers manuals
