Aplex ViTAM-1 Series User manual

ViTAM-1XX Series User Manual
0
ViTAM-1XX Series
10.1”, 12.1”, 15”, 15.6”, 17”, 19”, 21.5”, and 23.8”New Gen. IP66/IP69K
Stainless Steel Display
User Manual
Release Date Revision
Nov. 2018 V1.4
®2018 Aplex Technology, Inc. All Rights Reserved. Published in Taiwan
Aplex Technology, Inc.
15F-1, No.186, Jian Yi Road, Zhonghe District, New Taipei City 235, Taiwan
Tel: 886-2-82262881 Fax: 886-2-82262883 URL: http://www.aplextec.com/zh/home.php

ViTAM-1XX Series User Manual
1
Revision History
Reversion
Date
Description
0.1
2016/12/14
For Preliminary Release
0.2
2016/12/22
Update power consumption and net weight
1.0
2017/01/10
Official Version
1.1
2017/03/07
Revised VESA mounting size
1.2
2017/07/28
Add I/O drawing and definition
1.3
2018/02/14
LCD description
1.4
2018/11/01
Revise Operatiing temperature+LCD size

ViTAM-1XX Series User Manual
2
Warning!___________________________
This equipment generates, uses and can radiate radio frequency energy and if
not installed and used in accordance with the instructions manual, it may
cause interference to radio communications. It has been tested and found to
comply with the limits for a Class A computing device pursuant to FCC Rules,
which are designed to provide reasonable protection against such interference
when operated in a commercial environment. Operation of this equipment in
a residential area is likely to cause interference in which case the user at his
own expense will be required to take whatever measures may be required to
correct the interference.
Disclaimer
This information in this document is subject to change without notice. In no event
shall Aplex Technology Inc. be liable for damages of any kind, whether incidental or
consequential, arising from either the use or misuse of information in this
document or in any related materials.
Electric Shock Hazard –Do not operate the machine with its back cover
removed. There are dangerous high voltages inside.

ViTAM-1XX Series User Manual
3
Table of Contents
Revision History………………………………………………………………………………….1
Warning!………………………………………………………………………………….……..….2
Disclaimer……………………….……………………………………………….…………………2
Chapter 1 Getting Started
1.1 Features…………………………………………………..…………………………….5
1.2 Specifications…………………………………………………………………………5
1.3 Dimensions……………………...……………...…..………………………….…11
1.4 Brief Description of ViTAM-1XX Series………………………………….15
Chapter 2 OSD
2.1 AD Board OSD Functions………….…...………..….…..……………….….19
2.2 OSD Controls……………………………..…………….…………………….……20
2.3 Main Menu…..…………………………………………..………………………...21
Chapter 3 Installation
3.1 Windows 7 Universal Driver Installation for PenMount 6000
Series…………………………………..………………..………………………...…25
3.2 Software Functions…………………………………………………………….33
Appendix A: Board Dimensions 51
Board Dimensions………………….…………………….……………………………51
Appendix B: Panel Mounting and VESA Mounting 52
Figures
Figure 1.1: Dimensions of ViTAM-110P/R/G/(H)..…………………..…11
Figure 1.2: Dimensions of ViTAM-112P/R/G/(H)………………………11
Figure 1.3: Dimensions of ViTAM-115P/R/G/(H)……………………….12
Figure 1.4: Dimensions of ViTAM-116P/R/G/(H)….……………………12
Figure 1.5: Dimensions of ViTAM-117P/R/G/(H)….……………………13
Figure 1.6: Dimensions of ViTAM-119P/R/G/(H)…..…………………..13
Figure 1.7: Dimensions of ViTAM-121P/R/G/(H)…………………….…14
ViTAM-1XX Series User Manual
4
Figure 1.8: Dimensions of ViTAM-124P/G/(H)…………………………..14
Figure 1.9: Front View and Touch on/off Button of ViTAM-1XX
Series.......................................................................15
Figure 1.10: Rear View of ViTAM-110P/R/G/(H)…..…………………..16
Figure 1.11: Rear View of ViTAM-112P/R/G(H)………………………...16
Figure 1.12: Rear View of ViTAM-115P/R/G/(H).…………………….…16
Figure 1.13: Rear View of ViTAM-116P/R/G/(H)………………………..17
Figure 1.14: Rear View of ViTAM-117P/R/G/(H)..………………………17
Figure 1.15: Rear View of ViTAM-119P/R/G/(H)……………………..…17
Figure 1.16: Rear View of ViTAM-121P/R/G/(H)……………………..…18
Figure 1.17: Rear View of ViTAM-124P/G/(H)..………………….………18
Figure A: Dimensions of TB-6029……………………………………………..51
Figure B: Yoke Mounting of ViTAM-1XX Series………………………….52
Figure C: VESA Mounting of ViTAM-1XX Series............................52

ViTAM-1XX Series User Manual
5
Chapter 1 Getting Started
1.1 Features
10.1”/12.1”/15”/15.6”/17”/19”/21.5”/23.8”New Gen. stainless steel display
True flat front bezel design and grade 304 stainless steel enclosure (grade 316
for option)
IP66/IP69K rated with M12 connectors
Support resistive touch, projected capacitive touch, and glass
Touch on/off button on the side edge for hygienic cleaning
Support ergonomic versatile mounting: Yoke mounting / space-saving VESA
mounting
1.2 Specifications
ViTAM-1XX Series
I/O port –Standard m12 I/O Connector on the Rear Side with waterproof
VGA
1 x M12 for VGA by 12 pin
Pin Define
1
R
2
G
3
B
4
DDATA
5
HSYNC
6
GND
7
VSYNC
8
DCLK
9
VCC
10
GND
11
GND
12
GND
HDMI
1 x W.F. HDMI with waterproof
cap
Type A (Receptacle) HDMI
1
TMDS Data2+

ViTAM-1XX Series User Manual
6
2
TMDS Data2 Shield
3
TMDS Data2-
4
TMDS Data1+
5
TMDS Data1 Shield
6
TMDS Data1-
7
TMDS Data0+
8
TMDS Data0 Shield
9
TMDS Data0-
10
TMDS Clock+
11
TMDS Clock Shield
12
TMDS Clock-
13
CEC
14
Reserved (N.C. on device)
15
SCL(I2C serial clock for DDC)
16
SDA(I2C serial data for DDC)
17
DDC/CEC Ground
18
+5 V Power
19
Hot Plug Detect
Touch
1 x M12 for TOUCH USB 2.0
CN1
Pin Define
1
USB 5V
7
D-
6
D+
5
GND
4
NC
3
NC
8
NC
2
NC

ViTAM-1XX Series User Manual
7
Power
1 x DC power input (9~36V) by M12
connector
Pin Define
1
NC
3
VCC
4
GND
Others
1 x Touch on/off button on the side
OSD Control Membrane
OSD on the rear side
Speaker
1 x 2W IP65 speaker (optional)
Touch Screen
Type
Resistive touch window (for R model) (not available for ViTAM-124)
Projected capacitive touch screen (for P model)
Interface
USB
Light Transmission
Resistive touch window: over 80%
Projected capacitive touch screen: over 90%
Glass Type (option)
Type
AR
Light Transmission
Over 90%
Power
Power Input
DC 9~36V
Mechanical
Construction
304 Stainless steel enclosure (default)
316 Stainless steel enclosure (optional)
Construction
Stainless steel enclosure
IP Rating
IP66/IP69K
Environmental
Operating temperature
0~50°C / -20~60°C for option (for 10.1”~15”model)
0~50°C (for 15.6”, 17”, 19”, 23.8”model)
0~40°C (for 21.5”High Brightness model)
Storage temperature
-30~70°C
Storage humidity
10 to 90% @ 40°C, non- condensing
Certification
CE / FCC Class A

ViTAM-1XX Series User Manual
8
Power Consumption and Mechanical Specifications
ViTAM-110
P/R/G/(H)
ViTAM-112
P/R/G/(H)
ViTAM-115
P/R/G/(H)
ViTAM-116
P/R/G/(H)
Power Consumption
Power Consumption
MAX: 6.2W (110R)
MAX: 11W (110P)
MAX: 8.9W (112R)
MAX: TBD (112P)
MAX: TBD (115R)
MAX: 9.3W (115P)
MAX: TBD (116R)
MAX: 12.5W (116P)
Mechanical
Mounting
VESA mount 75 x 75, Yoke mount
Dimensions(mm)
300 x 220 x 53
335 x 265 x 53
399 x 324 x 53
440 x 290 x 55
Net Weight
3.5 Kg
4.5 Kg
6.5 Kg
6.5 Kg
ViTAM-117
P/R/G/(H)
ViTAM-119
P/R/G/(H)
ViTAM-121
P/R/G/(H)
ViTAM-124
P/G/(H)
Power Consumption
Power Consumption
MAX: TBD (117R)
MAX: 19.2W (117P)
MAX: TBD (119R)
MAX: 18.6W (119P)
MAX: 11W (121R)
MAX: TBD (121P)
MAX: 26.4W (124P)
Mechanical
Mounting
VESA mount 75 x 75,
Yoke mount
VESA mount 100 x 100, Yoke mount
VESA mount 200 x
100, Yoke mount
Dimensions(mm)
432 x 358 x 55.3
470 x 388.6 x 60
571 x 362 x 55
656 x 423 x 53
Net Weight
7.5 Kg
8.8 Kg
9.4 Kg
12 Kg
Standard LCD
ViTAM-110P/
ViTAM-110R/
ViTAM-110G
ViTAM-112P/
ViTAM-112R/
ViTAM/112G
ViTAM-115P/
ViTAM-115R/
ViTAM-115G
ViTAM-116P/
ViTAM-116R/
ViTAM-116G
Dipslay
Display Type
10.1”TFT LCD
12.1”TFT LCD
15”TFT LCD
15.6”TFT LCD
Max. Resolution
1280 x 800
800 x 600/
1024 x 768 (option)
1024 x 768
1366 x 768
Max. Colors
16.7M
262K/16.2M (option)
16.7M
16.7M
Contrast Ratio
800: 1
800: 1/
800: 1
500: 1

ViTAM-1XX Series User Manual
9
700: 1 (option)
Luminance(cd/m2)
350
450 / 500 (option)
420
300
Viewing Angle
170(H) / 170(V)
160(H) / 150(V)
160(H) / 140(V)
(option)
160(H) / 160(V)
160(H) / 160(V)
Backlight Lifetime
15,000 hrs
50,000hrs/
30,000 hrs (option)
50,000 hrs
50,000 hrs
Option
Optical bonding
ViTAM-117P/
ViTAM-117R/
ViTAM-117G
ViTAM-119P/
ViTAM-119R/
ViTAM-119G
ViTAM-121P/
ViTAM-121R/
ViTAM-124G
ViTAM-124P/
ViTAM-124G
Dipslay
Display Type
17”TFT LCD
19”TFT LCD
21.5”TFT LCD
23.8”TFT LCD
Max. Resolution
1280 x 1024
1280 x 1024
1920 x 1080
1920 x 1080
Max. Colors
16.7M
16.7M
16.7M
16.7M
Contrast Ratio
1000: 1
1000: 1
3000: 1
3000: 1
Luminance(cd/m2)
350
350
300
250
Viewing Angle
170(H) / 170(V)
170(H) / 165(V)
178(H) / 178(V)
178(H) / 178(V)
Backlight Lifetime
50,000 hrs
50,000 hrs
50,000 hrs
30,000 hrs
Option
Optical bonding
High Brightness LCD (Option)
ViTAM-110PH/
ViTAM-110RH/
ViTAM-110GH
ViTAM-112PH/
ViTAM-112RH/
ViTAM-112GH
ViTAM-115PH/
ViTAM-115RH/
ViTAM-115GH
ViTAM-116PH/
ViTAM-116RH/
ViTAM-116GH
Dipslay
Display Type
10.1”TFT LCD
12.1”TFT LCD
15”TFT LCD
15.6”TFT LCD
Max. Resolution
1280 x 800
800 x 600/
1024 x 768 (option)
1024 x 768
1366 x 768
Max. Colors
16.7M
262K/16.2M (option)
262k
16.7M
Contrast Ratio
800: 1
700: 1
800: 1
500: 1

ViTAM-1XX Series User Manual
10
Luminance(cd/m2)
1000
1000
1000
1000
Viewing Angle
170(H) / 170(V)
178(H) / 178(V)
160(H) / 140(V)
(option)
160(H) / 150(V)
160(H) / 160(V)
Backlight Lifetime
30,000hrs
50,000hrs
30,000hrs
50,000hrs
Option
Optical bonding
ViTAM-117PH/
ViTAM-117RH/
ViTAM-117GH
ViTAM-119PH/
ViTAM-119RH/
ViTAM-119GH
ViTAM-121PH/
ViTAM-121RH/
ViTAM-121GH
ViTAM-124PH/
ViTAM-124GH
Dipslay
Display Type
17”TFT LCD
19”TFT LCD
21.5”TFT LCD
23.8”TFT LCD
Max. Resolution
1280 x 1024
1280 x 1024
1920 x 1080
1920 x 1080
Max. Colors
16.7M
16.7M
16.7M
16.7M
Contrast Ratio
1000: 1
1000: 1
3000: 1
5000: 1
Luminance(cd/m2)
1000
1000
1000
1000
Viewing Angle
170(H) / 160(V)
170(H) / 160(V)
178(H) / 178(V)
178(H) / 178(V)
Backlight Lifetime
50,000hrs
50,000hrs
50,000hrs
50,000hrs
Option
Optical bonding

ViTAM-1XX Series User Manual
12
Figure 1.3: Dimensions of ViTAM-115P/R/G/(H)
Figure 1.4: Dimensions of ViTAM-116P/R/G/(H)

ViTAM-1XX Series User Manual
13
Figure 1.5: Dimensions of ViTAM-117P/R/G/(H)
Figure 1.6: Dimensions of ViTAM-119P/R/G/(H)

ViTAM-1XX Series User Manual
14
Figure 1.7: Dimensions of ViTAM-121P/R/G/(H)
Figure 1.8: Dimensions of ViTAM-124P/G/(H)

ViTAM-1XX Series User Manual
15
1.4 Brief Description of ViTAM-1XX Series
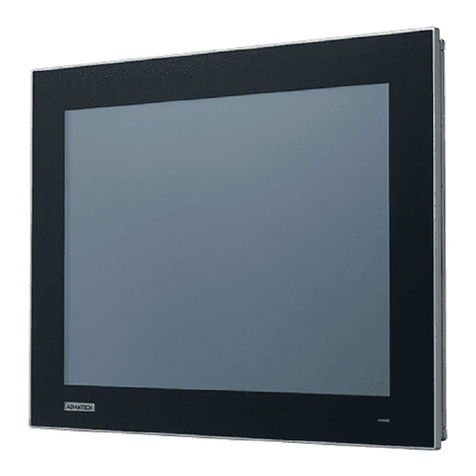
ViTAM-1XX series with TB-6029 AD board is an IP66/IP69K rated with M12
connectors new generation stainless steel display, which comes with 10.1”, 12.1”, 15”,
15.6”, 17”, 19”, 21.5”, and 23.8”color TFT LCD. ViTAM-1XX series are wide range DC
9~36V power input and true flat front bezel designed with grade 304 stainless steel
enclosure (grade 316 is for option). Futhermore, the models support resistive touch,
projected capacitive touch, and glass for option, and can be high brightness LCD and
optical bonding designed for option. It supports touch on/off button on the side edge
for hygienic cleaning nad ergonomic versatile mounting: Yoke mounting and
space-saving VESA mounting.
Figure 1.9: Front View and Touch on/off Button of ViTAM-1XX Series

ViTAM-1XX Series User Manual
16
Figure 1.10: Rear View of ViTAM-110P/R/G/(H)
Figure 1.11: Rear View of ViTAM-112P/R/G/(H)
Figure 1.12: Rear View of ViTAM-115P/R/G/(H)

ViTAM-1XX Series User Manual
17
Figure 1.13: Rear View of ViTAM-116P/R/G/(H)
Figure 1.14: Rear View of ViTAM-117P/R/G/(H)
Figure 1.15: Rear View of ViTAM-119P/G/(H)

ViTAM-1XX Series User Manual
18
Figure 1.16: Rear View of ViTAM-121P/G/(H)
Figure 1.17: Rear View of ViTAM-124P/G/(H)

ViTAM-1XX Series User Manual
19
Chapter 2 OSD
2.1 AD Board OSD Functions
Auto Adjust Up/Left Down/Right Power
Menu/Entry Power Indicator
Power switch: To turn ON or OFF the power
Shift the icon to the right side or shift it up
Shift the icon to the left side or shift it down
Menu: To enter OSD menu for related icon and item.
Auto Button: One-touch auto adjustment
1.) Getting into Burn-in Mode
Before setting into a burn-in mode, first disconnect the AC power cord. Then press
(don’t let them go) the buttons until the AC power cord is connected and the
“RGB” appears on the top left corner of your screen. Now it can be put into the
burn-in mode for changing colors.
2.) Getting Out of Burn-in Mode
Before getting out of the burn-in mode, please first disconnect the AC power cord.
Then press the button (If not workable, press the button and don’t let
them go) until the AC power cord is connected. Please don’t let your fingers go until
the AC power cord is connected again and the wording of “RGB” appears on the top
left corner of your screen, and wait for 3 second. Under the non-signal entry
situation, if is seen, exit is thus successfully made.
Cable Not Connected
This manual suits for next models
32
Table of contents
Popular Industrial Monitor manuals by other brands

Hope Industrial Systems
Hope Industrial Systems HIS-ML15B user manual

ESA AUTOMATION
ESA AUTOMATION EW3 Series installation manual

Element4
Element4 LCD8000-97C user manual

Tynetec
Tynetec ZXT315 user guide

Hope Industrial Systems
Hope Industrial Systems HIS-ML18 user manual

Alpha
Alpha Moeller XVC-601-GTR Series installation instructions