2016 Aqua Logic, Inc., 9558 Camino Ruiz, San Diego, CA 92126 Effective 02/09/16
Ph: 858.292.4773 FAX: 858.279.0537 email: info@aqualogicinc.com website: www.aqualogicinc.com
Page 5
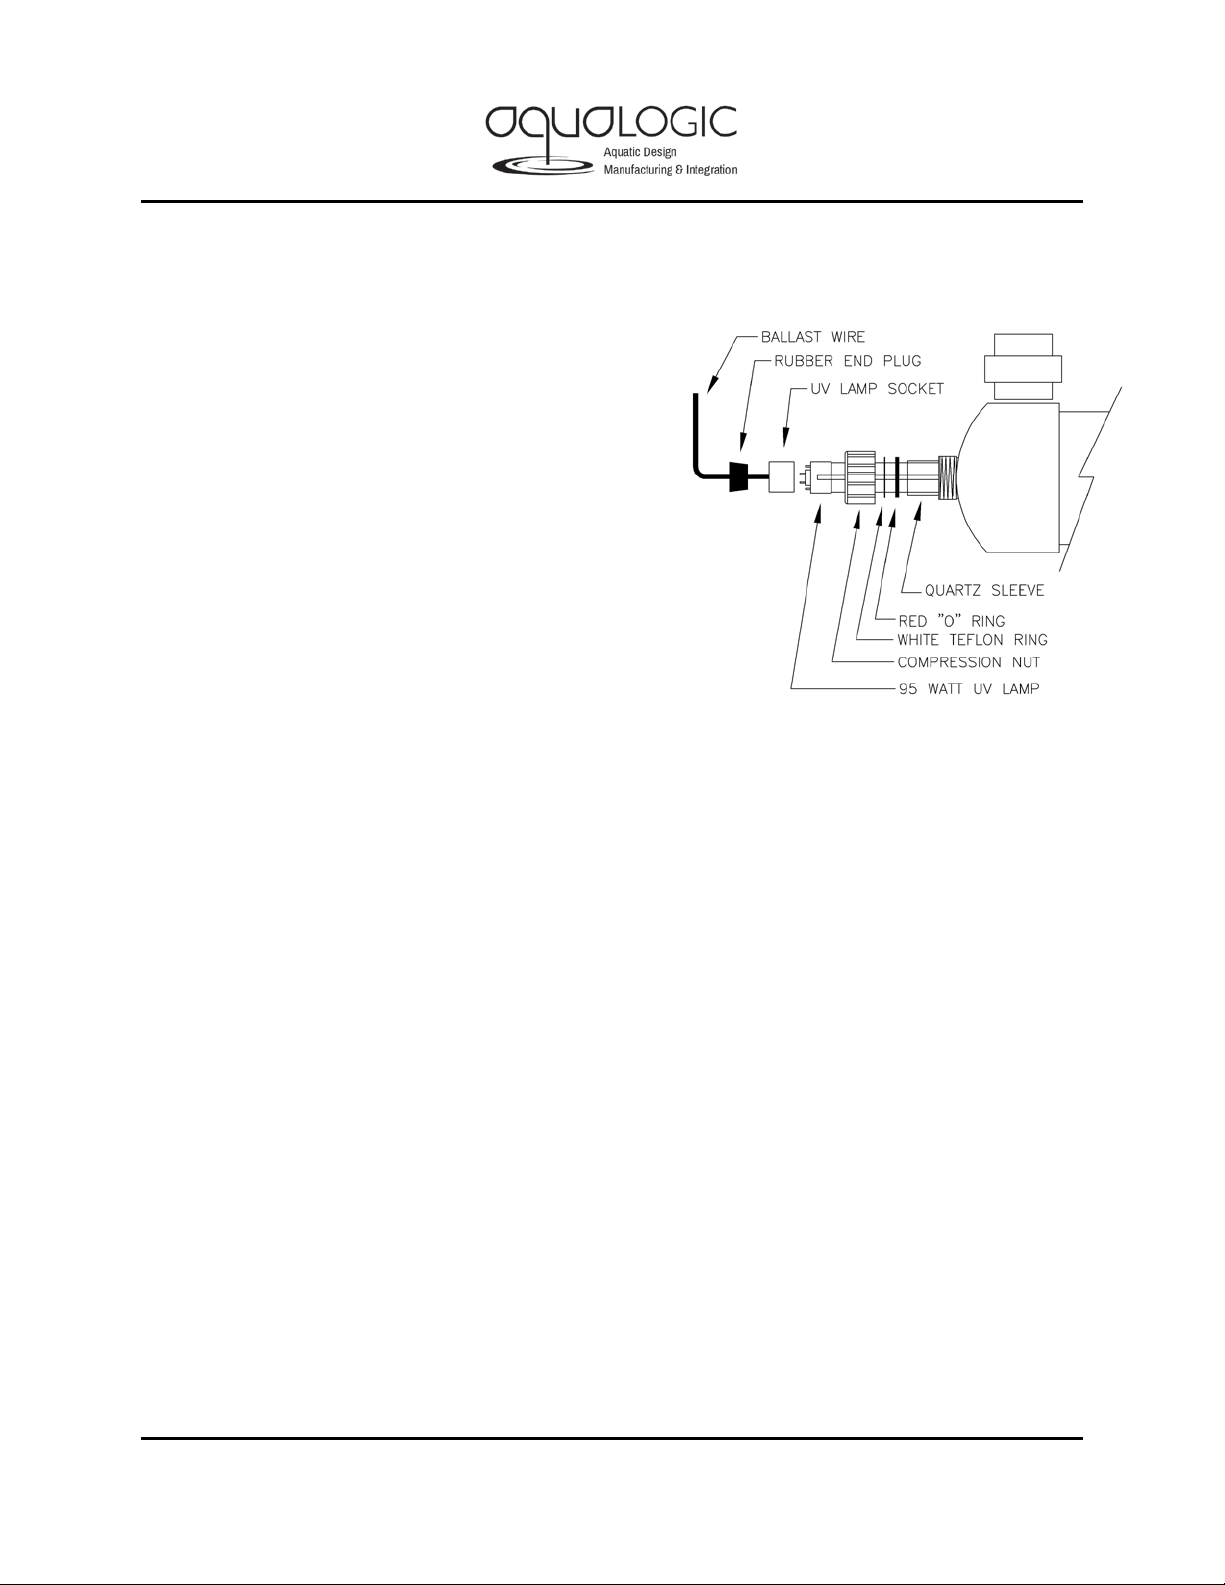
.Replace Lamp in all Models
WARNING: Be sure to wear protective gear for your hands and eyes!!
•Turn off or unplug pump.
•Unplug UV ballast from outlet.
•Remove both rubber end plugs from UV sterilizer
by carefully pulling on ballast wire.
•Carefully slide UV lamp from quartz sleeve just
enough to expose the white lamp socket.
•Hold the lamp socket with one hand and with the
other hand hold the lamp. Carefully pull apart the
connector from the lamp.
•Remove lamp by sliding it out of the unit.
•Slide replacement lamp into the quartz sleeve.
[DO NOT force the lamp into the sleeve or you
may break the quartz sleeve! We recommend
using Aqua Logic certified lamps for a perfect fit.]
•Attach lamp socket to the new lamp and carefully
slide the lamp in to position where the rubber
cover plugs seat correctly.
•Turn on or plug in pump.
•Carefully inspect for leaks.
•Plug UV sterilizer ballast into outlet.
•The view port should show a blue light after a few seconds.
Replacing the quartz O-rings and/or quartz sleeve [See Drawing]
WARNING: Be sure to wear protective gear for your hands and eyes!!
•Turn off or unplug the pump.
•Unplug the UV ballast.
•Isolate or remove UV from system.
•Drain the water from the unit.
•Disconnect and remove UV lamp from quartz sleeve.(use instructions from above)
•Remove the compression nuts on each end of the UV. [NOTE: Some water may leak out during
this procedure.] If you cannot loosen them by hand, you may obtain a UV lamp removal wrench
from your distributor or from Aqua Logic Systems or use a pair of adjustable spanner pliers.
•Remove both red O-rings and Teflon rings.
•Carefully slide the quartz sleeve from the chamber in the same manner as removing the lamp.
•If you are not replacing the O-rings them, inspect them carefully for damage or cracks.
•Carefully slide the new or cleaned sleeve back into the chamber until it is approximately centered
in the sterilizer.
•Slide the red O-rings and Teflon rings onto the sleeve and snug them evenly against their seats.
•Screw the compression nuts back on. Hand tighten only. Do NOT over tighten.
•Reinstall the UV lamp and reconnect the lamp sockets with the rubber end plug snuggly in place.
•Reconnect the UV to the plumbing.
•Turn on or plug in pump.
•Inspect carefully for leaks.
•Plug UV ballast into its outlet.
•After a few seconds, the view port should glow with a blue color.