5
Pre-Installation Check List
Before installing your SPLASHER, review and understand all warnings and safety information in this
manual. Failure to follow these instructions or improper installation of the cleaner can result in damage
to the pool finish or the vinyl liner, Aqua Products disclaims any liability for repairs or replacement to any
of these structures or components of the customer’s pool.
Before installing the cleaner in a vinyl liner pool: Check liner closely for signs of deterioration or damage
from age, chemicals, pool wall damage, etc. If any damage is found, have a qualified pool professional
make all the necessary repairs. Also, if there are stones, roots, etc, under the liner, remove them before
installing the cleaner. Certain vinyl liner patterns are particularly susceptible to surface wear, pattern
removal, ink rubbing o of, or serious scratches to the pattern caused by objects coming into contact
with the vinyl surface, including automatic pool cleaners. Aqua Products is not responsible for any
pattern removal, abrasions or markings on vinyl liners.
Before installing the cleaner in a gunite pool or a pool that is partially or completely tiled: Before installing
the pool cleaner in a gunite (concrete) pool or pool that is partially or completely tiled, check closely for
loose tiles and loose light fittings. Do not install the pool cleaner before having a qualified professional
perform the necessary repairs.
Before installing the cleaner, clean your filter system: Make sure you have cleaned the filter, including
backwashing, rinsing, and emptying all baskets. A clean system is necessary for proper cleaner operation
and coverage.
Before installing the cleaner, understand cleaner coverage: The cleaner is designed to rid your pool of
debris in approximately 4-6 hours. Less time could be needed, depending on the pool size. The cleaner
was not designed to automatically clean steps or swim-outs or to work under a solar cover.
Post- installation Check List
AFTER installing your SPLASHER, make sure the cleaner is operating correctly: The cleaner may need
some minor adjustments to make sure it is operating properly so there is no damage to the pool finish.
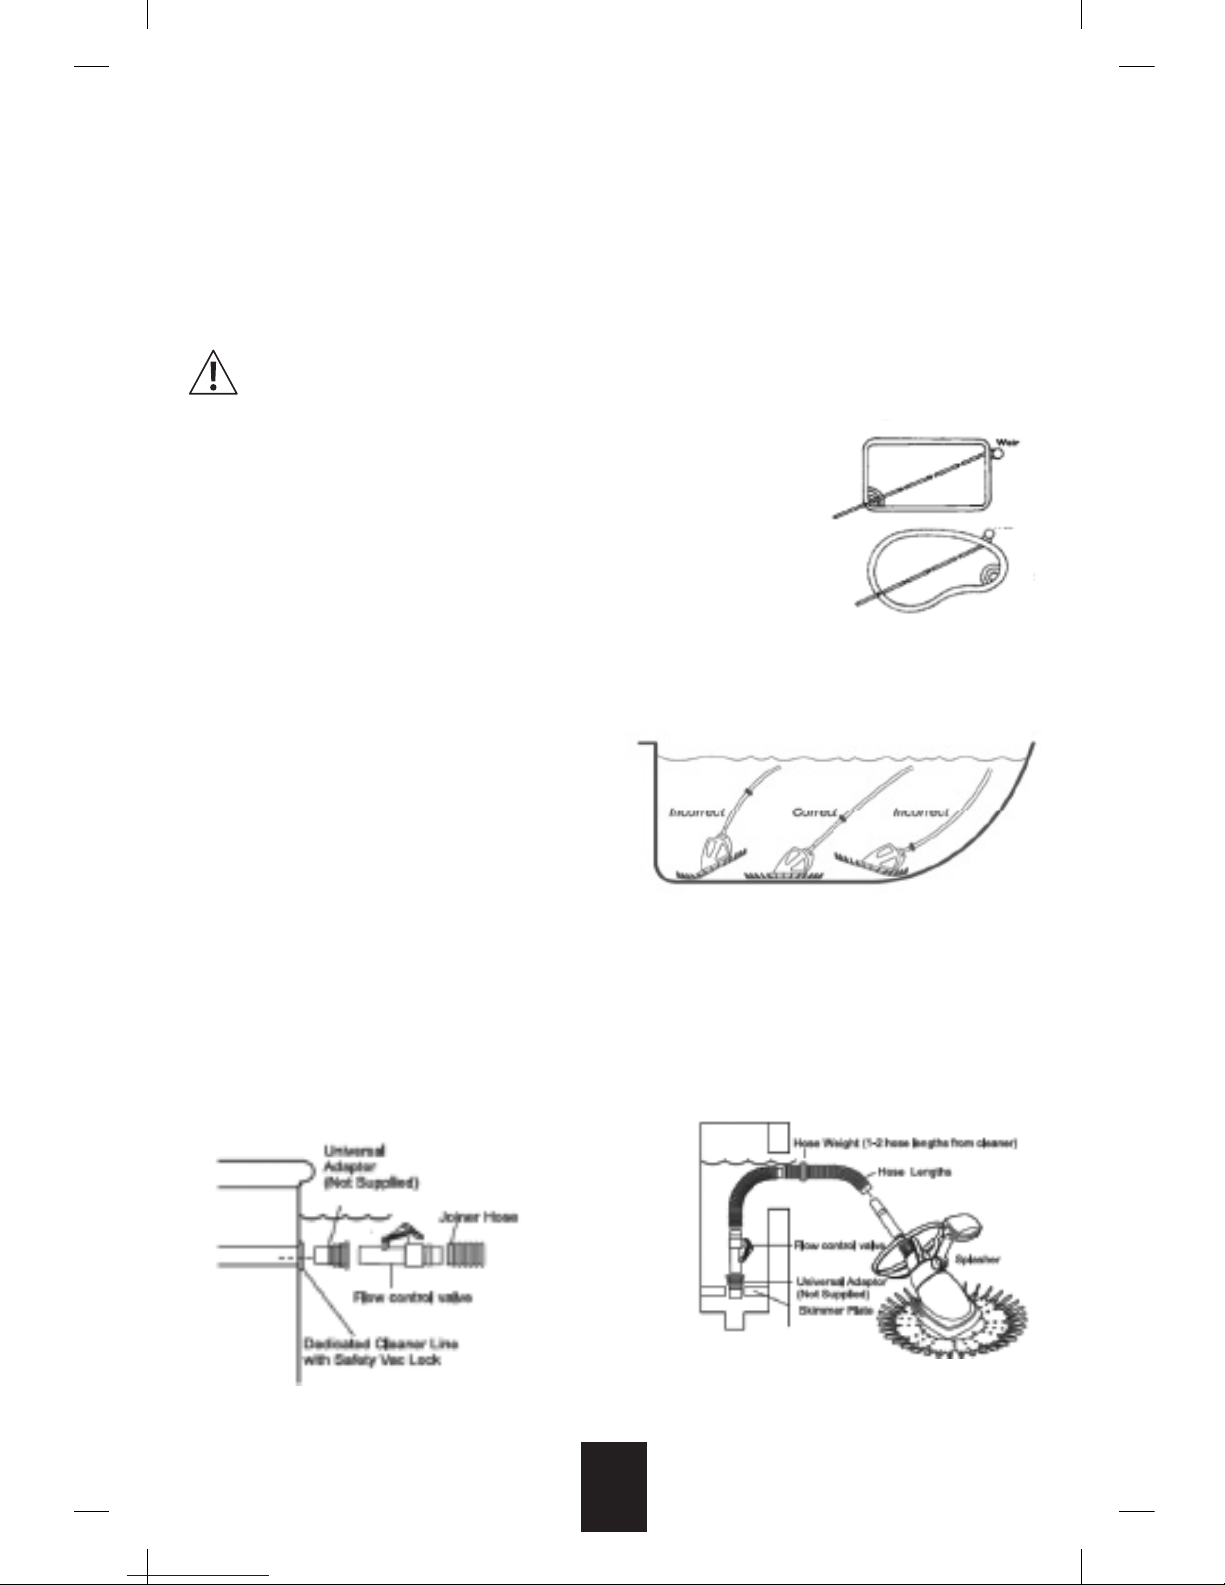
Preparation for installation (Pool preparation)
Method for cleaning pools and pumps
Before assembling and installing your SPLASHER Automatic Pool Cleaner, your pool should be clean and
algae-free so as not to inhibit the cleaner’s traction. If necessary, make the following preparations before
proceeding:
• Chemically balance the pool water.
• Brush pool and let the debris settle.
• Manually vacuum thoroughly.
• Remove, clean and replace the weir and pump strainer baskets.
• Ensure your filtration system’s multiport valve is working properly.
• Thoroughly clean and backwash the filter.
Ideal water conditions for the SPLASHER are:
GENERAL INSTALLATION CHECKS
GENERAL INSTALLATION CHECKS
Fiberglass Pools Marbelite Pools
Total Alkalinity 120 - 150ppm 80 - 120ppm
pH Levels 7.0 - 7.2 7.2 - 7.6
Chlorine 1.0 - 1.5ppm 1.0 - 1.5ppm