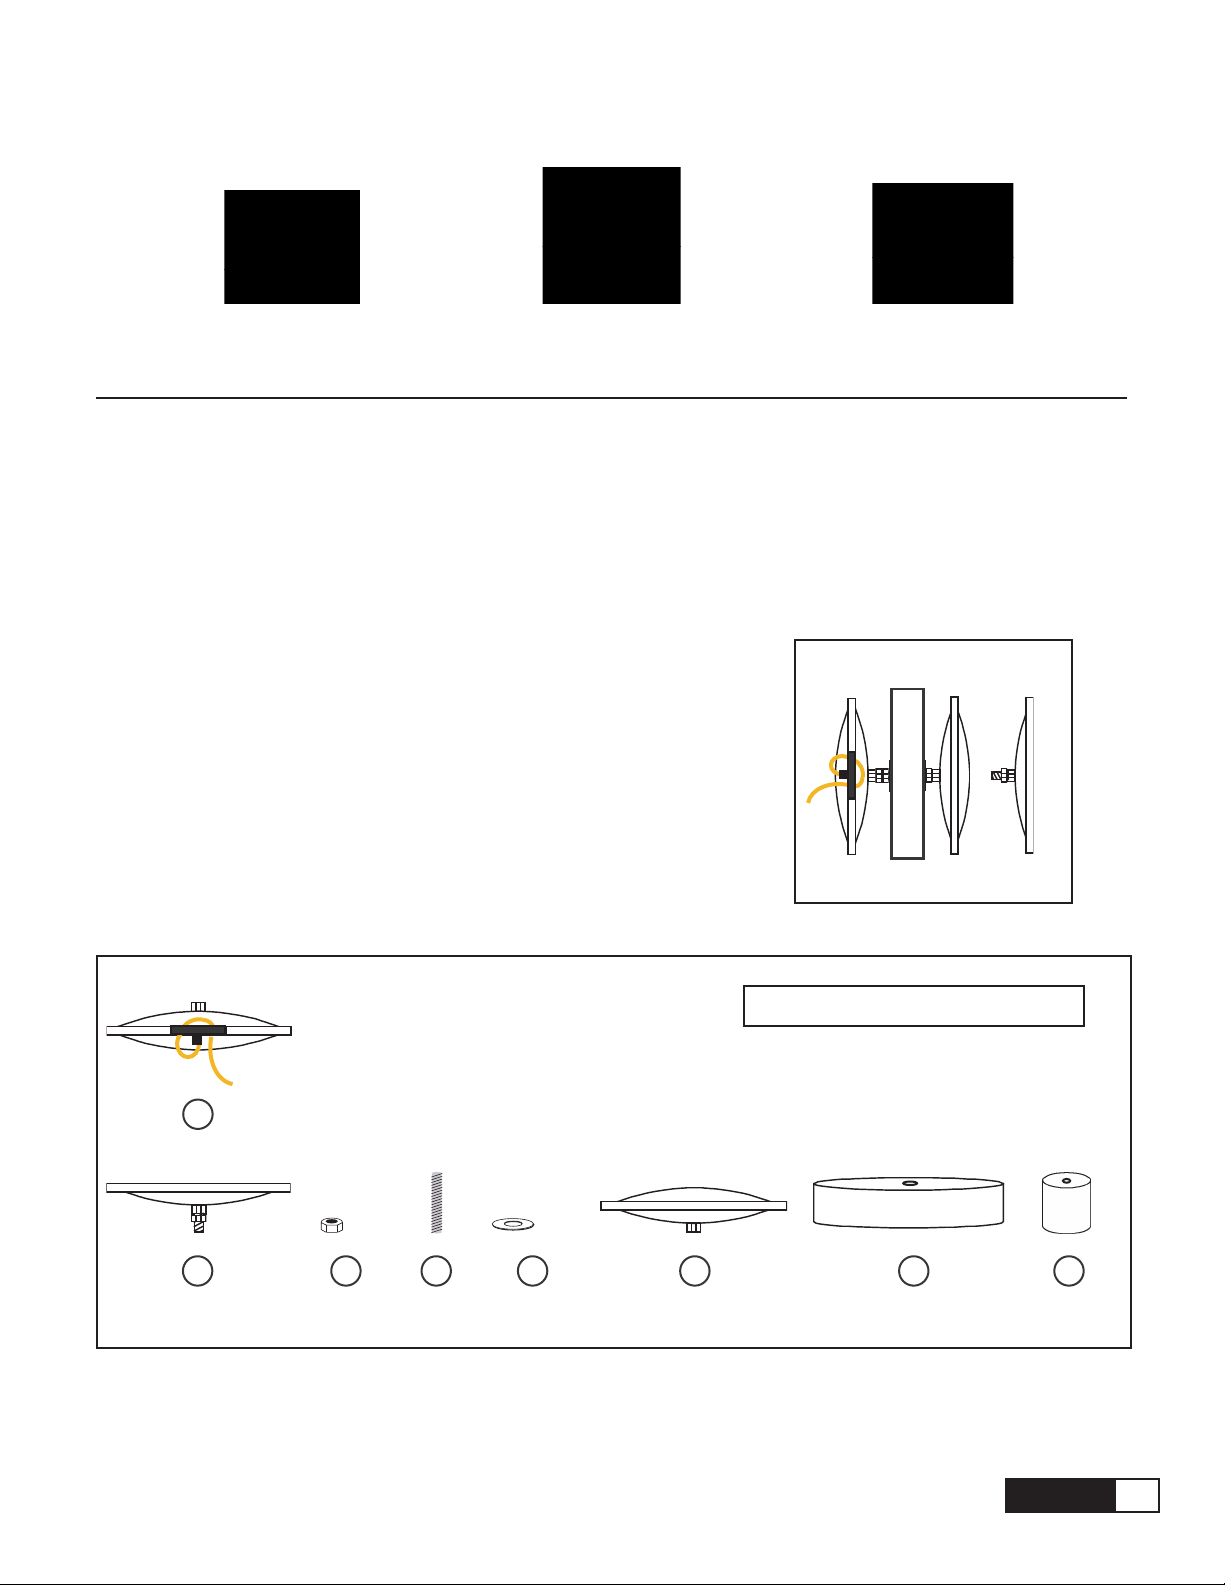
1. Remove AC339 and acoustic sound lens (ASL) from packaging.
2. Seperate the TST from the float. Using the 9/16” wrenches,
loosen the jam nut to remove the float assembly from the gold
mounting point on the TST. Use one 9/16" wrench to hold the
TST’s gold fastener, and with the second 9/16" wrench turn the jam
nut away from the gold mounting point until float and TST are
seperated.
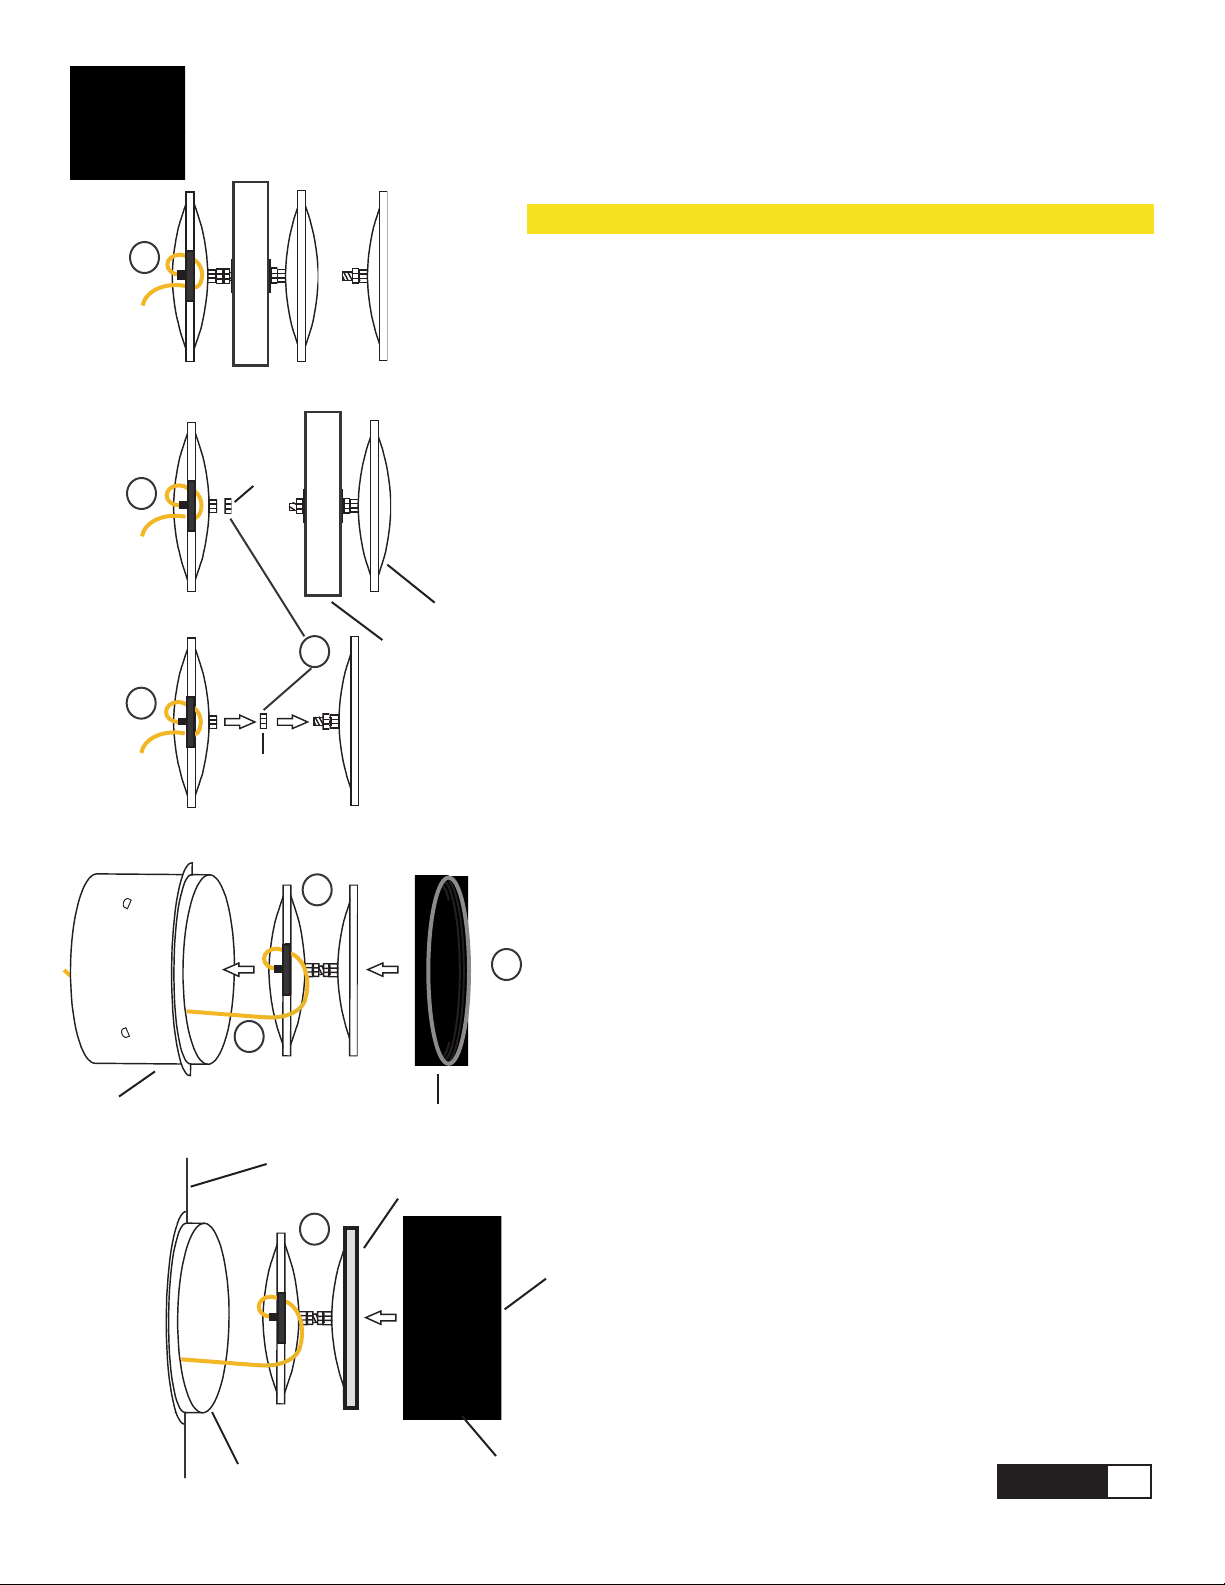
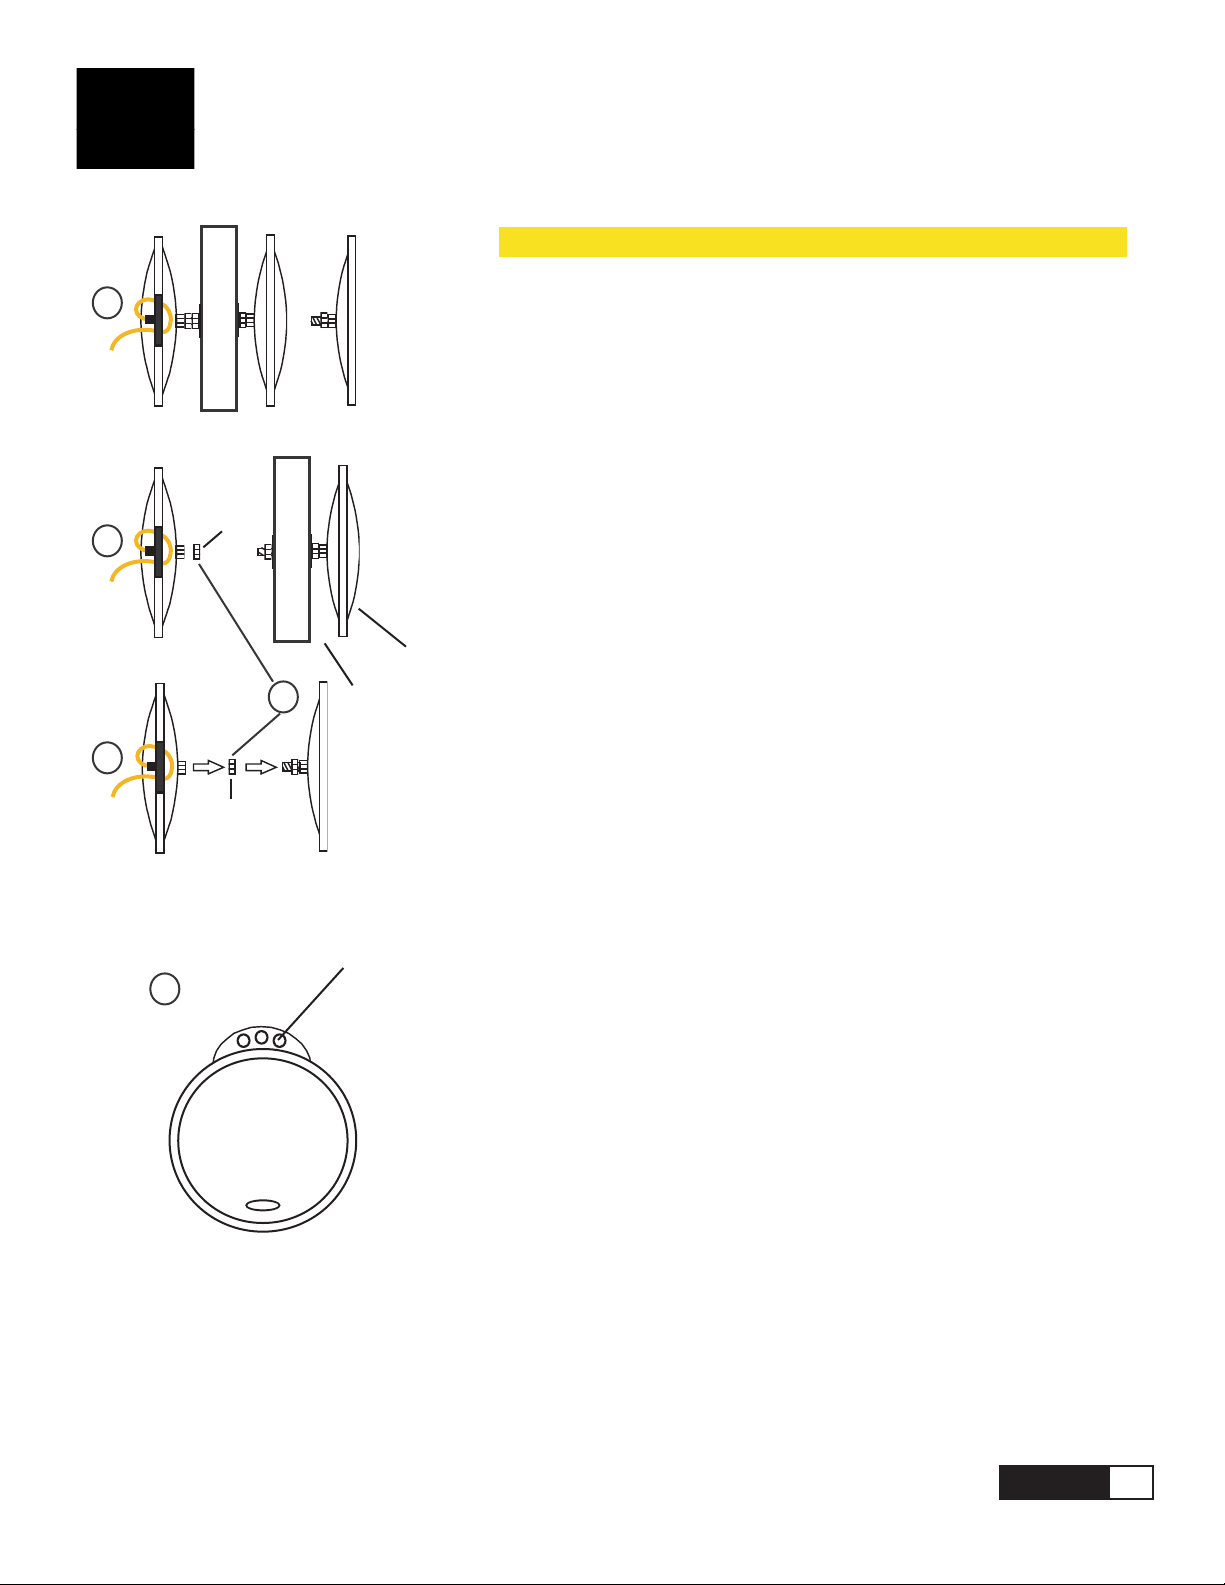
3. Remove one jam nut from the threaded stud on float assembly.
Thread jam nut completely onto stud attached to acoustic
sound lens. You should now have two jam nuts threaded
completely on to the stud connected to the sound lens.
4. Fully thread acoustic sound lens onto TST. Using two wrenches
tighten jam nut against the mounting point. Using one wrench to
hold the TST’s gold fastener, while the second tightens the
jam nut against the gold mounting point. Make sure that jam nut
is firmly tightened against the gold mounting point. This assembly
is now ready for installing into a third-party light niche.
IMPORTANT NOTE: DO NOT ASSEMBLE BY USING THE DOME
ITSELF TO TIGHTEN—MAKE SURE TO TIGHTEN THE TSTs BY
USING A 9/16”WRENCH ON THE GOLD HEX MOUNTING POINT
AND TURN THE JAM NUT USING A SECOND 9/16”WRENCH.
5. Remove rubber gasket (#3) from a third-party light niche
face ring assembly (#1) by loosening Phillips head screw on
unitension wire clamp (#2).
6. Wrap rubber gasket (#3) onto acoustic lens black rubber ring
then re-install (#3) with AC339 assembly installed into face
ring (#1). Tighten unitension wire clamp (#2).
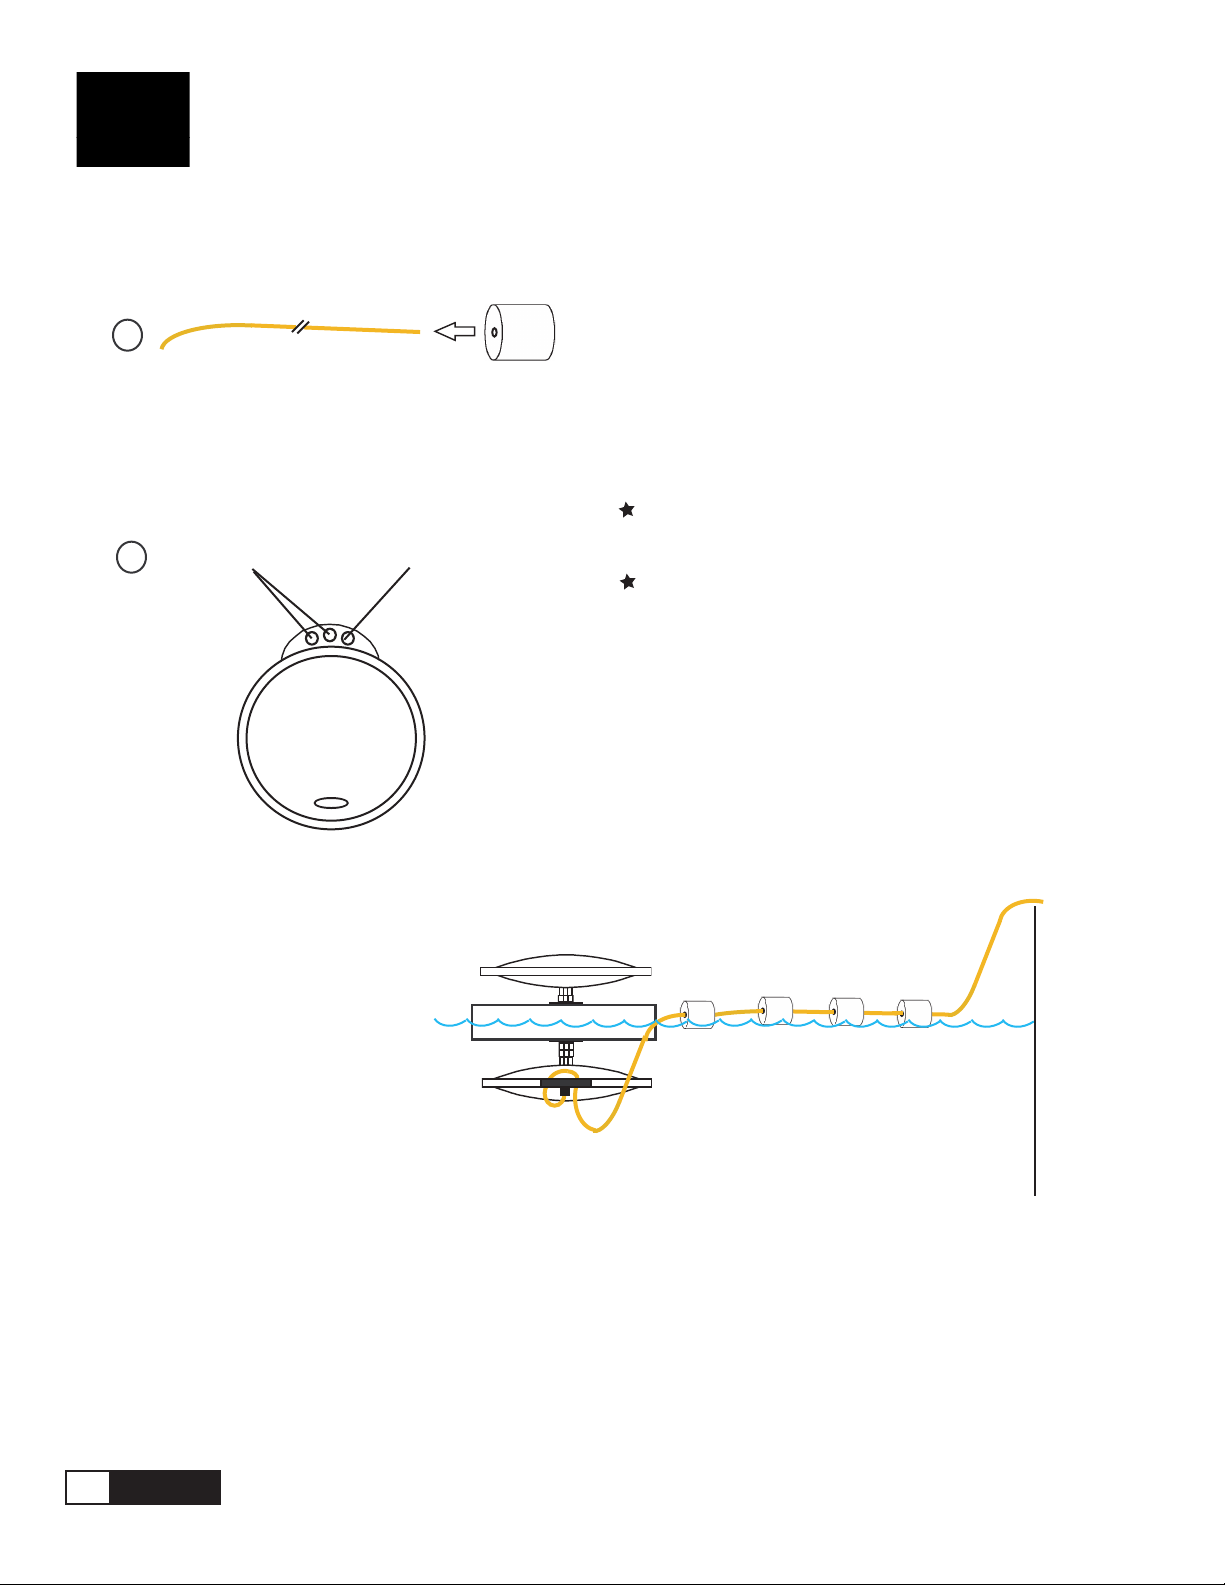
7. Insert finished end of underwater speaker cable into conduit
opening in back of light niche (#4). Thread wire through
conduit to junction box.
8. Insert complete assembly into light niche back can (#4) using
pilot screw with captive gum washer (#5) to fasten chrome face
ring assembly (#1) to finish installation.
9. Connect supplied speaker wire to sound system amplifier by
connecting the red insulated wire to the positive terminal and the
black insulated wire to the negative terminal.
10. Adjust volume level—enjoy!
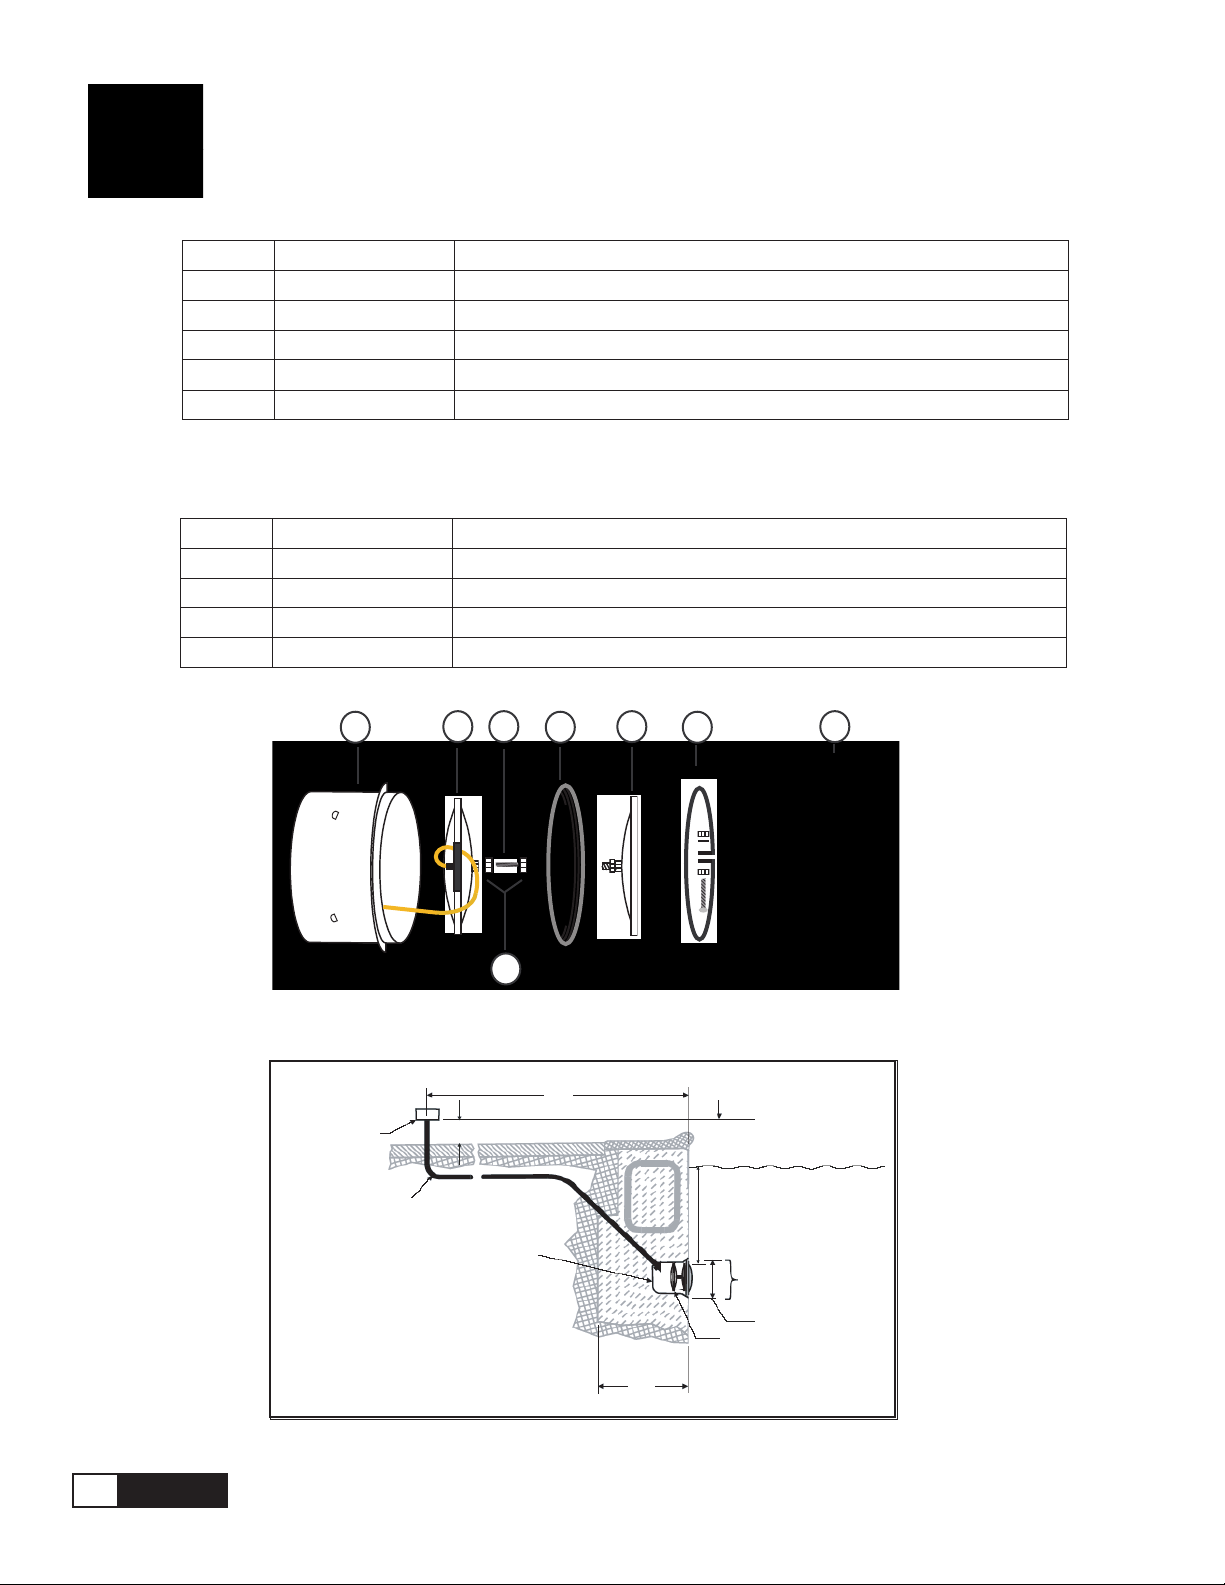
AQUASONIC IN-WALL INSTALLATION
Please refer to page 5 for exploded diagram and part listing.
1
2
4
3
6
7
8
Pool Wall
Third-Party Light Niche (#4)
8
Gasket Mounted onto Sound Lens
Chrome Face Ring Assembly (#1)
This configuration requires some assembly. The Aquasonic®AC339 simply replaces the light bulb in the light niche.
ASLFloat
Float
TST
ASL
ASL
TST
Jam Nut
Jam Nut
Rubber Gasket (#3)
Third-Party Light Niche (#4)
TOOLS NEEDED: Phillips Head Screwdriver, 2-9/16" Open-Ended Wrenches.
TST
TST
ASL
TST
Passive TST
Passive TST
Pilot Screw
with Captive
Gum Washer
(#5)
Aquasonic 4