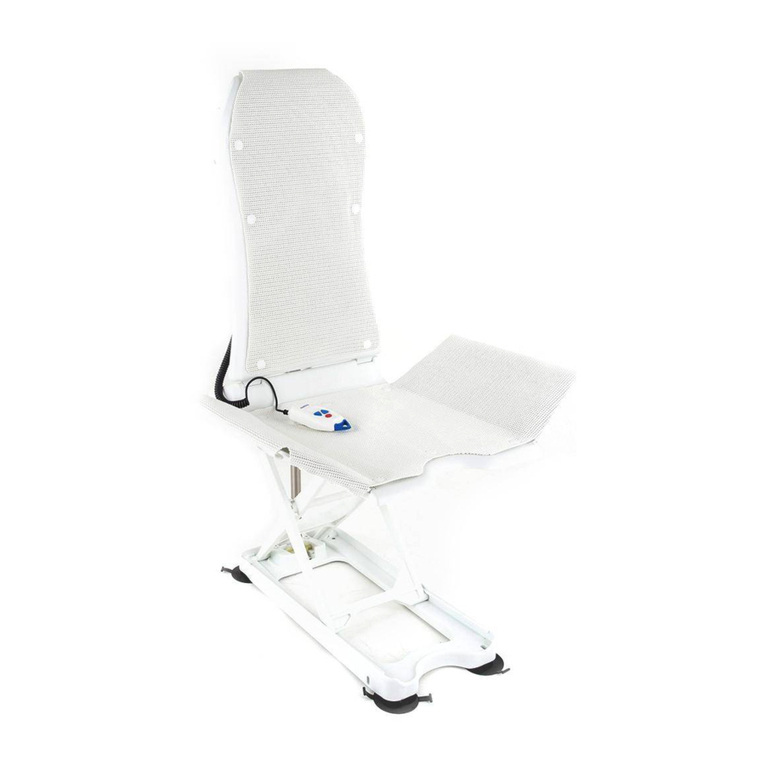
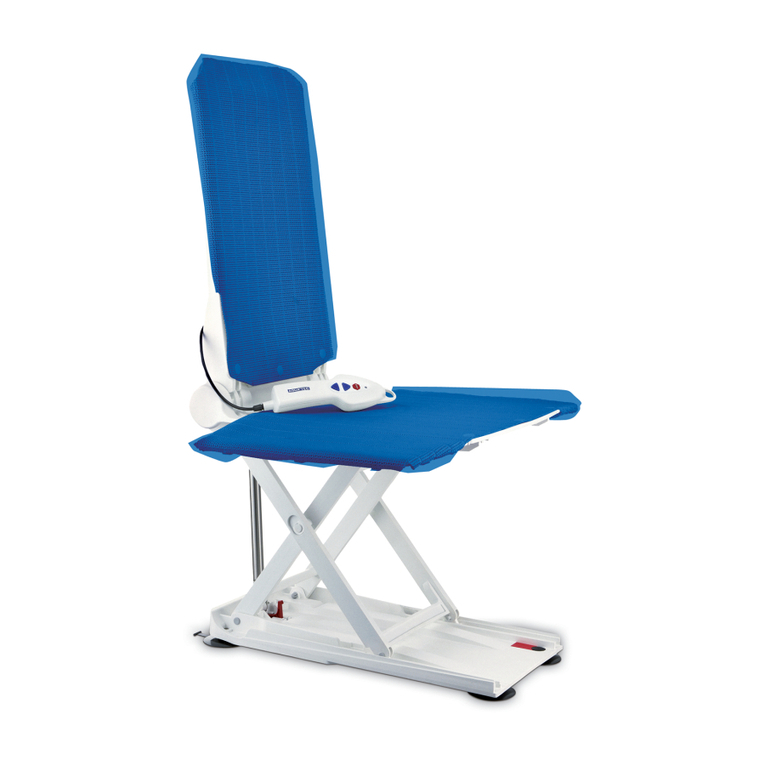
Aquatec orca User manual

ORC
A
B
adewannenlifter
G
ebrauchsanweisung
DE
B
athlift
O
perating instructions
EN
E
lévateur de bain
M
ode d’emploi
FR
B
adlift
G
ebruiksaanwijzing
NL
S
ollevatore per vasca da bagn
o
I
struzioni per l’uso
IT
A
parato elevador de bañera
M
anual de instrucciones
ES
B
adekarløfter
B
ruksanvisning
NO

Bitte lesen Sie diese Gebrauchsanweisung aufmerk-
sam durch, bevor Sie das Produkt benutzen. Beach-
ten Sie alle Hinweise, insbesondere die Sicherheits-
hinweise, und handeln Sie danach.
WICHTIG!
DE
B
efore you use the product, please read these opera-
t
ing instructions carefully. Pay attention to all instruc-
t
ions, especially those regarding safety, and follow them
a
t all times.
IMPORTANT!
EN
V
euillez lire attentivement ce mode d’emploi avant d’ut
i-
l
iser le produit. Veuillez respecter toutes les consignes
,
n
otamment les consignes de sécurité, et agir en consé
-
q
uence.
IMPORTANT !
FR
L
ees deze gebruiksaanwijzing aandachtig door, voorda
t
u
het product gebruikt. Neem alle instructies in acht,
v
ooral de veiligheidsinstructies en volg deze op.
BELANGRIJK!
NL
S
i prega di leggere attentamente queste istruzioni per
l
’uso prima di utilizzare il prodotto. Attenersi a tutte le in
-
d
icazioni, in particolar modo a quelle relative alla sicu-
r
ezza e procedere di conseguenza.
IMPORTANTE!
IT
P
or favor lea este manual de instrucciones atentament
e
a
ntes de utilizar el producto. Tenga en cuenta todas la
s
i
ndicaciones, especialmente las relativas a la seguri-
d
ad, y sígalas.
¡IMPORTANTE!
ES
L
es bruksanvisningen nøye før du tar i bruk produktet.
F
ølg alle henvisningene, spesielt ang. sikkerhet.
VIKTIG!
NO

3
1
87
4 5
2
3
6
910

4DE
1 Grundlegende Hinweise. . . . . . . . . . . . . . 4
1.1 Einleitung . . . . . . . . . . . . . . . . . . . . . . . . . . 4
1.2 Verwendung . . . . . . . . . . . . . . . . . . . . . . . . 4
1.3 Garantie . . . . . . . . . . . . . . . . . . . . . . . . . . . 4
1.4 Wiederverwendung/Aufbereitung . . . . . . . . 4
1.5 Entsorgung . . . . . . . . . . . . . . . . . . . . . . . . . 5
1.6 CE-Kennzeichnung. . . . . . . . . . . . . . . . . . . 5
2 Sicherheitshinweise . . . . . . . . . . . . . . . . . 5
2.1 Warnhinweise und Symbole . . . . . . . . . . . . 5
2.2 Allgemeine Hinweise. . . . . . . . . . . . . . . . . . 5
2.3 Hinweise zum Akku und zum Ladegerät. . . 5
3 Beschreibung . . . . . . . . . . . . . . . . . . . . . . 6
3.1 Lieferumfang. . . . . . . . . . . . . . . . . . . . . . . . 6
3.2 Technische Daten. . . . . . . . . . . . . . . . . . . . 6
4 Transportieren. . . . . . . . . . . . . . . . . . . . . . 6
5 In Betrieb nehmen. . . . . . . . . . . . . . . . . . . 6
5.1 Akku laden . . . . . . . . . . . . . . . . . . . . . . . . . 6
5.2 In der Badewanne aufbauen. . . . . . . . . . . . 7
5.3 In der Badewanne abbauen . . . . . . . . . . . . 7
6 Bedienen . . . . . . . . . . . . . . . . . . . . . . . . . . 8
6.1 Steuern . . . . . . . . . . . . . . . . . . . . . . . . . . . . 8
6.1.1 Heben. . . . . . . . . . . . . . . . . . . . . . . . . . . . . 8
6.1.2 Senken . . . . . . . . . . . . . . . . . . . . . . . . . . . . 8
6.1.3 NOT-AUS . . . . . . . . . . . . . . . . . . . . . . . . . . 8
6.2 Baden . . . . . . . . . . . . . . . . . . . . . . . . . . . . . 8
6.3 Störungen beseitigen . . . . . . . . . . . . . . . . . 9
7 Pflegen und warten. . . . . . . . . . . . . . . . . . 9
7.1 Sitz und Rückenlehne. . . . . . . . . . . . . . . . . 9
7.2 Ladegerät und Handbedienteil . . . . . . . . . 10
7.3 Warten/Sicherheitstechnische
Kontrolle . . . . . . . . . . . . . . . . . . . . . . . . . . 10
1.1 Einleitung
In dieser Gebrauchsanweisung finden Sie Informatio-
nen und Hinweise darüber, wie Sie den Badewannen-
lifter sicher und sachgerecht benutzen.
Der Text dieser Gebrauchsanweisung enthält Hinwei-
se auf Bildnummern und Positionsnummern in den Bil-
dern. Diese Angaben sind in Klammern gesetzt.
Beispiel: (3, Bild 1) bedeutet Bild 1, Position 3.
Bewahren Sie alle Unterlagen sorgfältig auf.
1.2 Verwendung
Der Badewannenlifter ist ausschließlich zum Baden
von Personen innerhalb der Badewanne bestimmt.
Jede weitere Verwendung ist nicht erlaubt.
Den Badewannenlifter dürfen Sie nicht als Hilfe zum
Ein- oder Aussteigen, zum Auf- oder Absteigen, als
Unterlage, als Hebebühne oder zu ähnlichen Zwecken
benutzen.
1.3 Garantie
AQUATEC gewährt auf das Produkt eine Garantie von
3 Jahren.
Ausgenommen hiervon sind Bezüge, Sauger und der
Akku, der in das Handbedienteil integriert ist.
Das Auslieferungsdatum auf dem AQUATEC-Liefer-
schein gilt als Garantiebeginn.
1.4 Wiederverwendung/Aufbereitung
Das Produkt ist für den Wiedereinsatz bestimmt. Die
Anzahl der maximalen Wiedereinsätze ist abhängig
vom jeweiligen Gerätezustand.
Bei der Aufbereitung die AQUATEC-Aufbereitungs-
und Hygienerichtlinien beachten. Diese werden auf
Anfrage von AQUATEC zur Verfügung gestellt.
Inhaltsverzeichnis 1 Grundlegende Hinweise

5
DE
1.5 Entsorgung
1.6 CE-Kennzeichnung
Das Produkt entspricht den Bestimmungen der Medi-
zinprodukte-Richtlinie 93/42/EWG.
Das Produkt entspricht den Anforderungen der Norm
DIN EN 60601-1-2 (Elektromagnetische Verträglich-
keit).
2.1 Warnhinweise und Symbole
In dieser Gebrauchsanweisung finden Sie folgende
Warnhinweise und Symbole:
2.2 Allgemeine Hinweise
2.3 Hinweise zum Akku und zum Ladegerät
Dieses Produkt ist von einem umweltbe-
wussten Hersteller geliefert worden, der ge-
mäß der Verordnung 2002/96/CE zur Entsor-
gung von Elektro- bzw. Elektronikschrott
(WEEE) arbeitet.
Dieses Produkt kann Stoffe enthalten, die
sich für die Umwelt als schädlich erweisen
könnten, falls sie an Orten (Mülldeponien)
entsorgt werden, die nach der Gesetzge-
bung dafür nicht geeignet sind.
Das Symbol der "durchgestrichenen Müllton-
ne" befindet sich auf diesem Produkt, um Sie
an die Verpflichtung zum Recycling zu erin-
nern.
Bitte verhalten Sie sich umweltbewusst und
führen Sie dieses Produkt am Ende seiner
Nutzungsdauer Ihrer Recyclingeinrichtung
zu.
*VORSICHT!
Dieser Hinweis kennzeichnet eine mög-
liche Gefährdung.
Wenn Sie die Hinweise nicht beachten,
können Personenschäden oder Sach-
schäden die Folge sein.
Wichtig!
Dieser Hinweis kennzeichnet zusätzliche Hin-
weise, Infos oder Tipps.
Benutzen Sie den Badewannenlifter nur in-
nerhalb der Badewanne zum Baden von Per-
sonen.
2 Sicherheitshinweise
*
An dieser Stelle finden Sie eine Darstellung, die di
e
Art der Gefahr veranschaulicht.
Baden Sie, wenn Ihr Gesundheitszustand ein
selbstständiges Baden nicht erlaubt, nur un-
ter Aufsicht.
Beispiel: Sie erreichen die NOT-AUS-Taste
an der Handsteuerung während der Bedie-
nung nicht jederzeit.
Beachten Sie die Angaben auf dem Typ-
schild. Überlasten Sie den Badewannenlifter
nicht.
Achten Sie, wenn Sie Badeöle oder Badesal-
ze verwenden, auf die empfohlene Dosie-
rung. Die Zusätze können das Gleitverhalten
der Hubschere beeinträchtigen.
Transportieren oder lagern Sie das Produkt
in trockenen Räumen bei einer Temperatur
zwischen 0 °C und 40 °C und einer Luft-
feuchtigkeit von 30 bis 75 %.
Lagern Sie das Produkt nicht direkt neben
Wärmequellen.
Setzen Sie das Produkt nicht dem direkten
Sonnenlicht aus.
Wenden Sie sich bei Funktionsstörungen bit-
te sofort an Ihren Fachhändler.
Nehmen Sie keine eigenmächtigen Verände-
rungen oder Umbauten vor.
Werfen Sie das Handbedienteil niemals ins
Feuer und lagern Sie das Handbedienteil
nicht in der Nähe von Feuer.
Öffnen Sie das Handbedienteil nicht. Beim
Öffnen erlischt die Gewährleistung!
Verwenden Sie ausschließlich das mitgelie-
ferte Ladegerät (Art.-Nr. 16429) zum Laden
des Akkus im Handbedienteil.
Laden Sie den Akku im Handbedienteil nach
der Benutzung möglichst sofort wieder.
Laden Sie den Akku zur Erhöhung der Le-
bensdauer bei längerem Nichtgebrauch ein-
mal im Monat nach.
Verbinden Sie das Ladegerät nur mit dem
Stromnetz, wenn das Handbedienteil am La-
degerät angeschlossen ist.

6DE
3.1 Lieferumfang
Im Lieferumfang des AQUATEC ORCA sind folgende
Teile enthalten (Bild 1 bis Bild 3):
Sitz (Bild 1) bestehend aus:
1 Seitenklappe
2Sitzplatte
3 Scharnier für Rückenlehne
4 Hubschere
5 Spindelfußaufnahme
6 hinterer Sauger (zweilaschig mit Gewinde)
7 Grundplatte
8 Führung für Gleitschuh
9 Gleitschuh
10 vorderer Sauger (einlaschig mit Kopf)
Rückenlehne (Bild 2) bestehend aus:
1 Klinkenstecker
2 Antrieb
3 Spindelfuß
4 Verriegelungsbolzen
5 Platte Rückenlehne
Handbedienteil und Ladegerät (Bild 3)
1 Handbedienteil und Spiralkabel
3 Ladegerät
Der Akku ist in das Handbedienteil integriert.
Gebrauchsanweisung (ohne Abbildung)
3.2 Technische Daten
Badewannenlifter
Länge Sitz: 590 mm
Breite Sitz bei ausgeklappten
Seitenklappen: 715 mm
Breite Sitz bei eingeklappten
Seitenklappen: 390 mm
Höhe des Sitzes in tiefster
Position: 60 mm
Höhe des Sitzes in höchster
Position: 420 mm
Belastung max.: 135 kg
Gesamtgewicht ohne Handbedienteil: 12,3 kg
Gewicht Sitz: 7,7 kg
Gewicht Rückenlehne: 4,6 kg
Gewicht Handbedienteil: 0,45 kg
Gewicht Ladegerät: 0,25 kg
Betriebsspannung: 14 V
Nennstrom: 4 A
Akkutyp: LiIon
Ladegerät Eingang: 230-240 V AC, 50 Hz
Ladegerät Ausgang: 24 V DC, 200 mA, 12 W
Ladezeit ab
Unterspannungsanzeige: ca. 5 h
Dem Typschild (Bild 10) können Sie wichtige Informati-
onen entnehmen:
1 Hinweis (Entsorgung)
2 Konformitätskennzeichen
3 Einschaltdauer
4 Anwendungsteil des Typs B
5 Produktionszeitraum
6 laufende Gerätenummer
7 Produktionstag (1 bis 365 Tage)
8 letzte Ziffer des Produktionsjahres
9 Gerätetyp
10 Hinweis (Begleitpapiere beachten)
11 Schutzart
12 Nennspannung/Nennaufnahme
13 Belastbarkeit
Das Typschild ist auf der Rückseite der Rückenlehne
angebracht.
Nehmen Sie das Handbedienteil ab und zerlegen Sie
den Badewannenlifter zum Transport immer in zwei
Teile (Sitz und Rückenlehne).
Die Beschreibung des Zerlegens finden Sie in Ab-
schnitt 5.3.
5.1 Akku laden
3 Beschreibung
Wichtig!
●Die Rückenlehne ist im zusammengeklapp-
ten Zustand nicht am Sitz arretiert.
●Die Sauger bleiben beim Transport ange-
baut.
●Das Handbedienteil muss beim Transport
von der Rückenlehne abgenommen wer-
den.
Wichtig!
●Prüfen Sie vor der Inbetriebnahme die Teile
auf Transportschäden.
●Beachten Sie bei der Montage die richtige
Lage der Teile zueinander.
VORSICHT!
Gefahr durch elektrischen Strom
Laden Sie den Akku nur in trockenen Räu-
men (nicht im Badezimmer).
4 Transportieren
5 In Betrieb nehmen

7
DE
1. Den Klinkenstecker (7, Bild 3) des Ladegerätes
(3, Bild 3) so weit in die Klinkenbuchse (6, Bild 3)
am Spiralkabel (4, Bild 3) des Handbedienteils (1,
Bild 3) stecken, bis der Klinkenstecker einrastet.
2. Den Netzstecker (2, Bild 3) des Ladegerätes in
eine Steckdose stecken.
Die rote Kontroll-Leuchte (5, Bild 9) am Handbedienteil
leuchtet so lange, bis der Akku geladen ist.
3. Den Netzstecker des Ladegerätes aus der Steck-
dose ziehen.
4. Die Entriegelungshülse (5, Bild 3) nach oben
schieben und den Klinkenstecker des Ladegerä-
tes aus der Klinkenbuchse am Handbedienteil zie-
hen.
5.2 In der Badewanne aufbauen
1. Den Sitz (2, Bild 4) auf den Boden der leeren Ba-
dewanne stellen. Die Spindelfußaufnahme
(3, Bild 4) zeigt dabei zum Badewannenende, das
dem Ablauf (1, Bild 4) gegenüberliegt.
2. Die Seitenklappen am Sitz nach außen klappen
(Bild 5).
3. Die Rückenlehne (ohne Handbedienteil)
(1, Bild 6) so auf den Sitz legen, dass die Haken
(2, Bild 6) der Rückenlehne in die Scharniere
(3, Bild 6) der Sitzplatte (4, Bild 6) eingreifen.
4. Die Rückenlehne mittig am Kopfende langsam bis
in Endstellung anheben (Bild 6).
5. Die Klinkenbuchse mit Entriegelungshülse (3,
Bild 7) am Spiralkabel (2, Bild 7) des Handbedien-
teils (1, Bild 7) auf den Klinkenstecker (4, Bild 7)
aufstecken, bis die Verriegelung spürbar einrastet.
Der Badewannenlifter ist betriebsbereit.
5.3 In der Badewanne abbauen
1. Das Wasser aus der Badewanne ablassen.
2. Den Badewannenlifter mit der AB-Taste (4, Bild 9)
absenken (1, Bild 8), bis die Rückenlehne in ab-
gesenkter Endlage stoppt.
3. Die Klinkenbuchse am Spiralkabel des Handbe-
dienteils durch Hochschieben der Entriegelungs-
hülse (3, Bild 7) entriegeln und von dem Klinken-
stecker (4, Bild 7) abziehen.
4. Die Rückenlehne mit einer Hand am Kopfende
greifen und bis in Endstellung nach vorn klappen
(2, Bild 8).
5. Die Rückenlehne nach oben vom Sitz abnehmen
(3, Bild 8) und aus der Badewanne herausheben.
6. Die Seitenklappen am Sitz nach innen klappen (4,
Bild 8).
Wichtig!
●Laden Sie den Akku vor jeder Benutzung
ganz auf.
●Die Spannungsangabe auf dem Ladegerät
muss mit der Spannung Ihres Stromnetzes
übereinstimmen.
VORSICHT!
Wegrutschen des Sitzes durch schlecht haf-
tende Sauger
●Reinigen Sie vor dem Aufstellen die
Badewanne und die Sauger.
●Verändern Sie die Position des aufge-
stellten Badewannenlifters in der Bade-
wanne nicht mehr.
Wichtig!
●Die Sauger müssen montiert sein.
●Der Akku im Handbedienteil muss geladen
sein.
●Der Spindelfuß muss ganz eingefahren
sein.
●Beachten Sie beim Heben die Gewichte:
Der Sitz wiegt 7,7 kg, die Rückenlehne
4,6 kg (ohne Handbedienteil).
●Wenn bei der Badewanne ein Haltegriff
montiert ist, benutzen Sie den Seitenklap-
penabweiser (Option).
VORSICHT!
Defekt durch Herausrutschen des Spindel-
fußes
●Kontrollieren Sie vor dem Hochklappen
der Rückenlehne, ob die Spindel ganz
eingefahren ist.
●Kontrollieren Sie nach dem Hochklap-
pen der Rückenlehne, ob der Spindelfuß
in der Spindelfußaufnahme steht.
Wichtig!
●Achten Sie beim Umklappen der Rücken-
lehne darauf, dass das Spiralkabel (2,
Bild 7) des Handbedienteils nicht einge-
klemmt wird.
●Klappen Sie die Rückenlehne nur um,
wenn sich kein Wasser mehr in der Bade-
wanne befindet.
Wichtig!
Beachten Sie beim Heben die Gewichte: Der
Sitz wiegt 7,7 kg, die Rückenlehne 4,6 kg (oh-
ne Handbedienteil).

8DE
7. Die hinteren Sauger (6, Bild 1) durch Hochziehen
der Lasche des Saugers lösen.
8. Den Sitz hinten weiter anheben (5, Bild 8).
Die vorderen Sauger lösen sich von selbst.
9. Den Sitz aus der Badewanne herausheben.
10. Alle Teile des Badewannenlifters sorgfältig ver-
stauen.
6.1 Steuern
Das Steuern erfolgt über das Handbedienteil (Bild 9).
6.1.1 Heben
Die AUF-Taste (2, Bild 9) am Handbedienteil (3, Bild 9)
drücken.
Die Rückenlehne schwenkt in die aufrechte Position,
bzw. der Sitz fährt nach oben.
6.1.2 Senken
Die AB-Taste (4, Bild 9) am Handbedienteil (3, Bild 9)
drücken.
Der Sitz fährt nach unten, bzw. die Rückenlehne
schwenkt nach hinten.
6.1.3 NOT-AUS
Wenn die rote Leuchtdiode nach dem Loslassen der
NOT-AUS-Taste erlischt, wurde der Fehler behoben
(z. B. Lösen der Taste). Das Gerät ist wieder betriebs-
bereit.
Wenn die rote Leuchtdiode nach dem Loslassen der
NOT-AUS-Taste weiterhin leuchtet, wurde der Fehler
noch nicht behoben. Das Gerät ist nicht betriebsbereit
und muss repariert werden (z. B. bei einem Elektronik-
schaden).
6.2 Baden
Der Badewannenlifter ist wie im Abschnitt 5.2 be-
schrieben in der Badewanne aufgebaut.
1. Den Sitz mit der AUF-Taste (2, Bild 9) auf eine
Höhe mit dem Badewannenrand fahren.
Die Seitenklappen liegen eben auf dem Badewannen-
rand auf.
2. Das Badewasser einlassen und die Wassertem-
peratur prüfen.
3. Auf die Ihnen zugewandte Seitenklappe wie auf
einen Stuhl setzen.
4. Bis zur Mitte des Sitzes nach hinten rutschen.
5. In Badeposition drehen. Dazu ein Bein nach dem
anderen über den Wannenrand schwenken.
6. Bei richtiger Sitzposition den Sitz durch Drücken
der AB-Taste (4, Bild 9) in die Badewanne absen-
ken.
Wichtig!
Lösen Sie beide hinteren Sauger gleichzeitig!
Wichtig!
Bei montierten Höhenadaptern (Option) müs-
sen Sie die vorderen Sauger ebenfalls durch
Ziehen an den Laschen lösen.
Wichtig!
●Falls der Akku im Handbedienteil nicht aus-
reichend geladen ist, leuchtet die Akkukon-
trollanzeige (5, Bild 9) rot. Die Absenkfunk-
tion des Badewannenlifters wird gesperrt.
Das Hochfahren ist jedoch noch möglich.
Laden Sie den Akku in diesem Fall nach
dem Hochfahren sofort auf.
●Betätigen Sie die Handsteuerung nur bei
eingebauter und aufgestellter Rückenleh-
ne.
●Der Lifter bleibt beim Loslassen der Taste
sofort in der momentanen Position stehen.
Wichtig!
Ist die Rückenlehne abgesenkt, schwenkt zu-
erst die Rückenlehne in die aufrechte Position.
Wichtig!
Ist der Sitz bereits abgesenkt, senkt sich die
Rückenlehne nach hinten ab.
6Bedienen
Wichtig!
Drücken Sie die rote NOT-AUS-Taste (1,
Bild 9) nur, wenn das Gerät nach dem Loslas-
sen der AUF- bzw. AB-Taste nicht sofort ste-
hen bleibt (z. B. beim Verklemmen einer Tas-
te). Die Bewegung des Badewannenlifters wird
sofort gestoppt. Die rote Leuchtdiode, die in
das Handbedienteil integriert ist, leuchtet.
VORSICHT!
Wegrutschen des Sitzes durch schlecht haf-
tende Sauger
Vergewissern Sie sich vor der Benutzung
vom rutschsicheren und kippsicheren Stand
des Badewannenlifters in der Badewanne.
Wichtig!
●Überzeugen Sie sich vor dem Baden durch
einen Probelauf* von der ordnungsgemä-
ßen Funktion.
●Prüfen Sie vor der Benutzung die Tempera-
tur des Badewassers.
*
Unbelasteten Lifter einmal nach oben und wieder
nach unten fahren.

9
DE
Hat der Sitz die tiefste Position erreicht, können Sie
die Rückenlehne nach hinten neigen, um eine beque-
mere Badeposition und ein weiteres Eintauchen ins
Badewasser zu erreichen.
7. Die AB-Taste weiter drücken, bis die gewünschte
Position der Rückenlehne erreicht ist.
Das Aussteigen aus der Badewanne erfolgt in umge-
kehrter Reihenfolge.
Zum Hochfahren die AUF-Taste (2, Bild 9) drücken.
8. Die Klinkenbuchse am Spiralkabel des Handbe-
dienteils durch Hochschieben der Entriegelungs-
hülse vom Klinkenstecker an der Rückenlehne ab-
nehmen und wie im Abschnitt 5.1 beschrieben
laden oder den Badewannenlifter wie im
Abschnitt 5.3 beschrieben in der Badewanne ab-
bauen.
6.3 Störungen beseitigen
7.1 Sitz und Rückenlehne
1. Das Produkt mit handelsüblichen Reinigungs- und
Desinfektionsmitteln sowie einem Lappen oder ei-
ner Bürste abwaschen.
2. Das Produkt mit warmem Wasser abbrausen.
3. Das Produkt mit einem Lappen abtrocknen.
4. Die Führung für den Gleitschuh (8, Bild 1) mit Va-
seline leicht einfetten.
5. Die Bezüge (optional) von Sitz und Rückenlehne
abknöpfen.
6. Die Bezüge (optional) bei max. 60 °C mit Fein-
waschmittel in der Waschmaschine waschen.
Wichtig!
Die folgende Tabelle gibt Ihnen Hinweise auf
Störungen und deren mögliche Ursachen.
Können Sie die Störung anhand der genann-
ten Abhilfen nicht beseitigen, wenden Sie sich
bitte direkt an Ihren Fachhändler.
Störung mögliche
Ursache Abhilfe
kein Motorenge-
räusch hörbar/der
Lifter bewegt sich
nicht
Klinkenbuchse
des Handbedien-
teils nicht richtig
verriegelt
Akku ist leer
Kontakte ver-
schmutzt
Kabel gequetscht
Klinkenbuchse
verriegeln (siehe
Abschnitt 5.2)
Akku laden (siehe
Abschnitt 5.1)
Kontakte reinigen
Handbedienteil
austauschen
Lifter fährt nur
nach oben Unterspannungs-
überwachung hat
angesprochen
Akku laden
Lifter bleibt beim
Hochfahren ste-
hen
Hublast zu hoch max. Belastung
beachten
Akku lädt sich
nicht auf Elektronik defekt
Akku defekt
Ladegerät defekt
Handbedienteil
durch Ihren Fach-
händler prüfen
lassen
Handbedienteil
austauschen
Ladegerät prüfen
lassen
kein rutschsiche-
rer Stand Sauger alt oder
beschädigt Sauger austau-
schen
VORSICHT!
Klemmgefahr durch bewegliche Hubsche-
ren
Gehen Sie beim Reinigen des Sitzes be-
sonders vorsichtig vor.
Gefahr der Beschädigung
Reinigen Sie niemals die Rückenlehne mit
Hochdruck.
Wichtig!
●Halten Sie den Sitz und die Rückenlehne
sauber und reinigen Sie beide regelmäßig.
●Verwenden Sie keine scheuernden Mittel.
VORSICHT!
Gefahr der Beschädigung
Trocknen Sie die Bezüge nicht in einem
Wäschetrockner.
7 Pflegen und warten

10 DE
7.2 Ladegerät und Handbedienteil
1. Das Ladegerät mit einem trockenen Tuch abwi-
schen.
2. Das Handbedienteil mit einem feuchten Tuch ab-
wischen und mit einem Lappen abtrocknen.
7.3 Warten/Sicherheitstechnische
Kontrolle
Periodische Überwachung:
Der Lifter ist mindestens alle 24 Monate auf folgende
Punkte zu kontrollieren:
●Funktionsbeeinträchtigende, mechanische Schä-
den am Gerät und am Zubehör
●Lesbarkeit sicherheitsrelevanter Aufschriften
●Funktion gemäß Gebrauchsanweisung
Die Kontrollen müssen Personen durchführen, die auf
Grund ihrer Ausbildung, ihrer Kenntnisse und ihrer
durch praktische Tätigkeit gewonnenen Erfahrungen
solche sicherheitstechnischen Kontrollen ordnungsge-
mäß durchführen können. Die Personen dürfen hin-
sichtlich ihrer Kontrolltätigkeit keinen Weisungen un-
terliegen.
Wenden Sie sich bitte an Ihren Sanitätsfachhändler,
um die periodische Überwachung durchführen zu las-
sen.
Ihr Sanitätsfachhändler hält auch eine Ersatzteilliste/
Dokumentation bereit.
Erforderliche Reparaturen lassen Sie bitte nur vom au-
torisierten Sanitätsfachhandel durchführen.
VORSICHT!
Gefahr durch elektrischen Strom
●Ziehen Sie vor dem Reinigen des Lade-
geräts immer den Netzstecker aus der
Steckdose.
●Stecken Sie keine leitenden Gegenstän-
de (z. B. Stricknadel, Metallstift) in die
Klinkenbuchse des Handbedienteils.
●Reinigen Sie das Ladegerät nur mit ei-
nem trockenen Tuch.
Wichtig!
Das Handbedienteil darf nur vom Hersteller
des Lifters geöffnet werden.

11
EN
1 General instructions. . . . . . . . . . . . . . . . 11
1.1 Introduction. . . . . . . . . . . . . . . . . . . . . . . . 11
1.2 Proper use . . . . . . . . . . . . . . . . . . . . . . . . 11
1.3 Warranty . . . . . . . . . . . . . . . . . . . . . . . . . . 11
1.4 Re-use/Reconditioning . . . . . . . . . . . . . . . 11
1.5 Disposal . . . . . . . . . . . . . . . . . . . . . . . . . . 12
1.6 CE marking. . . . . . . . . . . . . . . . . . . . . . . . 12
2 Safety instructions . . . . . . . . . . . . . . . . . 12
2.1 Warnings and symbols . . . . . . . . . . . . . . . 12
2.2 General instructions . . . . . . . . . . . . . . . . . 12
2.3 Instructions on the battery and charger . . 12
3 Description . . . . . . . . . . . . . . . . . . . . . . . 13
3.1 Scope of delivery . . . . . . . . . . . . . . . . . . . 13
3.2 Technical data. . . . . . . . . . . . . . . . . . . . . . 13
4 Transport. . . . . . . . . . . . . . . . . . . . . . . . . 13
5 Setting up . . . . . . . . . . . . . . . . . . . . . . . . 13
5.1 Recharging the battery . . . . . . . . . . . . . . . 13
5.2 Setting up the bathlift in the bathtub . . . . . 14
5.3 Removing the bathlift from the bathtub. . . 14
6 Operation. . . . . . . . . . . . . . . . . . . . . . . . . 15
6.1 Control . . . . . . . . . . . . . . . . . . . . . . . . . . . 15
6.1.1 Lifting . . . . . . . . . . . . . . . . . . . . . . . . . . . . 15
6.1.2 Lowering . . . . . . . . . . . . . . . . . . . . . . . . . . 15
6.1.3 Emergency stop . . . . . . . . . . . . . . . . . . . . 15
6.2 Using the bathlift. . . . . . . . . . . . . . . . . . . . 15
6.3 Troubleshooting . . . . . . . . . . . . . . . . . . . . 16
7 Care and maintenance . . . . . . . . . . . . . . 16
7.1 Seat and backrest. . . . . . . . . . . . . . . . . . . 16
7.2 Charger and hand control. . . . . . . . . . . . . 16
7.3 Maintenance/safety check . . . . . . . . . . . . 17
1.1 Introduction
These operating instructions contain information and
instructions regarding the safe and proper use of your
bathlift.
In the text of these operating instructions, we refer to
figures and individual items within the figures. These
references are shown in brackets.
Example: (3, fig. 1) refers to figure 1, item 3.
Keep all documents supplied in a safe place.
1.2 Proper use
The bathlift is designed exclusively for lowering and
lifting a person in a bathtub.
Any other use is prohibited.
Never use the bathlift as an aid to get in or out of any-
thing, nor as a support, lifting platform or for other sim-
ilar purposes.
1.3 Warranty
The warranty depends on the legal specifications in
the country of destination or on the specifications
made by our sales partners.
In the event of damage, please notify your specialist
dealer or contact one of the addresses printed in these
operating instructions.
The covers, suction cups and the battery that is built in
to the hand control are not covered by the warranty.
The warranty period begins at the delivery date as
shown on the delivery note.
1.4 Re-use/Reconditioning
The product is designed for repeated use. The maxi-
mum number of times you can re-use the device de-
pends on its general state and condition.
On reconditioning, always follow the AQUATEC recon-
ditioning and hygiene instructions. These are available
on request from AQUATEC.
Contents 1 General instructions

12 EN
1.5 Disposal
1.6 CE marking
The product complies with EU directive 93/42/EEC for
medical equipment.
The product meets the requirements specified in the
DIN EN 60601-1-2 standard (electromagnetic compati-
bility).
2.1 Warnings and symbols
The following warnings and symbols are used in these
operating instructions:
2.2 General instructions
2.3 Instructions on the battery and charger
This product has been supplied from an envi-
ronmentally aware manufacturer that com-
plies with the Waste Electrical andElectronic
Equipment (WEEE) Directive 2002/96/CE.
This product may contain substances that
could be harmful to the environment if dis-
posed of in places (landfills) that are not ap-
propriate according to legislation.
The "crossed out wheelie bin" symbol is
placed on this product to encourage you to
recycle wherever possible.
Please be environmentally responsible and
recycle this product through your recycling
facility at its end of life.
*CAUTION!
This notice indicates a potential hazard.
Not following these instructions can re-
sult in injury or damage.
Important!
This symbol indicates additional instructions,
information or tips.
The bathlift may only be used for lowering
and lifting a person within a bathtub.
If you are unable to take a bath on your own,
use the device only under supervision.
Example: You might not always be able to
reach the emergency stop button on the
hand control while you are operating the de-
vice.
2 Safety instructions
*
In the text, a picture illustrating the type of risk re-
places the asterisk.
Observe the information on the label. Do not
overload the bathlift.
If you are using bath oils or bath salts, do not
exceed the recommended dosage. These
additives may impair the operation of the lift-
ing scissors.
Transport or store the product in a dry room
at a temperature between 0 °C and 40 °C
and a humidity of 30 to 75 %.
Never store the product directly next to heat
sources.
Never expose the product to direct sunlight.
If you detect any malfunction, please contact
your authorised dealer immediately.
Do not modify or reconstruct the device.
Never throw the hand control into a fire. Do
not store it near naked flames.
Do not open the hand control. The warranty
expires if it is opened!
Only use the charger provided (art.no.
16429) to recharge the battery in the hand
control.
Recharge the battery in the hand control as
soon as possible after use.
To increase the life of the battery, recharge it
once a month if you do not use the device for
extended periods.
Only plug the charger into the mains if the
hand control is connected to the charger.

13
EN
3.1 Scope of delivery
The AQUATEC ORCA is supplied with the following
parts (fig. 1 to fig. 3):
Seat (fig. 1) consisting of:
1 Sideflap
2 Seat plate
3 Hinge for backrest
4 Lifting scissors
5 Spindle foot retainer
6 Rear suction cup (double strap with thread)
7 Base plate
8 Guide for gliding shoe
9 Gliding shoe
10 Front suction cup (single strap with head)
Backrest (fig. 2) consisting of:
1 Jack plug
2Drive
3 Spindle foot
4 Lock pin
5 Backrest plate
Hand control and charger (fig. 3)
1 Hand control and curled cable
3 Charger
The battery is built into the hand control.
Operating instructions (not illustrated)
3.2 Technical data
Bathlift
Seat length: 590 mm
Seat width with sideflaps folded out: 715 mm
Seat width with sideflaps folded in: 390 mm
Seat height at lowest position: 60 mm
Seat height at highest position: 420 mm
Maximum load: 135 kg
Total weight without hand control: 12.3 kg
Seat weight: 7.7 kg
Backrest weight: 4.6 kg
Hand control weight: 0.45 kg
Charger weight: 0.25 kg
Operating voltage: 14 V
Rated current: 4 A
Battery type: LiIon
Charger input: 230-240 V AC, 50 Hz
Charger output: 24 V DC, 200 mA, 12 W
Charge time as from low-voltage warning: approx. 5 h
The label (fig. 10) provides important information:
1 Instruction (disposal)
2 Conformance code
3 Duty cycle
4 Type B application unit
5 Period of production
6 Serial number
7 Day of production (1 to 365)
8 Last digit of year of production
9 Device type
10 Instruction (observe accompanying documents)
11 Degree of protection
12 Rated voltage/consumption
13 Load capacity
The label is on the rear side of the backrest.
Remove the hand control and always disassemble the
bathlift into two sections for transport (the seat and the
backrest).
For detailed instructions on how to dismantle the de-
vice, please refer to section 5.3.
5.1 Recharging the battery
1. Insert the jack plug (7, fig. 3) of the charger (3,
fig. 3) into the jack socket (6, fig. 3) on the curled
cable (4, fig. 3) of the hand control (1, fig. 3), until
the jack plug engages.
3 Description
Important!
●The backrest is not locked on the seat
when it is folded together.
●Do not remove the suction cups when
transporting the bathlift.
●The hand control must be removed from
the backrest for transport.
Important!
●Before setting up, inspect all parts for dam-
age caused by transport.
●During assembly, make sure the parts are
positioned correctly in relation to each
other.
CAUTION!
There is a risk of injury from electric shock.
Only recharge the battery in dry rooms (not
in the bathroom).
Important!
●Recharge the battery completely each time
before you use the bathlift.
●Make sure that the voltage specifications
shown on the charger correspond to those
of the power mains.
4 Transport
5 Setting up

14 EN
2. Insert the power plug (2, fig. 3) of the charger into
the power socket.
The red indicator lamp (5, fig. 9) on the hand control
stays on until the battery is fully recharged.
3. Pull the charger out of the power socket.
4. Push the unlocking sleeve (5, fig. 3) upwards and
disconnect the jack plug of the charger from the
jack socket on the hand control.
5.2 Setting up the bathlift in the bathtub
1. Place the seat (2, fig. 4) onto the base of the emp-
ty bathtub. The spindle foot retainer (3, fig. 4)
must point towards the end of the bathtub oppo-
site the drain (1, fig. 4).
2. Fold the sideflaps of the seat outwards (fig. 5).
3. Place the backrest (without the hand control) (1,
fig. 6) onto the seat so that the hooks (2, fig. 6) in
the backrest fit in the hinges (3, fig. 6) of the seat
plate (4, fig. 6).
4. Carefully lift the backrest by pulling it up to the
limit position at the head end (fig. 6).
5. Plug the jack plug with the unlocking sleeve (3,
fig. 7) on the curled cable (2, fig. 7) of the hand
control (1, fig. 7) onto the jack plug (4, fig. 7) until
the locking mechanism engages noticeably.
The bathlift is now ready for use.
5.3 Removing the bathlift from the bathtub
1. Let the water out of the bathtub.
2. Lower (1, fig. 8) the bathlift with the DOWN button
(4, fig. 9), until the backrest is at the stop in low-
ered limit position.
3. Unlock the jack socket on the curled cable of the
hand control by pushing up the unlocking sleeve
(3, fig. 7) and pull it off the jack plug (4, fig. 7).
4. Take hold of the backrest at the head-end with
one hand and fold it forwards up to the limit posi-
tion (2, fig. 8).
5. Pull the backrest up off the seat (3, fig. 8) and out
of the bathtub.
6. Fold the sideflaps on the seat inwards (4, fig. 8).
7. To release the rear suction cups, pull the straps (6,
fig. 1).
8. Lift the rear end of the seat further (5, fig. 8).
This releases the front suction cups.
9. Take the seat out of the bathtub.
10. Carefully put away all components of the bathlift.
CAUTION!
The seat may slip if the suction cups do not
adhere properly.
●Before you set up the bathlift, clean the
bathtub and the suction cups.
●Do not move the bathlift once you have
installed it in the bathtub.
Important!
●The suction cups have to be attached.
●The battery in the hand control must be fully
charged.
●The spindle foot must be fully retracted.
●When lifting, please remember: The seat
weighs 7.7 kg and the backrest weighs
4.6 kg (without the hand control).
●If your bathtub has a handrail, use the side-
flap diverter (optional).
CAUTION!
There is a risk of damage if the spindle foot
slips out.
●Before you fold up the backrest, check
whether the spindle is fully retracted.
●After you have folded the backrest up,
check whether the spindle foot is in the
spindle foot retainer.
Important!
●When folding the backrest down, ensure
that the curled cable (2, fig. 7) of the hand
control does not get caught.
●Do not fold the backrest down if there is wa-
ter in the bathtub.
Important!
When lifting, please remember: The seat
weighs 7.7 kg, and the backrest weighs 4.3 kg
(without the hand control).
Important!
Release the suction cups at the rear simulta-
neously.
Important!
If you have installed the height adapters (op-
tional), you also have to pull the straps on the
front suction cups to release them.

15
EN
6.1 Control
Controlling is done using the hand control (fig. 9).
6.1.1 Lifting
Press the UP button (2, fig. 9) on the hand control (3,
fig. 9).
The backrest moves to the upright position, or the seat
moves up.
6.1.2 Lowering
Press the DOWN button (4, fig. 9) on the hand control
(3, fig. 9).
The seat moves down, or the backrest moves back.
6.1.3 Emergency stop
If the red LED goes out after letting go of the emergen-
cy stop button, the fault has been rectified (e.g. if the
button is released). The device is ready for use again.
If the red LED stays on after letting go of the emergen-
cy stop button, the fault has not yet been rectified. The
device is not ready for use and must be repaired (e.g.
in the event of damage to the electronics).
6.2 Using the bathlift
Section 5.2 describes how to set up the bathlift in the
bathtub.
1. Raise the seat until it is level with the edge of the
bathtub by pressing the UP button (2, fig. 9).
The sideflaps should be level and rest on the edge of
the bathtub.
2. Fill the bath with water and check the tempera-
ture.
3. Sit down on the sideflap nearest to you as you
would sit down on a chair.
4. Slide backwards until you are sitting in the middle
of the seat.
5. Turn yourself so that you can be comfortably low-
ered into the water. Lift one leg after the other over
the edge of the bathtub.
6. Once you are sitting correctly, press the DOWN
button (4, fig. 9) to lower the seat into the water.
Once the seat has reached its lowest position, you can
tilt the backrest back, so that you can lean back deep-
er in the water.
7. Keep pressing the DOWN button until the back-
rest is at the right position.
To get out of the bath, follow the above steps in re-
verse order.
To lift the seat, press the UP button (2, fig. 9).
8. Remove the jack socket on the curled cable of the
hand control from the jack plug on the backrest by
moving up the unlocking sleeve and charge as de-
scribed in section 5.1 or remove the bathlift from
the bathtub as described in section 5.3.
Important!
●If the battery in the hand control is not suffi-
ciently charged, the battery pilot light goes
on (5, fig. 9). In this case, the lowering func-
tion of the bathilft is disabled. However, you
can still raise the lift. Recharge the battery
immediately after you have raised it.
●The hand control may only be used when
the backrest is properly mounted and in up-
right position.
●If you let go of the button, the lift stops in-
stantly in its position.
Important!
If the backrest is folded down, it first moves to
the upright position.
Important!
If the seat is already lowered, the backrest
leans backwards.
Important!
Only press the red emergency stop button (1,
fig. 9) if the device does not stop immediately
after letting go of the UP or DOWN button (e.g.
if a button jams). The bathlift stops moving im-
mediately. The red LED that is built into the
hand control goes on.
6 Operation CAUTION!
The seat may slip if the suction cups do not
adhere properly.
Before you use the bathlift, make sure that it
is securely positioned and cannot tip over.
Important!
●Before you take a bath, do a test run* to
make sure that the bathlift functions proper-
ly.
●Before using the bathlift, check the temper-
ature of the bath water.
*
Run the lift unloaded once to the top and then bac
k
to the bottom.

16 EN
6.3 Troubleshooting
7.1 Seat and backrest
1. Wash the product with commercial detergents and
disinfectants using a cloth or brush.
2. Rinse the product with warm water.
3. Dry the product with a cloth.
4. Lightly grease the guide for the sliding shoe (8,
fig. 1) using Vaseline.
5. Unbutton the covers (optional) from the seat and
backrest.
6. Wash the covers (optional) in the washing ma-
chine at maximum 60 °C using a mild detergent.
7.2 Charger and hand control
1. Wipe down the charger with a dry cloth.
2. Wipe down the hand control with a damp cloth
and dry it with a dry cloth.
Important!
The following table provides information on
faults and their probable cause. If you cannot
rectify a fault using the table, please contact
your authorised dealer directly.
Problem Possible
causes Remedy
No motor noise/lift
does not move Jack socket of the
hand control is not
locked correctly
The battery is flat
The contacts are
dirty
The cable is dam-
aged
Lock the jack
socket (see sec-
tion 5.2)
Recharge the bat-
tery (see
section 5.1)
Clean the contacts
Replace the hand
control
The lift can be
raised but not low-
ered
Low-voltage pro-
tection is activated Recharge the bat-
tery
The lift stops while
being raised The load is exces-
sive Observe the maxi-
mum load
The battery can-
not be recharged The electronics
are faulty
The battery is
faulty
The charger is
faulty
Have your author-
ised dealer check
the hand control
Replace the hand
control
Have the charger
checked
The bathlift slips The suction cups
are old or dam-
aged
Replace the suc-
tion cups
CAUTION!
There is a risk of injury when the lifting scis-
sors move.
Be especially careful when cleaning the
seat.
There is a risk of damage.
Never clean the backrest with a high pres-
sure cleaner.
7 Care and maintenance
Important!
●Regularly clean the seat and backrest and
keep them clean.
●Do not use abrasive cleaning agents.
CAUTION!
There is a risk of damage.
Do not tumble-dry the covers.
CAUTION!
There is a risk of injury from electric shock.
●Before cleaning the charger, always pull
the plug out of the power socket.
●Never plug objects made of conducting
material (e.g. knitting needles, metal
pins) into the jack socket of the hand
control.
●Only use a dry cloth to clean the
charger.

17
EN
7.3 Maintenance/safety check
Routine inspection:
The lifter must be checked at least every 24 months
with regard to the following aspects:
●Mechanical damage to the device and the accesso-
ries that impairs the functionality
●Legibility of safety-relevant inscriptions
●Functionality according to the operating instructions
The checks must be carried out by specialists able to
carry out such safety checks correctly, due to their
training, knowledge and practical experience. These
persons must not be subject to instructions with regard
to their checking activities.
Contact your medical supplies dealer to carry out the
routine inspection.
A spare parts list/documentation is also available at
your sanitary specialist.
Please have necessary repairs only carried out by an
authorised sanitary specialist.
Important!
The hand control may only be opened by the
manufacturer of the lifter.

18 FR
1 Remarques de base . . . . . . . . . . . . . . . . 18
1.1 Introduction. . . . . . . . . . . . . . . . . . . . . . . . 18
1.2 Utilisation . . . . . . . . . . . . . . . . . . . . . . . . . 18
1.3 Garantie . . . . . . . . . . . . . . . . . . . . . . . . . . 18
1.4 Réutilisation/Préparation. . . . . . . . . . . . . . 18
1.5 Elimination . . . . . . . . . . . . . . . . . . . . . . . . 19
1.6 Sigle CE . . . . . . . . . . . . . . . . . . . . . . . . . . 19
2 Consignes de sécurité . . . . . . . . . . . . . . 19
2.1 Avertissements et symboles. . . . . . . . . . . 19
2.2 Remarques générales. . . . . . . . . . . . . . . . 19
2.3 Remarques concernant l’accumulateur
et le chargeur . . . . . . . . . . . . . . . . . . . . . . 19
3 Description . . . . . . . . . . . . . . . . . . . . . . . 20
3.1 Volume de livraison. . . . . . . . . . . . . . . . . . 20
3.2 Caractéristiques techniques . . . . . . . . . . . 20
4 Transport. . . . . . . . . . . . . . . . . . . . . . . . . 20
5 Mise en service . . . . . . . . . . . . . . . . . . . . 20
5.1 Chargement de l’accumulateur. . . . . . . . . 21
5.2 Montage dans la baignoire . . . . . . . . . . . . 21
5.3 Démontage dans la baignoire. . . . . . . . . . 21
6 Utilisation. . . . . . . . . . . . . . . . . . . . . . . . . 22
6.1 Commande . . . . . . . . . . . . . . . . . . . . . . . . 22
6.1.1 Elévation. . . . . . . . . . . . . . . . . . . . . . . . . . 22
6.1.2 Abaissement. . . . . . . . . . . . . . . . . . . . . . . 22
6.1.3 ARRET DE SECOURS. . . . . . . . . . . . . . . 22
6.2 Bains. . . . . . . . . . . . . . . . . . . . . . . . . . . . . 22
6.3 Réparation des pannes. . . . . . . . . . . . . . . 23
7 Maintenance et entretien . . . . . . . . . . . . 23
7.1 Siège et dossier . . . . . . . . . . . . . . . . . . . . 23
7.2 Chargeur et commande manuelle. . . . . . . 24
7.3 Maintenace/Contrôle de sécurité . . . . . . . 24
1.1 Introduction
Vous trouverez dans ce mode d’emploi des informa-
tions et des consignes pour une utilisation conforme et
en toute sécurité de l’élévateur de bain.
Vous trouverez également dans le texte de ce mode
d’emploi des renvois à des numéros d’illustrations et à
des numéros de positions sur les illustrations. Ces nu-
méros sont indiqués entre parenthèses.
Exemple : (3, image 1) signifie image 1, position 3.
Conservez soigneusement tous les documents.
1.2 Utilisation
L’élévateur de bain est conçu uniquement pour le bain
de personnes dans une baignoire.
Toute autre utilisation est interdite.
Il est interdit d’utiliser l’élévateur de bain comme aide à
la montée ou à la descente, comme support, comme
monte-charge ou tout autre emploi similaire.
1.3 Garantie
La garantie s’aligne sur les réglementations en vigueur
dans les pays d’exploitation ou sur les dispositions de
nos partenaires de distribution.
En cas de dommage, veuillez vous adresser à votre
distributeur spécialisé ou à l’une des adresses indi-
quées dans le présent manuel d’utilisation.
Sont exlus de cette garantie les housses, les ventou-
ses et l’accumulateur qui est intégré dans la comman-
de manuelle.
La date de livraison figurant sur le bon de livraison cor-
respond également à la date d’entrée en vigueur de la
garantie.
1.4 Réutilisation/Préparation
Le produit est destiné à être réutilisé. Le nombre maxi-
mal de réutilisations dépend de l’état de l’appareil
après chaque utilisation.
Lors de la préparation, respecter les directives de pré-
paration et d’hygiènes d’AQUATEC. Vous pouvez
vous procurer ces directives sur demande en vous
adressant à AQUATEC.
Sommaire 1 Remarques de base

19
FR
1.5 Elimination
1.6 Sigle CE
Ce produit est conforme aux réglementations de la
directive sur les produits médicaux 93/42/CEE.
Ce produit satisfait aux prescriptions de la norme
DIN EN 60601-1-2 (compatibilité électromagnétique).
2.1 Avertissements et symboles
Dans ce mode d’emploi, vous trouverez les avertisse-
ments et symboles suivants :
2.2 Remarques générales
2.3 Remarques concernant l’accumulateur
et le chargeur
Ce produit vous a été fourni par Invacare®,
un fabricant qui respecte l’environnement.
Il est conforme à la directive 2002/96/CE sur
la gestion des déchets d’équipements élec-
triques et électroniques (DEEE).
Ce produit peut contenir des substances qui
pourraient être nocives à l’environnement si
elles sont déposées dans des endroits inap-
propriés (remblais par exemple) et non con-
formes à la législation en vigueur.
Le symbole "poubelle barrée" est apposé sur
ce produit pour vous encourager à le recy-
cler dans les structures de collecte sélective
(veuillez contacter votre Mairie).
Soyez écologiquement responsable et recy-
clez ce produit à la fin de sa durée de vie.
*ATTENTION !
Ce terme d’avertissement indique un ris-
que possible.
Le non-respect de cette consigne de sé-
curité peut s’avérer dangereux pour les
personnes et occasionner des dégâts
matériels.
Important !
Ce terme caractérise des remarques, informa-
tions ou conseils supplémentaires.
L’élévateur de bain est conçu uniquement
pour le bain de personnes dans une
baignoire.
2 Consignes de sécurité
*
Vous trouverez ici une représentation du type de
danger encouru.
Prenez vos bains sous la surveillance d’une
autre personne si votre état de santé ne vous
permet pas de vous baigner seul.
Exemple : au cours du bain, vous n’atteignez
pas toujours le bouton ARRET DE SE-
COURS sur la commande manuelle.
Veuillez respecter les indications figurant sur
la plaque d’identification. Ne soumettez pas
l’élévateur de bain à des contraintes de
poids excessives.
Si vous utilisez des huiles ou des sels de
bain, respectez le dosage recommandé. Les
adjuvants pourraient affecter le bon glisse-
ment du ciseau de levage.
Transportez ou stockez le produit dans des
locaux secs, à une température de 0 °C à
40 °C et une humidité de l’air de 30 à 75 %.
Ne conservez pas le produit à proximité im-
médiate de sources de chaleur.
N’exposez pas le produit directement à la lu-
mière du soleil.
En cas de panne, veuillez immédiatement
contacter votre revendeur spécialisé.
N’effectuez jamais vous-même des modifica-
tions ou des transformations.
Ne jetez jamais la commande manuelle dans
un feu et ne la conservez pas à proximité
d’un feu.
N’ouvrez pas la commande manuelle. Vous
perdez votre droit à la garantie si vous
l’ouvrez!
Utilisez exclusivement le chargeur fourni
(n° art. 16429) pour recharge l’accu de la
commande manuelle.
Rechargez l’accumulateur de la commande
manuelle dès que possible après utilisation.
Pour augmenter la durée de vie de l’accumu-
lateur, chargez-le une fois par mois quand
vous ne l’utilisez pas sur une période prolon-
gée.

20 FR
3.1 Volume de livraison
Le volume de livraison de l’AQUATEC ORCA com-
prend les pièces suivantes (image 1 à 3) :
Siège (image 1) composé de :
1 Rabat latéral
2 Plaque du siège
3 Charnière pour le dossier
4 Ciseau de levage
5 Logement du pied de l’arbre
6 Ventouse arrière (à deux languettes avec filet
de vis)
7 Plaque de base
8 Guidage pour patin
9Patin
10 Ventouse avant (à une languette avec tête)
Dossier (image 2) composé de :
1 Fiche à jack
2 Entraînement
3 Pied de l’arbre
4 Goujons de verrouillage
5 Plaque dossier
Commande manuelle et chargeur (image 3)
1 Commande manuelle et câble en spirale
3 Chargeur
L’accumulateur n’est pas intégré à la commande ma-
nuelle.
Mode d’emploi (sans image)
3.2 Caractéristiques techniques
Elévateur de bain
Longueur du siège : 590 mm
Largeur du siège avec rabats
latéraux déployés : 715 mm
Largeur du siège avec rabats
latéraux repliés : 390 mm
Hauteur du siège en position la plus basse : 60 mm
Hauteur du siège en position la plus haute : 420 mm
Charge max. : 135 kg
Poids total sans commande manuelle: 12,3 kg
Poids du siège : 7,7 kg
Poids du dossier: 4,6 kg
Poids de la commande manuelle: 0,45 kg
Poids du chargeur : 0,25 kg
Tension d’alimentation : 14 V
Courant nominal: 4 A
Type d’accu: LiIon
Entrée chargeur : 230-240 V CA, 50 Hz
Sortie chargeur : 24 V CC, 200 mA, 12 W
Temps de chargement à partir de
l’avertissement de tension insuffisante : env. 5 h
Vous trouverez des informations importantes sur la
plaque d’identification (image 10) :
1 Remarque (élimination)
2 Certification de conformité
3 Durée de fonctionnement
4 Pièce d’application de type B
5 Période de fabrication
6 Numéro courant de l’appareil
7 Jour de fabrication (1 à 365 jours)
8 Dernier chiffre de l’année de fabrication
9 Type d’appareil
10 Remarque (observer la documentation annexe)
11 Type de protection
12 Tension nominale/Puissance absorbée nominale
13 Charge
La plaque d’identification est apposée au dos du dos-
sier.
Retirez la commande manuelle et détachez toujours
les deux parties de l’élévateur de bain (siège et dos-
sier) avant de le transporter.
Le démontage est décrit à la section 5.3.
Connectez le chargeur au réseau électrique
seulement après avoir branché la comman-
de manuelle sur le chargeur.
3 Description
Important !
●Lorsque le dossier est replié, il n’est pas
bloqué au niveau du siège.
●Les ventouses restent montées durant le
transport.
●La commande manuelle doit être retirée du
dossier pour le transport.
Important !
●Avant la mise en service, vérifiez si des élé-
ments ont subis des dégâts pendant le
transport.
●Lors du montage, respectez l’emplacement
des éléments les uns par rapport aux
autres.
4 Transport
5 Mise en service
Other manuals for orca
3
Table of contents
Languages:
Other Aquatec Lifting System manuals
Popular Lifting System manuals by other brands

Doosan
Doosan D20S-5 Operation & maintenance manual

REID LIFTING
REID LIFTING porta-gantry 500 Assembly & operation manual

Efco
Efco SWAPLOADER SL-518 Parts and operation manual

Tommy Gate
Tommy Gate G2 dual drive G-330 Mounting instructions

STS
STS STP01-DRU01-EX operating instructions

TESA
TESA Auto lift system Installation & operation manual

Nussbaum
Nussbaum 4.55 SL Operating Instruction and Documentation

Rothewald
Rothewald 10059174 Assembly and operating instructions

OpeMed
OpeMed United Care Monarch user guide

Sinoboom
Sinoboom GTJZ0408SE parts manual

Stratus
Stratus SAE-C10C Installation & operation

WITTUR
WITTUR servogearless WSG-S2.3 Operating instruction