Arcadia SERIES 6 AH30M Setup guide

SAFETY, INSTALLATION AND MAINTENANCE INSTRUCTIONS
AQUARIUM LED
www.arcadia.systems
FULL ONLINE INSTRUCTIONS:

KEEP THESE INSTRUCTIONS FOR FUTURE REFERENCE
DANGER- To avoid possible electric shock, special care should be taken since water is employed in the use of aquarium equipment. For each of the following
are followed. Failure to do so may result in serious personal injury or property damage.
on the cord to remove the plug from the socket, instead grasp the plug and pull to disconnect.
5. Do not look directly into the light source.
6. Do not touch the light source while it is on. Allow the light source to cool before touching it.
appliance get wet unplug the appliance immediately. If the appliance shows any sign of water leakage disconnect from the power supply immediately.
along the cord to the socket. Illustraon 1.
TECHNICAL SPECIFICATIONS
Code
Model LED nominal waages Dimensions Suits aquarium sizes
S6-45
Input voltage
Input current
2A
6.3A
Body
Aluminum
IP65
Storage temperature
ELECTRICAL SPECIFICATION
1.
CONSTRUCTION
M = Marine / F = Freshwwater
READ AND FOLLOW ALL SAFETY INSTRUCTIONS
Illustraon 1

AH30M AH45M AH60M AH90M AH120M
Channel
LED Specicaon Qty Qty Qty Qty Qty
1
6 12 16 24 32
2
nm 5W 6 12 16 24 32
3
CREE BLUE XPE 465-485nm 3W
3 5 6 12
4
UV 400-410nm 3W
1 2 3 4 6
VIOLET 420-430nm 3W
1 3 3 5 6
5
CREE RED XPE 620-630nm 3W
1 1 2 2 4
6
CREE GREEN XPE 520-535nm 3W
1 1 2 3 4
MARINE
LED SPECIFICATIONS - MARINE
1111111111111111
42 2 42 6 4242 2 42 6 42
3 2 2 3 2 5 3 2 3 2 2 3 2 5 3 2
1111111111111111
4 4 6 2 42 2 4246 2 42 2 4
2 3 5 2 3 2 2 3 2 3 5 2 3 2 2 3
AH120M
1 1 1 1 1 1 1 1
42 2 42 6 42
3 2 2 3 2 5 3 2
1 1 1 1 1 1 1 1
246 2 42 2 4
2 3 5 2 3 2 2 3
AH60M
1 1 1 1 1 1 1 1 1 1 1 1
245 2 42 6 2 45 2 4
2 3 2 2 3 2 3 2 3 2 2 3
3 2 2 3 2 3 2 3 2 2 3 2
42 6 424242 6 42
1 1 1 1 1 1 1 1 1 1 1 1
AH90M
111
46 3
2 2 2
2 2 2
3 5 4
1 1 1
AH30M
1 1 1 1 1 1
245 2 42
2 3 2 2 3 2
3 2 2 3 2 3
42 6 424
1 1 1 1 1 1
AH45M

AH30F AH45F AH60F AH90F AH120F
Channel
LED Specicaon Qty Qty Qty Qty Qty
1
6 12 16 24 32
2
6 12 16 24 32
3
2 5 6 12
4
2 5 6 9 12
5
1 1 2 2 4
6
1 1 2 3 4
1111111111111111
42 2 426 4 242 2 426 4 2
32 2 325 3 232 2 325 3 2
1111111111111111
4 4 6 242 2 424 6 242 2 4
23 5 232 2 323 5 232 2 3
AH120F
1 1 1 1 1 1 1 1
42 2 426 4 2
32 2 325 3 2
1 1 1 1 1 1 1 1
24 6 242 2 4
23 5 232 2 3
AH60F
1 1 1 1 1 1 1 1 1 1 1 1
24 5 242624 5 24
232 2 323232 2 3
32 2 323232 2 32
426 4 242426 4 2
1 1 1 1 1 1 1 1 1 1 1 1
AH90F
111
4 6 3
2 2 2
2 2 2
3 5 4
1 1 1
AH30F
1 1 1 1 1 1
24 5 242
232 2 32
32 2 323
426 4 24
1 1 1 1 1 1
AH45F
FRESHWATER
LED SPECIFICATIONS - FRESHWATER

This appliance must be earthed and the circuit must be protected by a suitable fuse!
This appliance should be earthed to minimise the possibility of electric shock. This appliance is equipped with an electric cord having an equipment earth wire
conductor and a grounding type plug. The plug must be plugged into a mains supply socket that is installed and earthed in accordance with all appropriate
codes and ordinances.
illustraon 1.
Connect unit to power supply and mains as illustraon 2.
PHYSICAL INSTALLATION
ELECTRICAL INSTALLATION
aquarium.
CONSTRUCT IN SEQUENCE CONSTRUCT IN SEQUENCE
MOUNT USING SUPPORT RODS MOUNT USING SUSPENSION WIRE
1.
1.
3.
4.
5.
6.
7.
8.
2.
2.
3.
4.
5.
d.
c. b.
a.
e.
f.
e.
a.
Slide legs into unit and mount on tank.
a. b. c. d.
f.e.
2.1.
5. 6.
3. 4.
2. Screw set
3. Suspension wire
4 Support rods
5. Support brackets
6. Power adapter
Illustraon 2

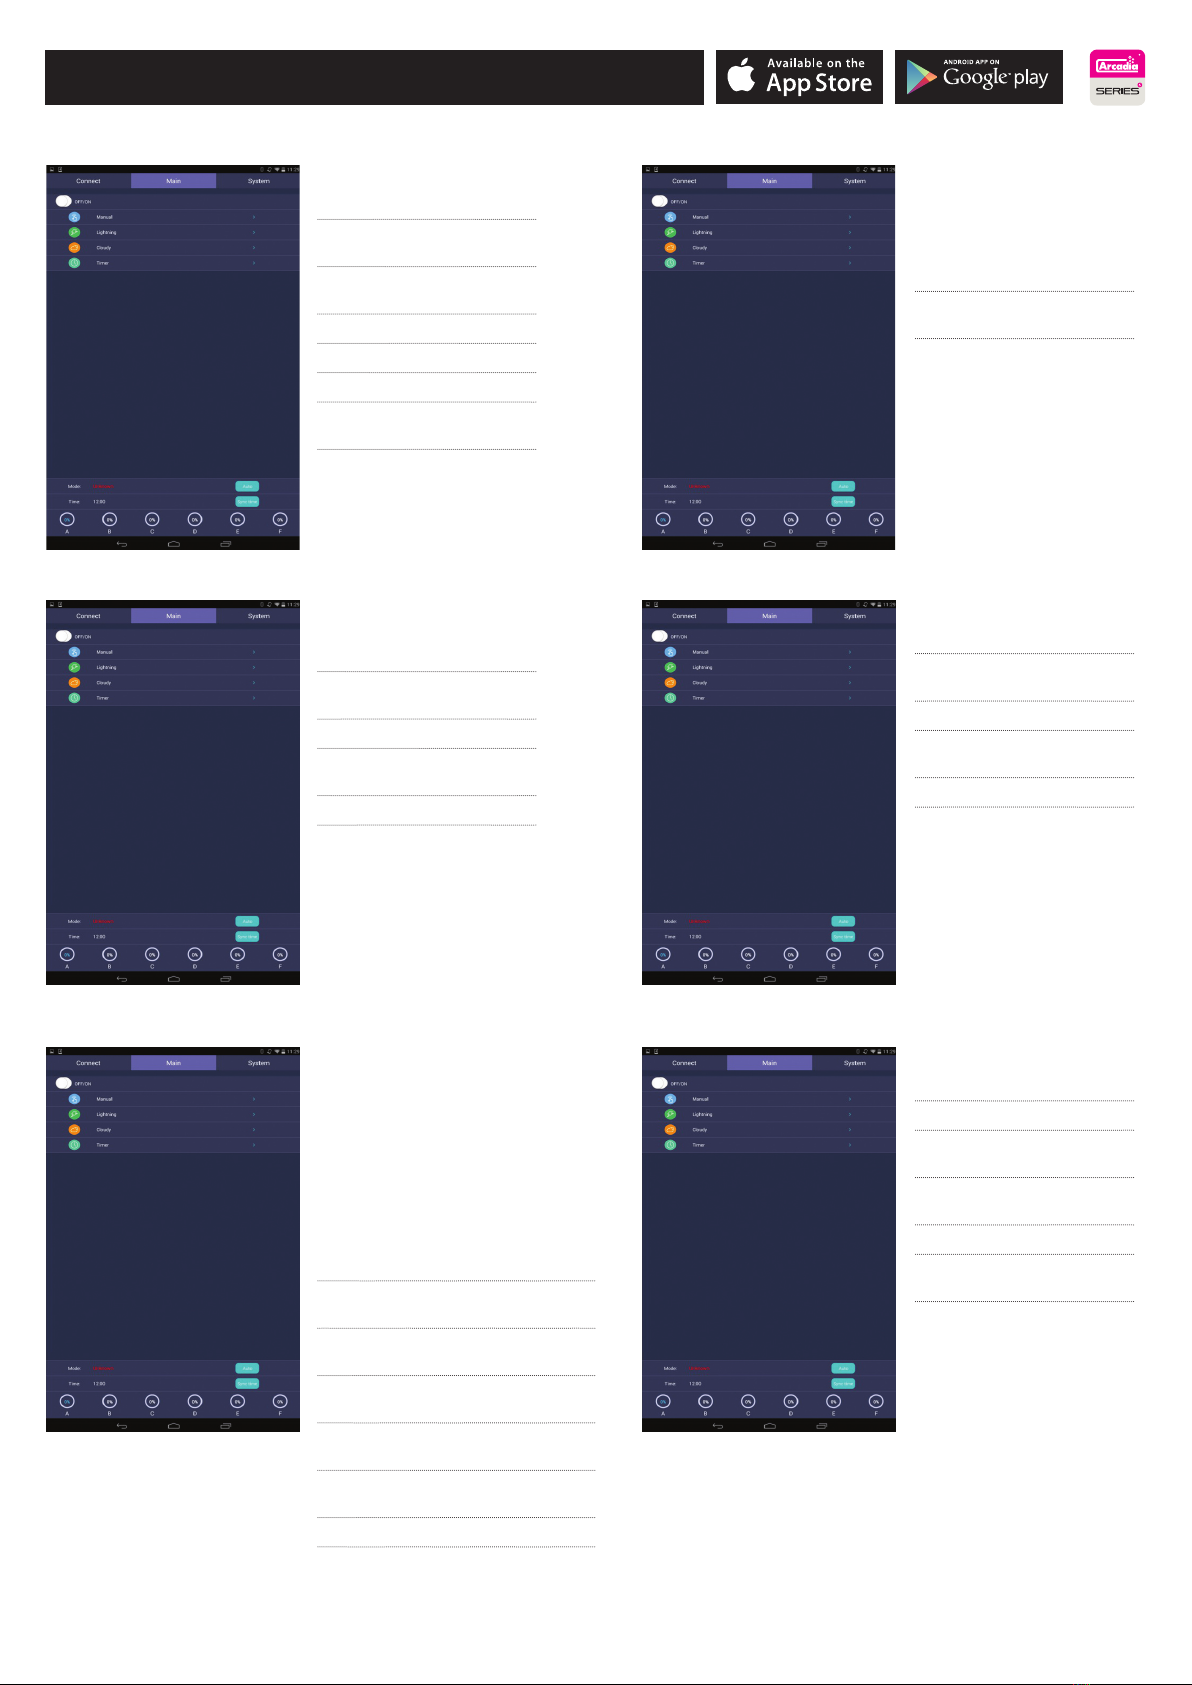
Brightness Displays current light level for each channel.
Power On/O
Dimmer
Timer
Sunrise
Sunset
Sunlight Sets light levels for sunlight.
Sets light levels for moonlight.
Preview
System
System Time
Temperature Displays chassis temperature and fan usage as a percentage.
Displays latest version level of unit.
Fault Phenomenon
Cause Analysis Soluon
The screen
The power plug is not properly inserted or the switch is not turned on. Check the plug and turn on the switch.
Check connector.
Contact Arcadia.
Remove the foreign material and keep the panel clean.
Contact Arcadia.
The WIFI signal
cannot be found
Contact Arcadia.
APP cannot
control the lamp
The device is not connected to the lamp WIFI. Reconnect to the lamp WIFI.
Reconnect the lamp in the APP.
Contact Arcadia.
operate according
brightness
Reset the data and save.
Contact Arcadia.
Indicator Light
Meaning
Goes out.
UNIT INTERFACE
TROUBLE SHOOTING
FAULT DIAGNOSIS

Connect
Go to connect screen
device
Click on device (number as
label on end of unit)
Enter password 12345678
Return to Connect screen
screen
Lighng
Allows use to set lightning
preview
TIMER
and % light output for each channel.
Programs are displayed graphically and
can be previewed.
Click Timer + to add number of
dimming points
Press and hold channels to alter
percentage light out puts
Press eye symbol or use slider to
preview program
Press Schem to select a preset program
Manual
Allows user to set light level
for each channel to compare
Tap channel to be changed and
use slider to set level
Manual
preview
SYSTEM
Restore default - Returns unit
to factory defaults
Novice guide - Provides some
basic advice
FAQ
DOWNLOAD APPLICATION

Remove the cover plate and end plates.
Remove lens.
LED REPLACEMENT

END OF USE RECYCLING INFORMATION
environment and human health.
All electronic components (this includes the power supply and the lamp holder) should be placed in the electronic waste recycling area.
Cauon!
Cleaning:
MAINTENANCE
Code
Descripon Barcode
Blue 465-485nm 3W
PGCW5
Code
Descripon Barcode
www.arcadia-sales.com
REPLACEMENT PLUG-IN LED’S
LED LENSES
This manual suits for next models
9
Table of contents
Other Arcadia Aquarium manuals