Archon CS-WM User manual
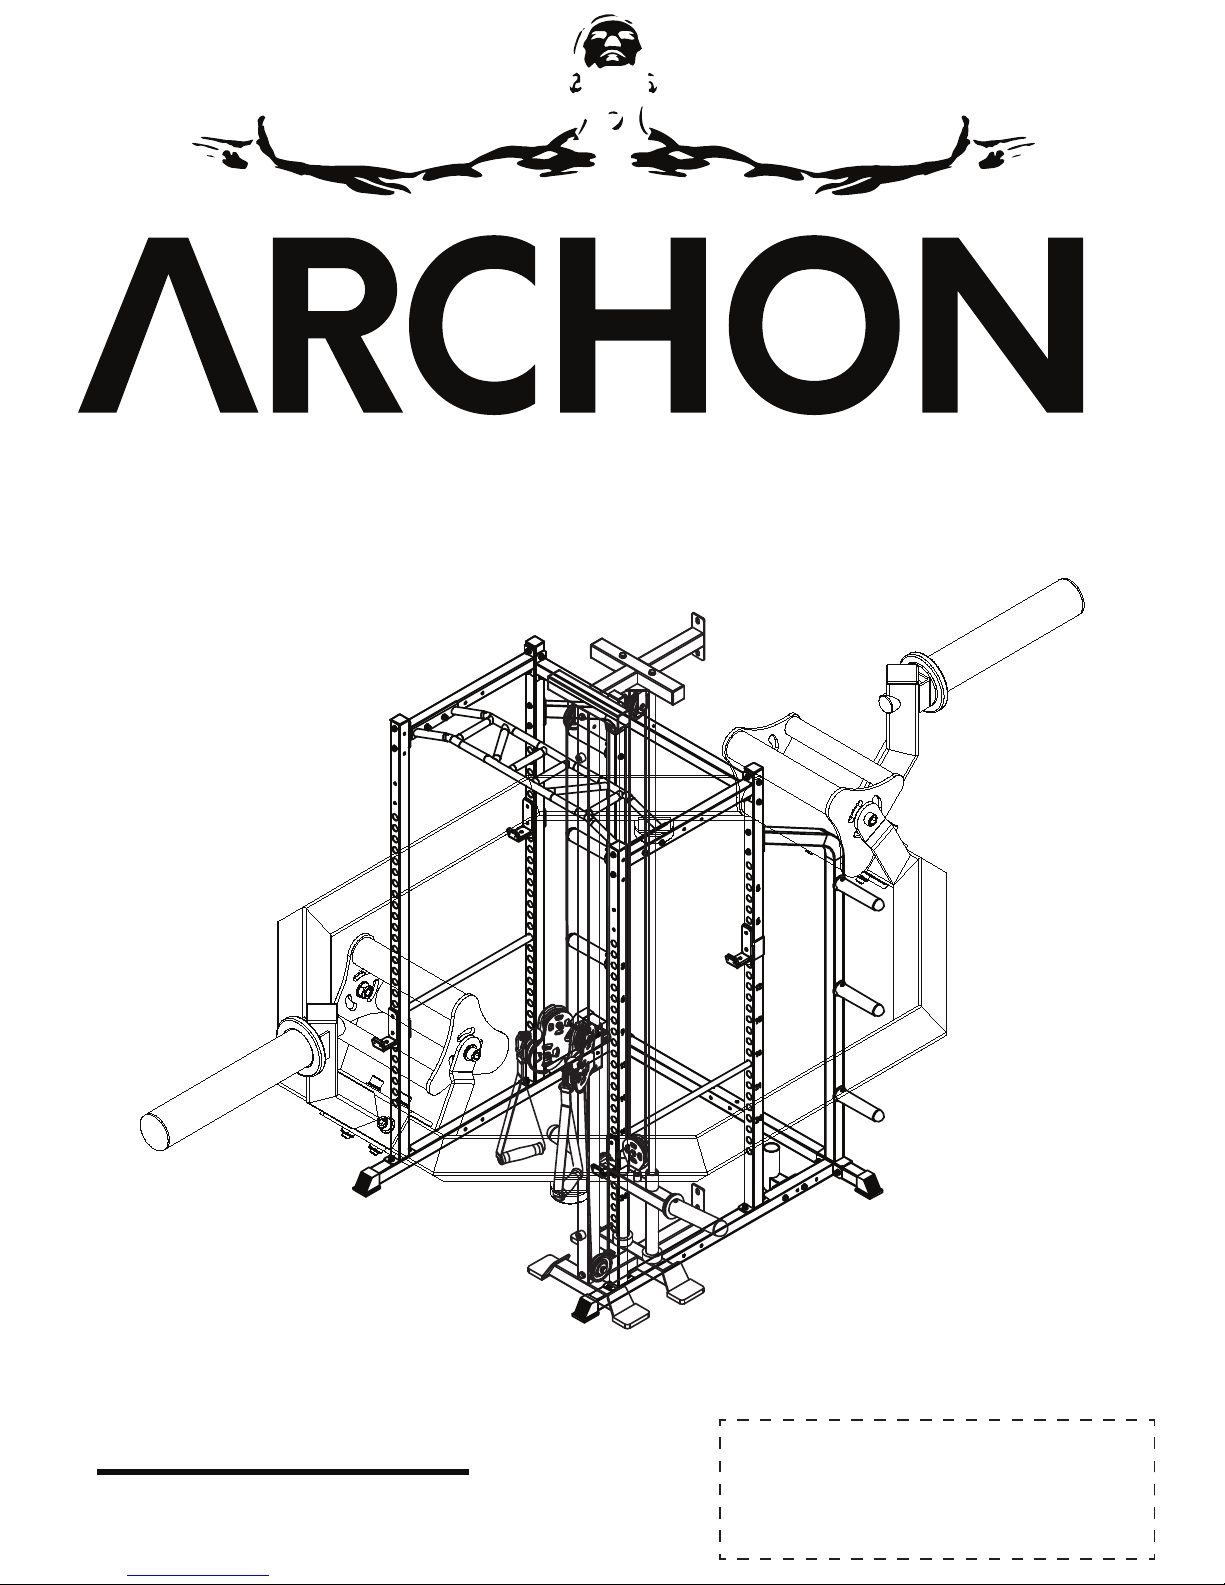
TM
WALL MOUNT CABLE STATION
CS-WM
ARCHONTM
10801 STARKEY ROAD
SUITE 104-255
SEMINOLE, FL 33777
888-6FITGYM (634-8496)
WARRANTY@FITARCHON.COM
www.FITARCHON.COM

www.FITARCHON.com
888-6FITGYM (634-8496)
2
CS-WM MANUAL
--------------------------------------------------------------------------------------------------------------------------------------
IMPORTANT SAFETY INSTRUCTIONS:
•Please keep this owner’s manual and make sure all warning labels are legible to read
and intact with the unit.
•When assembling, it is best to leave bolts/nuts hand tightened (still loose) until the
end when every part is assembled. Then tighten all hardware using the correct tools.
This will allow your unit to assemble easier and align correctly.
•If you have any questions with the assembly, operation or maintenance of this unit
please call our customer service line shown at the bottom of the page.
•Please be sure to read all assembly instructions and make sure all your hardware is
tightened before using the equipment.
•Do not allow children on or near the equipment.
•Do not use the equipment outside or near water.
•Use the equipment only for its intended purpose.
•Always check the equipment and its parts before each use to make sure everything is
secure.
•Do not use the equipment if it has been damaged or defective. Contact customer
service.
•Keep hands, hair and clothes free of all moving parts.
•Wear proper clothing and shoes during workouts.
www.FITARCHON.com
888-6FITGYM (634-8496)
3
CS-WM MANUAL
--------------------------------------------------------------------------------------------------------------------------------------
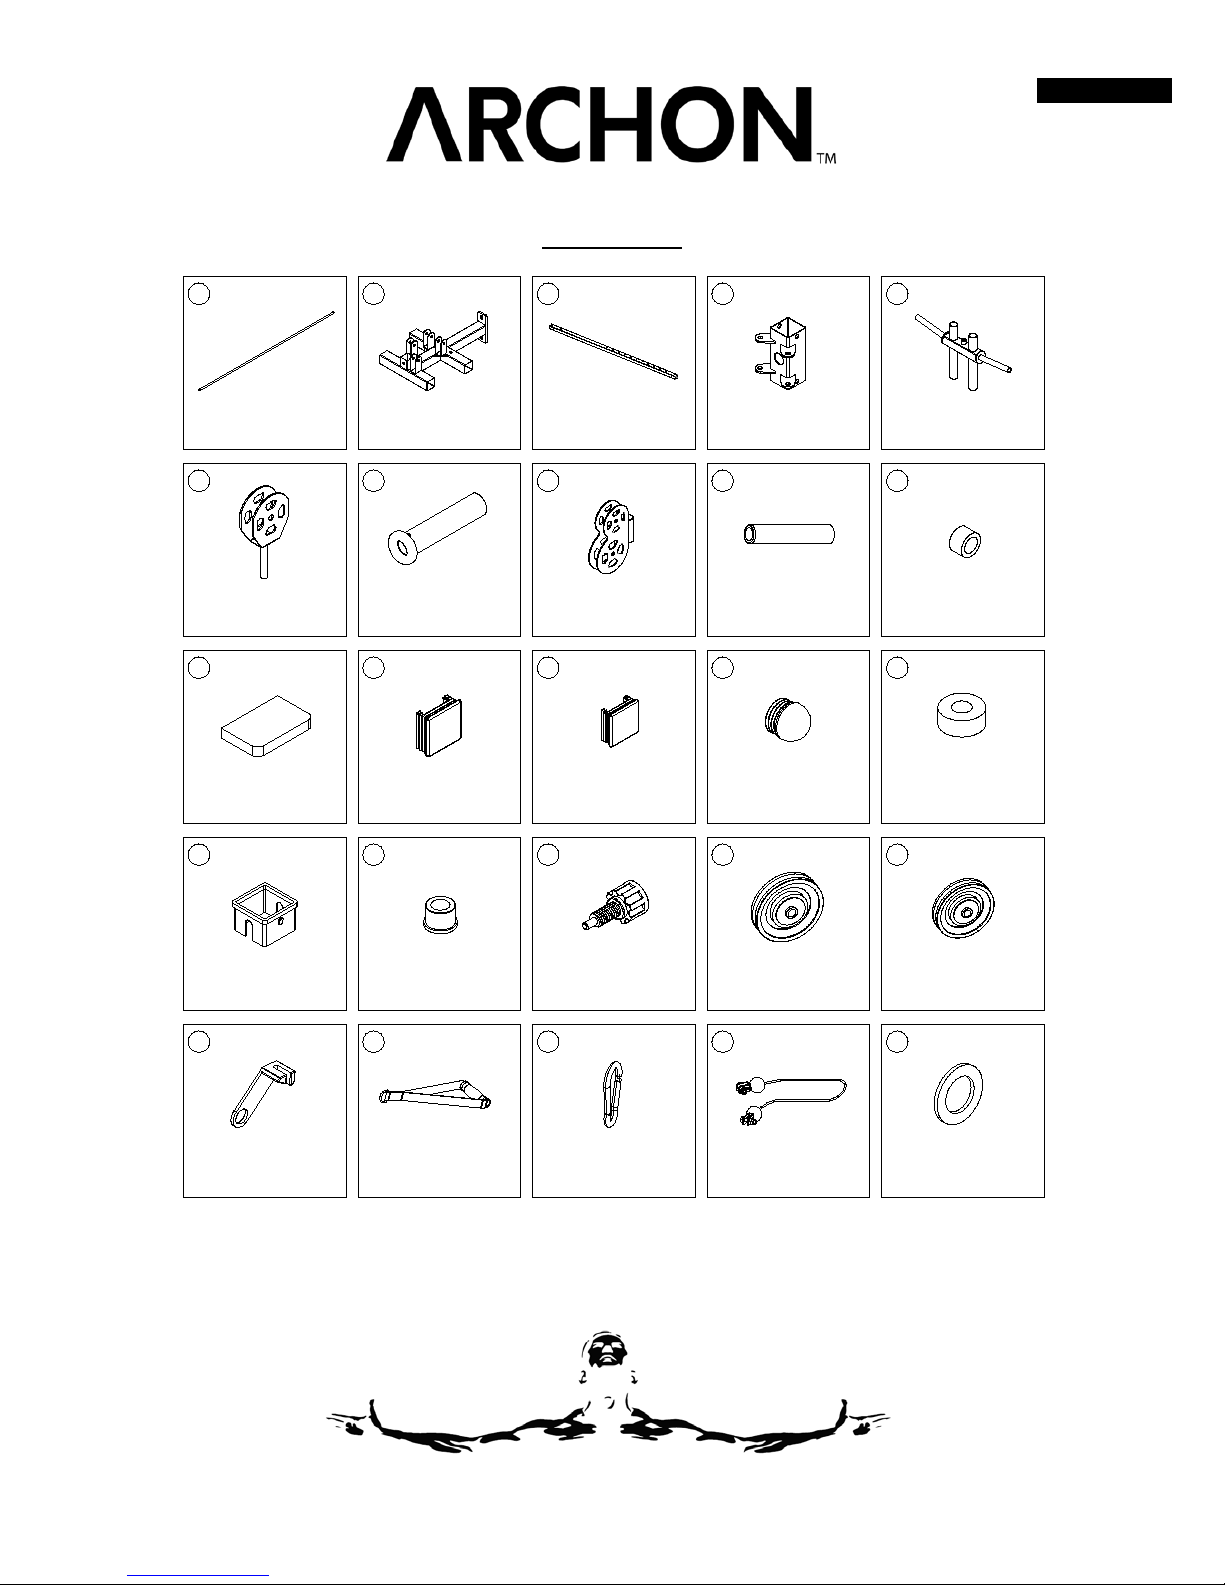
PARTS LIST:
1
Guide Rod
Qty:2
2 3 4 5
6 7 8 9 10
11 12 13 14
16 17 18 19 20
21 22 23
15
24 25
Upper Beam
Qty:1 Front Column
Qty:1 Slide Block
Qty:1 Weight Support
Qty:1
Swivel Pulley Block
Qty:1 Olympic Adapter
Qty:2 Double Pulley Block
Qty:2 Shaft
Qty:2 Rubber Bushing
Qty:2
Ebd Cap
Qty:4 50*50 Spuare Plug
Qty:4 30*30 Spuare Plug
Qty:1 dia 50 Round Plug
Qty:2 Rubber Bushing
Qty:2
60-50 Square Bushing
Qty:2 dia 28 dia 16 Bushing
Qty:4 Fast Pin
Qty:1 dia 115 Pulley
Qty:2 dia 90 Pulley
Qty:8
Cable Slide
Qty:2 Handle Strap
Qty:2 Hook
Qty:2 Cable
Qty:1 Rubbe Ring
Qty:2

www.FITARCHON.com
888-6FITGYM (634-8496)
4
CS-WM MANUAL
--------------------------------------------------------------------------------------------------------------------------------------
PARTS LIST:
M10 Washer
Qty:29 M8 Lock Nut
Qty:2 M10 Lock Nut
Qty:13 M12 Nut
Qty:1 Expansion Screw
Qty:8
40
M10*50 Bolt
Qty:8 M10*65 Bolt
Qty:4 M10*100 Bolt
Qty:1 M10*105 Bolt
Qty:2 M8 Washer
Qty:2
Bottom Base
Qty:1 Linear Bearing LME20
Qty:4 dia 32 Circle Hole
Qty:4 M10*45 Bolt
Qty:1
41 42 43 44
26 27 28 29 30
dia 25 Round Plug
Qty:2 Tube
Qty:1
M10*10 Heaxagon
Socket Set Screw
Qty:2
M10*65
Square Neck Bolt
Qty:2 M8*65 Bolt
Qty:2
31 32 33 34 35
36 37 38 39

www.FITARCHON.com
888-6FITGYM (634-8496)
5
CS-WM MANUAL
--------------------------------------------------------------------------------------------------------------------------------------
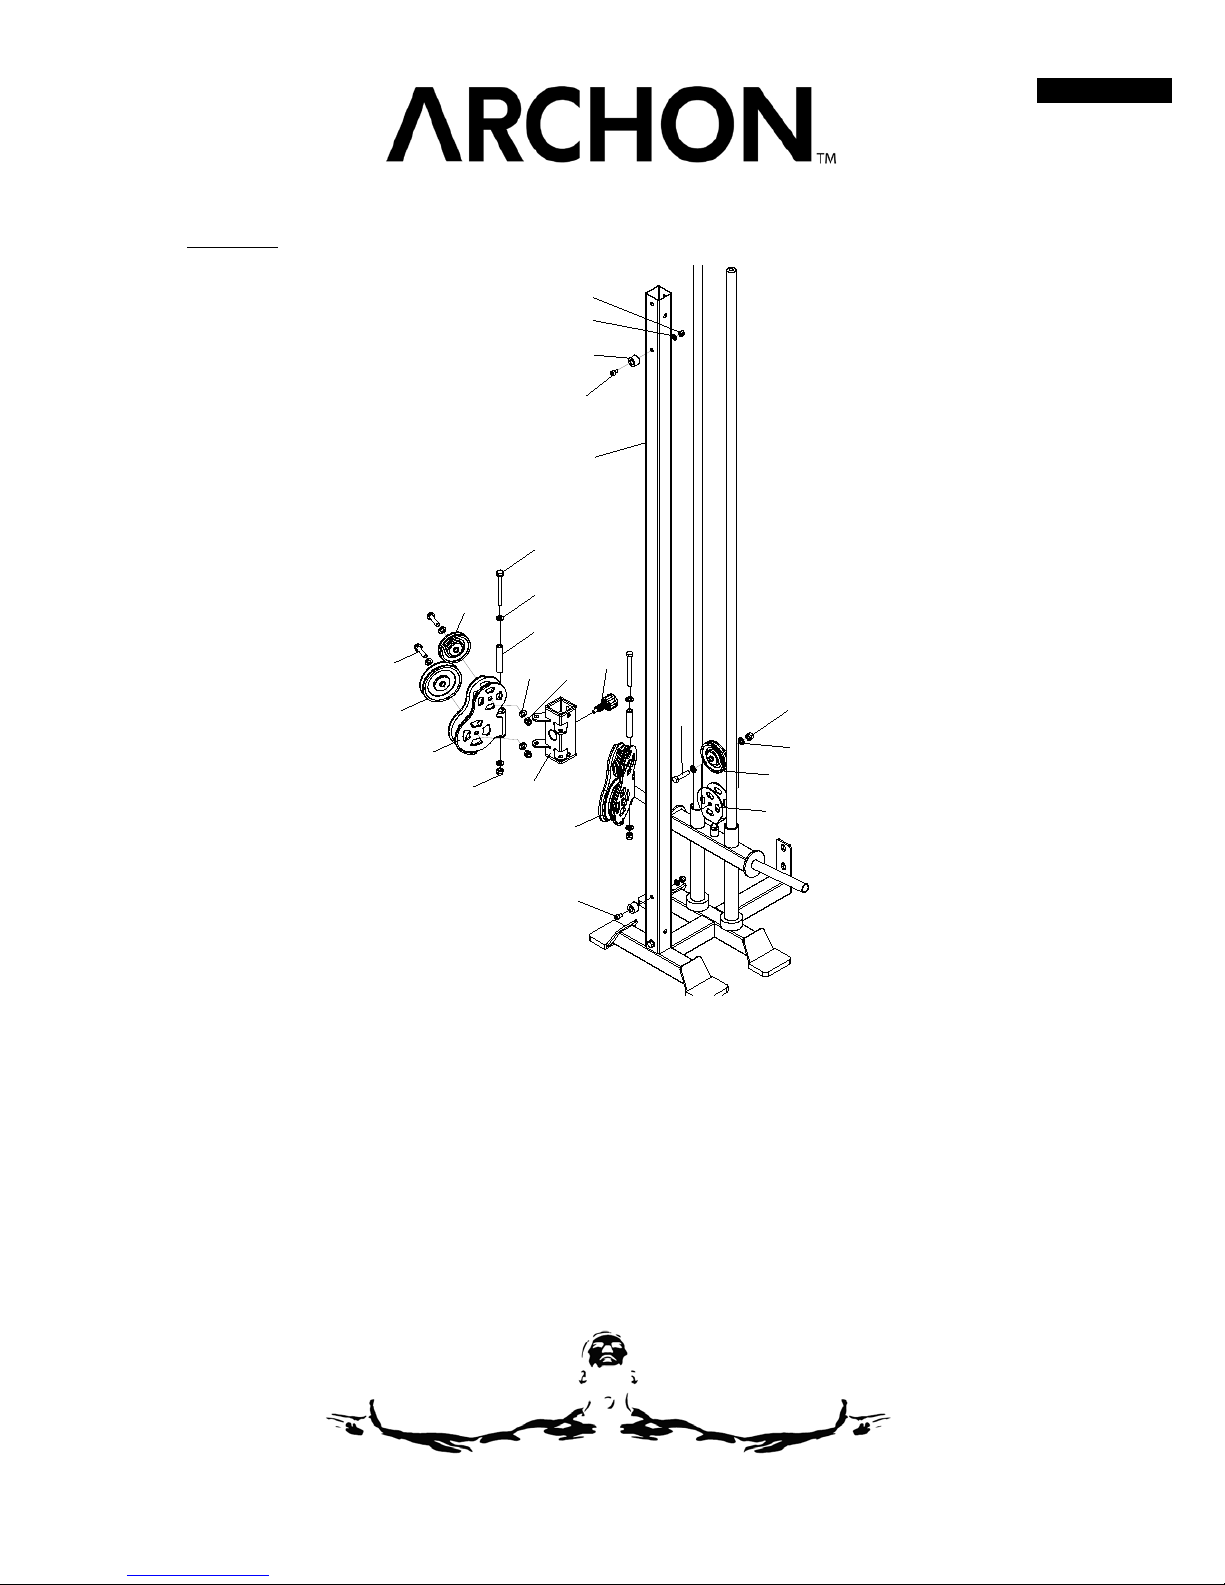
ASSEMBLY INSTRUCTIONS:
STEP 01
A. Attach End Caps (11) to Bottom Base (41).
B. Attach Front Column (3) to Bottom Base (41) with M10*65 Bolt (32), two M10
Washers (36) and M10 Lock Nut (38).
C. Attach two Guide Rods (1) to Bottom Base (41) with two M10*65 Square Neck
Bolts (29).
D. Slide Rubber Bushings (15) and Weight Support (5) on to Guide Rods (1).
E. Attach Swivel Pulley Block (6) and Nut M12 (39) to Weight Support (5).
11
41
15
6
39
31
32 36
38
5
29
www.FITARCHON.com
888-6FITGYM (634-8496)
6
CS-WM MANUAL
--------------------------------------------------------------------------------------------------------------------------------------
STEP 02
A. Slide the Slide Block (4) on to Front Column (3) and secure with Fast Pin (18).
B. Attach two Rubber Bushings (10) to Front Column (3) with two M8*65 Bolts (30),
four M8 Washers (35) and two M8 Lock Nuts (37).
C. Attach Pulley (20) to Swivel Pulley Block (6) with M10*50 Bolt (31), two M10
Washers (36) and M10 Lock Nut (38).
D. Attach one Pulley (20) and one Large Pulley (19) to Double Pulley Block (8) with
two M10*50 Bolts (31), four M10 Washers (36) and two M10 Lock Nuts (38). Do
this for both double pulley blocks.
E. Attach two Double Pulley Blocks (8) to Slide Block (4) with two M10*105 Bolts (34),
four M10 Washers (36), two Shafts (9) and two M10 Lock Nuts (38).
--------------------------------------------------------------------------------------------------------------------------------------
8
8
9
19
20
34
36
38
31
20
36 38
3
6
18
4
10
30
37
35
36
38
31
30

www.FITARCHON.com
888-6FITGYM (634-8496)
7
CS-WM MANUAL
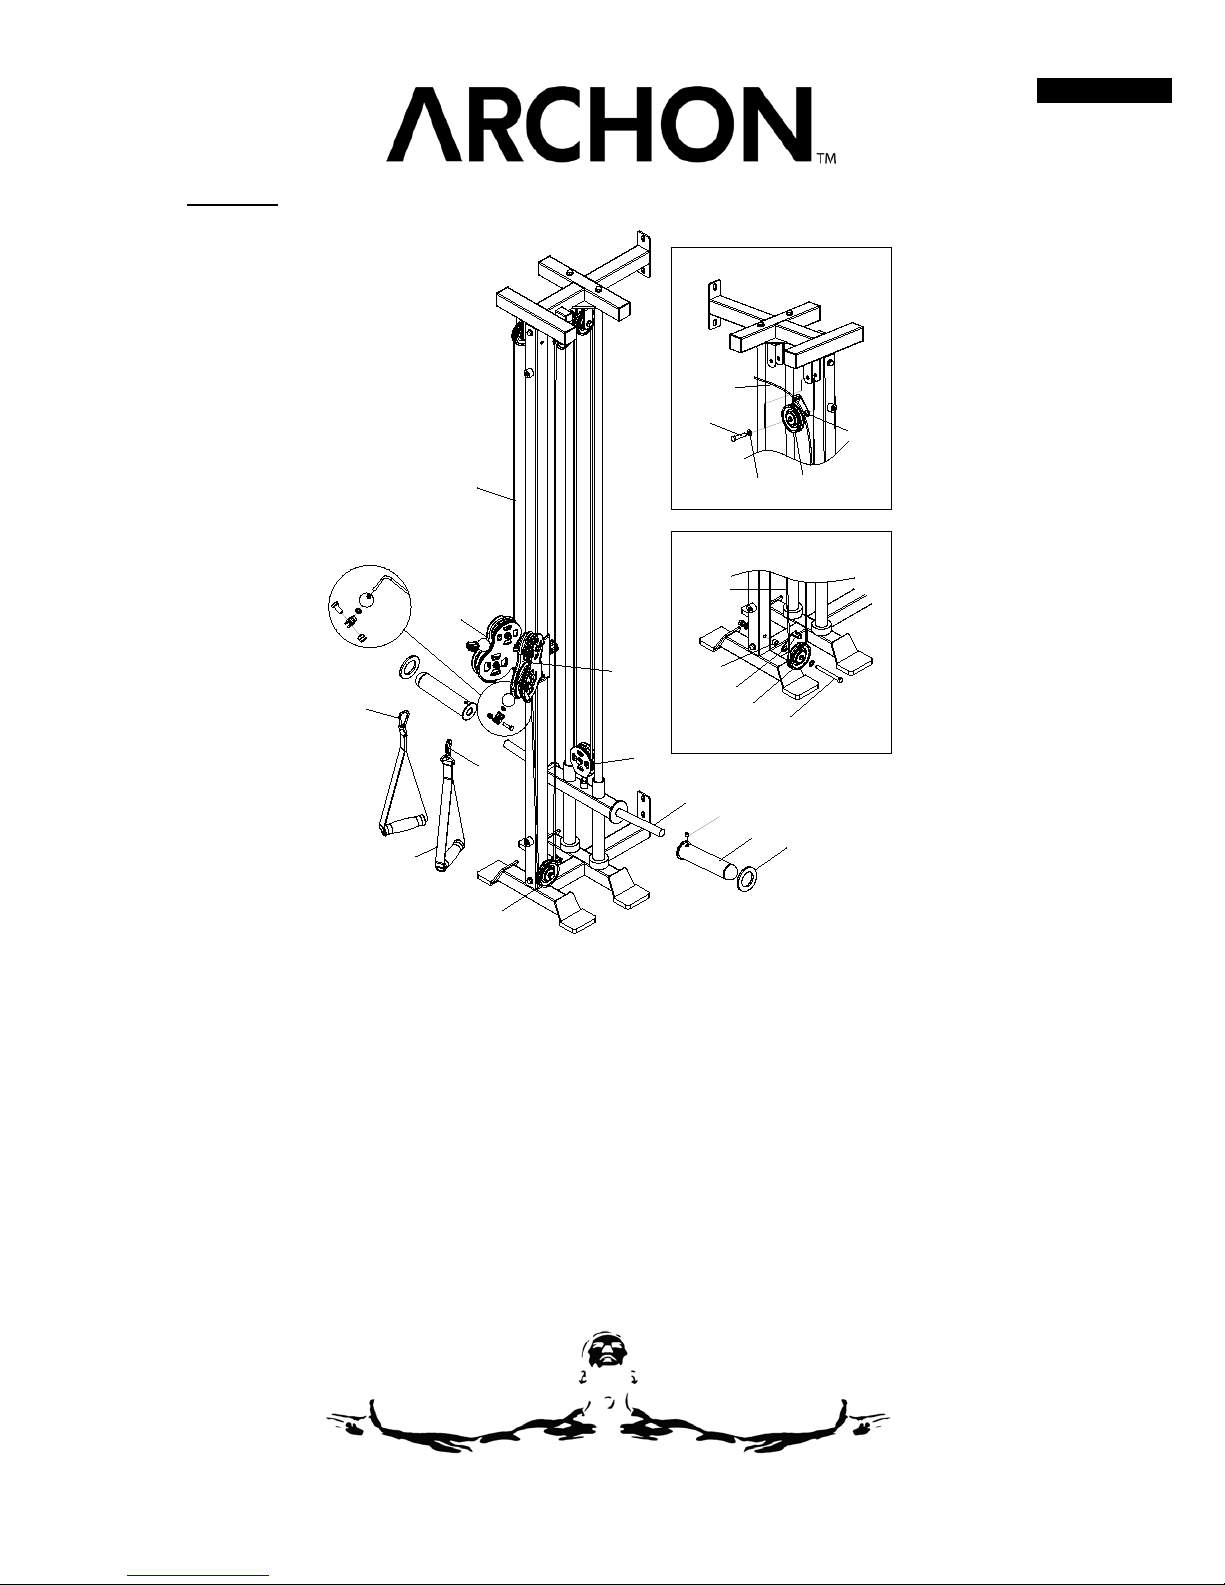
STEP 03
A. Attach three Pulleys (20) to Upper Beam (2) with three M10*50 Bolts (31), six M10
Washers (36) and three M10 Lock Nuts (38).
B. Attach Upper Beam (2) to Guide Rods (1) with two M10*65 Bolts (32) and two M10
Washers (36).
C. Attach Upper Beam (2) to Front Column (3) with M10*65 Bolt (32), two M10
Washers (36) and M10 Lock Nut (38).
--------------------------------------------------------------------------------------------------------------------------------------
3
32 36
2
31
36
20
3236
31 38 38
1
www.FITARCHON.com
888-6FITGYM (634-8496)
8
CS-WM MANUAL
STEP 04
A. Remove parts on one end of the Cable (24) (see the drawing in the circle), then
take the end through 8a→A→B→C→D→E→F→8b, finally attach the parts of the
cable (see the drawing in the circle).
B. Location A: Around the cable on one Pulley (20), attach pulley and Cable Slide (21)
to Upper Beam (2) with M10*45 Bolt (44) and M10 Washer (36).
C. Location F: Around the cable on one Pulley (20),attach pulley and Cable Slide (21)
to Front Column (3) with M10*100 Bolt (33), Tube (27), two M10 Washers (36) and
M10 Lock Nut (38).
D. Attach Handle Strap (22) to the end of the Cable (24) with Hook (23).
E. Slide Olympic Adapter (7) onto Weight Support (5) and secure with M10*10
Hexagon Socket Screw (28).
F. Slide Rubber Ring (25) onto Olympic Adapter (7).
--------------------------------------------------------------------------------------------------------------------------------------
5
725
22
A
B
E
D
C
F
24
8b
8a
28
23
23
21
44
36 20
33
21
27
20
A
F
24
24

www.FITARCHON.com
888-6FITGYM (634-8496)
9
CS-WM MANUAL
Installation
The Pulley must be installed in such a way that its use is not
limited by other objects. Recommended to keep at least 5 feet
free around unit.
The units must be attached to the wall with suitable fittings.
Contact a local contractor to do the install if you are not
comfortable. Mounting hardware for concrete walls are
included. Go to local hardware store if mounting to wood
studs. Do not mount to dry wall. The Pulley must only be
mounted on a brick or concrete wall. You must mount both top
and bottom brackets.
--------------------------------------------------------------------------------------------------------------------------------------
Maintenance
The steel undercarriage can be cleaned with a damp cloth and a (non abrasive) liquid household
cleaner.
After some time, the sliding and turning parts could run less smoothly, because of pollution and
dehydration. You can re-grease the pulley with ball bearings grease (which you can obtain at a
bicycle shop or hardware store). If required, the guiding bars of the weights can be greased with a
little oil.
Check the cord and the cord fixations regularly for signs of wear. In case of excessive wear and tear,
the cord must be replaced and use of the pulley is not recommended until the cord has been
replaced.
In order to obtain spare parts please contact Archon.

www.FITARCHON.com
888-6FITGYM (634-8496)
10
CS-WM MANUAL
Follow ARCHONTM on Social Media
We would be grateful if you would share pictures of
you, your family, or clients working on with your
new ARCHONTM equipment.
As ARCHONTM grows we will be excited to bring you
content to enhance your workouts and better
equip you to maximize the use of your equipment.
Visit: www.FitArchon.com
and
Find Social Media Links In Footer
Table of contents
Other Archon Fitness Equipment manuals

Popular Fitness Equipment manuals by other brands


G-FITNESS
G-FITNESS AIR ROWER user manual

CAPITAL SPORTS
CAPITAL SPORTS Dominate Edition 10028796 manual

Martin System
Martin System TT4FK user guide

CIRCLE FITNESS
CIRCLE FITNESS E7 owner's manual

G-FITNESS
G-FITNESS TZ-6017 user manual

Accelerated Care Plus
Accelerated Care Plus OMNISTIM FX2 CYCLE/WALK user manual


