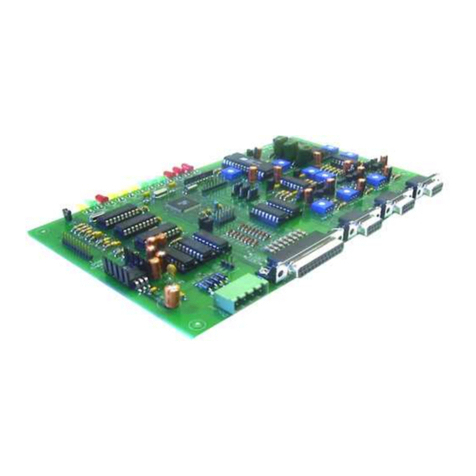
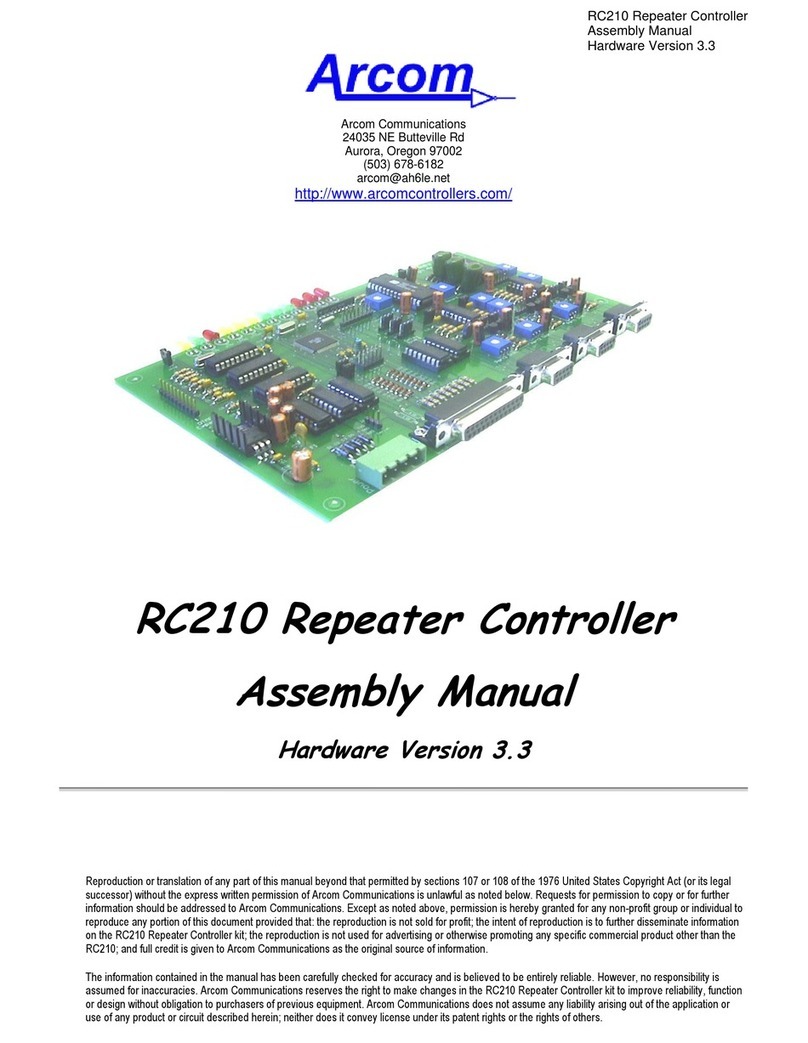
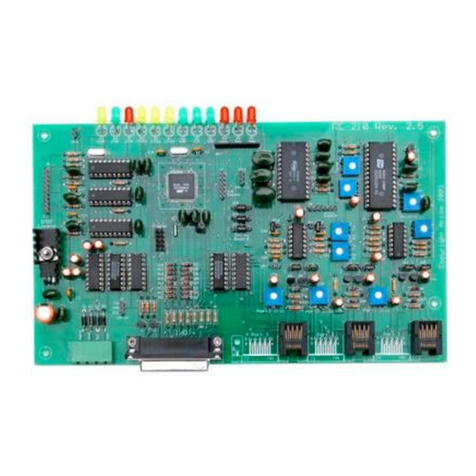
Arcom RC210 User manual

Arcom Communications
24035 NE Butteville Rd
Aurora, Oregon 97002
(503) 678-6182
arcom@arcomcontrollers.com
http://www.arcomcontrollers.com/
RC210 Repeater Controller
Operations and Programming Manual
Firmware version 6.0451
August 7th, 2016
Reproduction or translation of any part of this manual beyond that permitted by sections 107 or 108 of the 1976 United States Copyright Act (or its legal successor) without the
express written permission of Arcom Communications is unlawful as noted below. Requests for permission to copy or for further information should be addressed to Arcom
Communications. Except as noted above, permission is hereby granted for any non-profit group or individual to reproduce any portion of this document provided that: the
reproduction is not sold for profit; the intent of reproduction is to further disseminate information on the RC210 Repeater Controller; the reproduction is not used for advertising or
otherwise promoting any specific commercial product other than the RC210; and full credit is given to Arcom Communications as the original source of information.
The information contained in the manual has been carefully checked for accuracy and is believed to be entirely reliable. However, no responsibility is assumed for inaccuracies.
Arcom Communications reserves the right to make changes in the RC210 Repeater Controller kit to improve reliability, function or design without obligation to purchasers of
previous equipment. Arcom Communications does not assume any liability arising out of the application or use of any product or circuit described herein; neither does it convey
license under its patent rights or the rights of others.

2
(this page intentionally left blank)

3
Contents
(this page intentionally left blank) .................................................................................................................2
Command Reference...........................................................................................................................................7
Command Structure......................................................................................................................................................................... 7
Evaluation Of Entered Commands ........................................................................................................................................... 7
Command Accessibility............................................................................................................................................................... 7
Default Commands Accessible When Unlocked.................................................................................................................... 8
Supervisory Commands .............................................................................................................................................................. 8
Supervisory Commands (continued)......................................................................................................................................... 9
Supervisory Commands (continued)........................................................................................................................................10
Using A Control Receiver..........................................................................................................................................................10
Port Linking.................................................................................................................................................................................. 11
User DTMF Pad Test................................................................................................................................................................. 11
Auxiliary Audio Inputs..............................................................................................................................................................12
General Logic Outputs...............................................................................................................................................................12
Extended Logic Outputs...........................................................................................................................................................12
Analog Meter Inputs .................................................................................................................................................................13
Meter Alarms..............................................................................................................................................................................13
Logic Alarms ................................................................................................................................................................................13
Davis Instruments Weather Station.....................................................................................................................................14
Connecting the Davis to the RC210........................................................................................................................................14
Using the Davis Instruments Weather Station..................................................................................................................14
Remote Base Operation ............................................................................................................................................................15
AutoPatch Operation.................................................................................................................................................................17
Command Macros.............................................................................................................................................................................17
Message Macros .........................................................................................................................................................................17
ID Extras.....................................................................................................................................................................................17
IRLP©/Echolink© DTMF Regeneration.................................................................................................................................18
Real Time Clock And Calendar.................................................................................................................................................18
Digital Voice Recorder (DVR) ..................................................................................................................................................18
General Timers ...........................................................................................................................................................................18
Programming The RC210.................................................................................................................................. 19
General Programming Overview ...................................................................................................................................................19
Unlock Code Programming .............................................................................................................................................................19
Pre Command Prefix .................................................................................................................................................................20
Pre Access Code ........................................................................................................................................................................ 20
Locking (Leaving Program Mode) ................................................................................................................................................20
Programming A Custom Lock Code .............................................................................................................................................20
Programming A Custom Terminator Digit................................................................................................................................. 20
A Word Of Caution Regarding The Terminator Digit.......................................................................................................20
Port Unique Versus Global Programming....................................................................................................................................21
Port Unique Programming ..............................................................................................................................................................21
Timer Programming....................................................................................................................................................................21
Timer Programming (continued)............................................................................................................................................ 22
Timer Programming (continued)............................................................................................................................................ 23

4
Timer Programming (continued)............................................................................................................................................ 24
CTCSS Encode Control Programming....................................................................................................................................24
CTCSS Encode Control Programming (continued)..............................................................................................................24
Real Time Clock And Calendar................................................................................................................................................ 25
Miscellaneous Programming.....................................................................................................................................................26
Remote Base Programming ...........................................................................................................................................................27
Selecting The Type Of Remote Base Radio ........................................................................................................................27
Programming Remote Base Memories (non-Doug Hall)...................................................................................................... 28
Programming Kenwood TM-V7a/TM-G707/TM-271/TM-281 Memories......................................................................28
Remote Base Prefix ..................................................................................................................................................................28
Port Inactivity Macro...............................................................................................................................................................28
Programming The RC210 Command Macros..............................................................................................................................29
Command Macros.......................................................................................................................................................................30
Using Command Macros To Remap Controller Functions..................................................................................................30
Command Macro Priority...........................................................................................................................................................31
Startup Macro ............................................................................................................................................................................31
Macro Subset (Guest Macros) ................................................................................................................................................31
Some Useful Hints On How To Use The Macro Subset...................................................................................................32
Determining The Contents Of A Command Macro............................................................................................................. 32
Erasing Command Macros ........................................................................................................................................................32
Using Receiver Macro Functions............................................................................................................................................32
Controlling Command Macro Access By Port.......................................................................................................................33
Erasing All Command Macros Port Restrictions.................................................................................................................33
Message Macros.............................................................................................................................................................................33
Speech Control Within Command Macros................................................................................................................................. 34
List Of Port Direction Commands For Use In Macros......................................................................................................34
Macro Function Number List..................................................................................................................................................35
Macro Function Number List (continued) ............................................................................................................................36
Macro Function Number List (continued) ............................................................................................................................37
Macro Function Number List (continued) ............................................................................................................................38
Macro Function Number List (continued) ............................................................................................................................39
Macro Function Number List (continued) ............................................................................................................................40
Tail Messages..............................................................................................................................................................................41
Some Practical Examples Of Tail Message Programming..................................................................................................41
Some Practical Examples Of Tail Message Programming (continued)...........................................................................42
Special Features ............................................................................................................................................................................42
Temporarily Disabling ID's And Timeout Timer................................................................................................................42
Special Features (continued) ......................................................................................................................................................43
DTMF Memories ........................................................................................................................................................................ 43
DTMF Digits Duration and Time Between Digits ...............................................................................................................43
IRLP©/Echolink©DTMF Regeneration................................................................................................................................43
The Scheduler ................................................................................................................................................................................44
Recurring Voice Messages And The Scheduler..................................................................................................................44
Recurring Voice Messages And The Scheduler (continued)............................................................................................ 45
Plan! Plan! Plan!............................................................................................................................................................................45
Erasing Scheduler SetPoints..................................................................................................................................................46
Determining Setpoint Status .................................................................................................................................................46

5
Voice IDs .........................................................................................................................................................................................46
ID Extras.................................................................................................................................................................................... 46
Enable/Disable Voice IDs........................................................................................................................................................46
Selecting ID Timer Start .......................................................................................................................................................46
CW IDs.............................................................................................................................................................................................46
CW Speed Programming........................................................................................................................................................... 47
CW Tone Programming .............................................................................................................................................................47
CW ID Programming .................................................................................................................................................................47
Using The Digital Voice Recorder (DVR) .................................................................................................................................. 48
Recording DVR Tracks .............................................................................................................................................................48
Playing A Recorded DVR Track ..............................................................................................................................................48
Erasing Tracks ...........................................................................................................................................................................48
Editing Recorded Tracks.........................................................................................................................................................48
Using The Digital Voice Recorder (DVR) (continued) ............................................................................................................49
Finding Out How Much Recording Time You Have Left.................................................................................................... 49
User DVR Recording ................................................................................................................................................................. 49
Auxiliary Audio Inputs.............................................................................................................................................................49
Resetting The RC210................................................................................................................................................................49
Courtesy Tone Programming ...................................................................................................................................................50
Using A DVR Track Or Vocabulary As A Courtesy Tone...................................................................................................51
Courtesy Tone Behavior When Ports Are Linked ...............................................................................................................51
Programming Meter Faces - 10-bit A/D Converters.........................................................................................................52
Programming Meter Alarms .................................................................................................................................................... 53
A Practical Example..................................................................................................................................................................53
The Differences Between Accuracy And Precision...........................................................................................................54
Programming the Reference Voltage Value for the A/D Converters............................................................................54
Measuring Voltages Higher Than Vref - A Practical Example.......................................................................................55
Alarm Programming...................................................................................................................................................................55
Programming Which Macro To Use With An Alarm ..........................................................................................................55
Updating The Firmware.................................................................................................................................. 56
Downloading And Installing The Required Software On Your Computer .......................................................................... 56
Programming Cable......................................................................................................................................................................... 56
Downloading Firmware Updates..................................................................................................................................................56
Running Updater For The First Time ........................................................................................................................................57
Appendix A ........................................................................................................................................................ 59
Frequency Agile Radios Supported .......................................................................................................................................59
Factory Default Programming Values ...................................................................................................................................59
Appendix B ........................................................................................................................................................ 60
CTCSS Codes.............................................................................................................................................................................. 60
Appendix C..........................................................................................................................................................61
Default Factory Command Codes............................................................................................................................................61
Programming Commands Quick Reference................................................................................................. 62
Programming Commands Quick Reference (continued) .........................................................................................................63
Resetting The Unlock Codes...................................................................................................................................................63

6
Vocabulary List................................................................................................................................................. 64
The RC210 Development And Testing Team ............................................................................................. 67
ARCOM COMMUNICATIONS NO-NONSENSE LICENSE AGREEMENT FOR THE OPERATING
FIRMWARE OF THE RC210 REPEATER CONTROLLER ........................................................................ 68

7
Command Reference
Command Structure
The RC210 provides an extremely flexible and powerful command structure. Each port is capable of being controlled independently as
well as controlling any other port.
There are 3 types of commands in the RC210:
Port Specific - Those commands that are specific to a particular port. For example, if you wanted to select a different courtesy
tone on Port 1, you could do so without affecting the courtesy tone on the other ports.
Global - Those commands which don't affect a specific port. A good example would be reading a meter face.
Programming - Those commands which change the operating parameters of the RC210. Some programming commands affect
only a specific port. For example, programming the amount of Hang Time on Port 1. Other programming commands affect things that
are not port specific. For example, entering a Remote Base Prefix.
Evaluation Of Entered Commands
The controller evaluates and acts on entered DTMF digits under two conditions - upon COS (or CTCSS) closure of the receiver
receiving the digits or upon receipt of the DTMF Terminator Digit. For example, there is an interfering signal on the receiver you're
currently using. Obviously the controller would never detect COS (or CTCSS) closure under this condition. By ending your entered
command with a "D", you force the controller to act regardless of the COS (or CTCSS) state. This feature also permits you to string
commands together, separated by a "D" and the controller will act on them one-at-a-time. This allows for automated programming, such
as is done by our RCP Programming Software. Note: this terminator digit can be changed to be something other than "D". See the
Programming section for details.
Command Accessibility
As it arrives from the factory, all commands in the RC210 are protected behind the unlock commands. This means that no commands
will be accepted by the RC210 unless one of its 3 ports is first unlocked. Not to worry however, as you can easily assign any function in
the RC210 ("re-map") to be accessible without first unlocking the RC210 (this is explained in the Macro section of this manual).
To some, this may seem a strange way to do things but there are distinct advantages to doing so:
Most repeater system owners don't make the majority of functions available to general users.
Since every RC210 is shipped with the same default codes, you don't need to spend time reprogramming every, single
command in order to prevent malicious users from "playing". Only those functions you specifically make available are
accessible.
You can assign your own custom code to every function as needed.
As you can see, this method gives you complete control over who will have access to which functions in your repeater system without
compromising security on your system. And without you having to do a ton of work!

8
Default Commands Accessible When Unlocked
This section deals with those commands that allow you to change the operating conditions of the RC210. Except where noted, the
settings affected by these commands are stored in non-volatile memory and will survive a power cycle of the controller. For example, if
you have CTCSS Access selected on Port 1, that port will require CTCSS until you specifically change the setting, even if the controller
loses power.
Supervisory Commands
These commands are those which typically control the behavior of the RC210, such as enabling and disabling features. They are only
accessible while any of the 3 ports is unlocked but may be re-mapped using Command Macros to allow access even though no ports
are unlocked. An asterisk next to each description signifies the default power up state of that function (this can be changed by
programming).
Important
Any Port's Supervisory Commands are accessible regardless of which port is currently unlocked and regardless of which
Port you're actually connected to. For example, you could unlock Port 3 and change the Carrier/CTCSS setting on Port 1, even
though you're actually using a radio connected to Port 2.
Receiver Enable/Disable
Each port's receiver may be temporarily disabled individually to prevent a signal from that receiver from being recognized. Note that this
setting is not stored in non-volatile memory and upon a controller reset or power up, all receivers will once again be enabled. Also note
that for safety reasons, you cannot disable the receiver on the Port to which you’re currently connected.
1101 Port 1 Receiver Enable* 2101 Port 2 Receiver Enable* 3101 Port 3 Receiver Enable*
1100 Port 1 Receiver Disable 2100 Port 2 Receiver Disable 3100 Port 3 Receiver Disable
Transmitter Enable/Disable
Each port's transmitter may be disabled individually to prevent keying by itself or other ports. This command completely disables the
transmitter on that port, except for ID's
1111 Port 1 Enable* 2111 Port 2 Enable* 3111 Port 3 Enable*
1110 Port 1 Disable 2110 Port 2 Disable 3110 Port 3 Disable
Carrier/CTCSS AND Carrier/CTCSS Only Access
Each port supports an external CTCSS (or digital) decoder, the action of which may be controlled with these commands.
1120 Port 1 Carrier* 2120 Port 2 Carrier* 3120 Port 3 Carrier*
1121 Port 1 CTCSS AND Carrier 2121 Port 2 CTCSS AND Carrier 3121 Port 3 CTCSS AND Carrier
NOTE: CTCSS Only Access is a very special case you should NOT normally be used. If you’re wanting tone access, you
should select CTCSS AND Carrier as your access method
TouchTone© Covertone
Whenever a DTMF digit is pressed, the receiver audio from that port is muted. Optionally, a covertone may be selected so users aren't
faced with "dead air".
1131 Port 1 Touchtone© 2131 Port 2 Touchtone© 3131 Port 3 Touchtone©
Covertone ON* Covertone ON* Covertone ON*
1130 Port 1 Touchtone© 2130 Port 2 Touchtone© 3130 Port 3 Touchtone©
Covertone OFF Covertone OFF Covertone OFF

9
Supervisory Commands (continued)
Courtesy Tone Selection
Each port has its own, unique 10 programmable courtesy tone sets.
1134x Port 1 Courtesy Tone 2134x Port 2 Courtesy Tone 3134x Port 3 Courtesy Tone
Select x = 1-10 (1*) Select x = 1-10 (1*) Select x = 1-10 (1*)
Note: Courtesy Tone selection is not stored in non-volatile memory and will revert to Courtesy Tone #1 upon controller startup. You may
define which Courtesy Tone to use upon startup by defining it in the Startup Macro. See the Programming section for details.
Kerchunk Filtering
Each port has its own filtering command to prevent users from "kerchunking" that port. When turned on, these filters require that users
key up for a period of at least the setting of the Kerchunk Timer before the RC210 will recognize it as a valid signal.
1151 Port 1 Kerchunk Filter On 2151 Port 2 Kerchunk Filter On 3151 Port 3 Kerchunk Filter On
1150 Port 1 Kerchunk Filter Off* 2150 Port 2 Kerchunk Filter Off* 3150 Port 3 Kerchunk Filter Off*
Repeating/Non-Repeating Operation
Each port may be defined as repeating, where a signal on that port's receiver is retransmitted out that port's transmitter. Or it may be
defined as non-repeating, where a signal on that port's receiver is NOT retransmitted out that port's transmitter. For example, if you
wanted to use Port 2 for a half-duplex/simplex remote base, you would not want its transmitter to be activated by its receiver. You would
therefore define that port as being non-repeat. Of course if you want to use a particular port (or all ports) for a repeater, that port needs
to be defined as repeating.
1141 Port 1 Repeat* 2141 Port 2 Repeat 3141 Port 3 Repeat
1140 Port 1 Non-Repeat 2140 Port 2 Non-Repeat * 3140 Port 3 Non-Repeat *
Mix Monitored Audio with This Port RX Audio
This function selects whether audio from the monitored port(s) is mixed with the audio from the monitoring port or muted when there is
activity on the monitoring port.
1191 Monitor Mix* 2191 Monitor Mix* 3191 Monitor Mix*
1190 Monitor Mute 2190 Monitor Mute 3190 Monitor Mute
Mute DTMF ON/OFF
This command selects whether DTMF digits received on the selected port are retransmitted or muted.
1211 Mute DTMF ON* 2211 Mute DTMF ON* 3211 Mute DTMF ON*
1210 Mute DTMF OFF 2210 Mute DTMF OFF 3210 Mute DTMF OFF
Speech Override ON/OFF
Setting the Override to OFF causes user audio to be mixed with non-ID Speech. Setting the Override to ON causes non-ID speech to
be stopped if a signal appears on that port's receiver.
1201 Speech Override ON 2201 Speech Override ON 3201 Speech Override ON
1200 Speech Override OFF* 2200 Speech Override OFF* 3200 Speech Override OFF*

10
Supervisory Commands (continued)
Speech ID Override ON/OFF
Setting the Override to OFF causes user audio to be mixed with ID Speech. Setting the Override to ON causes ID speech to be
stopped if a signal appears on that port's receiver, in which case the voice ID reverts to CW in order to ensure the repeater is properly
identified.
1181 Speech ID Override ON* 2181 Speech ID Override ON* 3181 Speech ID Override ON*
1180 Speech ID Override OFF 2180 Speech ID Override OFF 3180 Speech ID Override OFF
Enable/Disable Port DTMF
Each port may have its DTMF decoder disabled. This function is useful under several circumstances, such as when a user is causing
problems. As a precaution, it is not possible to disable DTMF on the port to which you're currently connected. For example, you must
be using a radio (or repeater) connected to Port 2 or 3 in order to disable DTMF on Port 1.
1161 Port 1 DTMF Enable* 2161 Port 2 DTMF Enable* 3161 Port 3 DTMF Enable*
1160 Port 1 DTMF Disable 2160 Port 2 DTMF Disable 3160 Port 3 DTMF Disable
Require/Not Require CTCSS for DTMF
Each port may be configured to either require a user's signal to contain CTCSS or not require it, in order to enter DTMF commands.
This selection controls DTMF access regardless of the state of the access required for repeater access on that port. In other words, it is
possible to have a port configured for carrier squelch access, yet require CTCSS for DTMF commands to work.
1170 Port 1 no CTCSS for DTMF* 2170 Port 2 no CTCSS for DTMF* 3170 Port 3 no CTCSS for DTMF*
1171 Port 1 CTCSS for DTMF 2171 Port 2 CTCSS for DTMF 3171 Port 3 CTCSS for DTMF
DTMF Evaluation on COS or CTCSS
You may control how evaluation of entered DTMF commands by either COS closure or CTCSS decoder closure.
This can be helpful if your squelch locks open and may be selected on a Port-by-Port basis
1221 Port 1 DTMF Command Evaluation on CTCSS Closure
2221 Port 2 DTMF Command Evaluation on CTCSS Closure
3221 Port 3 DTMF Command Evaluation on CTCSS Closure
1220 Port 1 DTMF Command Evaluation on COS Closure
2220 Port 2 DTMF Command Evaluation on COS Closure
3220 Port 3 DTMF Command Evaluation on COS Closure
Using A Control Receiver
Because of the RC210's ability to control any Port from any other Port, there is no need for a special, dedicated control receiver port. By
using the right combination of Macro Functions, you can easily and quickly disable or enable any function the RC210 is capable of
performing. For example, you have a repeater on Port 1 and a link on Port 2. There is some user randomly entering DTMF, causing
disruption to the users of the repeater. You could "come in" through your link and turn off DTMF on Port 1 by unlocking Port 1 and
entering the command to turn DTMF off. This could be done without your presence being known to the users on Port 1 if you so chose.
You could even use an existing link or repeater as your control receiver and you will still have positive control of your system at all
times. The possibilities are only limited by your imagination and needs of your system.

11
Port Linking
Monitoring A Port from Other Ports
Any port may be selectively monitored by any other port. In the RC210, with multiple monitor commands you can create any
combination of monitoring from port to port. This provides considerable flexibility in audio routing. Each of these monitoring commands
is a one-way connection. In other words, if you select to monitor Port 2 from Port 1, activity on Port 1 will not be retransmitted on Port 2.
To create a two-way path between ports, you have two choices. You can either establish 2, one-way connections between ports or you
could use the Linking Commands (this is explained below).
Assume you're on Port 1 and want to monitor activity on Port 2. Enter the command 1301 and a one-way connection is established,
allowing the monitoring of Port 2 by Port 1. Now, activity on Port 2 is retransmitted out Port 1, but Port 1 is not retransmitted out Port 2.
It doesn’t matter what port is used to issue these commands.
1301 Monitor Port 2 From Port 1 ON 2301 Monitor Port 1 From Port 2 ON 3301 Monitor Port 1 From Port 3 ON
1300 Monitor Port 2 From Port 1 OFF* 2300 Monitor Port 1 From Port 2 OFF* 3300 Monitor Port 1 From Port 3 OFF*
1311 Monitor Port 3 From Port 1 ON 2311 Monitor Port 3 From Port 2 ON 3311 Monitor Port 2 From Port 3 ON
1310 Monitor Port 3 From Port 1 OFF* 2310 Monitor Port 3 From Port 2 OFF* 3310 Monitor Port 2 From Port 3 OFF*
After monitoring for a while, you decide you want to join in the conversation. By issuing the command 2301, activity on Port 1 is now
retransmitted out Port 2. In other words, there is now a two-way connection between Ports 1 & 2.
A two-way connection made in the above manner can be taken down by first turning off monitoring from the port you are on from being
monitored by the other port. Then stop monitoring that other port with a second command. For example, if you have a two-way monitor
between Ports 1 and 2, and you are actively using Port 1, send the command 2300 first so Port 1 activity does not appear on Port 2,
then send 1300 to stop monitoring Port 2. It can be taken down the other way, but if there is an interruption you will be transmitting Port
1 audio on Port 2 and not realize when Port 2 is busy.
Linking Ports Quickly
You may also establish two-way connections (linking) between ports quickly and easily by using only one command. Likewise, you can
also disconnect (unlink) ports using these commands. Note: Even if you established port monitoring using the Monitor Commands above,
you may use the Linking Commands to turn them off or modify them. In other words, the Linking Commands take precedence over
Monitoring commands.
A11 Link Port 1 to Port 2 A10 Unlink Port 1 from Port 2*
A21 Link Port 1 to Port 3 A20 Unlink Port 1 from Port 3*
A31 Link Port 2 to Port 3 A30 Unlink Port 2 from Port 3*
A41 Link all ports to all other ports A40 Unlink all ports from all other ports*
User DTMF Pad Test
By using this feature, users can test their DTMF pads to make sure their digits are being properly decoded by the RC210. By sending
the User DTMF Pad Test Command Prefix, followed by up to 16 digits, the RC210 will read back each digit it correctly decodes.
< User DTMF Pad Test Command Prefix> <up to 16 DTMF digits>
See the Programming Section of this manual for programming the Command Prefix for this feature.

12
Auxiliary Audio Inputs
These inputs can be used for connecting external audio devices, such as a weather receiver. When turned on, the selected transmitter
is locked on for a period selected by a programmable timer. After this timer times out, the audio is disconnected and the transmitter is
unkeyed. Which port a particular input is routed to is determined by programming commands.
1961 Turn Auxiliary Audio Input 1 ON 3961 Turn Auxiliary Audio Input 3 ON
1960 Turn Auxiliary Audio Input 1 OFF 3960 Turn Auxiliary Audio Input 3 OFF
2961 Turn Auxiliary Audio Input 2 ON
2960 Turn Auxiliary Audio Input 2 OFF
General Logic Outputs
There are 7 switched outputs that can be commanded on or off. They can also be pulsed ( 0.1 s open, 0.1 s low, 0.1 s open). When an
output is high, it is actually an open collector. If you need a logic high present, you can provide a pull up resistor (up to 100 vdc).
1810 Logic Output 1 Open Collector 1850 Logic Output 5 Open Collector
1811 Logic Output 1 Low 1851 Logic Output 5 Low
1812 Logic Output 1 Pulsed (open, low, open) 1852 Logic Output 5 Pulsed (open, low, open)
1820 Logic Output 2 Open Collector 1860 Logic Output 6 Open Collector
1821 Logic Output 2 Low 1861 Logic Output 6 Low
1822 Logic Output 2 Pulsed (open, low, open) 1862 Logic Output 6 Pulsed (open, low, open)
1830 Logic Output 3 Open Collector 1870 Logic Output 7 Open Collector
1831 Logic Output 3 Low 1871 Logic Output 7 Low
1832 Logic Output 3 Pulsed (open, low, open) 1872 Logic Output 7 Pulsed (open, low, open)
1840 Logic Output 4 Open Collector
1841 Logic Output 4 Low
1842 Logic Output 4 Pulsed (open, low, open)
Note: These outputs are independent of the "Output Sinker" functions provided by the Doug Hall RBI-1 Remote Base Interface. See the
Remote Base section of this manual for details.
Extended Logic Outputs
If you have connected external shift registers as described in the RC210 Hardware Reference Manual, you have a total of 32 Extended
Logic Outputs available.These are available in addition to the 7 on-board Logic Outputs
180xxy Logic Output xx (1-32) to state y
y = 0 Logic low
y = 1 Logic High
y =2 Pulsed output (low, open, low)

13
Analog Meter Inputs
Analog measurement capability consists of an 8 channel 10 bit analog to digital converter. Each channel is capable of measuring
voltages between 0 and approximately 5 volts DC and may be programmed to reflect actual values. With the proper sensor hardware
(see the RC210 Hardware Manual for details), the range of measurement can be anything you need it to be and not only those limited
to this range.
Signals may be provided from the receiver s meter and deviation metering circuits, from wattmeters, temperature sensors and other
transducers. There are a number of meter face names you can use, including Volts, Amps, Watts, Degrees, Miles per Hour, and
Percent. Scaling of these meter faces is completely programmable by the owner.
The voltage from an external sensor is applied to one of the Analog to Digital (A/D) inputs and measured. Then based on how that
meter channel is programmed, the RC210 speaks the measured value. For example, if you have Meter 1 programmed to read
temperature, the controller will speak the value in "Degrees".
When a meter readback command is entered, the controller reads back a value that represents the average of several measurements
taken over the past few seconds. As the A/D measurements are taken every second and smoothed in the controller firmware, this
provides for a very stable reading. For maximum accuracy, the reference voltage used by the A/D converter is programmable.
High and low values for each Meter are stored and can be read back by the user on command. This allows for tracking of trends and
each high and low value can be cleared using a command for each meter, or by a global command to clear all the stored high and low
values with one command.
How to setup Meters and how to calibrate them is explained later in the Programming section of this manual
1400 (channel 1 - 8) Readback current value
1400 (channel 1 - 8) 1Readback stored LOW value
1400 (channel 1 - 8) 2Readback stored HIGH value
To reset a meter's High/Low Stored value:
1500x where "x" is the Meter 1 - 8 channel you wish to clear. Entering a 0 will clear all channels.
Meter Alarms
Each of the Meter Inputs has programmable high and low alarms which when tripped will run a Command Macro. See the Programming
section of this manual for details.
Each of the 8 Meter Alarms may be enabled and disabled. To enable or disable a meter alarm:
1600xy where x = 1 to 8 for the meter channel and y = 1 for ON and 0 for OFF
Disabling a Meter Alarm retains that alarm's programming but causes it to be ignored even if "tripped".
Logic Alarms
Each Alarm may be individually turned ON, OFF or interrogated. While enabled, an alarm is triggered by 2 different event –its input line
transitioning from a logic high to a logic low and from a logic low to a logic high. Each state may be programmed to call its own
Command Macro. See the Programming Reference section for details about programming the Alarms. You may also interrogate the
logic state of each Alarm, which is handy for troubleshooting and setup.
1911 Alarm 1 Enabled 4911 Alarm 4 Enabled 2913 Alarm 2 Interrogate
1910 Alarm 1 Disabled 4910 Alarm 4 Disabled 3913 Alarm 3 Interrogate
2911 Alarm 2 Enabled 5911 Alarm 5 Enabled 4913 Alarm 4 Interrogate
2910 Alarm 2 Disabled 5910 Alarm 5 Disabled 5913 Alarm 5 Interrogate
3911 Alarm 3 Enabled
3910 Alarm 3 Disabled 1913 Alarm 1 Interrogate

14
Davis Instruments Weather Station
The following Davis Instrument systems are supported by the RC210:
Vantage Vue
Vantage Pro
Vantage Pro2
Vantage Pro Plus
Vantage Pro2 Plus
Using the above units (Consoles) will allow you to recall the following information:
Current wind speed & direction
Current Outdoor temperature
Indoor humidity
Outdoor humidity
Wind Speed high & direction (since Midnight)
Outdoor Temp High (since Midnight)
Outdoor Temp low (since Midnight)
In addition to the Weather Station itself, you will also need Davis Instruments DataLogger cable Model 6510SER which is available from
many sources. And while the cable also comes with a companion software CD, this software is not needed for use with the RC210. You
will also need a DB9 male to DB25 male adapter
Connecting the Davis to the RC210
Connection between the Davis Console and RC210 is accomplished by first connecting the 6510SER cable to the console as per the
Davis Manual. Once this is done, use the DB9 to SB25 adapter to connect the Davis cable to the RC210’s RS232 connector (labeled
“Programming” on the back of the RC210R Rack Mount). That’s all there is to it!
Note: The Davis Console needs to be set to 9600 baud. Refer to the documentation that came with it for instructions on how
to do this.
Using the Davis Instruments Weather Station
In order to communicate with the Console, you must first program some Macros to call the readings you desire. For example, let’s say
we want our users to be able to find out what the current outside temperature is at the repeater site. We’ll use Macro 10 in our example
but you can use anyone you wish.
*4002 10 593 Program Macro 10 to recall the current outdoor temperature from the Davis Console
Now we can assign this Macro the DTMF code of “123”.
*2050 10 123 Users can now enter DTMF “123 and the RC210 will read back the current outside temperature
Hint: You may find it useful to include a Message Macro in the above Command Macro to confirm the recall. For example, you
could record a DVR Track with “Outside Temperature is” and then recall the outdoor temperature Macro Function.

15
Remote Base Operation
Any of the 3 ports may be used to connect a remote base radio. See Appendix A for a list of supported radios.
The type of radio you plan to use with the RC210 is selected by programming commands. In addition, because of the different formats
used with radios within the Yaesu line, you must also select which model you wish to use if you program to use a Yaesu radio. See the
Programming Reference section of this manual for details. Remote Base Commands are available without unlocking the controller.
The default Remote Prefix is "A7", so you must preface each of the Remote Base codes below with it. You can change the
Remote Base Prefix as desired. See page 26 for details.
The commands to control the radio are:
Frequency and Transmitter Offset Entry
A71xxx.xxx y Enter Frequency with transmit offset*.
Frequency entered must be padded with zeros to make it 6 digits long.
Examples:
A 7 1 1 4 6 6 4 0 3 = 146.640 plus offset Note: the offset must always be entered, even if
A 7 1 4 4 8 3 2 5 1 = 448.325 minus offset if you are not in FM mode.
A 7 1 0 1 4 1 9 5 2 = 14.195 no offset
A 7 1 0 0 7 1 5 0 2 = 7.150 no offset
*The last digit represents the repeater offset .
y equals:
1 - minus
2 - simplex
3 - plus
CTCSS Entry
A72xxy Enter CTCSS code and select encode and/or decode. The 2 digit code xx used for a
particular frequency is shown in Appendix B.
y equals:
0 = No Tone
1 = Encode only
2 = Encode/Decode
Mode Entry
A73x Mode select. x equals: Note: This command only has relevance if you're using a remote base radio
1 = LSB capable of multimode use.
2 = USB
3 = CW Note: Any port used for a remote base should be defined as non-repeating.
4 = FM
5 = AM
Readback
A7 Readback current frequency, offset and mode that is currently loaded into radio
Memory Selection (Internal RC210 Memories)
The RC210 allows you to recall up to 10 previously stored Remote Base Memories (there are a total of 40 memories if the optional RTC
is installed. See the RTC Manual for details). Each of these memories will store operating frequency, transmit offset, CTCSS tone and
encode/decode selection and operating Mode. When recalled, these parameters will be spoken by the controller). (see the
Programming section of this manual for details on storing Remote Base Memories)
A75xx Recall Remote Base Memories 01-10 (or 01-40 if optional RTC is installed).

16
Remote Base Operation (continued)
Memory Recall When Using the Kenwood TM-V7a/TM-G707/TM-271A/TM-281A/TS-2000
When any of these radios are selected as the remote base radio, up to 255 of their memories may be recalled (180 total for the V7a).
A77 x ywhere x selects which band's memory to recall and "y" is Memory 1 to 255.
The Band Select digit is necessary because the Kenwood mobiles have no idea which memory we're going to recall. This digit is
therefore used to tell the radio which band's memory to use. 1 = VHF, 2 = UHF.
However, in the case of the TS-2000, you directly recall the desired memory using all 3 digits as the Memory Channel selection.
Examples:
A77012 Recall Memory 12
A77121 Recall Memory 121
A77299 Recall Memory 299
Remote Base Power Select When Using the Kenwood TM-V7a/TM-G707/TM-271A/TM-471A or
Doug Hall RBI-1
A79 x Select Transmitter power of the connect remote base radio, where x
Kenwood Doug Hall
0 High Power 0 Low Power
1 Medium Power 1 High Power
2 Low Power 2 Medium Power (only if radio supports this selection)
Note: Also see Programming Kenwood TM-V7a/TM-G707/TM-271A/TM-471A Memories in the Programming section of this manual.
Using the Doug Hall RBI-1 Remote Base Interface
There are extra remote base commands available for use if you have selected the Doug Hall RBI-1 for use as your remote base. Note:
these only work if "5" is selected as your remote base radio type
User Function Outputs
The RBI-1 provides 7 User Function outputs that can be used (in addition to Logic Outputs of the RC210) to control hardware at the
repeater site. Refer to the Doug Hall manual for details on making connections.
A74 x y User Outputs 1 through 7, where "x" is the output and "y" = 1 ON, 2 OFF
Memory Select
The Doug Hall RBI-1 provides for memory recall of up to 20 memories within the controlled radio
A76x Select Memory 1 –20
Power Select
A79x
x = 1 Low Power
x = 2 Mid Power
x = 3 High Power
x = 5 Radio Power OFF

17
AutoPatch Operation
The optional AP1 Autopatch board provides for full autopatch operations, including reverse patch that allows for programming of the
controller from the phone line. Please refer to the AP1 Autopatch Manual for programming and operating instructions
Command Macros
Command Macros serve several purposes:
To execute many different functions with one single command. This allows the owner to program multiple controller functions
to take place by the entering of only one command.
To generate and direct speech messages. This are generally used for such things as Good Morning/Afternoon/Evening
messages that the scheduler uses.
To generate DTMF digits and direct them to a Port. This is very useful for sending commands to a remote site linked by radio
or for use with an EchoLink or IRLP node.
To remap controller functions so they'll be available without having to first unlock the controller. By default, the RC210 will not
accept commands unless one of the 3 ports is first unlocked. By remapping controller functions in a macro, these functions are
made available without having to first unlock a port. This is how you provide commands for your general users.
There are 2 types of Command Macros - "Long" and "Short":
Command Macros 1 to 40 can store up to 15 functions each
Command Macros 41 to 90 can store up to 4 functions each
Typically, Command Macros 41 to 90 are used to remap functions and you can include up to 4 functions in a single one of these
macros. Remember however that there is nothing preventing you from using ANY Command Macro you like to accomplish this, but
most RC210 owners will probably want to reserve the Long Macros for those things where many functions are to be done with a
single command. This is however, totally up to you.
Some important things you need to remember when programming Command Macros:
Any Macro Command Function that is numbered higher than 255 requires two Function positions.
Any Macro Command Function that is numbered higher than 509 requires three Function positions
Any Macro Command Function that is numbered higher than 764 requires four Function positions
Each macro may be assigned its own unique command code, so you can define one of your own choosing. See the Programming
Reference section of the manual on how to program both the macro codes, as well as the macros themselves.
Macros may also be called from the Scheduler and the Alarms to automate commands. See the Scheduler and Alarm sections in the
Programming section of this manual for details. Finally, you may manually recall the contents of any Command Macro and the controller
will read back those contents.
Macro Subset
It is possible to program a smaller contiguous range of Command Macros, known as a Macro Subset. This Subset can be defined as
any contiguous number of Command Macros. For example, you could define this Subset to be Macros 1 through 15. Or perhaps
Macros 40 through 80. It is totally up to you how large or small this Subset should be. Once programmed, you can selectively enable
and disable them as needed. For example, let’s say you have Macros 10 through 15 defined as your Subset and they contain only the
most basic of functions; the intent being to limit your users to only these functions overnight. During the day, they can have access to all
your Macros. You enable Subsets with a Macro Function and disable them the same way.
You could also do some trickery with a tone decoder and an Alarm input to restrict users without tone to only the Subset of Macros. But
if they have the proper tone, they’d have access to all. It’s totally up to you how you want to use this feature!
Message Macros
There are 40 Message Macros (or 70 if the optional RTC is installed. See the RTC Manual for details), each of which is capable of
storing up to 9 words (or DVR tracks) of speech and can be used in conjunction with any Command Macro. These are typically used to
provide a message that reflects the action taken by a Command Macro.
For example, you might have a 2 meter remote base connected to Port 2 and you've defined a Command Macro to link Port 2 and Port
1. You could include a message such as "2 Meter Remote Base Link On" by using a Message Macro. Or perhaps you want a
scheduled message to be sent at the top of each hour..
ID Extras
ID Extras allow you to add various "phrases" to the Voice ID Messages. These ID Extras allow you to include such messages as "Good
Morning/Afternoon/Evening (automatically selected by the controller for the appropriate time of day), the time of day or date before OR
after the actual ID. See the Programming section of this manual for details.

18
IRLP©/Echolink© DTMF Regeneration
When you need to send DTMF to an external device, such as an IRLP© / Echolink © node, whether directly connected to the RC210
or via a radio link, it is desirable to ensure that DTMF is clean and unprocessed for maximum reliability.
To use this feature, all a user needs do is enter the Regenerate Prefix, followed by the DTMF digits to be sent to the node/link. The
DTMF sequence after the Prefix will then be sent. Optionally, you may include a voice message that will be spoken before the DTMF
sequence is sent. Note: this feature is available while the controller is locked. By default, the Command Prefix is #.
# <digits to send>
See the Programming section of this manual for details on how to program the Command Prefix and DTMF Regeneration parameters.
Real Time Clock And Calendar
If the Real Time Clock has been set since the last power outage, this command will announce the current time.
1700 Announce current time
Note: If the Real Time Clock has not been set since the past power outage and you don’t have the RTC installed, the controller will say "Clock
Not Set" .
If the calendar has been set since the last power outage, this command will announce the current date
1701 Announce current date
Note: If the Calendar has not been set since the past power outage and you don’t have the RTC installed, the controller will say "Date Not Set"
.
Digital Voice Recorder (DVR)
The RC210 includes an on-board DVR that allows for recording of custom messages that can be used in any programmable message
(ID's and Message Macros). It also allows your users to record their own transmission, for checking the quality of their signal.
The DVR has a total recording time of 63 seconds and divided into 20 "tracks". There is no time limit per track, other than the total
recording time available. In other words, you may use the total time available anyway you wish, be it one track that is 63 seconds long
or 20 tracks that are 3.14 seconds long. It is totally up to you. See the Programming section of this manual for details on recording DVR
tracks for use in messages.
DVR Track 19 is a special case, as that can be used to allow your users to check the quality of their signal into the repeater. This
function is available as a Macro Function, so you must specifically define it in order for it to be available to your users.
To use the feature, users enter the Command Code you've programmed, then unkey. The controller responds with "Ready", at which
point the user has 4 seconds to key again and speak their message. When they're done, they unkey and the controller will play what
was recorded. If after the controller speaks "Ready" and the user does nothing, the controller will timeout the recording and announce
such.
Obviously, there needs to be "free" minutes available in the DVR in order for this feature to be useable. If there are no free minutes
available and this feature is used, the controller will respond with "Error" instead of the Ready message and the function will be
terminated.
General Timers
There are 6 General Timers that may be used for any purpose you may have. Each timer is independent of the others and may run
simultaneously with them as well. Each of these timers is programmable in seconds and when it times out, it will run a Command Macro
of your choice. These timers may be used for everything from beacon IDs to automatically turning a feature on or off after functioning it.
The use of these timers is only limited by your imagination. See the Programming section of this manual for details.

19
Programming The RC210
General Programming Overview
Each port on the RC210 is programmed individually and the programming for one does not affect the others. The programming
commands for each port are identical - the only difference being the port you've "unlocked" to program. This makes it easier to
remember the code for programming a particular command and/or function.
For example, the code to program the Initial ID Timer is *1002, regardless which port you wish to program. What differentiates which
port is being programmed is determined by which port you unlocked through the use of its unlock code.
While you are in programming mode you can re-enter an Unlock Code at any time to unlock a different port without having to lock the
controller first. For example, if the controller's Port 1 is already unlocked, you can simply enter Port 2's unlock code and change over to
programming Port 2. Furthermore, any Port may be unlocked and programmed, regardless of which Port you're actually
connected to. For example, you may program Port 1 while actually using a radio or repeater connected to Port 2 or 3.
While unlocked, you may also play back your ID messages, based on which port you're currently "connected to". This allows for easy
verification of your ID messages as you program them.
AA1 The currently unlocked port CWID # 1
AA2 The currently unlocked port CWID # 2
AA3 The currently unlocked port Voice ID # 1
AA4 The currently unlocked port Voice ID # 2
AA5 The currently unlocked port Voice ID # 3
As mentioned in the Command Reference section of this manual while any port is unlocked, you can use any of the default command
codes.
In addition, by prefacing any Macro Command with "* *", you can recall any previously programmed Macro without having to first "lock"
the controller.
Unlock Code Programming
The RC210 comes programmed with a default unlock codes for each port. To unlock any port for the first time, enter the default code.
15281 Port 1 default unlock code
25281 Port 2 default unlock code
35281 Port 3 default unlock code.
For example, to unlock Port 1 for the first time, enter 1 5 2 8 1 and unkey. The controller will respond with "ULP1", indicating that Port 1
is now unlocked and ready to accept programming. The code to reprogram the unlock code is * 9 0 0 0 followed by up to 8 digits - those
digits will become your new unlock code for that port.
Note: For security reasons, you should try and use all 8 digits for the unlock codes.
For example, you want to program the unlock code for Port 1 to "22334455". Key your radio and enter * 9 0 0 0 2 2 3 3 4 4 5 5 and
unkey. The controller should respond with "CODE". Your new code is now set and will stay set until you explicitly change it, even
through power off cycles. It is suggested the first thing you do is reprogram the unlock code for each port.
Some owners prefer to use a prefix, followed by a command unlock code. This makes it even easier to remember the codes. For
example, you could program Port 1 unlock code as 12463683 , Port 2 as 22463683 and Port 3 as 32463683. Of course this is strictly up
to you, but the flexibility of the RC210 allows you this sort of freedom.
Important: Write your unlock codes down and keep them in a safe place. Should you lose them, it is possible to reset them back to factory
defaults but this cannot be done without physical access to the RC210.. See "Resetting your unlock codes" on Page 45 for details on how to
do this.
See Programming Commands Quick Reference at the end of this manual for how to reset the Unlock Codes should you forget them.

20
Pre Command Prefix
Sometimes it may desirable to be able to access commands that haven’t been remapped using a Command Macro without having to
first unlock a Port. By defining a Pre Command Prefix (up to 4 digits is permissible), you can access those commands that normally
require unlocking a Port with the exception of programming commands that start with a star ( *). Any command shown in Appendix C is
accessible in this manner. You may also disable this feature if it’s not needed by programming a zero:
*2109x where x is from 1 to 4 digits for use as. If programmed to 0, no Prefix is used and this feature is disabled.
If disabled you must first unlock a Port in order to access commands.
Pre Access Code
You may program a Pre Access Code which will then be required to be prepended to all commands EXCEPT UNLOCK CODES AND
COMMANDS ENTERED WHILE THE RC210 IS LOCKED. In other words, you will need to use any programmed Pre Access Code
before any Command Macro. This is not to be confused with the Pre Command Prefix above.
Probably the most common use of a Pre Access Code is as a Site Prefix in a multi-controller, linked system. By using such a prefix, all
controllers in the system can use identical codes with the Pre Access Code serving as a site address. For example, let’s say we have a
linked system consisting of 3 repeaters, all linked together full-time. At each site, we use the command of “ABC” to read backup battery
voltage. So we assign site #1 a Pre Access Code of “1”, site #2 to “2” and site #3 to “3”. Now we access site #3 from site #1 and send
DTMF digits 3 A B C. Site #3 will now read back its backup battery voltage down the link back to site #1. Similarly, we can use
addresses in this manner for and from anywhere within our system.
*2108x where x is 1 to 3 digits. If programmed to 0, no Pre Access Code is used.
Locking (Leaving Program Mode)
To lock the controller when you're done programming, you use a (by default) single "#". The controller will respond with "LOCK",
confirming you are no longer in program mode. Also, when any port is unlocked, a timer is started. Should no valid DTMF digit be
received at least every 2 minutes, the controller will automatically lock itself and announce that fact.
Programming A Custom Lock Code
Perhaps # conflicts with your intended code scheme, so the RC210 allows you to reprogram the Lock Code to be up to 4 digits long.
This code is not unique to any port and will be used to lock the controller regardless of which port is unlocked at the time.
*9010xxxx where "xxxx" is your new Lock Code of any length from 1 to 4 digits.
Programming A Custom Terminator Digit
By default, the RC210 recognizes a "D" as its terminator digit, forcing any DTMF digits beforehand to be evaluated by the command
decoder. Under some circumstances, "D" may conflict with a code used for some other function. If necessary, you can reprogram the
terminator digit to be any other single DTMF digit.
*9020x where "x" is the single DTMF digit that will cause the RC210 to evaluate DTMF digits preceding it.
A Word Of Caution Regarding The Terminator Digit
Should you decide to change the Terminator Digit from its default value, remember that you can no longer use that new digit anywhere
in any command. For example, it would be a bad idea to use "1" as your Terminator Digit, as you would not be able to use "1" in any
other command, as well as losing access to the defaults commands that have a "1" in their code. Nor would “ * “ be a good idea, as
you’d never again have access to those programming commands that start with an asterisk (which is just about all of them!).
Generally speaking, if you wish to redefine the Terminator Digit, you should strive to use one of the less commonly used DTMF digits,
such as A, B,C or D. But you must also make certain that whichever digit you decide to use does not conflict with a default command
either. For example, A is used as part of the default Remote Base Prefix Code. If you wish to use A, you should first reprogram the
Remote Base Prefix Code so as not to use A.
Other manuals for RC210
4
Table of contents
Other Arcom Controllers manuals
Popular Controllers manuals by other brands
Conrad
Conrad 75 02 01 operating instructions
SEDONA
SEDONA iSMA CONTROLLI iSMA-B-AAC20 user manual
Nietz
Nietz SSN Series user manual
Tamarack Technologies
Tamarack Technologies Airetrak 1A ADVANTAGE Product guide
Alpha Microsystems
Alpha Microsystems AM-219 installation instructions
STI
STI QuadSafe RM-4 Installation and operating manual
