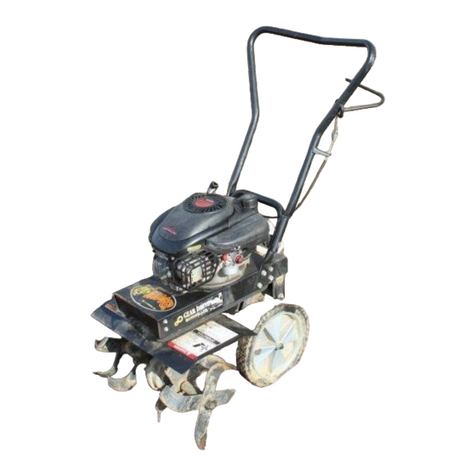
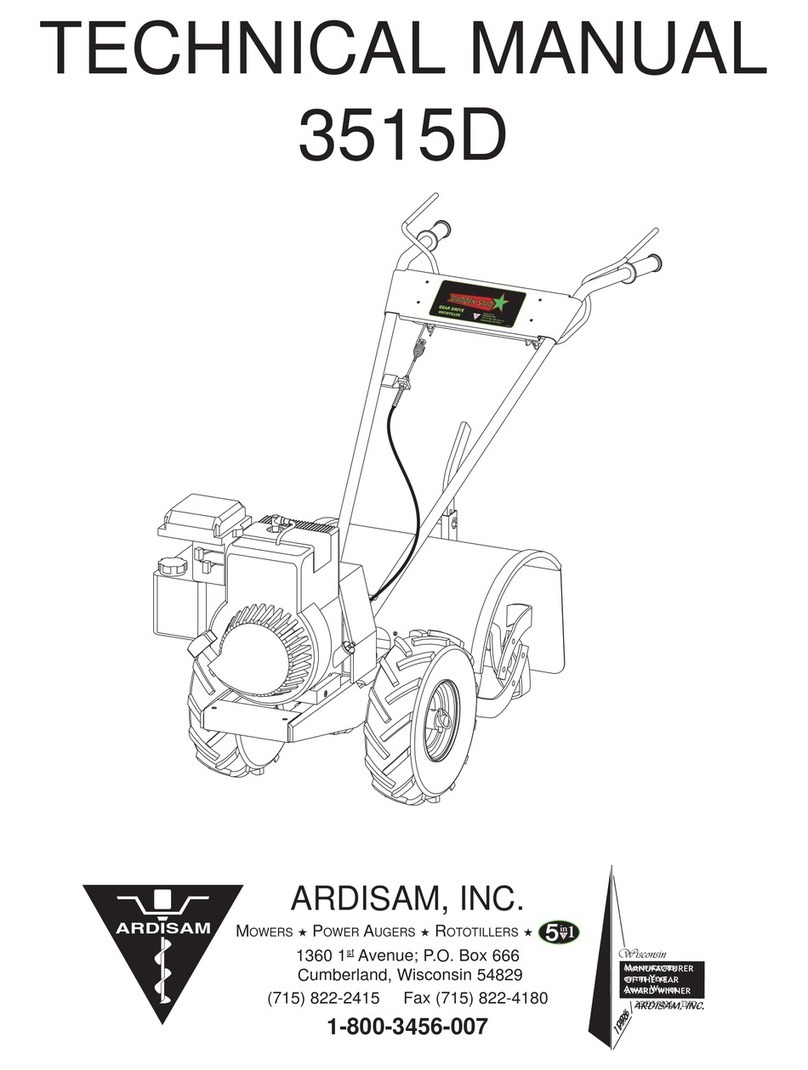
Ardisam GARDEN STAR 5020D User manual

GARDEN STAR
Model 5020D
Operator’s Manual
Manufactured by
ARDISAM, INC.
MOWERS ★POWER AUGERS ★ROTOTILLERS ★
1360 1st Avenue; P.O. Box 666
Cumberland, Wisconsin 54829
(715) 822-2415 Fax (715) 822-4180
1-800-3456-007
ARDISAM

ARDISAM
2
WARRANTY AND REGISTRATION
Thank You . . .
for purchasing an Ardisam, Inc. GARDEN STAR rototiller. We guarantee that this rototiller conforms to
applicable North American safety standards, and have worked to ensure that it will meet your exacting
standards for usability and durability. With proper care, your rototiller will provide many years of service.
Please take time to read this manual carefully to learn how to operate and service your rototiller correctly.
Failure to do so could result in personal injury or equipment damage. This manual should be considered a
permanent part of your rototiller. Congratulations on your investment in quality.
TWO YEAR
LIMITED WARRANTY
The Ardisam, Inc., Manufacturing Company warrants this
GARDEN STAR rototiller to be free from defects in material
or workmanship. Conditions of this warranty include:
What is covered under warranty:
For the first year from the date of purchase, Ardisam will
furnish 100% parts and labor to correct any defect caused
by faulty material or workmanship. During the second year
of ownership, Ardisam will furnish 100% of the parts to
correct any defect caused by faulty material or workmanship.
All repairs made under warranty must have prior approval
from Ardisam, Inc. Belts, batteries, tines, shear bolts and
tires, due to the nature of their function, are subject to normal
wear and tear and are covered only during the first year of
the warranty period. Any unit used in a commercial
application is covered for a period of 90 days after purchase.
The engine is covered under a separate warranty issued
by the engine manufacturer as stated in the engine manual.
What is not covered under warranty:
This warranty applies only to products which have not been
repaired or altered outside our factory. It covers only defects
resulting from normal use, and does not cover defects
arising from misuse, alteration, negligence, or accident.This
warranty applies only to the original purchaser, and is not
transferrable.
This warranty supersedes all other warranties either
expressed or implied and all other obligations or liabilities
on our part. Ardisam, Inc., does not assume, and does
not authorize any other person to assume for us, any
liability in connection with the sale of our products. This
guarantee is void unless the warranty card is properly
filled out and returned to Ardisam, Inc., Cumberland,
Wisconsin, within two weeks of the purchase date.
ARDISAM
ARDISAM, INC.
MOWERS ★POWER AUGERS ★ROTOTILLERS ★
1360 1st Avenue; P.O. Box 666
Cumberland, Wisconsin 54829
(715) 822-2415 Fax (715) 822-4180
1-800-3456-007
You must read, understand and comply with all safety
and operating instructions in this manual before
attempting to setup and operate this equipment.
Failure to comply with all safety and operating
instructions can result in loss of machine control, serious
personal injury to you and/or bystanders, and risk of
equipment and property damage. The triangle in the
text signifies important cautions or warnings which must
be followed.
CALIFORNIA PROPOSITION 65 WARNING
Engine exhaust from this product contains chemicals
known, in certain quantities, to cause cancer, birth
defects, or other reproductive harm.
CAUTION
CAUTION
For easy reference, please record the
information on the chart below.
The Rototiller Reference Data can be found on an
identification tag located on the engine mount. (Refer to
the engine manual for location of engine information and
serial number.)
ROTOTILLER REFERENCE DATA
Model Description/Number
M/N (Manufacturer's Number) S/N (Serial Number)
Dealer Name Date Purchased
ENGINE REFERENCE DATA
Engine Make/Model Engine ID/Serial Number
ARDISAM
3
TABLE OF CONTENTS
WARRANTY AND REGISTRATION...................................................................................................... 2
TABLE OF CONTENTS ........................................................................................................................ 3
OPERATION SAFETY .......................................................................................................................... 4-5
Owner's Responsibility ................................................................................................................. 4
Cautions and Important Notes ..................................................................................................... 4
Important Safety Instructions ....................................................................................................... 4-5
UNPACKING AND ASSEMBLY ............................................................................................................. 6-14
Unpack Tiller................................................................................................................................. 7-8
Registration Form ......................................................................................................................... 8
Install the Drag Stake ................................................................................................................... 9
Attach Throttle Lever and Cable Assembly to Handlebar ............................................................. 9-10
Attach Handlebar to Tiller ............................................................................................................. 10-11
Attach Throttle Cable and Control ................................................................................................ 11-12
Adjust Throttle Control Autochoke and Kill Functions .................................................................. 12
Attach Shift Lever Rod ................................................................................................................. 13
Fill Engine Crankcase .................................................................................................................. 13-14
CONTROLS AND ADJUSTMENTS ...................................................................................................... 15-18
Wheel Lockout Butterflies ............................................................................................................. 15
Shift Lever Rod ............................................................................................................................. 16
Forward Belt Position ................................................................................................................... 16-17
Drag Stake ................................................................................................................................... 17
T-clamp ......................................................................................................................................... 18
Throttle Control ............................................................................................................................ 18
OPERATION AND TILLING TIPS ......................................................................................................... 19-21
Check Oil and Gas Levels ............................................................................................................ 19
Check Position of Wheels and Wheel Lockout Butterflies and Wheel Lockpins ........................... 19
Check Drag Stake Adjustment .....................................................................................................19
Start the Engine ........................................................................................................................... 20
Tilling ............................................................................................................................................ 20
Turning ......................................................................................................................................... 21
Tilling Tips .................................................................................................................................... 21
Cultivating Tips ............................................................................................................................. 21
MAINTENANCE AND STORAGE ......................................................................................................... 22-27
Check Forward Belt Tension ......................................................................................................... 22
Check Reverse Belt/Change Reverse Belt ................................................................................... 23
Engine Maintenance .................................................................................................................... 24
Check Tiller Transmission Grease ................................................................................................ 24-25
Periodic Cleaning of the Tine Axle Shaft ...................................................................................... 25
Storage ......................................................................................................................................... 25-26
Check Tire Pressure ..................................................................................................................... 26
Throttle Adjustment ...................................................................................................................... 26
Tiller and Engine Maintenance Schedule ..................................................................................... 27
SERVICE, TROUBLESHOOTING, & REPAIR ...................................................................................... 28-36
Service Information ...................................................................................................................... 28
Ordering Repair Parts .................................................................................................................. 28
Troubleshooting ............................................................................................................................ 29-30
Repair Parts ................................................................................................................................. 31-38
SPECIFICATIONS................................................................................................................................. 39
ACCESSORIES & OTHER PRODUCTS ........................................................................................ back cover

ARDISAM
4
OPERATION SAFETY
Section Checklist ❑Owner's Responsibility
❑Cautions and Important Notes
❑Important Safety Instructions
Accurate assembly, safe and effective use of the rototiller is the
owner's responsibility.
1. Read and follow all safety instructions.
2. Carefully follow all assembly instructions.
3. Maintain the tiller according to directions and schedule included.
4. Ensure that anyone who uses the tiller is familiar with all controls
and safety precautions.
❒❒
❒❒
❒Owner's Responsibility
Two symbols which draw attention to information of special
importance appear throughout this manual. These comments range in
importance from helpful hints to warnings about risk of personal
injury. Please take the time to read and understand them.
❒❒
❒❒
❒Cautions and Important
Notes
Please read this section carefully. Operate the tiller according to
the safety instructions and recommendations outlined here and
inserted throughout the text. Make sure anyone who uses the tiller
has read the instructions and is familiar with the controls.
General
•CAREFULLY READ THIS MANUAL AND FOLLOW ALL
INSTRUCTIONS.
• Be familiar with all controls before operating the tiller. Practice
using the controls without the wheels and tines engaged. Your
tiller is equipped with a safety device that enables you to stop the
wheels and tines quickly in an emergency. Learn how the shift
lever rod works and how to control the tiller at all times.
• Never allow children to operate the tiller. Keep small children
away from the area being tilled. Do not allow adults to operate
the tiller without proper instruction.
❒❒
❒❒
❒Important Safety
Instructions
Provides helpful information
for proper assembly,
operation, or maintenance of
your rototiller.
Indicates a situation which may
cause personal injury or damage
to the rototiller or property. It
means - attention! Become alert!
Your safety is involved.
IMPORTANT

ARDISAM
5
Preparation
• Dress appropriately when operating the tiller. Always wear sturdy
footwear. Never wear sandals, sneakers, or open shoes, and never
operate the tiller in bare feet. Do not wear loose clothing that
might get caught in moving parts.
• Carefully inspect the area to be tilled. Do not till above
underground water lines, gas lines, electric cables, or pipes. Do
not operate the tiller in soil with large rocks and foreign objects
which can damage the equipment.
Operation
• Never operate the tiller without guards, covers, and hoods in place.
• Never start the engine or operate the tiller with the wheels in the
free wheel position. Make sure the wheel lockout butterflies are
engaged through wheel hubs and wheel axle. The wheels act as
brakes to keep the tiller at a controlled speed. Disengage wheel
lockout butterflies to permit free wheeling only when engine is
stopped.
• Keep feet, hands, and clothing away from rotating tines.
• Tines and wheels rotate when tiller is engaged in forward or
reverse-- in forward, tines and wheels rotate when the shift lever
rod is pushed forward; in reverse, tines and wheels rotate when the
shift lever rod is pulled to the rear. Releasing the shift lever rod to
its neutral position stops the tines and wheels.
• Be extremely cautious when operating in reverse. Take extra care
to avoid slipping or falling, and to keep feet clear of tines.
• If vegetation clogs the tines, raise the handlebars to elevate the
tines, and run the tiller in reverse. If this does not clean clogged
vegetation from the tines, STOP THE ENGINE AND
DISCONNECT THE SPARK PLUG WIRE before removing
vegetation by hand.
• Engine muffler may be hot from operation. Do not touch it with
bare skin or a severe burn may result.
• Always stop the engine when the tiller is unattended.
• Always leave the shift lever rod in neutral when engine is not
running.
Maintenance and storage
• To prevent accidental starting, always disconnect the spark plug
wire from the spark plug before performing tiller maintenance.
• Never run the engine indoors. Exhaust fumes are deadly.
• Always allow muffler to cool before filling fuel tank.
• Never store equipment with gasoline in the tank inside a closed
building where fumes may reach an open flame or spark. Allow
the engine to cool before storing in any building.
OPERATION SAFETY

ARDISAM
6
UNPACKING AND ASSEMBLY
Section Checklist ❑Unpack Tiller
❑Complete and Return Registration Form
❑Install the Drag Stake
❑Attach Throttle Lever and Cable Assembly to Handlebar and
Connect Cable to Engine
❑Attach Handlebar to Tiller
❑Attach Throttle Cable and Control
❑Adjust Throttle Control Autochoke and Kill Functions
❑Attach Shift Lever Rod
❑Fill Engine Crankcase
Your rototiller comes fully assembled except for a few parts
which are described below. The following instructions will
help you unpack your tiller and assemble and adjust the tiller's
drag stake, throttle lever and cable assembly, handlebar, and
shift lever rod. You will need a screw driver, a 1/2" and a 9/16"
wrench, and a rubber mallet or wood block and hammer.
Air Cleaner
Recoil Start
Serial Number
Belt Guard
Detent Pin
Drag Stake
Wheel Lockout Butterfly
T-handle Throttle Control
Shift Lever Rod
T-clamp
The right and left sides of your
rototiller are determined from
the operating position as you
face the direction of forward
travel.
IMPORTANT

ARDISAM
7
❒❒
❒❒
❒Unpack Tiller For Model 5020D Only
1. Remove handlebars and other loose parts.
Packing list:
❑parts packet with owner's manual
❑shift lever rod
❑drag stake
❑handlebars
❑tiller
2. Cut carton open at engine end and lay end
panel flat.
Wheels are shipped in the tilling position, that is, with wheel lockout
butterfly positioned in both the wheel hub and the axle. To roll tiller
from carton:
3. Release both wheels to neutral as follows.
4. Pull knob away from machine. Rotate wheel lockout butterflies to
neutral position by turning them 90o.
5. Wheels are now free to rotate.
6. Roll rototiller out of carton.
Wheel lockout butterfly
in tilling position.
Wheel lockout butterflies must always be in the
tilling position when engine is running. The
only reason to set wheels in the free wheel
position is to move the tiller when the engine
is not running. The wheels act as a brake to
control the travel speed of the tiller.
CAUTION
Do not try to lift the rototiller from the carton.
CAUTION
UNPACKING AND ASSEMBLY

ARDISAM
8
For Model 3515D Only
1. Remove handlebars and other loose parts.
Packing list:
❑parts packet with owner's manual
❑drag stake
❑handlebars
❑tiller
2. Cut carton open at engine end and lay end
panel flat.
Wheels are shipped in the tilling position, that is, with wheel
lockpins inserted through both the wheel hub and the axle. To roll
tiller from carton:
3. Release wheels by removing wheel lockpins.
4. Slide wheels toward transmission.
5. Replace wheel lockpins in axle holes only, and lock pins. Wheels
are now free to rotate.
6. Roll rototiller out of carton.
Free Wheel Drive Position
(wheel lockpin in axle hole only)
❒❒
❒❒
❒Registration Form Complete and return.
Your rototiller has a serial number on the engine mount in front of
the left wheel. Record this number and the model number in the
space provided on page 2 of this manual. You will need these
numbers if you order parts.
Fill out and mail the registration card in your parts packet.
Warranty is valid only if your completed registration card is received
by Ardisam, Inc., within two weeks of the purchase date.
UNPACKING AND ASSEMBLY

ARDISAM
9
❒❒
❒❒
❒Install the Drag Stake 1. Insert the drag stake into the top of the depth regulator bracket
with handle facing rearward.
2. Remove detent pin from parts packet.
3. Insert detent pin through depth regulator bracket and top hole of
drag stake--tines should clear the ground.
NOTE: The drag stake is now in the transport position.
❒❒
❒❒
❒Attach Throttle Lever and
Cable Assembly to
Handlebar
1. Remove throttle lever and cable assembly, and two small slotted
screws, nuts, and lockwashers from parts packet.
2. Insert the throttle lever through the slot in the upper crossbar,
aligning the holes in the lever body with the holes in the crossbar,
Insert screws through the upper crossbar and throttle lever. Install
lockwashers and nuts and tighten with a screwdriver.
UNPACKING AND ASSEMBLY

ARDISAM
10
❒❒
❒❒
❒Attach Handlebar to Tiller 1.Loosen handlebar height adjustment bracket by loosening both
bolts with a 1/2" wrench.
2.Unscrew T-clamp and both washers from handlebar assembly.
3. Remove black plastic T-handle from parts packet and place on
throttle lever. Strike T-handle with rubber mallet or place wood
block on top and strike gently with hammer until the T-handle is
firmly seated on the throttle lever.
lock washer
flat washer
3/8” bolts
lock nuts
handlebar
mounting tabs transmission
cover
height
adjustment
bracket bolts
height adjustment
bracket
handlebar
lower crossbar
t-clamp
UNPACKING AND ASSEMBLY

ARDISAM
11
❒❒
❒❒
❒Attach Throttle Cable and
Control
NOTE: When installed, the engine throttle cable is routed along the
right side of the handlebar and is attached to the engine.
1. Unscrew the wing nuts on the belt guard and remove the belt
guard from the tiller.
2. Remove cable casing clamp and screw located beneath gas tank
on right side of engine (see drawing below).
3. Insert end of throttle cable wire into top hole of engine speed
control (the square plastic block on the right side of the engine as
shown above).
4. Replace cable casing clamp on engine with cable casing between
the top of the screw and top of cable clamp, but do not tighten
clamp screw yet.
washers
bolts
handlebar lower crossbar
locator pin
In some engines, the cable
casing clamp may be shipped
in the forward position as
shown in the drawing to the
right. If this is the case,
reposition the clamp to the
correct position as shown.
The throttle cable must enter
the engine from the rear.
IMPORTANT
3. Attach handlebar assembly to handlebar bracket using a 9/16"
wrench, and the large bolts and nuts provided in parts packet.
NOTE: Position height adjustment bracket on top of handlebar
lower cross bar. Line up the locator pin on the crossbar in a hole in
the height adjustment bracket as shown.
4. Retighten both bolts on height adjustment bracket.
5. Replace T-clamp into handlebar, making sure both washers are
above the height adjustment bracket.
6. Tighten T-clamp.
UNPACKING AND ASSEMBLY

ARDISAM
12
5. BEFORE tightening clamp screw:
❖move throttle control lever to stop and hold it in that position.
❖while holding the control lever in the stop position, pull the
casing back through the casing clamp as far as possible.
6. Tighten clamp screw.
7. Route the throttle cable casing along the right handlebar as shown
on page 13. Use the two plastic cable ties provided to attach the
cable to the handlebar in the places shown. Draw the ties very
tight. Trim excess cable tie.
8. Replace belt guard.
❒❒
❒❒
❒AdjustThrottle Control
Autochoke and Kill
Functions
1. Remove air cleaner cover and filter.
2. Disconnect spark plug wire from spark plug.
3. Move throttle control all the way forward to choke position.
Choke valve in carburetor should be closed as shown. If not,
adjust according to the following instructions.
If choke does not fully close:
❖loosen cable casing clamp screw on carburetor.
❖advance cable casing forward until choke valve just closes.
4. Tighten cable casing clamp screw.
5. Replace air cleaner cover and filter.
6. Reattach spark plug wire to spark plug.
NOTE: Repeat this procedure to adjust throttle control functions after 3
hours of operation, or if engine is hard to start or run-on occurs.
To prevent accidental starting when adjusting
controls, always DISCONNECT SPARK PLUG
WIRE FROM THE SPARK PLUG.
CAUTION
Moving the cable casing too far forward in
clamp will prevent "STOP" function from
operating.
CAUTION
UNPACKING AND ASSEMBLY

ARDISAM
13
❒❒
❒❒
❒Attach Shift Lever Rod 1. Pass the lower end of the shift lever rod through the grommet in
the upper crossbar of the handlebar as shown.
NOTE: Shift handle should point downward.
2. Pass the lower end of the shift lever rod
through pivot on the left side of
the rod crank as shown.
3. Slide pin through hole
in shift lever rod.
❒❒
❒❒
❒Fill Engine Crankcase 1. Add and change oil according to chart below. Do not overfill. Use
a high quality detergent oil classified "For Service SC, SD, SE,
SF, SG," such as Briggs & Stratton "Warranty Certified" SAE 30
oil, part no. 100005. Use no special additives with recommended
oils. Do not mix oil with gasoline.
Adapted from Briggs & Stratton Corporation, form No. 272646-10/93
*Air cooled engines run hotter than automotive engines. Use of multi-
viscosity oils (10W-30, etc.) above 40o F (4o C) will result in high oil
consumption and possible engine damage. Check oil level more frequently
if using these types of oils.
**SAE 30 oil, if used below 40oF (4oC), will result in hard starting and
possible engine bore damage due to inadequate lubrication.
IMPORTANT
Engine is shipped from factory without oil. You
must add engine oil before starting engine.
UNPACKING AND ASSEMBLY

ARDISAM
14
2. Always check oil level before starting engine. Add oil as shown
below: oil capacity is about 2/3 quart (21 ounces or 0.6 liters).
Adapted from Briggs & Stratton Corporation, form No. 272646-10/93
UNPACKING AND ASSEMBLY

ARDISAM
15
Section Checklist ❑Wheel Lockout Butterflies--place wheels in free wheel
or tilling position
❑Shift Lever Rod--select forward, neutral, and reverse and
engage tines and wheels
❑Forward Belt--adjust tilling speed
❑Drag Stake--adjust tilling depth
❑T-clamp--adjust handlebar height
❑Throttle Control--start and stop engine and adjust engine
speed
Place wheels in free wheel or tilling position.
To change wheel from free wheel to tilling position:
1. Pull knob away from machine until wheel lockout
butterfly rotates.
2. Rotate knob 90oso wheel lockout butterfly aligns with
neutral slot.
3. Release knob.
4. Repeat for other wheel.
NOTE: Always have
both wheel lockout
butterflies in or out. Do
not operate tiller with
only one wheel
locked.
❒❒
❒❒
❒Wheel Lockout Butterflies
Wheel lockout butterfly
in tilling position.
Belt Guard
T-clamp
Drag Stake
Shift Lever Rod
Throttle Control
Wheel Lockout
Butterfly
CONTROLS AND ADJUSTMENTS
PLEASE!
Before operating your tiller, learn the location
and function of all controls by reading this
section and the safety section.
CAUTION
Never start engine or operate tiller with wheels
in free wheel position.The free-wheel position
is for transporting the tiller long distances over
level ground--do not attempt to move the tiller
up or down steep grades in the free-wheel
position.
CAUTION

ARDISAM
16
❒❒
❒❒
❒Shift Lever Rod Select forward, neutral, and reverse, and engage tines and wheels.
You will use the shift lever rod to engage the tines and wheels in
forward and in reverse. Releasing the shift lever rod to neutral when
in reverse, will disengage the tines and wheels.
1. To put the tiller in forward, push the shift lever rod down. To stop
the tines and wheels, pull the shift lever rod to the neutral
position.
2. To put the tiller in reverse, pull the shift lever back as far as
possible and hold it in that position. The shift lever will not lock
in reverse. When the shift lever is released, the tiller will return to
neutral.
3. To put the tiller in neutral, pull back on the shift lever rod and
release. The shift lever will automatically return to the neutral
position.
NOTE: Keep feet clear of tines at all times. When operating, always
keep a firm grip on the handlebars.
❖
As a safety precaution, the shift lever rod will
not lock in reverse.
❖
To stop the wheels and tines at any time,
release the shift lever rod.
❒❒
❒❒
❒Forward Belt Position Adjust tilling speed setting.
Your tiller was shipped with the forward belt in the low speed
position. Keep the tiller in this low speed position for most jobs and,
especially, until you become familiar with its operation. To change
the tiller to the high speed setting:
1. Turn off engine. Engine must be cool.
2. Remove spark plug wire from spark plug.
3. Place shift lever rod in neutral.
4. Remove belt guard.
IMPORTANT
IMPORTANT
Forward belt does not have alternate positions.
belt is pictured in low
speed setting:
- at engine, forward belt
is on smaller pulley
- at transmission, forward
belt is on larger pulley
This information is provided here only to
introduce the controls. DO NOT START THE
ENGINE ATTHISTIME. Starting and operating
instructions are given on page 20. Please read
this section and all operating and safety
instructions before starting your tiller.
CAUTION
CONTROLS AND ADJUSTMENTS
Engine must be turned off and cool, and spark
plug wire must be removed from spark plug
before attempting to change belt speed.
CAUTION

ARDISAM
17
forward belt is
shown on rear
pulleys, correctly
positioned for low
speed
5. Move forward belt to high speed position:
- WITH ENGINE OFF and SPARK PLUG DISCONNECTED and
SHIFT LEVER ROD IN NEUTRAL, turn the engine over slowly
by using short pulls on the engine recoil rope. This will cause the
pulleys to rotate.
- With the pulleys turning, first guide the forward belt onto the
smaller pulley at the transmission, and then onto the larger pulley
at the engine. NOTE: You must make the change in this order.
NOTE:
High speed position - forward belt is on pulleys toward the
front of the tiller (large diameter pulley at the engine, small
diameter pulley at the transmission).
Low speed position - forward belt is on pulleys toward the rear
of the tiller (small diameter pulley at the engine, large
diameter pulley at the transmission).
6. Replace belt guard.
7. Replace spark plug wire.
❒❒
❒❒
❒Drag Stake Adjust tilling depth.
Tilling depth is controlled by adjusting the drag stake. During
assembly, you installed the drag stake in the transport position, with
the tines clear of the ground and the detent pin positioned in the top
hole of the drag stake.
1. Remove detent pin.
2. Raise the drag stake to position tines at chosen tilling depth.
3. Align holes and replace detent pin.
Drag Stake Up =
deeper tilling. Place
the detent pin in the
bottom hole of the
drag stake for
deepest tilling.
Drag Stake Down =
shallower tilling.
Place the detent pin
in the top hole of the
drag stake for
shallowest tilling
and transport.
CONTROLS AND ADJUSTMENTS
IMPORTANT
Forward belt must be positioned on either the front
pulleys at both the engine and transmission (for
high speed), OR the rear pulleys at both the engine
and transmission (for low speed). Never cross the
belt from a front pulley to a rear pulley.
Always set the drag stake in the transport
position before starting engine, that is, place
the detent pin in the highest hole of the drag
stake.
CAUTION
Do not adjust tilling depth unless shift lever rod
is in neutral.
CAUTION

ARDISAM
18
❒❒
❒❒
❒T-clamp Adjust handlebar height.
The ideal height of the handlebar varies with operator height and the
depth of tilling. To adjust handlebar height:
1. Unscrew T-clamp until handlebar moves freely up and down.
2. Align locator pin to desired hole in the height adjustment bracket
by raising or lowering handlebars.
3. Retighten T-clamp firmly.
❒❒
❒❒
❒Throttle Control Start and stop engine and adjust engine speed.
The throttle control regulates engine speed, starting, and stopping.
The auto choke is engaged when the throttle control is moved
forward until it stops.
1. To increase engine speed, move the throttle control forward (away
from the operator) until desired speed is reached.
2. To actuate the auto choke, move the throttle control forward until
it stops.
3. To stop the engine, move throttle control to rear (closest to
operator).
auto choke position
T-clamp
3 handlebar height settings
high
medium
low
CONTROLS AND ADJUSTMENTS
This information is provided here only to
introduce the controls. DO NOT START THE
ENGINE ATTHISTIME. Starting and operating
instructions are given on page 20. Please read
this section and all operating and safety
instructions before starting your tiller.
CAUTION

ARDISAM
19
Section Checklist ❑Check Oil and Gas Levels
❑Check Position of Wheels, Wheel Lockout Butterflies and
Wheel Lockpins
❑Check Drag Stake Adjustment
❑Start the Engine
❑Tilling
❑Turning
❑Tilling Tips
❑Cultivating
OPERATION AND TILLING TIPS
❒❒
❒❒
❒Check Oil and Gas Levels 1. If you did not already add oil, add it now by following instructions
on pages 13-14. Always check oil level before starting engine.
2. If necessary, add fuel. Use clean, fresh, lead-free gasoline with a
minimum of 77 octane. (Refer to your engine manual for further
information on fuel.)
IMPORTANT
The engine is shipped without oil. YOU MUST ADD
ENGINE OIL BEFORE STARTING ENGINE.
❒❒
❒❒
❒Check Position of Wheels,
Wheel Lockout Butterflies
and Wheel Lockpins
❒❒
❒❒
❒Check Drag Stake
Adjustment
Please do not start your tiller until you have
read the Manual that came with your engine,
and the sections in this manual titled Controls
and Adjustments and Safety. If you have read
these, follow the steps below to start your tiller.
Always perform this pre-start checklist before
starting the engine.
CAUTION
Never add gas when engine is running or hot
from operation. Never fill the tank indoors.
CAUTION
Wheels must always be locked in the TILLING
position when engine is running. Do not
operate the tiller without the wheel lockout
butterflies or wheel lockpins installed or with
the wheel lockout butterflies or with the wheel
lockpins unlocked. Always set the wheels in
tilling position before starting engine.
CAUTION
Always put the drag stake in the transport
position before starting engine. Tines should
clear the ground.
CAUTION

ARDISAM
20
❒❒
❒❒
❒Start the Engine 1. Put the shift lever rod in neutral.
2. Put throttle lever in choke position if engine is cold. Put throttle
lever in warm start position if engine is warm.
3. Pull start the engine. Throttle down to slow as it begins to run
smoothly. Let engine warm for a few minutes before beginning to
till.
To stop the engine at any time, move the throttle
control to stop position (the position closest to the
operator).
To stop the wheels or tines at any time, release
the shift lever rod (if tiller is in forward or reverse).
NOTE: To pull start the engine, stand to the right of the tiller. Grasp
the recoil rope and pull rapidly, but let it draw back more slowly. If
the engine does not start in 5 or 6 tries, check the troubleshooting
guide for suggestions.
❒❒
❒❒
❒Tilling Practice adjusting the controls and operating the tiller with tines out
of ground before beginning to till. It is important that you know how
to use the tiller properly, how to keep control at all times, how to
stop the tines and wheels from turning, and how to kill the engine if
necessary. If you do not know how to do these things, read the
Controls and Adjustments and Safety sections before proceeding.
1. Adjust the drag stake to desired tilling depth.
❑make sure shift lever rod is in neutral and place throttle control
at slow.
❑remove the detent pin.
❑raise the drag stake to increase tilling depth; lower the drag
stake to decrease tilling depth.
❑reinsert detent pin.
NOTE: Raise drag stake up one hole at a time, testing tiller
operation after each raise. Raising drag stake too high can result in
loss of control of tiller!
2. Place the tiller in forward by pushing down on the shift lever rod-
-this will reengage wheels and tines.
3. Move the throttle control to fast.
NOTE: You can slow the tiller's forward advance at any time by
putting slight downward pressure on the handlebars, or you can stop
the tiller by pulling up on the shift lever rod into the neutral position.
IMPORTANT
IMPORTANT
OPERATION AND TILLING TIPS
To stop wheels and tines at any time, put shift
lever rod in the neutral position.
CAUTION
Always place the shift lever rod in neutral
before adjusting the drag stake.
CAUTION
Other manuals for GARDEN STAR 5020D
1
Table of contents
Other Ardisam Tiller manuals

Ardisam
Ardisam 6065Ve User manual

Ardisam
Ardisam Earthquake Badger Series User manual

Ardisam
Ardisam BENCHMARK 38248 User manual

Ardisam
Ardisam ROTOTILLERS User manual

Ardisam
Ardisam 3515D User manual

Ardisam
Ardisam CountyLine 20970 User manual

Ardisam
Ardisam Earthquake Badger 3100 User manual

Ardisam
Ardisam R3355H Parts list manual

Ardisam
Ardisam 5055 Parts list manual