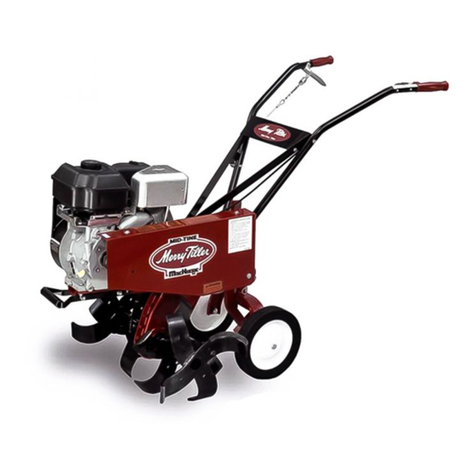
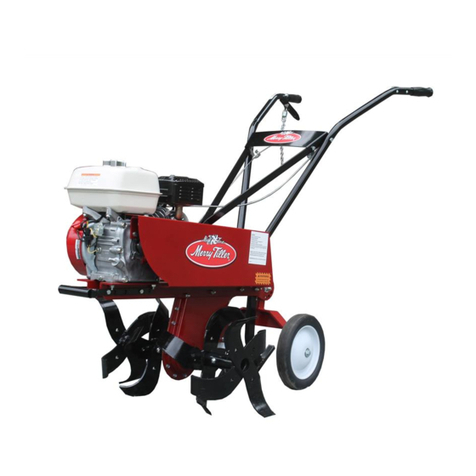
Merry Tiller ST5 5H Series User manual

OWNER’S MANUAL
Suburban Merry Tiller
Models: ST5.5H ST750IC ST6.5V
CAUTION:
Before using this product, read this
manual and follow all Safety Rules and
Operating Instructions.
MACKISSIC, INC. P.O. BOX 111, PARKER FORD, PA 19457-0111
www.mackissic.com
PART # 709-3400
05/18/2020

2
TABLE OF CONTENTS
Accessories .....................................
2
I. Safety ..............................................
3
General Preparation ............................
5
Repair and Maintenance Safety ..........
6
II. Assembly Instructions ....................
7
III. Lubrication & Engine Start Up ........
8
IV. Operation .......................................
10
V. Service - Maintenance - Repair ......
11
Belt and Clutch Adjustment .................
11
Belt Installation ....................................
12
Service Notes ......................................
12
Inspection of Transmission .................
12
Engine Maintenance
............................
13
VI. Storage ..........................................
13
Transmission Assembly Drawing ....
14
Tiller Drawing ..................................
15
Parts List
..............................................
16
Warranty .........................................
17
MERRY TILLER ACCESSORIES
AVAILABLE WHEREVER MERRY TILLER PRODUCTS ARE SOLD
MT-951
MT-952
MT-956
MT-1701
MT-1702
MT-1703
MT-1812
MT-1813
MT-2492
MT-2857
MT-7801
MT-7802
MT-7875
Finger Tine Assemblies - Right and Left Inside
Finger Tine Assemblies - Right and Left Outside
Pick Tine Assemblies (1 set)
Slasher Tine Assemblies - Right and Left Inside
Slasher Tine Assemblies - Right and Left Outside
Slasher Tine Extension Assemblies - Right and Left
Bolo Tine Assemblies - Right and Left Inside
Bolo Tine Assemblies - Right and Left Outside
Aerator Assemblies (3 spoons) Set of 4
Finger Tine Extension Assemblies (1 complete set)
8” Furrower
10” Furrower
Adjustable Plow Bar

3
SECTION I - SAFETY
This symbol points out important safety instructions which, if not followed,
could endanger the personal safety and/or property of yourself and others. Read
and follow all instructions in this manual before attempting to operate your tiller.
Failure to comply with these instructions may result in personal injury. When you
see this symbol - heed its warning.
INTENDED USE
Never use your tiller for any other purpose than cultivating soil and use only approved
attachments and accessories. It is designed for this use and any other use may cause
injury.
DANGER: Rotating tines and belt.
Keep hands and feet out of tines and belt area while machine is running.
DANGER: This machine can CRUSH, CUT, and SEVER parts of your body if they enter
the operating areas of the garden tiller.
Make certain that all safety labels on this equipment are kept
clean and in good condition.
If you need replacement labels, please order by part number
091-0423.

4
DANGER: Your tiller was built to be operated according to the rules for safe operation in this
manual. As with any type of power equipment, carelessness or error on the part of the
operator can result in serious injury. If you violate any of these rules, you may cause
serious injury to yourself or others.
WARNING: The Engine Exhaust from this product contains
chemicals known to the state of California to cause cancer,
birth defects or other reproductive harm.
OPERATORS INSTRUCTIONS
STARTING:
1. Remove or rotate wheels to up position.
2. Adjust drag bar for desired depth.
3. Stand between handlebars.
4. Allow clutch lever to drop into disengaged position.
5. Move throttle lever to run position.
6. Reach forward to set choke lever to choke position.
7. Hold left handlebar with left hand and pull starter
rope with right hand.
8. As engine starts, return choke lever to run
position and adjust throttle for desired speed.
TILLING:
Squeeze clutch lever to start tilling. Apply downward
pressure on handles to allow drag bar to control
forward motion of tiller. Certain tilling conditions
require tiller to be run at a reduced throttle speed.
STOPPING:
Release clutch lever and move throttle to stop position.

5
GENERAL PREPARATION
•Read the owner’s manual carefully and in its
entirety before attempting to assemble this
machine. Be thoroughly familiar with the
controls and the proper use of the equipment
before operation. Know how to stop the unit
and disengage the controls quickly.
•Your tiller is a powerful tool, not a plaything.
Therefore, exercise extreme caution at all
times.
•Never allow children to operate the
equipment. Only responsible adults who are
familiar with these rules of safe operation
should be allowed to use your unit.
•Keep the area of operation clear of all
persons, particularly small children, and pets.
Thoroughly inspect the area where the
equipment is to be used and remove all
foreign objects.
•Wear sturdy, rough-soled work shoes and close
fitting slacks and shirt. Slacks that cover the legs
and steel-toed shoes are recommended. Secure
hair above shoulders and do not wear loose
clothes that can be caught in moving parts.
Never operate a unit in bare feet, sandals or
sneakers.
•Do not operate while under the influence of
alcohol or drugs.
•If the tines strike a foreign object or if your
machine should start making an unusual noise or
vibration, immediately stop the engine and allow
the machine to come to a complete stop.
Disconnect the spark plug wire and move it away
from the spark plug.
Take the following steps:
a. Inspect for damage.
b. Repair or replace any damaged parts.
c. Check for any loose parts and tighten to assure
continued safe operation.
•Handle fuel with care; it is highly flammable.
•Refer to engine manual for safety and
service instructions.
•Disengage clutch before starting the engine
(motor).
•Never attempt to make any adjustments
while the engine (motor) is running (except
where specifically recommended by the
manufacturer).
•DO NOT put hands or feet near or under rotating
parts.
•Exercise extreme caution when operating on or
crossing gravel drives, walks, or roads. Stay
alert for hidden hazards of traffic. Do not carry
passengers.
•Stop the engine (motor) when leaving the
operating position. Disconnect the spark plug
before unclogging the tines, and when making
any repairs, adjustments, and inspections.
•Periodically check tines and remove any vines or
garden debris that may be wrapped around the
tine shaft. Before cleaning, repairing, or
inspecting, shut off the engine and make certain
all moving parts have stopped. Disconnect the
spark plug wire, and keep the wire away from the
plug to prevent accidental starting.
•Do not run the engine indoors; exhaust fumes are
dangerous.
•NEVER operate the tiller without proper guards,
plates, or other safety protective devices in place.
•Do not overload the machine’s capacity by
attempting to till too deep at to fast a rate.
•Only operate your tiller in good daylight. Do not
operate tiller at night or in dark areas where your
vision may be impaired.
•Be careful when tilling in hard soil or frozen
ground. The tines may catch in the ground and
propel the tiller forward. If this occurs, release
clutch lever to stop forward motion.
CHILDREN
•Tragic accidents can occur if the operator is not alert to the presence of small children.
•Keep children out of the work area and under the watchful eye of a responsible adult other than the operator.
•Be alert and turn the unit off if a child enters the area.
•Never allow children under the age of 16 to operate the tiller.

6
•REPAIR AND MAINTENANCE SAFETY
•Use extreme care in handling gasoline and other
fuels. They are extremely flammable and the
vapors are explosive.
•Store fuel and oil in approved containers, away
from heat and open flame, and out of the reach
of children. Check and add fuel before starting
the engine. Never remove gas cap or add fuel
while the engine is running. Allow engine to cool
at least three minutes before refueling.
•Replace gasoline cap securely and wipe off any
spilled gasoline before starting the engine as it
may cause a fire or explosion. Extinguish all
cigarettes, cigars, pipes and other sources of
ignition.
•Never refuel unit indoors because flammable
vapors will accumulate in the area.
•Never store the machine or fuel container inside
where there is an open flame or spark, such as
a gas hot water heater, space heater, clothes
dryer or furnace.
•Never run this machine in an enclosed area as
the exhaust from the engine contains carbon
monoxide, which is an odorless, tasteless, and
deadly poisonous gas.
•To reduce fire hazard, keep engine and muffler
free of debris build-up. Clean up fuel and oil
spillage. Allow unit to cool at least five minutes
before storing.
•Before cleaning, repairing, or inspecting, make
certain the tines and all moving parts have
stopped. Disconnect the spark plug wire and
keep wire away from spark plug to prevent
accidental starting. Do not use flammable
solutions to clean air filter. NOTE: If the engine
is equipped with a fuel shut off valve, be sure to
turn it to the off position.
•Check the belt and engine mounting screws at
frequent intervals for proper tightness. Also
visually inspect tines for wear or damage. Use
only replacement tines which meet original
manufacturer’s specifications.
•Never tamper with safety devices. Check their
proper operation regularly. Be sure all safety
guards and shields are in proper position.
These safety devices are for your protection.
•Never operate your tiller in poor mechanical
condition or when in need of repair. Periodically
check and keep all nuts, bolts, and screws tight
to be sure the equipment is in safe working
condition.
•Inspect the belt each time you use the unit.
Look for damage, worn areas, or tears. Do not
use the unit if this condition exists.
•If your machine strikes any foreign object or
starts making an unusual noise or vibration,
immediately shut off engine, disconnect spark
plug wire from spark plug, and allow all moving
parts to come to a complete stop. Inspect for
damage and repair and or replace damaged
parts. Check for and tighten any loose parts.
•Do not tamper with the engine’s governor
setting. The governor controls the maximum
safe operation speed and protects the engine.
Over revving the engine is dangerous and will
cause damage to the engine and to the other
moving parts of the machine. See your
authorized dealer for engine governor
adjustments.
YOUR RESPONSIBILITY
•Restrict the use of this power machine to persons who read, understand and
follow the warnings and instructions in this manual and on the machine.
SAVE THESE INSTRUCTIONS
FOR FUTURE REFERENCE.
HAZARD: This unit is equipped with an internal combustion engine
and should not be used on or near any unimproved forest-covered,
brush-covered or grass-covered land unless the engine’s exhaust
system is equipped with a spark arrester meeting applicable to local or
state laws (if any). If a spark arrester is used, it should be maintained
in effective working order by the operator.
In the State of California, the above is required by law (Section 4442 of the California Public
Resources Code). Other states may have similar laws. Federal laws apply on federal lands. A
spark arrester for the muffler is available through your engine manufacturer’s servicing dealer.

7
SECTION II - ASSEMBLY INSTRUCTIONS
PACKAGE CONTENTS
BOX
POLYBAG
BOLT BAG
•TILLER
•OWNER’S MANUAL
•1 EA CLUTCH SPRING
•2 EA 10-32 X 1 1/4 RHMS
•HANDLE BARS (2)
•ENGINE MANUAL
•1 EA PULL CORD HOLDER
•5 EA 1/4 X 20 NYLOCK NUT
•TIE BARS (2)
•WARRANTY CARD
•2 EA CABLE GUIDE
•2 EA 5/16-18 X 3/4 HHCS
•OUTSIDE TINES (2)
•CLUTCH CABLE
•2 EA 3/8 X 2 1/4 CLEVIS PIN
•2 EA 5/16 X 1 3/4 HHCS
•POLYBAG
•CROSS BRACE
•2 EA 1/8 HAIR SPRING COTTER
•4 EA 5/16-18 X 1 HHCS
•CLUTCH CONTROL LEVER
•2 EA 10-32 KEP NUT
•8 EA 5/16-18 NYLOCK NUT
•BOLT BAG
•1 EA 1/4-20 X 1 ½ HHCS
•
NOTE: All items in this section refer to the item numbers on assembly drawings on page 16
TOOLS REQUIRED FOR ASSEMBLY
•1/2”, 7/16”, 3/8” Wrench or Socket
STEP I - Unpacking and Checking Contents
1. Remove all parts and liners from carton
2. Slit carton ends, leaving the tiller available for assembly without lifting it.
3. After unpacking the shipping carton, compare items with list above. Use the parts lists and assembly
drawings on pages 17-19 for additional identification assistance.
4. If any parts are missing or damaged, contact your local dealer, distributor, or call the factory.
5. Assembly should be done on a clean, level surface
STEP II - Attaching Handles, Cross Brace and Tie Bars
1. Attach lower ends of handles (item #31 & # 34, pg. 16/17) to frame rails
(item #17 & #18, pg. 16/17). Use the 5/16-18 x 1” HHCS (item #51, pg.
16/17) and the 5/16-18 nylock nut (item #41, pg. 16/17) to attach each
handle. Do not completely tighten the bolts and nuts at this time.
2. Remove the three bolts and whiz nuts on the transmission where the tie
bars (item #28 & #29, pg. 16/17) will connect. Discard the whiz nuts.
Place the tie bars on both sides of the transmission case flange and put
the 1/4-20 x 1 1/4 bolts you just removed through the three holes in the
tie bars and transmission and hand tighten with three 1/4-20 nylock
nuts from the bolt bag.
3. To attach the cross brace, place a 5/16-18 x 1 3/4 HHCS (item #10, pg.
16/17) through the upper holes of the handle, tie bar, and cross brace.
Hand tighten a 5/16-18 nylock nut (item #41, pg. 16/17) to these bolts.
Attach two cable guides (item #50, pg. 16/17) to the inside of the cross
brace by placing a 5/16-18 x 3/4 HHCS (item #48, pg. 16/17) through
the lower hole in the tie bar, cross brace, and then through the cable
guide. Hand tighten a 5/16-18 nylock nut on both sides.
4. Tighten all nuts and bolts in the same order as installation of steps 1-3.

8
STEP III - Attaching the Throttle Control Cable, Clutch Cable and Starter Rope
1. Insert throttle control (item #52, pg. 16/17) through cable guide (item #50, pg. 16/17). Attach throttle control to
handlebar with 2 ea. 10-32 x 1 1/4 machine screw (item #33, pg. 19) and 2 ea. 10-32 Kep nut (item #32, pg.
19) provided in the bolt bag.
2. Insert clutch cable through the cable guides (item #50, pg. 16/17) on the cross brace and the transmission.
Slip lower cable loop (end without chain attached) over adjustment link (item #25, pg. 16/17). Attach clutch
control lever (#31B, pg. 16/17) to right hand handlebar with a 1/4-20 x 1 ½ HHCS (#31D, pg. 16/17) and a
1/4-20 nylock nut (#31D, pg. 16/17). Attach clutch spring (item #43, pg. 16/17) to the clutch control lever
(item #31B, pg. 16/17). Now attach the clutch cable chain to the spring.
3. Disconnect the spark plug. Grasp the starter pull cord and pull it 6” past the cross brace. String the cord into
the eye of pull cord holder (item #54, pg 16/17) from the bolt bag. Put the pull cord holder through the hole
below the cross brace. Secure with a 1/4-20 nylock nut from the bolt bag.
NOTE: Models with Honda engines do not provide an extended rope pull. This engine is equipped with
an on/off switch that requires the engine to be stated and stopped from the engine position

9
SECTION III - LUBRICATION & ENGINE START UP
FOR INFORMATION ABOUT:
❑OIL
❑FUEL
❑STARTING
❑STOPPING
❑RECOMMENDED MAINTENANCE
❑SERVICE
❑STORAGE
❑ENGINE WARRANTY INFORMATION
REFER TO THE ENGINE OWNER’S MANUAL.
THE ENGINE ON YOUR SUBURBAN TILLER HAS BEEN SHIPPED DRY.
BE SURE TO SERVICE THE ENGINE ACCORDING TO THE
ENGINE OWNER’S MANUAL PRIOR TO STARTING.
FAILURE TO DO SO CAN RESULT IN DAMAGE NOT WARRANTIED BY THE
ENGINE MANUFACTURER.
WARNING: Do not fill closer than ½” from the top of the fuel tank to prevent spills and to allow for fuel expansion.
If gasoline is accidentally spilled, move the mower away from the area of the spill. Avoid creating any source of
ignition until gasoline vapors have disappeared.
CAUTION: Experience indicates that alcohol blended fuels (gasohol, ethanol, methanol) can attract moisture
which leads to separation and formation of acids during storage. Acidic gas can damage the fuel system or an
entire engine while in storage. To avoid engine problems, the fuel system should be empty before storage for
periods over 30 days. For more information, refer to the engine owner’s manual. Use fresh fuel each season.
Never use engine or carburetor cleaner products in the fuel tank or permanent damage may result.
THE TRANSMISSION HAS BEEN FACTORY SERVICED WITH “00” GREASE.
NO ADDITIONAL LUBRICATION IS NECESSARY OR RECOMMENDED.
ALWAYS CHECK OIL LEVEL PRIOR TO
STARTING THE TILLER.

10
SECTION IV - OPERATION
TILLING - This tiller is equipped with a set of rear wheels. These wheels are designed only for transporting
the tiller to and from the tilling area. They should never be used during the tilling process. When at the
tilling site, lean the tiller forward until resting on the frame rails. Grab the ring on the pin holding the wheels in
place, pull it out and swing the wheels up and out of the way. Pull the upper pin out and lock the wheels into the
upper position with this pin. Adjust the dragbar by pulling the third pin out and raising or lowering it to the desired
tilling depth. The drag bar acts as an anchor, which forces the tiller to dig rather than walk over the area to be
tilled, and controls the forward motion of the tiller. By adjusting the downward pressure on the handlebars, the
operator controls the drag bar depth and the tiller will perform properly with a minimum of assistance.
1. NEVER allow bystanders near the unit.
2. DO NOT put hands or feet near or under rotating parts.
3. Exercise extreme caution when operating on or crossing gravel drives, walks, or roads. Stay alert for
hidden hazards of traffic. DO NOT carry passengers.
4. Exercise caution to avoid slipping or falling.
5. Never operate the machine at high transport speeds on slippery surfaces.
6. Do not overload the machine’s capacity by attempting to till TOO DEEP at too FAST a rate.
7. Be careful when tilling in hard soil or frozen ground. Certain soil conditions require the engine to be run at a
reduced speed or the tines may catch in the ground and propel the tiller forward. If this occurs, release clutch
lever to stop forward motion.
8. After striking a foreign object, STOP the engine, remove the wire from the spark plug, thoroughly inspect the
tiller for any damage before restarting and operating the machine.
9. If the unit should start to VIBRATE abnormally, STOP the engine (motor) and check immediately for the
cause. Vibration is generally a warning of trouble.
10. STOP the engine (motor) when leaving the operating position. Disconnect the spark plug wire before
unclogging the tines, and when making any repairs, adjustments, and inspections.
11. Take all possible precautions when leaving the machine unattended. Release the clutch lever and stop the
engine.
12. Periodically check tines and remove any vines or garden debris that may be wrapped around tine shaft.
BEFORE cleaning, repairing, or inspecting, shut off the engine and make certain all moving parts have
stopped. Disconnect the spark plug wire, and keep the wire away from the plug to prevent accidental starting.
13. Do NOT run the engine INDOORS; exhaust fumes are dangerous.
14. NEVER operate the tiller without proper guards, plates, or other safety protective devices in place.
15. Use only attachments and accessories APPROVED by the manufacturer of the tiller.
16. Never operate the tiller without good visibility of light.

11
SECTION V - SERVICE - MAINTENANCE - REPAIR
The transmission has been factory serviced with “00” grease. No additional lubrication
is necessary or recommended.
Belt tension should be checked, and adjusted if necessary, after initial 20 to 30 minutes
of operation. Follow directions below.
Belt and Clutch Adjustment
CAUTION: DO NOT ADJUST BELT OR CLUTCH WITH THE ENGINE RUNNING!
•For proper belt tightness and tiller operation, the distance from the center
of the engine crankshaft (A), to the center of the transmission input shaft
(B), should measure 14 3/4”.
•Proper clutch adjustment is very important. The idler type clutch may
need adjusting as the belt stretches.
•To check belt and clutch adjustment, start the tiller, press down on the
handle bars to raise the tines into the air, and squeeze the clutch lever. If
adjusted correctly, the tines will rotate while the clutch lever is squeezed
and stop when it is released. When the lever is squeezed tight, the clutch
spring (item #43, pg. 15) should be slightly stretched (about 1/4 inch).
If your tines fail to operate as described above, adjustment can be made in the following ways.
1. Switch the link on the end of the clutch cable (item #53, pg. 15) which is attached to the clutch spring (item
#43, pg. 15). A link closer to the cable will tighten the adjustment, a link further away from the cable will
loosen the setting.
2. Loosen the nut holding the adjustment link (item #25, pg. 15). While holding idler arm and pulley
(item #20 & #22, pg.15) firmly, adjustment link can be moved up (counterclockwise) to loosen
clutch, or moved down (clockwise) to tighten clutch. After making any change in position of
adjustment link, re-tighten nut.
3. Additional adjustment can also be made by loosening the four bolts (item #10, pg. 15) holding the engine to
the engine mounts (items #17 & #18, pg. 15) and sliding the engine forward or backward as needed. Re-
tighten engine mount bolts. This adjustment is almost never needed and should not be made unless all
other adjustments fail.
Belt Installation and Alignment of Pulleys
1. Whenever a new belt is installed be sure to examine the grooves of the pulleys for wear. A wide groove of a
worn engine pulley will cause slippage of the belt when the clutch is engaged. Replace the pulley if worn.
2. The pulleys must be aligned by sliding the engine pulley in or out so that the belt will travel in a straight line.
3. Be sure to install the belt inside the two pins of the belt release bracket. If improperly installed on the outside
of the belt release pins, the belt will be quickly damaged, and/or jump off pulleys.
4. Start the engine and test the clutch for proper operation.
5. Reinstall the belt cover.
6. Check belt tension after initial 20 to 30 minutes of operation with a new belt. Be sure your tiller operates as
per the directions in this section.
NOTE: The purpose of the belt release bracket is to force the belt out of the engine pulley groove, allowing it to
slip when clutch lever is not engaged.
•Proper maintenance includes periodic inspection and lubrication of the tiller by the operator, using the correct
lubricants. This will ensure long life of the tiller.
•Keep machine, attachments, and accessories in safe working condition.
•Check engine mounting bolts, and other bolts at frequent intervals for proper tightness to be sure the
equipment is in safe working condition.

12
Service Notes
1. The transmission has been factory serviced with “00” grease. NO additional lubrication is necessary
or recommended.
2. Service the engine according to the engine operating and maintenance instructions furnished with the tiller.
Special attention should be given to the proper installation and service of the engine air filter assembly.
3. Regularly check tines for wear. Tine clevis pin holes should be checked for wear or elongation. Tine
assemblies should be replaced when lead corner on cutting edge has become rounded, therefore reducing
tilling efficiency.
4. Proper maintenance includes periodic inspection and lubrication by the operator, using the correct lubricants.
This will ensure long life of the tiller.
5. Keep the machine, attachments, and accessories in safe working condition.
6. Check engine mounting bolts, and other bolts at frequent intervals for proper tightness to be sure the
equipment is in safe working condition.
7. Never store the machine with fuel in the fuel tank inside a building where ignition sources are present, such
as hot water and space heaters, clothes dryers, and the like. Allow the engine to cool before storing in any
enclosure.
8. Always refer to the engine operating instructions for important details if the tiller is to be stored for an
extended period.
Inspection of the Transmission Case Assembly
When it is necessary to make internal repairs to the transmission, it is advisable to take your tiller to an
authorized MERRY TILLER dealer, especially if there are signs of excessive wear. Following are some
suggestions that will help to determine the amount of wear.
1. Before removing the transmission case from the tiller, turn the large pulley by hand and observe whether or
not the rotor shaft also turns. If it does not, or if the pulley turns freely, check to be certain the square key
securing the pulley to the drive shaft is not missing or damaged. This could cause the pulley to slip on the
shaft.
2. Turn the large pulley in either direction until all the slack is removed from the chains and sprockets within the
transmission. Make a mark on the tine shaft and the outer edge of the large pulley. Then, while observing
both the mark on the pulley and the mark on the tine shaft, turn the large pulley in the opposite direction until
all internal slack is removed and the mark on the tine shaft just begins to move. The mark on the large pulley
should not travel a distance of more than 3 inches (7.6 centimeters) before the mark on the tine shaft begins
to move.
Any travel of the mark in excess of this indicates excessive wear inside the case of either one or both chains,
sprockets, shafts, or bearings. The case should be removed and disassembled for internal inspection.
Engine Maintenance
CHECK THE ENGINE OWNER’S MANUAL FOR RECOMMENDED REGULAR MAINTENANCE.
By following the engine maintenance schedule, you will obtain maximum engine and tiller life. The four-cycle
engine of your tiller will normally consume some oil, so check engine oil level regularly and before each use.

13
MERRY TILLER SERVICE BULLETIN
TIME TO CHANGE THE TINE SHAFT SEALS
Tine Shaft Seal Replacement Instructions
It is extremely important that the oil seals on the tiller transmission be inspected and replaced regularly to ensure proper lubrication and to
prevent dirt from entering the transmission. Both sides of the tine shaft have two oil seals. These seals are inserted back to back over the tine
shaft. The inner seal faces into the transmission and is designed to keep lubricant from escaping from the transmission. The outer seal faces
outward and is designed to keep dirt out of the transmission. The Merry Tiller transmission is lubricated with heavy “00” grease. If the seals
fail, it may not be noticed due to the heavy consistency of the grease. This is the best possible
lubricant available and will add years of life to your Merry Tiller. Seals should be inspected
regularly and replaced as needed or before periods of expected extended use.
To replace the seals proceed as follows.
1. Take a screwdriver or awl and hammer along the tine shaft until you can pry the first
seal out.
2. Repeat and take the second seal out.
3. Place the new seal on the tine shaft with smooth side facing out, and press into place.
(Note: A 1 ½” ID piece of plastic pipe works great to do this).
4. Place the second seal on the tine shaft with the smooth side facing in, and press into
place.
5. Repeat to other side of the transmission.
Note: It is very important that the smooth side of the two seals be against each other.
Replacement Parts
PART #
QTY
WHERE USED
DESCRIPTION
708-3241
1
MINNIE
OIL SEAL
708-3241-10
10
MINNIE
OIL SEAL –10 PACK
708-3241-50
50
MINNIE
OIL SEAL –50 PACK
706-0344
1
SUBURBAN/INTERNATIONAL
OIL SEAL
706-0344-10
10
SUBURBAN/INTERNATIONAL
OIL SEAL –10 PACK
706-0344-50
50
SUBURBAN/INTERNATIONAL
OIL SEAL –50 PACK
MAINTENANCE SCHEDULE
Frequency
Service required
After every use
Inspect belts & pulleys for proper alignment and excessive wear
Check operation of belt and idler, make sure tines stop & start correctly
Inspect transmission for any leakage, check all bolts for tightness. Pay particular attention to
center bolt that secures the transmission to the frame rails
Check tines for wear and excessive play, make sure no pins are missing
Perform normal engine maintenance
Every 150 hours
Inspect transmission case assembly, conduct test for excessive travel, (see attached). Check for
excessive wear on case halves
Check tine shaft and drive shaft for up and down play, if loose replace bearings.
If transmission is OK replace tine shaft and drive shaft seals
Inspect tines for wear, if cutting corner is rounded replace tines. Check pin holes for elongating
and wear, make sure no pins are missing
Anytime the transmission is unbolted from the frame rails it is necessary to secure the internal
sprockets with a 5/16" rod cut to the same width of the transmission case. It is possible for the
internal sprockets to move if not secured during service
Every 600 hours
Remove transmission for internal inspection. Disassemble and inspect all parts for wear. Clean
all parts, replace worn parts as needed, relubricate with approx. 9 oz.“00” grease. Reassemble
with new case gasket and reinstall on tiller.
Anytime the transmission is unbolted from the frame rails it is necessary to secure the internal
sprockets with a 5/16" rod cut to the same width of the transmission case. It is possible for the
internal sprockets to move if not secured during service

14
SECTION VI - STORAGE
•Clean the tiller thoroughly.
•Wipe down the tiller with an oiled rag to prevent rust (use a light oil or silicone).
•Store the unit in a clean, dry area. Do not store next to corrosive material, such as fertilizer.
NOTE: If storing in an unventilated or metal storage shed, rustproof the equipment by coating with a light
oil or silicone.
Engine
It is important to prevent gum deposits from forming in essential fuel system parts such as the carburetor, fuel
hose, or fuel tank during storage. Experience indicates that alcohol blended fuels (e.g. gasohol, ethanol or
methanol) can attract moisture which leads to separation and formation of acids during storage. Acidic gas can
damage the fuel system of an engine while in storage.
•Empty the fuel tank before storing the tiller for 30 days or longer.
•Start the engine and let it run until the fuel lines and carburetor are empty.
•Never use engine or carburetor cleaner products in the fuel tank or permanent damage may occur.
•Remove the spark plug, pour approximately one tablespoon of engine oil into cylinder and crank slowly to
distribute oil. Replace the spark plug.
•Use fresh fuel next season. Do not store gasoline from one season to another.
NOTE: Fuel stabilizer is an acceptable alternative in minimizing the formation of fuel gum deposits during storage.
Fuel Stabilizer
•Follow the mix ratio found on stabilizer container when mixing stabilizer to gasoline in fuel tank or storage
container.
•Run the engine at least ten minutes after adding stabilizer to allow the stabilizer to reach the carburetor.
Do not drain the gas tank and carburetor if using fuel stabilizer.
Oil
Drain all the oil from the crankcase and refill the crankcase with fresh oil each season (this should be done after
the engine has been operated and is still warm).
DANGER: Your tiller was built to be operated according to the rules for safe
operation in this manual. As with any type of power equipment, carelessness or
error on the part of the operator can result in serious injury. If you violate any of
these rules, you may cause serious injury to yourself or others.
BEFORE STARTING ENGINE, ALWAYS CHECK OIL LEVEL!

15
709-1933 TRANSMISSION ASSEMBLY
ITEM NO.
PART NO.
DESCRIPTION
QTY.
1
1A
1B
1C
1D
2
2A
2B
2C
2D
3
4
5
6
7
8
9
10
10A
11
12
13
14
15
16
--
709-1934
706-0342
706-0343
706-0344
706-0345
709-1935
020-0014
706-0343
706-0344
706-0345
709-0147
706-0347
706-0348
709-0352
709-0651
706-2500
706-3411
709-1615
030-0093
709-1654
706-2788
706-3096
090-0453
090-0419
090-0460
060-0034
L.H. Case Half Assembly (includes 1A-1D)
Drive Shaft Seal
Tine Shaft Bearing
Oil Seal
Bearing
R.H. Case Half Assembly (includes 2A-2D)
Soft Plug
Tine Shaft Bearing
Oil Seal
Bearing
Tine Shaft Weldment
Roller Chain #50-40 Pitches
Roller Chain #35-50 Pitches
Idler Sprocket Inner Race
Tine Shaft Spacer
Drive Shaft Assembly
Caplug
Idler Sprocket Assembly (includes 10A)
Idler Sprocket Bearing
Transmission Case Gasket
1/4 x 3/4” Self Tapping Screw
1/4-20 x 1/2” HH Whiz Lockscrew
1/4-20 Whiz Locknut
5/16-18 x 2-3/4” HHCS
5/16-18 Nylock Locknut
“OO” Grease
1
1
1
2
1
1
1
1
2
1
1
1
1
1
1
1
1
1
2
1
1
17
17
1
1
1

16

17
SUBURBAN PARTS LIST
ITEM NO.
PART NO.
DESCRIPTION
QTY.
1
2
2
2
3
4
5
6
7
8
9
10
11
12
13
14
15
16
17
18
19
20
21
22
23
25
26
27
28
29
30
31
31B
31C
31D
31D
32
33
34
35
36
37
38
39
40
41
42
43
44
45
46
47
48
49
50
51
52
53
54
57
---
---
---
---
709-1933
030-0623
706-3404
030-0658
500-0058
090-0232
090-0470
030-0109
090-0060
090-0419
090-0093
090-0091
706-1368
100-0018
080-0053
709-2502
090-0408
030-0131
709-2205
709-2208
709-2647
706-3417
090-0233
030-0111
709-3409
706-0137
706-1826
100-0018
709-3136
709-3137
090-0394
706-2637
706-3254
706-0630
090-0057
090-0470
706-1539
090-0400
706-2632
706-0895
706-3419
706-3347
709-2658
709-2659
709-3080
090-0460
090-0207
706-0152
706-0924
090-0089
706-1024
090-0461
090-0066
705-0056-2
706-2243
090-0088
030-0662
706-2250
090-0467
090-0012
707-1338-A
707-1339-A
707-1704-A
707-1705-A
Transmission Assembly
ST750IC - B&S Engine
ST5.5H - Honda Engine
ST6.5V –Vanguard Engine
Guide ¾”L
1/4” Flat Washer
1/4-20 Nylock Locknut
Pulley - Transmission
1/4-20 x 1” HHCS
5/16-18 x 2-3/4” HHCS
5/16-18 x 3” HHCS
5/16-18 x 1-3/4” HHCS
Pulley - Engine
3/16 x 3/16 x 1” Shaft Key
5/16-18 x 5/16” Set Screw
Hitch-Rear
5/16-24 x 3/4” HHCS
V-Belt
L.H. Engine Mount Weldment
R.H. Engine Mount
Belt Release Bracket Weldment
Idler Arm Weldment
5/16 Flat Washer
Idler Pulley
Idler Arm Compression Spring
Adjustment Link
Cross Brace
3/16 x 3/16 x 1 Key
Tie Bar L.H.
Tie Bar R.H.
5/16” Split Lock Washer
R. H. Handle Assembly (includes 31C)
Clutch Control Lever
Handle Grip
¼-20 x 1-1/2 HHCS
¼-20 Nylock Locknut
10-32 Nut
10-32 x 1 1/4 Rd Hd Machine Screw
L.H. Handle Assembly (includes 32B)
Rear Skid Weldment
Wheel Frame Weldment
Wheel
Belt Cover
Trans. Case to Belt Cover Bracket
Engine Mount to Belt Cover Bracket
5/16-18 Nylock Locknut
3/8-16 Hex Nut
Clutch Control Spring
1/8” Hair Spring Cotter
5/16-18 x 1-1/4” HHCS
Clevis Pin
3/8 Nut Nylock
5/16-18 x 3/4” HHCS
1/2 Shoulder Bolt
Cable Guide
5/16-18 x 1” HHCS
Throttle Control
Clutch Cable Assembly
Pull Cord Holder
1/4-20 x 3/4” HHCS
L.H. Inside Slasher Tine –Not Shown
R.H. Inside Slasher Tine –Not Shown
L.H. Outside Slasher Tine –Not Shown
R.H. Outside Slasher Tine –ot Shown
1
1
1
1
2
4
7
1
3
2
1
6
1
1
4
1
2
1
1
1
1
1
4
1
1
1
1
1
1
1
2
1
1
1
1
1
2
2
1
1
1
2
1
1
1
17
2
1
7
2
7
2
2
2
2
4
1
1
1
1
3
1
1
1
1

18

19
LIMITED WARRANTY
Any product manufactured by MacKissic, Inc. and found, in the judgment of MacKissic, Inc., to be
defective in material or workmanship, will be repaired or replaced by an Authorized MacKissic Service Dealer
without charge for parts and labor to the original owner of the MacKissic product.
The MacKissic product including any defective part must be returned to an Authorized MacKissic Service
Dealer within the warranty period. The expense of delivering the product to the dealer for warranty work and the
expense of returning it back to the owner after repair or replacement will be borne by the owner. MacKissic’s
responsibility is limited to making the required repairs or replacements only. No claim of breach of warranty shall
be cause for cancellation or rescission of the sales contract of any MacKissic product. Proof of purchase will be
required by the dealer to substantiate any warranty claim. All warranty work must be performed by an Authorized
MacKissic Service Dealer.
This warranty is limited to two years from the date of original retail purchase for any MacKissic product
that is used for consumer purposes or one year for commercial and rental use.
This warranty does not cover any product that has been subject to misuse, abuse, neglect, negligence, or
accident, or that has been operated in any way contrary to or inconsistent with the operating instructions as
specified in the owner’s manual. The warranty does not apply to any damage to the product that is the result of
improper maintenance, or to any product or parts that have not been assembled or installed as specified in the
owner’s manual.
The warranty does not cover any product that has been altered or modified. In addition, the warranty
does not extend to repairs made necessary by normal wear, or by the use of parts or accessories which, in the
judgment of MacKissic, Inc., are either incompatible with the MacKissic product or adversely affect its operation,
performance or durability. This warranty does not cover engines, electric starters, batteries, and tires which are
warranted separately by their manufacturer and for a different period of time.
MacKissic, Inc. reserves the right to change the design of any product without assuming any obligation to
modify any product previously manufactured.
THE DURATION OF THE LIMITED WARRANTY IS TWO YEARS CONSUMER, ONE YEARCOMMERCIAL AND
RENTAL USE. REPAIR OR REPLACEMENT AS PROCEEDED UNDER THIS LIMITED WARRANTY IS THE EXCLUSIVE
REMEDY OF THE PURCHASER. MacKissic, INC., SHALL NOT BE LIABLE FOR ANY INCIDENTAL OR CONSEQUENTIAL
DAMAGES, EXCEPT THE LIMITED WARRANTY DESCRIBED ABOVE, ALL IMPLIED WARRANTIES (MERCHANTABILITY
AND FITNESS FOR A PARTICULAR PURPOSE) ARE SPECIFICALLY DISCLAIMED.
MacKissic, INC. ASSUMES NO RESPONSIBILITY FOR INCIDENTAL, CONSEQUENTIAL OR OTHER DAMAGES
INCLUDING, BUT NOT LIMITED TO, EXPENSE FOR GASOLINE, OIL, EXPENSE OF DELIVERING THE PRODUCT TO AN
AUTHORIZED MacKissic SERVICE DEALER AND EXPENSE OF RETURNING IT BACK TO THE OWNER, MECHANIC’S
TRAVEL TIME, TELEPHONE OR TELEGRAM CHARGES, RENTAL OF A LIKE PRODUCT DURING THE TIME WARRANTY
REPAIRS ARE BEING PERFORMED, TRAVEL, LOSS OR DAMAGE TO PERSONAL PROPERTY, LOSS OF REVENUE,
LOSS OF USE OF THE PRODUCT, LOSS OF TIME OR INCONVENIENCE.
This warranty gives you specific legal rights, and you may also have other rights that vary from state to
state.
5/18/20
This manual suits for next models
2
Table of contents
Other Merry Tiller Tiller manuals
Popular Tiller manuals by other brands

Hyundai power products
Hyundai power products HMTB55 instructions
Troy-Bilt
Troy-Bilt TB154E Operator's manual
Senix
Senix TL4QL-L1 Operator's manual
Craftsman
Craftsman 917.299850 owner's manual

Craftsman
Craftsman 917.293302 owner's manual
Parkside
Parkside PGK 1400 A1 Translation of the original instructions

