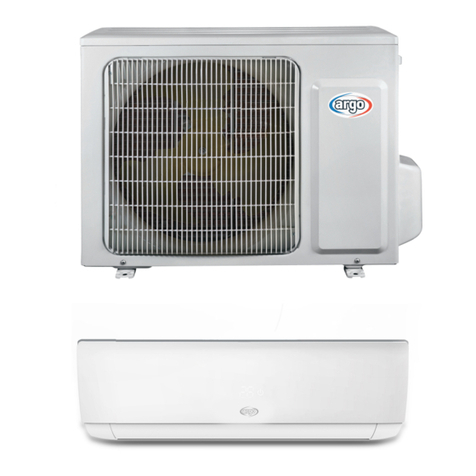
Argo AWI826HL User manual

EG
I
F
D
E
P
GR
OPERATING INSTRUCTIONS •
ISTRUZIONI D’USO
NOTICE D’UTILISATION •
BEDIENUNGSANLEITUNG
INSTRUCCIONES DE USO •
MANUAL DE INSTRUÇÕES
ΟΟΔΔΗΗΛΛΙΙΕΕΣΣΧΧΡΡΗΗΣΣΕΕΩΩΣΣ
37.4254.017.0 04/2008
Split air conditioner system •
Condizionatore d’aria split system
Climatiseurs split •
Split-klimagerät
Acondicionador de aire de consola partida sistema split •
Aparelho de ar condicionado-Sistema Split
ΔΙΑΙΡΟΥΜΕΝΕΣ ΜΟΝΑΔΕΣ ΚΛΙΜΑΣΜΟΥ
AWI826HL
AWI835HL
AWI8826HL
AWI8835HL
AWI826HLB
AWI835HLB
AWI8826HLB
AWI8835HLB

The following symbols used in this manual, alert you to
potentially dangerous conditions to users, service personnel
or the appliance:
This symbol refers to a hazard or unsafe practice which
can result in severe personal injury or death.
This symbol refers to a hazard or unsafe practice which
can result in personal injury or product or property damage.
This air conditioner is equipped with cooling, drying, heating and fan only functions.
Details on these functions are provided below; refer on these descriptions when using the air conditioner.
CONTENTS
2
NAME OF PARTS AND OPERATION SELECTOR SWITCH 3
INSTALLATION LOCATION 4
ELECTRICAL REQUIREMENTS 4
SAFETY INSTRUCTIONS 4
USING THE REMOTE CONTROL UNIT 4
REMOTE CONTROL UNIT 5
HOW TO SET THE PRESENT TIME 6
COOLING 6
HEATING 6
AUTOMATIC OPERATION 6
DEHUMIDIFYING (DRY) 6
FAN ONLY 7
ADJUSTING THE FAN SPEED 7
FILTER Ti027
SLEEP MODE 7
HIGH POWER MODE 7
SETTING THE TIMER 8
SETTING THE 1 HOUR TIMER 8
ADJUSTING THEAIR FLOW DIRECTION 8
OPERATION WITHOUT THE REMOTE CONTROL UNIT 9
CARE AND CLEANING 9
TIPS FOR ENERGY SAVING 11
TROUBLESHOOTING 11
DECLARATION OF CONFORMITY
This product is marked as it satisfies Directives:
– Low voltage no. 2006/95/CE.
– Electromagnetic Compatibility no. 89/336 EEC, 92/31 EEC and 93/68 EEC.
This declaration will become void in case of misusage and/or from non observance though partial of Manufacturer's
installation and/or operating instructions.
NOTE
PRODUCT INFORMATION
If you have problems or questions concerning your Air
Conditioner, you will need the following information. Model
and serial numbers are on the nameplate on the bottom of
the cabinet.
Model No.
Serial No.
Date of purchase
Dealer’s address
Phone number
ALERT SYMBOLS
EG
WARNING
CAUTION
INFORMATION FOR CORRECT DISPOSAL OF THE PRODUCT IN ACCORDANCE WITH THE EUROPEAN
DIRECTIVE 2002/96/EC
At the end of its working life this equipment must not be disposed of as an household waste.
It must be taken to special local community waste collection centres or to a dealer providing this service.
Disposing of an electrical and electronic equipment separately avoids possible negative effects on the environment
and human health deriving from an inappropriate disposal and enables its components to be recovered and recycled
to obtain significant savings in energy and resources.
In order to underline the duty to dispose of this equipment separately, the product is marked with a crossed-out dustbin.

3
NAME OF PARTS AND OPERATION SELECTOR SWITCH
1. Remote control unit.
2. Sensor: Detects the room temperature around the
remote control unit, the air conditioner is controlled
accordingly.
3. Air outlet : distributes filtered and treated air into the
room.
4. Receiver : receives signals transmitted from the remote
control.
5. Operation selector (without remote control): Push
the button to walk through the OFF, COOL and HEAT
operation modes.
6. OPERATION lamp: This lamp lights up during operation.
It blinks once to announce that the remote control signal
has been received and stored.
7. STANDBY lamp: This lamp lights up when the air
conditioner is connected to the power and ready to
receive the remote control command.
8. TIMER lamp: This lamp lights up when the system is
being controlled by the timer.
EG
The OFF position does not disconnect the power. Use
the main power switch to turn off power completely.
WARNING
NOTES
●It is possible to set the air conditioner in order to let
the OPERATION, TIMER and STANDBY lamps always
OFF, even during operation.
Press contemporary the IFEEL and FAN buttons on
the remote control unit for more then 5 seconds.
Repeat the same procedure to set again the normal
operation conditions.
●In case of troubleshooting the air conditioner
diagnostic system activates the lamps accordingly,
even if they are set to OFF. See paragraph
TROUBLESHOOTING for further details.
5
66
887 4
3
2
1

4
EG
SAFETY INSTRUCTIONS
●Read this booklet carefully before using this air
conditioner. If you still have any difficulties or
problems, consult your dealer for help.
●This air conditioner is designed to give you
comfortable room conditions. Use this only for its
intended purpose as described in this Instruction
Manual.
●Never use or store gasoline or other flammable vapor or
liquid near the air conditioner. It is very dangerous.
●Never install electrical equipment, which is not
protected with IPX1 protection (protection against
vertical water drop), under the unit.
●The manufacturer assumes no responsabilities if the
safety regulations or local codes are not observed.
●Never use the power main switch to start or stop the
air conditioner: always use the ON/OFF button on the
remote control unit or the selector switch on the unit.
●Do not stick anything into the air outlet of the air
conditioner. This is dangerous because the fan is
rotating at high speed.
●Do not let children play with the air conditioner.
●Do not cool the room too much if babies or invalids
are present.
WARNING
CAUTION
INSTALLATION LOCATION
●We recommend this air conditioner to be installed
properly by qualified installation technicians in
accordance with the installation instructions provided
with the unit.
●Do not install this air conditioner where there are
fumes or flammable gases, or in an extremely humid
space such as a green house.
●Do not install the air conditioner where excessively
high heat-generating objects are placed.
●Do not install the air conditioner where the
atmosphere is extremely damp or humid (e.g.
greenhouse or laundry) it could be wetted by drops
of water (i.e. in laundries).
●To protect the air conditioner from heavy corrosion,
avoid installing the outdoor unit where salty sea
water can splash directly onto it or in sulphurous air
near a spa.
WARNING
ELETRICAL REQUIREMENTS
●Before installation, check that the voltage of the electric
supply in your home or office is the same as the voltage
shown on the nameplate.
●All wiring must conform to the local electrical codes.
Consult your dealer or a qualified electrician for details.
●Each unit must be properly grounded with a ground (or
earth) wire or through the supply wiring.
●Wiring must be done by a qualified electrician.
TEMPERATURE SENSOR SELECTOR
●Under normal conditions the room temperature is detected
and checked by the temperature sensor placed in the
remote controller (I FEEL icon displayed ).This function
is designed to provide a confortable room temperature by
transmitting the temperature control command from the
location next to you. Therefore, when using this function,
the remote control should always be pointed at the air
conditioner.
●It is possible to disable the remote controller room sensor
pressing the I FEEL button. In this case the I FEEL icon
on the remote controller display lights off and the sensor
placed in the air conditioner becomes active.
HOW TO INSTALL BATTERIES
●Remove trhe lid in the rear part of the remote control unit
and check the settings of the four microswitches as
shown below:
USING THE REMOTE CONTROL UNIT
●Insert two AAA alkaline batteries of 1,5 V-DC making
sure that point in the direction marked in the battery
compartment.The displayed time flashes.
Press the SEL TYPE button.
Remote controller is now ready for operation.
●The batteries last about six months. Depending on how
much you use the remote control unit.
Remove the batteries if you do not use the remote control
unit for more than one month.
Replace the batteries when the remote control unit lamp
fails to light, or when the air conditioner does not receive
the remote control unit signals.
●The batteries of the remote control contain polluted
substances. Exhausted batteries must be disposed
according to the laws in force.
OPERATION WITH THE REMOTE CONTROL UNIT
When using the remote control unit, always point the unit
transmitter head directly at the air conditioner receiver.
HOW TO TURN ON THE AIR CONDITIONER
Press the ON/OFF button to turn the air conditioner on.
The operation lamp will light up, indicating the unit is in
operation.
The remote control unit sends the temperature signal
at any key pressing and automatically every five
minutes. If, due to some troubles, the signal from the
remote control is no longer detected, the air conditioner
keeps operating using the temperature sensor of the
indoor unit to control the room temperature. In this
case, the temperature around the remote control unit
may differ from the temperature detected in the air
conditioner position.
NOTE
SWITCHES
5
EG
REMOTE CONTROL UNIT
TRANSMITTER
When you press the buttons of the remote
control unit, the mark
appears on the display to transmit the
setting changes to the receiver in the air
conditioner.
TIMERAND PRESENT TIME SETTING
BUTTONS
With these buttons is possible to set the
clock and the timer. For details refer to
paragraphs “ SETTING THE HOUR” and
“SETTING THE TIMER”.
“TIMER SEL” BUTTON
Press this button to select the type of
timer to activate. For details refer to
paragraph “SETTING THE TIMER”.
DISPLAY
Information is displayed when the remote controller is switched on.
If switched off, only the operating mode, the room temperature and
the clock are shown
Operation mode
Fan speed
High speed
Automatic Medium speed
Low speed
Displayed when
transmitting data
Set point
temperature
I FEEL mode is active
(remote controller
sensor active)
Timer modes
Automatic
Cooling
Heating
Dehumidification
Fan
MODE SELECTOR BUTTON
Press this button to modify the air
conditioner mode.
(automatic)
When this setting is selected, the air
conditioner calculates the difference
between the thermostat setting and the
room temperature and automatically
switches to the "cool" or "heat" mode.
(heating)
The air conditioner makes the room
warmer. (dry)
The air conditioner reduces the humidity in
the room.
(cooling)
The air conditioner makes the room cooler.
(fan)
The air conditioner works only as a
circulation fan.
Clock
Room
temperature
Night
mode Oscillation
Flap
Filter Ti02is ON
HIGH POWER
mode
TEMPERATURE SETTING BUTTONS
TEMP - (cooler)
Press this button to decrease the set
temperature.
TEMP + (warmer)
Press this button to increase the set
temperature.
SENSOR
A temperature sensor inside the remote
control unit detects the room temperature.
“SEL TYPE” BUTTON
Press this button in order to:
• set the clock
• set the ON/OFF timer
For details refer to paragraphs “SETTING
THE HOUR” and “SETTING THETIMER”.
TEMPERATURE SENSOR SELECTOR
Press the I FEEL button to modify the
active setting for room temperature
detection (from remote controller to air
conditioner and viceversa)
“FAN “ BUTTON
Fan speed is automatically
selected by the microcomputer.
High speed.
Medium speed.
Low speed.
ON/OFF BUTTON
This button turns the air conditioner ON
and OFF.
PUSH-BUTTON FLAP
Press this button in order to select the
desired function.
Fixed: six position
Continous oscillations
Automatically oscillations
“NIGHT”/“HIGH POWER” BUTTON
Press this button in order to select the desired
mode:
NIGHT mode
HIGH POWER mode
FILTER Ti02 BUTTON
Press this button in order to select the mode.

6
EG
HOW TO SET THE PRESENT TIME
HEATING (heat pump)
1. Press the button SEL TYPE three times.
The time indication alone flashes.
2. Press the SET H button until the present time hour
is displayed. Press the SET M button until the present
time minutes are displayed. The display will
automatically stop flashing.
ONON ON
Δ1 H Δ1 H
MIN. MAX.
A
B
C
C
B
A
27
26
25
24
23
22
21
20
19
AUTOMATIC OPERATION
1.Set the MODE selector to HEAT .
2.Press the ON/OFF button and switch the air condioner ON.
3.Press the TEMP. buttons to set the desired temperature (the
temperature range is between 32 °C max. and 10 °C min.).
THE DISPLAY SHOWS THE
SELECTED TEMPERATURE.
AFTER 5 SECONDS FROM THE
REQUIRED TEMPERATURE SETTING
THE DISPLAY WILL SHOW THE ROOM
TEMPERATURE AGAIN.
4.Press the FAN button to select the fan speed.
For several minutes after the start of heating operation, the
indoor fan will stop until the indoor heat exchanger coil has
warmed up sufficiently. This is because the COLD DRAFT
PREVENTION SYSTEM is operating. During this period, the
STANDBY lamp remains lit.
NOTE
DEFROSTING OF OUTDOOR UNIT HEAT
EXCHANGER
When the outdoor temperature is low, frost or ice may
appear on the heat exchanger coil, reducing the heating
performance. When this happens, a protection function for
the heat exchanger defrosting is activated. During this
function operation, the fan of the indoor unit stops and the
STANDBY lamp remains lit until defrosting is completed.
Heating operation restarts after several minutes. (This
interval will vary slightly depending on the room and outdoor
temperature).
HEATING PERFORMANCE
Aheat pump conditioner heats a room by taking heat from
outside air. The heating efficiency will fall off when the
outdoor temperature is very low. If enough heat is not
obtained with this air conditioner, use another heating
appliance in conjunction with it.
1.Set the MODE selector to AUTO .
2.Press the ON/OFF button and switch the air condioner
ON.
3.Press the TEMP. buttons to set the desired temperature
(the temperature range is between 32 °C max. and 10 °C
min.).
When this setting is selected, the air conditioner calculates
the difference between the thermostat setting and the room
temperature and automatically switches to the COOL or
HEAT mode as appropriate.
4.Press the FAN selector button to the setting you want.
THE DISPLAY SHOWS THE
SELECTED TEMPERATURE.
AFTER 5 SECONDS FROM THE
REQUIRED TEMPERATURE SETTING
THE DISPLAY WILL SHOW THE ROOM
TEMPERATURE AGAIN.
Example of operation diagram in the (Auto) mode with
the set room temperature at 23°C.
NOTE
The air conditioner changes the operation mode (from cool
to heat or vice versa, if one of the following conditions
occurs:
-ZONE A: changes if the difference between the room
temperature and the temperature set on the remote control
unit is at least 3°C..
-ZONE B: changes if the difference between the room
temperature and the temperature set on the remote control
unit is at least 1°C, one hour after the compressor stop.
- ZONE C: never changes if the difference between the
room temperature and the temperature set on the remote
control unit is no more than 1°C.
COOLING
THE DISPLAY SHOWS THE
SELECTED TEMPERATURE.
AFTER 5 SECONDS FROM THE
REQUIRED TEMPERATURE SETTING
THE DISPLAY WILL SHOW THE ROOM
TEMPERATURE AGAIN.
4.Press the FAN button to select the fan speed.
1
43
2
Verify that the unit is connected to the
main power and the STANDBY lamp is
light up.
1.Set the MODE selector to COOL .
2.Press the ON/OFF button and switch the
air condioner ON.
3.Press the TEMP. buttons to set the desired
temperature (the temperature range is
between 32 °C max. and 10 °C min.).
NOTE
1.Set the MODE button to DRY. The icon is displayed.
2.Press the ON/OFF button and switch the air condioner
ON.
3.Press the TEMP. buttons to set the desired temperature
(the temperature range is between 32 °C max. and 10 °C
min.).
DEHUMIDIFYING (DRY)
THE DISPLAY SHOWS THE
SELECTED TEMPERATURE.
AFTER 5 SECONDS FROM THE
REQUIRED TEMPERATURE SETTING
THE DISPLAY WILL SHOW THE ROOM
TEMPERATURE AGAIN.

●Use DRYoperation when you want to reduce the humidity
in the room.
●Once the room temperature reaches the set level, the unit
repeats the cycle of turning on and off automatically.
●During DRYoperation, the fan speed is automatically set
(Remote control lamp is ON) to prevent overcooling.
●Dry operation is not possible if the indoor temperature is
10 °C or less.
7
EG
ADJUSTING THE FAN SPEED
AUTOMATIC
Simply set the FAN selector to the position.A
microcomputer automatically controls the fan speed when
theAUTO mode is selected. When the air conditioner starts
operating, the difference between the room temperature
and the set temperature is detected by the microcomputer
which then automatically switches the fan speed to the
most suitable level.
NIGHT MODE / ENERGY SAVING
●This mode enables you to save energy.
1. Set the MODE selector to cool, dry or heat.
2. Press the NIGHT button.
3. The mark appears on the display. Press the NIGHT
button again to release the NIGHT function.
What does the NIGHT mode mean?
When you select the NIGHT mode, the air conditioner will
modify automatically the set temperature after 60 minutes.
This enables you to save energy without sacrificing your
comfort.
NOTE
FAN ONLY
If you want to make air circulate without any temperature
control, follow these steps:
1. Press the ON/OFF operation button and switch the air
conditioner ON.
2. Press MODE button until only the fan sign
appears on the display.
The above mentioned data make reference to the
conditioner operating when the sensor on the remote control
unit is ON. (Refer to temperature sensor selector). If the
sensor on the indoor unit is being used then actual operation
will slightly differ from that described in the above tables.
The automatic speed is not available in FAN ONLY mode.
NOTE
WHEN DIFFERENCE BETWEEN
ROOM TEMPERATURE AND SET FAN SPEED
TEMPERATURE IS
Cooling and 2 °C and over High
dehumidifying Between 2 and 1 °C Medium
modes: Below 1 °C Low
2 °C and over High
Heating mode:
Below 2 °C Medium
High speed Med. speed Low speed
MANUAL
If you want to manually adjust speed just set the FAN selector
as desired.
OPERATING MODE SET TEMPERATURE CHANGE
Heating Lowered by 1 °C
Cooling and Dehumidifying Raised by 2 °C
During the NIGHT mode the internal fan speed is
automatically lower and reduces the noise.
NOTA
Selezione funzione
Temperatura ambiente
1 h TEMPO
1°C
COOLING AND DEHUMIDIFYING
HEATING
Selezione funzione
Temperatura ambiente
1 h TEMPO
2°C
HIGH POWER MODE
When this mode is active the internal fan speed is set
automatically and the air conditioner operates, for 15
minutes, at the maximum power.After 15 minutes from the
selection the symbol on the display switch off and the
mode is automatically switched off.
NOTE
During the high power operation the room temperature
could not correspond to the set temperature.
FILTER Ti02
Pressing the FILTER button (symbol on the display)
the filtering system with titanium dioxide is activated; this
is very effective to prevent bad odours and to eliminate
bacteria and micro-organisms.
NOTE
The filter is active only if the internal fan is operating.
Function selection
Room temperature
TIME
Function selection
Room temperature
TIME

Do not move the flap with your hands when the air
conditioner is running.
8
EG
CAUTION
ADJUSTING THE AIR FLOW DIRECTION
HORIZONTAL (manual)
The horizontal air flow can be adjusted by moving the
vertical vanes to the left or right, as indicated in the following
figures.
VERTICAL (with remote control unit)
Make sure that the remote control unit has been turned on. Press
the FLAP button to select the flap function
A)HOW TO SET THE ON TIME
1. Press the SEL TYPE button once.
The ON and time indications flash.
2. Press the SET H button until the
designed hour is displayed.
Press the SET M button until the
designed minutes are displayed. The
display will change automatically back
to show the present time after 10 sec.
3. Press the ON/OFF button to start the air
conditioner.
4. Press the TIMER SELbutton to activate
the ON timer.
B) HOW TO SET THE OFF TIME
1. Press the SEL TYPE button twice.
The OFF and time indications flash.
2. Press the SET H button until the
designed hour is displayed.
Press the SET M button until the
designed minutes are displayed. The
display will change automatically back
to show the present time after 10 sec.
3. Press the ON/OFF button to start the air
conditioner.
4. Press the TIMER SELbutton two times
to activate the OFF timer.
C) HOW TO SET A PROGRAM FOR
DAILY ON/OFF OPERATION (OR
VICEVERSA)
1. Set the timer ON/OFF as shown in A)
and B).
2. Press the ON/OFF button to start the air
conditioner.
3. Press three times the TIMER SELECT
button to activate the DAILY timer.
SETTING THE TIMER
After timer setting, press PROGRAM button in order to
check the ON/OFF setting time.
NOTE
2
14
3
TIMER SETTING PROCEDURE.
●Press four times the TIMER SEL
button.The 1 HOUR TIMER mark will
appear on the display.
CANCELLATION PROCEDURE
●Press the ON/OFF button to turn the air conditioner off.
●Wait for the indoor unit to stop operating.
●Press the ON/OFF button again to turn the air conditioner
on.
SETTING THE 1 HOUR TIMER
This function causes the unit to operate for one hour at the
set conditions, regardless of whether the unit is on or off.
Fixed:
six
position
Continous
oscillations Automatically
oscillations
NOTES ●The functional flap automatically closes when
the unit is off.
●The aesthetic flap automatically closes 3
minutes after the unit is switched off.
●When the unit starts in heating operation,
the fan speed will be low and the flap will be
in the 4 position until the air being blown out
of the unit begins to warm. Once the air
warms up, the flap position and fan speed
change to the settings specified with the
remote control.
Left
Vertical vane Right
Aesthetic
flap
Fuctional
flap

9
EG
Set vertical vanes to the front position during COOLING/DRY
operation if humidity is high.
If the vertical vanes are set to the left-most or right-most
position, condensation will form around the air outlet and
drip off.
CAUTION
• Use the FLAP button on the remote control to adjust
the position of the flap. If you move the flap by hand,
the factual flap position and the flap position on the
remote control may no longer match. If this should
happen, shut off the unit, wait for the flap to close,
and then turn on the unit again; the flap position will
now be normal again.
• Do not have the flap pointed down during cooling
operation. Condensation may begin to form around the
air vent and drip down.
CAUTION
2. WHEN THE AIR CONDITIONER IS RUNNING
If you want to turn off the air conditioner push the operation
selector with a pen until the OPERATION lamp is turned off.
Power failure during operation.
In the event of power failure, the unit will stop. When the
power is resumed, the unit will restart automatically after 3
minutes.
NOTE
If you have lost the remote control unit or it has troubles,
follow the steps below.
1. WHEN THE AIR CONDITIONER IS STOPPED
If you want to turn on the air conditioner push the operation
selector with a pen to select the desired mode (COOL or
HEAT).
OPERATION WITHOUT THE REMOTE
CONTROL UNIT
The air conditioner will start in HIGH fan speed.
The temperature setting is 25°C for cooling mode and
21°C for heating mode.
NOTE
CARE AND CLEANING
●Maintenance operations must be carried out by specially
trained personnel.
●For safety, be sure to turn the air conditioner off and also
to disconnect the power before cleaning.
●Do not pour water on the indoor unit to clean it. This will
damage the internal components and cause an electric
shock hazard.
WARNING
The front panel can be removed in order to wash it with
water.
CASING AND GRILLE (INDOOR UNIT)
Clean the casing and grille of the indoor unit with a vacuum
cleaner brush, or wipe them with a clean, soft cloth.
If these parts are stained, use a clean cloth moistened with
a mild liquid detergent.
When cleaning the grille, be careful not to force the vanes
out of place.
●Never use solvents, or harsh chemicals when cleaning the
indoor unit. Do not wipe the plastic casing using very hot
water.
●Some metal edges and the vanes are sharp and may
cause injury if handled improperly; be especially careful
when you clean these parts.
●The internal coil and other components of the outdoor
unit must be cleaned every year. Consult your dealer or
service centre.
CAUTION
HOW TO REMOVE THE FRONT PANEL
●With the front panel open all the way, grip both
arms with your hans and pull toward you to remove.
●To remount, hold the front panel roughly horizontal
and push it in until the arm shafts fit into the indenta-
tions in the main unit, then fit the front panel into place.
Up
Down Flap
Air outlet
grille
OPERATION
SELECTOR
Front
panel

10
EG
TROUBLESHOOTING
WARNING
●The use of portable telephones near the air conditioner
may cause disturbance to its normal operation and must
be avoided. In case abnormal operation is noticed,
(OPERATION lamp lights, but the air conditioner will not
run) to restore normal operation turn-off electric supply
for about 3 minutes, by disconnecting the main switch or
the wall plug, then start again the air conditioner.
If your air conditioner does not work properly, first check the
following points before requesting service.
If it still does not work properly, contact your dealer or
service centre.
AIR FILTER
The filter behind thefront panel should be checked and
cleaned at least once every two weeks.
HOW TO REMOVE THE FILTER
1. Grasp both ends of the front panel and pull it towards you
and up.
2. Push the filter up slightly, and then take it out. Clean the
air filter and replace it.
TIPS FOR ENERGY SAVING
DO NOT:
●Block the air intake and outlet of the unit.
If they are obstructed, the unit will not work well, and
may be damaged.
●Let direct sunlight into the room. Use sunshades,
blind or curtain.
DO:
●Always try to keep the air filter clean. A clogged filter
will impair the performance of the unit.
●To prevent conditioned air from escaping, keep windows,
doors and any other openings closed.
Trouble: the air conditioner does not run at all.
Possible cause:
1. Power failure.
2. Leakage breaker tripped.
3. Operation button is OFF.
4. Batteries in remote control unit have run down.
Remedy:
1. Restore power.
2. Contact service centre.
3. Press the button again.
4. Replace batteries.
Trouble: The air conditioner does not operate and
STANDBY and OPERATION lamps flash.
Possible cause:
1. Defective indoor unit room sensor.
Remedy:
1. Contact service centre.
Trouble: The air conditioner does not operate and TIMER
and OPERATION lamps flash.
Possible cause:
1. Indoor unit coil sensor defective.
Remedy:
1. Contact service centre.
Trouble: The air conditioner does not operate and TIMER,
OPERATION and STANDBY lamps flash.
Possible cause:
1. Communication trouble between indoor and outdoor
unit.
Remedy:
1. Contact service centre.
Trouble: The air conditioner does not operate and
STANDBY lamp flashes.
Possible cause:
1. Indoor unit trouble.
Remedy:
1. Contact service centre.
Trouble: Poor cooling or heating performance.
Possible cause:
1. Dirty or clogged air filters.
2. Heat source or many people in room.
3. Doors and/or windows are open.
4. Obstacle near air intake or air discharge port.
5. The set temperature on the remote control unit is too
high.
6. Outdoor temperature is too low (heat pump version).
7. Defrosting system does not work (heat pump version).
Remedy:
1. Clean air filters to improve airflow.
2. Eliminate heat source if possible.
3. Shut them to keep the heat or cold out.
4. Remove it to ensure good airflow.
5. Set the right temperature on the remote control unit.
6. Try to use a back-up heater.
7. Consult your dealer.
Front panel Air filter
FILTER CLEANING
Use a vacuum cleaner to remove light dust. If there is
sticky dust on the filter, wash the filter in lukewarm, soapy
water, rinse it in clean water, and dry it.

NOME DELLE PARTI E SELETTORE DI FUNZIONAMENTO 3
LUOGO DI INSTALLAZIONE 4
REQUISITI ELETTRICI 4
ISTRUZIONI DI SICUREZZA 4
USO DEL TELECOMANDO 4
TELECOMANDO 5
COME REGOLARE L’OROLOGIO 6
RAFFREDDAMENTO 6
RISCALDAMENTO 6
FUNZIONAMENTO IN AUTOMATICO 6
DEUMIDIFICAZIONE 6
VENTILAZIONE 7
SCELTA VELOCITÀ VENTILATORE 7
FILTRO Ti027
PROGRAMMA NOTTURNO 7
PROGRAMMA HIGH POWER 7
REGOLAZIONE DEL TIMER 8
REGOLAZIONE DEL TIMER 1 ORA 8
REGOLAZIONE DEL FLUSSO D’ARIA 8
FUNZIONAMENTO SENZATELECOMANDO 9
CURA E MANUTENZIONE 9
CONSIGLI PER IL MASSIMO CONFORT E IL MINIMO CONSUMO 11
IDENTIFICAZIONE E SOLUZIONE PROBLEMI DI FUNZIONAMENTO 11
Questo condizionatore d’aria è dotato delle funzioni di raffreddamento, deumidificazione, riscaldamento e ventilazione
I dettagli su queste funzioni sono forniti di seguito; riferitevi a queste descrizioni quando usate il condizionatore d’aria.
INDICE
DICHIARAZIONE DI CONFORMITÀ
Questo prodotto è marcato in quanto conforme alle Direttive:
– Bassa Tensione n. 2006/95/CE.
– Compatibilità Elettromagnetica n. 89/336 CEE, 92/31 CEE e 93/68 CEE.
Questa dichiarazione sarà nulla nel caso di impiego diverso da quello dichiarato dal Fabbricante e/o di mancata
osservanza, anche solo parziale, delle istruzioni d'installazione e/o d'uso.
2
NOTA
In caso di difficoltà o se si hanno dei dubbi riguardo al
condizionatore d’aria, sono necessarie le seguenti
informazioni. I numeri del modello e di serie si trovano sulla
targhetta del nome, sulla parte inferiore del mobile.
No. del modello
No. di serie
Data di acquisto
Indirizzo del rivenditore
Numero di telefono
INFORMAZIONI RIGUARDANTI IL PRODOTTO SIMBOLI DI AVVERTIMENTO
I
I seguenti simboli sono usati in questo manuale per mettere
in guardia l’utente ed il personale di servizio sulle condizioni
potenziali di pericoli personali o di danni al prodotto.
Questo simbolo si riferisce a pericoli o a interventi che
possono causare ferite gravi o la morte.
Questo simbolo si riferisce a pericoli o a interventi che
possono causare danni al prodotto.
AVVERTIMENTO
PRECAUZIONE
INFORMAZIONE PER IL CORRETTO SMALTIMENTO DEL PRODOTTOAI SENSI DELLADIRETTIVA EUROPEA
2002/96/CE
Alla fine della sua vita utile questo apparecchio non deve essere smaltito insieme ai rifiuti domestici.
Deve essere consegnato presso appositi centri di raccolta differenziata oppure presso i rivenditori che forniscono questo
servizio.
Smaltire separatamente un apparecchio elettrico ed elettronico consente di evitare possibili effetti negativi sull’ambiente
e sulla salute umana derivanti da uno smaltimento inadeguato e permette di recuperare e riciclare i materiali di cui è
composto, con importanti risparmi di energia e risorse.
Per sottolineare l’obbligo di smaltire separatamente queste apparecchiature, sul prodotto è riportato il simbolo del
cassonettobarrato.
Lo smaltimento abusivo del prodotto da parte dell’utente comporta l’applicazione delle sanzioni amministrative previste
dalla normativa vigente.

I
NOME DELLE PARTI E SELETTORE DI FUNZIONAMENTO
1. Telecomando.
2. Sensore: rileva la temperatura ambiente attorno al
telecomando; il condizionatore è regolato dalla
temperatura rilevata.
3. Uscita aria: distribuisce nel locale l’aria trattata.
4. Ricevitore: riceve i segnali inviati dal telecomando.
5. Selettore funzionamento (senza telecomando):
Premere questo tasto per passare da una funzione
all’altra (OFF, COOL e HEAT).
6. Spia funzionamento (OPERATION): si accende
quando l’unità è in funzione.
Lampeggia una volta per avvisare che il segnale del
telecomando é stato ricevuto e memorizzato.
7. Spia attesa (STANDBY): Si accende quando il
condizionatore é collegato alla corrente ed é pronto a
ricevere il segnale dal telecomando.
8. Spia TIMER: si accende quando l’unità è controllata
dal timer.
3
La posizione OFF non interrompe l’alimentazione
elettrica. Usate l’interruttore principale per isolare il
condizionatore d’aria.
AVVERTIMENTO
NOTE
●E’ possibile impostare il condizionatore in modo da
mantenere sempre spente, anche durante il
funzionamento, le spie OPERATION, TIMER e
STANDBY.
Per ottenere ciò premere contemporaneamente per
più di 5 secondi i tasti IFEEL e FAN del telecomando.
Ripetendo la procedura vengono ripristinate le
normali condizioni di funzionamento.
●In tutte le situazioni di guasto rilevate dal sistema di
diagnostica del condizionatore le spie, anche se
impostate per lo spegnimento, vengono attivate in
accordo all’anomalia da segnalare. Vedi paragrafo
IDENTIFICAZIONE E PROBLEMI DI FUNZIONAMENTO
per ulteriori informazioni.
5
66
887 4
3
2
1

4
I
SELETTORE DEL SENSORE DI TEMPERATURA
●In condizioni normali la temperatura ambiente viene
rilevata e controllata dal sensore di temperatura
posizionato all’interno del telecomando (icona IFEEL
attiva sul display).
Questa funzione permette di creare una temperatura
ambiente ottimale perché il telecomando trasmette la
temperatura dalla posizione in cui vi trovate. Quindi,
usando questa funzione, il telecomando deve sempre
essere indirizzato verso il condizionatore.
●E’ possibile disattivare il sensore di temperatura del
telecomando premendo il tasto I FEEL. In tal caso la
relativa icona sul display si spegne e diventa operativo
il sensore presente all’interno dell’unità.
INSERIMENTO DELLE BATTERIE
●Rimuovere il coperchio sul retro del telecomando e
verificare che i quattro microinterruttori siano impostati
come in figura:
USO DEL TELECOMANDO
●Inserire due batterie da 1,5 V-DC tipo AAA alcaline
rispettando la polarità indicata sul telecomando.
L’indicazione dell’ora sul display lampeggia.
Premere il tasto SEL TYPE.
Il telecomando ora é pronto per funzionare.
●La durata media delle batterie è di sei mesi e dipende
dalla frequenza con cui si usa il telecomando.
Rimuovere le batterie nel caso di lungo inutilizzo del
telecomando (oltre un mese).
Sostituire le batterie quando la spia di trasmissione dati
del telecomando non lampeggia oppure quando il
condizionatore non risponde ai comandi del
telecomando.
●Le batterie del telecomando contengono sostanze
inquinanti. Terminata la loro vita utile, devono essere
smaltite secondo le vigenti normative.
FUNZIONAMENTO CON IL TELECOMANDO
Indirizzare il telecomando con la testina del trasmettitore
verso il ricevitore posto sul condizionatore d’aria.
COME ACCENDERE IL CLIMATIZZATORE
Premere il tasto ON/OFF per accendere il climatizzatore.
La spia funzionamento si accenderà, ad indicare che l’unità
é in funzione.
Il telecomando trasmette il segnale della temperatura
ambiente alla pressione di ogni tasto ed automatica-
mente ogni cinque minuti.
Se, a causa di inconvenienti, l’unità non riceve il se-
gnale del telecomando il condizionatore d'aria utiliz-
za, per il controllo della temperatura ambiente, il sen-
sore presente all’interno dell’unità. In questi casi la
temperatura vicino al telecomando può differire dalla
temperatura rilevata nella posizione del condizionato-
re d'aria.
NOTA
●Non installare questo condizionatore d’aria dove ci
sono fumi, gas infiammabili o molta umidità, come in
una serra.
●Non installare il condizionatore dove ci sono
apparecchiature che generano un calore eccessivo.
●Non installare l'unità interna in locali dove potrebbe
essere investita da spruzzi d'acqua (es. lavanderia).
●Per proteggere il condizionatore d’aria dalla
corrosione eccessiva, non installate l’unità esterna
dove può essere esposta direttamente agli spruzzi
d’acqua marina o a vapori solforosi nelle stazioni
climatiche.
REQUISITI ELETTRICI
●Prima dell’installazione assicuratevi che la tensione
dell’alimentazione elettrica di rete sia uguale a quella
indicata sulla targhetta del condizionatore d’aria.
●Tutti gli allacciamenti elettrici devono essere conformi
alle normative elettriche locali. Per i dettagli consultare il
rivenditore o un elettricista.
●Ciascuna unità deve essere collegata correttamente a
massa, con un filo di terra.
●Gli allacciamenti elettrici devono essere eseguiti da un
elettricista specializzato.
ISTRUZIONI DI SICUREZZA
●Leggete attentamente questo manuale prima di usare
il condizionatore d’aria. In caso di dubbi o problemi
rivolgetevi al rivenditore o al centro assistenza
autorizzato.
●Questo condizionatore d’aria è stato progettato per
creare condizioni climatiche ideali nella vostra stanza.
Usatelo soltanto per questo scopo specifico e come
descritto in questo manuale.
●Mai usare o conservare benzina o altri liquidi infiammabili
vicino al condizionatore. È molto pericoloso.
●Non installare sotto l’unità apparecchiature elettriche
non protette con grado di protezione IPX1 (protezione
all’acqua a caduta verticale).
●Il costruttore non si assume responsabilità alcuna nel
caso in cui le norme di sicurezza e antinfortunistiche non
vengano rispettate.
●Non accendete e spegnete il condizionatore d’aria
mediante l’interruttore generale. Usate sempre il
pulsante ON/OFF sul telecomando o il selettore di
funzionamento sull’unità.
●Non inserite oggetti nel condizionatore. È molto
pericoloso perché il ventilatore gira ad alta velocità.
●Non lasciate giocare i bambini con il condizionatore
d’aria.
●Non raffreddate eccessivamente la stanza se ci sono
bambini molto piccoli o degli invalidi.
AVVERTIMENTO
PRECAUZIONE
LUOGO DI INSTALLAZIONE
●
Si raccomanda di far installare questo condizionatore
d’aria da un tecnico qualificato seguendo le istruzioni
di installazione allegate.
AVVERTIMENTO
INTERRUTTORI

I
5
TELECOMANDO
PULSANTE “NIGHT”/HIGH POWER
Premere questo pulsante per selezionare la
funzione desiderata:
Programma notturno impostato
Programma HIGH POWER
impostato
TRASMETTITORE
Quando vengono premuti i pulsanti del
telecomando, il simbolo si accede sul
visore per trasmettere i cambiamenti della
regolazione al ricevitore del climatizzatore.
PULSANTI REGOLAZIONE OROLOGIO
E IMPOSTAZIONE ORARIO TIMER
Premendo i pulsanti SET H / SET M è
possibile impostare l’ora e il timer.
Per dettagli vedere le sezioni
“COME REGOLARE L’OROLOGIO” e
“REGOLAZIONE DEL TIMER”.
PULSANTE “TIMER SEL”
Premendo il pulsante sul display viene attivata
la procedura per l’impostazione del timer.
Per dettagli vedere esempio “REGOLAZIONE
DEL TIMER”.
VISORE
Visualizza le informazioni quando il telecomando è acceso.
Modo di funzionamento
Velocità ventilatore
Alta velocità
Automatico Media velocità
Bassa velocità
Conferma trasmissione dati
al climatizzatore
Temperatura
impostata
Indica che il climatizzatore
funziona in modalità I FEEL
(sensore telecomando attivo)
Programma
notturno
Indica i tipi di
timer
Automatico
Raffreddamento
Riscaldamento
Deumidificazione
Ventilazione
PULSANTE MODO DI
FUNZIONAMENTO
Premere questo pulsante per modificare il
funzionamento del condizionatore.
(automatico)
Quando viene scelta la posizione
“automatico” il microprocessore sceglie
automaticamente tra raffreddamento e
riscaldamento in base alla differenza tra
la temperatura ambiente e quella impostata
sul telecomando.
(riscaldamento)
Il condizionatore riscalda il locale.
(deumidificazione)
Il condizionatore riduce l’umidità dell’aria
ambiente.
(raffreddamento)
Il condizionatore raffredda l’aria
abbassando la temperatura del locale.
(ventilazione)
Il condizionatore funziona solo come
ventilatore
Orologio
Temperatura
ambiente
Oscillazione
Flap
PULSANTE FILTRO Ti02
Premere questo pulsante per selezionare
la funzione
Programma
HIGH POWER
Indica che il filtro Ti02è
acceso
PULSANTI SELEZIONE TEMPERATURA
TEMP - (più freddo)
Premere questo pulsante per diminuire la
temperatura selezionata.
TEMP + (più caldo)
Premere questo pulsante per aumentare
la temperatura selezionata.
SENSORE
Un sensore di temperatura all’interno del
telecomando rileva la temperatura am-
biente.
PULSANTE “SEL TYPE”
Premere questo pulsante per selezionare
le funzioni:
• impostazione dell’ora
• impostazione del timer ON/OFF
Per dettagli vedere le sezioni “COME
REGOLARE L’OROLOGIO” e
“REGOLAZIONE DEL TIMER”.
SELETTORE SENSORE DI
TEMPERATURA
Premere il pulsante I FEELper modificare
l’impostazione del sensore di temperatura
attivo ( da telecomando a Condizionatore
e viceversa).
PULSANTE “FAN”
(velocità ventilatore)
La velocità del ventilatore viene
scelta automaticamente dal
microprocessore.
Alta velocità ventilatore.
Media velocità ventilatore.
Bassa velocità ventilatore.
PULSANTE ON/OFF (acceso/spento)
Il pulsante serve per mettere in funzione
o arrestare il climatizzatore.
PULSANTE FLAP
Premere questo pulsante per selezionare
la funzione desiderata.
Fissa: 6 posizioni
Oscillazione continua
Oscillazione automatica

6
Esempio: schema funzionamento in modalità (Auto)
con temperatura ambiente impostata a 23 gradi.
Verificare che l’unità sia collegata alla
rete elettrica e che la spia STANDBY sia
accesa.
1.Premere il pulsante MODE (modo di
funzionamento) fino a far apparire sul
visore il simbolo RAFFREDDAMENTO
.
2.Premere il pulsante ON/OFF e mettere
in funzione il condizionatore.
3.Premere i pulsanti TEMP+/- per
impostare la temperatura desiderata (il
campo di regolazione varia tra 32 °C
massimo e 10 °C minimo).
Quando la temperatura esterna scende sotto lo zero sullo
scambiatore di calore esterno si forma del ghiaccio che ri-
duce la potenzialità in riscaldamento. Quando questo acca-
de viene attivata un’opportuna protezione che consente lo
sbrinamento dello scambiatore. In queste condizioni opera-
tive il ventilatore dell’unità interna si ferma e la spia STANDBY
si accende per tutta la durata dello sbrinamento.
Il funzionamento in riscaldamento riprende dopo alcuni mi-
nuti in relazione alle temperature ambiente ed esterna.
SBRINAMENTO DELLO SCAMBIATORE DI
CALORE DELL’UNITA’ ESTERNA
FUNZIONAMENTO E CAPACITÀ DI UN
SISTEMA IN “POMPA DI CALORE”
Un condizionatore in versione pompa di calore riscalda
l’ambiente sottraendo il calore all’aria esterna. La capacità
(efficienza) del sistema si riduce quando la temperatura
esterna scende sotto lo zero. Se il condizionatore non riesce
a mantenere un valore sufficiente della temperatura si dovrà
integrare il riscaldamento con un’altra apparecchiatura.
Dopo l’attivazione della funzione riscaldamento, la velocità
della ventola è bassa. Questo perché è operativa una
protezione “Prevenzione corrente aria fredda” che abiliterà il
normale funzionamento del ventilatore solo dopo che lo
scambiatore di calore dell’unità interna sarà sufficientemente
caldo. Durante questo periodo la spia STANDBY rimane
accesa.
COME REGOLARE L'OROLOGIO
RAFFREDDAMENTO
NOTA
1.Premere il pulsante MODE (modo di funzionamento) fino
a far apparire sul visore il simbolo RISCALDAMENTO .
2.Premere il pulsante ON/OFF e mettere in funzione il
condizionatore.
3.Premere i pulsanti TEMP+/- per impostare la temperatura
desiderata (il campo di regolazione varia tra 32 °C massimo
e 10 °C minimo).
1.Premere il pulsante MODE (modo di funzionamento) fino
a far apparire sul Visore il simbolo AUTOMATICO .
2.Premere il pulsante ON/OFF e mettere in funzione il
condizionatore.
3.Premere i pulsanti TEMP+/- per impostare la temperatura
desiderata (il campo di regolazione varia tra 32 °C
massimo e 10 °C minimo).
DEUMIDIFICAZIONE
1.Premere il pulsante MODE (modo di funzionamento) fino
a far apparire sul visore il simbolo DEUMIDIFICAZIONE
.
2.Premere il pulsante ON/OFF e mettere in funzione il
condizionatore.
3.Premere i pulsanti TEMP+/- per impostare la temperatura
desiderata (il campo di regolazione varia tra 32 °C massimo
e 10 °C minimo).
Il condizionatore automaticamente funzionerà passando dal
funzionamento riscaldamento in raffreddamento (o
viceversa) in modo da mantenere la temperatura impostata.
4.Premere il pulsante FAN per impostare la velocità ventilatore.
2. Premere il pulsante SET H fino a visualizzare l’ora
desiderata.
Premere il pulsante SET M fino a visualizzare i minuti
desiderati.
L’indicazione dell’ora sul visore cesserà automatica-
mente di lampeggiare dopo 10 secondi.
1. Premere tre volte il pulsante SEL TYPE.
L’indicazione dell’ora inizierà a lampeggiare.
IL VISORE INDICHERÀ IL VALORE
DELLA TEMPERATURA SELEZIONATA.
TRASCORSI 5 SECONDI DALL’IMPOSTA-
ZIONE DELLA TEMPERATURA DESIDE-
RATA IL VISORE TORNERÀ A INDICARE
LATEMPERATURAAMBIENTE.
4.Premere il pulsante FAN per impostare la velocità ventilatore.
ONON ON
Δ1 H Δ1 H
MIN. MAX.
A
B
C
C
B
A
27
26
25
24
23
22
21
20
19
NOTA
Il climatizzatore cambia il modo di funzionamento (da freddo
a caldo o viceversa) al verificarsi di una delle seguenti
condizioni:
-ZONAA: cambia se la temperatura varia di almeno 3°C da
quella impostata sul telecomando.
-ZONAB: cambia se la temperatura varia di almeno 1°C da
quella impostata sul telecomando dopo un’ora dallo stop
del compressore.
- ZONA C: non cambia mai se la temperatura non varia più
di 1°C rispetto a quella impostata sul telecomando.
NOTA
1
43
2
TRASCORSI 5 SECONDI DALL’IMPOSTA-
ZIONE DELLA TEMPERATURA DESIDE-
RATA IL VISORE TORNERÀ A INDICARE
LATEMPERATURAAMBIENTE.
IL VISORE INDICHERÀ IL VALORE
DELLA TEMPERATURA SELEZIONATA.
IL VISORE INDICHERÀ IL VALORE
DELLA TEMPERATURA SELEZIONATA.
TRASCORSI 5 SECONDI DALL’IMPOSTA-
ZIONE DELLA TEMPERATURA DESIDE-
RATA IL VISORE TORNERÀ A INDICARE
LATEMPERATURAAMBIENTE.
TRASCORSI 5 SECONDI DALL’IMPOSTA-
ZIONE DELLA TEMPERATURA DESIDE-
RATA IL VISORE TORNERÀ A INDICARE
LATEMPERATURAAMBIENTE.
IL VISORE INDICHERÀ IL VALORE
DELLA TEMPERATURA SELEZIONATA.
RISCALDAMENTO (in pompa di calore)
FUNZIONAMENTO IN AUTOMATICO
I

I
Se si vuole soltanto far circolare aria nel locale senza modificare
la temperatura, operare come segue:
1.
Premere il pulsante ON/OFF e mettere in funzione il
condizionatore.
2. Premere il pulsante MODE (modo di funzionamento) fino a
far apparire sul visore solo il simbolo ventilazione .
●Usare la funzione deumidificazione quando volete ridurre
l’umidità dell’aria ambiente.
●Quando la temperatura ambiente raggiunge il valore
impostato sul telecomando (termostato) il condizionatore
ripete in automatico dei cicli di acceso o spento.
●In modalità deumidificazione, la velocità del ventilatore è
impostata automaticamente (spia telecomando
accesa) per evitare di raffreddare troppo.
●La funzione deumidificazione non può essere attivata quando
la temperatura interna è 10 °C o inferiore.
7
NOTA
I valori precisati sulla tabella si riferiscono al funzionamento
del condizionatore quando è abilitato il sensore sul
telecomando (v. selettore del sensore di temperatura).
I valori precisati variano leggermente nel caso sia abilitato
il sensore posizionato nell’unità interna.
La velocità automatica non è attiva nella modalità
VENTILAZIONE.
SCELTA VELOCITÀ VENTILATORE
AUTOMATICO
Impostare con il pulsante FAN la posizione “AUTOMATICO”
. Il microprocessore controllerà automaticamente la
velocità del ventilatore. Quando il climatizzatore comincia a
funzionare il sensore temperatura rileva la differenza tra la
temperatura ambiente e la temperatura impostata e la trasmette
al microprocessore che automaticamente sceglie la velocità del
ventilatore più idonea.
NOTA
PROGRAMMA NOTTURNO/RISPARMIO
ENERGIA
Durante il programma notturno il ventilatore interno riduce
automaticamente la velocità migliorando la silenziosità.
VENTILAZIONE
DIFFERENZATRA
TEMPERATURAAMBIENTE VELOCITÀ VENTILATORE
E TEMPERATURA IMPOSTATA
Raffreddamento 2 °C e oltre Massima
e deumidificazione Tra 2 e 1 °C Media
Meno di 1 °C Minima
2 °C e oltre Massima
Riscaldamento Meno di 2 °C Media
Alta velocità Media velocità Bassa velocità
MANUALE
Per regolare manualmente la velocità del ventilatore agire
sul pulsante FAN scegliendo la velocità desiderata:
MODO DI FUNZIONAMENTO MODIFICATEMPERATURA IMPOSTATA
Riscaldamento Diminuzione di 1 °C
Raffreddamento e Deumidificazione Aumento 2 °C
NOTA
Selezione funzione
Temperatura ambiente
1 h TEMPO
1°C
RAFFREDDAMENTO E DEUMIDIFICAZIONE
RISCALDAMENTO
Selezione funzione
Temperatura ambiente
1 h TEMPO
2°C
PROGRAMMA HIGH POWER
Quando questa selezione è attiva la velocità del ventilatore
interno è impostata automaticamente ed il condizionatore
funziona, per 15 minuti, alla massima potenza. Trascorsi 15
minuti dalla selezione l’indicatore sul display si spegne
e la modalità viene automaticamente disattivata.
NOTA
●Questo programma serve per risparmiare energia elettrica.
1.Premere il pulsante MODE per predisporre il condizionatore
in raffreddamento, deumidificazione o riscaldamento.
2.Premere il pulsante NIGHT.
3.Il simbolo appare sul visore. Per rilasciare il programma
premere nuovamente il pulsante NIGHT.
Cos’è il Programma Notturno?
Quando viene selezionato il programma notturno il condizionatore
d’aria modifica automaticamente la temperatura impostata
trascorsi 60 minuti dalla selezione.
In questo modo si risparmia energia senza pregiudicare il comfort
del locale.
Durante il funzionamento ad alta potenza la temperatura del
locale potrebbe non coincidere con la temperatura
impostata.
FILTRO Ti02
Premendo il tasto FILTER (simbolo acceso sul display)
viene attivato il sistema di filtrazione al biossido di titanio
che svolge un’azione efficace nella prevenzione dei cattivi
odori e nell’eliminazione di batteri e microrganismi.
NOTA
Il dispositivo è attivo solo nel caso di ventilatore interno in
funzione.
TEMPO
Selezione funzione
Temperatura ambiente
Selezione funzione
Temperatura ambiente
TEMPO

I
PRECAUZIONE
Non muovete il deflettore con le mani durante il
funzionamento
8
Sinistra
Alette verticali Destra
REGOLAZIONE DEL FLUSSO D'ARIA
ORIZZONTALE (manuale)
Il flusso d’aria può essere regolato orizzontalmente
spostando le alette verticali verso sinistra o verso destra
come indicato nelle figure successive.
VERTICALE (con telecomando)
Accertarsi che il telecomando sia acceso. Premere il
pulsante FLAP per selezionare la funzione desiderata.
A) COME REGOLARE L’ORA DI
PARTENZA (ON)
1. Premere una sola volta il pulsante SEL
TYPE.
L’indicazione ON e quelle dell’ora
inizieranno a lampeggiare.
2. Premere il pulsante SET H fino a quando
viene visualizzata l’ora desiderata.
Premere il pulsante SET M fino a quando
sono visualizzati i minuti desiderati.
L’indicazione sul visore ritornerà ad
indicare l’ora corrente dopo 10 secondi.
3. Premere il pulsante ON/OFF per mettere
in funzione il condizionatore.
4. Premere il pulsante TIMER SEL per
impostare il timer sulla funzione ON TIME
(partenza).
B) COME REGOLARE L’ORA DI
FERMATA (OFF)
1. Premere due volte il pulsante SELTYPE.
L’ indicazione OFF e quella dell’ora
inizieranno a lampeggiare.
2. Premere il pulsante SET H fino a quando
viene visualizzata l’ora desiderata.
Premere il pulsante SET M fino a quando
sono visualizzati i minuti desiderati.
L’indicazione sul visore tornerà ad
indicare l’ora corrente dopo 10 secondi.
3. Premere il pulsante ON/OFF per mettere
in funzione il condizionatore.
4. Premere due volte il pulsante TIMER SEL
per impostare il timer sulla funzione “OFF
TIME” (partenza).
C) COME REGOLARE IL PROGRAMMA
GIORNALIERO
ACCESO/SPENTO (O VICEVERSA)
1. Regolare il timer come illustrato ai punti
AeB.
2. Premere il pulsante ON/OFF per mettere
in funzione il condizionatore.
3. Premere tre volte il pulsante TIMER SEL
per impostare il programma del timer
acceso/spento o viceversa.
REGOLAZIONE DEL TIMER
Dopo la regolazione del timer, per verificare l’orario di
impostazione in accensione/spegnimento (ON/OFF) premere
il pulsante SEL TYPE.
NOTA
2
14
3
OPERAZIONI DI IMPOSTAZIONE TIMER.
●
Premere quattro volte il pulsante TIMER
SEL. Sul visore appare il simbolo del TIMER
1 ORA.
CANCELLAZIONE DEL TIMER.
●
Premere il pulsante ON/OFF per spegnere il condizionatore.
●
Attendere che l’unità interna sia spenta.
●
Premere di nuovo il pulsante ON/OFF per riaccendere il
condizionatore.
REGOLAZIONE DEL TIMER 1 ORA
Questa funzione permette al condizionatore di funzionare per
1 ora alle condizioni impostate, indipendentemente se questo
sia acceso o spento.
Fissa:
6
posizioni
Oscillazione
continua Oscillazione
automatica
●Il deflettore funzionale si chiude
automaticamente quando il sistema è
spento.
●Il deflettore estetico si chiude
automaticamente 3 minuti dopo lo
spegnimento del condizionatore.
●Quando il sistema parte in riscaldamento,
la velocità della ventola è bassa e il deflettore
è in posizione 4 finché l’aria che è soffiata
dal sistema comincia a riscaldarsi. Quando
l’aria si è riscaldata, la posizione del
deflettore e la velocità della ventola
cambiano secondo le regolazioni specificate
con il telecomando.
NOTA
Deflettore
estetico
Deflettore
funzionale

I
9
• Usate il pulsante FLAP sul telecomando per regolare
la posizione del deflettore. Se spostate il deflettore a
mano, la posizione del deflettore secondo il
telecomando e la posizione reale potrebbero non
corrispondere. Se ciò accadesse spegnete il sistema,
aspettate che il deflettore si chiuda e poi accendete
di nuovo il condizionatore; ora la posizione del
deflettore è di nuovo normale.
• Non orientare il deflettore verso il basso durante il
funzionamento di raffreddamento. La condensa può
iniziare a formarsi attorno all’uscita dell’aria causando
un gocciolamento.
PRECAUZIONE
Durante il raffreddamento o deumidificazione, specialmente
in presenza di alta umidità in ambiente, orientare frontalmente
le alette verticali.
Orientamenti delle alette all'estrema sinistra o destra
potrebbero causare la formazione di condensa e
gocciolamenti dalla griglia di uscita aria.
PRECAUZIONE
Su
Giù Deflettore
Griglia
uscita aria
2.CONDIZIONATORE IN FUNZIONE
Se volete fermare il condizionatore premere il selettore di
funzionamento con una penna fino allo spegnimento della
spia OPERATION.
Interruzione di corrente durante il funzionamento.
Se si
verifica un’interruzione di corrente, il condizionatore d’aria
si arresta. Quando l’alimentazione elettrica viene ripristinata
il condizionatore riparte automaticamente dopo 3 minuti.
NOTA
Se il telecomando non funziona o è stato smarrito, operare
come segue.
1.CONDIZIONATORE FERMO
Se volete avviare il condizionatore premere il selettore di
funzionamento con una penna per selezionare la modalità
desiderata (COOL o HEAT).
Il condizionatore si avvierà con la velocità ALTA del
ventilatore.
L’impostazione della temperatura é di 25°C per la
modalità raffreddamento e di 21°C per il riscaldamento.
NOTA
FUNZIONAMENTO SENZA TELECOMANDO
SELETTORE
DI FUNZIONAMENTO
CURA E MANUTENZIONE
●Le operazioni di manutenzione devono essere eseguite
da personale dell’assistenza tecnica.
●Per la vostra sicurezza accertarsi che il condizionatore sia
spento e che la corrente elettrica sia disinserita prima di
procedere con le operazioni di pulizia.
●Non versate acqua sull'unità interna durante la pulizia.
Questa potrebbe danneggiare le parti interne dell'unità e
provocare un corto circuito.
COPERTURA E GRIGLIA
Pulire la copertura e la griglia dell’unità interna con la
spazzola di un aspirapolvere, o con un panno morbido e
asciutto.
Se queste parti fossero macchiate usate un panno inumidito
con un detergente leggero.
Nel pulire la griglia fare attenzione a non spingere le alette
fuori dalla loro sede.
●
Non usate solventi, detergenti o forti sostanze chimiche. Non
usate acqua bollente per pulire l’unità interna.
●
Alcuni spigoli metallici e le alette del condensatore sono
taglienti; prestate molta attenzione quando pulite queste parti.
●Lo scambiatore e altri componenti dell’unità esterna
devono essere puliti almeno una volta all’anno. Consultate
il Servizio Assistenza.
AVVERTIMENTO
PRECAUZIONE
Il pannello frontale può essere rimosso per essere lavato con
acqua.
Pannello
frontale
COME TOGLIERE IL PANNELLO FRONTALE
●Con il pannello completamente aperto afferrare le due
estremità con le mani e tirare verso di sè per rimuoverlo.
●Per rimontarlo, tenere il pannello orizzontale e spingere
le levette finché si agganciano all’unità, poi richiudere
il pannello.

COME TOGLIERE IL FILTRO
1.Afferrare entrambe le estremità del pannello e tirate verso
di voi e verso l’alto.
2.Spingere leggermente verso l’alto il filtro ed estrarlo. Eseguire
la pulizia del filtro e reinserirlo.
10
FILTRO ARIA
Il filtro aria dietro il pannello frontale deve essere pulito
almeno una volta ogni due settimane.
Pannello frontale Filtro aria
PULIZIA FILTRO
Pulire il filtro con una aspirapolvere. In presenza di polvere
oleosa lavate con acqua saponata tiepida, risciacquate
e lasciate asciugare.
I
CONSIGLI PER IL MASSIMO COMFORT
ED UN MINIMO CONSUMO
EVITARE:
●Di ostruire le griglie di mandata e aspirazione dell’unità,
se queste sono ostruite l’unità non lavora correttamente
e potrebbe danneggiarsi.
●L’irraggiamento diretto in ambiente usando tende
parasole esterne oppure tirando le tende interne.
VERIFICARE:
●Cheil filtro aria sia sempre pulito. Unfiltro sporcodiminuisce
il passaggio dell’aria e riduce la resa dell’unità.
●Cheporte e finestre siano chiuse per evitare infiltrazione
di aria non condizionata.
IDENTIFICAZIONE E SOLUZIONE
PROBLEMI DI FUNZIONAMENTO
●L’uso di telefoni cellulari in prossimità del climatizzatore
deve essere evitato perché può causare disturbi al
regolare funzionamento dello stesso. Qualora fosse
notato questo funzionamento anomalo (la spia di
funzionamento - OPERATION si accende, ma il
climatizzatore non funziona) ripristinare il normale
funzionamento togliendo l’alimentazione elettrica per
circa 3 minuti, tramite l’interruttore generale o la spina,
quindi rimettete in funzione il climatizzatore.
NOTA
Se il vostro climatizzatore non funziona regolarmente, prima
di chiamare il Servizio Assistenza eseguite i controlli
sottoelencati. Se il problema permane, contattare
il Rivenditore o il Servizio Assistenza.
Difetto: Il climatizzatore è completamente fermo.
Possibile causa:
1. Alimentazione interrotta.
2. Interruttore automatico aperto o fusibile interrotto.
3. Il pulsante di avviamento è nella posizione OFF.
4. Batterie del telecomando scariche.
Rimedio:
1. Ripristinare l’alimentazione.
2. Contattare il Servizio Assistenza.
3. Premere il pulsante di avviamento ON/OFF.
4. Sostituire le batterie.
Difetto: Il climatizzatore non funziona e le spie STANDBY
eOPERATION lampeggiano.
Possibile causa:
1. Sonda aria unità interna difettosa.
Rimedio:
1. Contattare il Servizio Assistenza.
Difetto: Il climatizzatore non funziona e le spie TIMER e
OPERATION lampeggiano.
Possibile causa:
1. Sonda scambiatore unità interna difettosa.
Rimedio:
1. Contattare il Servizio Assistenza.
Difetto: Il climatizzatore non funziona e le spie TIMER,
OPERATION eSTANDBY lampeggiano.
Possibile causa:
1. Anomalia nella comunicazione tra unità interna ed
esterna.
Rimedio:
1. Contattare il Servizio Assistenza.
Difetto: Il climatizzatore non funziona e la spia STANDBY
lampeggia.
Possibile causa:
1. Guasto sull’unità esterna.
Rimedio:
1. Contattare il Servizio Assistenza.
Difetto: Il condizionatore non raffredda o non riscalda a
sufficienza.
Possibile causa:
1. Filtri sporchi o ostruiti.
2. Carico termico eccessivo.
3. Porte o finestre aperte.
4. Ostruzione in prossimità della ripresa o della mandata
d’aria.
5. Temperatura impostata sul telecomando troppo alta.
6. Temperatura aria esterna molto bassa (versione pompa
calore).
7. Il sistema di sbrinamento sull’unità esterna in
riscaldamento non funziona (versione pompa calore).
Rimedio:
1. Pulire i filtri.
2. Eliminare sorgenti di calore in eccesso.
3. Chiudere porte e finestre.
4. Rimuovere le ostruzioni per ripristinare una corretta
circolazione d’aria.
5. Modificare la temperatura impostata sul telecomando.
6. Usare un’altra fonte di calore aggiuntiva.
7. Contattare il Servizio Assistenza.

NOM DES DIFFERENTES PARTIES ET SELECTEUR DE FONCTIONNEMENT
3
EMPLACEMENT D’INSTALLATION 4
PRECAUTIONS ELECTRIQUES 4
INSTRUCTIONS DE SECURITE 4
UTILISATION DE LA TELECOMMANDE 4
TELECOMMANDE 5
REGLAGE DE L’HEURE 6
REFROIDISSEMENT 6
CHAUFFAGE 6
FONCTIONNEMENTAUTOMATIQUE 6
DESHUMIDIFICATION 6
VENTILATION 7
REGLAGE DE LA VITESSE DU VENTILATEUR 7
FILTRE Ti027
PROGRAMME NOCTURNE 7
PROGRAMME HIGH POWER 7
REGLAGE DU TEMPORISATEUR 8
REGLAGE DU TEMPORISATEUR 1 HEURE 8
REGLAGE DU FLUX D’AIR 8
FONCTIONNEMENT SANS LA TELECOMMANDE 9
ENTRETIEN ET NETTOYAGE 9
CONSEILS POUR LE CONFORT ET L’ECONOMIE DE L’ENERGIE 11
GUIDE DE DEPANNAGE 11
Ce climatiseur est doté des fonctions de refroidissement, déshumidification, chauffage e ventilation. Vous trouverez ci-après
des détails à leur sujet. Veuillez vous référer à ces explications lors de l’utilisation de ce climatiseur.
SOMMAIRE
DECLARATION DE CONFORMITÉ
Ce produit est marqué puisque il est conforme aux Directives:
– Basse Tension n° 2006/95/CE.
– Compatibilité Electromagnétique n° 89/336 CEE, 92/31 CEE et 93/68 CEE.
Cette déclaration sera nulle en cas d'une utilisation différente de celle déclarée par le Constructeur et/ou de la non-
observation, même partielle des instructions d'installation et/ou d’utilisation.
2
REMARQUE
Pour tout problème ou toute question relatifs au climatiseur,
il faudra les informations ci-dessous. Les numéros de série
et de modèle figurent sur la plaque signalétique placée sur
le fond du coffret.
No. de modèle
No. de série
Date d’achat
Adresse du vendeur
Numéro de téléphone
INFORMATIONS SUR LE PRODUIT SYMBOLES D’AVERTISSEMENT
Les symboles suivants utilisés dans ce manuel
avertissement d’un danger potentiel pour l’utilisateur, le
personnel d’entretien ou l’appareil proprement dit:
Ce symbole signale un danger ou des opérations
dangereuses qui risquent d’entraîner des blessures
physiques graves, ou mortelles.
Ce symbole signale un danger ou des opérations
dangereuses qui risquent d’entraîner des blessures
physiques ou des dommages matériels, notamment du
produit.
AVERTISSEMENT
ATTENTION
AVERTISSEMENT POUR L’ELIMINATION CORRECT DU PRODUIT AUX TERMES DE LA DIRECTIVE
EUROPEENNE2002/96/CE
Au terme de son utilisation cet équipement ne doit pas être éliminé avec les ordures ménagères.
Le produit doit être remis à l’un des centres de collecte sélective locaux ou auprès des revendeurs assurant ce service.
Eliminer séparément un équipement électrique et électronique permet d’éviter des potentielles retombées négatives pour
l’environnement et la santé humaine dérivant d’une élimination incorrect et permet de récupérer les matériaux qui le
composent dans le but d’une économie importante en termes d’énergie et de ressources.
Pour rappeler l’obligation d’éliminer séparément ces équipements, le produit porte le symbole d’un caisson à ordures
barré.
F
This manual suits for next models
7
Table of contents
Languages:
Other Argo Air Conditioner manuals

Argo
Argo Ulisse 10 AUR101CL Manual

Argo
Argo Softy User manual

Argo
Argo POLIFEMO CLASS User manual

Argo
Argo AER608SH Manual

Argo
Argo AWR222CLE - AER222SC Operating manual

Argo
Argo AE720SH User manual

Argo
Argo POLIFEMO CLASS User manual

Argo
Argo XFETTO DCI HPL User manual

Argo
Argo I Series User manual

Argo
Argo HPL Manual

Argo
Argo AUR210CL Series Manual

Argo
Argo AWR609CL User manual

Argo
Argo CHARM DUBBEL 9000 UI User manual

Argo
Argo ADG35PH User manual

Argo
Argo APOLLO User manual

Argo
Argo GREENSTYLE DUAL 14000 UE User manual

Argo
Argo Bear User manual

Argo
Argo AUG38PCLI Manual

Argo
Argo dados 9/13 User manual

Argo
Argo Ulisse 13DCI User manual