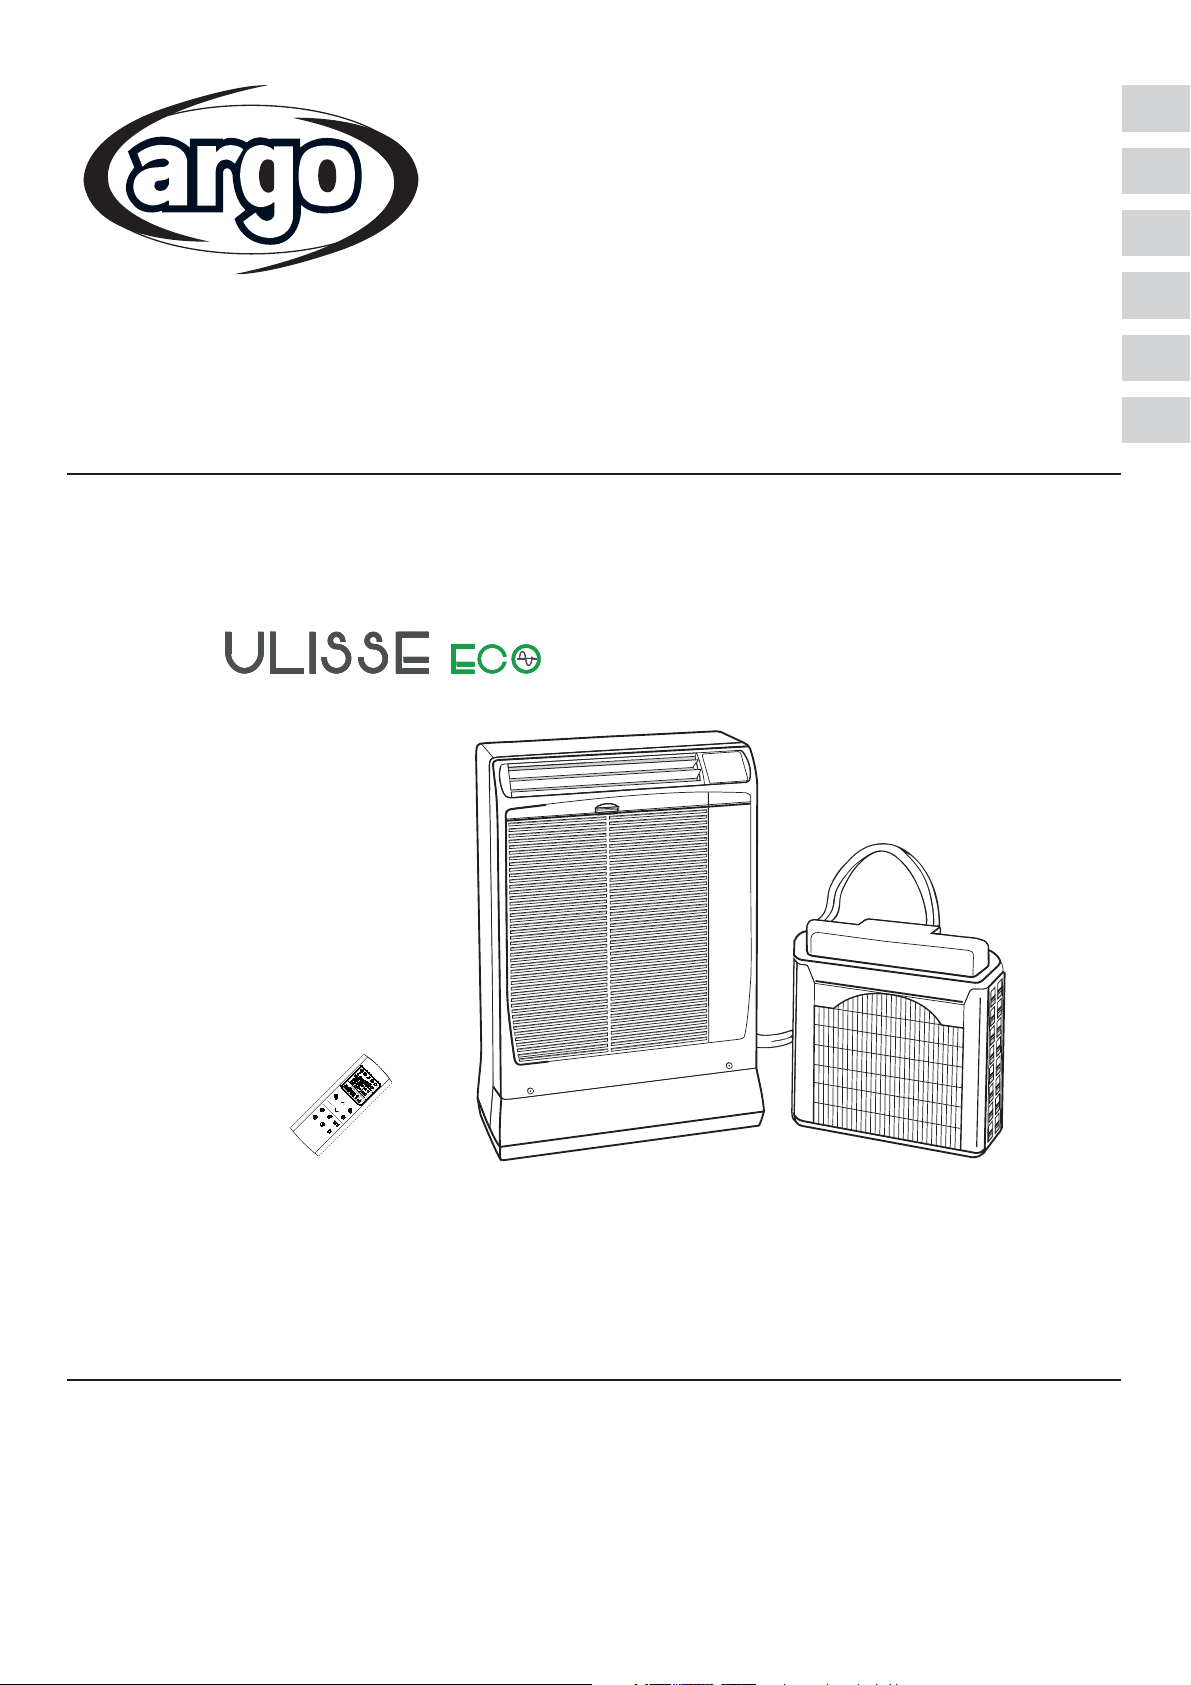
Argo ULISSE ECO User manual

37.4256.044.00 01/2021
35*+
9+:
:[XHU
+IU
4OMNZ
,ORZKX :OSKX 2OMNZ
S
1
MW
TTFS
AUTO
WEEK
SET
23
A
EN
IT
OPERATING INSTRUCTIONS
ISTRUZIONI D’USO
NOTICE D’UTILISATION
BEDIENUNGSANLEITUNG
INSTRUCCIONES DE USO
INSTRUCÇÕES DE FUNCIONAMENTO
FR
DE
ES
PT
Room air conditioner with remote condenser
Condizionatore d’ambiente con condensatore remoto
Climatiseur avec condenseur a air exterieur - Klimagerät mit außengerät
Acondicionador de ambiente con condensador a distancia
Ar Condicionado com condensador remoto

2
EN
CONTENTS
PRODUCT INFORMATION
The year of production of this unit is indicated in the
Nameplate (see figure below).
ALERT SYMBOLS
The following symbols used in this manual, alert you
to potentially dangerous conditions to users, service
personnel or the appliance:
This symbol refers to a hazard or unsafe practice which
can result in severe personal injury or death.
This symbol refers to a hazard or unsafe practice which can
result in personal injury or product or property damage.
WARNING
CAUTION
SAFETY INSTRUCTIONS
• Read this booklet carefully before using this
air conditioner. If you still have any difficulties
or problems, consult your dealer for help.
• Never use or store gasoline or other flammable vapour
or liquid near the air conditioner. It is very dangerous.
Moreover, never install electrical equipment, which
is not protected with IPX1 protection (protection
against vertical water drop), under the unit.
• The manufacturer assumes no responsibilities if the
safety regulations or local codes are not observed.
• Never use neither the power main switch or the
power plug to start or stop the air conditioner.
Always use the ON/OFF button.
• Do not stick anything into the air outlet of the air
conditioner. This is dangerous because the fan is
rotating at high speed.
• Do not let children play with the air conditioner.
• Do not cool the room too much if babies or invalids
are present.
•This air conditioner can be used by children aged
from 8 years and above and persons with reduced
physical, sensory or mental capabilities or lack of
experience and knowledge if they have been given
supervision or instruction concerning use of the
air conditioner in a safe way and understand the
hazards involved.
• Cleaning and user maintenance shall not be made
by children without supervision.
• For safety, be sure to turn the air conditioner off and
also to disconnect the power before cleaning.
WARNING
CAUTION
• This air conditioner is designed to give you
comfortable room conditions for domestic use.
As far as industrial and professional activities are
concerned, Argoclima declines all responsibility
for any unsuitability of the appliance depending on
its characteristics and the purposes it should be
responsible for.
SAFETY INSTRUCTIONS............................................................................... 2
INSTALLATION LOCATION............................................................................ 3
ELECTRICAL REQUIREMENTS .................................................................... 3
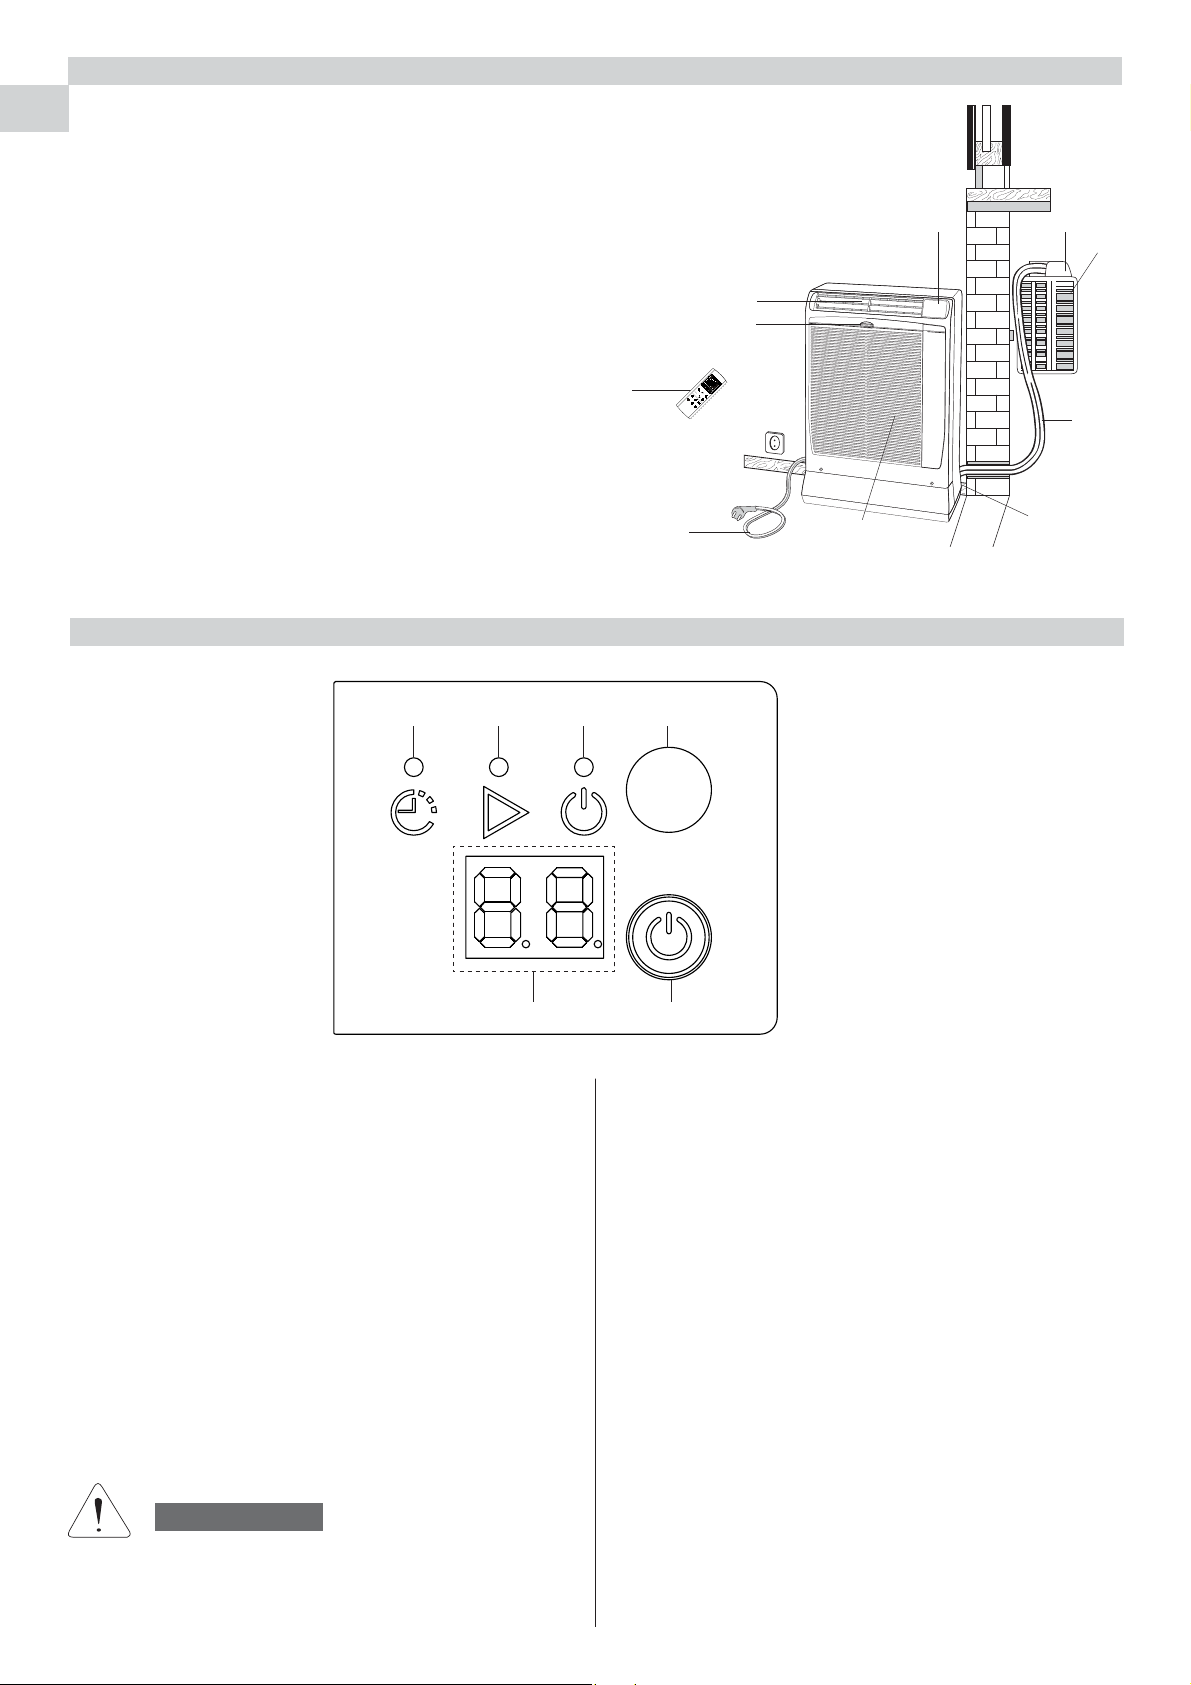
PRODUCT IDENTIFICATION.......................................................................... 4
MONITOR PANEL .......................................................................................... 4
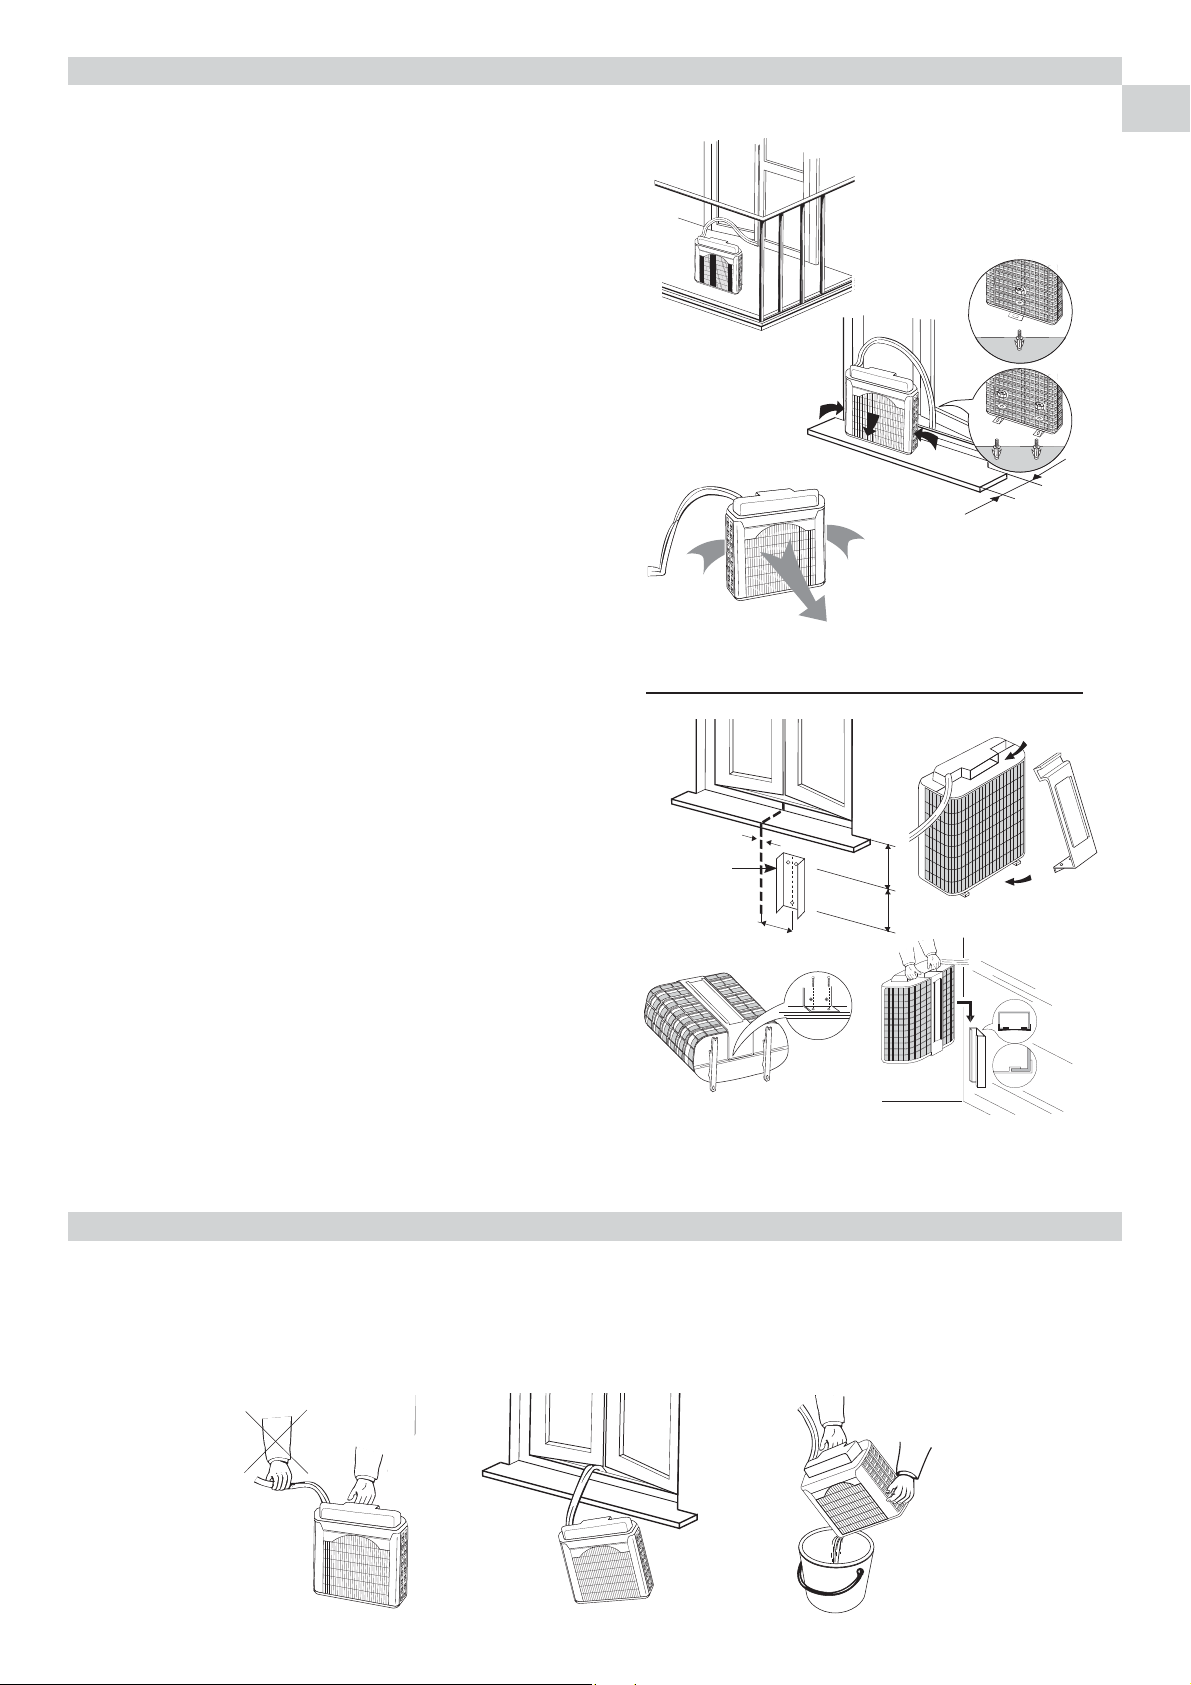
AIR CONDITIONER INSTALLATION............................................................... 5
IMPORTANT ADVICE ..................................................................................... 5
USING THE REMOTE CONTROL UNIT ......................................................... 6
REMOTE CONTROL UNIT ............................................................................ 7
HOW TO SET THE CLOCK ........................................................................... 8
COOLING/AUTOMATIC MODE...................................................................... 8
DEHUMIDIFYING MODE (DRY)...................................................................... 8
FAN ONLY MODE .......................................................................................... 8
ADJUSTING THE FAN SPEED ....................................................................... 8
NIGHT MODE................................................................................................. 9
ENERGY SAVING (ECO)................................................................................. 9
TURBO MODE................................................................................................ 9
TIMER SELECTION ........................................................................................ 9
HOW TO SET SCHEDULES ........................................................................... 9
RESET BUTTON............................................................................................. 9
PARAMETERS SETTING................................................................................ 10
ADJUSTING THE AIR FLOW DIRECTION...................................................... 12
OPERATION WITHOUT THE REMOTE CONTROL UNIT............................... 12
CARE AND CLEANING................................................................................... 12
ACCESSORIES (SUPPLIED ON REQUEST) .................................................. 13
TIPS FOR ENERGY SAVING.......................................................................... 14
TROUBLESHOOTING .................................................................................... 14
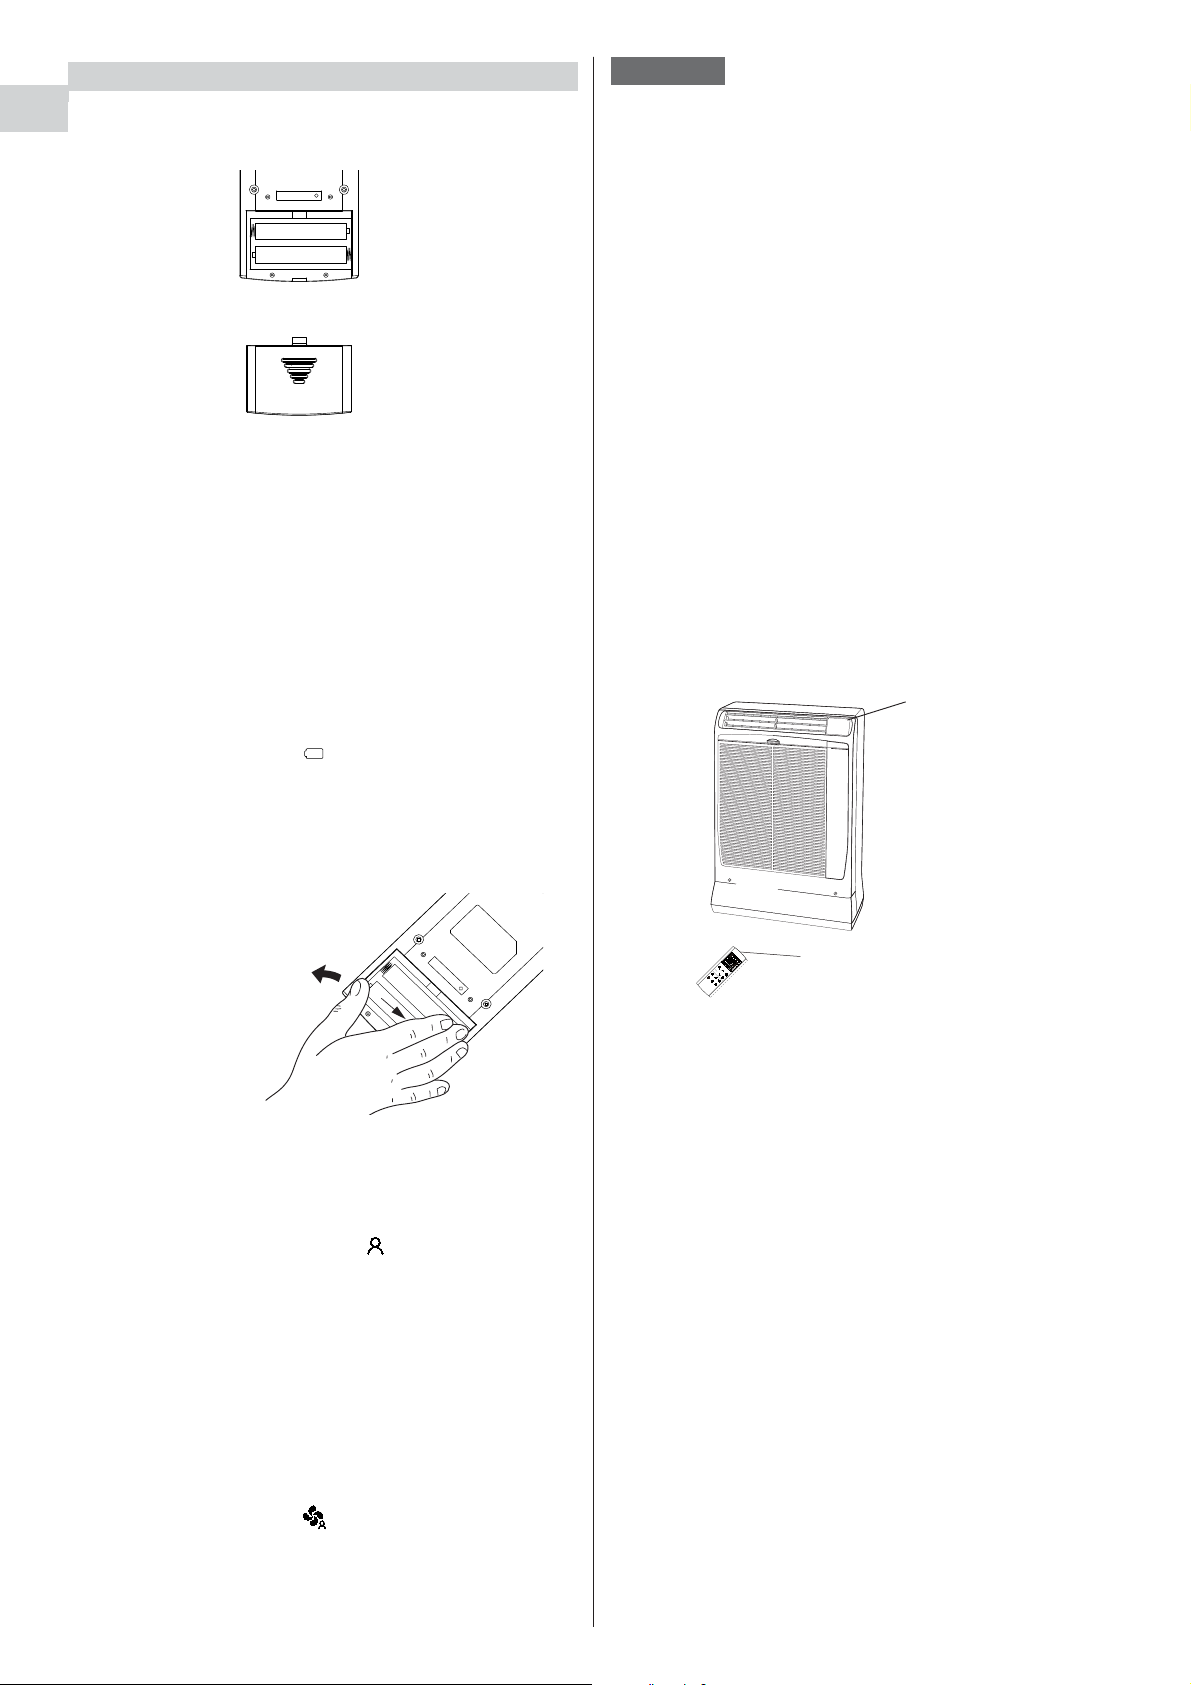
Serial number
Year of production
example: 0=2020
1=2021
s/n: Y00000RR

3
EN
This air conditioner is equipped with cooling, drying and fan functions.
Details on these functions are provided here following; refer on these descriptions when using the air conditioner.
NOTE
COOLING
OUTDOOR TEMPERATURE 46°C D.B.
ROOM TEMPERATURE 32°C D.B./23°C W.B.
OUTDOOR TEMPERATURE 19°C D.B.
ROOM TEMPERATURE 19°C D.B./14°C W.B.
OPERATING LIMITS
MAXIMUM CONDITIONS
MINIMUM CONDITIONS
Before using the appliance
• Check that the power supply at the location where the
air conditioner is going to be used is 220/240 volt, single
phase.
• For your safety care check periodically the conditions
of the electric supply cable; the electrical connection of
the unit is Y type with cable prepared in a special way;
in case you should notice any damage due to usage, call
the nearest After Sale Service to get the cable replaced.
• Before connecting the air conditioner to a power
socket, make sure that the socket is provided with
an earth connection.
• Verify that the available power supply is sufficient for
running other electrical domestic appliances in use
simultaneously from the same supply. See the data
plate on the unit showing the max. absorbed powers.
• Install a double - pole switch, protected fuses of the
delayed type, upstream the electricity wall socket 10A.
ELECTRICAL REQUIREMENTSINSTALLATION LOCATION
• Do not install this air conditioner where there are
fumes or flammable gases, or in an extremely humid
space such as a green house.
• Do not install the air conditioner where excessively
high heat-generating objects are placed.
• Do not install the air conditioner where the
atmosphere is extremely damp or humid (e.g.
greenhouse or laundry) it could be wetted by drops
of water (i.e. in laundries).
Avoid:
To protect the air conditioner from heavy corrosion, avoid
installing the outdoor unit where salty sea water can
splash directly onto it or in sulphurous air near a spa.
• Make sure that there are no obstacles around the
indoor unit affecting the free circulation of air. Do
not block the air intake and outlet of the unit with
curtains or other.Never put objects on the top of
the unit.
WARNING
• Make sure that circuit breakers, fuses, etc. are of
sufficient capacity to handle start - up current (normally
for no longer than a second).
• All wiring must conform to the local electrical codes.
Consult your dealer or a qualified electrician for details.
WARNING!
The air conditioner is provided with a time-guard system,
which does not allow re-starting of compressor until after
3 minutes from a previous stop.

4
EN 01. Infrared rays remote control unit
02. Monitor panel
03. Supply air deflector
, 4. Return air grille
, 5. Outdoor unit
06. Flexible tube
07. Air filter
08. Electric cable with plug
09. Service tube for condensate evacuation
10. Quick coupling cover
MONITOR PANEL
1. Time setting lamp (TIMER): This lamp lights up when
a timer is activated (see section “TIMER SELECTION”).
2. OPERATION lamp: This lamp lights up when you switch
on the unit.
The OFF position does not disconnect the power. Use the
main power switch to turn off power completely.
WARNING
5. Operation button (without remote control): Push
the button to switch on or off the unit (see section
“OPERATION WITHOUT REMOTE CONTROL UNIT”).
Press and hold this button for 5 seconds to enable the
WiFi configuration (Only for WiFi models, see “WiFi
INSTRUCTIONS” manual).
PRODUCT IDENTIFICATION
2
7
10
5
6
1
8
3
49
3. STANDBY lamp: this lamp lights up when the air
conditioner is connected to the power and ready to
receive the remote control command.
4. Receiver : it receives signals transmitted from the
remote control.
6. Display for room temperature and operation errors:
It indicates the room temperature or any operating error
codes (see AUTO-DIAGNOSIS table).
Each time a remote control signal is received and
stored, the display indicates the set temperature (set
point) for a few seconds.
ONLY FOR WiFi MODELS
35*+
9+:
:[XHU
+IU
4OMNZ
,ORZKX:OSKX2OMNZ
S
1
MW
TTFS
AUTO
WEEK
SET
23
A
1243
5
6

5
EN
POSITIONING OF OUTDOOR UNIT
The outdoor unit must always be kept in vertical position and
levelled. Make sure that there are no obstacles around the unit
affecting the free circulation of air. A lug at the rear bottom
of the unit ensures the minimum distance from the wall (3
cm). The unit must be kept at a minimum distance of cm. 15
(sidewise) and cm. 80 (frontally) from any walls.
INSTALLATION TYPE A
If your room has a balcony or a window-sill of sufficient depth
(min. 25 cm) you may rest the unit freely onto it. For safety’s
sake, you may anchor the unit to the window-sill using one
M6 x 20 expansion bolt in the slot of the lug at the rear bottom
of the unit.
The flexible tube may easily pass through the balcony door
or window shutters set ajar.
INSTALLATION TYPE B USING THE OUTDOOR UNIT
SUPPORT BRACKET KIT (NOT SUPPLIED)
You can buy separately the support bracket kit to fix the
outdoor unit to the wall, as follows:
1. Fix the support guide to the wall below the window sill.
2. Insert the support in the handle of outdoor unit, and turn
the outdoor unit upside down as shown in the picture.
3. Place the support and secure it at the edge of the unit,
using the screws.
4. Insert the support, fixed on the unit, at the guide fixed to
the wall. Make sure it is levelled.
SUPPORT
The air conditioner is made of two units interconnected by a
flexible tube. The indoor unit must be placed in the room to be
air conditioned, near a window, a balcony-door or a perimeter
wall. The outdoor unit, that provides to the disposal of heat
and condensation, must be located outside, on a window sill,
on a balcony or hanged to the wall.
Min. 25 cm.
M6 x 20
M6 x 20
AIR CONDITIONER INSTALLATION
TYPE A
TYPE B
IMPORTANT ADVICE
OUTDOOR UNIT
1.When you move the outdoor unit, always hold it by the handle, never pull it by the flexible tube.
2.Never let the outdoor unit hang on the flexible tube.
3.When you recover the outdoor unit after operation, drain away any remaining condensate by tilting the unit.
NO!
NO!
140
3 x ø 10
Holes
100 min.
200
SUPPORT
GUIDE

6
EN
OPERATION WITH THE REMOTE CONTROL UNIT
When using the remote control unit, always point the unit
transmitter head directly at the air conditioner receiver.
TEMPERATURE SENSOR SELECTOR
•Under normal conditions the room temperature is
detected and checked by the temperature sensor placed
in the remote controller ( IFEEL icon displayed ).This
function is designed to provide a comfortable room
temperature by transmitting the temperature control
command from the location next to you. When using this
function, the remote, control should always be pointed
at the air conditioner, therefore it should be placed in
a position in which it is visible by the indoor unit (for
example, do not put it in a drawer).
●It is possible to disable the remote controller room sensor
pressing the FAN/IFEEL button for a few seconds. In
this case the icon on the remote controller display lights
off and the sensor placed in the air conditioner becomes
active.
USING THE REMOTE CONTROL UNIT
• Insert two AAA alkaline batteries of 1,5 V-DC making
sure that point in the direction marked in the battery
compartment.
• Set the clock (see procedure on page 8).
Remote controller is now ready for operation.
• The batteries last about six months. Depending on how
much you use the remote control unit.
Remove the batteries if you do not use the remote
control unit for more than one month.
Replace the batteries when the battery symbol appears
on the remote control ( ).
• The batteries of the remote control contain polluted
substances. Exhausted batteries must be disposed
according to the laws in force.
HOW TO REMOVE BATTERIES
• Remove the lid.
• Press the battery
toward the
negative end
and lift it out by
its positive end
(as shown in the
figure).
• Remove the other
battery in the same
way.
HOW TO INSTALL BATTERIES
• Remove trhe lid in the rear part of the remote control
unit.
The remote control unit transmits signals to the indoor
unit each time you press a key and at any temperature
change detected by the internal sensor. In case of
troubles (low batteries, remote control placed in
a position not visible by the indoor unit,...) room
temperature control is automatically switched to the
sensor of the indoor unit. In this case, the temperature
around the remote control unit may differ from the
temperature detected in the air conditioner position.
NOTE
RESET
-+
-+
RESET
-+
-+
INDOOR UNIT
REMOTE
CONTROL UNIT
RECEIVER
TRANSMITTER HEAD
35*+
9+:
:[XHU
+IU
4OMNZ
,ORZKX :OSKX2OMNZ
S
1
MW
TTFS
AUTO
WEEK
SET
23
A

7
EN
ON/OFF BUTTON
Press this button to turn the air conditioner
ON / OFF.
Press for 2 seconds to lock / unlock the
buttons
MODE SELECTOR BUTTON
Press this button to modify the air
conditioner mode.
COOLING
The air conditioner makes the room
cooler.
HEATING
(not available)
DEHUMIDIFYING (DRY)
The air conditioner reduces the humidity
in the room.
FAN
The air conditioner works only as a
circulation fan.
AUTOMATIC =
A
REMOTE CONTROL UNIT
DISPLAY
Information is displayed when the remote controller is switched on.
Operation mode
Fan speed
I FEEL mode is active
(remote controller sensor
active)
Night mode
Timer: 3 types + delayed timer
Cooling
Dehumidification
Fan
Automatic
Clock
A
TRANSMITTER
When you press the buttons of the
remote control unit, the mark
appears on the display to transmit
the setting changes to the receiver
in the air conditioner.
CLOK AND TIMER SETTING BUTTON
Press this button in order to select the
desired timer.
Press for 2 seconds to set the timer
For details refer to paragraphs “HOW
TO SET THE PRESENT TIME”, “TIMER
SELECTION”, and “SETTING THE TIMER”.
35*+
9+:
:[XHU
+IU
4OMNZ
,ORZKX :OSKX 2OMNZ
S
1
MW
TTFS
AUTO
WEEK
SET
23
A
TEMPERATURE SETTING BUTTONS
- (cooler)
Press this button to decrease the set
temperature.
+ (warmer)
Press this button to increase the set
temperature.
USE THESE BUTTONS ALSO FOR TIMER
SETTING
SENSOR
A temperature sensor inside the remote
control unit detects the room temperature.
(see on the back of the remote control unit)
IFEEL MODE
Press this button for a few seconds
to modify the active setting for room
temperature detection (from remote
controller to air conditioner and viceversa).
FILTER BUTTON
(INACTIVE BUTTON)
NIGHT BUTTON
Press this button in order to select the
NIGHT mode.
FLAP BUTTON
(INACTIVE BUTTON)
TURBO BUTTON
Press this button in order to select the
TURBO mode.
ECO BUTTON
Press this button in order to select the ECO
mode.
S
1
MW
TTFS
AUTO
WEEK
SET
23
A
TURBO mode
LIGHT BUTTON
Press this button to turn the unit display
on or off
Days of the week
ECO mode
Temperature
FAN/IFEEL BUTTON
Press this button to change the fan speed.
Fan speed is automatically
selected by the unit.
Low speed
Medium/low speed
Medium speed
Medium/high speed
High speed
Very high speed
AUTO
HEATING MODE: not active on this unit
FLAP: not active on this unit

8
EN
HOW TO SET THE CLOCK
1. Turn on the unit with the ON / OFF
button.
2. Press the button until the
COOLING symbol appears on
the display.
3. Press the buttons to set the
desired temperature (
the temperature
range is between 10 °C and 32 °C
).
COOLING / AUTOMATIC MODE
NOTES
SET
THE DISPLAY SHOWS THE
SELECTED TEMPERATURE
AND THE WORD “SET”.
AFTER 5 SECONDS FROM THE
REQUIRED TEMPERATURE
SETTING THE DISPLAY
WILL SHOW THE ROOM
TEMPERATURE AGAIN.
4. Press the button to select the fan speed.
1
If the fan is set in automatic mode and the unit stops
because setpoint is reached, also the fan will stop.
If the fan is set in one of the six manual speeds, it will
go on operating at the selected speed, even if the unit
stops due to reaching the setpoint.
• When the external or internal temperature is too low,
the unit could limit the speed of the compressor or
switch it off for a certain period of time to avoid the
formation of ice on the internal heat exchanger.
35*+
9+:
35*+
9+:
:[XHU
+IU
4OMNZ
,ORZKX :OSKX 2OMNZ
SMW
TTFS
AUTO
WEEK
SET
3
4
2. AM or PM starts flashing: use the arrows to choose
AM or PM, then confirm with
The hour indication starts flashing: set the hour with
the arrows, then confirm with
The minutes indication starts flashing: set the
minutes with the arrows, then confirm with
WEEK starts flashing: set the day of the week with
the arrows, then confirm with
3. At this point the procedure is finished: press the
button to exit the clock menu.
1. Press for a few seconds the Timer button .
Press the button . :OSKX
35*+
9+:
35*+
9+:
35*+
9+:
SMW
TTFS
WEEK
SET 35*+
9+:
:[XHU
+IU
4OMNZ
,ORZKX :OSKX 2OMNZ
35*+
9+:
35*+
9+:
SMW
TTFS
WEEK
ARROWS
2
DEHUMIDIFYING MODE (DRY)
ADJUSTING THE FAN SPEED
1. Turn on the unit with the ON / OFF button
2. Press the button until the DEHUMIDIFYING symbol
appears on the display .
3. Press the buttons to set the desired temperature
(
the temperature range is between 10 °C and 32 °C
).
•Use DRY operation when you want to reduce the
humidity in the room.
•Once the room temperature reaches the set level, the
unit repeats the cycle of turning on / off automatically.
•During DRY operation, the fan speed is automatically
set (Remote control lamp is ON) to maximize
dehumidification.
•Dry operation is not possible if the indoor temperature
is less than 10 °C.
NOTES
If you want to make air circulate without any temperature
control, press the button until the FAN symbol
appears on the display .
FAN ONLY MODE
In FAN ONLY mode, the AUTOMATIC speed corresponds
to the high speed H.
AUTOMATIC
Set with the button the “AUTO” position
. The unit automatically controls the fan speed.
When the air conditioner starts operating, the fan speed
varies according to the thermal load of the room .
NOTE
MANUALE
If you want to manually adjust the fan speed just set the
button as desired:
35*+
9+:
SET
THE DISPLAY SHOWS THE
SELECTED TEMPERATURE
AND THE WORD “SET”.
AFTER 5 SECONDS FROM THE
REQUIRED TEMPERATURE
SETTING THE DISPLAY
WILL SHOW THE ROOM
TEMPERATURE AGAIN.
AUTO
35*+
9+:
AUTO
AUTO
LML M
MHHVH
MH Medium-high
HHigh
VH Very high
LLow
ML Medium-low
MMedium

9
EN
A) DELAYED TIMER
This timer is used to start the unit (if it
is off) or to stop the unit (if it is on) after
a certain time, to set the delayed time.
1.
Press the Timer button for a few
seconds.
2. Press the arrow “up” to select the
delayed timer .
3. Press the button : the hour
indication starts flashing; set the hour
with the arrows.
4. Press the button again: the minutes
indication starts flashing; set the minutes
with the arrows.
5. Confirm with the button , then press
the button to exit the delayed timer
menu.
B) SCHEDULE
This timer is used to turn the unit on and
off at predefined times and days.
1.
Press the Timer button for a few
seconds
.
2. Press the arrow “up” to select the
schedule to be set ( , or ) .
3. Press the button : ON indication
starts flashing.
4. Press the button again: AM indication
starts flashing (you can choose AM or
PM with the arrows).
5. Press the button : the hour indication
starts flashing; set the desired hour with
the arrows.
6. Press the button again: the minutes
indication starts flashing; set the minutes
with the arrows.
7. Press the button : OFF indication
starts flashing.
8. Repeat the same procedure to set AM
or PM, hour and minutes.
9. At this point, press the “up” arrow
and WEEK will start flashing.
9. Press the button : the indication of
the first day of the week starts flashing;
set ON or OFF with the arrows, then
confirm with the button .
9. The indication of the second day of
the week starts flashing: repeat the
procedure with every day of the week,
if desired.
10.At the end press to exit the menu.
HOW TO SET SCHEDULES
S
1
MW
TTFS
WEEK
• It is possible to set up to 3 weekly schedules at different
times using the timers.
NOTE
TIMER SELECTION
To select the timer, press the button to switch on the
remote control, then press the button to chose the
desired schedule:
This program is used to increase silence and comfort during
the night.
To activate the Night mode:
1.Press the button to set the air conditioner in cooling
or dehumidification.
2.Press the button .
3.The symbol
appears on the display
. Press the
button again to release the function.
What does the NIGHT mode mean?
When you select the NIGHT mode, the air conditioner will
modify automatically the set temperature after 60 minutes: it
will be raised by 1°C.
This enables you to save energy without sacrificing your
comfort.
NIGHT MODE
During the NIGHT mode the internal fan speed is automatically
lowered, reduceing the noise.
NOTE
35*+
9+:
4OMNZ
This program is used to limit the maximum electrical power
absorbed by the unit.
When the energy saving program is selected, the air conditioner
limits the absorbed power to 75% of the maximum power. This
limit can be set by modifying parameter P12 on the remote
control (see paragraph “Parameters setting”).
To activate the Energy save mode:
1.Press the button to set the air conditioner in cooling
or dehumidification.
2.Press the button .
3.The symbol
appears on the display
. Press the button
again to release the function.
ENERGY SAVING MODE (ECO)
35*+
9+:
+IU
This program is used to increase the maximum power that
can be supplied by the air conditioner, even if it involves less
silence.
To activate the Turbo mode:
1.Press the button to set the air conditioner in cooling .
2.Press the button .
3.The symbol
appears on the display
. Press the button
again to release the function.
TURBO MODE
35*+
9+:
:[XHU
:OSKX
35*+
9+:
35*+
9+:
35*+
9+:
:[XHU
+IU
4OMNZ
,ORZKX :OSKX 2OMNZ
ARROWS
35*+
9+:
123
:OSKX
35*+
9+:
35*+
9+:
35*+
9+:
35*+
9+:
35*+
9+:
35*+
9+:
35*+
9+:
S
1
MW
TTFS
WEEK
35*+
9+:
:[XHU
+IU
4OMNZ
,ORZKX :OSKX 2OMNZ
ARROWS
:OSKX
1
23
or “OFF”
In the event of a power failure and restoration, the timer
selection must be performed again.
NOTE
123
Press the RESET button on the back of the remote control if
you want to reset all settings and return to the factory setting.
RESET BUTTON
RESET

10
EN
PARAMETERS SETTING
or (2 sec)
To access to the “Parameter menu”, long press “MODE/SET” from the main screen or from the OFF screen:
The first parameter shown is P00. Press“UP”or“DOWN”to scroll the parameter list:
When a parameter has been selected, long press “MODE/SET” to modify the value of the parameter. The value of the parameter
starts blinking and SET symbol switches on:
(2 sec)
Press “UP” or “DOWN” to modify the value of the parameter, then press “MODE/SET” to save and transmit the selected value
of the parameter or press “ON/OFF” to restore the previous value of the parameter:

11
EN
(0.5 sec)
Press “ON/OFF” to go back to main screen:
Par. Parameter name Min Default Max Values
P00 Factory default reset 0 0 3 0 = No action
1 = Reset all remote control parameters to facto-
ry default value
P01 Software version 0 - 7 Software version of the remote controller
P05 Temperature scale 0 0 1 0 = °C (Celsius)
1 = °F (Fahrenheit)
P06 Transmission channel 0 0 3 0 = Channel #0
1 = Channel #1
2 = Channel #2
3 = Channel #3
P12 ECO mode power input limit 30 75 99 When ECO mode is selected, max electrical
power input of the unit is limited to P12:
30 = 30% of Max Power Input
31 = 31% of Max Power Input
...
99 = 99% of Max Power Input
NOTE
Parameters not listed in the table are reserved and should not be changed. Changing the parameters not listed can cause the
air conditioner to malfunction.

12
EN
• Do not pour water on the unit to clean it. This will damage
the internal components and cause an electric shock
hazard.
• Never use solvents, or chemical agents when cleaning
the indoor unit. Do not wipe the plastic casing using very
hot water.
Casing and Grille
Clean the casing and grille of the indoor unit with a vacuum
cleaner brush, or wipe them with a clean, soft cloth. If
these parts are stained, use a clean cloth moistened with
a mild liquid detergent. When cleaning the grille, be careful
not to force the blades out of place.
HORIZONTAL
The horizontal air flow can be adjusted by moving the
vertical blades to the left or right, as indicated in the
following figure.
ADJUSTING THE AIR FLOW DIRECTION
Set vertical blades to the front position during
COOLING/DRY operation if humidity is high.
If the vertical blades are set to the left-most or right-
most position, condensation will form around the air
outlet and drip off.
CAUTION
VERTICAL
Hold the end of the flap and move it up and down to adjust
the vertical air flow.
2. WHEN THE AIR CONDITIONER IS ON
If you want to turn off the air conditioner push the
OPERATION BUTTON again.
Power failure during operation.
In the event of power failure, the unit will stop. When the
power is restored, the unit automatically restarts after 3
minutes. The operating settings are stored 1 minute after
the last remote control signal received from the unit.
NOTE
If necessary, the air conditioner can operate without a
remote control:
1. WHEN THE AIR CONDITIONER IS OFF
If you want to turn on the air conditioner push the
OPERATION BUTTON to select the COOLING mode:
OPERATION WITHOUT THE REMOTE
CONTROL UNIT
The air conditioner will start in HIGH fan speed.
The temperature setting is 25°C.
NOTE
CARE AND CLEANING
For safety, be sure to turn the air conditioner off and
also to disconnect the power before cleaning.
• Some metal edges and the
condenser fins are sharp and may
cause injury if handled improperly;
special care should be taken when
you clean these parts.
• Periodically check the outdoor unit
to see if the air outlet or air intake
are clogged up with dirt or soot.
• The condenser and other
components of the outdoor unit
must be cleaned periodically.
Consult your DEALER or AFTER
SALES SERVICE.
OUTDOOR UNIT
(CASING AND CONDENSING COIL)
CAUTION
INDOOR UNIT
TEST
OFFON
OPERATION BUTTON

13
EN
AIR FILTER
The air filter must be cheked at least once every two weeks
operation. Operation with a dirty filter always causes a lower
efficency of the air conditioner and severe product damage.
The filter is located at the back of the intake grille in the front
of the air-conditioner and shall be removed from the upper
side of the unit.
HOW TO REMOVE THE FILTER
FILTER CLEANING
Use a vacuum cleaner to remove light dust. If there is
sticky dust on the filter, wash the filter in lukewarm,
soapy water, rinse it in clean water, and dry it.
TRANSPORT
Keep the air conditioner in the vertical position during
transportation.
STORAGE
If you are not going to use the air-conditioner for a long
period, clean the air filters, evacuate the condensate from
the indoor unit through the drain hose at the unit back
side. Do not disconnect the flexible tube, unless you are
obliged to do it: in that case protect the open halves of the
couplings, after disconnecting it and before handling the
flexible hose and the outdoor unit; utilize the plastic plugs
supplied as accessories, that must be tightened with a
spanner. After handling, reconnect the flexible tube to the
outdoor unit to avoid refrigerant leaks during the storage.
Do not put heavy objects on the top of the unit, and protect
it with a cloth or a plastic bag.
CONDENSATE DRAIN PIPE
ACCESSORIES (SUPPLIED ON REQUEST)
OUTDOOR UNIT SUPPORT BRACKET KIT
It is possible to buy a support bracket kit for the installation
of outdoor unit.
SUPPORT GUIDE SUPPORT
140
3 x ø 10
Holes
100 min.
200

14
EN
•The use of portable telephones near the air-conditioner
may cause disturbance to its normal operation and
must be avoided. In case abnormal operation is noticed,
(OPERATION lamp lights but outdoor unit will not run)
to restore normal operation turn-off electric supply for
60 seconds at least, by disconnecting the main switch
or the wall plug, then start again the air-conditioner.
•The blinking OPERATION lamp, together with the stop
of the air conditioner for a short time are due to the
exceeding condensate drainage. (see table “AUTO-
DIAGNOSIS”)
If the OPERATION lamp goes on blinking and the air
conditioner definitely stops means that the condensate
pump is not working or that the condensate drain pipe
in the flexible connection pipe is obstructed; in this case
contact the AFTER SALE SERVICE.
In case of emergency the air conditioner can work by
draining the condensate from the back little pipe into a
rather short container: extract the little pipe and remove
the cap.
•If your air conditioner does not work properly, first check
the following points before requesting service.
If it still does not work properly, contact your dealer or
service center.
TIPS FOR ENERGY SAVING
DO NOT:
●Block the air intake and outlet of the unit.
If they are obstructed, the unit will not work well, and
may be damaged.
●Let direct sunlight into the room. Use sunshades, blind
or curtain.
DO:
●Always try to keep the air filter clean. A clogged filter
will impair the performance of the unit.
●To prevent conditioned air from escaping, keep
windows, doors and any other openings closed.
TROUBLESHOOTING
Trouble: the air conditioner does not run at all.
Possible cause:
1. Power failure.
2. Leakage breaker tripped.
3. Line voltage is too low.
4. Operation button is OFF.
5. Batteries in remote control unit have run down.
Remedy:
1. Restore power.
2. Contact service center.
3. Consult your electrician or dealer.
4. Press the button again.
5. Replace batteries.
Trouble: Compressor runs but soon stops.
Possible cause:
1. Obstruction in front of condenser coil.
Remedy:
1. Remove obstruction.
Trouble: Poor cooling performance.
Possible cause:
1. Dirty or clogged air filter.
2. Heat source or many people in room.
3. Doors and/or windows are open.
4. Obstacle near air intake or air discharge port.
5. Thermostat is set too high.
Remedy:
1. Clean air filter to improve airflow.
2. Eliminate heat source if possible.
3. Shut them to keep the heat or cold out.
4. Remove it to ensure good airflow.
5. Set the temperature lower.
Trouble: Clicking sound is heard from the air conditioner.
Possible cause:
1. Any plastic parts may expand or shrink due to a sudden
temperature change. In this event, a clicking sound may
occur.
Remedy:
1. This is normal, and the sound will disappear when an
even temperature is settled.
AUTO-DIAGNOSIS
N.
LED
POSSIBLE CAUSE REMEDYTIMER OPERATION STANDBY
-•Heating mode not available
Select an available mode
E1 Communication error with HMI receiver PCB (WiFi model only) Contact service centre
E2 O O Condensate drainage error (float error) Contact service centre
E3 ••
PFC error (over current, over voltage or PFC communication error)
Contact service centre
E4 •OInternal fan malfunction Contact service centre
E5 •OInverter PCB overtemperature (compressor module) Contact service centre
E6 O •Compressor overcurrent Contact service centre
E7 O Defective or disconnected indoor air sensor (RAT) Contact service centre
E8 O Defective or disconnected coil sensor (ICT) Contact service centre
E9 O O
Defective or disconnected compressor discharge temperature sensor (CDT)
Contact service centre
O = LED off •= LED on = flashing LED

15
EN
INFORMATION FOR CORRECT DISPOSAL OF THE PRODUCT IN ACCORDANCE WITH THE EUROPEAN
DIRECTIVE 2012/19/EU
At the end of its working life this equipment must not be disposed of as an household waste.
It must be taken to special local community waste collection centres or to a dealer providing this service.
Disposing of an electrical and electronic equipment separately avoids possible negative effects on the environment
and human health deriving from an inappropriate disposal and enables its components to be recovered and recycled
to obtain significant savings in energy and resources.
In order to underline the duty to dispose of this equipment separately, the product is marked with a crossed-out dustbin.
INFORMATION FOR CORRECT DISPOSAL OF THE BATTERY IN ACCORDANCE WITH THE EUROPEAN
DIRECTIVE 2006/66/EC AND MODIFICATIONS INTRODUCED BY DIRECTIVE 56/2013/EU
Please replace battery when its electricity charge is used up: please do not eliminate this battery together with normal
household waste. It must be taken to special local community waste collection centres or to a dealer providing this
service. Disposing of a battery separately avoids possible negative effects on the environment and human health
deriving from an inappropriate disposal and enables its components to be recovered and recycled to obtain significant
savings in energy and resources. In order to underline the duty to dispose of this equipment separately, the battery
is marked with a crossed-out dustbin.
REGULATION (EU) No. 517/2014 - F-GAS
The unit contains R32, a fluorinated greenhouse gas with a global warming potential (GWP) of 675.
Do not release R32 into the atmosphere.

S.A.C. - Printed in italy
Via Alfeno Varo, 35 - 25020 Alfianello - BS - Italy
Tel. +39 0331 755111 - Fax +39 0331 755501
www.argoclima.com
Other manuals for ULISSE ECO
1
Table of contents
Other Argo Air Conditioner manuals

Argo
Argo AEG ECO PLUS 35PIH User manual

Argo
Argo Bear User manual

Argo
Argo AE726SCL Manual

Argo
Argo POLIFEMO ZEUS User manual

Argo
Argo NEWAGE 9000 UI User manual

Argo
Argo ASIAS8 User manual

Argo
Argo dados 9/13 User manual

Argo
Argo AW22AL User manual

Argo
Argo AS71CL Manual

Argo
Argo AEG ECO 100PI Operating manual

Argo
Argo SWAN User manual

Argo
Argo Nuk User manual

Argo
Argo DD Series User manual

Argo
Argo LUDVIG User manual

Argo
Argo AEI1G42EMX User manual

Argo
Argo AEI826SH Manual

Argo
Argo DAVEN PLUS User manual

Argo
Argo AWR222CLE - AER222SC Operating manual

Argo
Argo AWIBS9 Manual

Argo
Argo X3I ECO PLUS 35 SH LHB Operating manual