V 01/20 58
"FAN" button will allow you to adjust the fan speed. Pressing the "SWING" button will allow you to
adjust the angle of airflow.
N.B. When several indoor units are connected to the same outdoor unit, do not select the
AUTO mode, unless only one indoor unit is used and the others are switched off. All the
units must in fact operate in the same mode: if the mode selected or automatically defined
is different for the units connected to the same outdoor unit, the system goes into error and
the error E7 appears on the display of the indoor unit.
When you select cool mode, the air conditioner will run in cool mode. The indicator will illuminate
on the display. Press "▲" or "▼" to adjust the set temperature. Press the "FAN" button to adjust the
fan speed. Pressing the "SWING" button will allow you to adjust the angle of airflow.
When you select dry mode, the air conditioner will run at low speed in dry mode. The indicator
will illuminate on the display. The fan speed cannot be adjusted in this mode. Pressing the "SWING"
button will allow you to adjust the angle of airflow.
When you select fan mode, the air conditioner will operate only the fan, blowing air without cooling
or heating. All the indicators will switch off. Press the "FAN" button to adjust the fan speed. Pressing
the "SWING" button will allow you to adjust the angle of airflow.
When you select heat mode, the air conditioner will run in heat mode. The indicator will illuminate
on the display. Press "▲" or "▼" to adjust the set temperature. Press the "FAN" button to adjust the
fan speed. Pressing the "SWING" button will allow you to adjust the angle of airflow.
N.B.:
To prevent blasts of cold air from being blown into the room, there will be a delay of 1 – 5 minutes
after selecting heat mode before operation begins. (The actual delay will depend on the indoor
ambient temperature).
The temperature can be set between 16 – 30°C and four fan speeds are available: automatic, low,
medium and high.
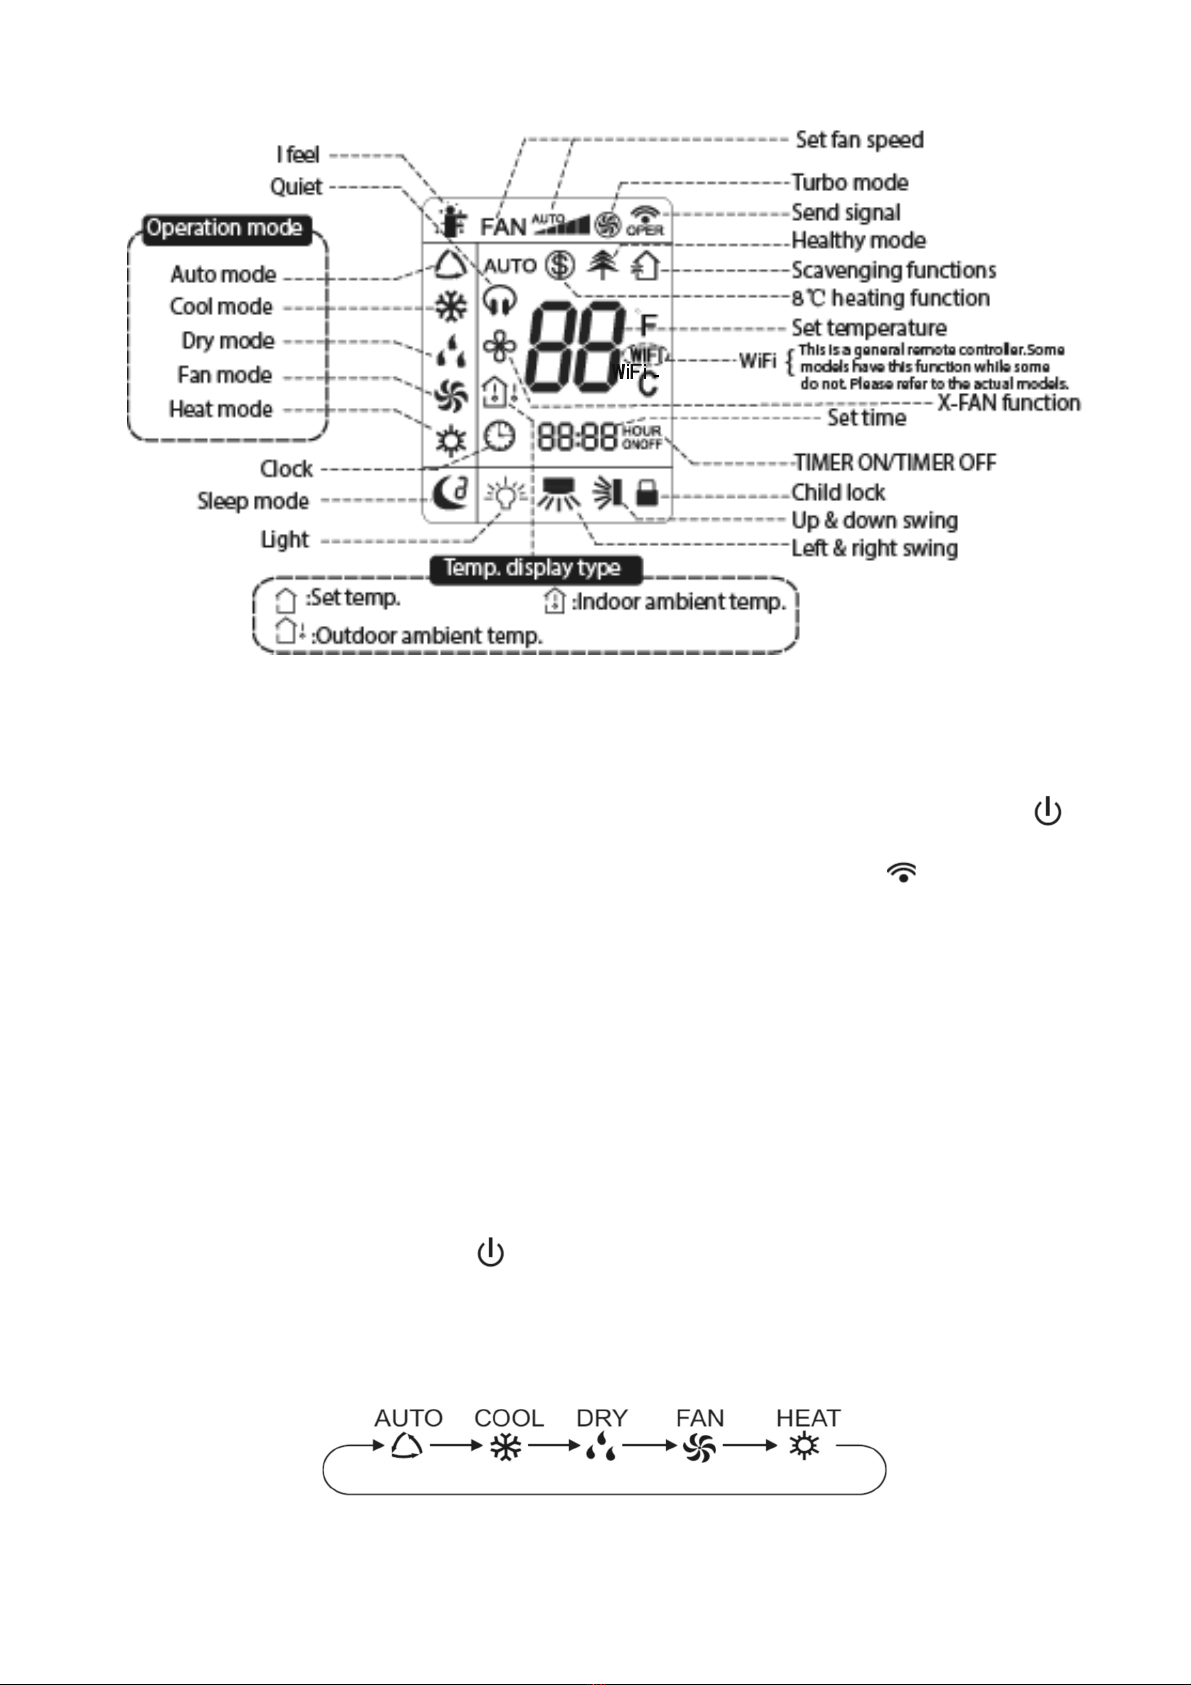
3. FAN button
Pressing this button will allow you to cycle through and set the fan speed:
automatic (AUTO), Low ( ), Low-medium( ) Medium ( ), Medium-high (),High(
).
N.B.:
The fan speed in dehumidification mode is low.
Pressing the ventilation speed button for 2 seconds in Cooling or Dehumidification mode activates
the X-FAN function and the icon appears on the remote control: the unit will continue to ventilate
for a few minutes, even after switching off the unit, to dry the battery of the indoor unit, thus
preventing the formation of mold. This function is not available in Auto, Ventilation or Heating mode.
If the X-FAN function has been selected: after turning off the unit with the ON / OFF button, the
indoor unit fan will continue to run for a few minutes at low speed. During this time, press the FAN
key for 2 seconds to stop the fan.
If the X-FAN function is not selected, when the air conditioner is switched off by pressing the ON /
OFF button, the fan goes off together with the unit.
4. TURBO button
In cool/heat mode, press this button to switch to rapid cool/heat mode. The icon will appear on
the remote control display. Press this button again to exit the TURBO function. The icon will
disappear from the display.If start this function, the unit will run at super-high fan speed to cool or