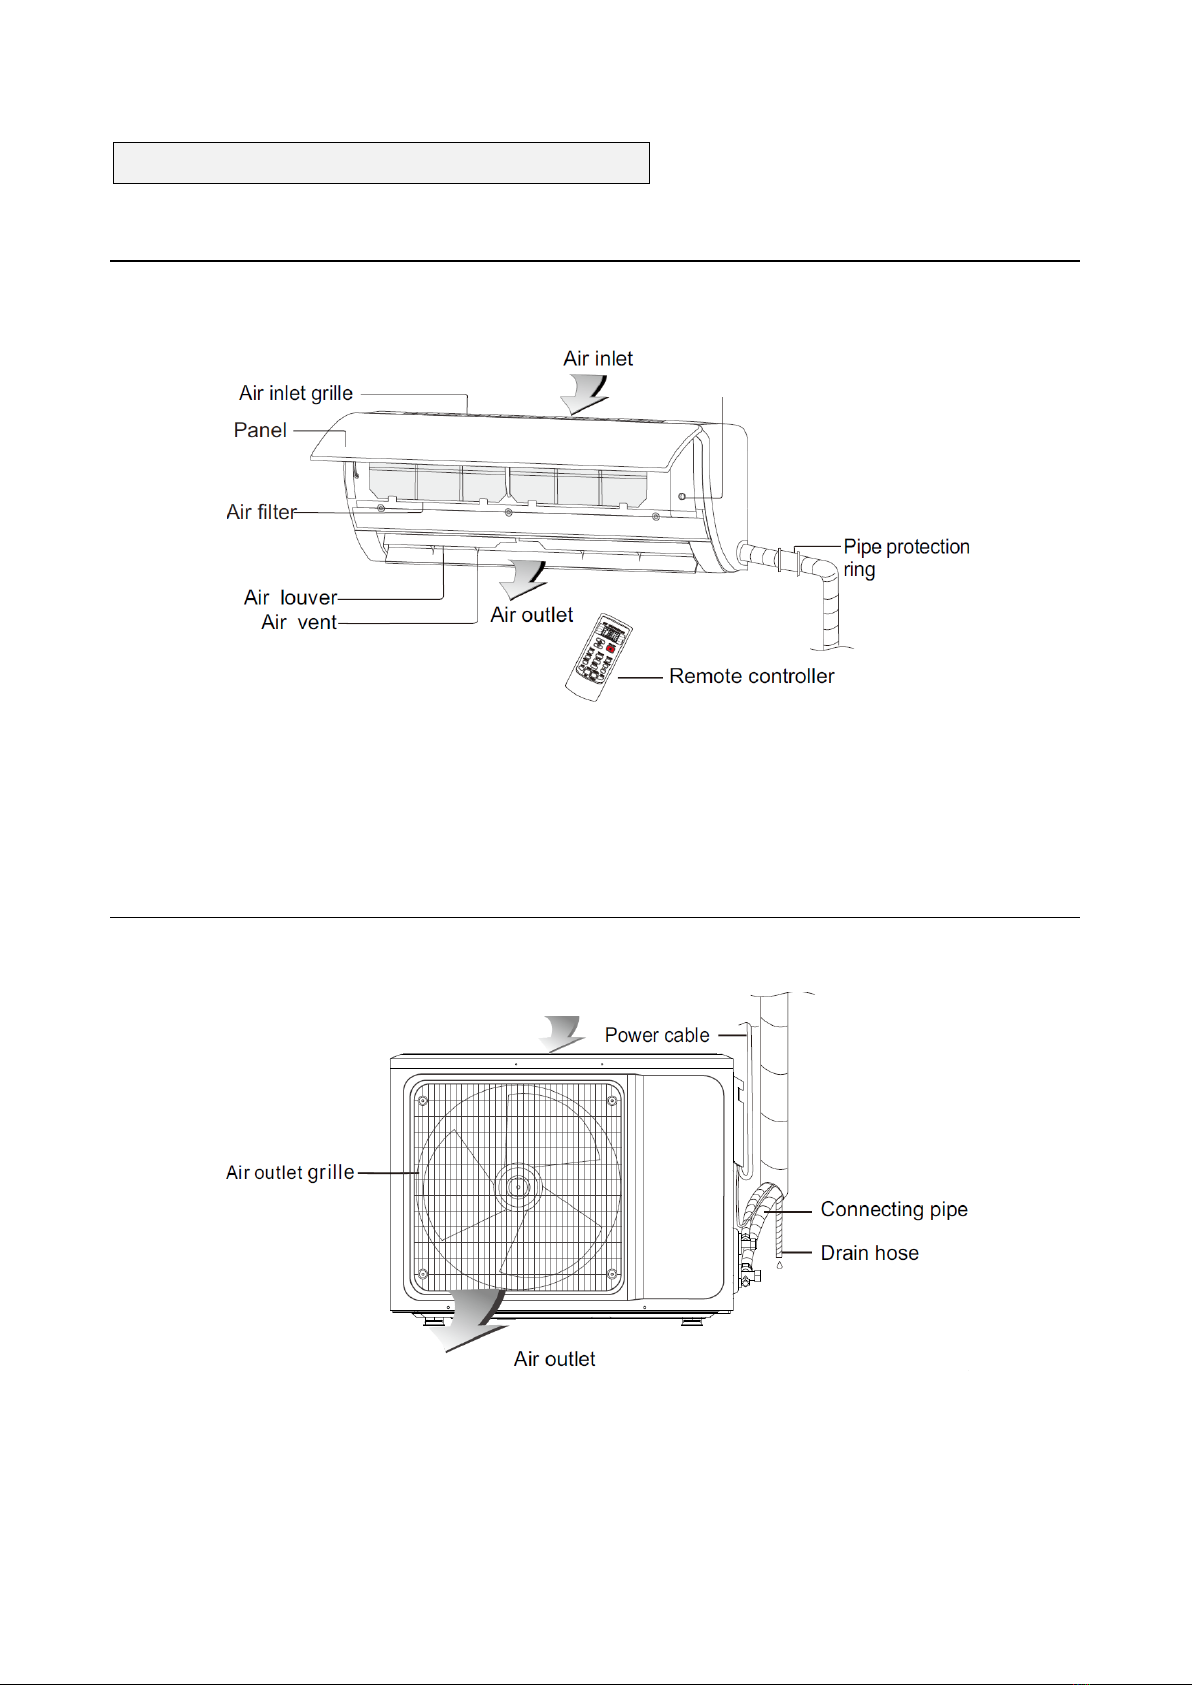
Argo HI-COMFORT DUAL 9000 UI User manual

38
USER MANUAL and INSTALLATION GUIDE
HI-COMFORT
MULTISPLIT AIR
CONDITIONERS – R32
V 12/21
Please read this manual carefully before installing and using the air conditioner, and retain for future reference.
INDOOR UNIT OUTDOOR UNIT
HI-COMFORT DUAL 9000 UI HI-COMFORT DUAL 14000 UE
HI-COMFORT DUAL 12000 UI

39
INDEX
General warnings………………………………………………………….……..…..40
Safety precautions……………………………………………………..………..…...41
Notices for usage…………………………………………………………………..…43
Description of parts………………………………………………….………....….....45
Remote controller Guide…………………..……………………………………...…46
Wifi Guide (Optional).……………………………………………………………......51
Clean and care…………………………………………………………….………….56
Troubleshooting……………………………………………………..………..….……57
Notices for installation..………………………………………………………...….....59
Indoor unit installation…………………………………………………………….......64
Outdoor unit installation………………………………………………..…..…….......67
Maintenance notes………………………………………………...……………...….71

40
The Refrigerant
•To realize the function of the air conditioner unit, a special refrigerant circulates in the system. The
refrigerant is the fluoride R32 = GWP (Global warming potential). This refrigerant is flammable and
inodorous. It can lead to explosions under certain conditions, however the flammability of this refrigerant
is very low and it can be ignited only by fire.
•Compared to other common refrigerants, R32 is a non-polluting refrigerant with no harm to the
ozonosphere and a lower effect upon the greenhouse effect. R32 has very good thermodynamic
features which lead to a really high energy efficiency. The units therefore need less filling.
Warning:
Do not try to accelerate the defrosting process or to clean the appliance in different ways other than those
recommended by the manufacturer. Should repair be necessary, contact your nearest authorized Argoclima
Service Centre. Any repairs carried out by unqualified personnel may be dangerous. The appliance has to be
stored in a room that doesn’t have any continuously operating ignition sources. (for example: open flames, an
operating gas appliance or an operating electric heater.) Do not pierce or burn.
Appliance has to be installed, operated and stored in a room with a floor area larger than X m2. (Please refer
to table "a" in section of " Safety Operation of Inflammable Refrigerant" for Space X.)
For repairs, strictly follow manufacturer’s instructions only for appliances filled with R32 flammable gas. Be aware
that refrigerants do not have any odour.
Appliance filled with flammable gas R32.
Before using the appliance, read the owner’s manual.
Before installing the appliance, read the installation manual.
Before repairing the appliance, read the service manual.

41
SAFETY PRECAUTIONS
This appliance can be used by children aged from 8 years and above and persons with reduced physical, sensory or
mental capabilities or lack of experience and knowledge if they have been given supervision or instruction concerning use
of the appliance in a safe way and understand the hazards involved. Children shall not play with the appliance. Cleaning
and user maintenance shall not be made by children without supervision.
The air conditioner must
be grounded. Incomplete
grounding may result in
electric shocks.
Do not connect the earth wire to the
gas pipeline, water pipeline, lightning
rod, or telephone earth wire.
Always switch off the
device and cut the
power supply when the
unit is notin use for long
time so as to ensure safety.
Take care not let the remote control
and the indoor unit watered or
being too wet.
Otherwise, it may cause short circuit.
If the supply cord is
damaged, it must be
replaced by the
manufacturer, its service
agent or similarly qualified persons
in order to avoid a hazard.
Don't cut off main power switch
during
operating or with
wet hands.
It may cause electric shock.
Don't share the socket
with other electric
appliance.
Otherwise, it may cause electric shock
even fire and explosion.
Always switch off the device and
cut
the power supply
before performing any
maintenance or
cleaning.
Otherwise, it may cause electric shock
or damage
Don't pull the
power cable.
The damage of pulling power cord will
cause serious electric shock.
A warning that ducts connected
to an appliance shall not contain an
ignition source.
Don't use liquid or corrosive
cleaning agent wipe the air
conditioner and sprinkle water or
other liquid either.
Don't
attempt to repair the air
conditioner by yourself.

42
Don't install air conditioner in a
place where there is flammable gas
or liquid. The distance between
them should above 1m.
It may cause fire even explosion.
Incorrect repairs may cause fire or
explosion. Contact a qualified service
technician for all service requirement.
Don't use air conditioner in
lightning storm weather.
Power supply should be cut in time to
prevent the occurrence of danger.
Don't put hands or any objects into
the air inlets or outlets.
This may cause personal injury or
damage to the unit.
Please note whether the installed
stand is firm enough or not.
If it is damaged, it may lead to the fall
of the unit and cause the injury.
Don't block air inlet or air outlet.
Otherwise, the cooling or heating
capacity will be weakened, even
cause system stop operating.
Don’t let the air conditioner blow
against the heater appliance.
Otherwise it will lead to incomplete
combustion, thus causing poisoning.
The appliance shall be installed
in accordance with national wiring
regulations.
An earth leakage breaker with rated
capacity must be installed to avoid
possible electric shocks.
INFORMATION FOR CORRECT DISPOSAL OF THE PRODUCT IN ACCORDANCE WITH THE EUROPEAN
DIRECTIVE 2012/19/EU
At the end of its working life this equipment must not be disposed of as an household waste. It must be taken to special
local community waste collection centres or to a dealer providing this service. Disposing of electrical and electronic
equipment separately avoids possible negative effects on the environment and human health deriving from an
inappropriate disposal and enables its components to be recovered and recycled to obtain significant savings in energy
and resources. In order to underline the duty to dispose of this equipment separately, the product is marked with a crossed-
out dustbin.

43
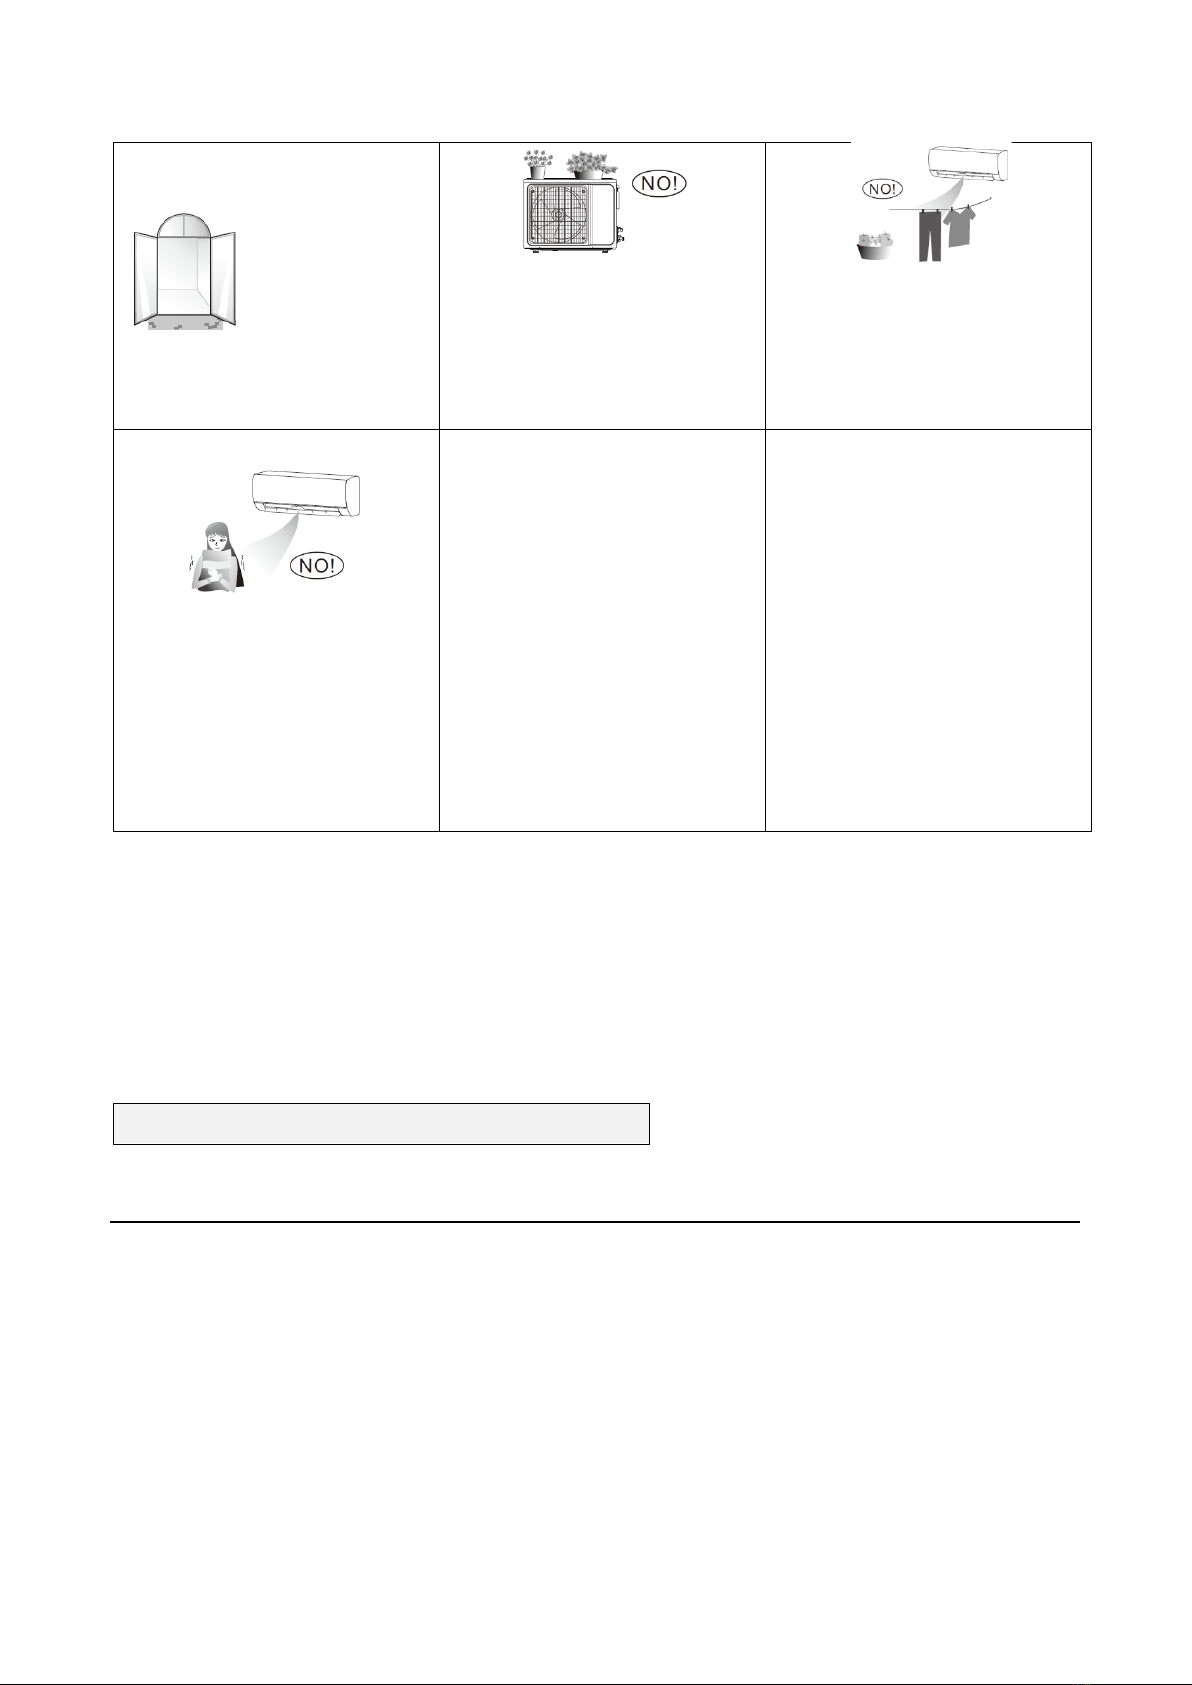
Don’t open the windows and doors
for long time when
the air conditioner
is running.
Otherwise, the cooling or heating
capacity will be weakened.
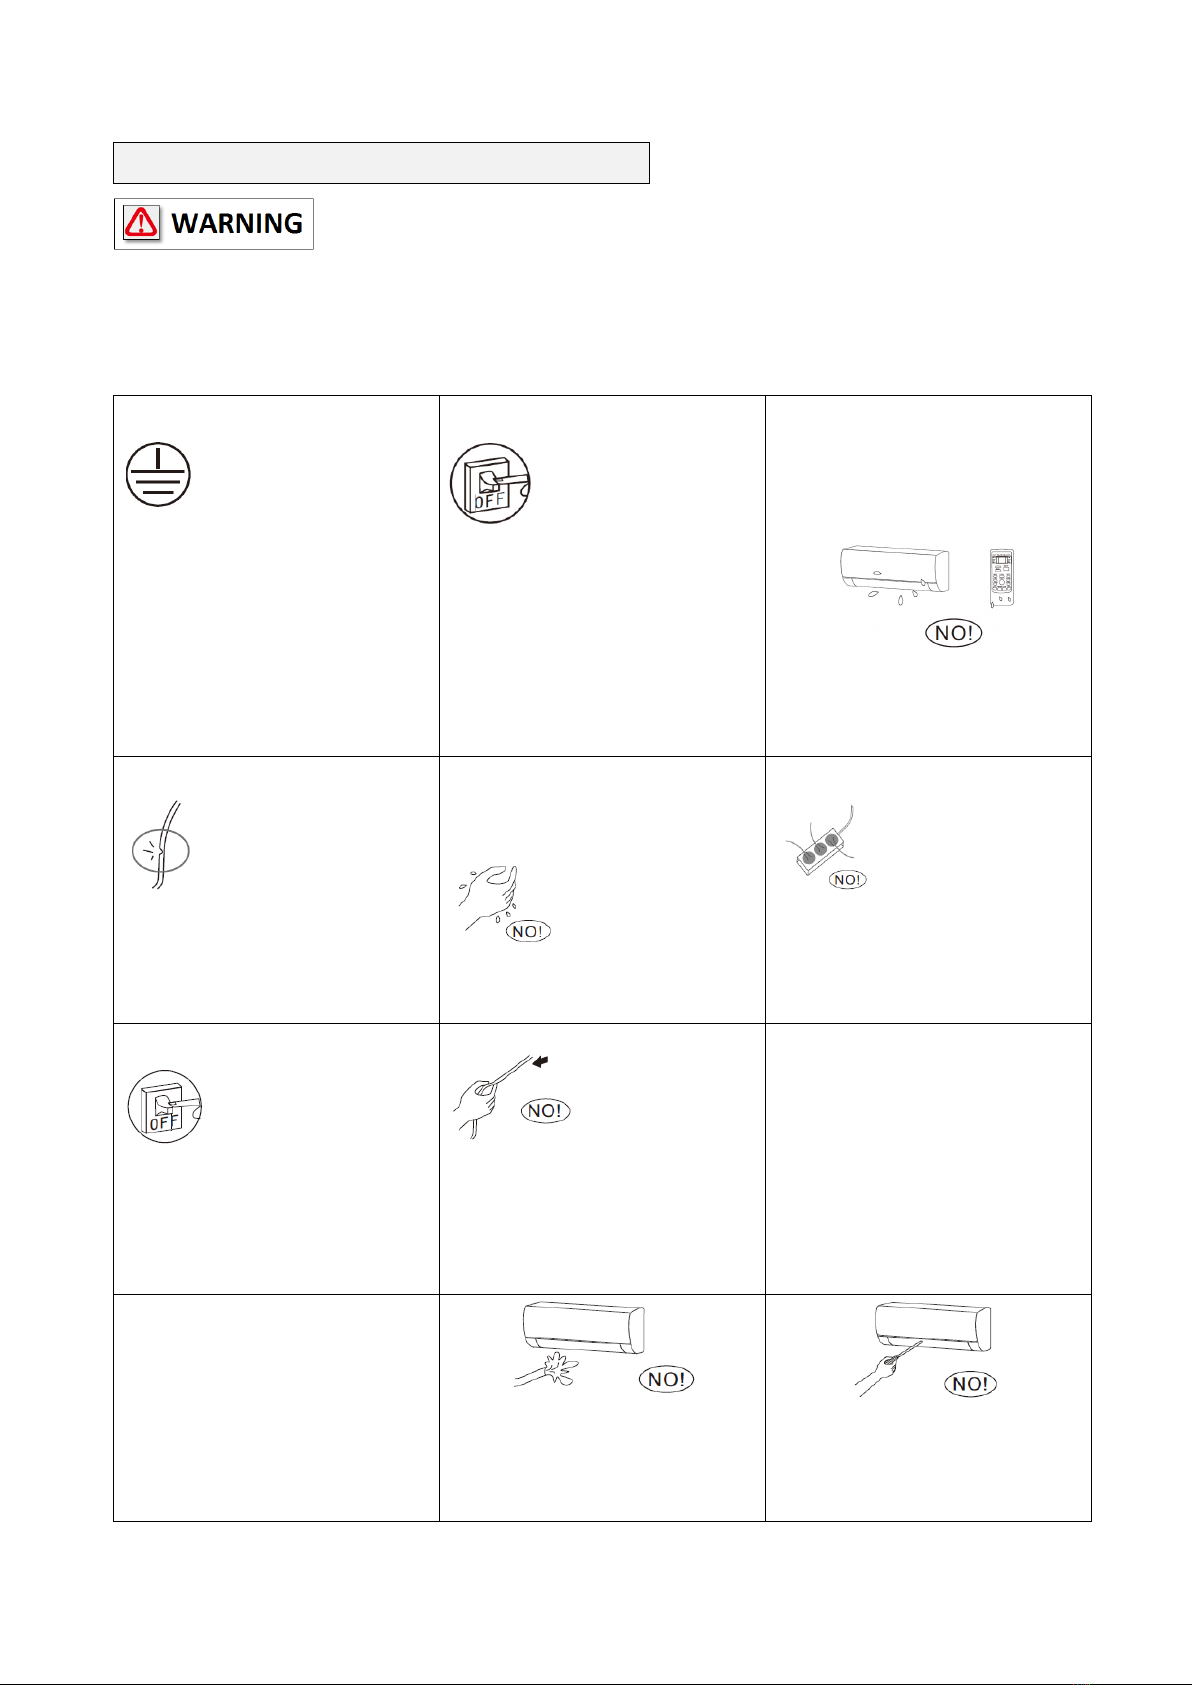
Don’t stand on the top of the
outdoor unit or place heavy things
on it.
This cloud cause personal
injuries or damage the unit.
Don’t use the air conditioner for
other purposes, such as drying
clothes, preserving foods, etc.
Don't apply the cold air to the body
for a long time. It will deteriorate your
physical conditions and cause health
problems.
Set the suitable temperature.
It is recommended that the
temperature difference between
indoor and outdoor temperature
should not be too large.
Appropriate adjustments of the
setting temperature can prevent
the waste of electricity.
If your air conditioner is not fitted
with a supply cord and a plug, an
anti-explosion all-pole switch must
be installed in the fixed wiring and
the distance between contacts
should be no less than 3.0 mm.
Fuse Type: T3.15AH250V, the electricity passing through the fuse cannot be higher than 3.15A.
For the air conditioner permanently connected to an outlet, equip the line with a power switch. The current switch must be
single-pole, with a distance between the contacts greater than 3 mm and a residual nominal value not greater than 30mA.
The power supply circuit must have a leakage protection device and an air switch whose rated capacity should be greater
than 1.5 times the maximum current.
NOTICES FOR USAGE
OPERATING RANGE
Cooling mode: from -10°C to +52°C (outdoor temperature)
Heating mode: from -15°C to +24°C (outdoor temperature)
•When the temperature is too high, the air conditioner may activate the automatic protection device, so that the air
conditioner could be shut down.
•When the temperature is too low, the heat exchanger of the air conditioner may freeze, leading to water dripping or
other malfunction.
•In long-term cooling or dehumidification with a relative humidity of above 80% (doors and windows are open), there
may be water condenses or dripping near the air outlet.

44
NOTES FOR HEATING FUNCTION
•When the heating function is started, the indoor unit fan will not work immediately to avoid the introduction of
insufficiently hot air into the environment.
•When the outdoor temperature is very low and the humidity is high, ice may form on the heat exchanger of the outdoor
unit. Then the air conditioner will start defrost function.
•During defrost, the air conditioner will stop heating for about 5-12 minutes.
•Vapor may come out from the outdoor unit during defrost. This is not a malfunction, but a result of fast defrost.
•Heating will resume after defrost is complete.
NOTES FOR TURNING OFF
•When the air conditioner is turned off, the unit may continue to ventilate for a few minutes to help dry the battery of
the indoor unit.
EMERGENCY OPERATION
•If the remote control is faulty, use the emergency button located under the front
panel of the indoor unit (see image).
•If this button is pushed with the unit OFF, the air conditioner will operate in Auto
mode.
•If this button is pushed with the unit ON, the air conditioner will stop running.
AIRFLOW DIRECTION ADJUSTMENT
1. Use the vertical oscillation button on the remote control to set the direction of the
air flow.
2. It is possible to direct the air flow also horizontally; this operation is only possible
manually, by moving the air delivery flaps as desired (see image).
Note: Move the air vents before the unit is in operation, or your finger might be
injured.
Never place your hand into the air inlet or outlet when the air conditioner is in operation.
Emergency
button

45
DESCRIPTION OF PARTS
INDOOR UNIT
OUTDOOR UNIT
Note: All the illustrations in this manual are for explanation purpose only. Your air conditioner may be slightly
different. The actual shape shall prevail. They are subject to change without notice for future improuvement.
Emergency button

46
REMOTE CONTROL USER GUIDE
GENERAL WARNINGS
1. Before first time use of the remote controller, install the batteries and ensure that the "+"and "-" poles are correctly
positioned. To insert the batteries, follow the instructions below:
•Slide to open the cover according to the direction indicated by the arrowhead (Fig.1)
•lnsert two brand new batteries, and position the batteries to the right electric poies (Fig.2).
•Put back the cover according to the direction indicated by the arrowhead (Fig.3)
2. Ensure the remote controller is pointed to the signal receiving window, and that there is no obstruction in between and
the distance is 8m at the maximum.
3. Do not let the remote controller drop or fling it at will. Do not let any liquid in the remote controller.
4. Do not expose the remote controller directly to the sunlight or excessive heat.
5. lf the remote controller does not work normally, remove the batteries far 30 seconds before reinstall them. lf that doesn't
work, replace the batteries.
6. When replacing the batteries, do not mix the new batteries with old ones or mix batteries of different types, which could
cause failure of the remote controller.
7. lf the remote controller is not to be used far a long period of time, remove the batteries first, lest the leakage from them
may damage the remote controller.
8. Properly dispose the discarded batteries.
Fig.1
Fig.2
Fig.3
INFORMATION FOR THE CORRECT DISPOSAL OF BATTERIES IN ACCORDANCE WITH EUROPEAN DIRECTIVE
2006/66/EC and MODIFICATIONS INTRODUCED BY DIRECTIVE 2013/56/EU
Replace batteries when they are depleted. At the end of their life, batteries must be disposed of separately from unsorted
waste. They must be taken to designated recycling centres or returned to a retailer providing this service. Separate
disposal of batteries helps to reduce the potential harmful effects on the environment and human health caused by their
improper disposal and also enables the recovery and recycling of component materials, saving significant energy and
resources. The requirement for separate disposal is indicated by the crossed-out wheelie bin label affixed to the appliance.
Illegal disposal of the product by the user is subject to administrative penalties as per current regulations.

47
BUTTONS DESCRIPTION
1. ON/OFF button
With this button you can turn the unit on or off. This button can also be used to reset the timer and the SLEEP function.
2. °C/ °F button
Press this button to select the temperature unit of measurement, the selectable units are Fahrenheit (° F) or Celsius (° C)
which is the default unit. When pressed for the first time, ° F will be selected, and the ° C symbol will no longer appear on
the display. Press again to select ° C.
NOTE: Some models do not have the possibility to select the temperature in ° F; this means that when the ° C / °
F" button is pressed, the °F symbol may appear on the remote control display, but the temperature will continue
to be displayed in ° C on that of the air conditioner.
3. SPEED button
• Press this button, you can select the fan speed as follows:
Note: AUTO air speed is not available in FAN mode.

48
4. DISPLAY button
It is possible to turn the remote control display on or off, while the unit is running, to extend the life of the batteries.
5. iFEEL button
Pressing this button activates the IFeel function. The LCD screen shows the room temperature and when the function is
canceled it shows the set temperature. This function is not active in AUTO and FAN mode.
6. TIMER button
NOTE: When the TIMER function is active, all function buttons (except SLEEP, DISPLAY and iFEEL) are usable.
7. HEALTH/iCLEAN button
This button has two functions.
a. HEALTH
Function not available
b. iCLEAN
When the remote control is off, press the “iClean” button to activate the “iClean” function with a maximum duration of 30
minutes. The purpose of this function is to clean the evaporator from dust, dry the water inside the evaporator and prevent
the formation of mold which can cause the spread of bad odors.
After setting the "iClean" function, press the "iClean" button again to cancel the function or press the ON / OFF button to
cancel the "iClean" function and turn on the appliance.
The “iClean” function is deactivated after 30 minutes of operation if no operation takes place.
Note: the iClean function can be set in parallel with the “Timer on” function; in this case, the “Timer on” function will be
executed after the “iClean” function.
Press the / button to adjust the temperature from 16 ° C to 32 ° C; the screen will change each time the button is
pressed. Each time you press " " the temperature will increase by 1 ° C and each time you press " " the temperature
will decrease by 1 ° C.
NOTE: The temperature cannot be set in AUTO and FAN mode, so these two buttons will have no effect.
9. TURBO button
Press this button only in COOL or HEAT mode to select the TURBO function and set the maximum fan speed. When
TURBO mode is active, the fan is at maximum speed; When TURBO mode is off, the dispensing speed is restored to the
previous state.

49
10. MODE button
Press this button, you can select the running mode as follows:
Note: HEAT mode is not available for cool only units.
11. SLEEP button
By pressing the SLEEP button, the indoor unit light flashes.
After setting the Sleep mode, in the cooling function, the temperature will increase by 1 ° C in one hour, then it will
automatically increase by 1 ° C again after another hour.
After setting the Sleep mode, in the heating function, the temperature will decrease by 2 ° C after one hour, then it will
automatically decrease by 2 ° C again after another hour.
After 10 hours of operation in SLEEP mode, the air conditioner returns to the previous functions and switches off
automatically.
Note: press the MODE button or the ON / OFF button to cancel the setting of the SLEEP function. The SLEEP function
cannot be activated in FAN mode.
Press this button to set the automatic vertical swing mode, which allows the outer flaps to swing from top to bottom and
vice versa. Press this button again to deactivate the SWING function.
This function is not available. However, it is possible to direct the air flow manually, by moving the flaps of the indoor unit
horizontally.
14. Anti-F button
This air conditioner has a special drying and anti-mold function. This function is controlled by the remote control in the
COOLING, DRY and AUTO modes.
When the air conditioner is operating in the heating mode, the indoor fan runs for three minutes on weak ventilation before
stopping. The purpose of this function is to dry the water inside the evaporator and prevent the formation of mold which
can cause the dispersion of a strange odor.
This function is not set by default, it can be freely set and deactivated. The setting method is as follows: when the air
conditioner and remote control are off, point the remote control at the unit and press the "Anti-F" button, the unit will beep
five times and then indicate that this function is set. Once set, this function remains valid unless the air conditioning is
completely switched off or the function is manually deactivated.
To deactivate the function:
1. Turn off the unit.
2. When the air conditioner and the remote control are off, point the remote control at the unit and press this button, the
device emits a sound three times and this indicates that the function is disabled.
NOTE. When this function is active, it is advisable not to restart the air conditioner before it is completely stopped;
This function will not be active if the unit is switched off or stopped by the “SLEEP” function.

50
15. ELE.H/ECO button
a.ELE.H (FUNCTION NOT AVAILABLE)
b. ECO
If you press this button in COOL mode, the unit will activate the ECO mode which has the lowest electricity consumption
and that is automatically deactivated after 8h. If you change the mode or turn off the remote control, the function ECO will
be automatically canceled. Press the ECO button in ECO mode to exit this mode.
USER GUIDE
Automatic mode (AUTO)
1. Press the "MODE" button, select the automatic operation mode.
2. By pressing the "SPEED" button, you can select the fan speed from LOW, MID, HIGH, AUTO.
3. Press the "ON/OFF" button, the air-conditioner starts to operate.
4. Press the "ON/OFF" button again, the air-conditioner stops.
COOLING/HEATING mode
1. Press the "MODE" button, select the Cooling or Heating operation mode.
3. By pressing the "SPEED" button, you can select the fan speed from LOW, MID, HIGH, AUTO.
4. Press the "ON/OFF" button, the air-conditioner starts to operate.
5. Press the "ON/OFF" button again, the air-conditioner stops.
FAN mode
1. Press the "MODE" button, select the fan operation mode.
2. By pressing the "SPEED" button, you can select the fan speed from LOW, MID, HIGH.
3. Press the "ON/OFF " button, the air-conditioner starts to operate in FAN mode.
4. Press the "ON/OFF" button again, the air-conditioner stops.
DRY mode
1. Press the "MODE" button, select the drying operation mode.
3. By pressing the "SPEED" button, you can select the fan speed from LOW, MIO, HIGH, AUTO.
4. Press the "ON/OFF" button, the air-conditioner starts to operate.
5. Press the "ON/OFF" button again, the air-conditioner stops.
The remote controller has a backlight which can be turned on by pressing any button for the convenience of operation in
darkness. The backlight will be automatically turned off if there is no operation within 1O seconds.

51
WIFI GUIDE (Optional)
INTRODUCTION
It is possible to install the Wifi module to remotely control the air conditioner.The AC system is in constant connection with
a wireless router or access point attached to the Internet. Mobile terminals such as smart phones and tablet computers,
on which special control software are installed and WI-FI modules successfully configured locally, can be used as remote
controllers once they are connected to the Internet.
DOWNLOAD AND INSTALL THE CONTROL SOFTWARE
The control software can be downloaded and installed as follows.
1. For mobile terminals such as smart phones and tablet (Android 4.1 and iOS 6.0 or above only), search and download
“AC Freedom” from Google Play or App store on and install it on your system.
2. You may also use your mobile terminal (Android 4.1 and iOS 6.0 or above only) to scan the “QR code” (see Fig.1) with
a thirdparty scan tool, which will automatically direct you to the download interface of AC Freedom for you to download
and install the software.
For ANDROID For iOS
Fig.1
Once the control software is
installed, enter the “Scanning
Interface” (1) for downloading the
Home Page.
(See Fig.2).
Fig. 2

52
1. SCAN Function: By clicking “scan” and scanning the QR code on the right (See Fig.3)
RESET AC WI-FI MODULE
For first time configuration or after changing the connected wireless router is, the WI-FI module inside the air conditioner
needs to be reset, following the indications here below:
When AC is running, press “HEALTH” button 8 times, reset successfully after twice “beep” sounds. (see Fig.4)
Fig.3
After scanning the QR code, enter the activation
code 6364d (image 1) and click on activate (image 2)

53
Note: If the device is not connected successfully, please reset the air conditioner Wi-Fi in the same way.
SMARTPHONE, PAD OR OTHER MOBILES TERMINALS CONNECT TO WIFI OR HOTSPOT
Activate the WI-FI function of the mobile device and connect it to a wireless router or an access point
Note: A wireless router is required for the WI-FI function to work.
CONFIGURATION OF DEVICES
After the control software is downloaded and installed on the mobile terminal, configure the AC devices according to the
following figure:
Fig.4

54
Activate the control software and
click “Add device” within 30 minutes
after the WIFI module is reset.
the WI-FI name will automatically
appear in “Wi-Fi name”. Enter the
password of the Wi-Fi and click
“Start the configuration”.
Once the configuration is
complete, the ”Device List”
interface will be automatically
returned to and the configured the
AC can be seen.
Note:
1. For first time configuration or after the connected wireless router or access point is changed, make sure the mobile
device is already connected to the wireless router or access point to be paired with the WI-FI module.
2. If the configuration is failed, press “Config faild check items” to check them notes about the failure before reconfigure
the AC.
After the configuration is successful, click the corresponding AC name to enter the control interface for further
operation.
1. Modify and Lock the Devices
In the “Device List” interface, press and hold for more than 0.5 second (for Android system) or press (for IOS system)
the icon of an existing device to activate the “Modify the name” interface.
You can change the name or the icon, to identify different AC devices.
To lock a device, simply touch the “Locking Device” icon. Once a device is locked, other users won't be able to search
for it, thus preventing it from hostile control. After the configurations of the AC device names, icons and locking status
are complete, touching “Save” will save and validate them.

55
2. Delete an AC under control
For Android: Click “Delete Device” button under “Modify the name” in Fig.5.
For IOS: Swipe over the AC name to the left under “Device List” and click “Delete”.
3. Remote control with wireless router
Once the wireless router is connected to the Internet, activating the GPRS on the mobile terminal will enable the remote
control of the devices.
The software provides help service through which the users may check the operational instructions of the software and
other information.
Besides, as the operation interface and the function of the software is under constant improvement, we will keep you
informed about the subsequent upgrades for your updating.
As the operation interface may change due to the constant version upgrading, the figures in this manual are for
reference only, so please rely on the actual operation interface.
APPENDIX “A”: CONFIG FAILED CHECK ITEMS
1. Please check the Wi-Fi icon on the air conditioner panel, if the icon not display, please contact customer service.
2. Please make sure the mobile phone network under the current router WI-FI environment: Close the mobile phone
3G/4G data connection, to be connected to the router WI-FI pairing.
3. Please check whether the module is reset successfully. For details, see “Reset AC WI-FI module”.
4. Please check the Wi-Fi name of the router, recommended not contain spaces and other non-alphanumeric characters.
5. Please check the Wi-Fi password of the router, not allowed more than 32 bits, recommended not contain spaces and
special symbols in addition to letters and numbers.
6. Please check whether the Wi-Fi password input is correct when APP configuration: you can check show password to
confirm when input the WI-FI password.
Fig.5

56
CLEAN AND CARE
•Before the cleaning of the air conditioner, it must be shut down and the electricity must be cut off for more than 5
minutes, otherwise there might be the risk of electric shocks.
•Do not wet the air conditioner, which can cause an electric shock. Make sure not to rinse the air conditioner with
water under any circumstances.
•Volatile liquids such as thinner or gasoline will damage the air conditioner housing, therefore please clean the housing
of air conditioner only with soft dry cloth and damp cloth moistened with neutral detergent.
•In the course of the usage, pay attention to cleaning the filter regularly, to prevent the accumulation of dust which
may affect the air conditioner performance. If the service environment of the air conditioner is dusty, correspondingly
increase the number of times of cleaning. After removing the filter, do not touch the fin part of the indoor unit with the
finger, and no force to damage the refrigerant pipeline.
CLEAN THE PANEL
Clean the front panel of the indoor unit with a cloth and lukewarm water, below 40 ° C.
Do not disassemble the panel for cleaning.
CLEAN THE AIR FILTER
Remove the air filter
1. Use both hands to open the panel for an angle from both ends of the panel in accordance with the direction of the
arrow.
2. Release the air filter from the slot and remove it.
Clean the air filter
Use a vacuum cleaner or water to rinse the filter, and if the filter is very dirty (for
example, with greasy dirt), clean it with warm water (below 45°C) with mild
detergent, and then put the filter in the shade to dry in the air.

57
Mount the air filter
Reinstall the dried filter in reverse order of removal, then cover and lock the panel.
CHECK BEFORE USING
1. Check whether all the air inlets and outlets of the units are unblocked.
2. Check whether there is blocking in the water outlet of the drain pipe, and immediately clean it up if any.
3. Check the ground wire is reliably grounded.
4. Check whether the remote control batteries are installed, and whether the power is sufficient.
5. Check whether there is damage in the mounting bracket of the outdoor unit, and if any, please contact our local
service center.
MAINTENANCE AFTER USING
1. Cut off the power source of the air conditioner, turn off the main power switch and remove the batteries from the
remote controller.
2. Clean the filter and the unit body.
3. Remove the dust and debris from the outdoor unit.
4. Check whether there is damage in the mounting bracket of the outdoor unit, and if any, please contact our local
service center.
TROUBLESHOOTING
Do not repair the air conditioner by yourself as wrong maintenance may cause electric shock or fire or explode, please
contact the authorized service center and let the professionals conduct the maintenance, and checking the following items
prior to contacting for maintenance can save your time and money.
PHENOMENON TROUBLESHOOTING
The air conditioner
does not work
•There might be power outages.→ Wait until power is restored.
•Power plug may be loose out from the socket.→The plug in the plug tightly.
•Power switch fuse may blow.→ Replace the fuse.
•The time for timing boot is yet to come.→ Wait or cancel the timer settings.
The air conditioner
can't run after the
immediate start-up
•If the air conditioner is turned on immediately after it is turned off, the protective
delay switch will delay the operation for 3 to 5 minutes.
This manual suits for next models
2
Table of contents
Other Argo Inverter manuals
Popular Inverter manuals by other brands

LSIS
LSIS SV-iV5 Series user manual

Vanner
Vanner SRC12-1200L owner's manual

Goodwe
Goodwe MT series Quick installation guide

Hitachi
Hitachi SJ700-2 Series instruction manual

Mitsubishi Electric
Mitsubishi Electric FR-A7NC E kit-SC instruction manual

Telair
Telair ENERGY 4010B User's operating instruction and installation manual