Table of Contents
Introduction ........................................................................................ i
Section A
System Components
Assure® Prism multi Blood Glucose Meter
................................................. 1
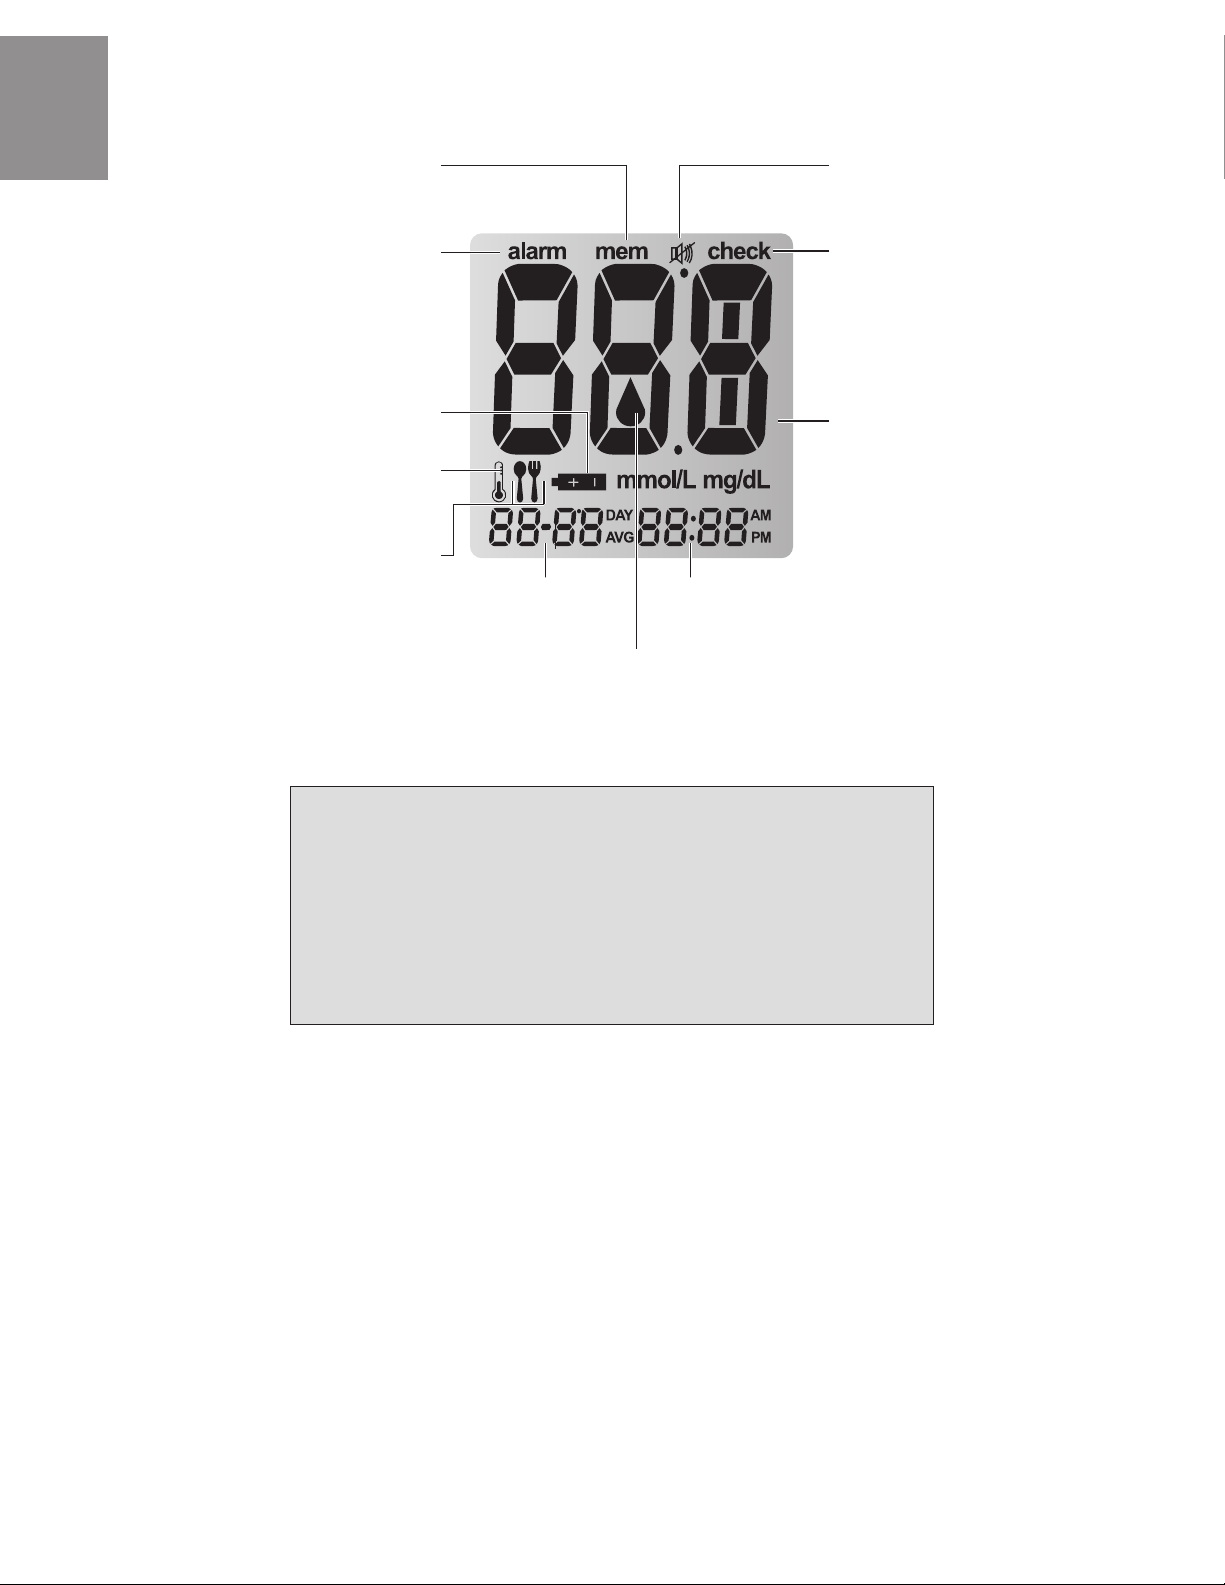
Meter Display Screen
.............................................................................. 2
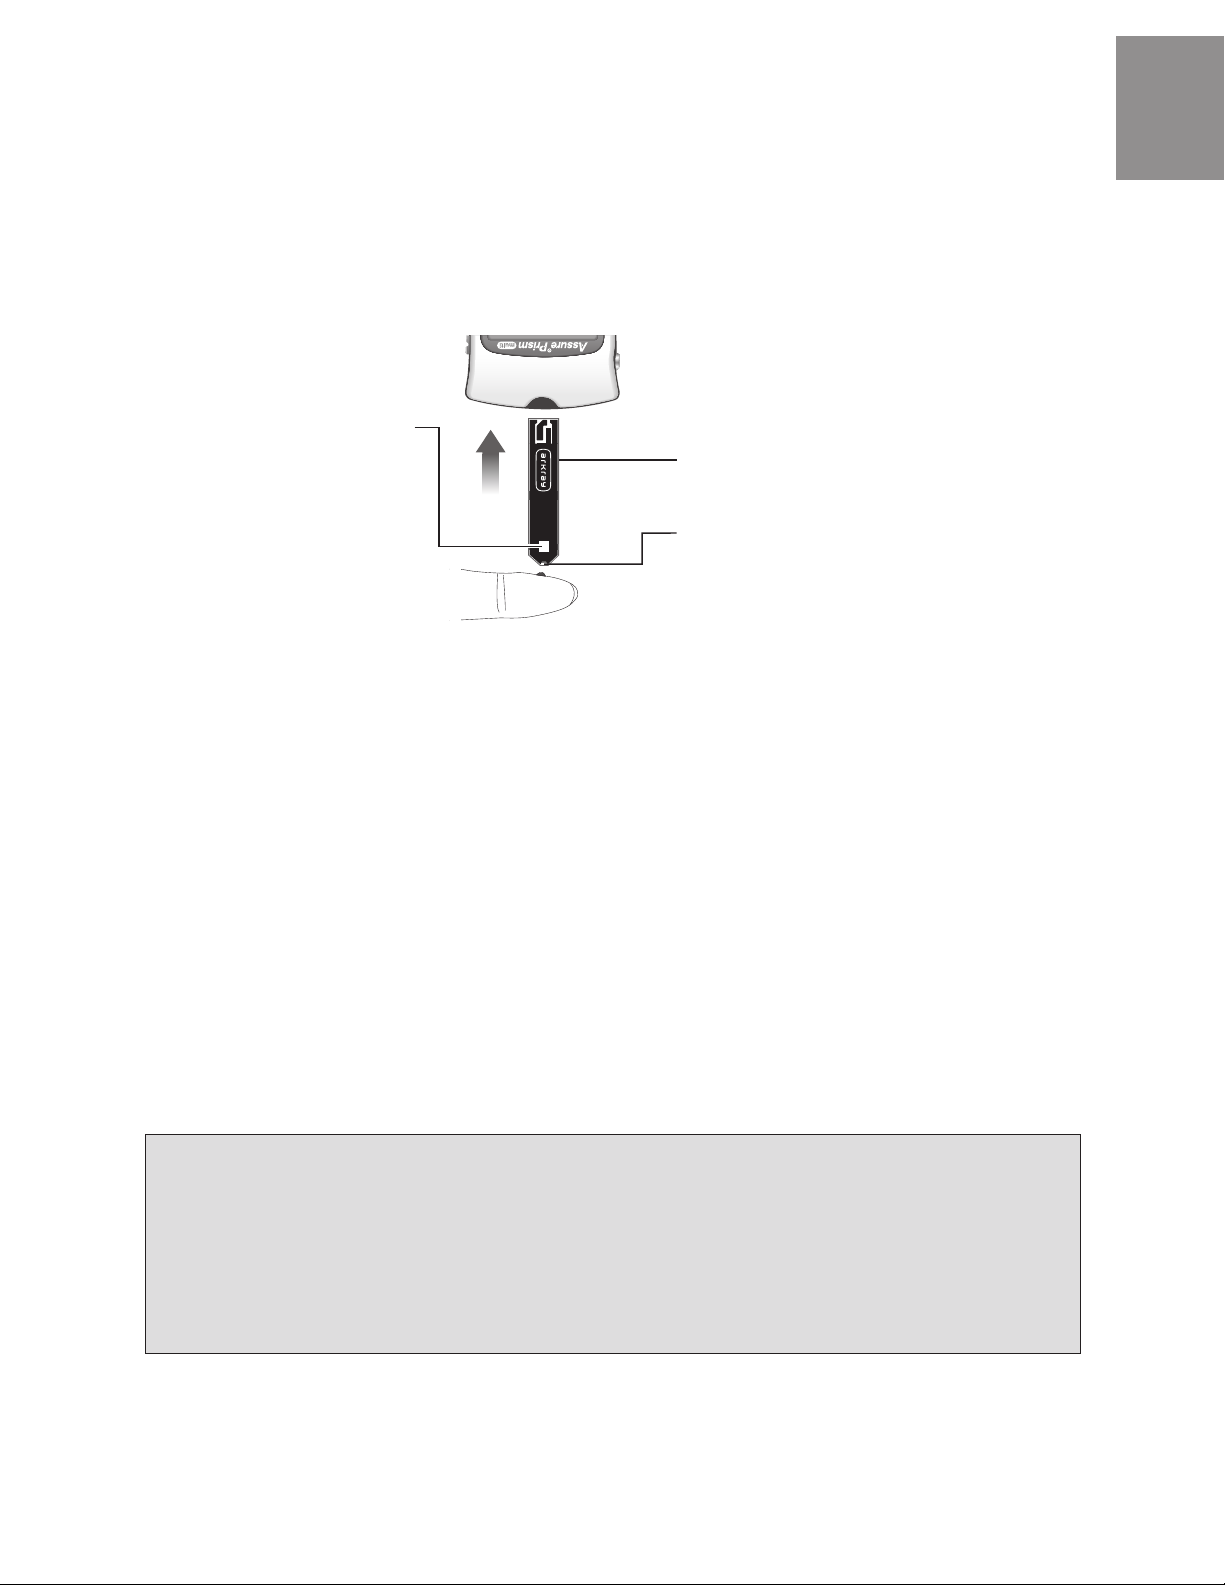
Assure Prism multi Test Strips
.................................................................. 3
Assure Prism Control Solution
.................................................................. 5
MeterSpecications
............................................................................... 6
Section B Meter Operation and Set-up
Meter Set-up
.......................................................................................... 7
Performing a Blood Glucose Test
.............................................................. 9
Performing a Control Solution Test
..........................................................11
Meter Memory
......................................................................................13
Inserting or Replacing the Batteries
.........................................................14
Cleaning and Disinfecting the Meter
........................................................15
Cleaning and Disinfecting FAQ.........................................................................17
F-Tag 880 (Infection Control Requirements for Blood Glucose Monitoring).....................17
Troubleshooting
.....................................................................................18
Section C Regulatory Review and Guidelines for QA/QC Protocols
Regulatory Review and Guidelines for QA/QC Protocols
............................20
Accuracy and Precision Studies
...............................................................21
Alternative Site Testing Evaluation
...........................................................22
Section D Addendums
Product Ordering ............................................................................................ 23
Warranty
..............................................................................................23
Section E In-service Training
In-serviceTrainingandCertication
.........................................................24
Competency Checklist
............................................................................25
Instructor Training Record
.......................................................................26
Healthcare Professional In-service Training Record
....................................27
Self-test
................................................................................................28
Section F Quality Assurance/Quality Control Recording Forms
Meter Tracking Record
...........................................................................31
Quality Control Record
...........................................................................32
Field Inspection Report
..........................................................................33
Sample Policy and Procedures........................................................................ 34
Policy: Infection Control: Cleaning and Disinfecting the
Assure Prism multi Meter........................................................................... 35
Cleaning and Disinfecting the Meter.......................................................... 36
Policy: Performing a Blood Glucose Test
with the Assure Prism multi Meter ............................................................ 38
Policy: Quality Control Testing on Assure Prism multi Meter .....................41
Policy: Maintaining the Assure Prism multi Meter..................................... 43