Arlight T2 User manual

12
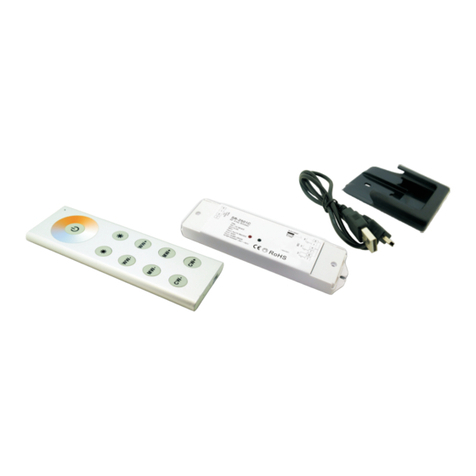
T2 is the 2.4GHZ RF wireless synchronization color temperature controller which adopts LTECH multiple
global initiate technology, the control system consists of two parts, the RF remote control and the receiver,
realize the signal synchronization on unlimited receivers within effective distance, a very good solution for the
LED project needs sync control wirelessly.
1. Technical Specs:
Model: T2-5A
× 2CH
5~100%
ync Quantity: No Quantity Limit
Compatible Remote Control: T1/T2/T2M
Working Temperature: -30 55
Dimensions: L175×W44×H30(mm)
Package Size: L178×W48×H33(mm)
Weight (G.W.): 110g
Power Supply Chosen: DC CV SMPS
Input Voltage: DC5V DC24V
Max Current Load: 5A
Max Output Power: 50W/120W/240W(5V/12V/24V)
Dimming Range:
S
~
℃℃~
Model: T2
Input Voltage: DC5V Built-in Lithium Battery
Working Current: 30mA
Working Frequency: 2.4GHZ
RF Remote Distance: 30m
Remote Option: Sync Control
Battery Capacity: 1000mAh
Standby Time: 6 Months
Normal Using Time: 30 Days
<
Dimensions: L145×W55×H22(mm)
Package Size: L168×W102×H28(mm)
Weight (G.W.): 200g
Receiver
Remote Control
1 Adopt 2.4GHZ RF wireless transmission technology, which is applicable for license and patent free worldwide..
2. Performance Features:
RoHS
COMPLIANT
warranty
3 years
ISO9001:2008
3. Product Size:
4. Components Description for Receiver and Remote Control:
55mm
145mm
22mm
175mm
44mm
170mm
30mm
LED Lamp Connection Terminal
OUTPUT
Power Input Terminal
DC5V 24V~
RUN
CH1 CH2
Remote ID
Learning Button
On Off/
Touch Color Circle
Speed+/Speed-
CT+/CT-
Scene-save Keys
CT Shortcut Keys
BRT+/BRT-
Sync Status Indicator Light
Delay Off Keys
BRT Shortcut Keys
Receiver can automatically adapt to the input voltage of DC 5V-24V. widely used for all LED lights with
current-limiting resistance, such as single color LED module, LED tape and SMD flexible strip and so on.
Can RF remote the functions of color temperature dimming, quick color temperature/brightness selection, DIY
and delay off and so on. User-friendly color wheel for color temperature adjustment, unique LED state light
for sync change indicated, user can simply know the LED working state from distance by checking the remote
control.
7. USB charging port.
6. Color changing scene mode and preset storage function.
5. Built-in sync status indicator on the remote control, which can show the bright status of the LED synchronously.
4. The remote control adopts the capacitive touch control technology on the circle, make the color temperature
adjustment more intelligentized and humanized.
3. Advanced RF wireless sync control technology, no sync signal wire between receivers, sync capability is stable
and reliable.
2. make it 10 times of processing speed. can process the wireless data transmission
in complicated and multiple levels.
Built-in with dual-core driver,
Сенсорный пульт LT-T2 (для MIX-ленты)

34
5. The Charging Methods for Remote Control:
6. Detailed Key Functions:
The remote control has 18 function keys and 1 touch circle.color
7. System Diagram:
ON OFF/
CT+/CT-
SPEED+
SPEED-
BRT+
BRT-
CT
SHORTCUT KEYS
SCENE-SAVE KEYS
BRT
SHORTCUT KEYS
Turn on or turn off the receiver.(turn on or turn off light)
DELAY OFF KEYS
●
●
●
●
●
●
●
●
●
●
●
Long press for 3 seconds to memorize the current color
temperature status. Can memorize three groups’ color temperature
status in total.
Press the keys to quickly select the high, medium or low color
temperature status.
Press the keys to delay power off (or turn off the lights) in 30
seconds or 1 hour.
Press either key to enter the color temperature gradual mode.
Press the keys to adjust the brightness.
Keep pressing to adjust brightness continuously.
Press the keys to increase or decrease the color temperature
of the LED.
OUTPUT
OUTPUT
OUTPUT
OUTPUT
OUTPUT
OUTPUT
OUTPUT
OUTPUT
OUTPUT
OUTPUT
OUTPUT
OUTPUT
OUTPUT
OUTPUT
OUTPUT
OUTPUT
OUTPUT
OUTPUT
OUTPUT
OUTPUT
OUTPUT
OUTPUT
OUTPUT
OUTPUT
Unlimited receivers can be installed within effective distance, no wiring needed between the receivers,
which can be less or more in quantity according to your need for the installation, if you want to increase
or decrease the receivers, just activate or cancel the control ID on the remote control will be fine, no any
changes and effects on the other receivers.
1. When charging, please connect USB cable to the mobile charger or computer with the USB interface.
Press the keys to quickly select the high, medium or low level
of brightness for current color temperature.
Remote Control Sign
Description
Key
The learning of remote control:
Learning ID:
If you want to control multiple receivers synchronously, just follow the above instructions for each
receiver.
Cancelling ID:
Press any key on the remote control within 5 seconds, until the green LED indicator light flashes
3 times (a voice prompt at the same time), means the controlling between the remote control and
receiver is activated, release the button on the receiver and remote control when the learning is
finished.
Press any key on the remote control over 5 seconds, until the red LED indicator light flashes 3
times(a voice prompt at the same time), means the controlling between the remote control and receiver
is cancelled, release the button on the receiver and remote control when the deleting is finished.
Press “ID learning button” on the receiver for 2 seconds, there is a buzzer sound, now according to the following
steps learning ID and deleting ID:
★Other function: press “DELAY OFF KEY” in 3 seconds, the buzzer can be on or off.
5. Please make sure more than 40% battery remaining on the remote control for long time no use, and it needs
to be charged at least every half year, otherwise the capacity of the battery would be decreased or the battery
gets damaged.
4. Red indicator light flickers meaning low battery and need to be charged. Charging in low battery will affect life of
battery.
3. No memory effect in the lithium battery of remote control. Follow the standard charging procedure even for the
first three times, no need over charge.
2. The blue indicator light flickers while charging, and turns green means the charging is completed. The remote
control can be chargeable even at the OFF state, on which the indicator light is black.
Keep pressing to adjust the color temperature continuously.
Press again to increase or decrease the gradual speed.
56
8. Wiring Diagram:
10. Warranty Agreement:
9. Attention:
1 Multiple Receivers are Powered by One Power Supply、:
2 Each Receiver is Powered by One Power Supply Independently、:
RUN
CH1 CH2
OUTPUT
RUN
CH1 CH2
OUTPUT
RUN
CH1 CH2
OUTPUT
RUN
CH1 CH2
OUTPUT
RUN
CH1 CH2
OUTPUT
RUN
CH1 CH2
OUTPUT
RUN
CH1 CH2
OUTPUT
RUN
CH1 CH2
OUTPUT
RUN
CH1 CH2
OUTPUT
RUN
CH1 CH2
OUTPUT
POWER SUPPLY
AC220V/1110V
AC220V/1110V
AC220V/1110V
AC220V/1110V
AC220V/1110V
DC12V
DC12V
DC12V
DC12V
DC12V
POWER SUPPLY
POWER SUPPLY
POWER SUPPLY
POWER SUPPLY
L
L
L
L
L
N
N
N
N
N
Warm White LED Strip
Warm White LED Strip Warm White LED Strip
Warm White LED Strip
White LED Strip
White LED Strip
White LED Strip White LED Strip
White LED Strip
White/Warm White
2 in 1 LED Strip
White/Warm White
2 in 1 LED Strip
White/Warm White
2 in 1 LED Strip
White/Warm White
2 in 1 LED Strip
White/Warm White
2 in 1 LED Strip
121
121
121
121
121
121
121
121
121
121
121
121
121
121
121
121
121
121
121
121
121
121
121
121
121
121
121
121
121
121
121
121
121
121
121
121
121
121
121
121
121
121
121
121
121
121
121
121
121
121
121
121
121
121
121
121
121
121
121
121
121
121 121
121 121
121
121 121
121 121
121
121 121
121 121
121
121 121
121 121
121
121 121
121 121
121
121 121
121 121
w
ww
w w
ww
ww ww
ww ww
1. The product shall be installed and serviced by a qualified person.
7. If a fault occurs please return the product to your supplier. Do not attempt to fix this product by yourself.
6. Ensure all wire connections and polarities are correct before applying power to avoid any damages to the LED
lights.
5. Please ensure that adequate sized cable is used from the controller to the LED lights to carry the current.
Please also ensure that the cable is secured tightly in the connector to avoid the accidents due to overheat
and poor contact on the wire.
4. Please check if the output voltage of any LED power supplies used comply with the working voltage of the
product.
3. Good heat dissipation will prolong the working life of the controller. Please ensure good ventilation.
2. This product is non-waterproof. Please avoid the sun and rain. When installed outdoors please ensure it is
mounted in a water proof enclosure.
1. We provide lifelong technical assistance with this product:
★This manual only applies to this model. LTECH reserves the right to make changes without prior notice.
4. Any amendment or adjustment to this warranty must be approved in writing by LTECH only.
3. Repair or replacement as provided under this warranty is the exclusive remedy to the customer. LTECH shall
not be liable for any incidental or consequential damages for breach of any stipulation in this warranty.
2. Warranty exclusions below:
For faults beyond the 3-year warranty we reserve the right to charge for time and parts.
A 3-year warranty is given from the date of purchase. The warranty is for free repair or replacement and
covers manufacturing faults only.
Any man-made damages caused from improper operation, or connecting to excess voltage and overloading.
The product appears to have excessive physical damage.
Damage due to natural disasters and force majeure.
Warranty label, fragile label and unique barcode label have been damaged.
The product has been replaced by a brand new product.
This manual suits for next models
1
Other Arlight Remote Control manuals

Arlight
Arlight SR-2819SP User manual

Arlight
Arlight SR-2833K8 Operation manual

Arlight
Arlight SR-2819-DIM User manual

Arlight
Arlight SR-2501C Series User manual

Arlight
Arlight Mini SR-2819 User manual

Arlight
Arlight SR-2828 User manual

Arlight
Arlight SR-2819S User manual

Arlight
Arlight SR-1009F Series User manual