manuals.online logo
Brands
  1. Home
  2. •
  3. Brands
  4. •
  5. Armytek Optoelectronics
  6. •
  7. Flashlight
  8. •
  9. Armytek Optoelectronics Viking PRO User manual

Armytek Optoelectronics Viking PRO User manual

Model
Viking PRO
Viking PRO Warm
LED
Cree XM-L2 U2
Cree XM-L2 T6
Brightness stabilization type
FULL stabilization (constant brightness)
Light output, LED lumen
850 lm
760 lm
Hotspot / Spill
10 / 40 degrees
10 / 40 degrees
Beam distance
270 yard / 250 meters
220 yard / 200 meters
Hotspot diameter at 330 feet
/100 meters
52 feet/16 meters
52 feet/16 meters
Modes and Runtimes*
(measured for Panasonic 18650 Li-Ion NCR
2900mAh battery)
850 lm / 2 h 40 min
200 lm / 7 h
70 lm / 20 h
6 lm / 155 h
760 lm / 2 h 40 min
180 lm / 7 h
62 lm / 20 h
6 lm / 155 h
Recommended power source
1x18650 Li-Ion / 2xR123 Li-Ion / 2xCR123A
Size
Length 6.1"/155mm, head diameter 1.56"/39.5mm, body diameter 1"/25.4mm
Weight (without batteries)
5.82 oz /165 g
www.armytek.comwww.armytek.comwww.armytek.com
Armytek Viking PRO
The most technically advanced flashlights in the world.
Born to exceed
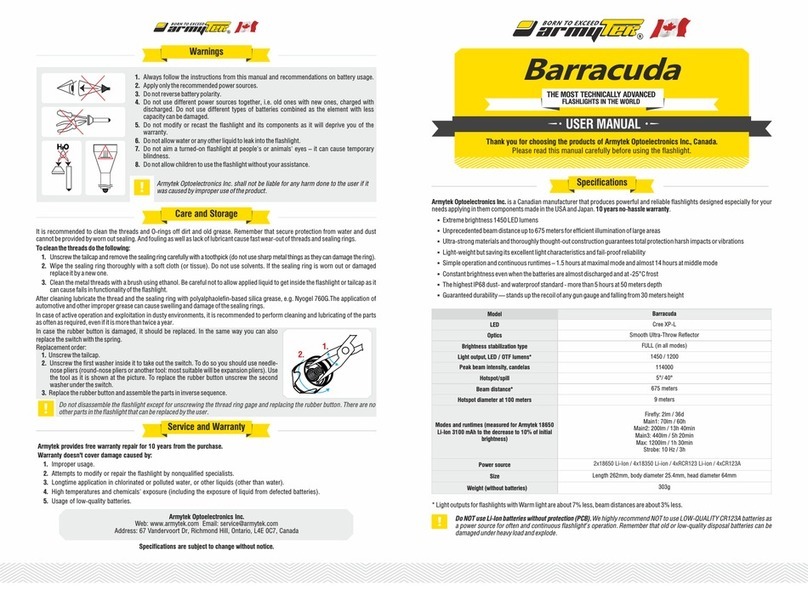
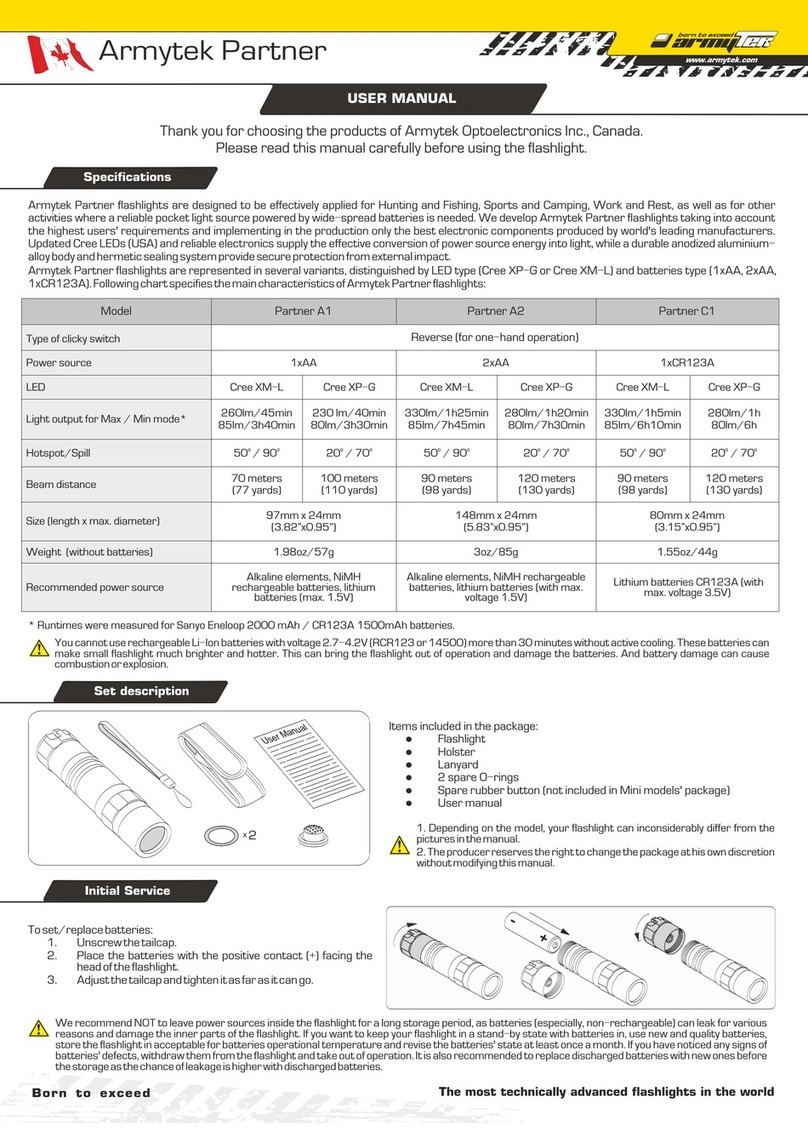
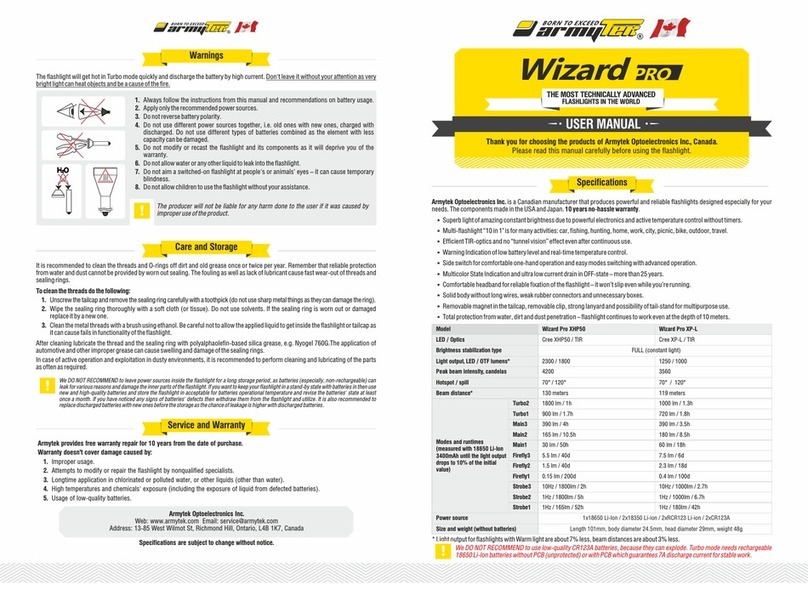
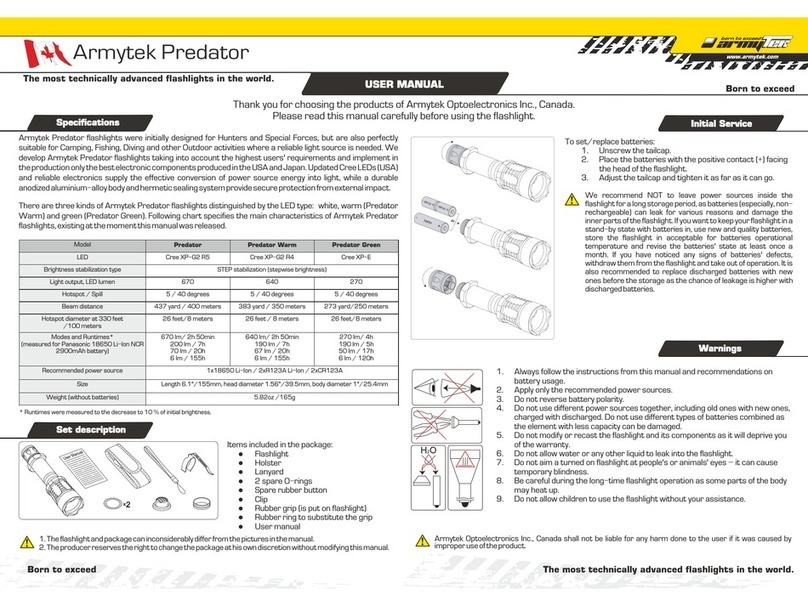
QUICK GUIDE
Thank you for choosing the products of Armytek Optoelectronics Inc., Canada.
Please read this manual carefully before using the flashlight.
The most technically advanced flashlights in the world.
Born to exceed
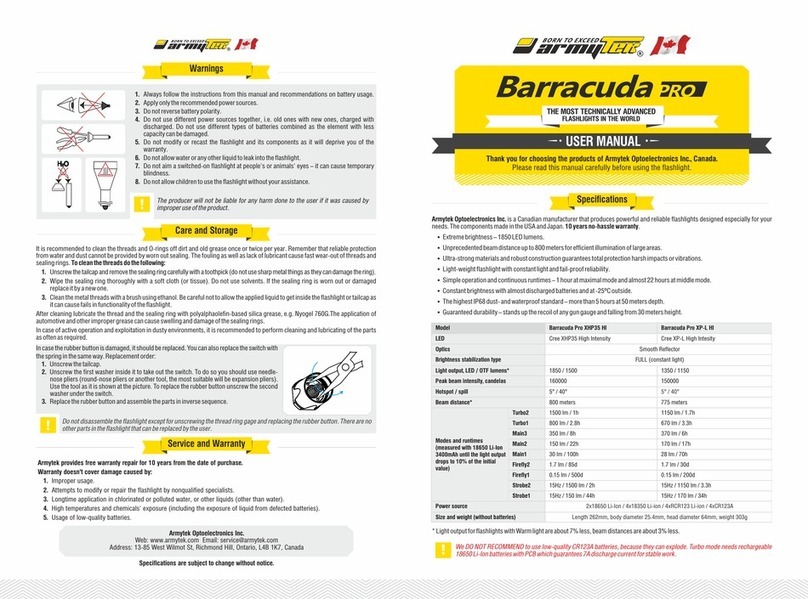
Specifications
Armytek Viking PRO flashlights were initially designed for Hunters and Special Forces, but are also perfectly
suitable for Camping, Fishing, Diving and other Outdoor activities where a reliable light source is needed. We
develop Armytek Viking PRO flashlights taking into account the highest users' requirements and implement in
the production only the best electronic components produced in the USA and Japan. Updated Cree LEDs (USA)
and reliable electronics supply the effective conversion of power source energy into light, while a durable
anodized aluminium-alloy body and hermetiñ sealing system provide secure protection from external impact.
There are three kinds of Armytek Viking PRO flashlights distinguished by the LED type: white and warm light
(Viking PRO Warm). Following chart specifies the main characteristics of Armytek Viking PRO flashlights,
existing at the moment this manual was released.
* Runtimes were measured to the decrease to 10 % of initial brightness.
Set description
1. The flashlight and package can inconsiderably differ from the pictures in the manual.
2. The producer reserves the right to change the package at his own discretion without modifying this manual.
Items included in the package:
 Flashlight
 Holster
 Lanyard
 2 spare O-rings
 Spare rubber button
 Clip
 Rubber grip (is put on flashlight)
 Rubber ring to substitute the grip
 User manual
Initial Service
To set/replace batteries:
1. Unscrew the tailcap.
2. Place the batteries with the positive contact (+)
facing the head of the flashlight.
3. Adjust the tailcap and tighten it as far as it can go.
We recommend NOT to leave power sources inside the
flashlight for a long storage period, as batteries (especially,
non-rechargeable) can leak for various reasons and
damage the inner parts of the flashlight. If you want to keep
your flashlight in a stand-by state with batteries in, use new
and quality batteries, store the flashlight in acceptable for
batteries operational temperature and revise the batteries'
state at least once a month. If you have noticed any signs of
batteries' defects, withdraw them from the flashlight and
take out of operation. It is also recommended to replace
discharged batteries with new ones before the storage as
the chance of leakage is higher with discharged batteries.
Warnings
1. Always follow the instructions from this manual and recommendations on
battery usage.
2. Apply only the recommended power sources.
3. Do not reverse battery polarity.
4. Do not use different power sources together, including old ones with new ones,
charged with discharged. Do not use different types of batteries combined as
the element with less capacity can be damaged.
5. Do not modify or recast the flashlight and its components as it will deprive you
of the warranty.
6. Do not allow water or any other liquid to leak into the flashlight.
7. Do not aim a turned on flashlight at people's or animals' eyes – it can cause
temporary blindness.
8. Be careful during the long-time flashlight operation as some parts of the body
may heat up.
9. Do not allow children to use the flashlight without your assistance.
10. Be careful while using rechargeable batteries – Armytek flashlights are
designed to consume all the available battery power and don't protect
batteries from over-discharge.
Armytek Optoelectronics Inc., Canada shall not be liable for any harm done to the user if it was caused by
improper use of the product.
1.
2.
Armytek Viking PRO
www.armytek.comwww.armytek.comwww.armytek.com
The most technically advanced flashlights in the world.
Born to exceed
QUICK GUIDE
Thank you for choosing the products of Armytek Optoelectronics Inc., Canada.
Please read this manual carefully before using the flashlight.
The most technically advanced flashlights in the world.
Born to exceed
Operation
Armytek Viking PRO flashlight can be turned on in two ways: persistent and tactical. Full pressing of the button
to the click provides the persistent turning on. The flashlight will deliver light till you turn it off with second full
pressing. Tactical turning on is performed by holding the button half pressed. The flashlight will provide light till
the button is released.
Armytek Viking PRO has two mode lines. First Line is accessible when the head of the flashlight is tightly
screwed to the body (it touches the contact ring). To switch to the Second Line, loosen the head on 1/8 of a
circle and wait for 1-2 seconds. To switch to the First Line again tighten the head and wait for 1-2 seconds.
The modes in each mode line are switched cyclically in the order they are set in the flashlight memory. To switch
modes in the First Line quickly (within 1 second) turn the body of the flashlight on 1/8 of a circle counter-
clockwise, and then turn the body clockwise to the maximum.
To switch modes in the Second Line quickly (within 1 second) turn the body of the flashlight on 1/8 of a circle
clockwise to the maximum, and then bring it to the initial position.
On default the following modes are available:
in the First Line: 850 lm, 6 lm, 200 lm
in the Second Line: Strobe (15 Hz), Firefly 1.5 lm
Care and Storage
Service and Warranty
It is recommended to clean the threads and O-ring off dirt and old grease. Remember that secure protection
from water and dust cannot be provided by worn out sealing and fouling as well as lack of lubricant cause fast
wear-out of threads and sealing rings.
To clean the thread do the following:
1. Unscrew the tailcap and remove the sealing ring carefully with a toothpick (do not use sharp metal
things as it can damage the ring).
2. Wipe the sealing ring thoroughly with a soft cloth (or tissue). Do not use solvents. If the sealing ring is
worn out or damaged replace it by a new one.
3. Clean the metal threads with a brush using ethanol. Be careful not to allow applied liquid to get inside
the flashlight or tailcap as it can cause fails in functionality of the flashlight.
After cleaning lubricate the thread and the sealing ring with polyalphaolefin-based silica grease, e.g. Nyogel
760G. The application of automotive and other improper grease can cause swelling and damage of the sealing
rings.
In case of active operation and application in dusty environments it is recommended to perform cleaning and
lubricating of the parts as often as required, even if it is more than twice a year.
Armytek Optoelectronics Inc.
Web: www.armytek.com Email: [email protected]
Address: 67 Vandervoort Dr, Richmond Hill, Ontario, L4E 0C7, Canada
Specifications are subject to change without notice.
Armytek provides free warranty repair for 10 years from the purchase.
Warranty doesn't cover damage caused by:
1. Improper usage.
2. Attempts to modify or repair the flashlight by nonqualified specialists.
3. Longtime application in chlorinated or polluted water, or other liquids (other than water).
4. High temperatures and chemicals' exposure, including the liquid from defected batteries.
5. Usage of low-quality batteries.
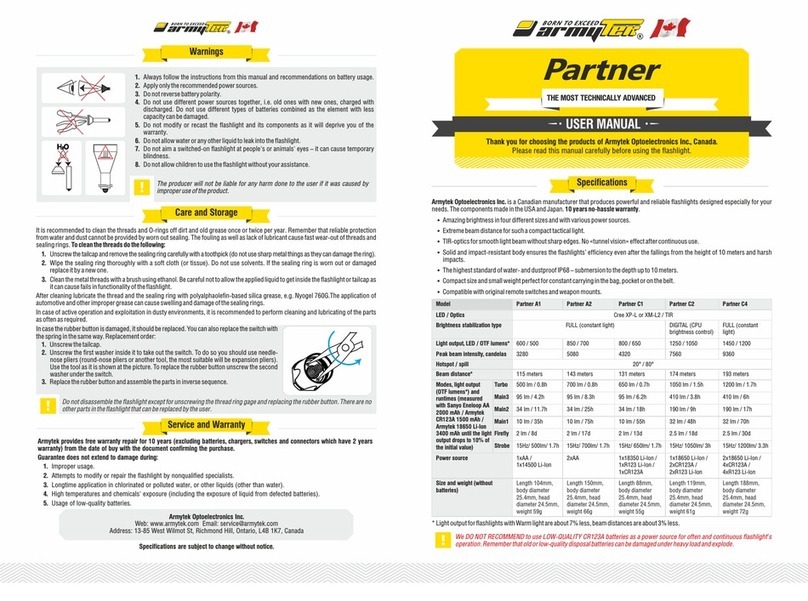
In case the rubber button is damaged, it should be replaced.
Replacement order:
1. Unscrew the tailcap.
2. Unscrew the thread ring gage, which holds the rubber button in the cap.
To do so you should use needle-nose pliers (round-nose pliers or
another tool: most suitable will be expansion pliers). Use the tool as it is
shown at the picture.
Do not disassemble the flashlight except for unscrewing the thread ring gage and
replacing the rubber button. There are no other parts in the flashlight that can be
replaced by the user.

Other manuals for Viking PRO

2

Other Armytek Optoelectronics Flashlight manuals

Armytek Optoelectronics Barracuda PRO Series User manual

Armytek Optoelectronics

Armytek Optoelectronics Barracuda PRO Series User manual

Armytek Optoelectronics Predator Cree XP-G2 R5 User manual

Armytek Optoelectronics

Armytek Optoelectronics Predator Cree XP-G2 R5 User manual

Armytek Optoelectronics Prime A1 Pro User manual

Armytek Optoelectronics

Armytek Optoelectronics Prime A1 Pro User manual

Armytek Optoelectronics Barracuda User manual

Armytek Optoelectronics

Armytek Optoelectronics Barracuda User manual

Armytek Optoelectronics Wizard Pro User manual

Armytek Optoelectronics

Armytek Optoelectronics Wizard Pro User manual

Armytek Optoelectronics Viking PRO User manual

Armytek Optoelectronics

Armytek Optoelectronics Viking PRO User manual

Armytek Optoelectronics Wizard Pro User manual

Armytek Optoelectronics

Armytek Optoelectronics Wizard Pro User manual

Armytek Optoelectronics Partner A1 User manual

Armytek Optoelectronics

Armytek Optoelectronics Partner A1 User manual

Armytek Optoelectronics Viking PRO User manual

Armytek Optoelectronics

Armytek Optoelectronics Viking PRO User manual

Armytek Optoelectronics Partner A1 User manual

Armytek Optoelectronics

Armytek Optoelectronics Partner A1 User manual

Popular Flashlight manuals by other brands

XanLite FR120 quick guide

XanLite

XanLite FR120 quick guide

Armytek DOBERMANN PRO user manual

Armytek

Armytek DOBERMANN PRO user manual

Makita DML803 instruction manual

Makita

Makita DML803 instruction manual

Garmin VARIA UT800 owner's manual

Garmin

Garmin VARIA UT800 owner's manual

HeatStar MH400PT operating instructions

HeatStar

HeatStar MH400PT operating instructions

SEACHOICE 30-Day GLO 46601 operating instructions

SEACHOICE

SEACHOICE 30-Day GLO 46601 operating instructions

Gama Sonic 23i60065 instruction manual

Gama Sonic

Gama Sonic 23i60065 instruction manual

tiki Cabos Warnings and Instructions

tiki

tiki Cabos Warnings and Instructions

Makita ML180 Parts Breakdown

Makita

Makita ML180 Parts Breakdown

Motorola MR515 user guide

Motorola

Motorola MR515 user guide

Klein Tools 56412 instructions

Klein Tools

Klein Tools 56412 instructions

Bosch GLI 18V-300 Original instructions

Bosch

Bosch GLI 18V-300 Original instructions

BGS technic 86690 manual

BGS technic

BGS technic 86690 manual

Nitecore MT10C user manual

Nitecore

Nitecore MT10C user manual

Uwatec Nova 850R user guide

Uwatec

Uwatec Nova 850R user guide

Luxli ORC-FIDDLE-01 user manual

Luxli

Luxli ORC-FIDDLE-01 user manual

Black & Decker VPX1401 manual

Black & Decker

Black & Decker VPX1401 manual

ESAB W-17 instructions

ESAB

ESAB W-17 instructions

manuals.online logo
manuals.online logoBrands
  • About & Mission
  • Contact us
  • Privacy Policy
  • Terms and Conditions

Copyright 2025 Manuals.Online. All Rights Reserved.