PELI 7610 User manual

Cat. #7610
7610
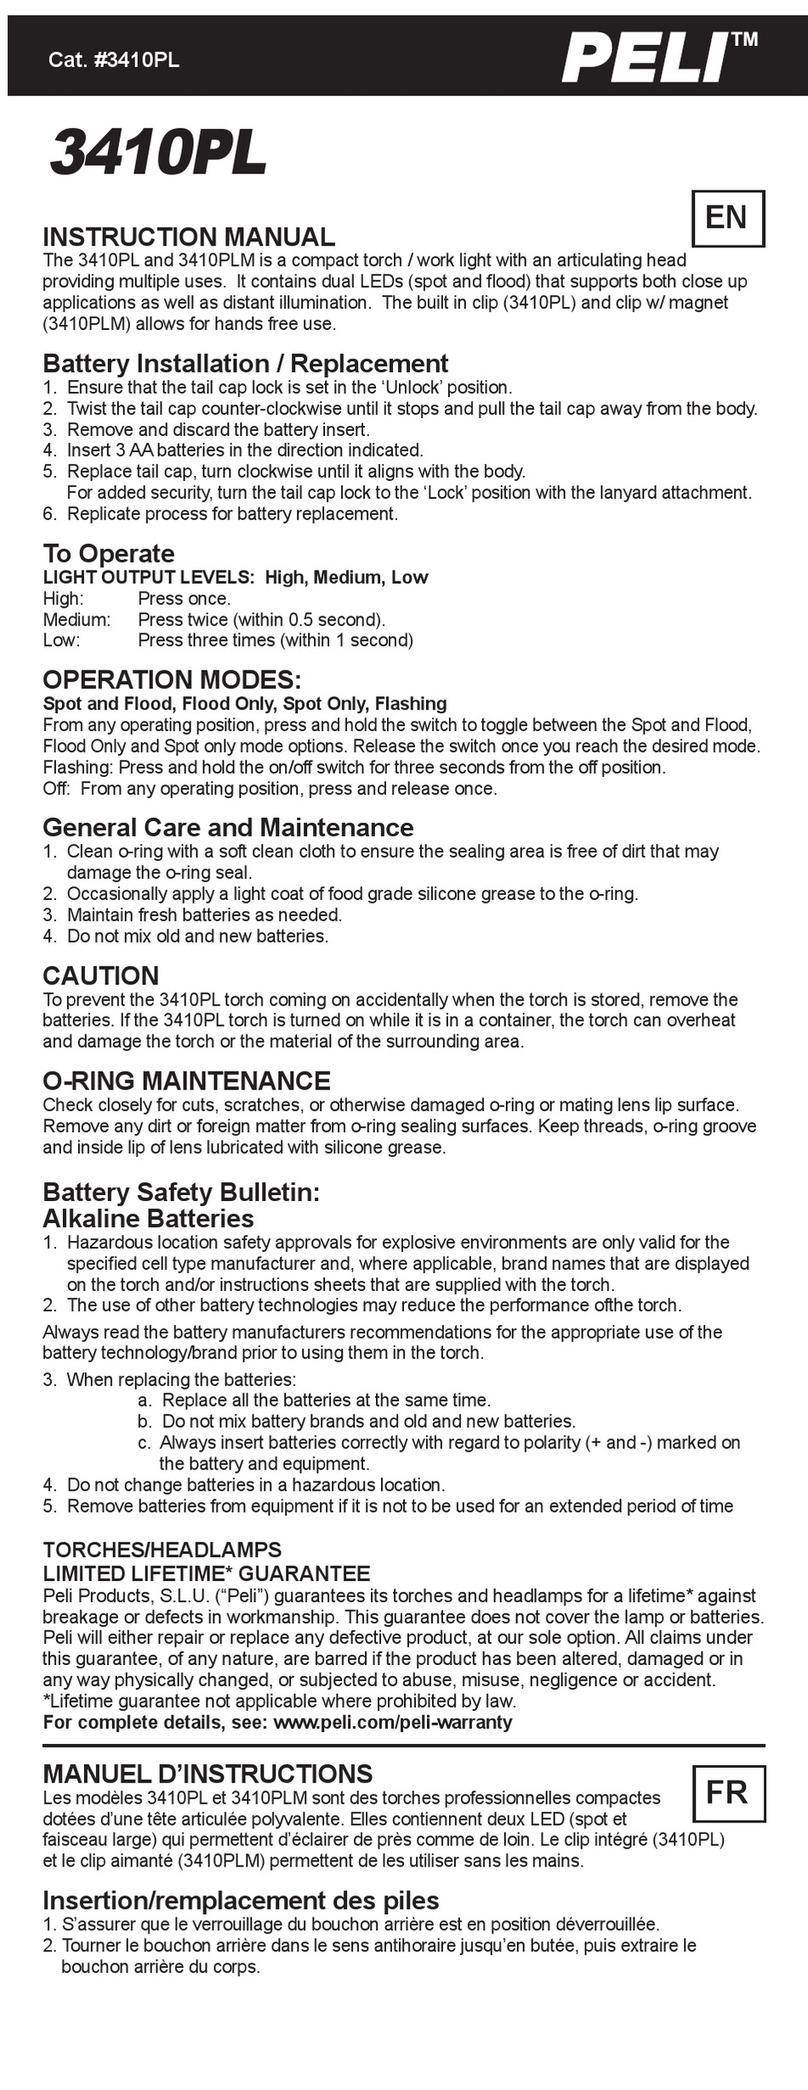
INSTRUCTION MANUAL
This compact torch produces an ultra bright pre-focused light beam by using a high-efficiency
LED powered by either (1) AA alkaline, (1) CR123 lithium, (2) CR123 lithium, (1) 18650 lithium ion
rechargeable or (1) AA NiMH rechargeable battery. The 7610 torch is designed for easy use with one
hand operation and has a dual-switch mode for constant-on or momentary-on activation. The 7610
body is made by high precision CNC machines from aerospace-grade aluminum alloy and is hard
anodized for the most durable construction. The lens is constructed with anti-reflective (AR) glass
for added durability and increased light output. The 7610 carries an ingress protection level of IPX8,
which allows for use in the most inclement weather conditions.
TO INSERT BATTERIES
1. Remove the tail cap by turning counter-clockwise.
2. Install battery (see figure 1) with + terminal facing to the head assembly.
3. Replace the tail cap onto the torch by turning clockwise until sealed.
OPERATION
To select a program, partially depress the button (momentary press, do not click) as indicated
in the table below and hold until the 7610 flashes in acknowledgment.
The light will flash to let you know that a new program has successfully been selected.
The number of flashes indicates the program number.
Momentary
presses
Conrmation ashes
Program 1 (default) High > Strobe > Medium > Low 8 *
Program 2 High Only 10 **
Program 3 High > Medium > Low 12 ***
Program 4 Low > Medium > High 14 ****
Program 5 High > Low 16 *****
To change the mode within a program, depress the button (momentary, do not click) once for each
step in the program. Presses need to be within .5 second.
Fully depress the switch to lock on the desired mode.
To turn off, fully depress the switch once more.
The 7610 has a full-time battery status indicator built in.
The small LED between the collar and the head indicates the battery status when the light is turned on:
Green = Full
Amber = Mid
Red = Low
Note: The battery status indicator is calibrated for one AA alkaline battery or one 18650 Lithium Ion battery. It will not show accurate
battery status with any other usable battery types.
TO CHANGE BATTERIES
1. Remove the tail cap by turning counter-clockwise until it comes off the rear of the 7610 torch.
2. Remove the used battery from the 7610 torch.
3. Install the new battery with + terminal facing to the head assembly.
4. Replace the tail cap by turning clockwise until sealed.
GENERAL CARE & MAINTENANCE
1. Clean o-rings with a soft clean cloth to insure that sealing area is free of dirt that could destroy the o-ring
seal.
2. Apply a light coat of clear silicone grease on the o-rings occasionally if turning action becomes too difficult.
3. Remove the tail cap and wipe the rear threads of the 7610 torch body and inside of the tail cap with a soft
clean cloth occasionally to avoid intermittent torch operation.
CAUTION
To prevent the 7610 torch coming on accidentally when the torch is stored, remove the batteries.
If the 7610 torch is turned on while it is in a container, the torch can overheat and damage the torch
or the material of the surrounding area.
SPECIFICATIONS
BULB: LED
BATTERY: (1) one AA alkaline or NiMH, (1) one or (2) two CR123 or (1) one 2389 battery
O-RING MAINTENANCE
Check closely for cuts, scratches, or otherwise damaged o-ring or mating lens lip surface.
Remove any dirt or foreign matter from o-ring sealing surfaces. Keep threads, o-ring groove and inside
lip of lens lubricated with silicone grease. See Warranty information for replacement of o-ring.
Battery Safety Bulletin: Alkaline Batteries
1. Hazardous location safety approvals for explosive environments are only valid for the specified
cell type manufacturer and, where applicable, brand names that are displayed on the Torch and/or
instructions sheets that are supplied with the light.
2. The use of other battery technologies may reduce the performance of the the Torch. Always read
the battery manufacturers recommendations for the appropriate use of the battery technology/brand
prior to using them in the Torch.
3. When replacing the batteries:
a. Replace all the batteries at the same time.
b. Do not mix battery brands and old and new batteries.
c. Always insert batteries correctly with regard to polarity (+ and -) marked on the battery and equipment.
4. Do not change batteries in a hazardous location.
5. Remove batteries from equipment if it is not to be used for an extended period of time.
TORCHES/HEADLAMPS
LIMITED LIFETIME* GUARANTEE
Peli Products, S.L.U. (“Peli”) guarantees its torches and headlamps for a lifetime* against
breakage or defects in workmanship. This guarantee does not cover the lamp or batteries.
Peli will either repair or replace any defective product, at our sole option. All claims under this
guarantee, of any nature, are barred if the product has been altered, damaged or in any way
physically changed, or subjected to abuse, misuse, negligence or accident.
*Lifetime guarantee not applicable where prohibited by law.
For complete details, see: www.peli.com/peli-warranty
EN

MANUEL D’INSTRUCTIONS
INTRODUCTION
Cette lampe de poche compacte produit un faisceau de lumière pré-focalisé ultra brillant en utilisant une LED haute
efficacité alimentée par (1) AA alcalin, (1) CR123 lithium, (2) CR123 lithium, (1) 18650 lithium ion rechargeable ou
(1 ) AA NiMH batterie rechargeable. La lampe de poche 7610 est conçue pour une utilisation simple avec une seule
main et dispose d’un mode à double commutation pour une activation constante ou momentanée. Le corps de la
torche 7610 est fabriqué par des machines CNC de haute précision en alliage d’aluminium de qualité aérospatiale
et anodisé dur pour la construction la plus durable. L’objectif est construit avec un verre anti-réfléchissant (AR) pour
une durabilité accrue et une augmentation de la luminosité. Le 7610 porte un niveau de protection contre l’entrée de
l’IPX8, qui permet d’utiliser les conditions météorologiques les plus défavorisées.
POUR INSÉRER LES PILES
1. Enlevez le couvercle en le faisant tourner dans le sens inverse des aiguilles d’une montre.
2. Installez la batterie (voir figure 1) avec + borne tournée vers l’assemblage de la tête.
3. Remettez le couvercle en place sur la torche en le faisant tourner dans le sens des aiguilles d’une montre
jusqu’à ce qu’il ferme bien.
MODE DE FONCTIONNEMENT
Pour sélectionner un programme, enfoncez partiellement le bouton (momentanément, ne cliquez pas) comme
indiqué dans le tableau ci-dessous et maintenez jusqu’à ce que la 7610 clignote en reconnaissance. La lampe
clignote, pour vous indiquer qu’un nouveau programme a bien été sélectionné. Le nombre de clignotements
indique le numéro de programme.
Pression temporaire Clignotements de
conrmation
Programme 1
(par défaut)
Élevé > Stroboscopique >
Intermédiaire > Faible 8*
Programme 2 Élevé uniquement 10 **
Programme 3 Élevé > Intermédiaire > Faible 12 ***
Programme 4 Faible > Intermédiaire > Élevé 14 ****
Programme 5 Élevé > Faible 16 *****
Pour changer de mode dans un programme, enfoncez partiellement le bouton une fois (momentanément, ne cliquez
pas dessus) à chaque étape du programme. Vous devez appuyer sur le bouton dans la limite de 0,5 seconde.
Enfoncez complètement l’interrupteur pour verrouiller le mode désiré. Pour éteindre, appuyez à fond sur l’interrupteur.
Un témoin, intégré à la lampe 7610, indique en permanence l’autonomie de la batterie. Le petit témoin LED entre
le collier et la tête indique l’état de la batterie lorsque la lampe est allumée :
Vert = Plein
Ambre = Moyen
Rouge = faible
Remarque: L’indicateur d’état de la batterie est calibré pour une pile alcaline AA ou une pile 18650 Lithium Ion. Il ne montrera pas l’état
précis de la batterie avec d’autres types de batteries utilisables.
POUR CHANGER LES PILES
1. Démontez le couvercle en le faisant tourner dans le sens inverse des aiguilles d’une montre jusqu’à ce qu’il
se démonte de l’arrière de la torche 7610.
2. Retirez la batterie usée de la lampe de poche 7610.
3. Installez la nouvelle batterie avec la borne + tournée vers l’assemblage de la tête.
4. Remettez le couvercle en place sur la torche en le faisant tourner dans le sens des aiguilles d’une montre
jusqu’à ce qu’il ferme bien.
ENTRETIEN GÉNÉRAL ET MAINTENANCE
1. Nettoyez les joints toriques à l’aide d’un chiffon doux et propre pour vérifier que les parties de fermeture ne
contiennent pas de poussière qui pourrait abîmer le joint torique.
2. Appliquez une fine couche de graisse de silicone de temps en temps sur les joints toriques si vous notez qu’il
devient difficile de faire tourner la torche.
3.
Enlevez le couvercle et essuyez les filetages arrières du corps de la lampe torche 7610 et l’intérieur du couvercle
de temps en temps à l’aide d’un chiffon doux et propre pour éviter un fonctionnement inopiné de la torche.
AVERTISSEMENT
Pour éviter que la torche 7610 ne s’allume inopinément lorsqu’elle est rangée, retirez les piles. Si la torche 7610
s’allume alors qu’elle est rangée, elle peut chauffer de manière exagérée et être endommagée ou endommager le
matériau dans lequel elle est rangée.
SPÉCIFICATIONS
AMPOULE : LED
PILES : (1) un alcali AA ou NiMH, (1) un ou (2) deux CR123 ou (1) un 2389 batterie
MAINTENANCE DU JOINT TORIQUE
Examiner attentivement le joint torique ou la superficie de la lèvre de contact de la lentille afin de détecter les
éventuelles fissures, rayures ou autre type de dommage. Éliminer les impuretés ou tout corps étranger des
surfaces d’étanchéité du joint torique. Conserver les filets, la rainure du joint torique et la lèvre interne de la lentille
bien huilés avec de la graisse de silicone. Consulter dans la Garantieles informations concernant le remplacement
du joint torique.
Bulletin de sécurité des piles : Piles alcalines
1. Les agréments de sécurité de site dangereux pour les environnements explosifs sont valables uniquement pour le
fabricant du type de pile indiqué et, le cas échéant, les noms de marque qui sont mentionnées sur la torche et/ou
les fiches d’instruction fournies avec le système d’éclairage.
2. L’utilisation d’autres technologies de pile peut réduire les performances de la torche. Toujours lire les recommandations
des fabricants de pile pour l’utilisation appropriée de la technologie/marque de pile, avant d’utiliser les piles dans la torche.
3. Remplacement des piles :
a. Remplacer toutes les piles en même temps.
b. Ne pas mélanger les marques de pile, ni d’anciennes piles avec des neuves.
c. Toujours insérer les piles dans le sens correct en respectant la polarité (+ et -) indiquée sur la pile et l’appareil.
4. Ne pas changer les piles dans un site dangereux.
5. Retirer les piles de l’appareil en cas de non-utilisation pendant une période prolongée.
TORCHES/TORCHES FRONTALES
GARANTIE À VIE* LIMITÉE
Peli Products, S.L.U. (« Peli ») garantit à vie* ses torches et ses torches frontales contre la
casse ou les défauts de fabrication. Cette garantie ne couvre pas l’ampoule ni les piles. Peli
réparera ou remplacera tout produit défectueux, à sa seule discrétion. Toute demande de prise
en charge sous garantie, de quelque nature qu’elle soit, sera refusée si le produit a été modié,
endommagé, s’il a subi des transformations physiques quelles qu’elles soient, s’il a été sujet à
un traitement abusif, une mauvaise utilisation, une négligence ou un accident.
Garantie à vie* non applicable là où elle est interdite par la loi.
Pour obtenir des informations complètes sur la garantie, consultez la page suivante :
www.peli.com/peli-warranty
MANUAL DE INSTRUCCIONES
Esta linterna compacta produce un haz de luz pre-enfocado ultra brillante usando un LED de alta
eficiencia alimentado por (1) AA alcalina, (1) CR123 litio, (2) CR123 litio, (1) 18650 recargable
o (1) Batería AA NiMH recargable. La linterna 7610 está diseñada para operarse fácilmente con una mano y
tiene un modo de doble conmutador para la activación constante o momentánea. El cuerpo de la linterna 7610
está fabricado por máquinas CNC con una aleación de aluminio similar al utilizado en los aviones, y es
anodizado para garantizar la máxima duración y resistencia. La lente está construida con vidrio antirreflectante
(AR) para mayor durabilidad y un haz luminoso más potente. La 7610 lleva un nivel de protección de IPX8, que
permite su uso en las condiciones climáticas más adversas.
ES
FR
INTRODUCCIÓN DE LAS PILAS
1.
Retire la tapa situada en el extremo posterior de la linterna, girándola en sentido contrario a las agujas del reloj.
2. Instale la batería (ver figura 1) con el terminal + mirando hacia el conjunto del cabezal.
3.
Vuelva a poner la tapa en la linterna, girándola en el sentido de las agujas del reloj, hasta que quede cerrada.
Pulsaciones breves Destellos de
conrmación
Programa 1
(predeterminado)
Alta intensidad > Intermitente >
Intensidad media>Baja intensidad 8*
Programa 2 Solo alta intensidad 10 **
Programa 3 Alta intensidad > Intensidad
media > Baja intensidad 12 ***
Programa 4 Baja intensidad > Intensidad
media > Alta intensidad 14 ****
Programa 5 Alta intensidad > Baja intensidad 16 *****
FUNCIONAMIENTO
Para seleccionar un programa, presione parcialmente el botón (pulsación momentánea, no haga clic) como
se indica en la tabla de abajo y manténgala presionada hasta que la 7610 parpadee en reconocimiento.
La luz parpadeará para indicar que el nuevo programa se ha seleccionado con éxito. El número de destellos
se corresponde con el número del programa.
Para cambiar el modo en un programa, pulsar el botón (brevemente, sin que llegue a hacer clic) una vez por
cada paso del programa. Las pulsaciones deben durar menos de medio segundo. Presione completamente el
interruptor para bloquear el modo deseado. Para apagar, presione completamente el interruptor una vez más.
La linterna 7610 tiene un indicador de estado de la batería. El pequeño LED que se encuentra entre el anillo
y el cabezal indica el estado de la batería cuando está encendida:
Verde = Completo
Ámbar = Medio
Rojo = bajo
Nota: El indicador de estado de la batería está calibrado para una batería alcalina AA o una batería de iones de litio 18650. No mostrará
el estado exacto de la batería con ningún otro tipo de batería utilizable.
CAMBIO DE LAS PILAS
1. Retire la tapa situada en el extremo posterior de la linterna 7610, girándola en sentido contrario
a las agujas del reloj, hasta que quede suelta y pueda sacarla.
2. Retire la batería usada de la linterna 7610.
3. Instale la nueva pila con el terminal + mirando al conjunto del cabezal.
4. Vuelva a poner la tapa posterior y gírela en el sentido de las agujas del reloj hasta que quede cerrada.
CUIDADO GENERAL Y MANTENIMIENTO
1. Limpie las juntas tóricas con un trapo suave y limpio para asegurarse de que en la zona de cierre no queda
suciedad que pueda estropear las juntas.
2. Aplique ocasionalmente una pequeña capa de grasa de silicona pura en las juntas tóricas, en caso de que
sea demasiado difícil girar la linterna.
3. Saque de vez en cuando la tapa posterior y limpie la rosca de la linterna y la parte interior de la tapa con un
trapo limpio y suave, para evitar que la linterna funcione de manera intermitente.
ATENCIÓN
Para evitar que la linterna 7610 se encienda accidentalmente cuando está guardada, retire las pilas. Si la linterna
7610 se enciende cuando está dentro de una caja, podría calentarse en exceso y quedar dañada o estropear los
materiales cercanos a la misma.
ESPECIFICACIONES
BOMBILLA: LED
PILAS: (1) una pila AA alcalina o NiMH, (1) una o (2) dos CR123 o (1) una batería 2389
MANTENIMIENTO DE LA JUNTA TÓRICA
Inspeccione atentamente la junta tórica y la superficie de contacto del reborde de la lente en busca de cortes,
arañazos u otro tipo de daños. Limpie cualquier suciedad o cuerpo extraño de las superficies de contacto de la
junta tórica. Mantenga las roscas, la ranura de la junta tórica y el reborde interior de la lente lubricados con grasa
de silicona. Consulte en la Garantía la información sobre sustitución de la junta tórica.
Comunicado sobre seguridad de las pilas: Pilas alcalinas
1. Los certificados de seguridad en zonas peligrosas para entornos explosivos solo se aplican al fabricante de
pilas especificado y, si procede, a las marcas que aparecen en la linterna o en las hojas de instrucciones que
la acompañan.
2. El uso de cualquier otro tipo de pilas puede afectar al rendimiento de la linterna. Consultar siempre las
recomendaciones de los fabricantes de dichas pilas en cuanto a su uso antes de utilizarlas en la linterna.
3. Para cambiar las pilas:
a. Sustituir todas las pilas a la vez.
b. No mezclar pilas de distinta marca ni pilas usadas y nuevas.
c. Introducir las pilas correctamente siguiendo la polaridad (+ y -) indicada en la pila y el equipo.
4. No cambiar las pilas en zonas peligrosas.
5. Sacar las pilas del equipo si no va a utilizarse durante un largo periodo de tiempo.
LINTERNAS/FRONTALES
GARANTÍA LIMITADA DE POR VIDA*
Peli Products, S.L.U. (“Peli”) garantiza de por vida* sus linternas y frontales contra roturas
o defectos de fabricación. Esta garantía no cubre la lámpara ni las pilas. Peli reparará o sustituirá
a su entera discreción los productos defectuosos. Las reclamaciones de garantía de cualquier
clase se considerarán nulas en caso de que el producto haya sufrido alteraciones, daños,
modicaciones físicas de cualquier tipo o accidentes, o se haya hecho un uso incorrecto, abusivo
o negligente.
*La garantía de por vida no es aplicable donde la ley lo prohíba.
Para obtener toda la información relativa a la garantía, véase: www.peli.com/peli-warranty
BEDIENUNGSANLEITUNG
Diese kompakte Taschenlampe erzeugt einen ultrahellen, vorfokussierten Lichtstrahl, indem sie eine
hocheffiziente LED verwendet, die entweder durch (1) AA-Alkaline, (1) CR123-Lithium, (2) CR123-Lithium, (1) 18650
Lithium-Ionen-Akku oder (1 ) AA NiMH Akku. Die Taschenlampe 7610 ist für den einfachen Gebrauch mit einer
Handbedienung ausgelegt und verfügt über einen Dual-Switch-Modus für Konstant-On- oder Moment-On-Aktivierung.
Der 7610 Körper wird durch hochpräzise CNC-Maschinen aus der Luft- und Raumfahrt-Aluminiumlegierung hergestellt
und ist für die haltbarste Konstruktion hart eloxiert. Das Objektiv ist mit Antireflex-Glas (AR) für zusätzliche Haltbarkeit
und erhöhte Lichtleistung konstruiert. Der 7610 verfügt über ein Schutzniveau von IPX8, das den Einsatz bei den
schlechten Wetterbedingungen ermöglicht.
EINLEGEN DER BATTERIEN
1. Nehmen Sie den Deckel am Gehäuseende ab, indem Sie ihn gegen den Uhrzeigersinn drehen.
2. Batterie einlegen (siehe Abbildung 1) mit + Klemmeder Kopfanordnung zugewandt.
3. Setzen Sie den Deckel am Gehäuseende wieder auf die Taschenlampe auf, indem Sie ihn im Uhrzeigersinn drehen.
BEDIENUNG
Um ein Programm zu wählen, die teilweise die Taste drücken (Taster drücken, klicken Sie nicht), wie in der
folgenden Tabelle angegeben und halten, bis der 7610 in Anerkennung blinkt.
Die Lampe blinkt und zeigt damit an, dass ein neues Programm erfolgreich gewählt wurde. Die Anzahl des
Blinkens zeigt die Programmnummer an.
DE

Kurz
drücken
Bestätigung
blinkt
Programm 1
(Standard) Hoch > Blinken > Mittel > Niedrig 8 *
Programm 2 Nur hoch 10 **
Programm 3 Hoch > Mittel > Niedrig 12 ***
Programm 4 Niedrig > Mittel > Hoch 14 ****
Programm 5 Hoch > Niedrig 16 *****
Um den Modus innerhalb eines Programms zu ändern, drücken Sie die Taste (nur kurz, nicht klicken)
einmal für jeden Programmschritt. Das Drücken muss innerhalb von 0,5 Sekunden stattnden. Den Schalter
vollständig drücken, um den gewünschten Modus zu sperren. Zum Ausschalten den Schalter nochmals
vollständig drücken.
Der 7610 verfügt über eine Vollzeit-Batteriezustandsanzeige.
Die kleine LED zwischen dem Kragen und dem Kopf zeigt den Batteriestatus an, wenn das Licht eingeschaltet ist:
Grün = Vollständig
Bernstein = Mittel
Rot = Niedrig
Hinweis: Die Batteriestatusanzeige ist für eine AA-Alkalibatterie oder eine 18650 Lithium-Ionen-Batterie kalibriert. Es zeigt keinen
genauen Batteriestatus mit anderen verwendbaren Batterietypen an.
AUSTAUSCHEN DER BATTERIEN
1. Nehmen Sie den Deckel am Gehäuseende ab, indem Sie ihn gegen den Uhrzeigersinn drehen, bis er sich
hinten von der 7610 Taschenlampe löst.
2. Entfernen Sie die gebrauchte Batterie aus der 7610 Taschenlampe.
3. Installieren Sie die neue Batterie mit der + Klemme zur Kopfbaugruppe.
4.
Setzen Sie den Deckel am Gehäuseende wieder auf, indem Sie ihn im Uhrzeigersinn drehen, biss er dicht
schließt.
ALLGEMEINE PFLEGE UN WARTUNG
1. Reinigen Sie die O-Ringe mit einem weichen und sauberen Tuch, um sicherzustellen, dass der Bereich frei
von Schmutz ist, der die O-Ring-Dichtung beschädigen könnte.
2. Tragen Sie gelegentlich eine dünne Schicht sauberes Silikonfett auf die O-Ringe, sobald die Drehbewegung nicht
mehr leicht geht.
3. Nehmen Sie den Deckel am Gehäuseende ab und wischen Sie gelegentlich das hintere Gewinde des
Gehäuses der 7610 -Taschenlampe und das Innere des Deckels am Gehäuseende mit einem weichen und
sauberen Tuch ab, um zu vermieden dass die Taschenlampe intermittierend arbeitet.
VORSICHT
Um zu verhindern, dass die 7610 Taschenlampe während der Aufbewahrung versehentlich eingeschaltet wird,
nehmen Sie die Batterien heraus. Wenn die 7610 Taschenlampe in einem Behälter angeschaltet wird, kann sie
überhitzt werden und die Taschenlampe oder das Material der Umgebung beschädigen.
WARTUNG DES O-RINGS
Überprüfen Sie den O-Ring und die Dicht-fläche des Linsenrandes genau auf Schnitte, Kratzer oder andere
Beschädigungen. Schmutz oder Fremdstoffe müssen von den O-Ring-Dichtflächen entfernt werden. Die Gewinde,
die Nut des O-Rings und der Innenrand der Linse müssen mit Silikonfett eingefettet werden. Informationen zum
Auswechseln des O-Rings finden Sie in den Garantiehinweisen.
TECHNISCHE DATEN
BIRNE: LED
BATTERIEN: (1) eine AA Alkaline oder NiMH, (1) eine oder (2) zwei CR123 oder (1) eine 2389 Batterie
Sicherheitsmerkblatt für Batterien: Alkaline-Batterien
1. Sicherheitszulassungen für explosionsgefährdete Umgebungen gelten ausschließlich für den spezifizierten
Hersteller des Batterie-Typs und gegebenenfalls für den Markennamen, der auf der Taschenlampe und/oder in
den Anleitungsbeschreibungen, die mit der Lampe geliefert wurden, angegeben ist.
2. Die Verwendung anderer Batterietechnologien kann die Leistung der Taschenlampe mindern. Lesen Sie stets die
Empfehlungen des Batterieherstellers zur entsprechenden Verwendung der Batterietechnologie/Marke, bevor Sie
diese in der Taschenlampe verwenden.
3. Bei einem Batteriewechsel:
a. Ersetzen Sie stets alle Batterien.
b. Mischen Sie keine Batteriemarken und keine alten und neuen Batterien.
c. Legen Sie die Batterien stets unter Beachtung der Polarität (+ und -), wie auf der Batterie und dem Gehäuse
angegeben, korrekt ein.
4. Wechseln Sie die Batterien nicht in Gefahrenzonen.
5. Nehmen Sie die Batterien aus der Lampe, wenn diese längere Zeit nicht benutzt werden wird.
TASCHENLAMPEN/STIRNLAMPEN
BESCHRÄNKTE LEBENSLANGE* GARANTIE
Peli Products, S.L.U. („Peli“) gewährt für seine Taschenlampen und Stirnlampen eine
lebenslange* Garantie in Bezug auf Bruch und Verarbeitungsmängel. Diese Garantie erstreckt
sich weder auf die Lampe noch auf die Batterien. Pelican wird in alleinigem Ermessen defekte
Produkte reparieren oder wahlweise austauschen. Gewährleistungsansprüche jeglicher Art
sind ausgeschlossen, wenn das Produkt verändert, beschädigt oder auf andere Art physikalisch
verändert wurde oder Gegenstand von Missbrauch, Zweckentfremdung, Fahrlässigkeit oder
eines Unfalls war.
*Die lebenslange Garantie gilt nicht, wenn sie gesetzlich verboten ist.
Für komplette Garantieangaben siehe: www.peli.com/peli-warranty
MANUALE DI ISTRUZIONI
Questa torcia compatta produce un raggio luminoso ultra brillante con pre-messa a fuoco
utilizzando un LED alimentato da (1) batteria alcalina AA, (1) batteria CR123 al litio, (2) batterie CR123
al litio, (1) batteria ricaricabile agli ioni di litio 18650 o (1) batteria ricaricabile NiMH AA. La torcia 7610
è progettata per un facile utilizzo con una sola mano ed è dotata di una modalità a doppio interruttore per
un’accensione costante o temporanea. Il corpo della torcia 7610 è realizzato mediante macchine CNC ad
alta precisione a partire da una lega di alluminio di grado aerospaziale con finitura anodizzata indurita per
una struttura della massima resistenza. La lente è realizzata in vetro antiriflesso (AR), per una maggiore
durata e potenza luminosa. La 7610 vanta un livello di protezione contro la penetrazione IPX8, che ne
consente l’utilizzo nelle condizioni atmosferiche più inclementi.
PER INSERIRE LE BATTERIE
1. Rimuovere il tappo terminale ruotandolo in senso antiorario.
2. Montare la batteria (vedere la Figura 1) con il polo + rivolto verso il gruppo di testa.
3. Reinserire il tappo terminale sulla torcia ruotandolo in senso orario finché non è fisso.
FUNZIONAMENTO
Per selezionare un programma, premere parzialmente il pulsante (pressione temporanea, non far scattare)
come indicato nella tabella seguente e tenere premuto fino a quando la 7610 non lampeggia per conferma.
La luce lampeggerà per informare l’utente che è stato selezionato con successo un nuovo programma.
Il numero di lampeggi indica il numero del programma.
Pressioni temporanee Lampeggi di conferma
Programma 1 (predenito) Alta > Strobo > Media > Bassa 8 *
Programma 2 Solo alta 10 **
Programma 3 Alta > Media > Bassa 12 ***
Programma 4 Bassa > Media > Alta 14 ****
Programma 5 Alta > Bassa 16 *****
IT

Per modificare la modalità all’interno di un programma, premere il pulsante (temporaneamente, non far
scattare) una volta per ogni fase del programma. Le pressioni devono avvenire entro 0,5 secondi.
Premere completamente l’interruttore per bloccare nella modalità desiderata.
Per spegnere, premere di nuovo l’interruttore completamente.
La 7610 è dotata di un indicatore di stato della batteria integrato.
Il piccolo LED tra il collare e la testa indica lo stato della batteria quando la torcia viene accesa:
Verde = Piena
Giallo = Metà
Rosso = Bassa
Nota: L’indicatore di stato della batteria è tarato per una batteria alcalina AA o una batteria agli ioni di litio 18650. Non mostrerà
uno stato accurato della batteria con altri tipi di batterie utilizzabili.
PER SOSTITUIRE LE BATTERIE
1. Rimuovere il tappo terminale ruotandolo in senso antiorario fino a quando non fuoriesce dalla parte
posteriore della torcia 7610.
2. Rimuovere la batteria usata dalla torcia 7610.
3. Montare la nuova batteria con il polo + rivolto verso il gruppo di testa.
4. Reinserire il tappo terminale ruotandolo in senso orario finché non è fisso.
CURA E MANUTENZIONE GENERALE
1. Pulire gli O-ring con un panno morbido e pulito per garantire che l’area di tenuta sia priva di sporco che
potrebbe distruggere la tenuta O-ring.
2. Occasionalmente, applicare uno strato sottile di grasso al silicone trasparente sugli O-ring, se l’azione
di rotazione diventa troppo difficoltosa.
3. Occasionalmente, rimuovere il tappo terminale e pulire le filettature posteriori del corpo della torcia 7610
e l’interno del tappo terminale con un panno morbido e pulito per evitare un funzionamento intermittente
della torcia.
AVVERTENZA
Per evitare un’accensione accidentale della torcia 7610 quando viene riposta, rimuovere le batterie.
Se la torcia 7610 si accende all’interno di un contenitore, può surriscaldarsi e danneggiare la torcia
o il materiale dell’area circostante.
SPECIFICHE
LAMPADINA: LED
BATTERIA:
(1) una batteria alcalina AA o NiMH, (1) una o (2) due batterie CR123 o (1) una batteria 2389
MANUTENZIONE O-RING
Controllare attentamente che non vi siano tagli, graffi o altri danni a O-ring o superficie del bordo della
lente di accoppiamento.
Rimuovere eventuale sporcizia o materiali estranei dalle superfici di tenuta degli O-ring. Mantenere
lubrificati filettature, scanalatura degli O-ring e bordo interno della lente con grasso al silicone. Consultare
le Informazioni sulla garanzia per la sostituzione di un O-ring.
Bollettino relativo alla sicurezza delle batterie: Batterie alcaline
1. Le certificazioni di sicurezza per luoghi potenzialmente pericolosi in relazione ad ambienti esplosivi
sono valide esclusivamente per le batterie del tipo e del fabbricante specificato nonché, ove applicabile,
per le marche riportate sulla torcia e/o sui fogli di istruzioni forniti con la stessa.
2. L’uso di batterie basate su altri tipi di tecnologie può ridurre le prestazioni della torcia. Leggere sempre
le indicazioni del produttore delle batterie per un uso corretto delle batterie a seconda del tipo di
tecnologia/marca prima di installarle nella torcia.
3. Precauzioni per la sostituzione delle batterie:
a. Sostituire tutte le batterie nello stesso momento.
b. Non inserire insieme batterie vecchie e nuove o di marche diverse.
c. Inserire sempre le batterie secondo la polarità corretta (+ e -) indicata sulle stesse
e sull’apparecchiatura.
4. Non sostituire le batterie in luoghi pericolosi.
5. Se si prevede di non utilizzare la torcia per un periodo prolungato, estrarre le batterie.
TORCE/TORCE DA TESTA
GARANZIA LIMITATA A VITA*
Peli Products S.L.U. (“Peli”) garantisce a vita* le sue torce e torce da testa contro rotture o difetti
di fabbricazione. La presente garanzia non copre le lampade o le batterie. Peli riparerà o, a sua
esclusiva discrezione, sostituirà gli eventuali prodotti difettosi. Tutte le richieste di risarcimento
in garanzia vengono bloccate, qualunque sia la loro natura, qualora il prodotto sia stato alterato,
danneggiato, modicato sicamente in qualunque modo o trattato male, oppure sia stato oggetto
di uso improprio, negligenza o incidenti.
*Garanzia non applicabile nei casi vietati ai sensi della legge.
Per informazioni complete sulla garanzia, vedere: www.peli.com/peli-warranty
РУКОВОДСТВО ПО ЭКСПЛУАТАЦИИ
Этот компактный фонарь обеспечивает сверхъяркий предварительно сфокусированный световой
луч за счет применения высокоэффективного светодиода, питаемого от 1 (одной) щелочной батареи
размера AA, 1 (одной) литиевой батареи CR123, 2 (двух) литиевых батарей CR123, 1 (одного) литий-
ионного аккумулятора 18650 или 1 (одного) никель-металлогидридного аккумулятора размера AA.
Специально спроектированный для пользования одной рукой, фонарь модели 7610 оснащен режимом
двойного переключения для активации непрерывного свечения или кратковременного включения.
Корпус фонаря модели 7610 изготавливается из авиационного алюминиевого сплава на высокоточном
оборудовании с ЧПУ, укрепляется анодным покрытием и отличается крайне прочной конструкцией. Линза
изготавливается из стекла с противоотражающим покрытием, что гарантирует повышенную надежность
и увеличенную выходную яркость. Фонарь модели 7610 отличается уровнем защиты от проникновения
IPX8, что позволяет эксплуатировать его в большинстве сложных погодных условий.
УСТАНОВКА БАТАРЕЙ
1. Снимите торцевую крышку, поворачивая ее против часовой стрелки.
2. Вставьте батарею (см. рисунок 1) так, чтобы полюс «+» был направлен к головной части фонаря.
3.
Наденьте торцевую крышку на фонарь, поворачивая ее по часовой стрелке до плотного закрывания.
ЭКСПЛУАТАЦИЯ
Для выбора программы нажмите кнопку не до конца (кратко, не до щелчка), как указано в таблице
ниже, и удерживайте ее, пока фонарь модели 7610 не начнет мигать.
Фонарь будет мигать, свидетельствуя об успешном выборе новой программы. Количество миганий
соответствует номеру программы.
Кратковременные
нажатия
Подтверждающие
мигания
Программа № 1
(по умолчанию)
Высокая яркость > импульсный >
средняя яркость > низкая яркость 8*
Программа № 2 Только высокая яркость 10 **
Программа № 3 Высокая яркость > средняя яркость >
низкая яркость 12 ***
Программа № 4 Низкая яркость > средняя яркость >
высокая яркость 14 ****
Программа № 5 Высокая яркость > низкая яркость 16 *****
Чтобы изменить режим для выбранной программы, нажимайте кнопку (кратко, не до щелчка)
по одному разу для каждого шага программы. При этом интервал между нажатиями не должен
превышать 0,5 секунды.
RU

Для фиксации фонаря в желаемом режиме нажмите переключатель до конца.
Для выключения фонаря нажмите переключатель до конца еще раз.
В фонарь модели 7610 встроен постоянно работающий индикатор заряда батареи.
Когда фонарь включен, небольшой светодиодный индикатор, расположенный между манжетой
и головкой, отображает уровень заряда батареи:
Зеленый = полный
Желтый = средний
Красный = низкий
Примечание. Индикатор заряда батареи настроен на одну щелочную батарею размера AA или одну литий-ионную
батарею 18650. При применении подходящих батарей других типов он может отображать уровень их заряда неточно.
ЗАМЕНА БАТАРЕЙ
1. Снимите торцевую крышку. Для этого поворачивайте ее против часовой стрелки до тех пор, пока
она не отделится от заднего торца фонаря модели 7610.
2. Извлеките использованную батарею из фонаря модели 7610.
3. Вставьте новую щелочную батарею размера AA так, чтобы полюс «+» был направлен к головной
части фонаря.
4. Наденьте торцевую крышку, поворачивая ее по часовой стрелке до плотного закрывания.
ОБЩИЕ УКАЗАНИЯ ПО УХОДУ И ОБСЛУЖИВАНИЮ
1. Очистите уплотнительные кольца с помощью мягкой ткани, чтобы удалить грязь возле уплотнения,
чтобы она не повредила уплотнительное кольцо.
2. Периодически, когда проворачивание становится затруднительным, наносите на уплотнительные
кольца тонкий слой прозрачной силиконовой смазки.
3.
Чтобы фонарь работал бесперебойно, периодически снимайте торцевую крышку и протирайте мягкой
чистой тканью резьбы в торцевой части корпуса фонаря модели 7610 и внутри торцевой крышки.
ВНИМАНИЕ!
Во избежание случайного включения фонаря модели 7610 во время его хранения извлеките
из него батареи. Если фонарь модели 7610 включится во время нахождения в контейнере,
фонарь может перегреться и повредить материалы своей конструкции либо же материал,
к которому он прилегает.
ТЕХНИЧЕСКИЕ ХАРАКТЕРИСТИКИ
ЛАМПА: светодиодная
БАТАРЕЯ: 1 (одна) щелочная или никель-металлогидридная батарея размера AA, 1 (одна) или
2 (две) батареи CR123 либо 1 (одна) батарея 2389
ОБСЛУЖИВАНИЕ УПЛОТНИТЕЛЬНОГО КОЛЬЦА
Внимательно проверьте уплотнительное кольцо или контактную поверхность кромки линзы
на наличие порезов, царапин или иных повреждений.
Удалите любые загрязнения и инородные частицы с контактных поверхностей уплотнительного
кольца. Смазывайте резьбу, канавку для уплотнительного кольца и внутреннюю кромку линзы
силиконовой смазкой. Сведения о замене уплотнительного кольца см. в информации о гарантии.
Бюллетень по технике безопасности при обращении с щелочными
батареями
1. Стандарты безопасности для опасных зон со взрывоопасной средой действительны только для
производителя определенного типа элемента питания и в соответствующих случаях торговых
марок, которые указаны на фонаре и/или инструкциях, поставляемых с фонарем.
2. Использование других батарейных технологий может снизить производительность фонаря.
Обязательно читайте рекомендации производителей батарей по надлежащему использованию
батарейной технологии / торговой марки, прежде чем применять их в фонаре.
3. Указания по замене батарей:
А. Заменяйте все батареи одновременно.
Б. Не смешивайте батареи разных марок, не смешивайте новые батареи со старыми.
В. При вставке батарей всегда соблюдайте полярность («+» и «–»), указанную на батарее
и устройстве.
4. Не заменяйте батареи в опасных местах.
5. Если устройство не будет использоваться в течение продолжительного времени, извлекайте
из него батареи.
РУЧНЫЕ/НАЛОБНЫЕ ФОНАРИ
ОГРАНИЧЕННАЯ БЕССРОЧНАЯ* ГАРАНТИЯ
На ручные и налобные фонари компания Peli Products, S.L.U. (далее — «Peli»)
предоставляет бессрочную* гарантию на случай поломок или дефектов технологического
процесса. Настоящая гарантия не распространяется на ламповый модуль и батареи. Peli
либо выполнит ремонт, либо заменит любое дефектное изделие по своему собственному
единоличному усмотрению. Никакие требования по гарантии какого бы то ни было
характера не принимаются, если изделие было модифицировано, повреждено, изменено
либо подвергнуто ненадлежащему использованию, небрежному обращению или
аварийному воздействию.
* Бессрочная гарантия не используется в тех случаях, когда она запрещена законом.
Все сведения о гарантии см. на веб-сайте: www.peli.com/peli-warranty
Figure 1 Figura 1Figure 1 Abbildung 1 Figura 1 Рисунок 1
AA NiMH BATTERY
OR
OR
AA BATTERY TUBE
AA ALKALINE AA BATTERY
TUBE
CR123
BATTERY CR123
BATTERY 2 CR123 TUBE
CR123
SPACER CR123
BATTERY 2 CR123 TUBE
BATTERY
CAT.#2389
OR
OR
007613-3110-000E 5-23380 REV B © 2018 Peli Products
All trademarks & logos displayed herein are registered & unregistered trademarks of Peli Products, S.L.U. or Pelican Products, Inc. & others.
Table of contents
Languages:
Other PELI Flashlight manuals

PELI
PELI StealthLite 2410 User manual

PELI
PELI 7600 User manual

PELI
PELI 2360 User manual

PELI
PELI Mitylite 1900 Zone 1 User manual

PELI
PELI 7100 User manual

PELI
PELI 2765Z0 User manual

PELI
PELI 3410M User manual

PELI
PELI MityLite 1965 LED Zone 0 User manual

PELI
PELI Little Ed Recoil LED 3660 Series User manual

PELI
PELI MityLite 1975 LED Zone 1 User manual
Popular Flashlight manuals by other brands

Surefire
Surefire LumaMax L4 Operator's manual

Northern Diver
Northern Diver Varilux Micro user manual

Nicron
Nicron B78T user manual

Abicor Binzel
Abicor Binzel ABTIG Little 9 operating instructions

Paaschburg & Wunderlich
Paaschburg & Wunderlich HIGHSIDER TYPE 6 Mounting and safety instructions

Makita
Makita ML100W instruction manual