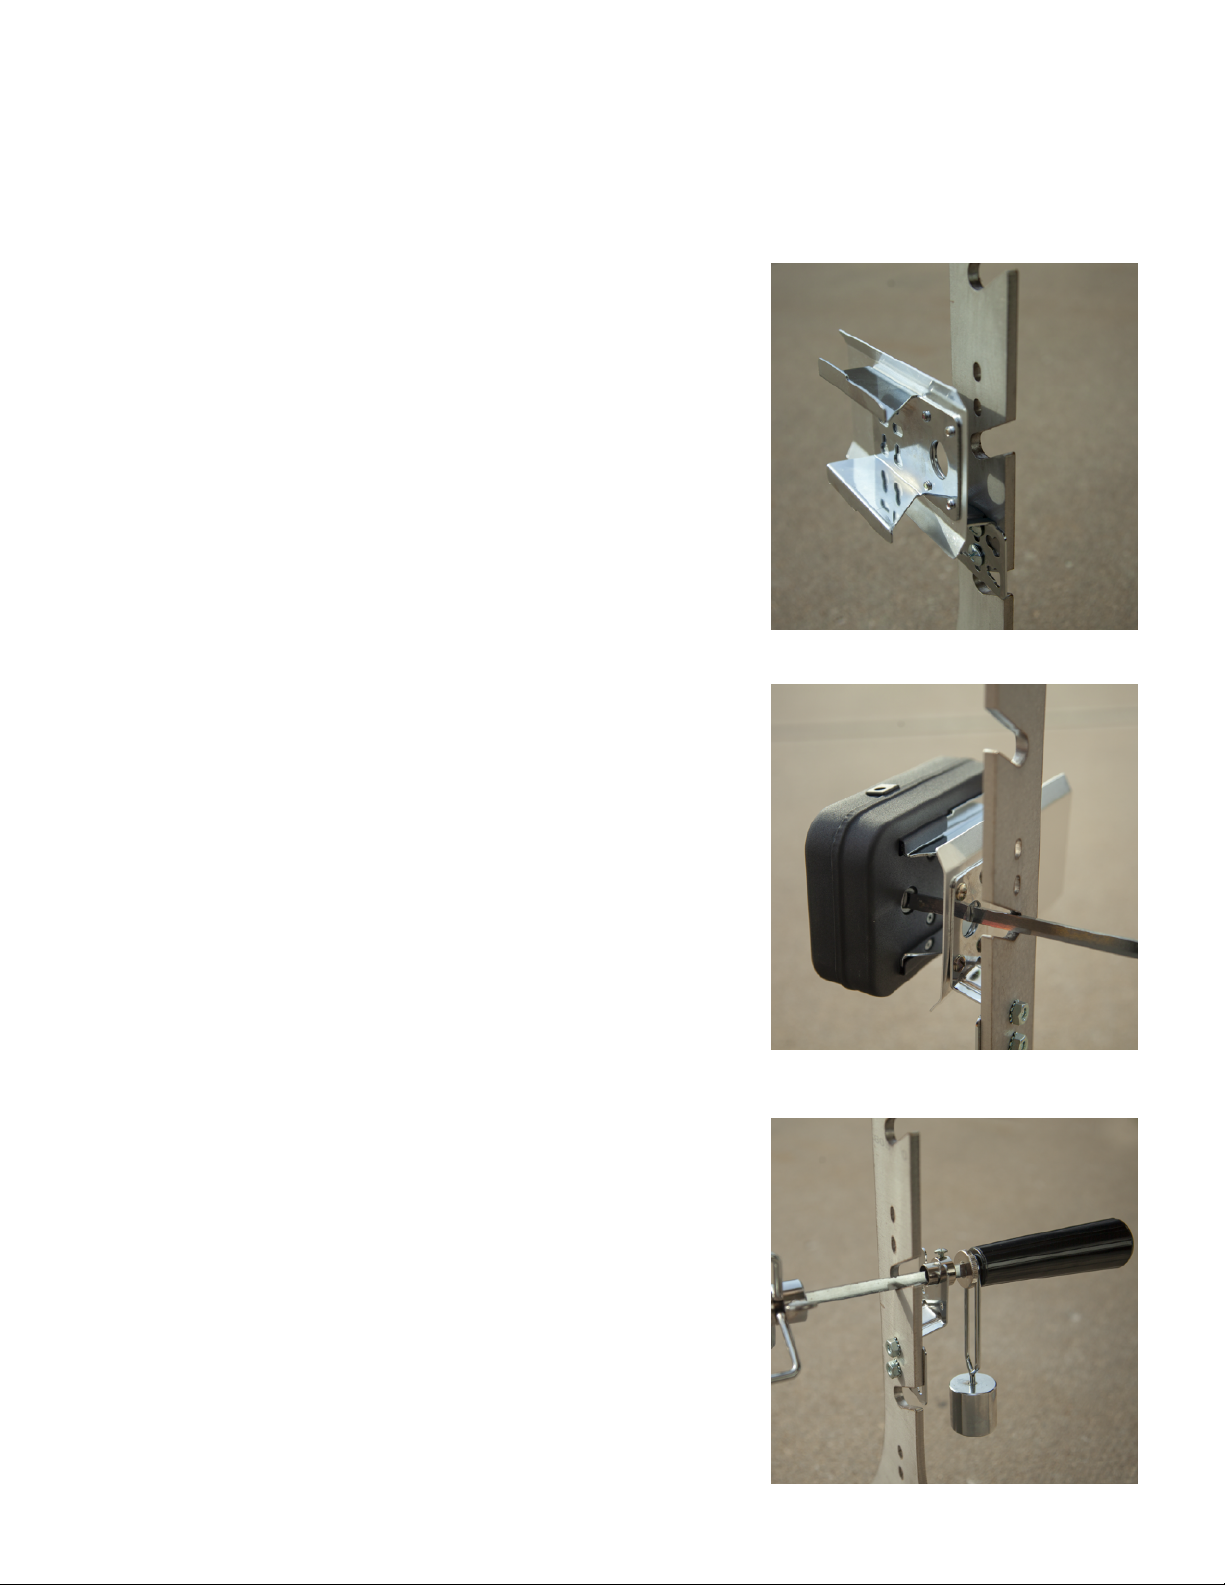
ROTISSERIE ASSEMBLY INSTRUCTIONS
Assemble Motor Bracket (2), Motor Shield(3),
and Motor Mount (1) using four screws (13) as
shown in Figure 1.
**CAUTION** Do not mount motor mount directly
to grill. Motor will fail prematurely.
Attach Motor Bracket Assembly to side of
rotisserie frame (can be mounted on either the
left or right side of the frame) using two screws
(11) and two nuts (12) as shown in Figure 2.
Attach Outboard Support Bracket (4) to
opposite side and secure with two screws (11)
and two nuts (12) as shown in Figure 3.
Insert Rotisserie Motor onto Motor Bracket
Assembly as shown in Figure 2.
Assemble Key Washer (8), Counterbalance
(9), and Handle (10) to Spit Rod (5). Slide
Shaft Collar (7) with end towards Handle as
shown in Figure 2 and 3.
Slide Prong Forks (6) onto Spit Rod (5). Place
food onto Spit Rod and secure with Prong
Forks. Secure with thumb screws. Place Spit
Rod assembly over Shaft Bracket (4) and
position into Motor. Secure position with Shaft
Bushing; tighten thumbscrew/screw.
Align the Motor Bracket(1) and Shaft Mounting
Bracket (4) so that the Spit Rod is centered in the
rotisserie rack openings allowing 1/16” clearance
to allow Spit Rod to turn see Figure 4 .
Ensure that all screw/nuts are tightened
securely.