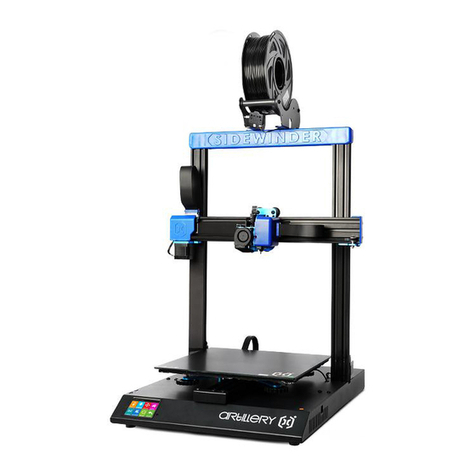
Artillery Sidewinder X4 Plus User manual

User Manual for 3D Printer
Sidewinder X4 Plus

Thank you for choosing ARTILLERY Products. For your convenience, please read this manual carefully before use, and strictly follow the
instructions in the manual. The ARTILLERY team is always ready to provide you with excellent seice.
No matter what problems you encounter, please contact us by telephone and email at the end of the manual. In order to enhance your
experience with our product, you can also acquire knowledge about equipment operation through the following methods:
Included User Guide: You can nd relevant instructions and videos on the USB ash drive.
You can also visit the ARTILLERY ocial website (www.aille3d.com) to nd information regarding software and hardware, contact details,
equipment operation, and maintenance,etc.
ProductIntroduction
1. Do not attempt to use the machine in any way that is not described in the user manual to avoid personal inju or propey damage.
2. Do not place the machine near ammable or high heat sources. Instead, place it in a well-ventilated, cool, and dust-free environment.
3. Do not place the printer in a vibrating or unstable environment, as machine vibrations can aect print quality.
4. It is recommended to use consumables recommended by the manufacturer to avoid nozzle clogging and machine damage.
5. Do not use other power cords during installation. Please use the power cord provided with the machine and plug it into a three-hole socket
with grounding.
6. Do not touch the nozzle or hotbed while the printer is in operation to prevent burns and personal inju.
7. Do not wear gloves or loose clothing while operating the machine to prevent entanglement or inju from moving pas.
8. After completing a print, clean the residue on the nozzle using tools while taking precautions not to touch the hot nozzle with bare hands.
9. Regularly maintain the printer by cleaning the machine body with a d cloth, removing dust and adhered printing materials or foreign objects
from the guide rails while the power is o.
10. Children under the age of 10 should not use the machine without supeision to avoid personal inju.
11. Users must comply with relevant national and regional laws and regulations, adhere to professional ethics, and fulll safety obligations. It is
strictly prohibited to use our products or equipment for any illegal purposes. Our company takes no responsibility for any legal liabilities
resulting from violations.
12. In case of emergencies, please turn o the power directly.
Instructions

CONTENTS
15-16
4.2 Printing Files
17-17
4.3 WIFI Connection Printing
01-03
01. Equipment Information
01-01
1.1 Introduction
02-02
1.2 Specications
03-03
1.3 Packing List
04-06
2.1 Product Installation
20-23
06.Warmly Reminding and Daily Maintenance
20-21
6.1 Printing Precautions
22-22
6.2 Maintenance Projects
23-23
6.3 Legal Explanation
18-19
05.Machine Function Explanation
18-18
5.1 Feed
19-19
5.2 Material Retraction
12-16
04.Printing for The First Time
12-14
4.1 Software Conguration
07-11
03.Introduction to the Equipment Screen Inteace
07-07
3.1 Common Inteaces
08-09
3.2 Common Functions
10-10
3.3 Boot Guide
11-11
3.4 Leveling Settings
04-06
02.Unboxing Operation

1.1 设备简介
Extruder Assembly
Type-C Inteace
USB Inteace
Touch Screen
Filament Tube
Filament Spool Holder
Filament Run-out Sensor
Coupling
Power Socket
Lead Screw
Diagonal Brace
Power Switch
WIFI Antenna
01
1. Equipment Information
1.1 Introduction

Basic Specication
Sidewinder X4 Plus
300mm*300mm*400mm
510mm*490mm*680mm
FDM
≤500m/s
0.4mm
5-45 ℃
Proximal Extrusion
PLA/TPU/PETG/ABS/PET/Carbon
300°C
100°C
4.3 inch Touch Screen
U disk/WIFI
Suppo
Suppo
Suppo
02
Printing Size
Machine Dimensions
The Principle of Printing
Print Speed
Nozzle Diameter
Operating Environment Temperature
Type of Extruder
Compatible Materials
Maximum Nozzle Temperature
Screen
Maximum Heated Bed Temperature
Printing Method
Auto-leveling
Power-o Resume
Filament Run-out Detection
Product Model
1. Equipment Information
1.2 Specications

03
List of main pas and components: List of accessories and tools:
Pedestal assembly x1
1Gant x1
2
Tool Kit x1
1
Wrench and Screwdriver x1
2
PTFE Tube x1
3
Metal Spatula x1
4
Pliers x1
5
Needle Probe x1
6
Zip Ties x2
7
Screen Bracket x1
5Display Screen x1
6Power Cable × 1
8Display Cable x17
Nozzle x1
8
Quick Sta Guide x1
14
WIFI Antenna x1
9
Consumables x1
9
Quick guide
User Manual x1
15
User's Manual
10 Filament Run-out Detection
11 Tension Rod x2
( M5*40 )4pcs
( M4*18 )2pcs
( M3*12 )2pcs
( M5*16 )2pcs
( M5*10 )2pcs
( M3*4 )1pcs
( M5 black at gaske) 4pcs
( φ4x3xM3)1pcs
Adhesive x1
10 R-type Wire Clip x1
11
3Filament Tube × 1
12 USB Flash Drive x1
Filament Holder × 1
4
1.3 Packing List
Grease x1
13
1. Equipment Information

Inse the gant into the slot on the
base. Ensure that the gant direction
matches the bottom slot direction.
1
Assemble the material rack assembly as shown in the following gure:
Thread the material pipe through the material rack and tighten it, and
then install the broken material detector assembly on the right side of
the material rack with one φ 4 x3xM3 screw (screw bags②) .
2. Unboxing Operation
2.1 Product Installation
04
2Use four M5*40 screws (screw bags ①) to lock the gant on the base.
When locking the screws, make sure to keep the prole close to the
inside and then lock it to prevent the appearance of external eight
characters.
3
Install the rack assembly to the top cross member using two M4*18
screws (screw bags ③) .
4
M5*40
M5*40
φ4x3xM3
M4*18

2. Unboxing Operation
56
Fix the screen bracket on the right side of the machine with two M3*12
screws (screw bags④) (as shown in Figure a);
Connect both ends of the telephone line to the right side of the
machine and the screen po respectively (as shown in Figures b and c);
Place the display screen on the screen bracket. Connect the WIFI
antenna (as shown in Figures d and e).
Inse the 3pin line of broken material detection into the broken materi-
al detection po; Then inse the 2pin line of the top LED lamp into the
LED lamp po; Finally, inse the 4pin wire of the motor into the motor
pos on both sides of the Z axis.
05
M3*12
WIFI Antenna
Display cable
a
c
d e
b
Material break
detection
LED light
Z-axis machine
Z-axis machine
left Z-axis machine
Right Z-axis machine

2. Unboxing Operation
7
8
9
Inse the at cable from the xed sheet
metal pa and then inse it into the horn
head po at the top of the extrusion head.
Inse the 6pin wire of the motor into the
X-axis motor po.
Use one M3*4 screw (screw bags ⑤) to x the
R-type clamp at the rear end of the X-axis xture.
Use two M5*10 screws (screw bags⑥) to x the
upper end of the inclined tie rod, and then use
two M5*16 screws (screw bags⑦) to x the
lower end of the inclined tie rod. (4 M5 gaskets
should be added during installation to prevent
loosening.)
06
10
M5*10
M5*10
M5*16
M5*16
M5 gasket
M5 gasket
M3*4
M3*4

50/88°C50/88°C
Turn on/
o the lights Fan
Print
Settings
Tools
Home page
SW-X4 Plus
Model fan
3.1 Common Inteaces
07
Heated bed temperatur
Top lighting lamp
Settings inteace
Boot inteace
Tool inteace Printing inteace
Main inteace
Nozzle temperature
3. Introduction to the Equipment Screen Inteace
Language After-sales
seice
System
resta About
简体中文
English
Deutsch
PrintSettingsToolsHome page
Print
Settings
ToolsHome page
0.1mm 1mm 10mm
000 000000
Moving Loading
consumables Calibration Network
zero
Unlock
Previous page Next page
-------File 1--------
-------File 2--------
-------File 3--------
-------File 4--------
-------File 5--------
-------File 6--------
-------File 7--------
Print
Print
Settings
ToolsHome page

Tool inteace Settings inteace
08
System resta
About
After-sales seice
Calibration
Network
Loading consumables
Case Backspace
OK123,. Blank space
WiFi-123
Please enter your password:
3.2 Common Functions
3. Introduction to the Equipment Screen Inteace
Language After-sales
seice
System
resta About
简体中文
English
Deutsch
PrintSettingsToolsHome page
Language After-sales
seice System
resta About
About after-sales
With regard to sales at Aille, we are proud
to provide professional, responsive and
friendly customer suppo to our global
customers. If you need help troubleshooting
your Aille 3D printer, please visit the
website above to submit your ticket.
sales@aille3d.com
to nd out about other Aille products,
please email the above address.
suppo@aille3d.com
If you have a general question or want to tell
us your thoughts, please send an email to the
above address. We are glad to receive your
letter.
Print
Settings
ToolsHome page
Tip: Your system environment is
abnormal, please resta the system
Resta rmware
Language After-sales
seice System
resta About
Print
Settings
ToolsHome page
No updates available
Power on guide
Renewable system!
Language After-sales
seice System
resta About
Print
Settings
ToolsHome page
Print
Settings
ToolsHome page
0.1mm 1mm 10mm
000 000000
Moving Loading
consumables Calibration Network
zero
Unlock
Moving Loading
consumables Calibration Network
10mm
50mm
100mm
Refueling
50/200°C
Nozzle
temperature
20/60°C
Hot bed
temperature
Material break
detection
Model fan Standard
air volume
Returning
material
feed hole
Print
Settings
ToolsHome page
Automatic leveling
Manual leveling
Resonance
compensation
Print
Settings
ToolsHome page
Moving Loading
consumables Calibration Network
IP:
Next
page
Previous
page
WIFI-NAME-987654321
WIFI-NAME-987654321
WIFI-NAME-987654321
WIFI-NAME-987654321
WIFI-NAME-987654321
WIFI-NAME-987654321
WIFI-NAME-987654321
WIFI-NAME-987654321
Print
Settings
ToolsHome page
Moving Loading
consumables Calibration Network

09
Print main inteace
Previous page Next page
打印文件
Print
Settings
Tools
Home page
Print le
-------Document 1--------
-------Document 2--------
-------Document 3--------
-------Document 4--------
-------Document 5--------
-------Document 6--------
-------Document 7--------
Print page Printing pagePrint le page
Stop
printing
Resume
print
oodlight
Model fan
Print rate
100%
Extrusion rate
100%
50/200°C
Nozzle
temperature
20/60°C
Hot bed
temperature
25%3h15m 1h10m
Z-axis oset
Standard
air volume
Printing
speed: 500 mm/s
-------Flighter--------
Previous page Next page
-------File 1--------
-------File 2--------
-------File 3--------
-------File 4--------
-------File 5--------
-------File 6--------
-------File 7--------
Print
Print
Settings
ToolsHome page
Zurück
Löschen
Druck
staen
-----Luftfahrzeuge------
2h 15m
Zeitverbrauch Material
PLA
Drucken
Einstellungen
WerkzeugeStaseite
3. Introduction to the Equipment Screen Inteace

10
When staing the machine for the rst time, it enters the boot
program. Please follow the prompts on the screen.
1
3/6
In order to ensure the
accuracy of the model, the
system will car out manual
leveling
Next step
3.3 Boot Guide
Cancel
Self-est
1/6
Wait for the nozzle temperature to
heat to 210 ° C and sta adjusting
the nozzle temperature
2/6
Next step
Please make sure there is no
sundries on the nozzle
Return Next step
Please wait for the platform and
nozzle position to initialize.
Please wait for the platform and
nozzle position to initialize.
YES NO
Load
5/6
Load consumables into the feed
hole and obsee whether the
tailings are extruded. If not, please
click Load or Check
Next step
6/6
Please inse U disk
Finish
3. Introduction to the Equipment Screen Inteace
Place a piece of A4 paper between the nozzle and the hot bed, move
the nozzle to 7 points in turn by operating the touch screen, Adjust the
knob at the bottom of the hot bed to ensure that the height from the
nozzle at seven points to the printing platform is about the thickness
of A4 paper (0.08-0.1 mm)and click "Next" after completion.
2
Operate according to the screen inteace prompts, and wait for the
platform and nozzle position to be initialized.
3
Car out the "Z=0" oset step, and adjust the Z axis to move up and
down, so that the height from the nozzle to the platform is about the
thickness of A4 paper (0.08-0.1 mm), and there is obvious friction feeling
when drawing A4 paper. Click next and wait for the automatic leveling step
to end.
4
After the consumables are loaded into the feeding hole and extruded
smoothly, click "Next" to inse the U disk with printed documents.
5
YES NO
4/6
In order to ensure the
accuracy of the model, the
system will automatically level
Next step
Please make sure there is no
sundries on the nozzle
Return Next step
Move up
Move down
0.01 0.05
0.1 1
Use the Move Up/Move Down key on the right to
adjust the height of the platform so that the leveling
paper has a slight friction between the nozzle and the
platform, and then click the key below.
Next step
Save
Z=0Zoset=0
Collecting 121 compensation values, please
wait......
23
Manual leveling
Point 1 Point 2
Point 3 Point 4
Point 5 Point 6
Point 7
Next step
Move up
0.01 0.05
0.1 1
Use the Move Up/Move Down key on the right to
adjust the height of the platform so that the leveling
paper has a slight friction between the nozzle and the
platform, and then click the key below.
Z=0Zoset=0
Move down
Save Next step

3.4 Leveling Setting
11
Adjust the knob at the bottom of the hot bed to ensure that the height from
the nozzle at seven points to the printing platform is about the thickness of
A4 paper (0.08-0.1 mm).
Finally, car out automatic leveling: click "Set" → "Calibration" → car out
the "Auto-leveling" page to adjust the Z oset. → "Next" on the touch screen
for automatic leveling, and wait for the automatic leveling program to end.
Move the heating head to 7 points in turn through the touch screen.
4
5
6
Place a piece of A4 paper between the heating head and the hot bed.
Manual leveling: Return to zero printer, and click "Set" → "Calibration"
→ "Manual leveling" on the touch screen.
2
Peorm Z-axis oset rst: click "Set" → "Calibration" → "Automatic
leveling",Click "Z=0" and adjust the Z-axis oset after the machine
returns to zero,so that the height from the nozzle to the platform is
about the thickness of A4 paper (0.08-0.1mm), and there is
obvious friction feeling when drawing A4 paper.
1
3
Automatic leveling
Manual leveling
Resonance
compensation
Print
Settings
ToolsHome page
Moving Loading
consumables Calibration Network
Automatic leveling
Manual leveling
Resonance
compensation
Print
Settings
ToolsHome page
Moving Loading
consumables Calibration Network
Automatic leveling
Manual leveling
Resonance
compensation
Print
Settings
ToolsHome page
Moving Loading
consumables Calibration Network
Manual leveling
Point 1 Point 2
Point 3 Point 4
Intermediate point
Next step
Print
Settings
ToolsHome page
0.1mm 1mm 10mm
000 000000
Moving Loading
consumables Calibration Network
zero
Unlock
Print
Settings
ToolsHome page
0.1mm 1mm 10mm
000 000000
Moving Loading
consumables Calibration Network
zero
Unlock
Automatic leveling
Manual leveling
Resonance
compensation
Print
Settings
ToolsHome page
Moving Loading
consumables Calibration Network
Print
Settings
ToolsHome page
0.1mm 1mm 10mm
000 000000
Moving Loading
consumables Calibration Network
zero
Unlock
Print
Settings
ToolsHome page
0.1mm 1mm 10mm
000 000000
Moving Loading
consumables Calibration Network
zero
Unlock
3. Introduction to the Equipment Screen Inteace
Move up
Move down
0.01 0.05
0.1 1
Use the Move Up/Move Down key on the right to
adjust the height of the platform so that the leveling
paper has a slight friction between the nozzle and the
platform, and then click the key below.
Next step
Save
Z=0Zoset=0
Collecting 121 compensation values, please
wait......
23
Manual leveling
Point 1 Point 2
Point 3 Point 4
Point 5 Point 6
Point 7
Next step
Move up
0.01 0.05
0.1 1
Use the Move Up/Move Down key on the right to
adjust the height of the platform so that the leveling
paper has a slight friction between the nozzle and the
platform, and then click the key below.
Z=0Zoset=0
Move down
Save Next step
Move up
0.01 0.05
0.1 1
Use the Move Up/Move Down key on the right to
adjust the height of the platform so that the leveling
paper has a slight friction between the nozzle and the
platform, and then click the key below.
Z=0Zoset=0
Move down
Save Next step

12
4.1 Software Conguration
This printer is compatible with most slicing software, such as Slic3r, Cura, Simplify3D, etc. We'll cover the AilleSlicer software in
detail and show you how to set it up for the rst print.
Please nd the AilleSlicer installation package from the random U disk, and sta the software for initial conguration after
successful installation.
1
4.Printing for The First Time

13
Select "Aille" brand on the "Other Suppliers" page.
2Keep the default selection on the "Custom Printer Setting" page and click "Next".
4
Select the corresponding printer model and material conguration in the
"Consumables Conguration Selection" page (for example, as shown in the
following gure).
5
Select the "Aille Sildewinder X4 Plus" model in the
"Aille FFF Technology Printer" page.
3
AilleSlicer -Conguration Wizard
4.Printing for The First Time

14
Keep the default selection in the "Automatic Updates" page and
"View Page" page.
6Select the corresponding model in the “Printer Settings ”page.
7
Select the corresponding materials on the "Filament
Settings" page.
8
Select the corresponding parameters on the “Print Settings” page.
9
4.Printing for The First Time

15
4.2 Printing Files
Select the "Plater" page in the menu bar.
1
Data such as printing time and consumables will be displayed after
the model slicing is completed. After checking that there is no
problem with the slice model, click "Expo G-code" in the lower right
corner and press the key to expo the le.
3
Click the "Save" key to save the slice le to the removable disk or
USB ash drive.
4
Drag and drop STL les (or other suppoed formats) to slicing
software, or select "File"-> "Impo"-> Impo corresponding model
les in the menu bar. Click the "Slice Now" key in the lower right
corner to slice the model.
2
4.Printing for The First Time

16
Inse the USB disk into the USB inteace of the printer.
Enter the printing inteace and select the le to be printed. After conrming that the le is correct, select and click the "Sta Printing" key.
5
6
7When the hot bed reach the given temperature, the X, Y and Z axes return to zero, after the nozzle is warmed up and print automatically.
Previous page Next page
-------File 1--------
-------File 2--------
-------File 3--------
-------File 4--------
-------File 5--------
-------File 6--------
-------File 7--------
Print
Print
Settings
ToolsHome page
Previous page Next page
打印文件
Print
Settings
Tools
Home page
Print le
-------Document 1--------
-------Document 2--------
-------Document 3--------
-------Document 4--------
-------Document 5--------
-------Document 6--------
-------Document 7--------
Return
Delete
Sta
printing
-------Flighter--------
2h 15m
Time
consuming Material
PLA
Print
Settings
ToolsHome page
Stop
printing
Resume
print
oodlight
Model fan
Print rate
100%
Extrusion rate
100%
50/200°C
Nozzle
temperature
20/60°C
Hot bed
temperature
25%3h15m 1h10m
Z-axis oset
Standard
air volume
Printing
speed: 500 mm/s
-------Flighter--------
4.Printing for The First Time
Return
Delete
Sta
printing
-------Flighter--------
2h 15m
Time
consuming Material
PLA
Print
Settings
ToolsHome page
Stop
printing
Resume
print
oodlight
Model fan
Print rate
100%
Extrusion rate
100%
50/200°C
Nozzle
temperature
20/60°C
Hot bed
temperature
25%3h15m 1h10m
Z-axis oset
Standard
air volume
Printing
speed: 500 mm/s
-------Flighter--------

Click " " in the "Task List" to upload the required slice le.
(File sux is gcode)
4.3 WIFI Connection Printing
17
1
2
3
4Right click on the le to be printed in the "Task List" and click
"Print". The printer will print on its own.
The original IP is 0.0.0.0. After the printer successfully connects to
WIFI, click " "The screen page will display the new IP address, please
remember this IP address.
In addition to printing through a USB ash drive, printing can also be
controlled by connecting to WIFi:
Enter the IP address in the computer browser and open it, as shown in
the following gure:(The printer and computer end need to be
connected to the same WIFI)
IP: 192.168.0.211
Next
page
Previous
page
WIFI-NAME-987654321
WIFI-NAME-987654321
WIFI-NAME-987654321
WIFI-NAME-987654321
WIFI-NAME-987654321
WIFI-NAME-987654321
WIFI-NAME-987654321
WIFI-NAME-987654321
Print
Settings
ToolsHome page
Moving Loading
consumables Calibration Network
4.Printing for The First Time
Table of contents
Languages:
Other Artillery 3D Printer manuals