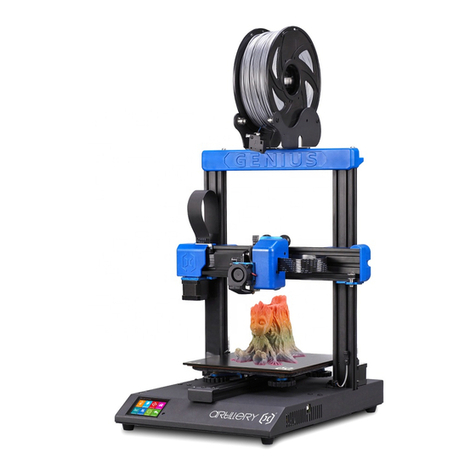
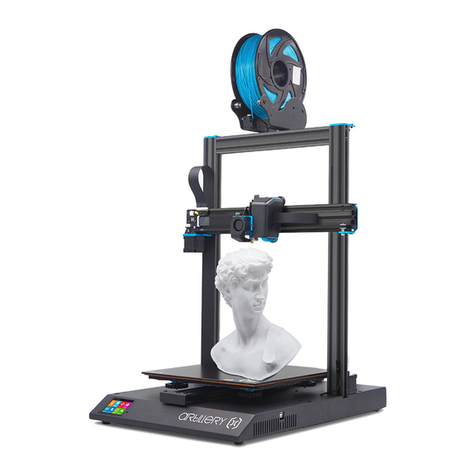
Artillery GENIUS User manual

0101
Read me rst
READ THIS MANUAL COMPLETELY BEFORE ASSEMBLING
AND POWERING UP YOUR PRINTER!
Hazards and Warnings
The Artillery GENIUS 3D printer has motorized and heated parts. When
the printer is in operation, always be aware of possible hazards.
Electric Shock Hazard
Never open the electronics bay of the printer while the printer is powered
on. Before removing the access panel, always power down the printer
and unplug the AC power cord.
Burn Hazard
Never touch the extruder nozzle, the heater block, or the heated bed
without first turning o the hotend and heated bed and allowing it
to completely cool down. The hotend and heated bed can take up to
twenty minutes to completely cool down. Also, never touch recently
extruded filaments. The filament can stick to your skin and cause a burn.
Fire Hazard
Never leave flammable materials or liquids on or near the printer when
powered on or in operation. Liquid acetone and vapors are extremely
flammable.
Pinch Hazard
When the printer is in operation, be careful never to put your fingers
in the moving parts, including the belts, pulleys, gears, wheels or
leadscrews.
Static Charge
Make sure to ground yourself before touching the printer, especially the
electronics. Electrostatic charges can damage electronic components.
To ground yourself, touch a grounded source.
Age Warning
For user under the ages of 18, adult supervision is recommended.
Beware of choking hazards around children.

02
EN
02
Table of Contents
Read me first 01
Table of Contents 02
Letter from Artillery 03
Contents of packaging 04
Assembly 05
Adjustment 06
Tips 08
Slicer Preparation 09

03
Dear Customer,
Thank you for choosing Artillery GENIUS 3D printer.
This guide will step you through the assembly and the first run of the
printer. If you have any problems during assembly, please contact our
customer service or visit our ocial Facebook group at:
https://www.facebook.com/groups/artillerygenius/
For detailed warranty policy, please visit
https://desk.zoho.com/portal/evnovo/kb/articles/evnovo-limited-
warranty
or visit our ticketing page at
https://desk.zoho.com/portal/evnovo/newticket
Or you can visit our Facebook group at
https://www.facebook.com/artillery3d
Regards,
Artillery
Letter from Artillery
Shenzhen Yuntu Chuangzhi Technology Co., Ltd.
Last update date: 26 September, 2019
This manual is updated to the date of printing,
please refer to the electronic version if in doubt.

04
EN
List 1 - Main Modules
List 2 – Tools & Spares
24pin (1pc)
M4x45 (5pcs)

05
Step 1
Step 2
Align the XZ gantry to the base, make sure the cable connector also
slides into the female connector on the base. Then fix the gantry with 4
pcs of M5x40 screws as shown in the picture.
M5x40 (4pcs)
Insert the spool holder into the slot on the back of the top beam, then
install the M3x4 screw on to the left side of the holder.

06
EN
Step 3
Step 4
Connect Z Endstop connector and both Z-axis stepper motors, then
plug in the connectors on both ends of filament runout sensor.
Adjust the eccentric nuts with the spanner supplied if the wheels on X
and Y carriage were loose.

07
Step 5
Now you can connect your power and turn on the machine. On the
touch screen, go to Tools -> Heat to pre-heat the nozzle and bed. Wait
till both heated up to target temperature and wait for 1 minute to allow
all components to equalize in temperature, then go to Tools -> Level.
Move the nozzle to all four corners, adjust the height by turning the
knob below the bed. Slide an A4 paper between the nozzle and the
bed, adjust the height so that the piece of paper slides, with just a bit of
drag, in all locations of the bed.
You may need to do the same process twice because an adjustment in
one corner will aect others.

08
EN
Reset Button
Tips
With this reset button, it will reset the machine and CANNOT resume
printing afterward, so be careful not to press it accidentally.
During printing, the LED near the nozzle shows the current printing
status:
- gradually change from blue to violet as the heated bed gets to target
temperature.
- gradually change from violet to red as the hotend gets to
temperature.
- change to white to illuminate work face.
- change to green once print has finished.
Also, you can change the LED color or turn it o through the TFT touch
screen.

09
Slicer Preparation - Step 1
This printer works with most slicing / printing software like Repetier-
Host, Cura, Simplify3D etc. But we will go in details for Repetier-Host
and tell you how to set it up so that you can make your first print. First,
install the Repetier-Host software comes on the USB stick or you can
download a copy from http://www.repetier.com.
During installation process, uncheck Repetier-Server in Select
Components step (unless you know what it is and needed it).
After installation and start the software, you should see the following
screen:

10
EN
Slicer Preparation - Step 2
Click on Printer Settings button on the top right corner to set up your
printer first.
In Printer Settings windows, go to Printer tab, and configure the printer
as shown in below:

11
Slicer Preparation - Step 3
Go to Printer Shape tab, configure with the following parameters:
X Max: 230; Y Max: 230;
Print Area Wdith/Depth: 220;
Print Area Height: 250

12
EN
Slicer Preparation - Step 4
Click on OK to close the Printer Settings window, then go to Slicer tab
on the right, choose Slic3r as Slicer and click on Configuration button.

13
Slicer Preparation - Step 5
If it’s your first time installing Repetier-Host, you may see the
“Welcome to the Slic3r Configuration Wizard” window, please follow
the steps below to set it up.
Firmware Type - RepRap (Marlin/Sprinter)
Bed Size - Shape: Rectangular; x: 220; y: 220
Nozzle diameter - 0.4
Filament Diameter - 1.75
Temperature - according to your filament, usually 220 for PLA is fine
Bed Temperature - 80 for PLA, 130 for ABS

14
EN
Slicer Preparation - Step 6
In Slic3r window, go to File -> Load Config Bundle... and load the config
file supplied on the USB stick comes with the machine.

15
Slicer Preparation - Step 7
When load finished, you will see the screen below, you can now close
this window.

16
EN
Slicer Preparation - Step 8
Choose the desired settings when slicing. You may need to tweak the
settings according to the filaments of your choice.

17
请先读我
安装及使用本机前,请先详阅本手册
危险和警告
此 Artrillery 小天才 3D 打印机电动及加热部件。打印机运行时,请始终
注意可能存在的危险。
触电危险
打印机电源打开时,切勿打开打印机的机箱。在打开机箱检修前,请务
必关闭打印机电源并拔下电源线。
灼伤危险
在喷嘴、加热块、热床还没完全冷却前,千万不要直接触摸。此些部件
可能需要20分钟以上才能完全冷却。同时,不要触摸刚挤出的耗材,未
冷却的塑料有可能粘住皮肤导致灼伤。
失火危险
在开启或运行时,切勿在打印机上或附近放置易燃材料或液体。液体丙
酮及挥发气体极易燃烧。
夹伤危险
打印机运行时,请小心不要将手指放在活动部件上,包括皮带,皮带
轮,齿轮,滚轮或螺杆。
静电
在接触打印机之前,请务必将自己接地,尤其是电子设备。静电可能会
损坏电子元件。要自己接地,请触摸接地源。
年龄警告
对于18岁以下的用户,建议成人进行监督。小心小零件对儿童有窒息危
险。

18
CN
目录
请先读我 17
目录 18
Artillery的信 19
包装内容 20
组装 21
调整 22
提示 24
切片软件准备 25

19
亲爱的顾客,
感谢您选择 Artillery 小天才 3D 打印机。
本手册将一步一步带领您从组装到第一次使用此打印机进行打印。如果
您在组装的时候遇到了什么问题,请跟我们的售后团队联系,请电邮至
support@artillery3d.com 或到我们的官方 Facebook 专页
https://www.facebook.com/groups/artillerygenius/
详细的保修政策,请参阅
https://desk.zoho.com/portal/evnovo/kb/articles/evnovo-limited-
warranty (英文)
同时,您亦可到我们的售后系统提交售后要求
https://desk.zoho.com/portal/evnovo/newticket
我司 Facebook 专页
https://www.facebook.com/artillery3d
Artillery的信
深圳市云图创智科技有限公司
最后更新日期:2019年09月26日
本手册内容更新截止至印刷当日,
如有更新改动,请参考最新的电子版本。
Table of contents
Languages:
Other Artillery 3D Printer manuals