Reinicio automático
Si la unidad se interrumpe inesperadamente debido a un
corte de alimentación, se reiniciará automáticamente con
la función anterior cuando se reanude el funcionamiento.
Ajuste del temporizador
Cuando la unidad esté encendida, presione el
botón del temporizador, la luz indicadora se
ilumina. Indica que se ha iniciado el programa
de parada automática. Presione nuevamente,
la luz indicadora de tiempo se enciende e
indica que se inició el inicio automático.
Cuando la unidad está apagada, presione
primero el botón, se iluminará el indicador
del temporizador, lo que indica que el
encendido automático está iniciado. Pulsa
de nuevo, se iluminará la señal que indica
que el apagado automático está activado.
Pulsa o mantén pulsado más/menos para
cambiar el tiempo automático: con
incrementos de 30 minutos hasta las 10
horas, luego de 1 hora en 1 hora hasta 24.
El dispositivo contará el tiempo restante
hasta el inicio.
El tiempo seleccionado se registrará en 5
segundos y el sistema volverá
automáticamente a mostrar la humedad
anterior.
Cuando se ajustan los tiempos de inicio
automático y de parada automática, dentro
de la misma secuencia de programa, las
luces de indicador TIMER ON OFF se
iluminan identificando que tanto los tiempos
ON como OFF están ahora programados.
Encender o apagar la unidad en cualquier
momento o ajustar el temporizador a 0.0
anulará la función de encendido y apagado
automático.
Cuando la ventana de visualización LED
muestra el código de P2, la función de
inicio/parada automático también se
cancelará.
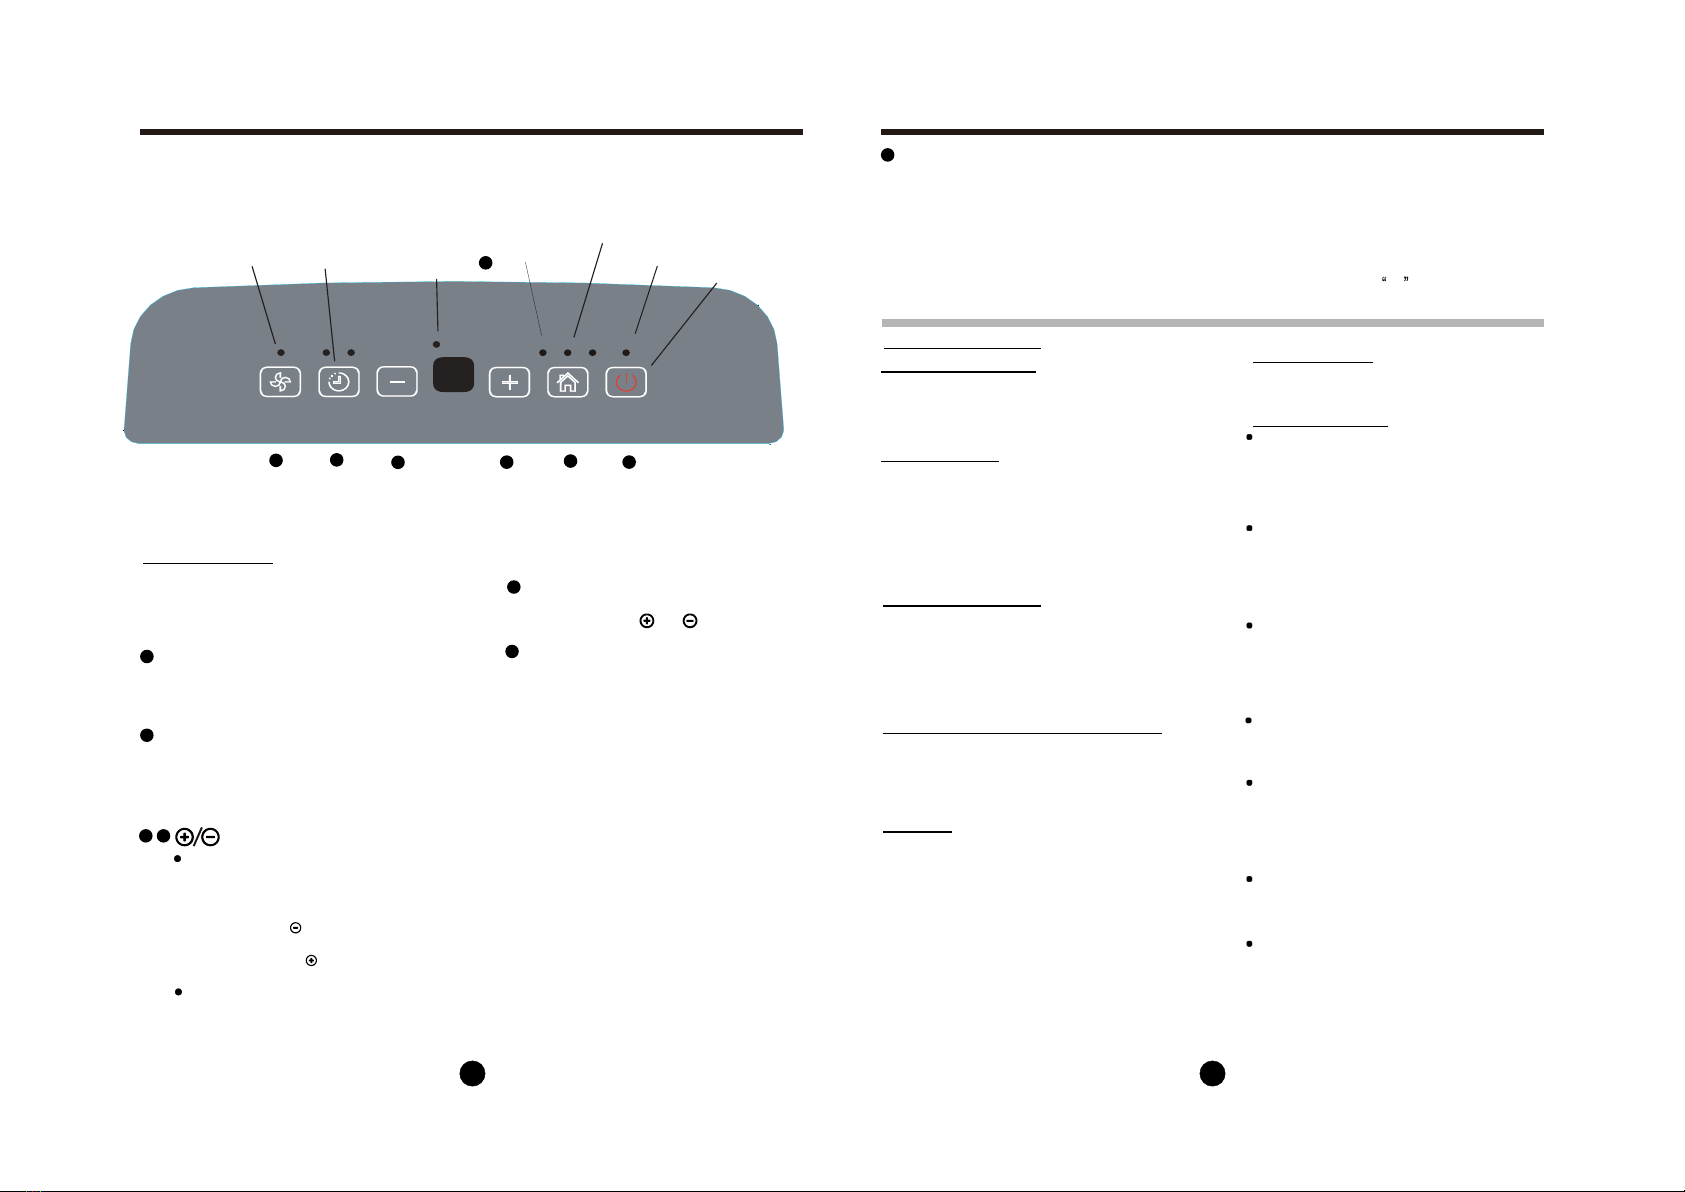
TECLAS DE CONTROL DEL DESHUMIDIFICADOR
TECLAS DE CONTROL DEL DESHUMIDIFICADOR
Tenga en cuenta: El panel de control de la unidad puede ser ligeramente diferente según el modelo.
7
Display
Muestra el nivel de humedad del 35% al 85% o el tiempo de
arranque/parada automático (0~24) durante el ajuste y luego
muestra el nivel de humedad en el ambiente (± 5% de
precisión) en un rango de 30% a 90% (Humedad Relativa).
Códigos de error y de protección:
AS
-
Error del sensor de humedad - Desconecte la unidad y
vuelva a enchufarla. Si persiste, llame al servicio técnico.
ES
-
Error del sensor de temperatura - Desenchufe la unidad
y vuelva a enchufarla. Si se repite, llame al servicio técnico.
Indicador de
operación
continua
indicador del
humidistato
Indicador del
modo secador
Indicador
luminoso de
funcionamiento
Indicador
luminoso de
la función
turbo
Indicador
depósito
lleno
Indicador
luminoso del
temporizador
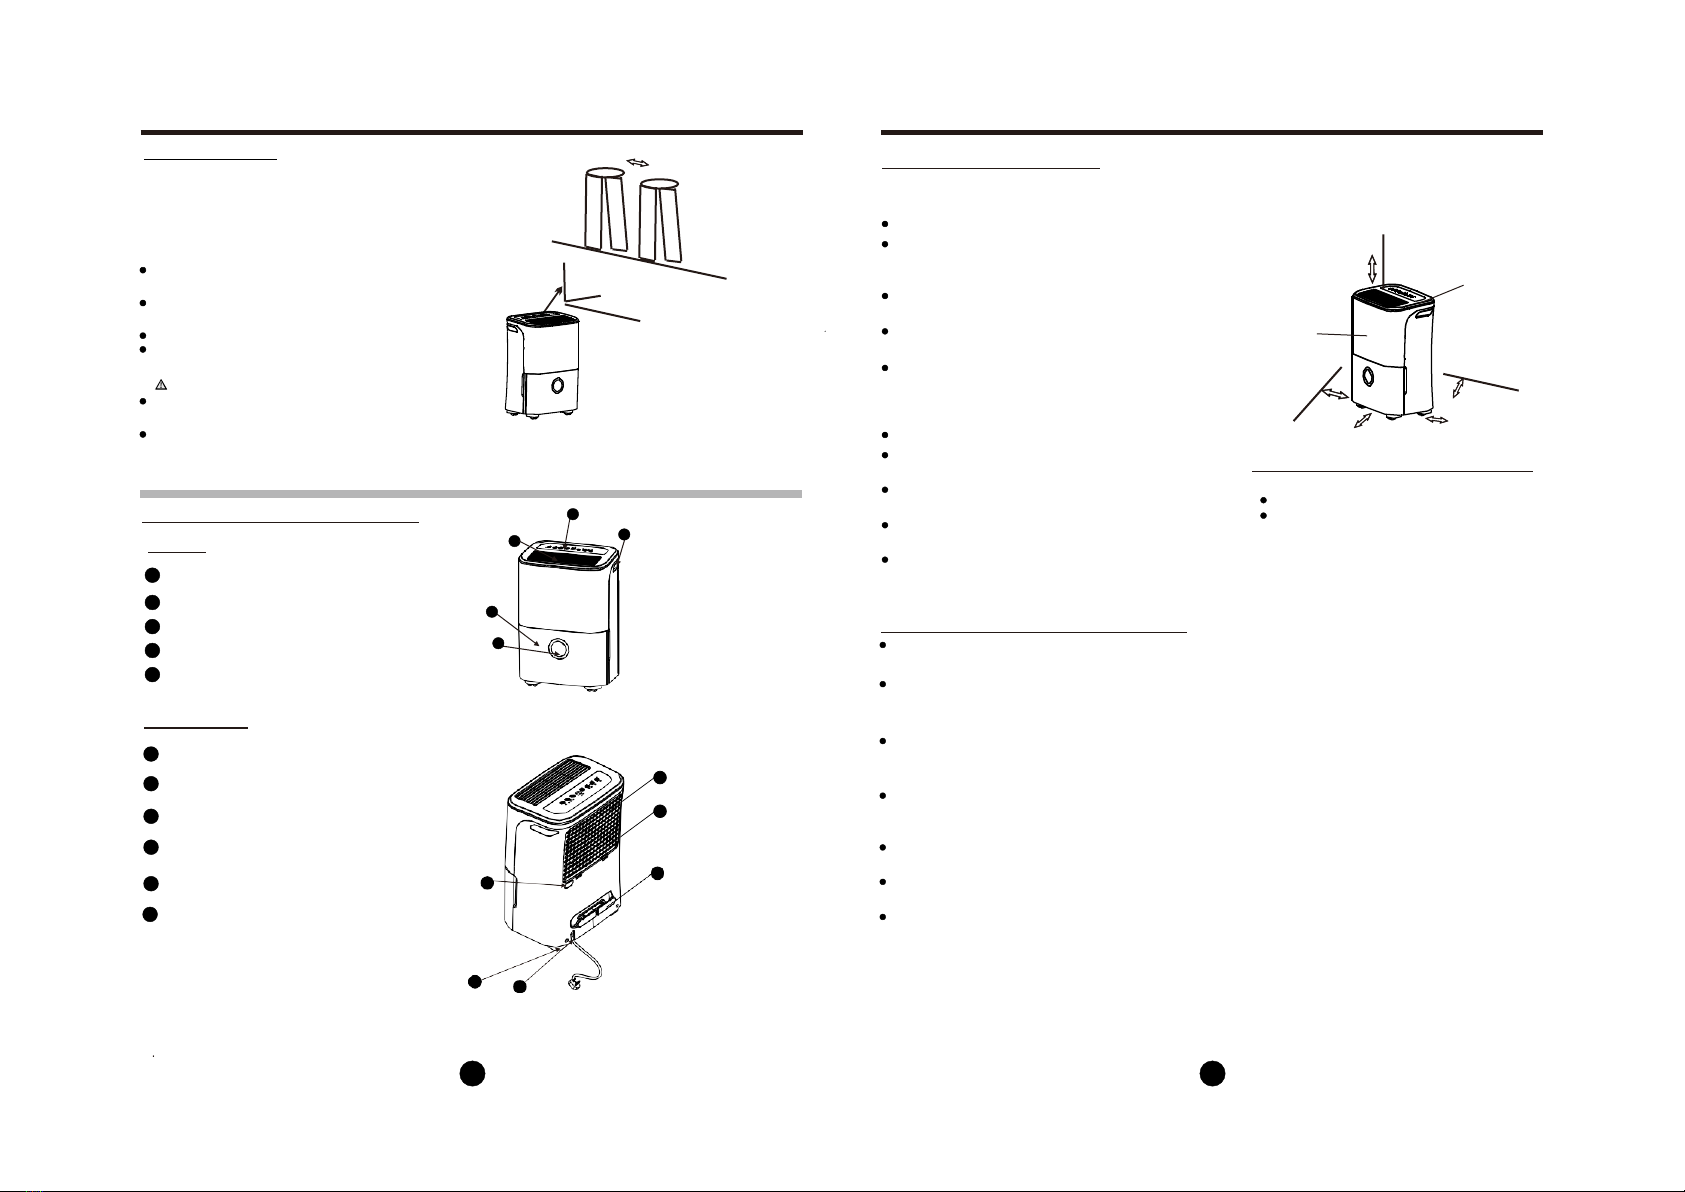
Otras caracter
í
sticas
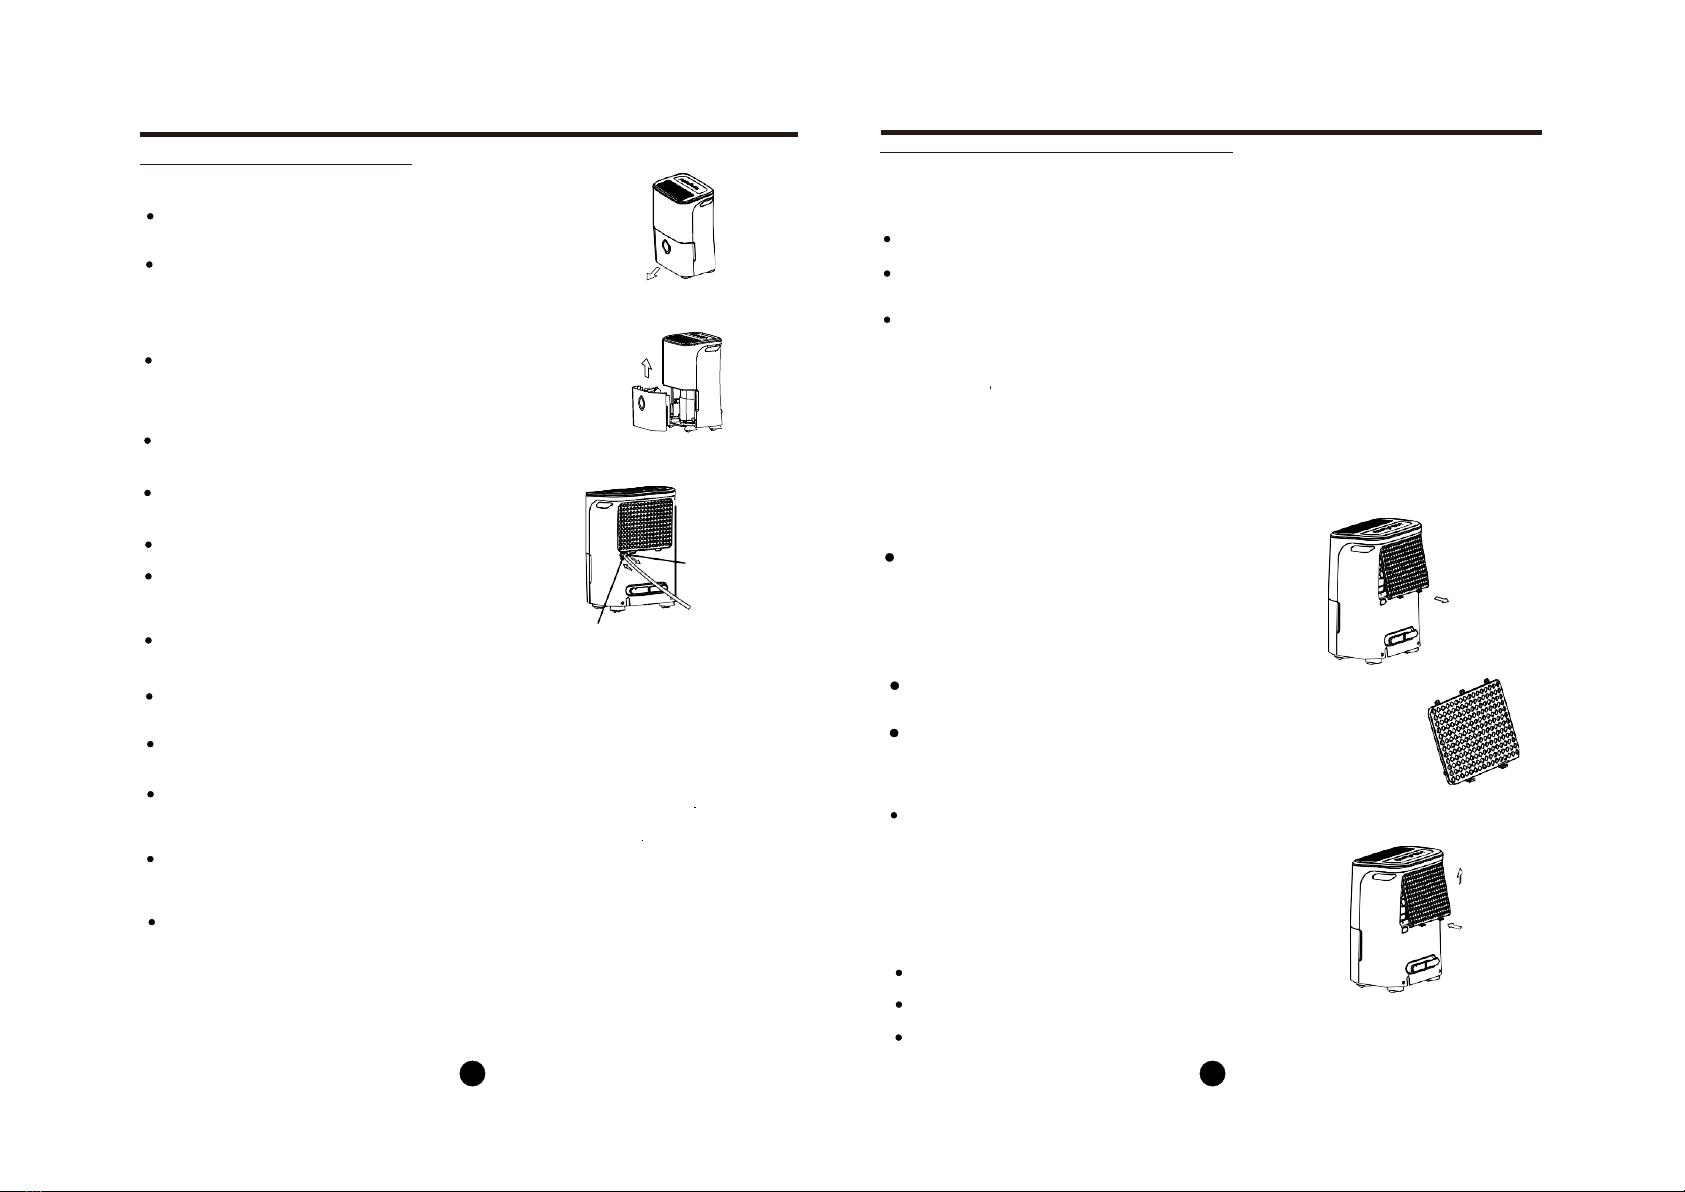
Indicador de depósito lleno
Se ilumina cuando el cubo está listo
para ser vaciado, o cuando el depósito
se ha retirado y no se coloca de nuevo
en la posición correcta.
T
El deshumidificador se apaga cuando el cubo
está lleno, o cuando se retira el cubo o no se
sustituye en la posición correcta. Cuando se
alcanza la humedad de ajuste, la unidad se
apagará automáticamente.
Para algunos modelos, el motor del ventilador
continuará funcionando.
Descongelación automática
Si se
acumula hielo en las bobinas del evaporador,
el compresor se apagará y el ventilador funcionará
hasta que desaparezca la escarcha
.
NOTA: Cuando funciona la descongelación
automática, la unidad puede hacer un sonido del
refrigerante fluyendo, es normal.
Espere 3 minutos antes de reanudar la operación
Después de que la unidad se haya detenido,
no se puede reiniciar la operación, esto es
para proteger el equipo, la operación
comenzará después de 3 minutos.
Fig.1
Teclas de control
Cuando pulse el botón para cambiar
los modos de funcionamiento, la
unidad emitirá un pitido para indicar
que está cambiando los modos.
Temporizador
Presione para la función de inicio automático y
parada auto., utilice y .
Turbo
Presione para seleccionar lavelocidad del
ventilador Alta o Normal. Ajuste el control del
ventilador a Alto para Máxima eliminación de
humedad, para un funcionamiento silencioso,
ajuste el control del ventilador a Normal.
5
6
Botón de encendido
Presione para encender y apagar el deshumidificador.
NOTA: Cuando el compresor arranca o deja de
funcionar la unidad puede hacer un sonido fuerte.
Modo
Presione para seleccionar el modo deseado de
deshumidificación, secador, deshumidificación
continua y función humidistato.
NOTA: Los modos de secado y la función humidistato
1
2
Humidistato
En el modo de deshumidificación inteligente, la unidad
controlará automáticamente la humedad
rango de 45%
~55% de acuerdo con la temperatura
ambiente. La función de ajuste de humedad no será
válida.
3 4
: Botones de más/menos
Control de humedad
El nivel de humedad puede ajustarse en un
rango de 35% HR (Humedad Relativa) a 85%
HR (Humedad Relativa) en incrementos del 5%.
Presione el botón
de
para conseguir aire más
seco y ajuste a un porcentaje menor (%).
Para lo contrario, pulse y ajuste un porcentaje
mayor (%).
Programación del Temporizador
Utilice las teclas más/menos para ajustar el inicio
automático y el tiempo de parada automática de
0.0 a 24.
Temporizador
Encendido Apagado Lleno Sec. Cont. Humidistato
Modo Potencia
Turbo
1
2
3
4
5
6
7