The following instructions are addressed to
the qualified specialist installing the cooker.
These instructions aim at ensuring that
installation and maintenance activities are
performed as professionally as possible.
Installing the cooker
●The kitchen should be dry and airy and
have effective ventilation according to
the existing technical provisions.
●The room should be equipped with a
ventilation system that pipes away
exhaust fumes created during
combustion. This system should
consist of a ventilation grid or hood.
Hoods should be installed according to
the manufacturer’s instructions. The
cooker should be placed so as to
ensure free access to all control
elements.
●The room should also enable the
necessary air supply for proper gas
combustion. Air supply should be not
less than 2m3/h per 1 kW of burner heat.
The air can be delivered from outside
by a duct with a section of at least 100
cm2, or indirectly from adjoining rooms
which are fitted with ventilation ducts
leading outside.
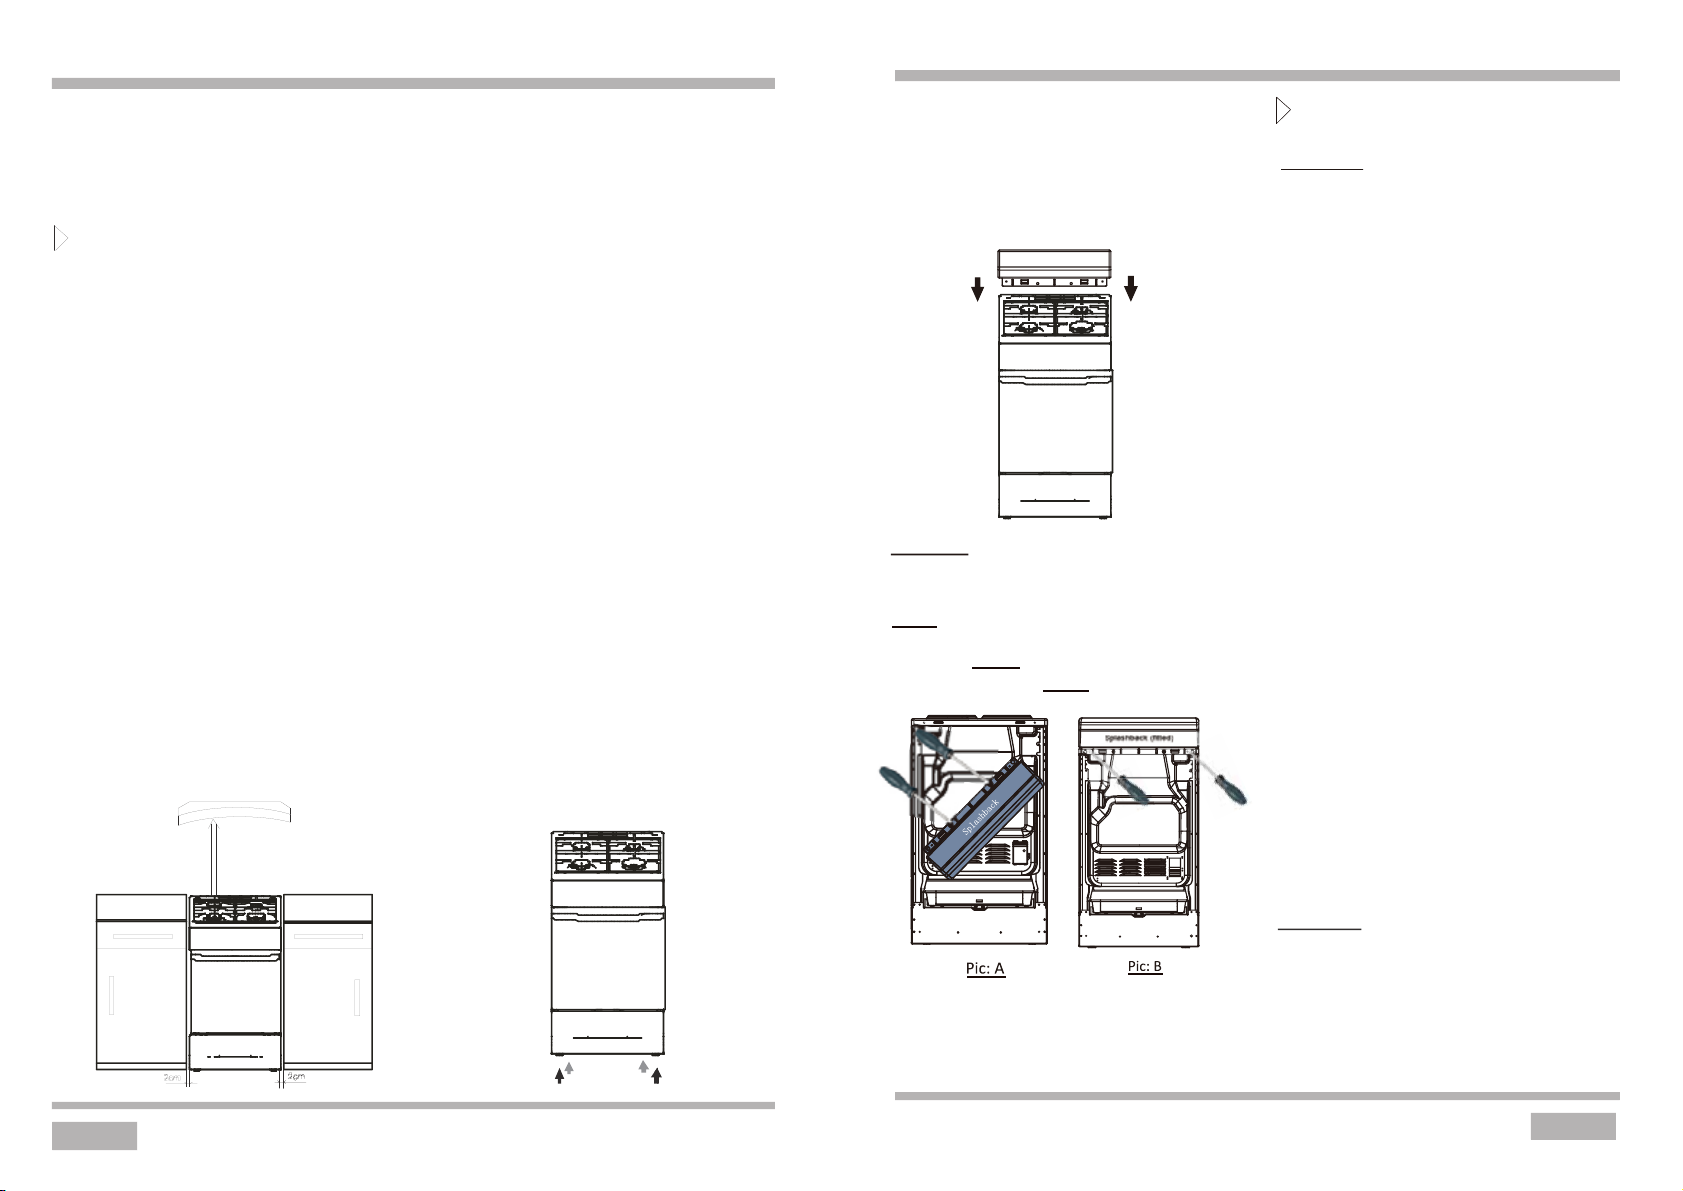
650mm
2cm 2cm2cm
●If the appliance is used intensively and
for a long time, it may be necessary to
open a window in order to improve
ventilation.
●In terms of protection against the
overheating of surrounding surfaces,
the gas cooker is an X –class
appliance and can be built into
furniture only up to the level of the
cooking hob, that is around 850 mm
above the floor. Raising furniture
construction over this level is
inadvisable. Coating or veneer used
on fitted furniture must be applied with
a heat resistant adhesive( 100℃). This
prevents surface deformation or
detachment of the coating, If you are
unsure of your furniture’s heat
resistance,you should leave
approximately 2 cm of free space
around the cooker. The wall behind
the cooker should be resistant to high
temperatur es. During operation, its
back side can warm up to around 50 ℃
above the ambient temperature.
●The cooker should stand on a hard,
even floor (do not put it on a base).
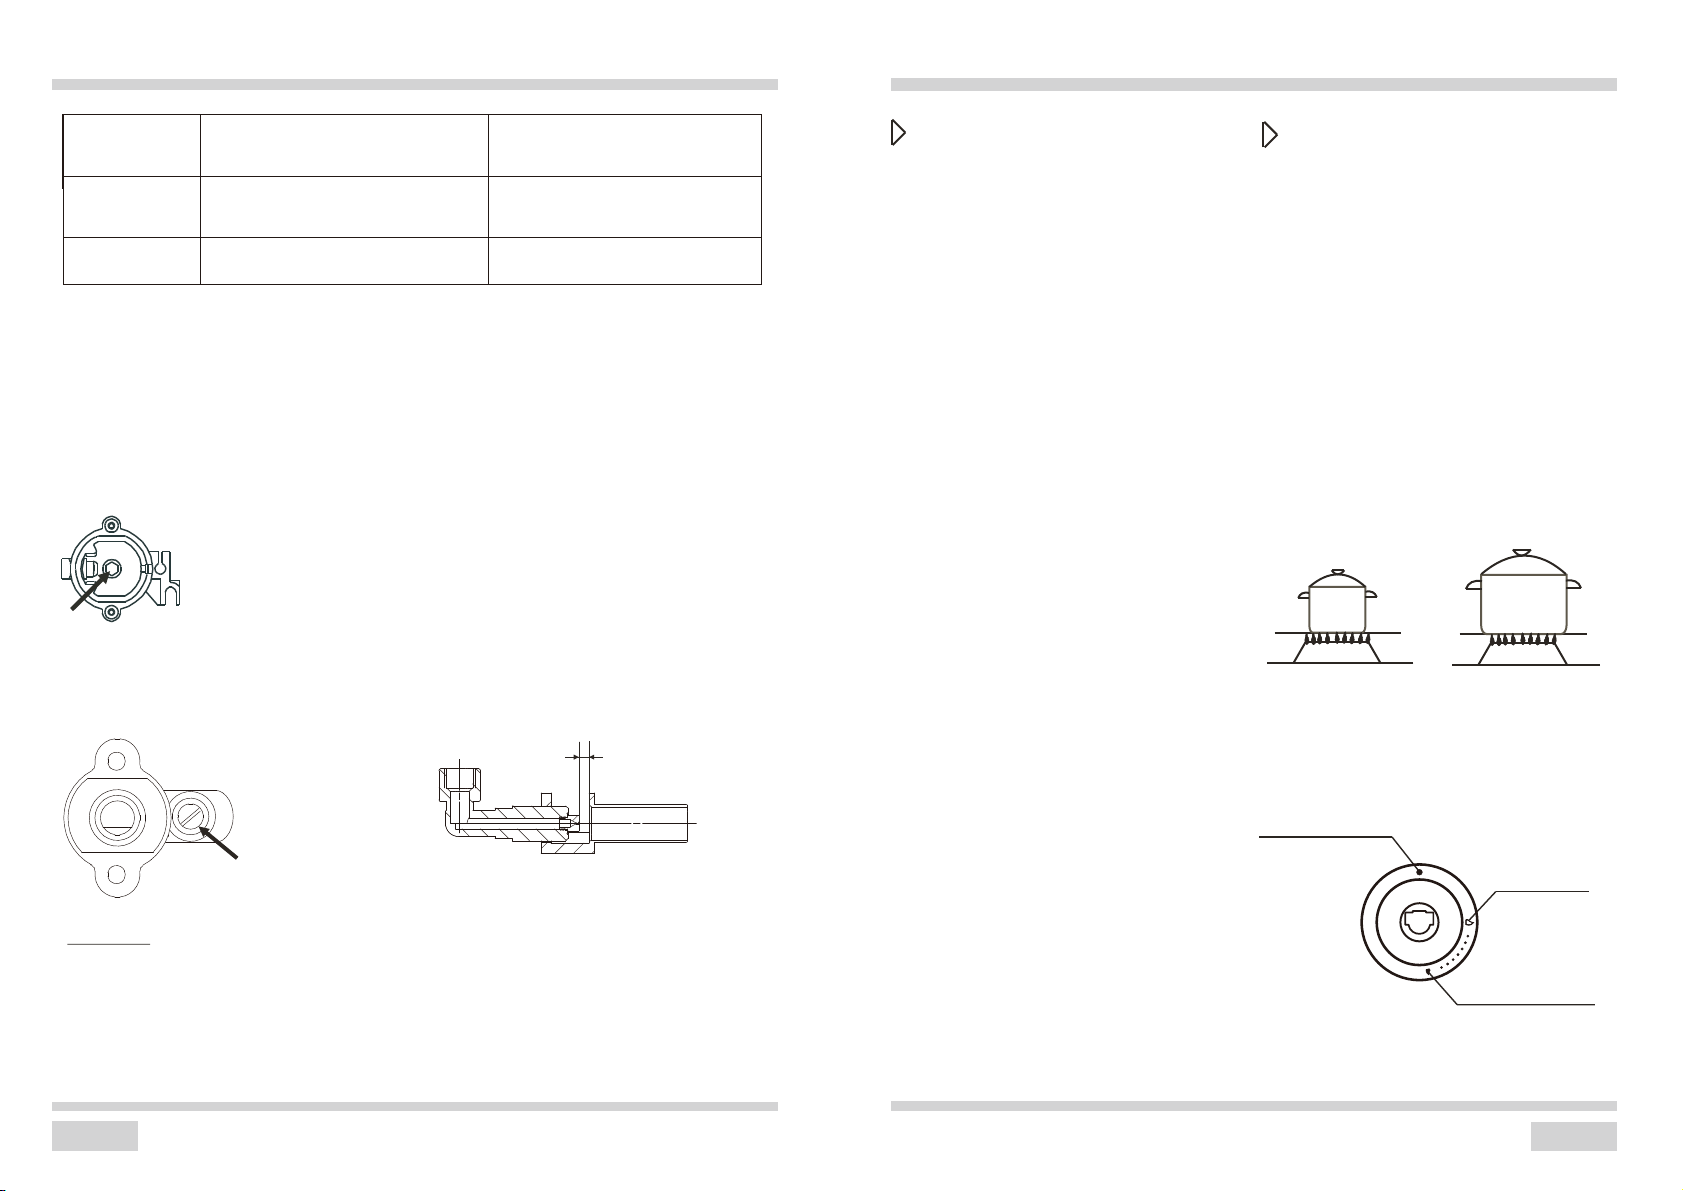
●Before you start using the cooker it
should be leveled, which is particularly
important for fat distribution in a frying
pan. To this purpose, adjustable feet
are accessible aft er removal of the
drawer. The adjustment range is +/ -
5mm.
INSTALLATION
8
INSTALLATION
Gas connection
Caution!
The cooker should be connected to a gas
supply of the particular type of gas that the
appliance is manufactured to function with.
Information about the type of gas that the
cooker has been adapted to by the factory
is shown on the data plate. The cooker
should be connected exclusively by an
appropriately authorized fitter and only he
or she has the right to adapt the cooker to
a different type of gas.
Fitting guidelines
A fitter should:
have a gas fitter’s authorisation
be acquainted with the information
included on the data plate of the
cooker about the type of gas to which
the cooker is adapted; the information
should be compared with gas supply
conditions at the place of installation.
check:
-airing efficiency, that is efficiency of
air exchange in the rooms,
-tightness of gas fitting connections,
-effectiveness of all functional
elements of the cooker,
-if the electricity supply is adapted to
function with a safety ground lead
(zero)
provide the user with a connection
certificate and give him or her
instructions in cooker use.
Caution!
The cooker may only be connected to a
liquid gas cylinder or the existing gas
supply by an authorized fitter, observing all
safety rules.
9
Install the cover. Take the cover and
cooker out of the packaging. Select a
proper place, and steadily level the cooker.
To fit the rear panel/splashback, slide
the lugs on the bottom of the panel into the
matching slots on the rear of stove and fix
with screws provided.
Unscrew the splashback from the rear wall of
the cooker, Pic: A and fit to the rear of the cooktop
section of the cooker, Pic: B
The splashback is fixed to the rear wall of cooker.
kindly please REMOVE before installation.
Pic: A
Caution!