manuals.online logo
Brands
  1. Home
  2. •
  3. Brands
  4. •
  5. ARX Racing
  6. •
  7. Motorized Toy Car
  8. •
  9. ARX Racing ARX-540 PK User manual

ARX Racing ARX-540 PK User manual

M
ANUALE DI
A
SSEMBLAGGIO
AR
X
-540
2007-1.0 – ITA Introduct ion / Pag.
す
え
Garanzia
AR Racing garantisce che il prodotto è esente da difetti. Il alore garantito non eccede comunque il costo di acquisto del
prodotto. La garanzia non copre qualunque danno pro ocato dopo l’acquisto dal danneggiamento delle singole
componenti o modifiche. La segnalazione di e entuali componenti mancanti/difettosi de e essere prontamente
segnalata, e comunque entro 7 giorni dalla data di acquisto. In caso di componenti difettosi, è necessario mostrare alla
AR Racing il componente difettoso. Le componenti e entualmente mancanti/difettose erranno in iate solo dimostrando
di a ere acquistato il prodotto. In caso di componenti mancanti/difettose segnalate il problema al punto d’acquisto
do e è stato acquistato il prodotto, oppure direttamente alla AR Racing se acquistato ia Internet dal sito della AR
Racing, in iando una mail all’indirizzo info@armodelling.com.
Manuale di
Manuale di Manuale di
Manuale di
Assemblaggio
AssemblaggioAssemblaggio
Assemblaggio
ARX
ARXARX
ARX-
--
-540
540540
540 PK
PK PK
PK
ARM
ARM ARM
ARM –
––
– 540
540 540
540 PK
PK PK
PK
M
ANUALE DI
A
SSEMBLAGGIO
AR
X
-540
2007-1.0 – ITA Introduct ion / Pag.
ず
え
Introduzione
Grazie per a er acquistato il model kit ARx-540. La AR Racing la ora per s iluppare modelli in scala
di ele ata qualità frutto di ricerche olte a realizzare prodotti inno ati i.
Il Manuale Istruzioni contiene tutti gli elementi n ecessari a preparare il modello per la messa in
strada. AR Racing i prega di seguire con attenzione le Istruzioni e di familiarizzare con il prodotto
una olta assemblato e completato con le componenti di alimentazione prima di un pieno utilizzo.
Riteniamo possibile che siano necessarie alcune ore di pratica prima di poter trarre il massimo
di ertimento dal prodotto acquistato.
NOTA BENE: in questo manuale sono contenute sia le istruzioni del modello CROSS che MOTARD.
LE immagini pre alenti sono quelle del modello cross.
Le differenti fasi di montaggio tra i due modelli sono e idenziate all’inizio del commento delle
fotografie.
Componenti necessari per il montaggio e l’uso
Utensili necessari al montaggio
 4 chia i a brugola di ottima qualità nelle
misure 3.0mm, 2.5mm, 2.0mm, 1.5mm
 1 chia e a bussola per esagono da 7mm
 1 caccia ite Philips (piccolo)
 1 pinza a becchi sottili
 1 taglierino
 1 frenafiletti tipo medio
 colla cianoacrilica
 1 righello
Dispositivi di Protezione Individuale
 anti-infortunistica
 Guanti protetti i
Componenti - non incluse – necessarie al funzionamento del modello
 Radiocomando
 Batteria
 Motore
M
ANUALE DI
A
SSEMBLAGGIO
AR
X
-540
2007-1.0 – ITA Introduct ion / Pag.
せ
え
 Regolatore
Altri elementi utili
Olio
Importante: Leggere con attenzione uanto segue prima di
iniziare l’assemblaggio
1. Warning: Questo prodotto non è un giocattolo.
Questo prodotto non è destinato a persone minori di 16 anni.
Questo prodotto può essere utilizzato da persone minori di 18 anni solo se assistiti da un
adulto responsabile.
Tenere il prodotto e tutte i relativi componenti a distanza di sicurezza da bambini minori di
3 anni!!! Le componenti distaccabili del prodotto possono essere ingerite dai bambini minori
di 3 anni!!! Rischio di soffocamento!!!
Uso specifico del prodotto: Auto o Moto radiocomandata.
Importante: in caso di clima freddo (al di sotto di 5°C) è possibile che alcune componenti del
Modello di entino più fragili e possano rompersi utilizzando il Modello. In caso di utlizzo in
presenza di tali temperature, e itare al massimo possibili collisioni del modello con ostacoli.
2. Questo è un modello di ele ate performance. Si consiglia di familiarizzare con l’uso del modello,
seguendo il manuale e le sue fasi di costruzione prima di un suo pieno utilizzo.
3. Non utilizzate questo prodotto do e ietato, su strade pubbliche, in caso di pioggia, nei posti
affollati, icino ad un aeroporto ed in qualunque area do e è ietato l’uso di radio-modelli.
4. Quando utilizzato con il ostro radiocomando, controllate se sono presenti di ieti di utilizzo di
radio frequenze nell’area in cui operate e/o se altri modellisti stanno utilizzando la stessa radio
frequenza.
5. L’utilizzo improprio del prodotto può pro ocare danni a cose o persone. AR Racing ed i suoi
distributori non hanno responsabilità per danni risultanti dalla spedizione, dall’errato montaggio
o da un uso improprio.
6. AR Racing non si assume e non accetta alcuna responsabilità per danni a cose o persone
deri anti dall’utilizzo di materiali non indicati, o da un uso non conforme alle istruzioni. Dal
momento in cui l’acquirente inizia le atti ità di assemblaggio, egli si assume le responsabilità
deri anti dall’utilizzo/montaggio improprio.
M
ANUALE DI
A
SSEMBLAGGIO
AR
X
-540
2007-1.0 – ITA Introduct ion / Pag.
ぜ
え
7. AR Racing consiglia di seguire attentamente le istruzioni ed estrarre i singoli componenti dai
sacchetti numerati in base alla fase di montaggio. Quando non indicato di ersamente, lasciare i
singoli componenti nei sacchetti per e itare di perderli o confonderli nella fase di montaggio. I
componenti sono presenti in numero esatto per completare il montaggio, ad eccezione di un
sacchetto con alcune iti di ricambio.
8. Non osser are scrupolosamente le istruzioni può compromettere il montaggio e danneggiare i
componenti.
9. La mancata applicazione del frenafiletti quando consigliato potrebbe comportare l'allentamento
delle iti.
10. Un serraggio eccessi o delle iti, superiore rispetto a quanto indicato nelle Istruzioni di
Assemblaggio può determinare la deformazione/rottura del pezzo.
11. A causa dell'ele ato numero delle parti in mo imento, prima di raggiungere la migliore
funzionalità/scorre olezza è necessario un periodo di rodaggio (4/6 batterie).
12. I materiali degli ingrannaggi sono autolubrificanti e non richiedono l'applicazione di grasso. Un
e entuale utilizzo di grasso è lasciato alla discrezione dell'utilizzatore.
13. Alcune componenti possono richiedere un ulteriore lie e la orazione manuale per raggiungere il
perfetto assemblaggio.
14. Capita che a olte siano raffigurate gomme motard durante il montaggio del modello cross e
ice ersa. Dato che ciò non impedisce la corretta comprensione del testo non è pre ista una
re isione in tal senso. O e le differenze tra i modelli sono sostanziali engono utilizzate le foto
corrette.
Elenco Moduli Assemblaggio
Il montaggio del prodotto ARX-540 si basa su un dettagliato manuale di Istruzioni composto da 9 fasi
o Moduli di assemblaggio, basati sull’utilizzo della lista dei componenti che compongo il Kit, riuniti
logicamente in 49 sacchetti di seguito elencati:
Elenco Moduli
 Modulo 1: Ruota Posteriore
M
ANUALE DI
A
SSEMBLAGGIO
AR
X
-540
2007-1.0 – ITA Introduct ion / Pag.
そ
え
 Modulo 2: Ruota Anteriore
 Modulo 3: Retrotreno
 Modulo 4: Regolazione tensione catena
 Modulo 5: Forcelle Anteriori
 Modulo 6 : Telaio

Modulo 7: Ammortizzatore
 Modulo 8: Assemblaggio finale
 Modulo 9: Messa in strada
M
ANUALE DI
A
SSEMBLAGGIO
AR
X
-540
2007-1.0 – ITA Introduct ion / Pag.
ぞ
え
Warranty
AR Racing guarantees that the product is not defecti e. The alue guaranteed does not exceed howe er the cost of
purchase of the product. The guarantee does not co er any damage that may occur after the purchase fro m the damage
of the indi idual components or any parts that were modified. Any claims of missing or defecti e parts must be made
within 7 days of the date of purchase. In the case of defecti e components, it will be necessary to pro ide AR Racing
with the defecti e component. The client requesting the missing or defecti e components has to present the proof of
purchase. The client has to present the request of missing or defecti e components to the store where the bike was
purchased, or directly to AR Racing if the purchase was made ia the AR Racing web site, by sending a mail to
info@armodelling.com.
ASSEMBLY MANUAL
ASSEMBLY MANUALASSEMBLY MANUAL
ASSEMBLY MANUAL
ARX
ARXARX
ARX-
--
-540
540540
540
PK
PKPK
PK
ARM
ARM ARM
ARM –
––
– 540
540 540
540 PK
PK PK
PK
M
ANUALE DI
A
SSEMBLAGGIO
AR
X
-540
2007-1.0 – ITA Introduct ion / Pag.
た
え
Introduction
Thanks for purchasing the ARx-540 model kit. AR Racing works to de elop scale models of the highest
quality as a result of research to create inno ati e products.
This manual contains all of the necessary information to prepare the model for its use. AR Racing
hopes that you will carefully follow the instructions in the manual during assembly and become
comfortable with the product once assembled and completed with the radio control components
before a full use. AR Racing belie es that it is necessary to spend some hours practicing before being
able to ha e the most fun with the product.
TO BE NOTED: this manual is alid for the CROSS and MOTARD ersion. It’ll mainly represent a cross
bike, when the MOTARD ersion will be different from the cross one it’ll be written next to the
picture and the instrucions will be alid for the specified ersion only.
Necessary components for assembling and use
Tool necessary for the assembling
 4 Allen wrenches of good quality with the following dimensions: 3.0mm, 2.5mm, 2.0mm,
 1.5mm;
 1 7mm Socket wrench;
 1 Philips Screwdri er (small);
 1 Needle-nosed Pliers;
 1 Cutter;
 1 Blue Thread lock;
 CA glue;
 Ruler or caliper;
Personal safety components
 Safety glasses;
 Safety glo es;
Not included components necessary for the use of the product
 Remote-Control and Recei er
 Battery (Lithium-Polymer battery recommended)
 Motor
 ESC
Other useful elements
 Oil
M
ANUALE DI
A
SSEMBLAGGIO
AR
X
-540
2007-1.0 – ITA Introduct ion / Pag.
だ
え
M
ANUALE DI
A
SSEMBLAGGIO
AR
X
-540
2007-1.0 – ITA Introduct ion / Pag.
ち
え
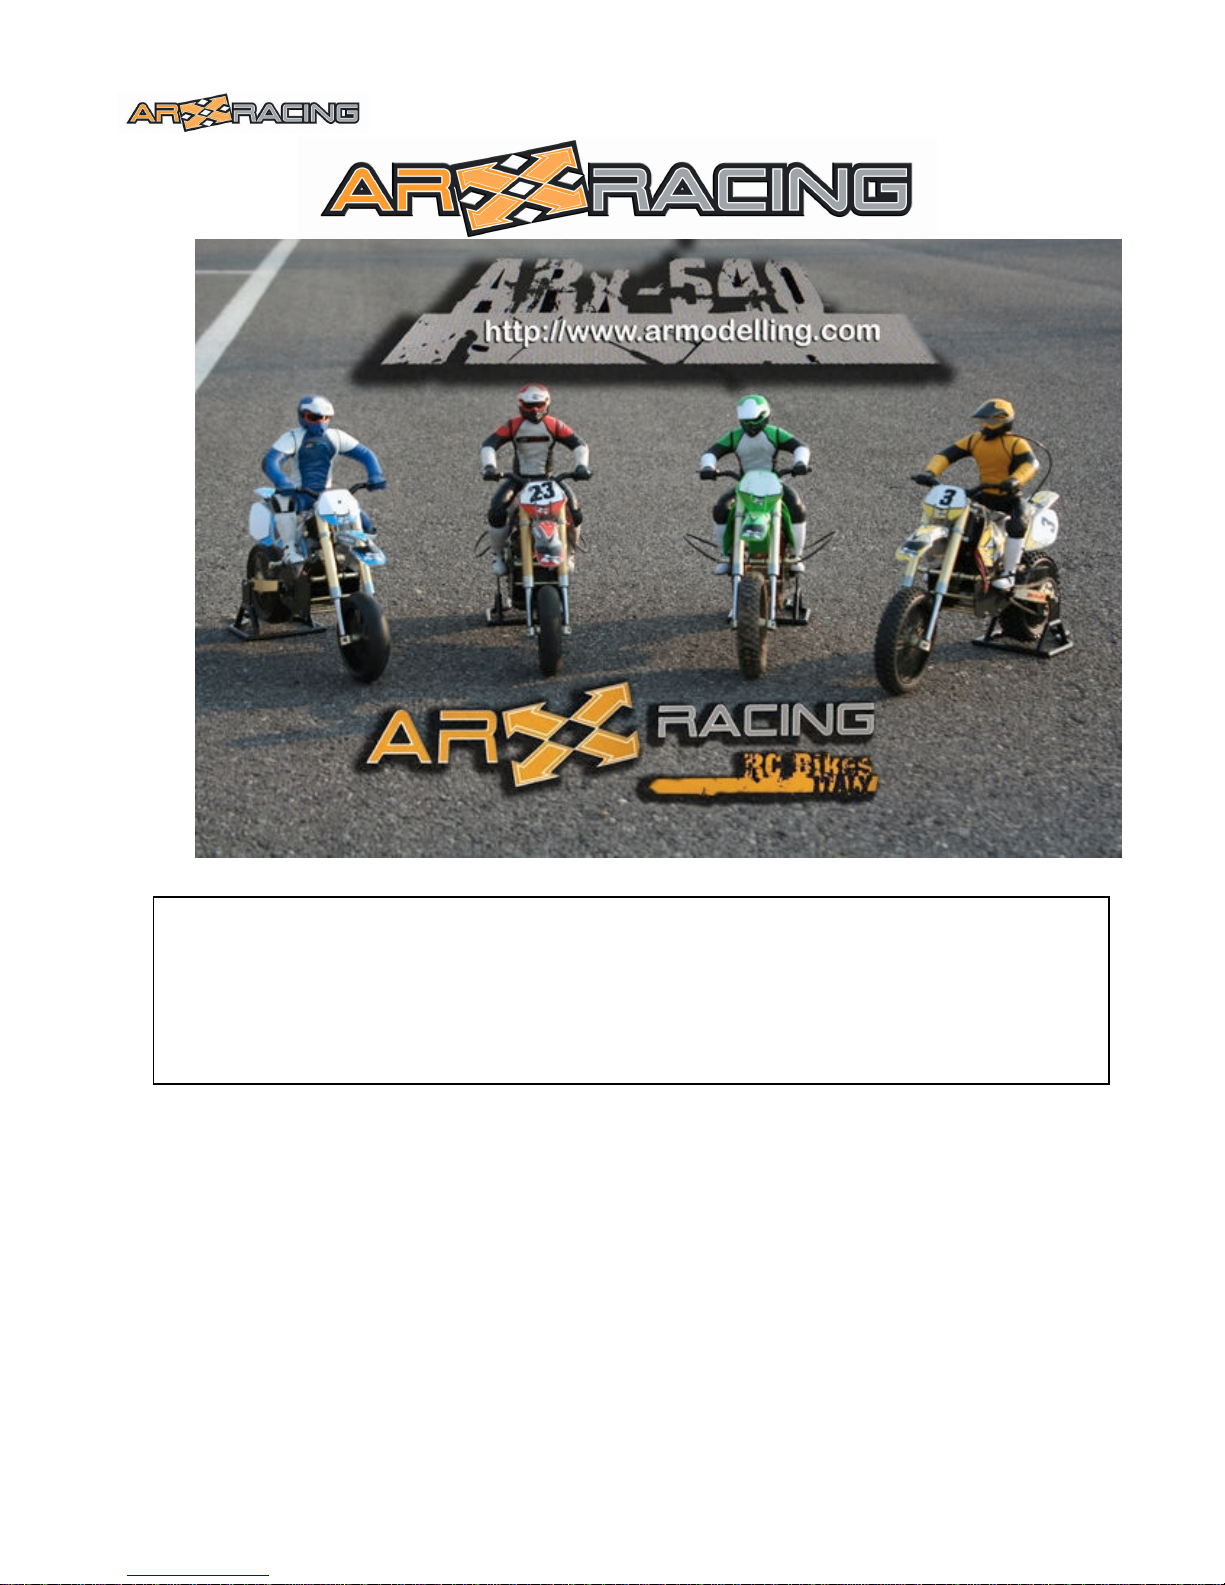
Important: read carefully the following section before starting
the assembling phase
1. Warning: This product is not a toy. This product is not intended for people younger than 16
years of age. This product can be used by persons younger than 18 years old only if assisted by a
responsible adult. Specific use of the product: Remote-controlled bike. Keep this product and all
the relevant components away from children younger than 3 years old as the small
components can be a choking/swallowing hazard!!! Note: in case of cold climate conditions
(below 5°C) it is possible that some of the model’s components can become brittle and break
during use. In case of use under this conditions, a oid possible collisions with obstacles.
2. This is a high performance product. Before its full use, AR Racing ad ices to become comfortable
with the use of the model and to follow the instruction manual carefully.
3. DO NOT use this product where forbidden; on public roads, in case of rain, in crowded places,
near an airport or in whate er area where the use of radio-controlled models is forbidden.
4. When using with the remote control, check if you are in an area where there are radio frequency
prohibitions or limitations and/or if other people are using the same radio frequency.
5. The improper use of the product can cause damage to people or property. AR Racing and its
distributors are not responsible for damages resulting from the shipping, improper assembly, or
from the improper use of the product.
6. AR Racing does not assume and doesn’t accept any responsibility for damages to property or
persons caused by the use of materials different from what is indicated in the Manual, or from
the improper use of the product. From the moment the buyer begins the assembly process,
he/she is assuming the responsibility for any consequence resulting from improper use or
assembly. If the Customer does not intend to assume such responsibility, he/she should return the
kit, new, unused and with complete packaging, to the place of purchase.
7. AR Racing ad ises you to carefully follow the Manual and remo e the components from the
numbered boxes according to the phase of assembly.
8. Not carefully following the Manual can compromise the assembly of the model and/or damage the
components.
9. Not applying thread lock where ad ised could cause the gears to work loose.
M
ANUALE DI
A
SSEMBLAGGIO
AR
X
-540
2007-1.0 – ITA Introduct ion / Pag.
すじ
え
10. O er-tightening of the screws, can cause the pieces to become deformation and not fit properly.
11. Because of the high number mo ing parts, a break-in period of 4-6 battery packs is necessary to
achie e the best functionality.
12. The gears are self lubricating and do not require the application of grease. The use of grease is
left to the discretion of the user.
13. It happenes that there are mixed pictures regarding the tire and the model, i.e. assembling a
cross bike you can see a motard tire and ice ersa. Due to the fact that this doesn’t compromise
the assembling comprehension we ha e left the pictures like this. When there are substantial
differences between the two models we ha e made proper pictures.
Assembling phase
The ARx-540 model kit Assembly and Instruction Manual is comprised of 9 assembly phases and 49
bags, di ided logically, and containing the components necessary for assembly:
Instruction Modules:
 Phase 1: Rear wheel
 Phase 2: Front wheel
 Phase 3: Rear axle
 Phase 4: Setting chain tension and steering
 Phase 5: Front forks
 Phase 6: Frame

Phase 7: Shock absorber
 Phase 8: Final assembly
 Phase 9: Dri ing/riding instructions.
M
ODULO
1
-
M
ONTAGGIO
R
UOTA
P
OSTERIORE
P
HASE
1
R
EAR
W
HEEL
A
SSEMBLY
2008 – 2.0 – ITA - Eng Modulo 1 / Pag.
1
M
ODULO
1
-
M
ONTAGGIO
R
UOTA
P
OSTERIORE
-
P
HASE
1
–
R
EAR
W
HEEL
A
SSEMBLING
NB: Il colore degli ingranaggi può ariare rispetto a quelli riportati in foto.
NB: Gear color may ary from the pictures.
Mod num Istruzione – Instrucion Foto - Picture
1. 1. MONTAGGIO RUOTA CON GIROSCOPIO
MECCANICO. PER IL GIROSCOPIO ELETTRICO
ANDARE AL PUNTO 56
ASSEMBLING INSTRUCTIONS FOR MECHANIC GYRO FOR
THE ELECTRIC GYRO GO TO INSTRUCION 1. 56.
1. 2. Estrarre dal sacchetto X002 il guscio ruota destro
(con pioli)
NB: non estrarre le iti, lasciarle nel sacchetto
per successi o utilizzo!!!!
From box X-002 extract the right wheel shell
(with pins). PICTURE
Note: do not extract the screws, keep them in
the bag for future use!!!
1. 3. Estrarre dal sacchetto X031 la corona dentata e
le 6 iti di fissaggio.FOTO
From box X-031 extract the spur gear and 6
fixing screws. PICTURE
1. 4. Inserire con attenzione la corona dentata nella
parte interna del guscio ruota destro in
corrispondenza dei pioli. NB: erso di inserimento
della corona come da foto (parte scanalata erso
l’alto). FOTO
Insert carefully the spur gear in the internal part
of the wheel shell matching pins. Note: side of
the spur gear as in the picture, with groo ed part
abo e.
M
ODULO
1
-
M
ONTAGGIO
R
UOTA
P
OSTERIORE
P
HASE
1
R
EAR
W
HEEL
A
SSEMBLY
2008 – 2.0 – ITA - Eng Modulo 1 / Pag.
2
Mod num Istruzione – Instrucion Foto - Picture
1. 5. A itare delicatamente le 6 isti di fissaggio in
corrispondenza dei pioli. FOTO
Screw delicately the six fixing screws matching
the pins. PICTURE
1. 6. Estrarre tutti i componenti dal sacchetto X004
From bag X-004 extract all parts.
1. 7. Estrarre tutti i componenti dal sacchetto X-003,
inserire il cuscinetto a fondo nella sede.
Posizionare la flangia posteriore destra
all'esterno del guscio ruota destro allineando i
fori. FOTO
Position the right rear flange abo e the rear
wheel shell, aligning the holes. PICTURE
1. 8. A itare dall'interno del guscio ruota destro le 6
iti di fissaggio. FOTO
From the internal part of the rear wheel shell,
screw the 6 fixing screws. PICTURE
1. 9. Estrarre dal sacchetto X002 il guscio ruota sinistro. Estrarre tutti i componenti dal sacchetto X004.
From bag X-002, extract the left rear wheel shell. From bag X004, extract all parts.
M
ODULO
1
-
M
ONTAGGIO
R
UOTA
P
OSTERIORE
P
HASE
1
R
EAR
W
HEEL
A
SSEMBLY
2008 – 2.0 – ITA - Eng Modulo 1 / Pag.
3
Mod num Istruzione – Instrucion Foto - Picture
1. 10. Posizionare la flangia posteriore sinistra
all'esterno del guscio ruota sinistro allineando i
fori dopo a er i inserito il cuscinetto a fondo.
Position the left rear flange abo e the left rear
wheel shell, aligning the holes. PICTURE
1. 11. A itare dall'interno del guscio ruota sinistro le 6
iti di fissaggio. FOTO
From the internal part of the left rear wheel
shell, screw the 6 fixing screws. PICTURE
1. 12. Estrarre tutti i componenti dal sacchetto X005
From bag X-005, extract all parts
1. 13. Inserire la corona nella flangia posteriore sinistra
ed a itare le 6 iti di fissaggio. FOTO.
Insert the spur gear in the rear left flange and
screw the 6 fixing screws. PICTURE.
M
ODULO
1
-
M
ONTAGGIO
R
UOTA
P
OSTERIORE
P
HASE
1
R
EAR
W
HEEL
A
SSEMBLY
2008 – 2.0 – ITA - Eng Modulo 1 / Pag.
4
Mod num Istruzione – Instrucion Foto - Picture
1. 14. Mettete da parte i due semigusci posteriori per
passare alla fase successi a di montaggio.
At this stage of the assembling of the rear wheel
shell, please go ahead with the following steps
1. 15. Estrarre tutti i componenti dal sacchetto X-032 - From bag X-032, extract all parts
1. 16. Bloccare gli alberi portasatelliti con le iti, una
olta applicato i il frenafiletti, come da FOTO. Il
bloccaggio de e essere deciso e il portasatelliti
a tenuto fermo solamente con le mani (e itare
di ro inare la superficie con pinze o altro).
Block the satellite gear shaft with the screws,
once applied the thread lock. PICTURE.
This blocking action must be firm, and the
satellite gear shaft must be handled with hands
to a oid ruining the surface with pliers or other
objects.
1. 17. A itare di un paio di giri il grano nell'apposito
foro di fissaggio nel portasatelliti. FOTO
Screw the grain, only a bit, in the hole on the
satellite gear shaft as in the PICTURE
1. 18. Mettete da parte il gruppo portasatelliti per passare alla fase successi a di montaggio.
Keep aside the satellite gear shaft and go ahead with the following steps.
1. 19. Estrarre dal sacchetto X-034 il perno ruota, un seger.
From bag X-034, extract the wheel pin, and a seger.
M
ODULO
1
-
M
ONTAGGIO
R
UOTA
P
OSTERIORE
P
HASE
1
R
EAR
W
HEEL
A
SSEMBLY
2008 – 2.0 – ITA - Eng Modulo 1 / Pag.
5
Mod num Istruzione – Instrucion Foto - Picture
1. 20. Per questa operazione è necessario l'utilizzo degli
occhiali protetti i: inserire il seger nell'apposita
ca a del perno ruota adiacente al piano fresato
aiutandosi con la pinza. Verificare che tutti e tre
i nasetti del seger siano alloggiati all'interno della
ca a. FOTO
Note: the following step must be done used
safety glasses.
Insert the seger in the predisposed way on the
wheel pin, close to the milled flat part, using the
pliers. Verify that all the three snug of the seger
are placed correctly in the predisposed way.
PICTURE
1. 21. Riprendere il portasatelliti. Inserire il perno ruota
nel porta satelliti allineando il grano di fissaggio
con il piano fresato.
Take again the satellite gear shaft. Insert the
wheel pin in the satellite gear shaft, aligning the
fixing grain with the milled flat part of the wheel
pin.
1. 22. A itare il grano con decisione dopo a er i
applicato il frenafiletti. NB: erificare che il
grano si appoggi sul piano del perno (parte
piatta). FOTO.
Mettere da parte il modulo fin qui assemblato e
proseguire ocn le successi e istruzioni.
Screw firmly the grain, once applied the thread
lock. Note: erify that the grain stands on the
flat part of the pin. PICTURE.
Note: put the part aside and go on with the
following instructions.
1. 23. Estrarre dal sacchetto X-031 i due cuscinetti e la flangia portamassette.
From bag X-031, extract two bearings and the clutch shoe flange.
M
ODULO
1
-
M
ONTAGGIO
R
UOTA
P
OSTERIORE
P
HASE
1
R
EAR
W
HEEL
A
SSEMBLY
2008 – 2.0 – ITA - Eng Modulo 1 / Pag.
6
Mod num Istruzione – Instrucion Foto - Picture
1. 24. Eliminare e entuali protuberanze presenti sulla
flangia portasatelliti mediante taglierino o carta
abrasi a, ottenendo una superficie
perfettamente piana. FOTO
Remo e possible protuberances existing on the
clutch shoe flange using sand paper or a cutter,
obtaining a surface perfectly plain. PICTURE
1. 25. Inserire il cuscinetto più grande nell'apposita
sede della flangia. FOTO
Insert the bigger bearing in the predisposed way
of the flange. PICTURE
1. 26. Inserire il cuscinetto più più piccolo nell'apposita
sede della flangia. FOTO
Insert the smaller bearing in the other
predisposed way of the flange. PICTURE
1. 27. Assicurarsi che i cuscinetti siano ben inseriti.
Be sure that the bearings all perfectly put in the flange.
1. 28. Estrarre tutto il contenuto del sacchetto X-033.
From bag X-033, extract all parts.
M
ODULO
1
-
M
ONTAGGIO
R
UOTA
P
OSTERIORE
P
HASE
1
R
EAR
W
HEEL
A
SSEMBLY
2008 – 2.0 – ITA - Eng Modulo 1 / Pag.
7
Mod num Istruzione – Instrucion Foto - Picture
1. 29. A itare i 6 grani negli appositi fori filettati
presenti sulle massette, dopo a er i applicato il
frenafiletti. FOTO
NB i grani ser ono ad aumentare il peso delle
massette nel caso di utilizzo su percorsi lenti.
Screw the 6 grains in the predisposed threaded
holes of the clutch shoes, once applied the
thread lock. PICTURE
Note: the grains are used to make the clutch
shoes hea ier, this is useful on slow track and is
suggested for the beginners.
1. 30. Il grano non de e sporgere da nessuno dei due lati delle massette.
The grains ha e not to jut out from both sides of the clutch shoes.
1. 31. Fissare una delle 2 molle ad una delle due
massette a itando le iti nell’apposita ca a,
dopo a er i applicato il frenafiletti. Ripetere
l’operazione con la seconda molla. FOTO
Fix one of the two springs to one of the two
clutch shoes, screwing the screws in the
predisposed way, once applied the thread lock.
Repeat this step with the second spring. PICTURE
1. 32. Applicare l'altra estremità delle 2 molle alla
seconda massetta mediante le altre due iti,
dopo a er i applicato il frenafiletti. FOTO
NB: Le molle non de ono sporgere da nessuno dei
due lati delle massette.
Apply the other end of the springs to the second
clutch shoe, using the other two screws, once
applied the thread lock. PICTURE
Note: the springs ha e not to jut out from both
sides of the clutch shoes.
M
ODULO
1
-
M
ONTAGGIO
R
UOTA
P
OSTERIORE
P
HASE
1
R
EAR
W
HEEL
A
SSEMBLY
2008 – 2.0 – ITA - Eng Modulo 1 / Pag.
8
Mod num Istruzione – Instrucion Foto - Picture
1. 33. Inserire le massette nei perni della flangia
portamassette mantenendo le molle ri olte erso
la flangia. FOTO
Insert both the clutch shoes in the clutch shoes
flange, with the springs close to the flange.
PICTURE
1. 34. Estrarre i 4 satelliti dal sacchetto X-031 e, dopo
a er i inserito i cuscinetti 6x10x2.5, inserirli nei
relati i alberi (FOTO)
NB: se gli ingranaggi non girassero liberamente
allentare le brugole e riserrarle.
From bag X-031, extract 4 satellites and insert
them on the predisposed satellite gear shafts.
(PICTURE)
Note: if the gears don’t spin freely unscrew the
hex screws and tight them again.
1. 35. Infilare la flangia sul perno ruota facendo
ingranare i denti dei satelliti con quelli della
flangia portasatelliti. FOTO
Insert the flange on the wheel pin, engaging the
gears of the satellites with the gears of the
satellite gear flange. PICTURE
36.
1. 37. Verificare che il rotolamento della flangia portasatelliti a enga senza attrito.
Verify the rolling of the satellite gear flange; it must be free and without friction.
M
ODULO
1
-
M
ONTAGGIO
R
UOTA
P
OSTERIORE
P
HASE
1
R
EAR
W
HEEL
A
SSEMBLY
2008 – 2.0 – ITA - Eng Modulo 1 / Pag.
9
Mod num Istruzione – Instrucion Foto - Picture
1. 38. Estrarre dal sacchetto X-034 il distanziale dello
spessore di 1mm ed inserirlo pel perno ruota fino
al cuscinetto. FOTO
From bag X-034, extract the 1mm spacer and
insert it in the wheel close to the bearing.
PICTURE
1. 39. Estrarre il olano dal sacchetto X-030 ed inserirlo
sul perno ruota. FOTO
From bag X.030, extract the flywheel and insert
it on the wheel pin. PICTURE
1. 40. Verificare che il olano ruoti liberamente.
Verify the free rolling of the flywheel.
1. 41. Estrarre dal sacchetto X-034 il secondo seger.
From bag X-034, extract the second seger.
M
ODULO
1
-
M
ONTAGGIO
R
UOTA
P
OSTERIORE
P
HASE
1
R
EAR
W
HEEL
A
SSEMBLY
2008 – 2.0 – ITA - Eng Modulo 1 / Pag.
10
Mod num Istruzione – Instrucion Foto - Picture
1. 42. Per questa operazione è necessario l'utilizzo degli
occhiali protetti i: inserire il seger nell'apposita
ca a del perno ruota adiacente al olano.
Verificare che tutti e tre i nasetti del seger siano
alloggiati all'interno della ca a. FOTO
Note: the following step must be done used
safety glasses.
Insert the seger in the predisposed way on the
wheel pin close to the flywheel. Verify that all
the three snug of the seger are placed correctly
in the predisposed way. PICTURE
1. 43. Estrarre dal sacchetto X-034 il distanziale da
2mm ed inserirlo sul perno ruota dal lato olano.
FOTO
From bag X-034, extract the 2mm spacer and
insert it in the wheel pin, flywheel side. PICTURE
1. 44. Inserire il guscio ruota sinistro (con corona
catena) ed inserirlo sul perno ruota lato olano.
FOTO.
Insert the left wheel shell (the one with the spur
gear) and insert it in the wheel pin, flywheel
side. PICTURE.

This manual suits for next models

1

Popular Motorized Toy Car manuals by other brands

Tamiya ROCK BUSTER TLT-1 Assembly instructions

Tamiya

Tamiya ROCK BUSTER TLT-1 Assembly instructions

Jamara New Holland T7 Instruction

Jamara

Jamara New Holland T7 Instruction

Tamiya M-05 instructions

Tamiya

Tamiya M-05 instructions

Jamara 402116 instructions

Jamara

Jamara 402116 instructions

Rollplay W461P-01 Owner's manual and assembly instructions

Rollplay

Rollplay W461P-01 Owner's manual and assembly instructions

Power Wheels FFY09 owner's manual

Power Wheels

Power Wheels FFY09 owner's manual

CCP G-Buddy instruction manual

CCP

CCP G-Buddy instruction manual

Radio Flyer Little Red Roadster 608 manual

Radio Flyer

Radio Flyer Little Red Roadster 608 manual

Tamiya GF-01 user guide

Tamiya

Tamiya GF-01 user guide

Sportwerks Tailwhip Assembly and operation manual

Sportwerks

Sportwerks Tailwhip Assembly and operation manual

Kyosho MINI-Z Racer AWD MA-010 Type instruction sheet

Kyosho

Kyosho MINI-Z Racer AWD MA-010 Type instruction sheet

Traxxas SLASH owner's manual

Traxxas

Traxxas SLASH owner's manual

Moni PRIDE instruction manual

Moni

Moni PRIDE instruction manual

WRC STX instruction manual

WRC

WRC STX instruction manual

Peg-Perego Polaris Sportsman 700 TWIN Use and care

Peg-Perego

Peg-Perego Polaris Sportsman 700 TWIN Use and care

Carson Desert Warrior XL 2.0 instruction manual

Carson

Carson Desert Warrior XL 2.0 instruction manual

Traxxas 83056-4 owner's manual

Traxxas

Traxxas 83056-4 owner's manual

ECX TORMENT ECX01001 instruction manual

ECX

ECX TORMENT ECX01001 instruction manual

manuals.online logo
manuals.online logoBrands
  • About & Mission
  • Contact us
  • Privacy Policy
  • Terms and Conditions

Copyright 2025 Manuals.Online. All Rights Reserved.