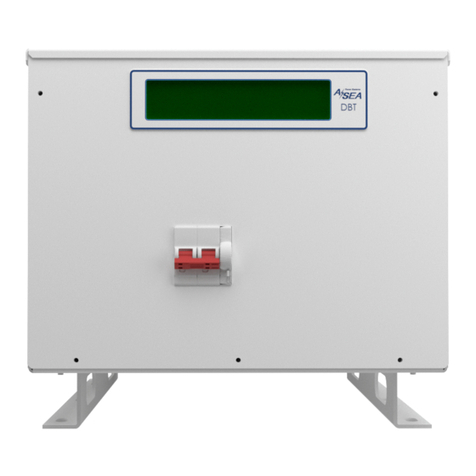
ASEA DBT12 User manual

Operations Manual
ASEA Power Systems
12kVA Dock Boost Transformer (DBT12)
P/N: 628050
Revision: ~
Revised 8/13/18

CERTIFICATION
ASEA Power Systems certifies that this product has been thoroughly tested and
inspected and found to meet or exceed its published specifications when shipped
from the factory.
WARRANTY
ASEA Power Systems warrants each unit to be free from defects in material and
workmanship. For a period of one year after purchase, ASEA Power Systems
will repair or replace any unit returned to our plant, by the original buyer, with
shipping both ways prepaid by the buyer.
ASEA Power Systems is not responsible for consequential damage arising from
the use of its equipment. It does not apply to extensively modified or
non-standard systems. Debit memos for returned units are not accepted, and will
cause return of the unit without repair.
LIFE SUPPORT POLICY
ASEA Power Systems does not authorize the use of any of its products or systems
for use as an AC voltage supply (source) for life support systems. Life support
systems are devices which support or sustain life, and whose failure to perform,
when properly used in accordance with this Operations Manual, can be reasonably
expected to result in significant injury to the user.

DBT12 Operations Manual....3
1. USING THIS MANUAL
This manual has been written as an Operations Manual. Installation, operations, and
preventative maintenance are covered in detail. This manual will cover the following model:
DBT12, 12kVA Dock Boost Transformer. It is important that the operator reads this manual
prior to installing and operating the unit. A thorough understanding of the information covered
in this manual is required for proper installation and operation.
If any questions arise while reading this manual, the user is encouraged to contact ASEA Power
Systems. ASEA Power Systems is located at:
ASEA Power Systems
15272 Newsboy Circle
Huntington Beach, CA. 92649
Phone (714) 896-9695
FAX (714) 896-9679
Web: www.aseapower.com

DBT12 Operations Manual....4
TABLE OF CONTENTS
1. USING THIS MANUAL.................................................................................................... 3
2. SAFETY NOTICES............................................................................................................ 5
3. INTRODUCTION TO THE DBT12.................................................................................. 7
4. SPECIFICATIONS............................................................................................................. 8
4.1. ELECTRICAL SPECIFICATIONS ....................................................................... 8
4.1.1. Input Service............................................................................................... 8
4.1.2. Output Service ............................................................................................ 8
4.1.3. Control and Status....................................................................................... 8
4.2. PHYSICAL SPECIFICATIONS ............................................................................ 9
4.2.1. Mechanical.................................................................................................. 9
4.2.2. Environmental............................................................................................. 9
5. INSTALLATION ............................................................................................................. 10
5.1. MECHANICAL INSTALLATION...................................................................... 10
5.2. ELECTRICAL INSTALLATION........................................................................ 14
5.2.1. Input / Output Power Connections............................................................ 15
5.2.2. Grounding................................................................................................. 17
5.2.3. Remote Communications.......................................................................... 17
6. OPERATION.................................................................................................................... 18
6.1. POWER TURN-ON PROCEDURE..................................................................... 18
6.2. OPERATION........................................................................................................ 20
6.3. TURN-OFF PROCEDURE.................................................................................. 20
6.4. AUTO RESTART FEATURE.............................................................................. 21
7. TROUBLESHOOTING AND DIAGNOSTICS .............................................................. 22
7.1. COMMON PROBLEMS...................................................................................... 22
7.2. SOFT-START INHIBIT....................................................................................... 22
7.3. ABNORMAL OPERATION................................................................................ 23
7.3.1. Warnings................................................................................................... 23
7.3.2. Faults and Restart...................................................................................... 23
7.3.3. Failure and Warning Messages................................................................. 23
7.4. GATHERING DATA........................................................................................... 24
8. MAINTENANCE............................................................................................................. 25
9. INTERNATIONAL POWER FORM REFERENCE....................................................... 26
LIST OF FIGURES
Figure 1: Unit Block Diagram ........................................................................................................ 7
Figure 2: Mechanical Outline ....................................................................................................... 12
Figure 3: Bottom- Mounting Hole Pattern.................................................................................... 13
Figure 4: Input / Output Terminals............................................................................................... 15
Figure 5: Input / Output Power Cables from the Bottom.............................................................. 16
Figure 6: Input / Output Power Cables from the Right Side......................................................... 16
Figure 7: Controls and Indicators ................................................................................................. 18
Figure 8: Voltage Chart Indicating the Gain Selection Hysteresis............................................... 20

DBT12 Operations Manual....5
2. SAFETY NOTICES
The DBT12 is capable of transferring large amounts of electrical energy very quickly.
International symbols are used throughout this manual to stress important information. Read
the text below each symbol carefully and use professional skills and prudent care when
performing the actions described by the text.
THE CAUTION SYMBOL (TRIANGLE ENCLOSING AN EXCLAMATION
POINT) INDICATES A CONDITION THAT COULD SERIOUSLY
DAMAGE EQUIPMENT AND POSSIBLY INJURE PERSONNEL.
CAUTIONS WILL BE PRESENTED IN THIS FORM. ALL CAUTIONS
SHOULD BE RIGOROUSLY OBSERVED.
THE WARNING SYMBOL (TRIANGLE WITH A LIGHTNING BOLT) IS
USED TO SIGNAL THE PRESENCE OF A POSSIBLE SERIOUS, LIFE
THREATENING CONDITION. A CONDITION THAT IS HAZARDOUS
TO BOTH PERSONNEL AND EQUIPMENT WILL BE ISSUED AS A
WARNING. ALL WARNINGS WILL BE PRESENTED IN THIS FORM.

DBT12 Operations Manual....6
THIS EQUIPMENT CONTAINS HIGH ENERGY, LOW IMPEDANCE
CIRCUITS! LETHAL POTENTIALS ARE CONTAINED WITHIN THE
UNIT EVEN WHEN IT IS APPARENTLY NOT OPERATING.
CARE MUST BE EXERCISED WHEN SERVICING THIS EQUIPMENT
IN ORDER TO PREVENT SERIOUS OPERATOR INJURY OR
EQUIPMENT DAMAGE.
DO NOT WORK ON OR OPERATE THIS EQUIPMENT UNLESS YOU
ARE FULLY QUALIFIED TO DO SO. NEVER WORK ALONE.
THE EQUIPMENT IS NOT IGNITION RATED, IT MUST NOT BE
OPERATED IN AREAS WHERE COMBUSTIBLE GASES MAY
ACCUMULATE.
DO NOT REMOVE THE SHORE CORD FROM THE DOCK PEDESTAL
WITHOUT FIRST OPENING THE DOCK OR YACHT BREAKER.
FAILURE TO DO SO MAY RESULT IN DAMAGE TO THE DBT12 AND
PEDESTAL.
OBSERVE THE FOLLOWING WHEN SERVICE AND MAINTENANCE
ARE REQUIRED:
REMOVE ALL JEWELRY FROM ARMS AND NECK WHEN
SERVICING THIS EQUIPMENT. THIS PREVENTS THE
POSSIBILITY OF SHORTING THROUGH THE JEWELRY TO OR
ELECTROCUTION OF THE OPERATOR.
WEAR SAFETY GLASSES WHEN SERVICING THIS EQUIPMENT TO
PREVENT EYE INJURY DUE TO FLYING PARTICLES CAUSED BY
ACCIDENTAL SHORT CIRCUIT CONDITIONS.
DO NOT REMOVE ANY PANELS OR COVERS WITHOUT FIRST
OPENING ALL CIRCUIT BREAKERS AND THEN REMOVING THE
INPUT SERVICE.
SERVICE OTHER THAN CLEANING AIR FILTER ELEMENTS
SHOULD BE REFERRED TO PERSONNEL AUTHORIZED BY THE
FACTORY TO SERVICE THIS EQUIPMENT.

DBT12 Operations Manual....7
3. INTRODUCTION TO THE DBT12
The DBT12 is a high performance Isolation Transformer designed to isolate and normalize the
shore power for reliable shipboard use.
Isolation is obtained through the use of a conservatively rated transformer compliant to the
requirements of ABYC E-11.7.2.8, and as such includes a full fault current shield. The
transformer also provides basic range normalization and a first level of electrical noise filtering
as shown in Figure 1.
Figure 1: Unit Block Diagram
Being a unit designed from the ground up specifically for the yachting industry, all efforts have
been made to produce a unit capable of sustaining the marine environment. All unit
components are packaged in single drip-proof, dust-resistant aluminum enclosure. Complete
maintenance and service can be provided with front and side access to the unit. Unit operation
is managed through one circuit breaker and the LCD display.

DBT12 Operations Manual....8
4. SPECIFICATIONS
4.1. ELECTRICAL SPECIFICATIONS
Parameter DBT12
4.1.1. Input Service
Input Power Form Single Phase
Input Voltage Range 167 - 270 VRMS
Input Frequency Range 57-70Hz
Input Current, Max. 50 ARMS continuous, 100 ARMS overload.
4.1.2. Output Service
Output Power Rating 12kVA *Note 1
Output Power Form, *Note 1 Split Phase 120 / 240 VRMS
Output Frequency Same as Input Freq.
Output Voltage Response Time 15 minutes
Output Current, Continuous 50 ARMS
Output Current, Peak 100 ARMS
Efficiency 97% at rated load
Note 1 - Power ratings are based on a 240 VRMS output. As the DBT12 is current limited, the input voltage
will affect the available output power.
4.1.3. Control and Status
On/Off Circuit Breaker, input power and output power contactors.

DBT12 Operations Manual....9
4.2. PHYSICAL SPECIFICATIONS
Parameter DBT12
4.2.1. Mechanical
Height 12.25" / 31.2 cm
Width, Enclosure 13.16" / 33.4 cm
Depth 18.16" / 46.1 cm
Weight 127 lbs / 57.7kg
4.2.2. Environmental
Ambient Temperature Range 0-45C non-condensing
Air Exchange Rate 171 CFM / 4.83 m³/min

DBT12 Operations Manual....10
5. INSTALLATION
Read this manual thoroughly prior to attempting the installation. Improper installation is the
most significant cause of system start-up problems and service issues over the products life.
Upon receipt of the equipment, perform an external visual inspection. Verify that nameplate
information is consistent with the ship’s power requirements (required form, voltage, and
frequency).
Proper planning will speed up installation, location, and connection of the equipment. Follow
the suggested minimum clearances provided in Table 1. Ensure the room / compartment has
adequate ventilation and cooling. The thermal load presented by the DBT12 will be
approximately 1,400 BTU/Hr. at full rated (12kVA) load.
THE DBT12 IS HEAVY, WEIGHING 127 lbs. (57.7 kg). EXTREME
CAUTION MUST BE EXERCISED IN HANDLING AND INSTALLATION
TO AVOID EQUIPMENT DAMAGE OR INJURY TO PERSONNEL. AN
ADEQUATE MATERIAL HANDLING DEVICE SHOULD BE USED FOR
UNLOADING, MOVING, AND POSITIONING THE UNIT.
5.1. MECHANICAL INSTALLATION
The unit is designed for horizontal, floor-mounted installation. The mounting feet on each side
of the unit contain mounting holes that are 0.41” (10.3 mm) in diameter. Stainless steel
hardware roughly equivalent to 3/8” (9 to 10 mm) is required for mounting.
The mounting surface should be flat and dimensionally stable to within 1/16” to prevent torsional
stresses being applied to the structure of the unit. Spacers (shim stock) may be added between
the mounting surface and the transformer mounting ears to adjust the mounting plane. Resilient
mounts must not be used directly between the unit and the mounting surface. If the unit is to be
mounted in a high vibration / shock environment, then the factory must be consulted concerning

DBT12 Operations Manual....11
the application. Drawings for approved shock mounting panels will be supplied.
The following recommended clearances must be considered during installation:
Table 1: Recommended Installation Clearances
Parameters
Proper Operation
Proper Service
Front
12" (User access)
12"
Left Side
6" (Intake Airflow)
12"
Right Side
6" (Outlet Airflow)
12" (Side Cable Entry)
Top
0"
14"
Rear
0"
2"
The installation should prevent air circulation from the air outlets to the air intake.
FRONT

DBT12 Operations Manual....12
LEFT
RIGHT
Figure 2: Mechanical Outline

DBT12 Operations Manual....13
Figure 3: Bottom- Mounting Hole Pattern

DBT12 Operations Manual....14
5.2. ELECTRICAL INSTALLATION
This procedure assumes the physical installation of the unit has been completed. It is the user’s
responsibility to provide input service over-current protection and disconnect means. Given the
maximum continuous input current listed in Section 4.1.1 a circuit breaker with a 60 Amp rating
is recommended.
It is recommended that connections be made to the distribution bus through a manually operated
disconnect device such as a molded case switch or circuit breaker (rated for the total system
amperage) to ease disconnection and provide a safe servicing environment in the event of unit
failure.
Conductors should be sized for the maximum continuous currents listed in Section 4.1.1.
All power wiring requires the removal of the front cover. This cover is secured with 5 ea.
10-32 × 1/4" stainless steel screws. Place the input circuit breaker in the OFF position.
Remove the front cover.
Prepare the power cable by removing the outer cable insulation approximately 6". Strip the
insulation back exposing ½" of bare conductor on all three conductors. Insert the prepared
cable and strain relief assembly into the bottom hole in the chassis. Insert the wire ends into the
output terminal block and tighten.
Replace front cover using the removed hardware.

DBT12 Operations Manual....15
5.2 ELECTRICAL INSTALLATION, cont.
INPUT WIRING MUST BE PERFORMED BY A QUALIFIED ELECTRICIAN
FAMILIAR WITH STANDARD SAFEGUARDS AND PROCEDURES REQUIRED BY
THE INSTALLATION OF THIS TYPE OF EQUIPMENT. POWER MUST BE
REMOVED FROM THE INPUT DISTRIBUTION SYSTEMS SUPPLYING POWER TO
THE DBT12 PRIOR TO THE START OF THE FOLLOWING STEPS. INPUT POWER
MUST BE SECURED (LOCKED) IN THE OFF (DE-ENERGIZED) STATE UNTIL
INSTRUCTED OTHERWISE BY THIS DOCUMENT. ALSO, SECURE IN THE OFF
STATE ANY CIRCUIT BREAKER(S) IN THE SWITCHGEAR PANEL THAT MAY BE
SUPPLYING SHIP’S BUS POWER TO THE DBT12 TERMINAL BLOCK. FAILURE
TO FOLLOW THESE PROCEDURES CAN RESULT IN DAMAGE TO THE
EQUIPMENT, AND CAN PRESENT THE RISK OF INJURY OR DEATH TO THE
INSTALLER OR THE OPERATOR.
5.2.1. Input / Output Power Connections
The unit is supplied with a compression type terminal block for power connections. The
terminal block accepts wires in the range of 18 AWG to 4 AWG. Refer to the applicable
standard for selecting the required wire gauge and type.
The input / output cables shall be connected according to Figure 4 below.
L1
PE
L2
L3
L4
L5
INPUT POWEROUPUT POWER
Figure 4: Input / Output Terminals

DBT12 Operations Manual....16
Connections to the terminal block can be made with input and output cables coming in from the
bottom or from the right side of the unit.
Figure 5: Input / Output Power Cables from the Bottom
Figure 6: Input / Output Power Cables from the Right Side
Cord grip connectors (Part Number: CD36NA-GY, Manufacturer: Sealcon LLC or equivalent)
with water sealing bushings and strain relief can be used to secure the wires or cables coming in

DBT12 Operations Manual....17
from the right side of the unit. Cord grip connectors are not included. The ground wire of the
input shore cable should connect to the second input terminal labeled PE. The input power
connections are not phase sensitive for proper operation.
5.2.2. Grounding
The unit chassis ground MUST be connected to the ship’s hull or common ground point via the
middle terminal block connection between the input and output power connections labeled with
the ground symbol. Failure to do so may create conditions that may in turn cause injury or
death to operators; failure to do so will also result in the voiding of the equipment warranty.
THE UNIT ISOLATES THE OUTPUT POWER FROM THE INPUT POWER AND
EQUIPMENT (SAFETY) GROUNDS SIMILAR TO AN ISOLATION TRANSFORMER.
THE INSTALLER MUST RE-ESTABLISH THE GROUND REFERENCE FOR THE
EQUIPMENT AT TIME OF INSTALLATION. THE EQUIPMENT (SAFETY)
GROUND IS TO BE CONNECTED PER THE APPROPRIATE CLASS STANDARD.
5.2.3. Remote Communications
The unit offers an RS-232C port utilizing a female 9-pin D-sub connector (DE-9). The
communications cable can come in through the bottom or through the right side of the unit. In
the latter case, a dedicated 0.719" / 1.83 mm hole is provided. A cord grip connector (Part
Number: CD09NA-GY, Manufacturer: Sealcon LLC or equivalent) with water sealing bushing
and strain relief can be used to secure the cable. Cord grip connectors are not included.

DBT12 Operations Manual....18
6. OPERATION
6.1. POWER TURN-ON PROCEDURE
Turn the circuit breaker to the ON position.
Figure 7: Controls and Indicators
After a few seconds the fan will start spinning and the display will illuminate and show the
model name and software version:
The unit will perform a self-test which requires approximately 2 seconds to complete and then
select the proper gain for the input voltage present and close the input (dock / shore power) and
output (ship power) contactors.
DOCK BOOST TRANSFORMER
Version x.xx
(c)2018 ASEA POWER SYSTEMS
DISPLAY

DBT12 Operations Manual....19
The display will sequence to the first summary screen indicating the following input and output
information: frequency, voltage, current, and apparent power. The screen also includes the unit
status (OK, WARNING, or FAILURE) and operating range (1:1, BOOST1, BOOST2 or
BOOST3).
Verify that the input voltage and frequency are displayed are the expected values. Also, ensure
that the load is within the unit ratings. Monitor the input voltage and current levels with load
applied. Refer to published rating curves for maximum current, kVA and kW levels.
NOTE: It is normal under no load conditions to have up to 2 Amps of input current flowing.
This current does not degrade the unit power rating.
After 5 seconds the display will sequence to the second summary screen indicating the following
input and output information: frequency, real power, power factor, and load level.
The display will continue alternating between the two summary screens every 5 seconds.
INPUT OUTPUT1 OUTPUT2 xx.xHz
VOLTAGE: xxx V xxx V xxx V OK
CURRENT: xx A xx A xx A BOOST1
LOAD: xx.xkVA x.xkVA x.xkVA 1 of 2
INPUT OUTPUT1 OUTPUT2 xx.xHz
POWER: xx.xkW x.xkW x.xkW OK
P.F.: x.x x.x x.x BOOST1
LEVEL: xx% xx% xx% 2 of 2

DBT12 Operations Manual....20
6.2. OPERATION
The unit constantly monitors the input voltage and selects the appropriate gain according to the
following logic:
a. When the input voltage is decreasing, the unit will go to BOOST1 at 228V, to BOOST2
at 211V and to BOOST3 at 196V.
b. When the input voltage is increasing, the unit will go to BOOST2 at 203V, to BOOST1 at
217V and to 1:1 at 233V.
c. A gain change will occur only after the target gain has been continuously higher or
continuously lower than the current gain for a time period of 15 minutes, and only if the
load is up to the continuous rated value.
Figure 8: Voltage Chart Indicating the Gain Selection Hysteresis
6.3. TURN-OFF PROCEDURE
Turn the circuit breaker to the OFF position. The unit will open the input and output contactors
and then power off.
1:1
BOOST1
BOOST2
BOOST3
170 180 190 200 210 220 230 240 250 260 270
Gain
Input Voltage, Vin
Vin ↗
Vin ↘
Other manuals for DBT12
1
Table of contents
Other ASEA Transformer manuals
Popular Transformer manuals by other brands

LD Didactic
LD Didactic 773 363 instruction sheet

Paradise Datacom
Paradise Datacom GL33200 manual

Monacor
Monacor FGA-30 instructions

Charles
Charles Isotransformer 93-IXFMR3/6-A Installation instructions & owner's manual

ZIEHL
ZIEHL STWA1 operating manual

ABB
ABB ELK Series Instructions for installation, use and maintenance