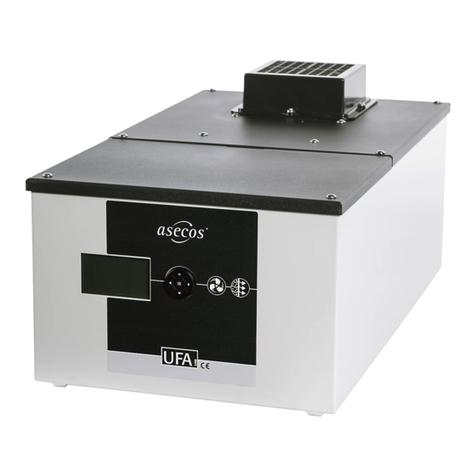
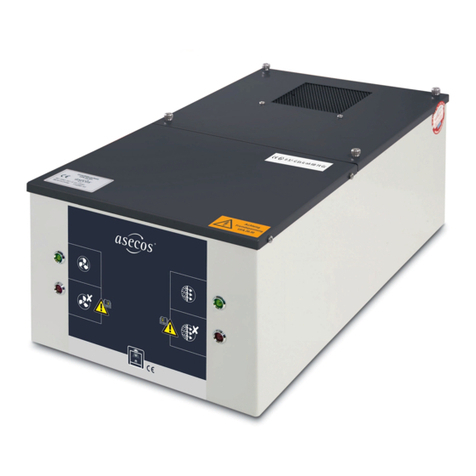
asecos CX Series User manual

11
EN
EP.V. 10367
10/2013
EP.V.30056 · 03/2016
USER MANUAL
Recirculating air filter storage cabinets
ChemFlex

2 32 3
EN
CX-CLASSIC-G
CX.229.105.WDFW
SLX.230.120.MV
CX.229.081.WDFW
SLX.230.060.MH
CX229.105.MM.4WD
IHRE PERSÖNLICHE DOKUMENTATION ZUM asecosSICHERHEITSSCHRANK
Sehr geehrte Kundin, sehr geehrter Kunde,
mit dem Kauf Ihres asecos-Sicherheitsschrankes haben Sie eine entscheidende Investition für
die Sicherheit in Ihrem Haus getätigt. Vor Ihnen steht ein innovatives Produkt aus hochwertigen
Materialien, das höchste Qualität garantiert.
Sicherheitsschränke aus dem Hause asecos verfügen über eine lückenlose Zulassungs-Dokumen-
tation. Wir archivieren Ihre Zulassungsdokumente jedes einzelnen Schrankes für Sie, bis Sie diese
im Bedarfsfall (z. B. einer Betriebsbegehung o. ä.) mit diesem Formular von uns anfordern.
Dazu einfach dieses Formular heraustrennen/kopieren und mit Ihrer Adresse und der Seriennum-
mer des Schrankes versehen per Fax zurück an uns.
Mit freundlichen Grüßen
asecos GmbH
YOUR PERSONAL DOCUMENTATION TO THE asecos SAFETY CABINET
Dear Customer,
you have made a decisive investment in safety for your company by purchasing this asecos safety
storage cabinet. You now own an innovative product made of top-quality materials guaranteeing
the highest quality standards.
asecos safety storage cabinets have complete authorisation documents. We archive the authori-
sation documents for every individual cabinet, keeping them ready for you should you ever need
them (e.g. for a works inspection or similar). Simply request them using this form.
Tear off or copy that page and return to us by fax with your address and serial number of the
cabinet on it.
Yours sincerely
asecos GmbH
Firma • company
Abteilung • department
Name • name
Straße • street
PLZ • postal code
Ort • city
Schrank • cabinet
Seriennummer(n) • serial number(s)
asecos GmbH
Abt. Kundendienst
Weiherfeldsiedlung 16–18
D-63584 Gründau
Fax: +49 60 51 – 92 20-10

4 54 5
EN
INHALTSVERZEICHNIS
1. NOTES • GUIDELINES • GUARANTEE ............................................ 6
1.1. General safety notes ............................................... 6
1.2. Guarantee ........................................................ 6
1.3. Cabinet details .................................................... 6
2. DISPOSAL ................................................................... 7
3. SAFETY CHECKS .............................................................. 7
4. TRANSPORT ................................................................. 8
5. ERECTION OF THE CABINET .................................................... 8
5.1. Alignment of the cabinets ........................................... 8
5.2. Anti-tilt device .................................................... 8
5.3. Assembly of exhaust air vents ........................................ 9
6. ERECTION OF THE RECIRCULATING AIR FILTER MODULE ............................ 9
6.1. Installation ....................................................... 9
6.2. Fall protection of the recirculating air filter module ...................... 10
6.3. Potential-free alarmcontact ......................................... 10
7. COMMISSIONING .............................................................11
7.1. Ventilation .......................................................11
7.2. Home display and main menu .......................................11
7.3. Change of time and date ............................................11
7.4. Change of system language ..........................................11
7.5. Change of system settings ......................................... 12
7.6. Change of volume flows ........................................... 12
7.7. Change of advisory alarm .......................................... 12
8. FILTER CHECK AND FILTER CHANGE ............................................ 13
8.1. Filter check ...................................................... 13
8.2. Filter change ..................................................... 13
9. INTERIOR FITTINGS .......................................................... 14
9.1. Shelves ......................................................... 14
9.2. Spill containment sump ............................................ 15
10. TYPES OF CLOSING · LOCKING ................................................. 15
APPENDIX 1: TECHNICAL DATA. . . . . . . . . . . . . . . . . . . . . . . . . . . . . . . . . . . . . . . . . . . . . . . . . . . . 17
APPENDIX 2: TECHNICAL DRAWINGS .............................................. 19
OPERATING INSTRUCTIONS
Dear customer,
Thank you very much for purchasing a safety storage cabinet from our company, with which you
have made a decisive investment in the safety within your company.
Our safety storage cabinets make the storage of hazardous materials at the workplace safe and
convenient for you.
Please read these operating instructions very carefully. Get to know the advantages and simple
operability of our safety storage cabinets in detail.
This simplifies the daily handling of hazardous materials for you.
Many thanks.
Your asecos team

6 76 7
EN
2. DISPOSAL
The models can be disposed of once they have
been dismantled and the materials sorted. They
are free from materials that have to be dispo-
sed of as special waste.
3. SAFETY CHECKS
The cabinets are designed and built in such a way that no significant servicing is required. If
safety-relevant damage (such as to the seals in acid and alkali cabinets) is found, the operator
must ensure that original parts are used to restore the cabin to good order before it is used again.
In order to check the evacuation, take a light piece of fluff or a smoke tube, and check that you
can observe a draught inside the cabinet in the area of the outlet opening (on the right of the
cabinet or at the rear wall).
In addition, we recommend that you carry out a daily and monthly functional check:
Daily functional check
• applies to the spill containment sumps (collect and remove any leakages)
Monthly functional check
• perfect function of the doors
• regular filter check (see point 8)
In case of damage please contact your dealer in order to have the cabinet repaired using original
spare parts. The cabinets can be cleaned with a mild household cleaner and a soft cloth.
CONTACT:
In the case of defects or complaints about our products (within and also after the
warranty period), and for requesting safety checks or taking out a service contract,
please contact our service hotline on:
Tel: +44 1785 22 70-90 [email protected]
1. NOTES • GUIDELINES • GUARANTEE
1.1. GENERAL SAFETY NOTES
• Observe applicable statutes and regulations, and the notes in these operating instructions, when
handling hazardous materials.
• Work on the electrical system is to be carried out only with the power turned off and only by
qualified electricians – refer here to the regulations of the local electricity supply company.
• The on-site installation conditions are to be observed (e.g. bolting the cabinets to the building).
• The instructions of the supervisory engineering department must be followed.
• Observe accident prevention regulations and workplace ordinance.
• Ensure that necessary safety checks are only carried out by authorised staff using original spare parts.
• Only use the cabinet after having been properly instructed; access is to be forbidden to
unauthorised persons.
• The pivoting area of the doors is to be kept free at all times; doors/drawers are to be kept closed.
• By assigning trained/authorised technical personnel you can prevent the malfunctions, damage
and corrosion damage that result from inappropriate transport.
• Observe the upper limits for stored quantities, loading etc.
• Containers with a volume larger than that of the spill containment sump may not be placed
inside the cabinet; spilt hazardous materials are to be collected immediately and removed.
• Vessels containing aggressive chemicals (acids/alkalis) are to be kept in special cabinets for acids and
alkalis or on shelves for acids and alkalis as well as in cabinets with metal-free interior equipment.
• Sufficient technical ventilation must be ensured.
• Before storing such materials, check that the cabinet's surface is resistant to the chemicals.
• The storage of corrosive liquids or gases can affect the function of the shut-off equipment for the
air supply and exhaust.
• Before the initial commissioning, the safety storage cabinet is to be examined by the user for
possible damage.
1.2. GUARANTEE
The guarantee for this product is agreed between you (the customer) and your dealer
(the seller). As the manufacturer, asecos guarantees the products listed in the operating instruc-
tions for a period of 24 months from the date of delivery. All model safety equipment are subject
to a compulsory annual inspection by specialised staff authorised by the manufacturer. Otherwise
the customer’s guarantee claim against the manufacturer expires.
PLEASE NOTE!
Only the original asecos accessories and spare parts are accepted!
Otherwise the costumer's guarantee claim against the manufacturer expires and
asecos assumes no liability for potential damage!
1.3. CABINET DETAILS
A complete overview of the models can be found at the start of the operating instructions.
Cabinet data Logbook (included with the cabinet)
Technical drawing Appendix 2
Technical data Table in Appendix 1
CX-LINE
secure storage of chemicals in accordance with regulations (not for the storage of inflammable liquids)
SLX-LINE
secure storage of aggressive liquids in accordance with regulations (not for the storage of inflam-
mable liquids)

8 98 9
EN
9 mm
5.3. ASSEMBLY OF EXHAUST AIR VENTS
1
2
= 4x
3
4×
2
6. ERECTION OF THE RECIRCULATING AIR FILTER MODULE
6.1. INSTALLATION
CAUTION:
The cabinet body must be aligned before installing the recirculating air filter module!
Place only in pairs the recirculating air filter module on the cabinet body!
2
3
4
5
×6 6
7
28
9
ALTERNATIVE WITH CX-
LINE
CX-LINE
(ACCESSORIES INSIDE THE
CABINET)
SLX-LINE
(ACCESSORIES INSIDE THE
CABINET)
4. TRANSPORT
CAUTION:
Transport the cabinet in an upright position on a pallet truck, tied and secured against slipping, until
the final place of installation is reached. The transport locks in the door joints may only be removed
directly at the place of installation!
Inappropriate transport can lead to concealed damage to the fire protection insulation!
We can only guarantee the necessary quality if the cabinet is transported to the place of its use by our
specially trained staff.
Tilting the cabinet (may only be done without jolts)
5. ERECTION OF THE CABINET
5.1. ALIGNMENT OF THE CABINETS
CAUTION:
The cabinet body must be aligned
before installing the recirculating air filter
module!
5.2. ANTITILT DEVICE
xx
IN GENERAL
ALL MODELS
CAUTION:
Use for this the enclosed anti-tilt
angle and position this in the
middle of the cabinet cover.

10 1110 11
EN
7. COMMISSIONING
• Before putting into operation for the first time, the user must carry out an examination of the
safety storage cabinet for possible damage, such as defective or loose sealing elements, correct
alignment and perfect functioning of the door elements.
• Use the cabinet and accessories only if they are in an orderly condition
7.1. VENTILATION
• Using the wool thread test the effectiveness of the ventilation and/or the correct connection of
the ventilator support to the cabinet supports!
7.2. HOME DISPLAY AND MAIN MENU
Air change x times
Operating hours
MENU MENÜMENU
7.3. CHANGE OF TIME AND DATE
1
MENU
Air change x times
Operating hours
2
MENU
3
DATE
TIME
HH MM SS
MM YYYY
7.4. CHANGE OF SYSTEM LANGUAGE
1
MENU
Air change x times
Operating hours
2
MENU
3
LANGUAGE
MENU
home display Return to home display
date and time
system settings
change of language
filter change
main menu
NOTE:
confirm entry, go
to main menu
cancel entry, go to
main menu
NOTE:
confirm entry, go
to main menu
cancel entry, go to
main menu
10
11
12
2
13
14
15
16
17
6.2. FALL PROTECTION OF THE RECIRCULATING AIR FILTER
MODULE
2
CAUTION:
Fixing the ventilation filter
module on the upper part of the
cabinet is absolutely necessary
for all modules! Screwing down
should be finger tight. Use the
screws supplied for this
6.3. POTENTIALFREE ALARMCONTACT
The three pole connector which is also supplied must be used in order to use the vol-
tage free alarm contact. Only clamps XS3(2) and XS3(1) are normally connected to the
connector! Internally a contact will be switched (opened), as soon as the ventilation filter cabinet
has reached the prescribed volume flow. If there is a ventilation breakdown or a filter saturation it
can therefore be signalled. Furthermore, it will signal if the ventilation filter has been cut off from
the mains power.
gn
–X5
–XS3
–XS3
–XS3
1
12
11
14
2
3
br
ws
CAUTION:
Max. Nominal voltage AC:
250 V ~
Max. permanent current at
250 V AC:
6 A

12 1312 13
EN
8. FILTER CHECK AND FILTER CHANGE
• Under the touch displays, all ventilation filter cabinets have a device for manually inspecting the
filter saturation.
• On the factory site, there is an indicator alarm for the manual filter check every 336 hours (this
can be moved in the framework of the risk assessment, see for this Point 7.7)
• In the delivery scope, there is a 1m long hose line suitable for commercially available inspection
tubes (for instance, Dräger) including an adaptor suitable for the withdrawal equipment.
8.1. FILTER CHECK
• Please connect the hose included. Adaptor with withdrawal equipment and an empty or used
inspection tube included. Gas detection pump.
• In order to remove the dead volume of the hose, first of all a hub with an empty or an already
used inspection tube is implemented.
• Immediately afterwards use the correct inspection tube and implement the test according to the
instructions of the testing equipment manufacturer.
• If the measurement results approach the limit value according to your risk assessment, a filter
change should be initiated, at latest however when the WEL (Workplace Exposure Limit according
to the Technical Rule for Hazardous Materials TRGS900 or the Safety Data sheet of the Medium)
8.2. FILTER CHANGE
Each filter of the ventilation cabinets is matched according to the size and characteristics of the
cabinet model and the intended passive storage therein (according to positive material list).
The filter must be changed after a more substantial leakage and at latest after 8640 operational
hours (12 months).
MENU
Room temperature
Relative humidity
Air change x times
Operating hours
MENU
SYSTEM
INACTIVE
Filter change
The system is inactive
until filter change or press "X"
Use the arrow buttons to
start the operation
SYSTEM
INACTIVE
Finish filter change
Only confirm with "OK",
if filter was changed
If not, cancel with "X".
1 2 3 4
Follow the instructions
on the display!
PLEASE NOTE!
Only the original asecos accessories and spare parts are accepted!
Otherwise the costumer's guarantee claim against the manufacturer expires and
asecos assumes no liability for potential damage!
CAUTION:
The filter saturation must be
checked manually at regular
intervals.
7.5. CHANGE OF SYSTEM SETTINGS
1
MENU
2
User
5
1
Password
SERVICE MENU
3
USER MENU
Volumetric flow
Advisory alarm
7.6. CHANGE OF VOLUME FLOWS
1
USER MENU
Volumetric flow
Advisory alarm
2
Value (in %)
Value (in m3/h)
Value (x times/h)
40
32
0
VOLUMENTRIC FLOW
• Volume flows can be adjusted
via the slide control or the key
pad within a pre-set range.
• The set range depends on the
model size
Preset:
≥30 times
7.7. CHANGE OF ADVISORY ALARM
1
USER MENU
Volumetric flow
Advisory alarm
2
The alert for the regular
filter check repeats
every x hours
0
ADVISORY ALARM
• A minimum of 24 and a maxi-
mum of 672 hours can be set.
preset:
336 h
user=5 / password=1
These values are preset and
can only be changed by an
asecos service technican.
clear the filled out
user and password
values
cancel entry, go to
main menu
return to service
menu
NOTE:
confirm entry,
change to user
menu
cancel entry, go
to user menu
NOTE:
confirm entry,
change to user
menu
cancel entry, go
to user menu

14 1514 15
EN
9.2. SPILL CONTAINMENT SUMP
CAUTION:
The individual volumes that can be collected can be found in the table of technical data in the appendix.
• It is the purpose of the spill containment sump to collect any liquids that might escape inside
the cabinet.
• Plastic sumps, impervious to liquids, at each storage level for trapping any liquid leaks
10. TYPES OF CLOSING LOCKING
CAUTION:
Make sure that the door(s) are always closed again after use. The door is/doors are
always locked by hand.
CX-LINE
• the cabinets are locka-
ble by means of safety
cylinders
CX-LINE
SLX-LINE
SLX-LINE
• are available with profile
lock
9. INTERIOR FITTINGS
9.1. SHELVES
CAUTION:
When adjusting the shelves, ensure that no containers are resting on the shelf so that they cannot be
pushed over or damaged by the modification work in the cabinet.
4
5
6
4
5
ACHTUNG:
Die Tablarauszüge sind fest im Schrank eingebaut und besitzen eine Ausziehsicherung.
Sie müssen nach Benutzung per Hand in den Schrank eingeschoben werden.
CX-LINE
CX-LINE
SLX-LINE

16 1716 17
EN
Int.
*
XYZXYZ m3/h ∆pges
(EK5/AK4 09-10)
m3/h ∆pges
(EK5/AK4 09-10)
CX.229.105.WDFW 1055 520 2290 996 493 1835 — 105 600 440 100 30 33 34 30 30,91 — — — —
CX.229.081.WDFW 810 520 2290 751 493 1835 — 93 600 536 60 30 33 25 30 22,73 — — — —
CX.229.105.MM.4WD 1055 520 2290 475/475 493 905/905 — 98 600 435 50 30 22 15 20 13,64 — — — —
SLX.230.120.MV 1197 615 2300 485/485 565 1865 — 195 300 204 — 25 30 18 27,27 16,36 — — — —
SLX.230.060.MH(.MHR) 600 615 2300 485 565 914/914 — 152 300 363 — 25 30 18 27,27 16,36 — — — —
(mm)
Abmessungen Dimensions Afmetingen Dimensions Dimensiones Dimensioni Dimensões
Typklasse Type-Classification Typeklasse Type de classe Clase tipo Classe del tipo Tipo de classe
(kg)
Leergewicht gesamt Net Weight Leeggewicht totaal Poids total à vide Peso en vacío total Peso a vuoto
completo
Peso total em vazio
(kg)
Max. Belastung max. Load Cabinet max. belading Chargement max. Carga máx Carico max. Carga máx.
(kg/ m2)
Flächenlast Area Load Oppervlaktebelasting Charge superficielle Carga superficial Carico specifico Carga da superfície
(kg)
Max. Belastung
Fachboden
max. Load Shelf max. belasting
opvanglegbord
Charge max.
d’étagère
Carga máx. bandeja Carico max. ripiano
fisso
Carga máx. da
prateleira
(kg)
Max. Belastung
Auszug
max. Load Drawer max. belasting
schuiflade
Charge max. de tiroir Carga máx. cajón Carico max. cassetto Carga máx. do extrato
(l)
Auffangvolumen
Bodenauffangwanne
und Auszug
Capacity Bottom
collecting sump and
Drawer
Opvangcapaciteit
bodemopvangbak en
schuiflade
Volume de rétention
de bac de rétention
au sol et tiroir
Volumen de recogida
del cubeto de retenci-
ón y del cajón
Volume di raccolta
vasca di raccolta sul
fondo e cassetto
Volume de recolha
da bacia de retenção
inferior e extrato
(l)
Max. Gebindegröße
Bodenauffangwanne
und Auszug
max. container size
bottom collecting
sump and drawer
max. containergrootte
bodemopvangbak en
schuiflade
Taille max. de
récipient pour bac
de rétention au sol
et tiroir
Tamaño máx. de
envase cubeto de
retención y cajón
Grandezza max. del
recipiente vasca di
raccolta sul fondo e
cassetto
Tamanho máx. do
bidão da bacia de
retenção inferior e
extrato
(m3/h, Pa)
Volumen und Druck-
verlust bei 10fachem
Luftwechsel
Air flow and Pressure
Loss at 10times Air
change
volume en drukverlies
bij 10-voudige
luchtverversing
volume et perte de
pression avec un taux
de renouvellement de
l’air de 10
Volumen y caída de
presión con renova-
ción de aire de 10
veces
Volume e perdita di
pressione con decup-
lo cambio dell'aria
Volume e perda de
pressão até 10 vezes
a renovação de ar
(m3/h, Pa)
Volumen und Druck-
verlust bei 120fachen
Luftwechsel
Air flow and Pressure
Loss at 120times Air
change
volume en drukverlies
bij 120-voudige
luchtverversing
volume et perte de
pression avec un taux
de renouvellement de
l’air de 120
Volumen y caída de
presión con
renovación de aire de
120 veces
Volume e perdita di
pressione con
centoventesimo
cambio dell'aria
Volume e perda de
pressão até 120 vezes
a renovação de ar
EN 14470-1
Sicherheitsschränke
EN 14470-1
Safety storage cabi-
nets EN 14470-1
Veiligheidskasten
EN 14470-1
Armoires de sécurité
EN 14470-1
Armarios de
seguridad
EN 14470-1
Armadi di sicurezza
EN 14470-1
Armários de
segurança
EN 14470-1
EN 14470-1
Kombischränke
Säuren und Laugen/
EN 14470-1
Combined cabinets
acids and alkalis/
EN 14470-1
Combinatiekasten
zuren en logen/
EN 14470-1
Armoires combinées Armarios combinados Armadi combinati Armários combinados
para ácidos e lixívias
EN 14470-2
Sicherheitsschränke
EN 14470-2
Safety storage cabi-
nets EN 14470-2
Veiligheidskasten
EN 14470-2
Armoires de sécurité
EN 14470-2
Armarios de
seguridad
EN 14470-2
Armadi di sicurezza
EN 14470-2
Armários de s
egurança
EN 14470-2
DE EN NL FR ES IT PT DE EN NL FR ES IT PT
APPENDIX 1: TECHNICAL DATA
Legende für Tabelle „Technische Daten“ Légende du tableau « Caractéristiques techniques »
Key for “Technical data” table Leyenda de la tabla “Datos técnicos“
Legende voor tabel „Technische gegevens“ Legenda per tabella "Dati tecnici"
Legenda para a tabela "Dados técnicos"

18 1918 19
EN
APPENDIX 2: TECHNICAL DRAWINGS
1055
2290
2290
810
520
507
110°
520
384
110°
520
CX.229.105.WDFW / CX.229.105.MM.4WD CX.229.081.WDFW
Natural ventilation Natural ventilation
1197
1960
2300
600
2300
1960
615
12
1153
615
max.180°
max.180°
max. 180°
1119
SLX.230.120.MV SLX.230.060.MH

2020
20
asecos GmbH
Abt. Kundendienst
Weiherfeldsiedlung 16-18
D-63584 Gründau
Fax: +49 60 51 – 92 20-10
www.asecos.com
Ihr Fachhändler:
Your partner:
Uw partner:
Votre partenaire :
Su distribuidor:
su richiesta:
This manual suits for next models
6
Table of contents
Other asecos Water Filtration System manuals
Popular Water Filtration System manuals by other brands

Hydrotech
Hydrotech HSF31 Series Operation and maintenance manual

Oase
Oase ProfiClear Premium L operating instructions

CALEFFI
CALEFFI DIRTMAGCLEAN Use and maintenance manual

BWT
BWT Bewades MQ-LC Installation and operating manual

Hydac
Hydac MFU-15E Operating and maintenance instructions

GE
GE SmartWater GXWH04F installation instructions

SMARDY
SMARDY PRO 190 instruction manual

Fumex
Fumex FA5-2 Series Operation manual

Philips
Philips AUT3015 user manual

Applied Membranes
Applied Membranes UV-SPH Series Operation & installation instructions

Jandy
Jandy SFSM60 Installation and operation manual

ELECTROSEA
ELECTROSEA ClearLine CL-1000-X1.5 installation manual