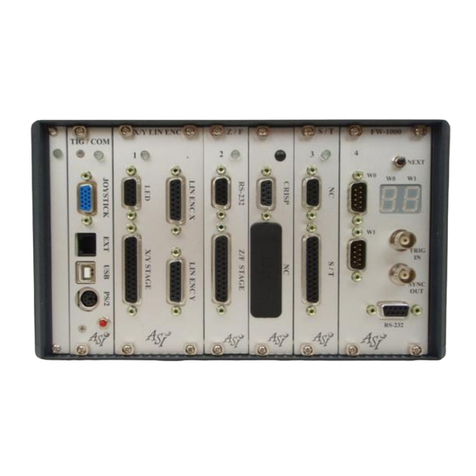
ASI MS2000 Instruction Manual

2022/03/16 04:45 1/18 MS2000, MFC2000 and RM2000 OPERATION
Applied Scientific Instrumentation - https://asiimaging.com/docs/
MS2000, MFC2000 and RM2000 OPERATION
Front Panel Controls
XY Joystick
Note: MFC2000 controllers lack a joystick.
The XY Joystick is spring loaded to return to a zero movement center when not in use. The speed at
which the stage moves is linear function of the degree to which the joystick is pushed away from the
center. The direction of deflection can be controlled by the settings of the DIP switches on the back
panel of the box (see Back Panel Controls). Depressing the button on top of the joystick will toggle the
speed range of the joystick. In the high-speed range, the stage will travel up to the maximum speed
of the motors; in the low-speed range, the speed for maximum deflection is reduced to 5 – 10% of
maximum speed. The speed settings for the joystick may be programmed and saved in firmware. See
the JSSPD command.
Command Encoder Knob
The Command Encoder Knob is usually used to control the Z-axis stage. The relative speed of the
knob can be set with the JSSPD command and saved in firmware. The command knob can be attached
to any axis by using the JS command.
Zero Button
The Zero Button allows the user to set all three axes coordinates to zero. Upon pressing the button,
the LCD will display the change. Pressing the button also cancels any and all serial-controlled
movement commands. The zero button also acts as a HALT button to stop undesired motion. Pressing
the zero button briefly will halt motion and zero the coordinates; pressing and holding down the zero
button for more than 1 second will halt motion, but not alter the coordinate settings.
Home Button
The Home Button sends the stage back to the zero coordinates.
@ Button
The @ Button is programmed for special functions. On most controllers this button is used with the
Multi-Point Save/Move feature (see Special Functions below).

Last update: 2021/12/20 16:41 ms2000_operation https://asiimaging.com/docs/ms2000_operation
https://asiimaging.com/docs/ Printed on 2022/03/16 04:45
Rocker Switch - Clutch Enable
The Clutch Enable Switch allows the user to disconnect the Z-Axis motor from the microscope’s fine
focus knob by setting the switch to “Disengaged” (no dot on switch). When switching from
“Disengaged” to “Engaged” (white dot on switch), the current position of the Z-Axis is locked in,
canceling any previously given Move commands. When the drive is “Disengaged,” the feedback
encoder still provides position information for the Z-axis LCD display. In some system configurations,
the rocker switch is not used, or used for other special purposes.
LCD Screen
Note: MS2000 and RM2000 have a 4-line LCD . MFC2000
controllers only have a two line LCD.
The Liquid Crystal Display (LCD) screen shows the current position coordinates of the axes with status
information displayed to the right. A dim back illumination allows users to clearly view the screen
even in a darkened room without causing light pollution. The LCD display has four display modes
selected by DIP switches 1 & 2 on the back panel. The display modes have the following
characteristics:
Mode 1 - SW 1 & 2 DOWN Normal Display with Controller Firmware Version Line Shown
4 Line version
2 line version
This display shows the stage position in millimeters with five digits of precision with the status
indicators on the right side.
Mode 2 - SW 1 DOWN & SW 2 UP Normal Display with Status Line Shown

2022/03/16 04:45 3/18 MS2000, MFC2000 and RM2000 OPERATION
Applied Scientific Instrumentation - https://asiimaging.com/docs/
4 line version
2 line version
The status line at the bottom of the display indicates the command set (H high or L low), the XY
encoder mode (R rotary or L linear), and the Z encoder mode (R rotary or L linear). The next two
numbers show the next position to move to for ring buffer, and the number of positions stored,
respectively, separated by a colon (:). Controllers with the Auto-Focus option display the focus value
on this line as well. On the right side is a time clock. Some error codes are displayed in place of the
clock for a few seconds after they occur.
Mode 3 - SW 1 & 2 UP Dual Display with Status Line Shown
4 line version
2 line version
In this mode, two sets of number are shown for each axis. The number on the left is the current
position reported by the axis encoders. The number on the right is the target position that the
controller is trying to achieve.
Mode 4 - SW 1 UP & 2 DOWN Dual Display with Firmware Version Line Shown
There are several status indicators that may appear on the right side of the axis line display (in
display columns 19 or 20). The meaning of these indicators is listed in the table below.
Table 1: Status Indicators in Order of Priority per Column

Last update: 2021/12/20 16:41 ms2000_operation https://asiimaging.com/docs/ms2000_operation
https://asiimaging.com/docs/ Printed on 2022/03/16 04:45
Status
Letter Meaning Column Priority Comments
D Disabled / Disengaged 19 highest Axis is disabled if run-away error condition is
detected
L Lower Limit Engaged 19 mid
U Upper Limit Engaged 19 mid
s Slow Joystick Control 19 lower
f Fast Joystick Control 19 lower
E Clutch Engaged 19 lowest Microscope Z-drive only
P Axis in PAUSE state 20 highest Axis is BUSY while paused.
B Axis BUSY 20 high
M Motor Active 20 mid Servos are turned on.
W Command Wheel 20 lowest
Used on controllers where the command
wheel may be switched between axes with
the ‘@’ button.
The status indicators can help you understand how the controller is set up and working. The f, s, & W
indicators tell you which axes are being controlled by the manual control devices as well as the speed
range for the devices. Momentarily depressing the joystick button will switch the speed indicator from
‘s’ to ‘f’ or vise versa.
Should the stage be moved into either a hardware or software limit switch, the ‘U’ or ‘L’ indicators will
appear. Further movement into the limit is prohibited.
When a commanded move is issued to an axis via a computer command, the ‘B’ indicator will appear
until the axis reaches target to the accuracy specified by the PC error variable. Should the stage drift
further from the current target by more than the E drift error variable, the motors will re-engage and
the ‘M’ will appear as the right status indicator. The ‘M’ will disappear when the stage is again within
the PC error variable of the target. When using manual input devices (joystick or knob), the ‘M’ will
appear as the motors attempt to keep the XY stage and Z drive at the location specified by the input
devices.
If excessive servo errors are encountered, the axis will be disabled and the ‘D’ will appear. This is a
safety feature to limit motion under run-away conditions or in the event of a stage crash.
Back Panel
USB Port
To use the USB port, you need to install the necessary drivers onto your computer, they are available
for download from Silicon Labs' website. Please note that the Windows 10 Universal drivers do not
work with ASI controllers; if you are running with Windows 10 OS, use the drivers for Windows 7/8/8.1.
After the drivers are installed, you can check the communication between your computer and the
controller by using your computer’s Device Manager. Before you connect and power up your ASI
controller, expand the “Ports (COM & LPT)” menu1) and note any communications ports listed.
Connect the controller via the provided null modem cable. When you power up the connected
controller, you should see a new communications port listed. (For example, if you see COM1 before

2022/03/16 04:45 5/18 MS2000, MFC2000 and RM2000 OPERATION
Applied Scientific Instrumentation - https://asiimaging.com/docs/
powering up the controller, you will see COM1 and COM2 after powering it up.)
The USB drivers on your computer create a virtual serial port whenever the computer is connected to
a powered-up controller. This virtual serial port operates like an RS-232 port as described below.
RS-232 Ports
The two 9-pin RS-232 ports allow serial commands to talk to and through the MS 2000. The IN port
attaches to the PC computer via a null modem RS 232 Serial Cable to allow serial commands to
control and get information from the MS 2000. The null modem cable switches the RX and TX lines
and terminates possible PC handshaking lines allowing for asynchronous communication without
handshaking. The OUT port is controlled by a second UART on the microcontroller. As a default it is
configured as a “pass though” so serial traffic sent to the controller from the PC is echoed directly on
the OUT port. Special functions are supported that use this port for dedicated purposes (e.g. triggered
encoder reporting).
Fuse
The MS 2000 uses a 1A, 250V, fast blow, 5x20mm standard fuse.
Power Input
The MS 2000 uses a 24V 1.25A universal input, switching DC power supply. The power supply is
connected and disconnected from the circuits via the ON/OFF power switch.
X-Y Stage Connector
This DB-25 connector is used to connect the MS 2000 to the X/Y stage via a four foot cable.
Z-Axis Connector
This DB-15 connector is used to connect the MS 2000 to the Z-Axis drive assembly via a four foot
cable.
Linear Encoder Connectors
X ,Y & Z linear encoder connectors are located on the back panel. Heidenhain encoders utilize labeled
DB-15F connectors. If the encoders are cross connected, the affected axes will behave erratically.
BNC Connectors

Last update: 2021/12/20 16:41 ms2000_operation https://asiimaging.com/docs/ms2000_operation
https://asiimaging.com/docs/ Printed on 2022/03/16 04:45
Two BNC connectors are provided, labeled IN and OUT. The connectors are wired to the internal board
connector SV1. The IN connector is usually wired to IN0, the buffered TTL input channel. On piezo Z-
axis (PZ_* Firmware) systems, the OUT connector is connected to the analog DAC output that is used
for control of the piezo system with a 0-10v analog signal (3mA max). On non-piezo systems, the OUT
connector is usually wired to OUT0, the buffered TTL output channel, and provides a 0 or 5v digital
output.
Reset Button
The reset button causes a hardware-level reboot of the microprocessor, which re-initializes the MS
2000 system.
DIP Switches
The DIP Switches allow the user to modify the configuration of the MS 2000’s input and output
devices. Switches 1 2 select the LCD screen options. Switches 4 and 5 set up the serial baud rate for
the RS-232 and USB interfaces. Switches 3 & 6 select between linear and rotary encoders for the XY
and Z axes, respectively. Switches 7 8 adjust the deflection of the joystick. The controller must be
reset for most new DIP switch settings to take effect.
Dip Switch Settings
SWITCH DOWN UP COMMENT
DIP SW 1 LCD Show Actual Position
Only (normal)
Displays Position Actual >
Target
DIP SW 2 LCD 4th line:
Firmware Version
LCD 4th line:
config / status / clock
4th line format depends on
specific firmware build
DIP SW 3 XY Linear Encoder XY Rotary Encoder Reset controller after changing
switch
DIP SW 4 Baud Rate Selector - see chart below Reset controller after changing
switch
DIP SW 5
DIP SW 6 Z Linear Encoder Z Rotary Encoder Reset controller after changing
switch
DIP SW 7 Joystick Y deflection
Reversed
Joystick Y deflection
Normal Reset controller after changing
switch
DIP SW 8 Joystick X deflection
Reversed
Joystick X deflection
Normal
Switch 4 Switch 5 Baud Rate
UP UP 9600
UP DOWN 19200

2022/03/16 04:45 7/18 MS2000, MFC2000 and RM2000 OPERATION
Applied Scientific Instrumentation - https://asiimaging.com/docs/
Switch 4 Switch 5 Baud Rate
DOWN UP 28800
DOWN DOWN 115200
Special Functions and Features
Several special features have been incorporated into the stage control firmware beginning with
version 6.0a. Several of these functions are standard on every controller, others are only supported
with special hardware modifications or options; each are discussed in turn.
Configuration Flags
Beginning with firmware version 8.0, a set of configuration flags are read upon startup which
determines the axis profiles for standard build firmware. These flags determine whether linear or
rotary encoders are to be used, and the type of motor / lead screw combination used for the various
axes. The configuration flags may be changed using the “CCA X” commands or by switching the
encoder DIP switches. When a configuration flag is changed for an axis, new default parameter
settings are used for that axis. On most controllers the “CCA X?” commands will show the existing
configuration and show the other configurations available in the firmware.
Build Configuration
Users often request special features for their systems. Often there are special firmware modules that
are included to provide custom functionality. The BUILD X [BU X] command lists the firmware basic
build flavor and all of the special firmware modules that are included in the controller. The following
list describes some of these modules that may be present in your controller.
LL COMMANDS † Low Level Command set is included
RING BUFFER † Internal 50 position Ring Buffer is supported
SEARCH INDEX † Supports ability to search for the index on linear encoders
TRACKING Firmware module to support PhotoTrack system
AUTOFOCUS Video autofocus scanning firmware module
SCAN MODULE Supports 1-d and 2-d programmable scan patterns.
ARRAY MODULE Firmware module for x,y moves in array pattern.
SPEED TRUTH Query on SPEED command returns internal calculated speed used.
CRIFF Firmware for the CRIFF focus system.
DAC OUT WRDAC command sends specified voltage to SV1,Pin-5. On PZ_* builds, this
is the 0-10v output for commanded Z moves.
PREPULSE Module to add predictive TTL output trigger pulse
PEDALS Support for foot pedals to control Z-axis and Zoom systems
MULTIAXIS MOVES Supports circular and spiral moves directly from the controller
CLOCKED POSITIONS Supports motorized objective turrets, filter turrets & filter wheels
TTL_REPORT_INT TTL IN0 used for interrupt-driven encoder position reporting
ENC_INT Interrupt line is used for encoder pulse counting with the SCAN MODULE

Last update: 2021/12/20 16:41 ms2000_operation https://asiimaging.com/docs/ms2000_operation
https://asiimaging.com/docs/ Printed on 2022/03/16 04:45
IN0_INT † TTL IN0 used for a variety of interrupt driven functions selected using the
TTL command.
† These modules are often included in standard builds. If you see something you want but don’t have,
contact ASI.
Power Down Coordinate Save
Beginning with firmware version 8.1, powering down the MS 2000 controller will automatically cause
the current positions to be saved to non-volatile memory so they can be restored upon startup. The
shutdown procedure watches for power failure and immediately turns off the motor drivers before
saving the position coordinates. Any power interruption will shut down operation. The user can always
reset the stage coordinate origin using the ZERO button, however the actual position of the preset
firmware limits remain unchanged with this operation. To reset the controller with default firmware
limits and with zero stage coordinates, press the RESET button on the back of the controller. With the
RESET operation, the current stage position will be lost. Upon loss of power, the controller will send
the character ‘O’ out the serial port. After successfully saving positions, the controller will send the
character ‘K’.
Save Settings to Non-Volatile Memory
The MS 2000 controller allows the user to customize various parameter settings and then save the
settings to non-volatile memory to be used on subsequent power-ups. The controller is shipped with
general purpose default setting suitable for most users. The user can always return to the default
settings unsuitable parameters are saved. See the SAVESET command in the Programming section of
the manual.
Post-Move Control Options
The behavior of the stage and controller at the completion of a move can be controlled with several
programmable parameters. The best method can depend upon the particular application, the thermal
and vibration environment, whether linear encoders are used, speed required, etc. The various
options are set using the MAINTAIN [MA] command codes for each axis. The Finish Error and Drift
Error tolerances are set with the PCROS and ERROR commands respectively. The WAIT command can
be used to enter a PAUSE state or control the motor drivers following a move. The table below shows
how the various command options can be used.

2022/03/16 04:45 9/18 MS2000, MFC2000 and RM2000 OPERATION
Applied Scientific Instrumentation - https://asiimaging.com/docs/
MAINTAIN
code [MA] Description
Axis STATUS
changes at end of
move
Consequence of
setting a WAIT
time[WT]
NOT
BUSY BUSY
0
Default – HYSTERESIS Motor and servo
turns off when position error is less than
the Finish Error. Motor turns on again
when error is more than the Drift Error.
Drift-out and re-correct can occur 18
times per 0.5 sec. before fatal position
error is set and motion is halted.
ε< Finish
Error [PC]
LCD shows
‘B’ until ε
< Finish
Error
ε > Drift
Error [E]
LCD
shows
‘M’ PAUSE state is entered
at end of move
trajectory. BUSY state
is not cleared until the
WAIT expires.
1
UNLIMITED_TRIES: Like HYSTERESOUS
above, but drift and re-correction can
occur indefinitely without error
ε < Finish
Error [PC]
ε > Drift
Error [E]
2
SERVOS_ON: Servo remains active and
correcting errors until HALT command is
received. Leaving the servos on
indefinitely will cause the controller to run
warm.
ε < Finish
Error [PC] Never
3
SERVOS_WAIT: Servo remains active and
correcting errors for the time set by the
WAIT command following the move
completion.
ε < Finish
Error [PC] Never
Motor driver and servo
remain active for the
WAIT time following
completion of the move
– then turn off.
ε is the final position error
Leaving the servos on can improve the positioning, especially on some linear encoded stages, and
especially when a second axis remains in motion after one axis has finished moving. Turning the
drivers off and using error threshold hysteresis means that most of the time there is no power applied
to the motors so they cannot move. This is also the most power efficient mode.
Multi-Point Save/Move
Often there is a need to mark several positions to later revisit. The MS 2000 controller has a ring-
buffer with up to 50 locations that the user can load with position information and then visit
sequentially. The current stage position can be saved to the buffer by depressing the button on top of
the joystick and holding it for longer than one second. (A short tap of the button toggles the joystick
speed) You can move to the next position of interest and again save the position in the buffer by
holding down the joystick button. Continue this procedure to save all positions of interest.
Save locations can be revisited by pressing the @ button briefly. Each press of the @ button advances
to the next position. When you reach the last position, the next press of the @ button will take you
back to the first position. Holding the HOME button down for longer than one second will clear all the
stored positions in the ring buffer.
The ring buffer may be preloaded with values via the serial command LOAD. Serial commands can
also be used to advance to the next position as well as to control which axes will be affected by the
move commands. See LOAD, RBMODE, and TTL commands in the Programming section of this
manual. Contact ASI for details.

Last update: 2021/12/20 16:41 ms2000_operation https://asiimaging.com/docs/ms2000_operation
https://asiimaging.com/docs/ Printed on 2022/03/16 04:45
Constant Velocity Moves – (with firmware Version 8.1+)
The MS 2000 controller now uses a full closed loop trajectory driven algorithm for all commanded
moves. This means that the move velocity is controlled as part of the digital feedback loop. Many
users need to have high precision slow speed control. The MS 2000 now provides the smoothest
control possible in a motorized stage. To achieve this unsurpassed control, we have had to impose
some small restrictions in terms of the acceptable velocity values. The controller has a minimum
controlled speed of one encoder count per 64 servo cycles. The table below shows the slowest
controlled speed for various stage configurations:
6.35 mm Pitch Lead-
screw Stage
1.59 mm Pitch Lead-
screw Stage
10nm resolution Linear
Encoder equipped Stage
XY Stage:
0.5 ms servo
loop
0.69 μm/sec 0.17 μm/sec 0.31 μm/sec
XYZ Stage:
0.75 ms servo
loop
0.46 μm/sec 0.12 μm/sec 0.21 μm/sec
The controlled stage speed must be an integer-multiple of the minimum speed. For example, an XYZ
stage with 6.35 mm pitch lead-screw could be programmed to move 0.46 m/s, 0.92 m/s, 1.38 m/s,
etc., but not values between the integer-multiple of the slowest speed. Be aware that at the very
slowest speeds, the condition and cleanliness of the stage, and the calibration of the analog stage
driver circuitry can have a dramatic effect on the smoothness of operation. Please request tech note
TN120 Slow Speed Considerations for further information.
TTL Controlled I/O Functions
Buffered TTL input (IN0) and output (OUT0) are available on internal connector SV1 pins 1 & 2
respectively. These lines may be connected to the IN and OUT BNC connectors on the MS 2000 back
panel. The TTL command allows the user to select which functions are active for the IN0 and OUT0
lines. Various functions supported by the TTL command include:
Triggered moves or Z-stack acquisitions
Triggered asynchronous serial stage position reporting
Output pulses upon move completion
Output gated during constant speed motion.
The TTL input functions require the IN0_INT firmware module. The output functions are available in all
builds.
Automated 1-D or 2-D Scanning
Systems the with SCAN_MODULE firmware addition have some special commands that make raster
scanning very easy and well controlled. With the SCAN, SCANR, and SCANV commands, you can
define a raster area and the number of raster lines. The stage will scan each line at constant speed,
followed by rapid retrace. Hardware line sync signals available on SV1 pin 7 for the X or Y axis, as
selected by internal jumper JP1 (1&2 X-axis; 2&3 Y-axis). With the ENC_INT firmware module encoder

2022/03/16 04:45 11/18 MS2000, MFC2000 and RM2000 OPERATION
Applied Scientific Instrumentation - https://asiimaging.com/docs/
transitions can be counted to provide a “pixel” clock for an external recording device.
Synchronous Encoder Reporting
The TTL_REPORT_INT firmware module allow for external TTL synchronized position reporting. The
position reports are sent to the auxiliary serial port on the MS 2000 WK in a binary format so that
rapid, low jitter position reporting is possible for real-time positioning tasks. Contact ASI for details.
Tracking Features
ASI’s PhotoTrack system uses the TRACKING firmware module along with hardware available from ASI
that allows the stage to latch on and track spots of fluorescent illumination from labeled organisms. A
quadrant PMT is used to provide sensitive and rapid position feed back information from the
illuminated target. Contact ASI for details.
Safety, Diagnostic and Alignment Features
Motor-driver current-limits prevent the motors from fully powering into hard stops. In addition, the MS
2000 controller is constantly monitoring the positions of the motors under its control. Situations that
may result in run-away conditions (such as reversed polarity motors or encoders), or situations where
the motor is not able to follow the desired move trajectory (e.g., when mechanical interference limits
the motion), cause the controller to detect an error condition. The motors are immediately turned off
and the offending axis is disabled. If this happens, a ‘D’ character is displayed as the status indicator
on the LCD display. The user should correct the problem and then reset the controller to regain
control of the disabled axis.
Controllers using firmware Version 6.0 and newer utilize a motor driver circuit where all analog circuit
alignment is done either automatically in firmware, or via serial commands. The user need not open
the case to adjust the drive-circuit feedback and zeroing levels.
The firmware also keeps track of any internal error conditions that may arise during operation and
saves the last 255 error codes in a buffer that may be read out for diagnostic purposes (see the serial
DUMP command). The controller also has a built in “move buffer” that holds move dynamic
information for up to 200 servo cycles. The user may utilize this buffer to attempt advanced tuning of
the controller for special applications or extremely fast or slow moves. Please see the section MS
2000 Optimal Alignment Procedures for a full discussion of these issues.
Clocked Devices
The MS 2000 controller supports clocked rotational devices, such as motorized objective nosepiece
turrets, filter cube turrets, and filter wheels. These devices move to discrete clocked positions. Manual
control is usually via the @ button to advance to the next position. The serial MOVE command is used
to move the devices to a specific integer-value clocked position. The current position is reported using
the WHERE command.

Last update: 2021/12/20 16:41 ms2000_operation https://asiimaging.com/docs/ms2000_operation
https://asiimaging.com/docs/ Printed on 2022/03/16 04:45
Default Settings, Saved Parameters, Configuration Flags,
Limits and Positions
The controller keeps track of several sets of flags, parameters and other saved configuration
variables. It is important to understand how changing some of these parameters affect the other sets.
The parameter sets are discussed below, starting with the most permanent settings and continuing to
the least permanent settings.
Motor Driver Alignment Parameters
The motor driver alignment parameters are set with the AA and AZ commands. These commands set
nonvolatile digital potentiometers located in the driver circuitry. These settings are independent of
the other parameters settings and are immediately saved on the digital pots themselves.
Configuration Flags
The configuration flags are set with the “CCA X=n” command, and by the position of DIP Switches #3
and #6 (the DIP switches change between linear and rotary mode for the XY stage and Z-axis drive
respectively). The configuration flags allow the loaded firmware to work with a variety of specific
hardware configurations. Specific lead screw pitch, linear encoder resolution, encoder type, and piezo
Z-axis range are some examples of the configurations settings that can be changed. (See the CCA
command for details). The configuration flags are usually only changed when the controller is first set
up for a particular set of hardware, when new firmware is loaded using the ASI Updater, or when
changing between linear and rotary encoder for the stage. When a configuration flag is changed, it is
immediately saved in nonvolatile memory; the controller must be restarted for the new configuration
to be implemented.
Whenever any configuration flag is changed, the controller
restores any Saved Parameter settings back to the Factory
Defaults settings.
Saved Parameters
There are many operating parameters that can be changed in the controller. These include such
things as error tolerances (E and PC commands), speed and acceleration times (S and AC commands),
servo parameters settings (KP, KI, and KD commands), and many others. All of these operating
parameters have Factory Default settings that have been determined to be appropriate for most
typical situations. A user may find that a change to some parameter value will improve the
performance of the system for their application. When parameter values are changed using a serial
command, the new parameter immediately becomes active in the controller. Third party software
vendors can change parameter settings “on the fly” using their software and the changes will remain
active as long as the controller remains powered on and not RESET. Parameter changes can be made

2022/03/16 04:45 13/18 MS2000, MFC2000 and RM2000 OPERATION
Applied Scientific Instrumentation - https://asiimaging.com/docs/
persistent using the “SS Z” command, which saves all parameter settings to nonvolatile flash
memory. Users wishing to make a one-time permanent change to a parameter setting can use a
terminal program to communicate with the controller, make the parameter change, and then make
the change persistent with the “SS Z” command. The new parameters will be used on subsequent
power down/up or controller RESET. The user can restore the Factory Default parameter settings any
time using the serial command “SS X”.
Saved Stage Positions, Limit and Home Positions
The controller watches the power line voltage so that it can detect when the controller is being turned
off. There is sufficient stored charge in the controller’s power supply to allow the controller to save the
stage position and a few other variables as power is being shut down. The variables that are saved
are the Stage Axis positions, the programmable Upper and Lower limit locations, and the Home
location all expressed in the current coordinated reference system. When power is restored, the
controller loads the saved information into its working memory and clears the data from the Saved
Position nonvolatile memory locations to ready those storage locations for when power is again shut
off.
If the controller is RESET (without turning off the power)
current locations are NOT saved, and the controller will come
up with axis positions at zero and default Limit and Home
positions; the Saved Position information will be lost.
Successful shutdown is indicated by “OK” broadcast on the serial port upon power-off.
Internal I/O connector details
Special user requirements often require custom external wiring. The MS 2000 WK controller has an
internal board connector with several I/O lines that are often wired to the external BNC connectors for
user connections. There may be occasions where the functions required are not wired to external
connectors. The table below shows the connector wiring and the firmware modules that are required
to take advantage of the I/O functions. The BU X command will list which modules are present in the
loaded firmware. On most controllers the IN BNC is connected to TTL IN0.
EXT I/O – SV1
PIN DESCRIPTION FUNCTION FIRMWARE Modules
1 TTL IN0
INPUT-TTL input w/
processor interrupt (Usually
wired to the IN BNC)
IN0_INT used for external TTL triggered tasks – see
TTL command for specific functions.
ENC_INT use to count encoder pulses (selected
with JP2) in conjunction with SCAN firmware.
TTL_REPORT_INT used for triggered position
reporting.

Last update: 2021/12/20 16:41 ms2000_operation https://asiimaging.com/docs/ms2000_operation
https://asiimaging.com/docs/ Printed on 2022/03/16 04:45
PIN DESCRIPTION FUNCTION FIRMWARE Modules
2 TTL OUT0
TTL OUTPUT – (Usually wire
to the OUT BNC on systems
without PIEZO)
All builds – see TTL command for specific
functions.
3 GND Ground for all I/O
4 TTL IN0 - OUT OUTPUT – IN0 buffered and
inverted
Can be used as buffered encoder pulses OUTPUT
with ENC_INT.
5 PZ-DAC OUT
ANALOG OUTPUT (0-10v)
from 16 bit DAC
(Wire to OUT BNC on PIEZO
(PZ) systems)
On systems with a PIEZO axis this is the controled
voltage when a commanded move to the PIEZO
(usually Z) axis is made.
DAC_OUT with WRDAC command, provides
external analog output.
6 TTL IN1 INPUT – Auxiliary TTL input
7 SCAN SYNC OUTPUT for SCAN MODULE
SYNC pulse
SCAN MODULE - selects sync source from JP1 to
clock the sync flip-flop.
Internal Jumper JP1 selects the encoder flag signal that is used for the SYNC flip-flop. JP1 1-2 selects
the X-axis; JP1 2-3 selects the Y-axis.
Internal Jumper JP2 selects the encoder signals that are counted during scanning. JP2 1-2 selects the
X-axis; JP2 2-3 selects the Y-axis.
Please contact ASI if you need assistance configuring the controller for special functions.
Back Panel Connector Pin-outs

2022/03/16 04:45 15/18 MS2000, MFC2000 and RM2000 OPERATION
Applied Scientific Instrumentation - https://asiimaging.com/docs/
X-Y Stage DB-25F Connector
PIN SIGNAL INFORMATION
1 X Mot - X Motor -
2 X GND X Encoder Ground
3 X Enc Ch A X Encoder Channel A
4 Y Mot - Y Motor -
5 Y GND Y Encoder Ground
6 Y Enc Ch A Y Encoder Channel A
7 N.C. Not Connected
8 N.C. Not Connected
9 N.C. Not Connected
10 X Lim U X Upper Limit
11 +5V +5V (X-limits)
12 Y Lim U Y Upper Limit
13 +5V +5V (Y-limits)
14 X Mot + X Motor +
15 +5V +5V (X-encoder)
16 X Enc Ch B X Encoder Channel B
17 Y Mot + Y Motor +
18 +5V +5V (Y-encoder)
19 Y Enc Ch B Y Encoder Channel B
20 N.C. Not Connected
21 N.C. Not Connected
22 X Lim L X Lower Limit
23 GND Ground (X-limits)
24 Y Lim L Y Lower Limit
25 GND Ground (Y-limits)
Z-Axis Drive & Optional F-Axis DB-15M Connector
PIN SIGNAL INFORMATION
1 F Enc Ch B F Encoder Channel B
2 Z Lim L Z Lower Limit
3 F Lim L F Lower Limit
4 F Mot - F Motor -

Last update: 2021/12/20 16:41 ms2000_operation https://asiimaging.com/docs/ms2000_operation
https://asiimaging.com/docs/ Printed on 2022/03/16 04:45
Z-Axis Drive & Optional F-Axis DB-15M Connector
PIN SIGNAL INFORMATION
5 Z Enc Ch B Z Encoder Channel B
6 GND Ground
7 CLTCH Clutch (+24V)
8 Z Mot + Z Motor +
9 F Enc Ch A F Encoder Channel A
10 Z Lim U Z Upper Limit
11 F Lim U F Upper Limit
12 F Mot + F Motor +
13 Z Enc Ch A Z Encoder Channel A
14 +5V +5V
15 Z Mot - Z Motor -
RS-232 Serial In DB-9F Connector
PIN SIGNAL INFORMATION
2 R In Receive
3 T Out Transmit
5 GND Signal Ground
1,4,6-9 N.C. Not Connected
RS-232 Serial Out DB-9M Connector
PIN SIGNAL INFORMATION
2 T Out Transmit
3 R In Receive
5 GND Signal Ground
1,4,6-9 N.C. Not Connected
Circular Power Connector
PIN SIGNAL INFORMATION
1 +24V +24V Power From Modular Supply.
2 GND C Case Ground
3 GND S Supply Ground
USB Connector
PIN SIGNAL INFORMATION
1 VBUS USB VBUS
2 D+ Data +
3 D- Data -
4 GND Ground
XY Axis Linear Encoder (optional) DB-9M Connector
PIN SIGNAL INFORMATION
1 X Enc Ch A X Encoder Channel A
2 X Enc Ch B X Encoder Channel B
3 GND Signal Ground
4 N.C. Not Connected
5 +5V +5V Power
6 N.C. Not Connected
7 Y Enc Ch A Y Encoder Channel A
8 Y Enc Ch B Y Encoder Channel B

2022/03/16 04:45 17/18 MS2000, MFC2000 and RM2000 OPERATION
Applied Scientific Instrumentation - https://asiimaging.com/docs/
XY Axis Linear Encoder (optional) DB-9M Connector
PIN SIGNAL INFORMATION
9 N.C. Not Connected
Z Axis Linear Encoder (optional) DB-15F Connector
PIN SIGNAL INFORMATION
1 Z Enc Ch A Z Encoder Channel A
2 GND Signal Ground
3 Z Enc Ch B Z Encoder Channel B
4 +5V +5V Power
5-15 N.C. Not Connected
IN BNC (optional)
PIN SIGNAL INFORMATION
Center TTL IN VIH > 3.2V
VIL < 1.3V
Outer GND Signal Ground
OUT BNC (optional - TTL)
PIN SIGNAL INFORMATION
Center TTL OUT
VOH > 4.4V
VOL < 0.1V
IO Max: ±50mA
Outer GND Signal Ground
OUT BNC (optional - Analog)
PIN SIGNAL INFORMATION
Center Analog OUT 0-10 VDC
IO Max: ±3mA
Outer GND Signal Ground
Electrical Characteristics
External Modular Power Supply
AC Input
100-240 VAC, 50/60 Hz, 0.8 A Standard Supply (1.5 A High-Current Supply Option)
DC Output
+24 VDC, 1.25 A Standard Supply (2.5 A High-Current Supply Option)
Fuse
1 Amp, Standard Supply 2 Amp, High-Current Supply

Last update: 2021/12/20 16:41 ms2000_operation https://asiimaging.com/docs/ms2000_operation
https://asiimaging.com/docs/ Printed on 2022/03/16 04:45
Indoor use only
WARNINGS
Ensure power switch is in the OFF position before1.
plugging in the power cord.
Do not unplug or plug-in devices / cables when power2.
is on.
Do not remove the cover; no user serviceable parts are3.
inside.
For indoor use only.4.
Keep clear of moving equipment. ASI Stages have5.
current limits on the motors to prevent excessive
traveler force from doing permanent bodily harm, but
pinches can still be painful.
Protection provided by the equipment may be impaired6.
if the equipment is used in a manner not specified by
ASI.
In the event of device failure, contact ASI: (541)7.
461-8181
(800) 706-2284
International: 011-541-461-8181
ms2000, manual, 0-10v
1)
If you do not see “Ports (COM & LPT)” when the drivers are installed and the controller connected and
powered up, then the computer may not fully support USB and RS-232. Certain inexpensive laptops
have been observed with this defect. The workaround solution for this problem is to use a Serial Port
PCI Card. Alternately, your computer may work with a Keyspan USA19HS High Speed USB / Serial
Adapter. This device, a cable with two connectors, plugs into your USB port, and the other end is a
serial port connector. With either the Keyspan or the Serial Card, you connect the device to the
controller via a serial null modem cable. A serial null modem cable is furnished with each ASI
controller and widely available at computer stores. Note that if the words “NULL MODEM” are not
stamped on the connectors of a serial cable, it is probably not a null modem cable.
From:
https://asiimaging.com/docs/ - Applied Scientific Instrumentation
Permanent link:
https://asiimaging.com/docs/ms2000_operation
Last update: 2021/12/20 16:41
This manual suits for next models
2
Table of contents
Other ASI Controllers manuals