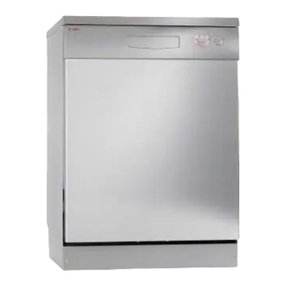
Asko D3530XL User manual

Use &
C
are
G
uid
e
Di
shwashe
r
ASKO D3530XL

2
D
ear ASKO customer,
Congratulations on your excellent pro
d
uct choice an
d
welcome to the Asko
f
amily. A global
f
amily with
its roots in Scan
d
inavia.
Cleaning results,
d
esign, environmental impact on nature an
d
home, user-
f
rien
d
liness, low consumption
of
time, energy an
d
water, a long li
f
e span, reliability.... Goo
d
appliances shoul
d
inclu
d
e all o
f
these.
An
d
this is what we try to give you.
When you buy an ASKO pro
d
uct, we want you to
f
eel assure
d
that the insi
d
e is as goo
d
as the outsi
de
an
d
that the ethics an
d
morals on which we built this machine are just as high as the quality an
d
per-
f
ormance you get
f
rom it. That is what Scan
d
inavian quality is all about.
In or
d
er to get the best possible results
f
rom your machine an
d
all its
f
unctions, please rea
d
this Use an
d
Care Gui
d
e be
f
ore using the machine
f
or the first time. An
d
i
f
you have any questions, please
d
o no
t
h
esitate to call us or contact us via our web site.
Best regar
d
s
f
rom Scan
d
inavia an
d
the people at Asko.

3
C
ontents
3
Be
f
ore doin
g
your
fi
rst wash
4
S
afety 5
C
hild safet
y
!
6
P
a
rt
s
of
th
e
d
i
s
hw
as
h
e
r*
7
T
echnical information
7
T
h
e
bas
k
e
t
s
*
8
C
ontrol panel
9
Dispenser
9
Basic
C
ourse
1
0
O
ptions
1
2
Eco-dishwashin
g
1
3
S
pecial settings
1
4
Fra
gi
le d
i
shes
1
7
S
tandard pro
g
ram
1
8
T
he d
i
spla
y
1
9
C
leanin
g
2
0
Rinse aid
2
2
S
alt
2
3
F
au
lt
i
n
dica
t
io
n
s
2
4
Troubleshoot
i
ng 2
5
Pe
r
fo
rm
a
n
ce
in
fo
rm
a
ti
o
n 2
8
Installation 2
9
S
ervice & guarantee
3
4
O
wn comments
3
5
Q
uick
G
uide
3
6
C
ontents

4
Before doing your first wash
Read
th
e
d
ir
ec
ti
o
n
s
o
f
use
Read the directions o
f
use be
f
ore starting
to use your mac
hi
ne, espec
i
a
ll
y t
h
e
S
afety,
C
hild
S
afety and Basic
C
ourse sections.
Take care with certain materials
Read the section ‘Fra
g
ile
d
ishes’ before
was
hi
n
g
c
hi
na w
i
t
h
un
gl
aze
d
d
ecorat
i
on
or other household
g
oods made of
pl
ast
i
c,
woo
d
or
c
rystal requirin
g
careful treatment
.
C
heck the door
C
heck that the door of the dishwasher fits
properly: open the door a little and let it go.
D
oes it stay exactly where you released it?
If not, you should check the installation in-
structions or consult the installer.
C
heck water hardness leve
l
Phone your local Water Board to check the
water hardness in your area. This is impor
-
tant when dispensing dishwasher detergent
a
n
d
rin
se
a
i
d
.
Machine with water softene
r
O
nce
y
ou know the water hardness, adjust
the water softener
(
see
S
ettin
gs
chapter
)
.
Before you be
g
in washin
g
, you may also
need to fill u
p
the salt
(
see
S
al
t
cha
p
ter
)
.
*NB!
W
a
t
e
r
s
o
f
t
e
n
e
r i
s
not
used
in A
us
tr
a
li
a
or
N
ew
Z
ea
l
an
d.
D
o you have a machine with a
w
a
t
e
r
sof
t
e
n
e
r
?
I
f
you are unsure whether your machine has
a
water softener, see the illustration. If there
is a cover cap in the bottom o
f
the machine,
it has a water so
f
tener and needs to be
filled with salt. See the
S
al
t
c
hapter.
*NB!
A
f
ter
fi
lling, there may be a short delay
before the signal light goes out.
C
A
U
TI
O
N!
Never pour dishwasher detergent into the
salt compartment. This will damage the wa-
C
over for the salt compartment

5
Safet
y
G
eneral
:
• Read and keep the directions
f
or use
!
• Installation o
f
water, drainage and electric
-
ity must be carried out by a quali
fi
ed pro
f
es-
s
ional
.
• Do not use the dishwasher
f
or any pur-
poses other than those stated in this User
G
uide.
• Do not load the dishwasher with anything
o
ther than dishes.
•
O
nly use
dis
hw
as
h
e
r
d
etergent!
• Place knives and other sharp objects so
t
hat they cannot cause injury to people or
d
amage the dishwasher.
• Damaged mains cables must only be re-
placed by an authorised pro
f
essional.
• By installation o
f
the unit the supply cord
s
hall be easily accessible.
• The door should not be le
f
t in the open
position since this could present a tripping
h
azard.
• The appliance is not intended
f
or use by
y
oung children or in
fi
rm persons without su
-
pervision
.
Never put dishes containing solvent residue
in the machine due to risk o
f
explosion.
Neither may dishes containing ashes, wax
o
r lubricating grease be washed in the dish-
w
asher
.
Winter storage/
T
ranspor
t
/
/
S
tore the machine away from frost.
A
void long journeys in extreme cold. Trans-
port the machine in an upright position or
lying on its back
.
O
verfill
p
rotectio
n
T
he over
fi
ll protection starts pumping out
wa
t
e
r
a
n
d
c
lo
ses
o
ff
th
e
w
a
t
e
r int
a
k
e
i
f
th
e
machi
n
e’s
w
a
t
e
r
le
v
el
e
x
ceeds
t
he
norm
al
level. I
f
the over
fi
ll
p
rotector starts u
p
, shut
off
the water supply and phone
f
or
se
rv
ice
.
S
ee “Fault indications” on page 26
.
C
leanin
g
When cleanin
g
around the ed
g
e of the
d
oor,
u
se on
l
y a s
ligh
t
l
y
d
ampene
d
c
l
ot
h
.
D
o not
u
se a spra
y
b
ott
l
e
!
W
ater can penetrate
i
nto t
h
e
l
oc
k
an
d
come
i
nto contact w
i
t
h
t
h
e
e
l
ectr
i
ca
l
components
.
Packa
gi
n
g
mater
i
al
s
S
ort at source in accordance with the rec
-
o
mmendations o
f
your local authority
.
S
crappin
g
Wh
e
n th
e
tim
e
c
om
es
f
or th
e
m
ac
hin
e
to
b
e scrappe
d
,
i
t s
h
ou
ld
i
mme
di
ate
l
y
b
e ren
-
d
ere
d
unusa
bl
e.
R
emove t
h
e p
l
ug an
d
cut
off
the lead as short as
p
ossible.
C
ontact your refuse collection department
o
r your local authority
f
or in
f
ormation on the
correct way to dispose o
f
the machine
!
T
h
e
m
ac
hin
e
i
s
m
a
n
ufac
t
u
r
ed
a
n
d
l
abe
ll
ed
f
or recyc
li
ng
.

6
Child safet
y!
C
hild-safe dishwashin
g
•
Always close the door and start the pro-
gram immediately once the dishwasher de
-
tergent has been added
.
•
Keep children away
f
rom the dishwasher
w
h
en
i
t
i
s open.
Th
ere m
i
g
h
t
b
e t
h
e rema
i
ns
o
f
dishwasher detergent present!
•
Do not allow children to use or play with
the dishwasher. Always take particular care
when the door is o
p
en.
Protect
y
our ch
i
ldren!
-
Dishwasher detergent is corrosive
!
WARNIN
G
: Dishwasher detergents are
s
trongly alkal
i
ne. They can be extremely
dangerous i
f
swallowed. Avoid contact
w
i
th sk
i
n and eyes and keep ch
i
ldren
away
f
rom the dishwasher when the door
i
s o
p
en.
C
heck that the detergent compartment is
empty a
f
ter completion o
f
the wash cy
-
c
l
e
.
S
tore dishwasher detergent and rinse aid out
of the reach of children!
S
hould dishwasher
d
etergent
b
e swa
ll
owe
d
,
i
mme
di
ate
l
y
d
r
i
n
k
one or two glasses o
f
milk or water. Do not
a
ttempt to induce vomiting.
C
ontact a doc-
tor!
S
hould dishwasher detergent come into
c
ontact with the eyes, rinse
(
for at least 15
minutes
)
with co
p
ious amounts of water.
C
hild-safe button lock
T
o prevent c
hild
ren start
i
ng t
h
e mac
hi
ne,
y
ou can act
i
vate a
b
utton
l
oc
k
.
P
ro
ceed
as
f
ollow
s:
1
.
S
witch off the dishwasher at the main
s
w
i
t
ch
.
2
.
H
o
ld
i
n t
h
e
T
emperature an
d
D
ry
i
ng
b
uttons
,
an
d
at t
h
e same t
i
me sw
i
tc
h
on
the
m
ai
n
s
w
i
t
ch
.
Th
e temperature,
d
ry
i
ng an
d
start sym
b
o
l
s
w
ill then
fl
ash. Release the Tem
p
erature
an
d
D
ry
i
ng
b
uttons.
3
.
P
ress t
h
e
P
rogram
b
utton unt
il
t
h
e
di
sp
l
ay s
h
ows 1 w
i
t
h
a
k
ey sym
b
o
l
a
l
ongs
id
e
i
t.
4
. Press the
S
tart
/S
to
p
button to store the
s
ett
i
ng.
T
o
d
eact
i
vate t
h
e
b
utton
l
oc
k
temporar
il
y
wh
en you want to start t
h
e mac
hi
ne,
p
ress t
h
e
T
emperature an
d
D
ry
i
ng
b
uttons
si
mu
l
taneous
l
y.
Th
e
b
utton
l
oc
k
w
ill
t
h
en
automatically switch on again a
f
ter 3
mi
n
u
t
es
.
T
o
d
eact
i
vate t
h
e
b
utton
l
oc
k
a
l
toget
h
er,
u
se the same
p
rocedure as
f
or activation.
Wh
en t
h
e
di
sp
l
ay s
h
ows 0 an
d
k
ey
s
ymbol goes out, the button lock has been
deac
tiv
a
t
ed.
Ad
v
ice
!
Y
o
u
ca
n r
ead
mor
e
ab
o
u
t t
his
i
n t
he
S
ettin
g
s chapter.

7
Pa
rt
s
o
f th
e
d
i
s
hw
as
h
e
r*
T
echnical in
f
ormatio
n
Height
W
i
d
th
D
e
p
t
h
W
eight
C
apacity*
*
W
ater
p
ressur
e
C
onnection
Ma
x
A
ccess
ori
es
*
Details may di
ff
er dependin
g
on model and mar
-
ket
!
*
*In accordance with standard, A
S/
NZ
S
200
7
*
**
S
ee type plate.
*
***Without fitted wooden door.
860-910 m
m
596 m
m
550 mm****
4
8 kg
/
51 kg with
w
ater so
f
tener
*
14 place settings
0
.03-1.0 MPa (0.3–10 kp
/
cm
2
)
1-phase, 230 V, 50Hz 10
/
10A***
1900 W***
W
ork surface,
S
ide panels, Anti-tilt
1. Knife basket
2. Upper basket
3
. Spray arm
s
4
. Lower basket
5. Cutler
y
basket
6. Rinse aid dispenser
7
.
D
ishwasher detergent compartment
8
. Main switc
h
9
. Program panel
1
0
. Filte
r
11. T
y
pe plate
*
Details may differ
1
3
4
6
7
8
9
10
2
11
5

8
Th
e
b
as
k
ets
*
U
pp
er baske
t
L
ower
b
as
k
et
C
utler
y
basket
K
nife baske
t
1. Wine glass shel
f
2. Folding glass support
3. Divided cu
p
shelve
s
4. Kni
f
e sto
p
5. Folding plate stand
6. Wine glass shelf (not all models)
7.
Folding hatch
8. Kni
f
e baske
t

9
PC-UPGRADEPC-UPGRADE
P C - U P G R A D EP C - U P G R A D E
MENUMENU
M E N UM E N U
SETSET
SETSET
STARTSTART
S T A R TS T A R T
STOPSTOP
S T O PS T O P
PROGPROG
P R O GP R O G
1
. Program selecto
r
2
. Display window
3.
S
et
Control pane
l
D
ispenser
1
3
4
5
2
1.
C
ompartment for main wash detergent
2.
C
ompartment for pre-wash detergent
3. Re
fi
ll indicator
r
inse aid (not all models)
4. Rinse aid cover
5. Detergent compartment cover
4. Start/sto
p
5
.
M
enu
1
2
3
4
5

10
B
e
l
ow are step
by
step
i
nstruct
i
ons to
h
e
l
p
y
ou
a
c
hi
eve t
h
e
b
est poss
ibl
e
di
s
h
was
hi
n
g
resu
l
ts.
L
oa
d
t
h
e
b
as
k
ets correct
ly!
Thanks to Super Cleaning System™, you
do not need to rinse the dishes under run-
ning water. Convenient and environmentally
friendly! Scrape off lar
g
e food particles be-
fore loading the machine.
Place glasses, cups, bowls, side plates and
saucers in the upper basket, wine glasses
should be placed on the wine glass shelf,
a
nd knives in the knife stand if present.
.
NB!
Ensure that all soiled surfaces face inwards
or downwards!
Place dinner plates, side plates, serving
dishes, saucepans and cutlery (in the cut-
l
er
y
basket) in the lower basket.
S
tand the cutler
y
with handles downward
a
nd as spread out as possible. Ensure that
spoons are not resting inside each other.
D
o not put cutlery made of different mater-
i
als, e.g. silver and stainless steel, in the
same compartment (risk of stains).
C
heck that the spray arms are able to move
freely.
S
ee Fragile
d
ishes, i
f
you want to wash arti
-
c
les that may be
f
ragile
.
D
eter
g
ent
d
osa
g
e
D
eter
g
ent should be dispensed in ac
-
c
ordance with the water’s hardness level.
Follow the dosa
g
e instructions on the deter
-
g
ent packa
g
e. If your dishwasher is fitted with
a
water softener, dispense as for soft water
.
Pour the dishwasher deter
g
ent into the
dishwasher deter
g
ent compartment. There
is one compartment for pre-wash and one
for main wash, see Dispenser. Phone the
dishwasher deter
g
ent manufacturer if you
have any questions re
g
ardin
g
the deter
g
ent.
Di
s
hw
as
h
e
r t
ab
l
e
t
s
Halve the tablet if it is difficult to close the
dispenser cover.
3
in1
/
C
ombined deter
g
ent
g
NB!
Read through the directions
f
or these prod-
ucts care
f
ully. I
f
anything is unclear, contact
the dishwasher detergent manu
f
acturer
.
CAUTION!
Protect your children!
- Dishwasher deter
g
ent is corrosive
!
g
NB!
O
nly use
dis
hw
as
h
er
detergent
H
a
n
d
a
n
d
C
lothe
s
washing detergent can
-
not be used as the build-up o
f
f
oam may
damage or impede the machine’s per
f
orm-
a
nce
.
Basic Cours
e

11
P
ress t
h
e power main switch
S
elect program
S
elect a program by pressing the program
button one or more times until the re
q
uired
program is displayed
.
Au
t
o
w
as
h
T
h
e
d
i
s
hw
as
h
e
r
de
t
ec
t
s
how
s
oil
ed
th
e
d
ishes are and ad
j
usts water consumption
and temperature accordingly.
H
eavy wash
T
he Heavy Wash program should be used
f
or heavily soiled dishes, e.g. saucepans,
pots and gratin dishes. I
f
there is still space
in the machine a
f
ter loading such items, you
can add
p
lates etc.
M
i
x
ed
w
as
h
T
his dishwashing program is used
f
or lightly
s
oil
ed
d
i
s
h
es
in th
e
upp
er basket and heav
-
ily soiled dishes in the lower basket
.
U
pp
er basket was
h
I
f
you only have cups and glasses in the up-
per basket which require washing, you can
u
se this program.
L
o
w
e
r
bas
k
e
t w
as
h
When you only want to wash plates and
cutlery in the lower basket you can use the
low
e
r
bas
k
e
t w
as
h
.
N
o
rm
a
l w
as
h
Used
f
or washing normally soiled dishes
s
uch as plates, serving dishes, cups and
glasses, etc.
F
or washing normally soiled mixed loads
use
th
e
Normal wash program
w
ith
6
5°
C
a
n
d
n
ormal dry
i
ng
.
T
o save more water and energy use 45°
C
and economy drying.
D
e
l
ica
t
e
w
as
h
I
f
the dishes are not heavily soiled, you
can select Delicate wash. This program is
intended
f
or glass and china which has just
been used and there
f
ore does not need
s
uch a power
f
ul program.
Frag
i
le d
i
shes
can be washed using the Delicate wash
program. Deselect the drying heat i
f
you
w
ant to be particularly careful.
S
ee also the
chapter on Fragile dishes.
Q
uick wash
S
elect
Q
uick Wash if the dishes are very
lightly soiled. This program is used
f
or very
lightly soiled glass and china, e.g. co
ff
ee
cups.
R
i
nse & Hol
d
F
or rinsing the dishes while waiting
f
or the
m
achine to be
fi
lled
.
R
i
nse & Dr
y
T
he Rinse & Dry program comprises a rinse
w
ith heat and drying. It is a suitable pro
-
gram i
f
you are planning to make jam and
w
ant to rinse and warm previously wash
glass jars
.
If you wish to use additional options,
continue to point 5.
O
therwise you can
n
ow start the mach
i
ne, see po
i
nt 6.

12
S
elect option
s
T
o select options press the Menu
button one or more times until the desired
option appears in the display window
.
D
ela
y
ed start
I
f
you want the machine to start later, select the
delayed start option.
1. By pressing the
S
et button, you can select
a
time delay o
f
between 0.5 – 24 hours. The
display window shows e.g. 1:30 and a clock
symbol will appear when you select a one and
a
hal
f
hour time delay.
2.
C
onfirm the selection by pressing the Menu
button and make further choices or
p
ress
S
tart.
L
oading the basket
s
If
y
ou have a few dishes that need to be
was
h
e
d
,
y
ou can c
h
oose on
ly
to was
h
t
h
e up-
p
er or
l
ower
b
as
k
et.
I
t
i
s a
l
so
p
oss
ibl
e to se
l
ect
a
mixed wash with a few dishes in the u
pp
er
b
as
k
et an
d
a
l
ar
g
e amount
i
n t
h
e
l
ower
b
as
k
et.
1. Press the
S
et button to select ”All bas
-
kets”, “U
pp
er basket”, “Lower basket” or
“Mixed baskets”.
2. Confirm the selection by pressin
g
the
Menu button and make further choices or
press Start
.
Tem
p
erature
Th
e temperature can
b
e c
h
ange
d
i
n a
ll
pro-
grams except t
h
e
A
uto was
h
,
Ri
nse
&
H
o
ld
a
n
d
Ri
nse
&
D
ry programs.
1. By pressing one or more times on the
S
et
b
utton, you can a
d
vance to t
h
e
d
es
i
re
d
tem-
p
erature,
f
rom co
ld
(
incoming water temp.
)
,
3
0°
,
40°
,
45
,
50°
,
55°
,
60°
,
65°
,
70°
,
75°
C
.
In the Delicate wash and
Q
uick wash
p
ro-
grams you can on
l
y se
l
ect temperatures up
to 60°
C
.
2.
C
onfirm the selection by pressing the
M
e
n
u
bu
tton
a
n
d
m
a
k
e
fu
rth
e
r
c
hoi
ces
or
p
ress
S
tart
.
Options
D
ry
i
n
g
You can select di
ff
erent drying time lengths de-
pending on how dry you want your dishes to be
when the program has
fi
nished. The tempera-
ture can be selected in all programs except
the Auto wash
,
Rinse & Hold and Rinse &
D
ry programs
.
1. By pressing the
S
et button you can select
‘
S
hort drying’, ‘Eco drying’ (the drying sym
-
b
ol i
s
s
hown with
a
wavy line) or ‘Normal dry
-
ing’ (the drying symbol is shown in the form
o
f
t
hree wavy lines) .
2.
C
onfirm the selection by pressing the
M
e
n
u
bu
tton
a
n
d
m
a
k
e
fu
rth
e
r
c
hoi
ces
or
p
ress
S
tart
.
E
x
p
ress
B
y se
l
ect
i
n
g
t
h
e
E
xpress opt
i
on, t
h
e was
h
-
i
n
g
t
i
me
i
s re
d
uce
d
an
d
t
h
e was
h
temperature
lowered b
y
10°C. Cannot be used in the Quic
k
was
h
or
Ri
nse
&
H
o
ld
pro
g
rams.
1. Usin
g
the Set button you can select Express
O
ff
(
the E symbol
g
oes out
)
or
O
n
(
the E
s
y
mbol comes on
)
.
2. Confirm the selection by pressin
g
the
M
e
n
u
bu
tton
a
n
d
m
a
k
e
f
u
rth
e
r
c
hoi
ces
or
p
ress Start
.
Super rinse
T
he Super rinse option adds two extra rinses.
T
he
S
u
p
er rinse o
p
tion can be used in all
p
ro
-
g
rams except the Auto wash, Quick wash, Rinse
&
H
o
ld
an
d
Ri
nse
&
D
ry pro
g
rams.
1
. Press the
S
et button to select
S
u
p
er rinse
O
n
(
the Super rinse s
y
mbol comes on) or Super
r
i
n
se
O
ff (the Super rinse symbol
g
oes out).
2
.
C
onfirm the selection by pressing the Menu
b
utton and make further choices or
p
ress
S
tart
.
C
ool touc
h
I
f
you want the dishes to be cooler
f
or unload-
ing, you can select the
C
ool Touch option.
1. Press the
S
et button to select
C
ool Touch
O
n (the
C
ool Touch symbol comes on) or
C
ool Touch
O
ff
(
the
C
ool Touch symbol goes
out
)
.
2.
C
onfirm your selection by pressing on the
Menu button and pressing
S
tart
.

1
3
E
co-d
i
shwash
i
ng
O
nly wash with a full loa
d
P
ut off dishwashin
g
until the machine is full,
an
d
i
n t
hi
s way you w
ill
save ener
g
y.
W
as
h
at a
l
ower temperature
If the dishes are only li
g
htly soiled you can
s
elect a lower temperature
.
S
elect option Eco dryin
g
T
o save more energy, use Economy dry-
ing. You will get a better drying result i
f
you
leave the door slightly open a
f
ter the end o
f
t
he program.
Do not rinse before dishwashin
g
Y
o
u
d
o not n
eed
to rin
se
th
e
d
i
s
h
es
be
for
e
l
oa
di
n
g
t
h
em
i
nto t
h
e mac
hi
ne.
J
ust scrape
o
ff lar
g
e food particles before loadin
g
the
machi
n
e.
C
hoose environmentally-
f
riendly
di
shwasher deter
g
en
t
R
ead
e
nvironm
e
nt
a
l
dec
l
a
r
a
tion
s
on th
e
package!
C
onnect to col
d
w
a
t
er
F
or best
p
erformance it is recommended
tha
t
c
onn
ec
t
i
on
is
to
c
o
ld
w
a
t
e
r
.

14
S
pecia
l
settin
g
s
Bu
zz
e
r v
olu
m
e
I
f
you wish, the machine will emit a buzzer
signal to let you know when it is
fi
nished.
Ad
j
ust the volume with the
S
et button.
S
e
-
lect from 1
,
2
,
3
,
4
,
5
,
6
,
7
,
8
,
9 and 0 =
O
ff.
C
ontinue with the Menu button to make fur-
ther ad
j
ustments or press
S
tart
/S
top.
W
ater hardness
(
machine with
water softener
)
NB!
Salt dis
p
ensers are not used in Australia or
New Zealand machines
.
Phone your local wa-
t
e
r
b
o
a
r
d
to
c
h
ec
k th
e
water hardness in your
a
r
ea
. Th
e
m
ac
hin
e
i
s
se
t
f
or low w
a
t
e
r h
a
r
d-
ness on delivery
.
S
et the desired hard-
ness with the
S
et but-
ton.
S
elect from 1
,
2
,
3
,
4
,
5
,
6
,
7
,
8
,
9 and 0
=
witho
u
t w
a
t
e
r
s
o
f
t
e
n-
e
r
as
w
e
ll
as
m
ac
hin
es
with w
a
t
e
r
s
o
f
t
e
n
e
r
a
n
d
low h
a
r
d
n
ess
.
C
ontinue with the Menu button to make fur-
ther ad
j
ustments or press
S
tart
/S
top.
T
em
p
erature
Usin
g
the Set button, choose if the t
e
m
-
perature is to be displa
y
ed in °C or °F. Con
-
tin
ue
with th
e
M
e
n
u
bu
tton to m
a
k
e
f
u
rth
e
r
a
d
j
ustments or press Start/Stop.
No. ˚dH ˚fH
00-5 0-9
16-8 9-14
29-11 15-20
312-14 21-25
415-19 26-34
520-24 35-43
625-29 44-52
730-39 53-70
840-49 71-88
950+ 89+
L
anguage,
C
hild lock, Buzzer
v
olume
,
Water hardness
,
Temperature, Machine in
f
ormation,
R
eset mach
i
ne to the or
i
g
i
nal
setting
s
You will probably only need to adjust these
settings when the machine is new or if you
intend to adapt pro
g
rams
.
To get to the
S
pecial settings
1.
Wh
en you
h
ave se
l
ecte
d
t
h
e pro
g
ram an
d
a
n
y
option, press the Menu button until ‘Spe-
ci
a
l
sett
i
n
g
s
’
appears
i
n t
h
e
di
sp
l
ay
.
2. Press the Set button and
y
ou will now be
i
n spec
i
a
l
sett
i
n
g
s.
3
.
P
ress t
h
e
M
enu
b
utton unt
il
t
h
e
d
es
i
re
d
sett
i
n
g
appears
i
n t
h
e
di
sp
l
ay
.
L
an
g
ua
ge
Usin
g
the
S
et button, select the lan
g
ua
g
e
you wish to use.
C
ontinue using the Menu
button and adjust other settings if required,
or press Start/stop if
y
ou want to start the
machine.
C
hild loc
k
S
elect ‘
O
n’ with the
S
et button to activate
the child lock.
C
ontinue with the Menu but-
ton to make
f
urther ad
j
ustments or press
S
tart
/S
to
p.
To temporarily deactivate the child lock
when starting the machine, press
S
et and
the Menu buttons simultaneously.
Th
e c
hild
l
oc
k
comes
b
ac
k
on automat
i
ca
ll
y
af
t
e
r thr
ee
min
u
t
es.

1
5
Machine informatio
n
B
y pressin
g
the Set button, you can see
h
ow m
uch
w
a
t
e
r t
he
m
achi
n
e
used
t
he
las
t
ti
me
i
t was o
p
erate
d
.
Y
ou can a
l
so see
h
ow
m
an
y
t
i
mes
i
t
h
as
b
een use
d
s
i
nce
i
t was
ne
w
.
T
o exit Special settin
g
s
P
ress the Menu button or Start/Stop.
Resett
i
ng the mach
i
n
e
S
witch off machine at the main switch. Hold
in the Program button while pressing the
ma
in
s
wit
c
h Th
e
m
ac
hin
e
will r
ese
t it
se
l
f
to
t
he original settings (with the exception of
w
ater hardness and language).

16
Press
S
tart
The
dish
w
ashe
r w
ill
now
s
t
a
rt.
I
t m
a
n
-
ages t
h
e ent
i
re was
h
automat
i
ca
ll
y.
E
nsure
th
at t
h
e
d
oor
i
s proper
l
y c
l
ose
d
or t
h
e ma-
chi
n
e
w
ill
not
s
t
a
rt
.
T
he display shows ‘Program started’. I
f
the
d
oor is open or not properly closed, ‘
C
lose
d
oor
’
appears
i
n t
h
e
di
sp
l
ay
.
C
han
g
in
g
option
s
I
f you wish to chan
g
e the pro
g
ram after
h
avin
g
started the machine, press the Start
/
S
top button for three seconds. Then select
a new pro
g
ram and press the Start/Stop
b
utton a
g
a
i
n.
Do
y
ou want to load more dishes
?
C
arefully open the door; the machine will
s
tops automatically, put in the dishes, close
t
he door and the dishwasher will continue
f
rom where it le
f
t o
ff
.
I
f th
e
m
ac
hin
e
i
s
s
wit
c
h
ed
o
ff
a
t
the
main switch
(
or in the event of a power cut
)
before the
w
as
hi
n
g
pro
g
ram
h
as
b
een comp
l
ete
d
, t
h
e
i
nterrupte
d
pro
g
ram w
ill
cont
i
nue w
h
en t
h
e
p
ower comes
b
ac
k
on.
NB!
I
f the power is switched off, or if the door is
o
pen for more than 2 minutes durin
g
dryin
g
,
th
e pro
g
ram
i
s
i
nterrupte
d
.
After dishwashin
g
W
hen the pro
g
ram is finished, End appears
next to the Start/Stop button. Should
y
ou
wi
s
h
to
di
sconnect t
h
e current comp
l
ete
ly
,
j
ust switch off at the main switch. Turn off
t
he water ta
p
if the machine is not to be
used for an extended period, e.
g
. durin
g
h
o
lid
a
y
s.
7

1
7
F
ra
g
ile dishes
A number of household
g
oods are not suit-
able for machine washin
g
. There can be
man
y
reasons for this. Certain materials
cannot w
i
t
h
stan
d
i
ntense
h
eat, ot
h
ers can
b
e
d
ama
g
e
d
b
y t
h
e
di
s
h
was
h
er
d
eter
g
ent
.
F
ra
gi
le decorat
i
on
China with decoration on top of the glaze
(the article has a rough feel) should not be
machine washed.
C
rystal
/
glass
Place the articles so that they do not knoc
k
toget
h
er
d
ur
i
ng t
h
e was
h
.
U
se t
h
e
l
owest
p
ossible wash tem
p
erature and the shortest
p
ossible program. No Drying Heat! Antique
and very
f
ragile items should not be ma
-
c
hin
e
w
as
h
ed
.
G
lass which is machine washed at high
temperatures can in time develop a grey
fi
lm whi
c
h
ca
nnot
be
r
e
mov
ed
. W
as
h
fi
n
e
gl
ass at t
h
e
l
owest temperature an
d
w
i
t
h
a
l
ow dosage o
f
dishwasher detergent.
S
ilver
S
ilver and stainless items should not come
i
nto contact w
i
t
h
eac
h
ot
h
er as t
h
e s
il
ver
can
di
sco
l
our.
C
utlery with glued handle
s
C
ertain t
y
pes of adhesive cannot withstand
m
ac
hi
ne was
hi
n
g
.
I
n suc
h
cases t
h
e
h
an
-
dles
ca
n
c
om
e
l
oo
se.
W
oo
d
Wooden articles should onl
y
be machine
w
ashed if the
y
are labelled as dishwasher
proof
.
Al
u
m
i
n
iu
m
A
luminium can be dulled by machine wash
-
ing. However, good quality aluminium
s
auce
p
ans can be machine washed, al-
t
hough a reduction in lustre should be ex-
p
ected
.
Plasti
c
C
ertain t
y
pes of plastic cannot withstand
th
e
high
temperature
g
enerate
d
i
n mac
hi
ne
di
s
h
was
hi
n
g
.
T
o protect plast
i
c art
i
cle
s
Select pro
g
ram with low temperature, 50°C
and Eco dryin
g
.

1
8
S
tandard pro
g
ram
P
rogra
m
T
em
p
°
C
D
ryin
g
P
r
e-
was
h
M
a
in
wash °c
Rinse
s
F
in
a
l
rinse °
C
E
nergy
kWh
C
old
water
(
20°
C)
E
nergy
kWh H
o
t
water
(
60°
C)
L
itre
s
M
in*
*
(
appr.
)
C
old wate
r
Min**
(
appr.
)
Hot
w
a
t
er
A
u
t
o
w
ash
-
-
0/1
40
-
60
2/3
60
0
.
8
-
1
.
4
0
.7-
1
.
0
9
-
15
115
-
185
95
-
160
Heavy was
h
70 Normal
2
70
370 1.
7
0.
9
18
1
9
5
1
7
0
Normal wash
6
5 Normal
2
65
2
7
0
1.
5
0
.
8
15
1
4
0
1
2
0
N
o
rm
a
l w
as
h*
45
E
co
1
45
2
45
0
.
7
0
.
3
13
95
85
Upper basket
45
E
co
1
45
2
45
0
.
6
0
.
3
10
90
75
D
e
licat
e
wash
55
Ec
o
-
55
2
55
1.
0
0.
6
9
1
0
5
90
Q
uick was
h
55 Ec
o
-
5
5
2
-
0
.
7
0.
5
8
8
5
75
Q
uick was
h
30
E
co
-
30
2
-
0
.
1
0
.
1
8
20
15
Rinse & dry
-
Normal
-
-
1
55
0.
5
0.
4
3
45
4
0
Rinse & hol
d
-
1
-
0
.
0
1
0
.
0
1
3
4
4
*
Tested pro
g
ram for
S
tandard A
S/
NZ
S
2007.1:200
3
*
* All quoted times are only indicative, fluctuations may occur.
Due to water temperature, water pressure, variations in voltage etc.
Hot water connection approx. 60°
C.
C
old water connection a
pp
rox. 15°
C.

1
9
When you have selected program and op
-
tion, the display shows the length o
f
time
the program took the last time it was used.
When you have started the machine, the
display window shows an approximate du-
r
a
t
i
on.
This time can vary a little
f
rom one occasion
to another depending on the temperature
o
f
the inlet water
,
the amount o
f
dishes
,
the
a
mbient tem
p
erature, etc
.
D
uring the time the program is operating,
t
h
e rema
i
n
i
ng program t
i
me
i
s s
h
own
i
n t
h
e
window. The remaining time is shown e.g.
a
s 1:02
,
which means that 1 hour and 2
minutes o
f
the program remain.
NB!
D
urin
g
the first run of each pro
g
ram, the
rema
i
n
i
n
g
t
i
me
di
sp
l
ay may
b
e m
i
s
l
ea
di
n
g
a
s the machine is estimatin
g
the time. If
t
h
e pro
g
ram ta
k
es
l
on
g
er t
h
an expecte
d
,
i
t
displays 1 minute until the pro
g
ram is fin-
ished. There is no need to call for service it
i
s mere
ly
an
i
n
di
cat
i
on t
h
at t
h
e mac
hi
ne
i
s
wor
ki
n
g
correct
l
y.
The displa
y

2
0
C
leaning
T
h
e
d
i
s
hw
as
h
e
r’
s
inn
e
r
c
ont
a
in
e
r i
s
m
ade
of
stainless steel and is kept clean through
n
ormal use. However, i
f
you have calci
f
erous
(
hard
)
water, lime de
p
osits can form in the
d
ishwasher. In this case
,
run a normal wash
program with two tablespoons o
f
c
itric acid in
t
he dishwasher detergent compartment.
C
oarse filte
r
T
he coarse
fi
lter collects lar
g
e
f
ood particles
w
hich cannot
p
ass the out
fl
ow
p
um
p
. Li
f
t out
and empt
y
the coarse
fi
lter as necessar
y
.
Don’t
f
or
g
et to replace it!
Fine
fi
lter
A
fter 300 dishwashin
g
cycles, ‘Clean filter’
appears in the displa
y
(
applies onl
y
to certain
m
odels and markets
)
.
1
. The fine filter is removed by first turnin
g
the
t
ubular strainer of the filter anti-clockwise and
t
hen liftin
g
it strai
g
ht up.
2
. Clean with a dishwashin
g
brush. Ensure
th
at t
h
e e
dg
es are proper
l
y sea
l
e
d
w
h
en re-
placin
g
the fine filter.
Th
e messa
g
e
i
s cance
ll
e
d
b
y press
i
n
g
on one
o
f the buttons or the main switch
.
Dra
i
n
p
um
p
T
he
p
um
p
can be accessed
f
rom the inside
of
the machine.
1
. Always remove the plug
f
rom the wall
s
ocket be
f
ore you clean the pump.
2
. Remove the coarse screen
fi
rst by press-
ing together the two lugs and pulling the
s
creen u
p
wards.
3. Now loosen the tubular
p
art o
f
the screen
by turning it anticlockwise and removing the
fi
ne screen.
4. Finally remove the small adapter to the
le
f
t o
f
the bottom drain.
5
. It’s possible, by inserting your
fi
nger in
t
he hole, to turn the
p
um
p
im
p
eller and re
-
m
ove any blockage.
6
. Re
fi
t the adapter and screens.
7. Insert the plug in the wall socket
.
Cleanin
g
Pum
p
pl
u
g
C
oarse
filte
r
T
ubular
stra
i
ne
r
Fi
ne
fi
lte
r
Table of contents
Other Asko Dishwasher manuals

Asko
Asko DW20.1 User manual

Asko
Asko DBI2332LIB User manual

Asko
Asko D3432 User manual

Asko
Asko DWCBI241.S.AU User manual

Asko
Asko DFI646B/1 User manual

Asko
Asko DFI756MUXXL User manual

Asko
Asko DBI233IB User manual

Asko
Asko 1755 Operating instructions

Asko
Asko D5122 User manual

Asko
Asko D5894XXLFI User manual