manuals.online logo
Brands
  1. Home
  2. •
  3. Brands
  4. •
  5. Asko
  6. •
  7. Dryer
  8. •
  9. Asko T741C User manual

Asko T741C User manual

Other manuals for T741C

1

Other Asko Dryer manuals

Asko T720 User manual

Asko

Asko T720 User manual

Asko TD70 User manual

Asko

Asko TD70 User manual

Asko T761 User manual

Asko

Asko T761 User manual

Asko T744C User manual

Asko

Asko T744C User manual

Asko T411VD*W*U User manual

Asko

Asko T411VD*W*U User manual

Asko PROFESSIONAL TDC112CS User manual

Asko

Asko PROFESSIONAL TDC112CS User manual

Asko T721 User manual

Asko

Asko T721 User manual

Asko TDC145V User manual

Asko

Asko TDC145V User manual

Asko T783 User manual

Asko

Asko T783 User manual

Asko 7304 Operating instructions

Asko

Asko 7304 Operating instructions

Asko T760 User manual

Asko

Asko T760 User manual

Asko 7003 Operating instructions

Asko

Asko 7003 Operating instructions

Asko T744 Assembly instructions

Asko

Asko T744 Assembly instructions

Asko T700 Series User manual

Asko

Asko T700 Series User manual

Asko T721 User manual

Asko

Asko T721 User manual

Asko T884XL User manual

Asko

Asko T884XL User manual

Asko T611VU.W.U User manual

Asko

Asko T611VU.W.U User manual

Asko T208C.W.AU User manual

Asko

Asko T208C.W.AU User manual

Asko TLS752 XXL User manual

Asko

Asko TLS752 XXL User manual

Asko TD75.13 Series User manual

Asko

Asko TD75.13 Series User manual

Asko DC 7171 User manual

Asko

Asko DC 7171 User manual

Asko PROFESSIONAL TDC111VG User manual

Asko

Asko PROFESSIONAL TDC111VG User manual

Asko Professional TDC145HPS User manual

Asko

Asko Professional TDC145HPS User manual

Asko TDC Assembly instructions

Asko

Asko TDC Assembly instructions

Popular Dryer manuals by other brands

Whirlpool WED9270XL2 parts list

Whirlpool

Whirlpool WED9270XL2 parts list

Kleenmaid KED2000 Repair instructions

Kleenmaid

Kleenmaid KED2000 Repair instructions

SPI Supplies SPI-DRY Operation manual

SPI Supplies

SPI Supplies SPI-DRY Operation manual

Amana NGD5800DW Use & care guide

Amana

Amana NGD5800DW Use & care guide

Bosch WTG86402GB Installation and operating instructions

Bosch

Bosch WTG86402GB Installation and operating instructions

Maytag MED4200BW0 installation instructions

Maytag

Maytag MED4200BW0 installation instructions

ffuuss eos user manual

ffuuss

ffuuss eos user manual

KitchenAid 53-3498 installation instructions

KitchenAid

KitchenAid 53-3498 installation instructions

Schulthess Spirit topLine TW 8340 operating instructions

Schulthess

Schulthess Spirit topLine TW 8340 operating instructions

Whirlpool LGR4624BW0 parts list

Whirlpool

Whirlpool LGR4624BW0 parts list

World Dryer AirMax D M5-972A manual

World Dryer

World Dryer AirMax D M5-972A manual

Alliance Laundry Systems ADEE9BSS user guide

Alliance Laundry Systems

Alliance Laundry Systems ADEE9BSS user guide

Miele PDR 910 EL Operating and installation instructions

Miele

Miele PDR 910 EL Operating and installation instructions

Amana NGD5800TQ0 parts list

Amana

Amana NGD5800TQ0 parts list

Bosch WTA79200GB Installation and operating instructions

Bosch

Bosch WTA79200GB Installation and operating instructions

AEG TR838P4OB user manual

AEG

AEG TR838P4OB user manual

Electrolux EW2H328R2 user manual

Electrolux

Electrolux EW2H328R2 user manual

Dawlance Spinner DS 6000 C owner's manual

Dawlance

Dawlance Spinner DS 6000 C owner's manual

manuals.online logo
manuals.online logoBrands
  • About & Mission
  • Contact us
  • Privacy Policy
  • Terms and Conditions

Copyright 2025 Manuals.Online. All Rights Reserved.

Heavy
Normal
Delicate
Iron dry
Timed dry
Air fluff
Programs
Power
Time set
Wrinkle free
Delay
Temperature
Signal
Quick cool-down
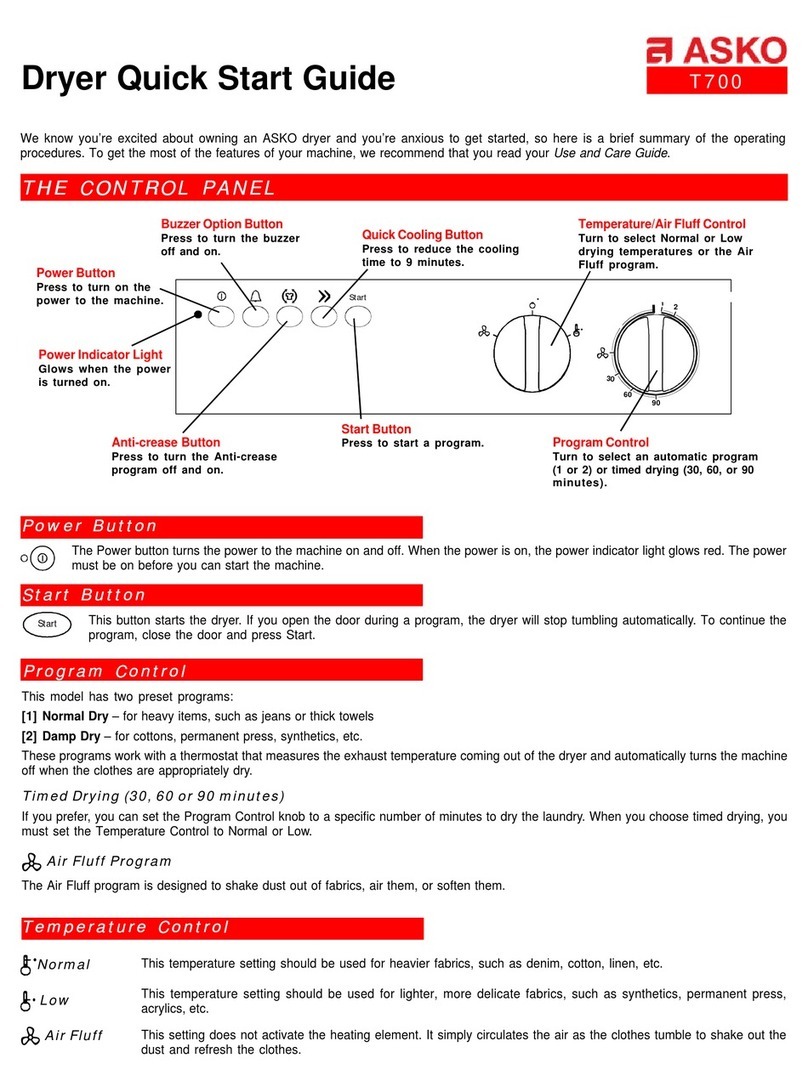
We know you’re excited about owning an ASKO dryer and you’re anxious to get started, so here is a brief summary of the operating
procedures. To get the most of the features of your machine, we recommend that you read your Use and Care Guide.
THE CONTRTHE CONTR
THE CONTRTHE CONTR
THE CONTROL POL P
OL POL P
OL PANELANEL
ANELANEL
ANEL
Dryer Quick Start Guide T741C
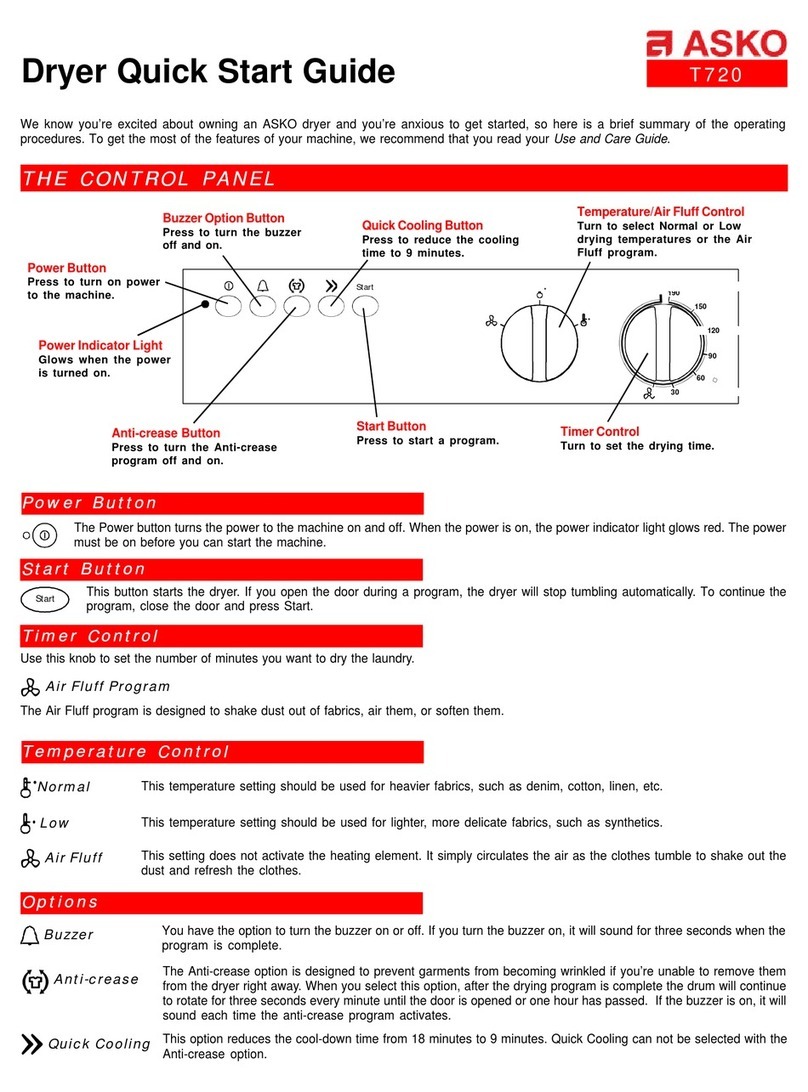
Power Button
Turns the power to the
machine off and on.
Power Indicator Light
Glows when the power
is turned on.
Power ButtonPower Button
Power Button
The Power button turns the power to the machine on and off. When the power is on, the power indicator light glows red. The power
must be on before you can start the machine.
StarStar
StarStar
Start Buttont Button
t Buttont Button
t Button
This button starts the dryer. If you open the door during a program, the dryer will stop tumbling automatically. To continue the
program, close the door and press Start.
ProgramsPrograms
ProgramsPrograms
Programs
Program Knob
Start
Start Button
Press to start a program.
StopButton
Press and hold for
approximately
3 seconds to cancel a
program.
OptionButtons
Program Definition
Heavy (P1) For items that are extremely difficult to dry, such as jeans and thick towels.
Normal (P2) Cotton w/out elastic and/or decorative trim.
Delicate (P3) Cotton with elastic and/or decorative trim, linen (white and colorfast).
Iron Dry (P4) Synthetics, polyester, cotton/polyester blends.
Timed Dry Any fabric that can be machine dried. (See note below.)
AirFluff This setting does not heat. It simply circulates the air as the clothes tumble to shake out
the dust and refresh the clothes. (See note below.)
Program Definition
LED
Window
Time Set – If you set the program knob to Timed Dry or Air Fluff, you must select the length of drying time by pressing this button until
the minutes you wish to dry the load displays.
Wrinkle-free – The Wrinkle-free option prevents garments from wrinkling if you’re unable to remove them right away. You can select
one, two, or three hours by pressing the Wrinkle-free button until the number of hours you prefer displays.
Delay – Press the button until the number of hours you wish to delay starting the machine displays on the LED. You can set delayed start
from 1 to 24 hours.
Temperature –You have two temperature options: Normal and Low. The Normal setting should be used for heavier fabrics, the Low
setting for lighter, more delicate fabrics. The indicator light will stay lit when Low is selected.
OptionsOptions
OptionsOptions
Options
QQ
QQ
QUICK STUICK ST
UICK STUICK ST
UICK STARAR
ARAR
ART PRT PR
T PRT PR
T PROCEDURESOCEDURES
OCEDURESOCEDURES
OCEDURES
T731
Art. No. 8077628 Rev. 01
OO
OO
OVERHEAVERHEA
VERHEAVERHEA
VERHEATING PRTING PR
TING PRTING PR
TING PROO
OO
OTECTIONTECTION
TECTIONTECTION
TECTION
ASKO dryers are designed with an overheat protection switch that will automatically turn the machine off if the temperature gets too high. The
machine will not start until it has cooled down sufficiently.
If the unit shuts down because of overheating, check that the lint filter , and the condenser unit are free of lint. These components need to be
cleaned on a regular basis. Additionally, the lint filter may need to be cleaned with warm, soapy water and a soft brush a few times a year to
ensure the filter screen is not blocked. Using dryer sheets (not recommended) can also cause this problem. See your Use and Care Guide
for instructions on how to clean these items.
Should the machine turn itself off because of overheating, it will not be possible to restart the unit until it has cooled down sufficiently. This
could possibly take up to thirty minutes.
To restart the unit once it has cooled down, press the “Start” button.
NOTE: If your dryer overheats frequently, it may not be vented properly or the room in which it is located may not have sufficient air circulation.

Contact your installer to have these issues checked out.
Signal – Press this button to set the signal to sound for three seconds when the program is complete. The indicator light will stay lit
when this option is on.
Quick cool-Down – Every program ends with a cool-down cycle that tumbles the clothes without heat for a few minutes to reduce
wrinkling. The Cool-down button lets you choose between a Normal cool-down cycle (15 minutes) or a Quick cool-down cycle (5 minutes).
The indicator light will stay lit when Quick Cooling is selected.
OptionsOptions
OptionsOptions
Options
QQ
QQ
QUICK STUICK ST
UICK STUICK ST
UICK STARAR
ARAR
ART PRT PR
T PRT PR
T PROCEDURESOCEDURES
OCEDURESOCEDURES
OCEDURES
T731
1. Press the Power Button. The Power Indicator Light will glow to indicate the machine is on.
2. Load the laundry.
3. Turn the Program Knob to the desired program.
4. Select options.
5. Press Start to start the program. (If you set a delayed start time, the LED will display the number of hours the unit was set to delay
and the unit will start after that time has expired.)
6. “End” will display when the program has finished.
CLEANINGCLEANING
CLEANINGCLEANING
CLEANING THE LINT FILTHE LINT FIL
THE LINT FILTHE LINT FIL
THE LINT FILTERTER
TERTER
TER
Although the lint in your ASKO dryer will be minimal, the lint filter should be cleaned after each
load to ensure maximum air flow and prevent possible overheating. To clean the filter, follow the
steps below:
1. Grasp the handle and pull it toward you.
2. Remove the filter from the holder by pulling it up.
3. Open the filter and gently brush away any lint.
4. Fold the filter together and return it to the holder on the door.
5. Push the holder in until it snaps into place.
We recommend that you clean the lint filter after every load.
NOTE: