manuals.online logo
Brands
  1. Home
  2. •
  3. Brands
  4. •
  5. aspenhome
  6. •
  7. Indoor Furnishing
  8. •
  9. aspenhome I218-422-WHT User manual

aspenhome I218-422-WHT User manual

HARDWARELIST:I218-422
1PC
No.
A
B
C
D
E
Description Sketch Quantity
Bolt 5/16" x2"
Lock Washer5/16"
FlatWasher5/16" x3/4"
Allen Wrench M4
6PCS
COMPONENTSLIST: I218-422
No.
1
2
3
Description Sketch Quantity
Headboard
LeftLeg
RightLeg 1PC
1PC
1PC
COMPONENTSLIST: I218-402
No.
1
2
Description Sketch Quantity
Bed rails
Slats 4PCS
2PCS
COMPONENTSLIST: I218-403
No.
1
2
Description Sketch Quantity
Footboard
SupportLeg(forslats) 4PCS
1PC
3Decking 8PCS
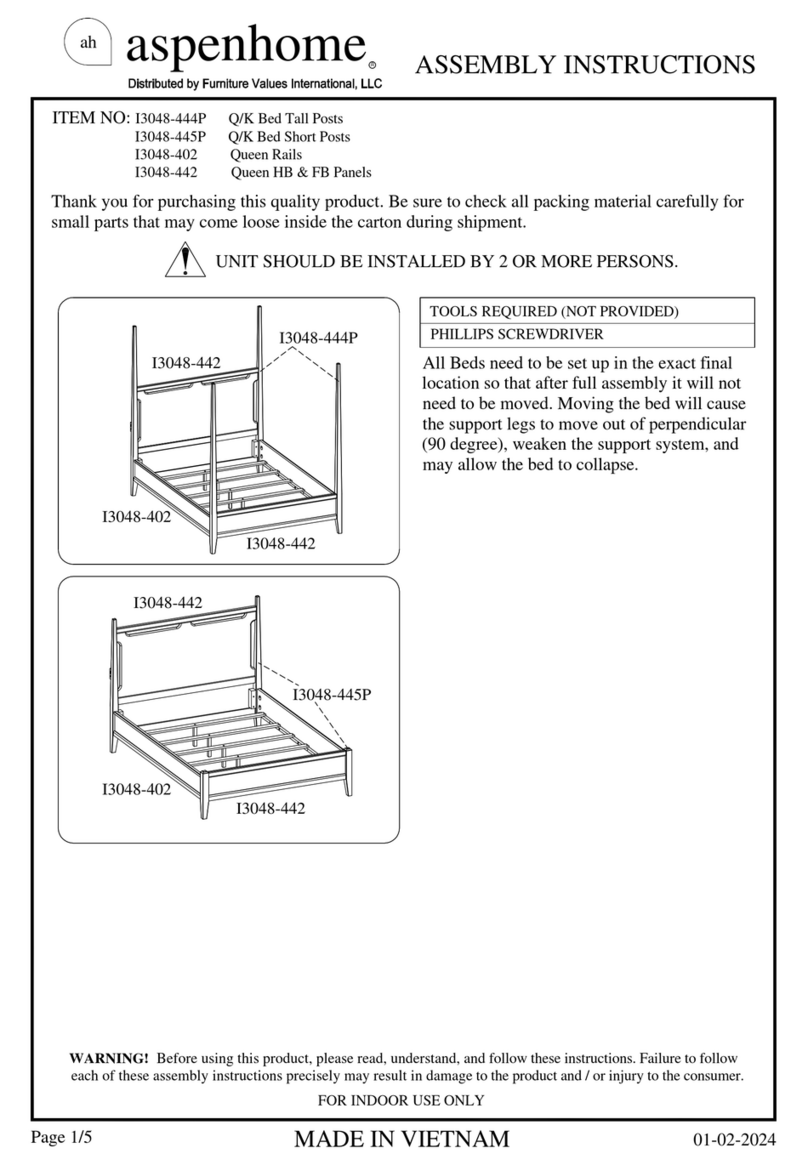
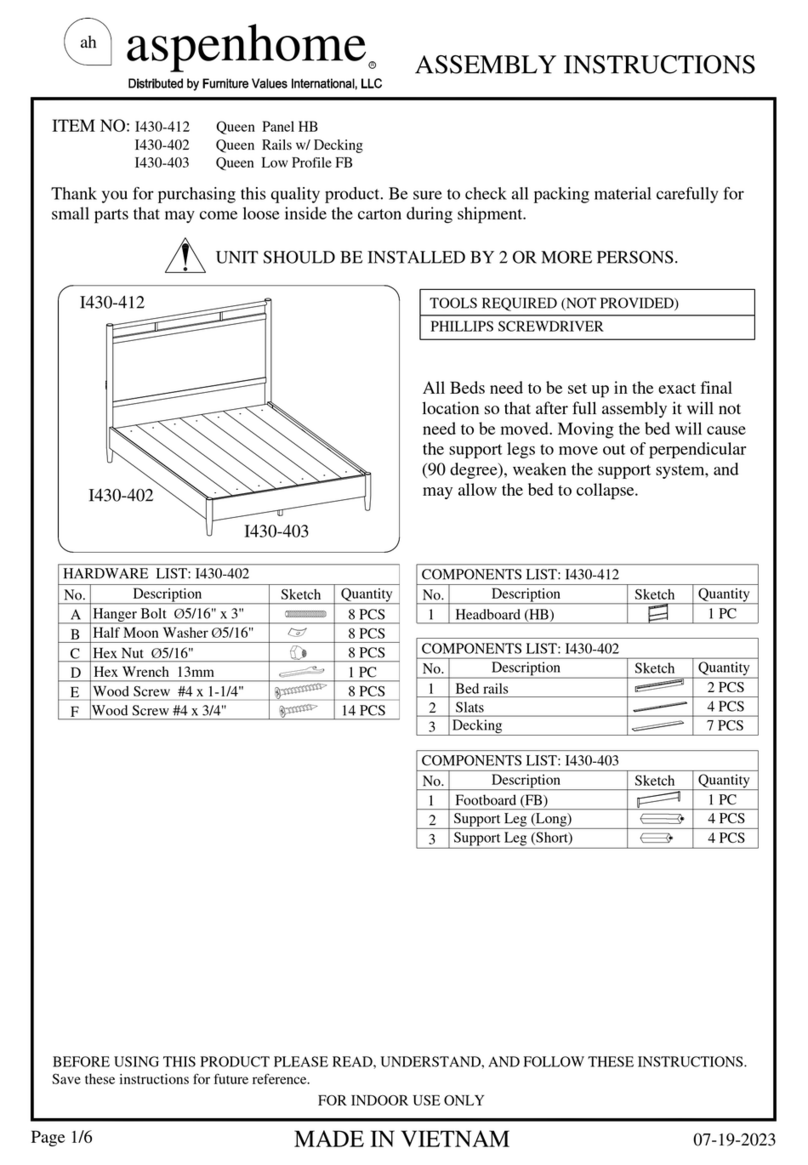
ITEMNO: I218-422-WHT/SHLQueen Uph HB
I218-403-WHT/SHLQueen Low Profile FB
I218-402-WHT/SHLQueen Rails w/Decking
Thankyouforpurchasingthisqualityproduct.Besuretocheckallpacking material carefullyfor
small partsthatmaycomelooseinsidethe cartonduringshipment.
UNIT SHOULDBE INSTALLEDBY2ORMORE PERSONS.
All Bedsneedtobeset upinthe exact final
locationsothatafterfull assemblyit will not
needtobemoved. Moving thebedwill cause
thesupportlegstomoveoutofperpendicular
(90degree),weakenthesupportsystem, and
may allowthebedtocollapse.
aspenhome
RASSEMBLYINSTRUCTIONS
MADEINVIETNAM
ah
BEFORE USING THISPRODUCT PLEASEREAD, UNDERSTAND, AND FOLLOWTHESEINSTRUCTIONS.
Save these instructionsforfuture reference.
FORINDOORUSEONLY
TOOLSREQUIRED (NOTPROVIDED)
PHILLIPSSCREWDRIVER
I218-403
I218-402
I218-422
HARDWARELIST:I218-402
No. Description Sketch Quantity
8PCS
HexWrench 13mm
8PCS
1PC
8PCS
HangerBolt 5/16" x3"
HexNut5/16"
Wood Screw #4x1-1/4"
HalfMoon Washer 5/16"
F
G
H
I
6PCS
6PCS
8PCS
01-02-2020
Wood Screw #4 x3/4"
J16 PCS
Page1/6
B
C
D
HBBackside
A
aspenhome
RASSEMBLYINSTRUCTIONS
MADEINVIETNAM
ah
STEP1: Laytheheadboardfacedownonasoftsurface.Attachthe left leg and right leg to
headboardbyusing6bolts(A),lockwashers(B)andflatwashers(C).
LeftLeg
RightLeg
STEP2:Screwthebolts(E)intoHB&FB.Align theboltswiththeholesintheend ofsiderails
and attachthesiderailstoHB&FBusing halfmoonwasher(F),andhexnuts(G).Thenuseahex
wrench totightenall the nuts.
Headboard Side Rail
E
FGH
Slatbearer
I218-403
I218-422
I218-402
STEP3:Attachthesupportlegswithlevelertotheslats.
Adjustthelevelersonbottomofsupportlegswhen necessary. SupportLeg
Leveler
This End Up
Slat
ITEMNO: I218-422-WHT/SHLQueen Uph HB
I218-403-WHT/SHLQueen Low Profile FB
I218-402-WHT/SHLQueen Rails w/Decking
01-02-2020
Page2/6
aspenhome
RASSEMBLYINSTRUCTIONS
MADEINVIETNAM
ah
I
ITEMNO: I218-422-WHT/SHLQueen Uph HB
I218-403-WHT/SHLQueen Low Profile FB
I218-402-WHT/SHLQueen Rails w/Decking
01-02-2020
STEP5: Putthedeckingovertheslats,securedeckingtotheslatswithwood screws (J) through
the pre-drilled holesinthedecking asshownbelow.
Pre-drilledhole
Makesurethatthereisaslat
underthepre-drilled hole.
JDecking
Slat
Page3/6
STEP4: Arrangeslatsontheslatbearersandthenlaythedeckingon top ofthe slats. Make sure
the topandbottomslatsaresituatedunderneaththepre-drilledholesasshownbelowinSTEP 5.
Removethedeckingandattachslatstotheslatbearerswithwood screws (I).
aspenhome
RASSEMBLYINSTRUCTIONS
MADEINVIETNAM
ah
b
a
FUNCTIONALITYINSTRUCTION
Single Powered USB
PortforChargingon
bothsides
I218-422
I218-403
I218-402
OPTION2: Thesiderailsmaybeusedoneitherside.Arrangetheside railssothe slat
bearersareinLOWERPOSITIONpriortoattachment inSTEP 3.
QueenStandardBed
ITEMNO: I218-422-WHT/SHLQueen Uph HB
I218-403-WHT/SHLQueen Low Profile FB
I218-402-WHT/SHLQueen Rails w/Decking
STEP2: Theslatbearershavebeenattachedinposition (b)originally.Theslatbearersmust be
movedintoposition(a)sinceusingmorethanamattressonthisbed. Remove the boltsand screws
fromtheslatbearersandsiderailsasshownbelow.Thenre-attachtheslat bearers tothe side rails
inposition(a)withbolts,lockwashers,flatwashers, and screws. Caution:Donotovertighten
boltsasthismayloosenthethreadedinsertsinthesiderails.
01-02-2020
Page4/6
aspenhome
RASSEMBLYINSTRUCTIONS
MADEINVIETNAM
ah
STEP3:Screwthebolts(E)intoHB&FB.Align theboltswiththeholesintheend ofsiderails
and attachthesiderailstoHB&FBusing halfmoonwasher(F),andhexnuts(G).Thenuseahex
wrench totightenall the nuts.
Side Rail
E
FGH
Slatbearer
SupportLeg
Leveler
This End Up
Slat
STEP4: Removethesupportlegs(top) asshown in thepicture
to theright.Attachthe support legswithlevelertothe slats.
Adjustthelevelersonbottomofsupportlegswhen necessary.
Remove
Support Leg(top)
I
I218-403
I218-422
I218-402
ITEMNO: I218-422-WHT/SHLQueen Uph HB
I218-403-WHT/SHLQueen Low Profile FB
I218-402-WHT/SHLQueen Rails w/Decking
01-02-2020
Page5/6
STEP5: Arrangeslatsontheslatbearersandthenlaythedeckingon top ofthe slats. Make sure
the topandbottomslatsaresituatedunderneaththepre-drilledholesasshownbelowinSTEP 6.
Removethedeckingandattachslatstotheslatbearerswithwood screws (I).
aspenhome
RASSEMBLYINSTRUCTIONS
MADEINVIETNAM
ah
FUNCTIONALITYINSTRUCTION
I218-403
I218-402
Single Powered USB
PortforChargingon
bothsides
I218-422
StandardQueen Bed
ITEMNO: I218-422-WHT/SHLQueen Uph HB
I218-403-WHT/SHLQueen Low Profile FB
I218-402-WHT/SHLQueen Rails w/Decking
01-02-2020
STEP6: Putthedeckingovertheslats,securedeckingtotheslatswithwood screws (J)
throughthepre-drilledholesinthe deckingasshownbelow.
Decking
Pre-drilledhole
Makesurethatthereisaslat
underthepre-drilled hole.
J
Slat
Page6/6
HARDWARELIST:I218-425
1PC
No.
A
B
C
D
Description Sketch Quantity
Bolt 5/16" x2"
Lock Washer5/16"
FlatWasher5/16" x3/4"
Allen Wrench M4
6PCS
COMPONENTSLIST: I218-425
No.
1
2
3
Description Sketch Quantity
Headboard
LeftLeg
RightLeg 1PC
1PC
1PC
COMPONENTSLIST: I218-406
No.
1
2
Description Sketch Quantity
Bed rails
Slats 5PCS
2PCS
COMPONENTSLIST: I218-407
No.
1
2
Description Sketch Quantity
Footboard
SupportLeg(forslats) 5PCS
1PC
3Decking 9PCS
COMPONENTSLIST: I218-410
No.
1
2
Description Sketch Quantity
Bed rails
Slats 5PCS
2PCS
3Decking 8PCS
Page1/6
ITEMNO: I218-425-WHT/SHLKing Uph HB
I218-407-WHT/SHLKing Low Profile FB
I218-406-WHT/SHLKing Rails w/Decking
I218-410-WHT/SHLCalKing Rails w/Decking
Thankyouforpurchasingthisqualityproduct.Besuretocheckallpacking material carefullyfor
small partsthatmaycomelooseinsidethe cartonduringshipment.
UNIT SHOULDBE INSTALLEDBY2ORMORE PERSONS.
All Bedsneedtobeset upinthe exact final
locationsothatafterfull assemblyit will not
needtobemoved. Moving thebedwill cause
thesupportlegstomoveoutofperpendicular
(90degree),weakenthesupportsystem, and
may allowthebedtocollapse.
aspenhome
RASSEMBLYINSTRUCTIONS
MADEINVIETNAM
ah
BEFORE USING THISPRODUCT PLEASEREAD, UNDERSTAND, AND FOLLOWTHESEINSTRUCTIONS.
Save these instructionsforfuture reference.
FORINDOORUSEONLY
TOOLSREQUIRED (NOTPROVIDED)
PHILLIPSSCREWDRIVER
I218-407
I218-406
I218-425
I218-410
6PCS
6PCS
01-02-2020
E
HARDWARELIST:I218-406/410
No. Description Sketch Quantity
8PCS
HexWrench 13mm
8PCS
1PC
10 PCS
8PCS
HangerBolt 5/16" x3"
HexNut5/16"
Wood Screw #4x1-1/4"
HalfMoon Washer 5/16"
F
G
H
I
JWood Screw #4 x3/4"(onlyfor-406) 18 PCS
WoodCap (onlyfor-410)
16 PCS
8PCS
Wood Screw #4 x3/4"(onlyfor-410)
k
L
aspenhome
RASSEMBLYINSTRUCTIONS
MADEINVIETNAM
ah
Page2/6
STEP1: Laytheheadboardfacedownonasoftsurface.Attachthe left leg and right leg to
headboardbyusing6bolts(A),lockwashers(B)andflatwashers(C).
LeftLeg
RightLeg
STEP2:Screwthebolts(E)intoHB&FB.Align theboltswiththeholesintheend ofsiderails
and attachthesiderailstoHB&FBusing halfmoonwasher(F),andhexnuts(G).Thenuseahex
wrench totightenall the nuts.
Headboard Side Rail
E
The outsideholesmatchto6/6standardkingrails,
the insideholesmatchto6/0Calkingbed rails.
FGH
Slatbearer
I218-407
I218-425
I218-406
I218-410
STEP3: Attachthesupportlegswithlevelertotheslats.
Adjustthelevelersonbottomofsupportlegswhen necessary.
SupportLeg
Leveler
This End Up
Slat
HBBackside
B
C
D
A
ITEMNO: I218-425-WHT/SHLKing Uph HB
I218-407-WHT/SHLKing Low Profile FB
I218-406-WHT/SHLKing Rails w/Decking
I218-410-WHT/SHLCalKing Rails w/Decking
01-15-2020
aspenhome
RASSEMBLYINSTRUCTIONS
MADEINVIETNAM
ah
Page3/6
I
ITEMNO: I218-425-WHT/SHLKing Uph HB
I218-407-WHT/SHLKing Low Profile FB
I218-406-WHT/SHLKing Rails w/Decking
I218-410-WHT/SHLCalKing Rails w/Decking
01-02-2020
STEP5: Putthedeckingovertheslats,securedeckingtotheslatswithwood screws (J &L)
throughthepre-drilledholesinthe deckingasshownbelow.
Decking
Pre-drilledhole
Makesurethatthereisaslat
underthepre-drilled hole.
J
L
I218-406
I218-410
I218-425
I218-425
I218-407
I218-407
J&L
STEP4: Arrangeslatsontheslatbearersandthenlaythedeckingon top ofthe slats. Make sure
the topandbottomslatsaresituatedunderneaththepre-drilledholesasshownbelowinSTEP 5.
Removethedeckingandattachslatstotheslatbearerswithwood screws (I).
b
a
STEP2: Theslatbearershavebeenattachedinposition (b)originally.Theslatbearersmust be
movedintoposition(a)sinceusingmorethanamattressonthisbed. Remove the boltsand screws
fromtheslatbearersandsiderailsasshownbelow.Thenre-attachtheslat bearers tothe side rails
inposition(a)withbolts,lockwashers,flatwashers, and screws. Caution:Donotovertighten
boltsasthismayloosenthethreadedinsertsinthesiderails.
OPTION2: Thesiderailsmaybeusedoneitherside.Arrangetheside railssothe slat
bearersareinLOWERPOSITIONpriortoattachment inSTEP 3.
aspenhome
RASSEMBLYINSTRUCTIONS
MADEINVIETNAM
ah
Page4/6
STEP6: ForCal Kingbed,insertwood capsintotheholeson
headboardandfootboard.ForregularKingbed, skipthisstep. WoodCap(K)
FUNCTIONALITYINSTRUCTION
Standardkingbed
Calkingbed
Single Powered USB
PortforChargingon
bothsides
I218-425
I218-425
I218-407
I218-407
I218-406
I218-410
ITEMNO: I218-425-WHT/SHLKing Uph HB
I218-407-WHT/SHLKing Low Profile FB
I218-406-WHT/SHLKing Rails w/Decking
I218-410-WHT/SHLCalKing Rails w/Decking
01-02-2020
aspenhome
RASSEMBLYINSTRUCTIONS
MADEINVIETNAM
ah
Page5/6
STEP3:Screwthebolts(E)intoHB&FB.Align theboltswiththeholesintheend ofsiderails
and attachthesiderailstoHB&FBusing halfmoonwasher(F),andhexnuts(G).Thenuseahex
wrench totightenall the nuts.
Headboard Side Rail
E
The outsideholesmatchto6/6standardkingrails,
the insideholesmatchto6/0Calkingbed rails.
FGH
Slatbearer
I218-407
I218-425
I218-406
I218-410
SupportLeg
Leveler
This End Up
Slat
STEP4: Removethesupportlegs(top) asshown in thepicture
to theright.Attachthe support legswithlevelertothe slats.
Adjustthelevelersonbottomofsupportlegswhen necessary.
Remove
Support Leg(top)
I
ITEMNO: I218-425-WHT/SHLKing Uph HB
I218-407-WHT/SHLKing Low Profile FB
I218-406-WHT/SHLKing Rails w/Decking
I218-410-WHT/SHLCalKing Rails w/Decking
01-02-2020
STEP5: Arrangeslatsontheslatbearersandthenlaythedeckingon top ofthe slats. Make sure
the topandbottomslatsaresituatedunderneaththepre-drilledholesasshownbelowinSTEP 6.
Removethedeckingandattachslatstotheslatbearerswithwood screws (I).
aspenhome
RASSEMBLYINSTRUCTIONS
MADEINVIETNAM
ah
Page6/6
STEP7: ForCal Kingbed,insertwood capsintotheholeson
headboardandfootboard.ForregularKingbed, skipthisstep. WoodCap(K)
FUNCTIONALITYINSTRUCTION
Standardkingbed
Calkingbed
I218-425
I218-425
I218-407
I218-406
I218-407
I218-410
Single Powered USB
PortforChargingon
bothsides
ITEMNO: I218-425-WHT/SHLKing Uph HB
I218-407-WHT/SHLKing Low Profile FB
I218-406-WHT/SHLKing Rails w/Decking
I218-410-WHT/SHLCalKing Rails w/Decking
01-02-2020
STEP6: Putthedeckingovertheslats,securedeckingtotheslatswithwood screws (J &L)
throughthepre-drilledholesinthe deckingasshownbelow.
J&L
Decking
Pre-drilledhole
Makesurethatthereisaslat
underthepre-drilled hole.
I218-406
I218-410
I218-425
I218-425
I218-407
I218-407
J
L
HARDWARELIST:I218-522
1PC
No.
A
B
C
D
E
Description Sketch Quantity
Bolt 5/16" x2"
Lock Washer5/16"
FlatWasher5/16" x3/4"
Allen Wrench M4
6PCS
COMPONENTSLIST: I218-522
No.
1
2
3
Description Sketch Quantity
Headboard
LeftLeg
RightLeg 1PC
1PC
1PC
COMPONENTSLIST: I218-517
No.
1
2
Description Sketch Quantity
Bed rails
Slats 4PCS
2PCS
COMPONENTSLIST: I218-503
No.
1
2
Description Sketch Quantity
Footboard
SupportLeg(forslats) 4PCS
1PC
3Decking 5PCS
ITEMNO: I218-522-WHT/SHLTwinUph HB
I218-503-WHT/SHLTwinLow Profile FB
I218-517-WHT/SHLTwinRails w/Decking
Thankyouforpurchasingthisqualityproduct.Besuretocheckallpacking material carefullyfor
small partsthatmaycomelooseinsidethe cartonduringshipment.
UNIT SHOULDBE INSTALLEDBY2ORMORE PERSONS.
All Bedsneedtobeset upinthe exact final
locationsothatafterfull assemblyit will not
needtobemoved. Moving thebedwill cause
thesupportlegstomoveoutofperpendicular
(90degree),weakenthesupportsystem, and
may allowthebedtocollapse.
aspenhome
RASSEMBLYINSTRUCTIONS
MADEINVIETNAM
ah
BEFORE USING THISPRODUCT PLEASEREAD, UNDERSTAND, AND FOLLOWTHESEINSTRUCTIONS.
Save these instructionsforfuture reference.
FORINDOORUSEONLY
TOOLSREQUIRED (NOTPROVIDED)
PHILLIPSSCREWDRIVER
HARDWARELIST:I218-517
No. Description Sketch Quantity
8PCS
HexWrench 13mm
8PCS
1PC
8PCS
HangerBolt 5/16" x3"
HexNut5/16"
Wood Screw #4x1-1/4"
HalfMoon Washer 5/16"
F
G
H
I
6PCS
6PCS
8PCS
I218-503
I218-522
I218-517
Wood Screw #4 x3/4"
J10 PCS
Page1/6
01-15-2020
B
C
D
HBBackside
A
aspenhome
RASSEMBLYINSTRUCTIONS
MADEINVIETNAM
ah
STEP1: Laytheheadboardfacedownonasoftsurface.Attachthe left leg and right leg to
headboardbyusing6bolts(A),lockwashers(B)andflatwashers(C).
LeftLeg
RightLeg
STEP2:Screwthebolts(E)intoHB&FB.Align theboltswiththeholesintheend ofsiderails
and attachthesiderailstoHB&FBusing halfmoonwasher(F),andhexnuts(G).Thenuseahex
wrench totightenall the nuts.
Headboard Side Rail
E
FGH
Slatbearer
I218-503
I218-522
I218-517
STEP3:Attachthesupportlegswithlevelertotheslats.
Adjustthelevelersonbottomofsupportlegswhen necessary. SupportLeg
Leveler
This End Up
Slat
The holesare for
Hollywood frames
ITEMNO: I218-522-WHT/SHLTwinUph HB
I218-503-WHT/SHLTwinLow Profile FB
I218-517-WHT/SHLTwinRails w/Decking
01-15-2020
Page2/6
aspenhome
RASSEMBLYINSTRUCTIONS
MADEINVIETNAM
ah
I
ITEMNO: I218-522-WHT/SHLTwinUph HB
I218-503-WHT/SHLTwinLow Profile FB
I218-517-WHT/SHLTwinRails w/Decking
STEP4: Arrangeslatsontheslatbearersandthenlaythedeckingon top ofthe slats. Make sure
the topandbottomslatsaresituatedunderneaththepre-drilledholesasshownbelowinSTEP 5.
Removethedeckingandattachslatstotheslatbearerswithwood screws (I).
STEP5: Putthedeckingovertheslats,securedeckingtotheslatswithwood screws (J) through
the pre-drilled holesinthedecking asshownbelow.
Pre-drilledhole
Makesurethatthereisaslat
underthepre-drilled hole.
JDecking
Slat
Page3/6
01-15-2020
aspenhome
RASSEMBLYINSTRUCTIONS
MADEINVIETNAM
ah
b
a
FUNCTIONALITYINSTRUCTION
Single Powered USB
PortforChargingon
bothsides
OPTION2: Thesiderailsmaybeusedoneitherside.Arrangetheside railssothe slat
bearersareinLOWERPOSITIONpriortoattachment inSTEP 3.
TwinStandardBed
I218-503
I218-522
I218-517
ITEMNO: I218-522-WHT/SHLTwinUph HB
I218-503-WHT/SHLTwinLow Profile FB
I218-517-WHT/SHLTwinRails w/Decking
STEP2: Theslatbearershavebeenattachedinposition (b)originally.Theslatbearersmust be
movedintoposition(a)sinceusingmorethanamattressonthisbed. Remove the boltsand screws
fromtheslatbearersandsiderailsasshownbelow.Thenre-attachtheslat bearers tothe side rails
inposition(a)withbolts,lockwashers,flatwashers, and screws. Caution:Donotovertighten
boltsasthismayloosenthethreadedinsertsinthesiderails.
Page4/6
01-15-2020
aspenhome
RASSEMBLYINSTRUCTIONS
MADEINVIETNAM
ah
STEP3:Screwthebolts(E)intoHB&FB.Align theboltswiththeholesintheend ofsiderails
and attachthesiderailstoHB&FBusing halfmoonwasher(F),andhexnuts(G).Thenuseahex
wrench totightenall the nuts.
Side Rail
E
FGH
Slatbearer
SupportLeg
Leveler
This End Up
Slat
STEP4: Removethesupportlegs(top) asshown in thepicture
to theright.Attachthe support legswithlevelertothe slats.
Adjustthelevelersonbottomofsupportlegswhen necessary.
Remove
Support Leg(top)
I218-503
I218-522
I218-517
The holesare for
Hollywood frames
ITEMNO: I218-522-WHT/SHLTwinUph HB
I218-503-WHT/SHLTwinLow Profile FB
I218-517-WHT/SHLTwinRails w/Decking
STEP5: Arrangeslatsontheslatbearersandthenlaythedeckingon top ofthe slats. Make sure
the topandbottomslatsaresituatedunderneaththepre-drilledholesasshownbelowinSTEP 6.
Removethedeckingandattachslatstotheslatbearerswithwood screws (I).
I
Page5/6
01-15-2020
aspenhome
RASSEMBLYINSTRUCTIONS
MADEINVIETNAM
ah
FUNCTIONALITYINSTRUCTION
Single Powered USB
PortforChargingon
bothsides
TwinStandardBed I218-503
I218-522
I218-517
ITEMNO: I218-522-WHT/SHLTwinUph HB
I218-503-WHT/SHLTwinLow Profile FB
I218-517-WHT/SHLTwinRails w/Decking
STEP6: Putthedeckingovertheslats,securedeckingtotheslatswithwood screws (J)
throughthepre-drilledholesinthe deckingasshownbelow.
Decking
Pre-drilledhole
Makesurethatthereisaslat
underthepre-drilled hole.
J
Slat
Page6/6
01-15-2020
HARDWARELIST:I218-525
1PC
No.
A
B
C
D
E
Description Sketch Quantity
Bolt 5/16" x2"
Lock Washer5/16"
FlatWasher5/16" x3/4"
Allen Wrench M4
6PCS
COMPONENTSLIST: I218-525
No.
1
2
3
Description Sketch Quantity
Headboard
LeftLeg
RightLeg 1PC
1PC
1PC
COMPONENTSLIST: I218-514
No.
1
2
Description Sketch Quantity
Bed rails
Slats 4PCS
2PCS
COMPONENTSLIST: I218-507
No.
1
2
Description Sketch Quantity
Footboard
SupportLeg(forslats) 4PCS
1PC
3Decking 7PCS
ITEMNO: I218-525-WHT/SHLFull Uph HB
I218-507-WHT/SHLFull Low Profile FB
I218-514-WHT/SHLFull Rails w/Decking
Thankyouforpurchasingthisqualityproduct.Besuretocheckallpacking material carefullyfor
small partsthatmaycomelooseinsidethe cartonduringshipment.
UNIT SHOULDBE INSTALLEDBY2ORMORE PERSONS.
All Bedsneedtobeset upinthe exact final
locationsothatafterfull assemblyit will not
needtobemoved. Moving thebedwill cause
thesupportlegstomoveoutofperpendicular
(90degree),weakenthesupportsystem, and
may allowthebedtocollapse.
aspenhome
RASSEMBLYINSTRUCTIONS
MADEINVIETNAM
ah
BEFORE USING THISPRODUCT PLEASEREAD, UNDERSTAND, AND FOLLOWTHESEINSTRUCTIONS.
Save these instructionsforfuture reference.
FORINDOORUSEONLY
TOOLSREQUIRED (NOTPROVIDED)
PHILLIPSSCREWDRIVER
HARDWARELIST:I218-514
No. Description Sketch Quantity
8PCS
HexWrench 13mm
8PCS
1PC
8PCS
HangerBolt 5/16" x3"
HexNut5/16"
Wood Screw #4x1-1/4"
HalfMoon Washer 5/16"
F
G
H
I
6PCS
6PCS
8PCS
I218-507
I218-525
I218-514
Wood Screw #4 x3/4"
J14 PCS
Page1/6
01-15-2020
B
C
D
HBBackside
A
aspenhome
RASSEMBLYINSTRUCTIONS
MADEINVIETNAM
ah
STEP1: Laytheheadboardfacedownonasoftsurface.Attachthe left leg and right leg to
headboardbyusing6bolts(A),lockwashers(B)andflatwashers(C).
LeftLeg
RightLeg
STEP2:Screwthebolts(E)intoHB&FB.Align theboltswiththeholesintheend ofsiderails
and attachthesiderailstoHB&FBusing halfmoonwasher(F),andhexnuts(G).Thenuseahex
wrench totightenall the nuts.
Headboard Side Rail
E
FGH
Slatbearer
I218-507
I218-525
I218-514
STEP3:Attachthesupportlegswithlevelertotheslats.
Adjustthelevelersonbottomofsupportlegswhen necessary. SupportLeg
Leveler
This End Up
Slat
The holesare for
Hollywood frames
ITEMNO: I218-525-WHT/SHLFull Uph HB
I218-507-WHT/SHLFull Low Profile FB
I218-514-WHT/SHLFull Rails w/Decking
Page2/6
01-15-2020

This manual suits for next models

5

Other aspenhome Indoor Furnishing manuals
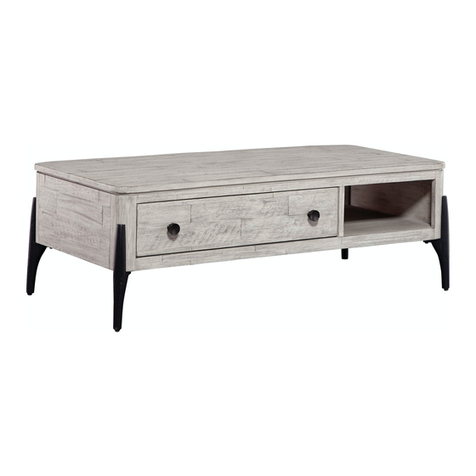
aspenhome I260-9100 User manual

aspenhome

aspenhome I260-9100 User manual

aspenhome I233-9130 User manual

aspenhome

aspenhome I233-9130 User manual

aspenhome Counter Height Side Chair I256-6643S User manual

aspenhome

aspenhome Counter Height Side Chair I256-6643S User manual

aspenhome I597-225 User manual

aspenhome

aspenhome I597-225 User manual

aspenhome I240-404-RIV User manual

aspenhome

aspenhome I240-404-RIV User manual

aspenhome I34-462-SNA User manual

aspenhome

aspenhome I34-462-SNA User manual
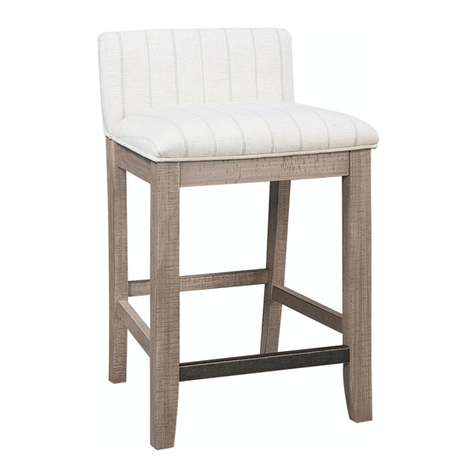
aspenhome I221-9140 User manual

aspenhome

aspenhome I221-9140 User manual

aspenhome IML-378-GRY User manual

aspenhome

aspenhome IML-378-GRY User manual

aspenhome I201-454 User manual

aspenhome

aspenhome I201-454 User manual

aspenhome I233-9100 User manual

aspenhome

aspenhome I233-9100 User manual

aspenhome I287-360T User manual

aspenhome

aspenhome I287-360T User manual

aspenhome I597-400 User manual

aspenhome

aspenhome I597-400 User manual

aspenhome Nesting I597-9101 User manual

aspenhome

aspenhome Nesting I597-9101 User manual

aspenhome I629-9151-DEN/PRW User manual

aspenhome

aspenhome I629-9151-DEN/PRW User manual

aspenhome I644-280 User manual

aspenhome

aspenhome I644-280 User manual

aspenhome I256-412 User manual

aspenhome

aspenhome I256-412 User manual

aspenhome I349-6641S-WST User manual

aspenhome

aspenhome I349-6641S-WST User manual

aspenhome I215-307 User manual

aspenhome

aspenhome I215-307 User manual

aspenhome I262-462 User manual

aspenhome

aspenhome I262-462 User manual

aspenhome I256-6642S User manual

aspenhome

aspenhome I256-6642S User manual

aspenhome I206-463 User manual

aspenhome

aspenhome I206-463 User manual

aspenhome I251-316-1 User manual

aspenhome

aspenhome I251-316-1 User manual
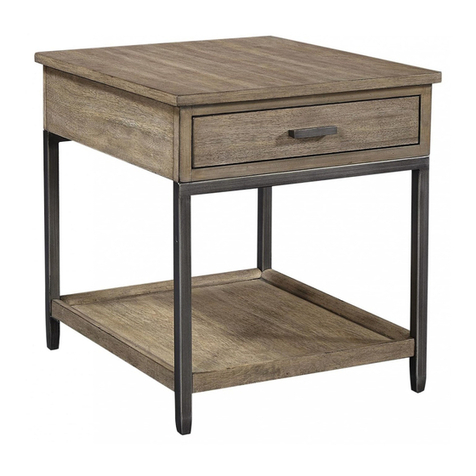
aspenhome ICB-492-BCH-KD-1 User manual

aspenhome

aspenhome ICB-492-BCH-KD-1 User manual

aspenhome I540-6050 User manual

aspenhome

aspenhome I540-6050 User manual

Popular Indoor Furnishing manuals by other brands

Belleze 048-GM-49022 owner's manual

Belleze

Belleze 048-GM-49022 owner's manual

J GEIGER inception shades installation guide

J GEIGER

J GEIGER inception shades installation guide

Williams-Sonoma Hide Mirror Zebra Wall Assembly instructions

Williams-Sonoma

Williams-Sonoma Hide Mirror Zebra Wall Assembly instructions

FMD Furniture VIBORG 7 4003-007 Assembly instruction

FMD Furniture

FMD Furniture VIBORG 7 4003-007 Assembly instruction

Euro-Rite Cabinets Base Cabinet with 1 Drawer Assembly instructions

Euro-Rite Cabinets

Euro-Rite Cabinets Base Cabinet with 1 Drawer Assembly instructions

Room essentials 249-05-0418 Assembly instructions

Room essentials

Room essentials 249-05-0418 Assembly instructions

Bensons for Beds CASSIA STK721501 Assembly instructions

Bensons for Beds

Bensons for Beds CASSIA STK721501 Assembly instructions

U-Line H-2489 quick start guide

U-Line

U-Line H-2489 quick start guide

meubar KORA BAR6 Assembly instruction

meubar

meubar KORA BAR6 Assembly instruction

Casa Lusso eden installation instructions

Casa Lusso

Casa Lusso eden installation instructions

VITRA Caddy operating instructions

VITRA

VITRA Caddy operating instructions

Samuel Lawrence 210-S076-030 Assembly instructions

Samuel Lawrence

Samuel Lawrence 210-S076-030 Assembly instructions

Bell'O AVS-4601HG Assembly instructions

Bell'O

Bell'O AVS-4601HG Assembly instructions

OSP furniture TUX-75R Assembly instructions

OSP furniture

OSP furniture TUX-75R Assembly instructions

SUNON DAM6026 Assembly manual

SUNON

SUNON DAM6026 Assembly manual

CorLiving DPU-604-B quick start guide

CorLiving

CorLiving DPU-604-B quick start guide

Next AMSTERDAM 947652 Assembly instructions

Next

Next AMSTERDAM 947652 Assembly instructions

Ambu Man Service manual

Ambu

Ambu Man Service manual

manuals.online logo
manuals.online logoBrands
  • About & Mission
  • Contact us
  • Privacy Policy
  • Terms and Conditions

Copyright 2025 Manuals.Online. All Rights Reserved.