ASTEC 40 Series User manual

IB-2003 8/14
Model 5044-32T
Sand Prep
Material
Handling
OPERATION AND MAINTENANCE MANUAL
Series 40 Tranflite - Stationary Conveyor
Series 40 Conveyor

CALIFORNIA
Proposition 65 Warning
Dieselengineexhaustandsomeofitsconstituentsareknowntothestate
ofCaliforniatocausecancer,birthdefects,andotherreproductiveharm.
© KPI-JCI 2014
Record your Series 40 conveyor serial and order number in the space provided below.
You will find the serial number plate located on the support frame.
Please include these numbers when requesting service or ordering replacement parts.
JOB ORDER
MODEL S/N
MANUFACTURED BY KOLBERG-PIONEER, INC. YANKTON, SD, U.S.A.
Serial Number Plate

OPERATION &
MAINTENANCE
MANUAL
Series 40
Transflite and
Stationary Conveyor
Models Covered:
Stationary
Model 41 - 8” Channel Frame
Model 42 - 24” Lattice Frame
Model 43 - 30” Lattice Frame
Model 44 - 36” Lattice Frame
Model 45 - 42” Lattice Frame
Model 46 - Channel and Lattice Frame
Transflite
43-2460T 43-3660T
44-2480T 44-3680T
44-24100T 44-36100T
43-3060T
44-3080T
44-30100T

Printed in the USA
Allrightsreserved. Nopartofthismanualmaybereproduced
or transmitted in any form or by any means, electronic or
mechanical, including photocopying, recording or by any
informationstorageorretrievalsystem,withoutpermission
from KPI-JCI.
Thismanualcontainsoperatinginstructions,lubrication,and
maintenance information. Application of this information
shouldmaximizetheperformanceandlifeofyourequipment
and minimize down time.
Safe and efficient operation requires that anyone who
will be operating or maintaining this equipment read
and understand the safety, operation, maintenance, and
troubleshooting information contained in the operator’s
manual.
Continuing improvement and advancement of KPI-JCI
products may cause changes to your equipment which
may not be reflected in this publication.
KPI-JCI reserves the right to make changes or add
improvementsto its productsat any time,without incurring
any obligation to make such changes on previously
manufactured equipment.
Although care has been taken to assure the accuracy of
this publication, KPI-JCI does not assume any liability for
loss, damage or injury caused by errors or omissions.

Contents
Introductory Pages About This Manual 7
Serial Number Plates 8
Buying Replacement Parts 9
Maintenance Techniques and Tools 10
Lubricants and Fluids 11
Storage 12
Introduction to the Series 40
Covneyor Chapter 1 13
Safety Chapter 2 19
Unloading Conveyor Chapter 3 30
Site Selection and Preparation Chapter 4 32
Conveyor Setup Chapter 5
Frame Sections/Belt Idlers 33
Receiving Hopper/Drives/Electrical 34
Conveyor Support Assembly 35
Conveyor Belt Chapter 6
Installation/Belt Tensioning 36
Belt Splicing 37
Belt Fastener Installation 38
Belt Training/Belt Cleaning 40
Belt Loading 41
Preoperation/Operation
Checklist Chapter 7 42
Maintenance Chapter 8
10 hours 44
50 hours 45
200 hours 47
Lubrication Chapter 9
50 hours 51
200/2500 hours 53
As needed 54
Troubleshooting Chapter 10 55
Disc Wheel Installation Appendix A
Prevailing Torque Locknut Appendix B
Belt Tension Instructions Appendix C
Warranty Registration and Preoperation Check

IB-2003
S
eries 40 Trans
fl
ite -
S
tationary
C
onveyor 7
Purpose
The purpose of this manual is
to help you get the best value
from your equipment. It can
do so by helping you decide
whatworkmustbedone,even
ifyoudecidetohaveitdoneby
adealerservicedepartmentor
a repair shop. It also provides
information and procedures
for routine maintenance and
servicing.
Using the Manual
The manual is divided into
chapters which are further
dividedintonumberedsections,
headed in bold type between
horizontal lines. Each section
consists of consecutively
numbered paragraphs.
About This Manual
Procedures, once described
in the text, are not normally
repeated. Whenitisnecessary
to refer to another chapter,
the reference will be given as
chapter and section number.
Crossreferencesgivenwithout
the word “chapter” apply to
sections and/or paragraphs in
thesamechapter,“seesection
8”means inthe samechapter.
Even though this manual
has been prepared with
extreme care, KPI-JCI cannot
acceptresponsibilityfor errors
in, or omissions from the
information given.
Special Notations
Withinthismanualprocedures
orsituationsthatrequirespecial
attentionareindicatedwiththe
words, DANGER,WARNING,
CAUTION and IMPORTANT.
DANGER, WARNING and
CAUTIONareusedtoindicate
proceduresorsituations where
personal safety is involved.
IMPORTANT is used to
indicate special procedures
or situations which, if not
observed, could result in
damage to the equipment
or affect the operation of the
machine.

IB-2003
S
eries 40 Trans
fl
ite -
S
tationary
C
onveyor 8
Serial Number Plate
Modifications are a continuing
processinthemanufactureofthis
equipment. Since replacement
parts, manuals, and lists are
compiled specifically for each
unit, the serial numbers are
essentialtocorrectlyidentifythe
component required.
Theserialnumberplatewillshow
the serial number, job order
number and model number.
Series 40 Serial Number
The serial number for the
Series40conveyorisstamped
on a plate which is located on
the conveyor frame.
Theserialnumber(S/N)isthe
numberthatshouldbereferred
to when ordering parts or
requesting service.
Serial number plate located near the tail end of the conveyor
Serial number plate
Tail end

IB-2003
S
eries 40 Trans
fl
ite -
S
tationary
C
onveyor 9
Authorized Dealer Parts
Department
An authorized dealer parts
department is the best source
for parts, particularly parts
which are unique to this
equipment. Ifyoudonotknow
who the authorized dealer
is in your area contact KPI-
JCI. Dealerships are located
throughout the United States
and some parts of the world.
Buying Replacement Parts
Purchased Components
Replacement parts for
components purchased by
KPI-JCIsuchasgearreducers,
electric motors, and engines
are available through your
authorized dealer. However,
items like engine parts are
typically not stocked by the
dealer or KPI-JCI.
Serial Number
Since replacement parts
manualsandlistsarecompiled
specifically for each unit, the
serialnumbersareessentialto
correctlyidentifythecomponent
required.

IB-2003
S
eries 40 Trans
fl
ite -
S
tationary
C
onveyor 10
Tools
Althougha minimal number of
toolsareneededforoperation
and maintenance, a good
selection of basic tools is
required.
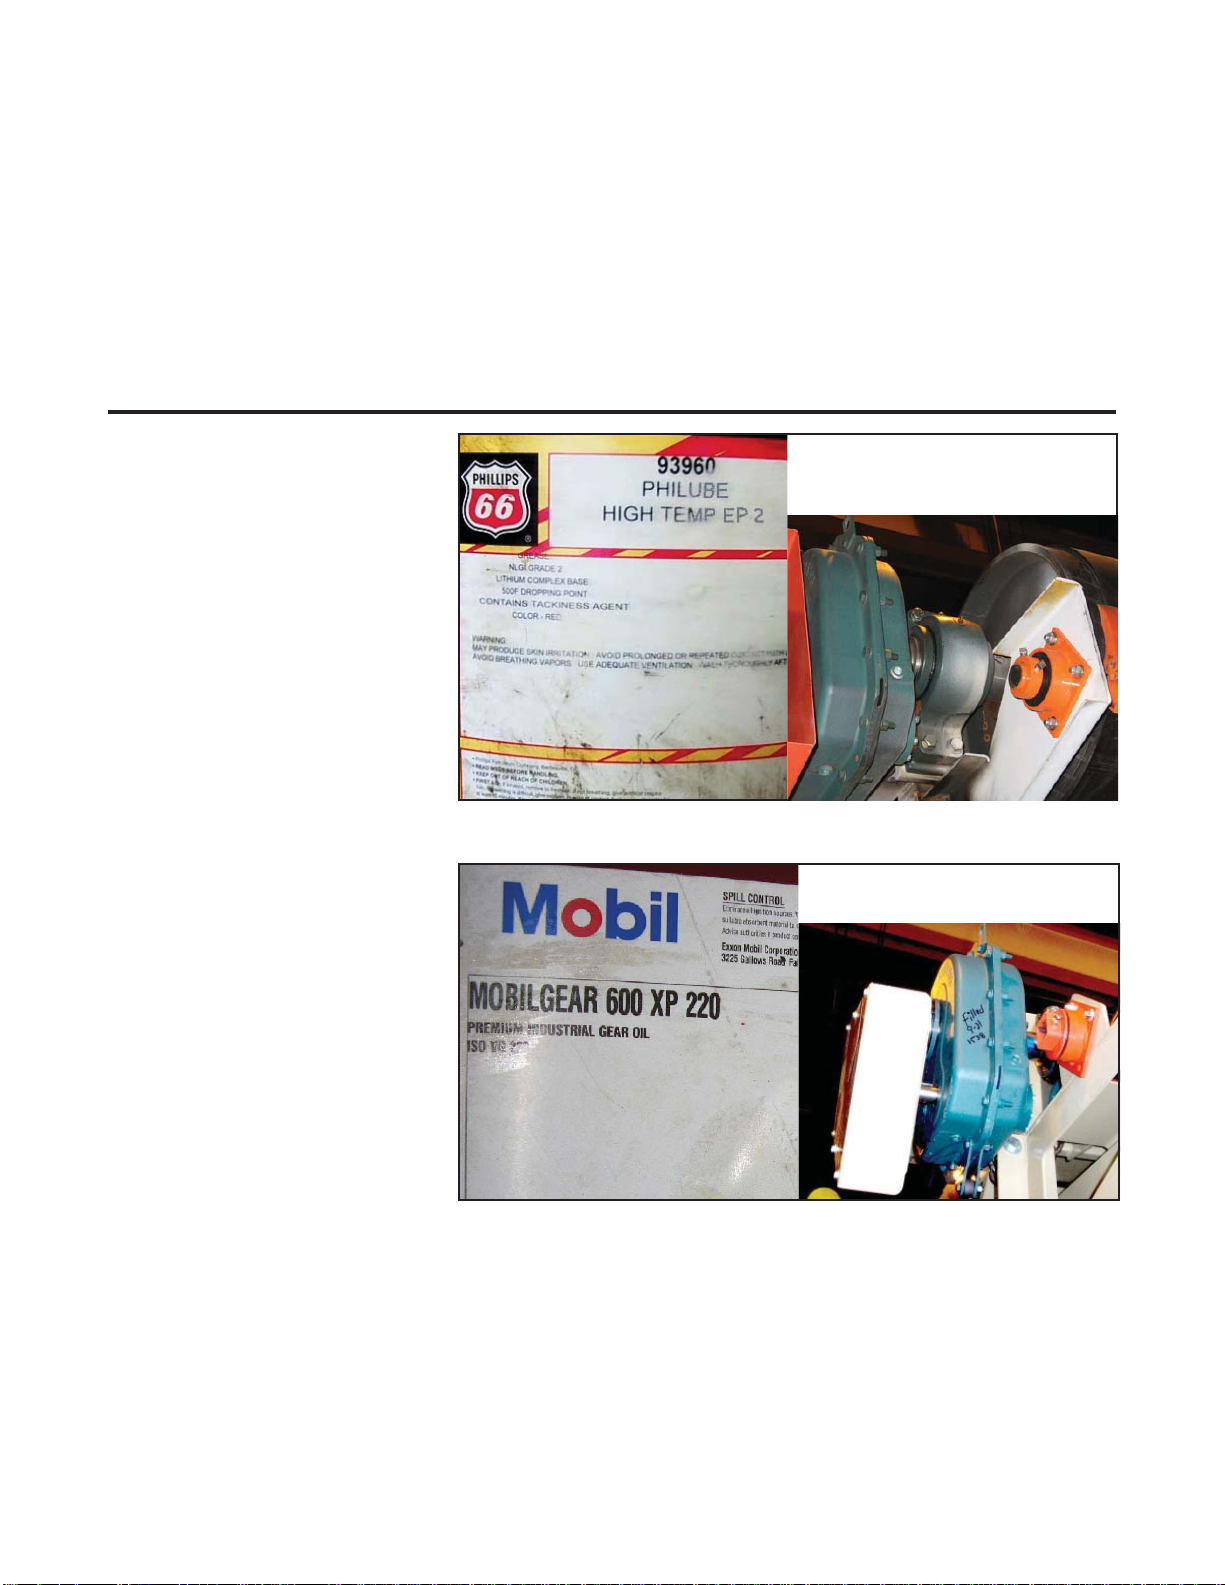
Waste Oil and Fluids
Waste oil and fluids drained
from the engine and hydraulic
system during normal
maintenance and repair can
present a disposal problem.
To avoid pouring them on the
ground or into the sewage
system, pour the used fluids
intolargecontainers,sealthem
andtakethemtoanauthorized
disposal or recycling center.
Maintenance Techniques and Tools
Fasteners
Typically, standard SAE
fastenersareused. Fasteners
are nuts, bolts, studs and
screws used to hold two or
more parts together.
All threaded fasteners should
be clean and straight, with
undamaged threads and
undamaged corners on the
hex heads.
It is a good habit to replace
all damaged fasteners when
performingmaintenance-never
reuse a damaged fastener.
Special locknuts with nylon
insertscanonlybeusedonce.
If they are removed, they lose
their locking ability and must
be replaced.
Rusted nuts and bolts should
be treated with a penetrating
fluid to ease removal and
prevent breakage. Badly
rusted fasteners may have to
bechiseled,sawed,ortorched
off.
Flatwashersandlockwashers,
when removed from an
assembly, should always be
replaced exactly as removed.
Whenreplacingnutsandbolts,
be sure to use the correct
grade. Never use a different
grade of bolt than the original
equipment.

IB-2003
S
eries 40 Trans
fl
ite -
S
tationary
C
onveyor 11
Lubricants and Fluids
Gear Reducers.
ISO 220 Gear Oil
Bearings, Pivot Points and
General Lubricant
EP-2Lithium Based Grease
The lubricants shown to the
rightare“factoryfill”lubricants.
Other lubricants may be
used, provided they meet
the lubrication requirements
specified.
Bearings
Bearings are lubricated with a
high temp EP-2 lithium based
grease containing a tackiness
agent. Lube color is red.
Gear Reducers
Gear reducers are filled with
ahigh grade petroleum based
rustandoxidationinhibitedgear
oil. Forambienttemperatures
15 to 60 degrees Fahrenheit,
ISO viscosity grade 220 is
used. Fortemperatures50-125
degreesFahrenheit MobilDTE
Oil Extra Heavy ISO viscosity
grade 150 can be used.
For temperatures above 125
degreesFahrenheit,useMobil
SHC634andfortemperatures
20 to -22 degrees Fahrenheit
use Mobil SHC 627.

IB-2003
S
eries 40 Trans
fl
ite -
S
tationary
C
onveyor 12
Storage
When the machine will not
be used for a period of a few
months, use the following
procedure for storage to
minimize corrosion and
deterioration.
General Storage Guidelines
• Remove all dirt
and debris from all
areas in and around
the machine.
• Lubricate all points as
specified in the
maintenance and
lubrication section of this
manual.
• Bearings must be rotated
and lubricated every 30
days (they are in storage)
topreventthemfromdrying
out.
• Loosenandremovev-belts
to prevent them from
stretching.
• Cover any exposed shaft
areaswithawaterrepellant
coating.
• Clean the outside of the
machine and repaint any
areas where needed.
• Attach a tag to the plant
indicating what storage
procedures have been
done.
Electric Motor Storage
Guidelines
Thefollowingguidelinesshould
be followed when storing
equipment with an electric
motor.
• Loosen v-belts from the
electricmotortoreducethe
load on the bearing.
• Fillthebearingcavitieswith
grease to prevent
condensation.
• Rotate and lubricate the
bearings and shaft every
30 days it is in storage to
prevent them from drying
out.
• Ifstoringforlongerthansix
months, follow the
ExtendedPeriodStorage
in the next column for
bearings.
If the equipment will be stored
for periods longer than two
years, the bearing will need
to be removed, cleaned, and
Extended Period Storage
(6 months or more)
Ifthemachinewillbestoredfor
aperiodofsixmonthsormore
follow the guidelines below.
These guidelines should
be completed once every
three months to lubricate
the bearings and/or to purge
condensation and to prevent
the bearings from drying out.
• Lubricate bearings
• Rotate the shaft two
revolutions.
• Replace breather cap.
• Remove,clean,roll-up,and
cover the conveyor belt
from the machine.
Conveyor Belt Storage
• Release tension on
conveyorbeltbyloosening
take-upscrewrodontake-
up bearings.
• Release tension on belt
cleaner springs.
• Make sure belt hold-down
devices are in place to
prevent belt damage due
to wind.
• Spray a rust preventative
on screws, rods, etc.
• To help prevent corrosion,
thefueltankshouldbefilled
to their proper level.
• Drain and replace fluid in
the gear reducers.
• Remove and plug all
breather type plugs and
caps to prevent moisture
from entering the system.
regreased; or it should be
replaced.

IB-2003
S
eries 40 Trans
fl
ite -
S
tationary
C
onveyor 13
Introduction to the Series 40 Conveyor
Material flow
Conveyor orientation is
determined by standing at the
tailendoftheconveyorlooking
toward the direction of travel.
Theconveyorisintheoperating
position when it has been
elevatedtoaworkingposition.
References to the right hand
and/orleft handside will beas
shown below.
Head pulley
Tail pulley

IB-2003
S
eries 40 Trans
fl
ite -
S
tationary
C
onveyor 14
Introduction to the Series 40 Conveyor
KPI-JCI stationary
conveyors are designed for
transporting large amounts
of bulk material and are built
in a wide variety of sizes to
handle many different types
of material.
The Series 40 conveyor
consists of an endless belt
whichrevolves around a head
pulley at one end of a steel
frame and a tail pulley at the
other end.
Material is fed onto a belt
through a hopper or feeder at
thetail pulley, and isunloaded
at the head pulley.
Stationary conveyors provide
great flexibility in application.
Idlers
Conveyor belt
Frame
Receiving
trough
Conveyor belt
take-up
Head end
Tail end
Drive

IB-2003
S
eries 40 Trans
fl
ite -
S
tationary
C
onveyor 15
Introduction to the Series 40 Conveyor
The following is a
brief description of the
conveyor’s basic parts and
function.
Head End
Tail End
Theheadendisthedischarge
end and often the drive end
of the conveyor. It utilizes
a vulcanized rubber lagged
pulley for maximum conveyor
belt grip.
Thetailendistheendatwhich
material is loaded and utilizes
aselfcleaningwingtypepulley
which clears excess material.
Frame
The conveyor frame is a
lattice frame design providing
exceptionalstrengthtosupport
theconveyor and its load. Itis
a fixture welded frame.

IB-2003
S
eries 40 Trans
fl
ite -
S
tationary
C
onveyor 16
Introduction to the Series 40 Conveyor
Troughing Idlers
Troughing idlers form the belt
in a curved shape to carry
material .
They are CEMA Class B or
C type sealed for life ball
bearings, 3 roll 35 degree, 5”
diameter steel on 4’ centers.
Optionalimpact idlers cushion
impact and protect the belt
from damage in high capacity
applications.
Return Idlers
The return idlers support the
belt on its return trip to the
loading point.
The return idlers are CEMA
Class B or C type, sealed for
life ball bearings, one single
steel roll.
Rubber disc return idlers are
optional.

IB-2003
S
eries 40 Trans
fl
ite -
S
tationary
C
onveyor 17
Introduction to the Series 40 Conveyor
Conveyor Belt Take-Up
Thetensioningoftheconveyor
belt is accomplished through
theuse ofatake-up screwrod
whichisattachedtoamovable
tailpulleyandtightenedagainst
the conveyor frame.
Conveyor Belt
The belt is a 2 ply 220 PIW,
1/8” top x 1/16” bottom.
Bothtypesinclude mechanical
fasteners.
Optionalvulcanized beltsplice
is also available.
Drive
TheSeries40conveyorutilizes
a Class 1 shaft mounted gear
reducer drive assembly with
a v-belt drive, motor mount,
drive guarding and a TEFC
electric motor less starter and
wiring.
Belt speed is set at 350 FPM.

IB-2003
S
eries 40 Trans
fl
ite -
S
tationary
C
onveyor 18
Introduction to the Series 40 Conveyor
Options
The following options are
available on Series 40
conveyors.
Stationary Conveyors
• Walkway
• Safety stop switch
• Verticalorhorizontalgravity
take-up
• Discharge hood with rock
shelf
• Wind hoops
• Backstop
• Belt plow
• Zero speed
Transflite Conveyors
• Dual tires
• Skid support
• Dolly assembly
A5’6” long material receiving
trough is used at the loading
point. This trough keeps
the conveyor evenly loaded
to maximize capacity and
reduce belt wear. The trough
is equipped with clamped
rubber flashing to help keep
the load centered on the belt
and reduce spillage.
Receiving Trough

IB-2003
S
eries 40 Trans
fl
ite-
S
tationary
C
onveyor 19
Safety First!
This symbol is used to bring
attentiontosafetyprecautions
and instructions.
Whenyouseethissymbol,be
alert and pay attention to all
instructions.
YOUR PERSONAL SAFETY
IS INVOLVED
Most accidents are caused
by failure to observe basic
safetyrulesorprecautions.An
accidentcanoftenbeavoided
by recognizing potentially
hazardous situations before
an accident occurs.
Improper operation is
dangerous and could result
in injury or death.
Basic safety precautions
are outlined in the “SAFETY
PRECAUTIONS” portion of
this publication and in the
description of operations
where hazards exist.
Warning decals have also
beenplacedontheequipment
to provide instructions and to
identifyspecifichazardswhich,
if not heeded, could cause
bodily injury or death to you
or other persons.
KPI-JCI,Inc.cannotanticipate
every possible circumstance
that might involve a potential
hazard. The warnings in
this publication and on the
equipment are therefore not
all inclusive.
Ifanoperationisnotperformed
as specifically recommended
by KPI-JCI, Inc. you must
satisfy yourself that it is safe
foryouandothers.Youshould
alsoensurethattheequipment
will not be damaged or made
unsafe by the method of
operation you choose.
The following signal words
may be used in this manual
to designate a degree or level
of hazard and are defined as
follows.
DANGER
NOTICE
NOTICE is used for specific
practices that are critical to
the operation or maintenance
of the equipment.
CAUTION
CAUTION without the safety
symbol is used for practices
that could result in damage to
the machine if not observed.
CAUTION
CAUTION with the safety
symbol is used for potentially
hazardous situations which,
if not avoided, may result in
minor or moderate injury. It
may also be used to alert
against unsafe practices.
!
WARNING
!
WARNINGisusedforpotentially
hazardous situations which,
if not avoided, could result in
death or serious injury.
DANGERisusedforimminently
hazardous situations which,
if not avoided, WILL result in
death or hazardous injury.
!

Safety
IB-2003
S
eries 40 Trans
fl
ite-
S
tationary
C
onveyor 20
Safety symbols are used
with signal words to further
demonstrate a safety hazard.
The table below illustrates
the safety symbols found on
decals.
Safety Precautions
The safe operation and
maintenance of the impact
crushing plant is the
responsibility of the owner/
employer and the operator/
employee.
The owner/employer must
ensure that anyone who
operates,maintains,services,
transports or works around
the machine is familiar with
operation, maintenance
and safety procedures and
information outlined in this
manual.
Owner/Operator’s
Responsibility
It is the owner/operator’s
responsibility to insure
everyone operating the
equipmentisfamiliarwithsafe
operation and maintenance
of the impact crushing plant.
Do not risk injury or death by
ignoring safety practices or
failing to instruct.
It is the owner’s responsibility
togive theoperator/employee
instruction before allowing
them to operate, service,
transport or work around
the impact crushing plant.
This instruction should be
reviewed at least annually.
Operator/Employee’s
Responsibility
It is the operator’s
responsibility to read,
understand and follow all
operation, service and safety
information presented in this
manual and on the machine.
Untrained operators and
maintenance personnel are
a hazard to themselves and
others and are not qualified to
operate or service the impact
crushing plant.
Never modify the impact
crushing plant in any way.
Unauthorized modifications
can affect the function and/or
safe operation and life of the
impact crushing plant.
Safety Symbol Safety Meaning
Fall Hazard. Do not stand or sit on frame while in
operation. Wear proper safety rigging and gear
before climbing on the equipment.
High Pressure Hazard. The machine’s hydraulic
system poses a high pressure fluid hazard. Wear
proper protective equipment (PPE) when working on
the machine. Follow the steps to relieve hydraulic
pressureandlockout/tagoutmachinebeforeservicing.
Impact Hazard. The machine uses counterbalance
valves. Wear proper PPE. Follow the steps to
relieve pressure and lockout/tagout machine before
servicing.
Magnetic Field Hazard. Pacemaker users should
use caution around the magnet.
Nip Point Hazard. The head and tail pulley areas
on conveyors pose a nip point hazard. Make sure
machine is locked out/tagged out before servicing.
Flammable Material Hazard. Diesel fuel and
hydrualic oil pose a flammable material hazard. Do
not smoke near machine.
Respiratory Hazard. Machine operation causes
dust. Wear a face mask when operating the machine.
Flying Debris Hazard. Crusher operation causes
debris and poses a risk of eye injury. Wear approved
eye protection when the crusher is operating.
Falling Objects Hazard. Loading the machine
causes debris to fall and poses a head injury. Wear
an approved hard hat when the machine is operating.
High Voltage Hazard. The electrical components on
this machine pose burns or shock risk. Make sure
machine is locked out/tagged out before servicing.

Safety
IB-2003
S
eries 40 Trans
fl
ite-
S
tationary
C
onveyor 21
Assembly Safety
1. Assemble in an area with
sufficient space to handle
the largest component
and access to all sides of
the machine.
2. Use only cranes, jacks
and tools with sufficient
capacity.
3. Do not allow spectators in
the assembly area.
Thefollowingsectionpresents
material on specific safety
items. Although specific
safety guidelines are given,
each situation can have its
own peculiarities which can
not always be covered by
specific rules.
General Safety
1. Read and understand the
Operator’s Manual before
operating, servicing or
working around this
machine.
2. Haveafirstaidkitavailable
and know how to use it.
3. Have a fire extinguisher
available and know how to
use it.
4. Wearnecessaryprotective
gear, including but not
limited to:
• Hard hat
• Protective shoes with slip
resistant soles
• Eye protection
• Protective gloves
• Hearing protection -
sound pressure level of
this plant are equal to
95dB(A) at a distance of
five meters. Appropriate
hearing protection must
be worn while operating
this machine.
• Respirator or filter mask
5. Check and secure all
guards before operating.
Repair or replace any
damaged or missing
guards or guarding
devices.
6. Repair or replace any
damaged handrails,
ladders, or walkways.
7. Place all controls in
neutral, stop engine,
remove ignition key, follow
lockout/tagout procedure
and wait for all motion
to stop before lubricating,
adjusting, or servicing.
8. Clear area of people
before starting the plant.
9. Review safety practices
annually.
Operating Safety
1. Read and understand the
Operator’s Manual before
operating, servicing or
working around this
machine.
2. Keep hands, feet, hair and
clothing away from
moving parts.
3. Follow lockout/tagout
procedure and wait for all
motion to stop before
lubricating, adjusting or
servicing.
4. Clear the area of people
before starting the
impact crushing plant.
5. Place the impact crushing
plantsothatitisvisiblefrom
the operator’s station.
6. Never operate the
impact crushing plant if it
has been damaged.
7. Keep all hydraulic lines,
fittings and couplers free
from leaks before
operating.
8. Review safety practices
annually.
9. Do not stand or sit on
catwalk, underscreen
frame, or rails while plant
is in operation.
This manual suits for next models
15
Other ASTEC Industrial Equipment manuals