Astra esa Regatta User manual

Operative Manual
1.1 - 3/2015
esa Regatta Watch

INDEX
pag. 2
Introduction page 3
esa Regatta Watch functionalities: initial procedure and main screens page 5
Main screens: navigation data, performance target, performance polar page 7
Main screens, starting procedure page 14
Other screens: setting page 17
Attachments 1- 4: file transfer from pc; new polar file data, file log, app upgrade page 19
pag. 2

Esa Regatta Watch is the first smartwatch with an application specifically designed for sail and regatta, able
to provide all the information on boat’s performances with a professional level, in a simple, direct and
completely automatic way right on your wrist.
esa provides the comparison of the actual performance respect to the target, provides all data for a winning start,
works as a repeater for the onboard instrumentation data, records navigation data al allows a further editing of them.
esa is an instrument useful at every level:
- for the beginners who wants to improve the basic setting of his sails, both in cruise and regatta;
- for the racers which searches for the best performances on his boat without renouncing to use a professional
Introduction: welcome in esa Regatta Watch (easy sailing assistance)
pag. 3
- for the racers which searches for the best performances on his boat without renouncing to use a professional
instrumentation that usually has much higher costs and complexity respect to esa.
Thankfully to the extreme portability is possible to access to all performance and navigation data of the boat in any
position onboard!
esa is connected to onboard instrumentation through Wi-Fi connection which transmits NMEA0183 data.
The following instruction will let also the beginners to use easily esa app
pag. 3

CAUTIONS
In order esa to work properly and to let work it at the maximum potential is important to have onboard
instrumentation calibrated.
For its own calculation esa imports from onboard instrumentation a series of essentials data that elaborates on its
own: Boat Speed (BS), Magnetic Heading (HDG), Apparent Wind Angle (AWA) and True Wind Angle (TWA).
We recommend to carefully read the instruction of yours navigation system and to perform the data calibration of those mentioned above
as written in their manual. Calibration values could change through time, is better to check them periodically to be ensured the onboard
instrumentation and consequently esa work properly.
It is better to learn the meaning of the abbreviations comparing in esa displays.
Initial Denomination Meaning
pag. 4
BS Boat speed Boat speed on water (knots)
Pol Boat speed polar Boat speed as polar (knots)
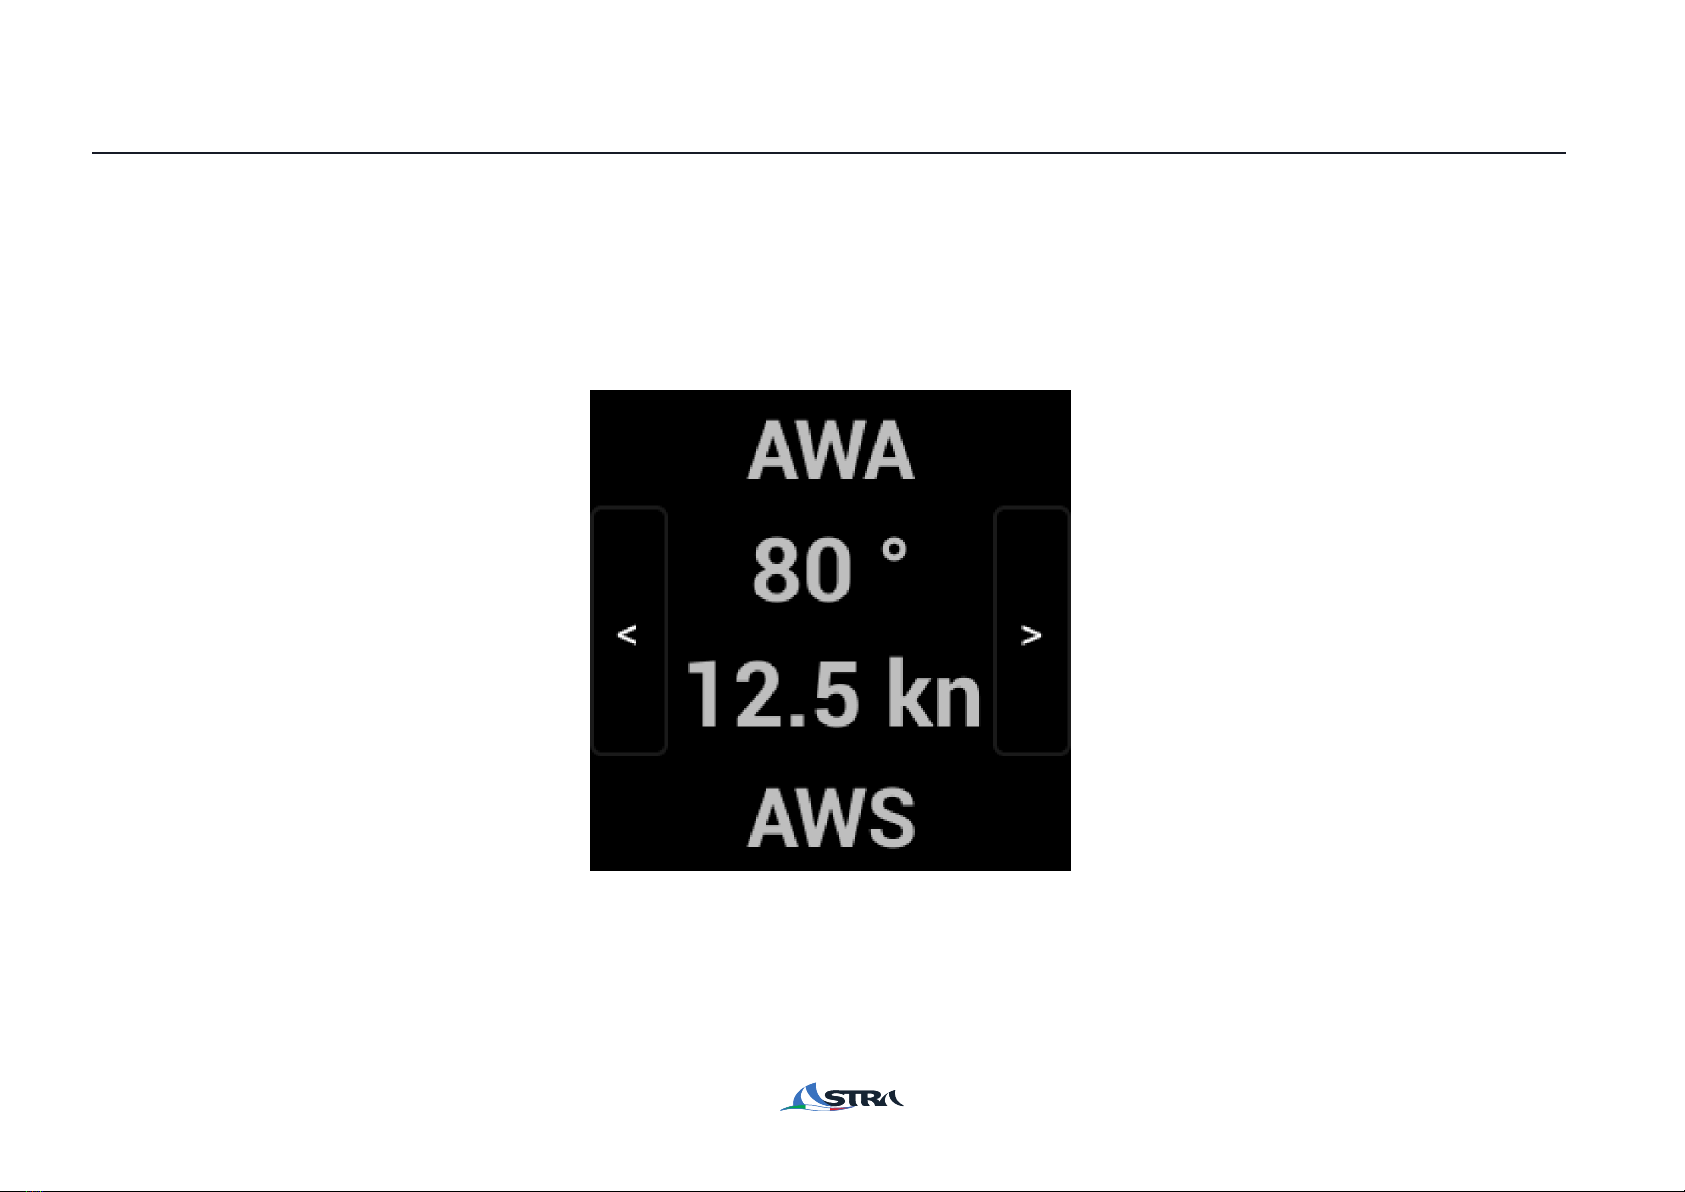
AWA Apparent Wind Angle Apparent wind angle(°) respect to the bow (+ from right; - from left)
AWS Apparent Wind Speed Apparent Wind Speed (Knots)
TWA True Wind Angle True Wind Angle (°) respect to the bow (+ from right; - from left)
TWS True Wind Speed True Wind Speed (Knots)
TWD True Wind Direction True Wind Direction respect to the magnetic North
%Boat Speed Perc. Boat Speed Percentage respect to the polar (target data)
HDG Heading Bow magnetic heading (°)
SOG Speed Over Ground Boat Speed over Ground (from GPS) (Knots)
COG Course Over Ground Boat course over ground (from GPS) (Knots)
OPP TACK Opposite Tack New bow Heading (HDG°) after a veer or shoot down, on TWA tgt course
BS tg Boat Speed Target Boat Speed Target for Bowline/Stern (Knots)
TWA tg True Wind Angle Target True Wind Angle Target for Bowline/Stern (°) (+ from right; - from left)

INITIAL SET UP PROCEDURE FOR THE APP
At THE FIRST BOOT of the app is useful to follow all the onscreen instructions.
In particular please remind to write with your reference email for esa Regatta Watch at the address displayed below, :
“licensing@astrayacht.com”
By this, Astra will be able to freely send to you all esa upgrades via email through .apk files to be installed on your esa
Watch
pag. 5

1
22
11
33
esa is operative
44 55
IT’S EASY, FEW STEPS AND GO!
1. Select reference yard polar file
pag. 6
WARNING
If you want to restart esa (in particular after errors of data computation, with crash of the app), is recommended to press and hold “home” button, and swipe out the
app itself from the list. After this, it is possible to restart esa from zero.
The following presentation is for getting in the way of functioning of esa.
It’s recommended to use demo to practice in esa, with the help of this manual.
2. Press “Connect” button
3. Choose Between Wi-Fi or Demo (in case of Demo is sufficient press Start then)
4. In case of Wi-Fi, select ESA or NMEA, esa Watch o be previously connected with through
system settings of the smartwatch itself, see also pag 18
5. Press Start

4 MAIN SCREEN
1. Navigation Data visualization. It
is possible to select 2 data per
time, until 8 minor screen by
pressing on arrows on the side of
the screen (see pg 11)
2. Target Display: wind angle and and
boat speed for best WMG (bowline and
stern)
3. Target Speed indication for any wind
angle
pag. 7
the screen (see pg 11)
4. Starting Procedure: time and
distance from the starting line.
All different screen are reachable by swiping left or right the finger on the screen.

•Wi-Fi connection system able to connect with both NMEA0183 transmitting system and GAMP 0183 esa system
by Astra
•Target data constantly updated depending on wind intensity and angle (continuous interpolation)
Data collection of navigation and possible storage on your PC
Damping setting
Possibility to insert target data (polar) of the boat by putting them in the appropriate folder
Possibility to ask Astra Yacht s.r.l. specific analysis
esa Functionalities OTHER ASPECTS
pag. 8

Choice of files Polar reference
from which will be extracted the
value of the target boat speed (can
be one of those present by default
in esa or entered by the user)
Starting Screen: choiche of the reference polar
Wi-Fi signal strenght
pag. 9
in esa or entered by the user)
REFERENCE POLAR FILE:
• Select a file in storage
• A new polar can be inserted following the
appropriate procedure (see page 19-21)
pag. 9

It can be displayed 2 data per time, between 8 different combinations, selectable by pressing the arrows on the side of
the screen (left and right)
In addition to data obtained by boat’s instrumentation, there are those calculated by esa: BS tg, Opp Tack.
Main Screen: NAVIGATION DATA (1/2)
pag. 10
Couple of data display switchable by arrow press on the side of the screen
pag. 10

Here below all the possible combination of navigation data displayable
Main Screen: NAVIGATION DATA (2/2)
pag. 11pag. 11

%shows the comparison
between real and target VMG
tgt: target angle of the wind
for the max VMG, shown with
This page displays the optimum speed boat and true wind angle that generate maximum VMG (Velocity
Made Good) going to bowline and stern, extracts from the polar table, given the intensity and angle of the wind.
These values are compared with the values obtained from the vessel and provides an indication of the
percentage VMG current than the
Main Screen: PERFORMANCE TARGET (bowline and stern) (1/2)
pag. 12
True wind Angle, shown also by the
instrumentation needle (and the red
one on the graphics)
Target BS: target speed of
the boat for max VMG
for the max VMG, shown with
a white triangle
Boat Speed: real time
boat speed.
pag. 12
The starting procedure page is on the right by swiping the finger on the screen from right to left from navigation screen.

%: comparison between boat and
polar speed
TWA : true wind angle, both number
In different points of sailing from bowline and stern, target speed to be reached is shown, obtaining data from
polar table, based on boat angle respect to the wind and its intensity: target are constantly update in real time.
Main Screen: PERFORMANCE TARGET (in all points of sailing) (2/2)
pag. 13
Boat Speed: actual boat
speed
TWA : true wind angle, both number
and needle (red one)
Polar BS: optimal speed
extracted from the polar
table, interpolated with
wind angle and intensity
pag. 13
The starting procedure page is on the right by swiping the finger on the screen from right to left from navigation screen.

• The positioning has to be made at low
speed, evaluating the point on the bow of
the boat, in order to prevent unalignment
between GPS and bow.
Bring the boat near the left side of the starting line, with a little pressure on the left flag (initially blue) the firts
side is fixed. The left flag becomes red. On the same way proceed with the right side (the flag becomes green)
STARTING LINE DEFINITION
• It is possible to replace the points by
Main Screens: STARTING PROCEDURE (1/3)
pag. 14
WARNING:
In order to the system to work is necessary to interface the onboard instrumentation with a GPS antenna, and that esa
receives GPS data (is sufficient to verify that SOG is on, with the boat under movement and the value has to be
different than zero)
Once set the starting line, the app
provides all data automatically.
• It is possible to replace the points by
keeping pressed the flag where desired.
pag. 14
3:22
1:22
1:22
54
The starting procedure page is on the right by swiping the finger on the screen from right to left from navigation screen.

Positioned the ends of the line (green flag and red), the system provides, on a single page, the data necessary for a
proper setting of the start
Graphic indication of the wind angle respect to the line
Meter distance of the boat from right
(green) or left (red) end of the line.
Time needed to reach the ends of the
SIZES HIGHLIGHTED IN STARTING PROCEDURE
Main Screens: STARTING PROCEDURE (2/3)
pag. 15
Time needed to reach the ends of the
line
DISTANCE TO LINE: distance to the line
measured perpendicularly to line itself:
Positive value: In
Negative value: out
START/STOP
5 minutes timer
Sync timer.
Press for a second to
change by + or – one
minute
pag. 15
TTB: Time to Burn is the time that we are ahead on the starting line from
the current position if sailing bowline to target speed; If the display is OUT
(see image above) means that you are over the line (see p. below)

esa before the start creates specific targets, reducing those from yard polar for a predefined percentage, accounting
that in this phase the performance are slightly lower. With these new target and the distances provided by esa, the time
needed to reach the ends of the starting line.
TIME EXTIMATION METHOD:
Main Screens: STARTING PROCEDURE (3/3)
P S
C
54.0m
0:45
73
1:03
pag. 16
If, in the point in which the boat is, is impossible to reach directly one of the ends of the starting line, sailing in strict
bowline, the time indication text is replaced by “OUT”.
Also in this way you obtain the indication that you are behind the lay line for the end in question, therefore is
necessary to veer at least one time to reach the end itself.
Note well: esa does not take count of veer time, for reach the point S, boats on point C in figure, the indicated time will be the same for
each boat, but for the read one one more veer will be needed, and consequently more time will be spent for reach the point
pag. 16
C
DISTANCE TO LINE
54.0m
54
4:09
0:451:03

SETTING: Damping
To access the screen, press the button on the low right (1)
Through this setting is possible to set the Damping level of entering data.
In particular Damping is the value of softening over data variation displayed. It can be selected to move from minimum
of 1s (established data) to a maximum of 9s (input data in esa very unstable)
pag. 17pag. 17
11

SETTING: Wi-Fi Connection
First connect the Wi-Fi on the smartphone to your on board Wi-Fi net
Then if you don’t use an Astra Wi-Fi device, you has to set the connection
To access to the Wi-Fi setting, press the button on the low right (1)
Through this setting is possible to set the connection parameters (IP, Port), write the data of your Wi-Fi device (2)
If the IP and Port fields are empty the app try to connects to the GAMP (Astra Yacht Multiplexer Wi-Fi) with default IP
and Port. (2)
Otherwise the app connects with IP and Port inserted. (3)
NOTE: the number that you see on the figure (3) is only for example, please check the instruction of your device to find
the rights numbers.
22 33
pag. 18
11
22 33

Is it possible to insert polar file data in esa, by
uploading the file in the appropriate folder, once you
connect the watch to the PC.
esa Watch connection to a pc:
-Windows: connect esa Watch through usb directly
to the pc. Select from notification tent (go home,
swipe down the finger) connect as “usb storage” (1)
Press then “Turn on USB storage” (2).
Select then polar file to be inserted, drag it in
Attachment 1: POLAR FILE UPDATE FROM FILE MANAGER (1/2)
11 22
pag. 19
Select then polar file to be inserted, drag it in
“ships” folder from your.
After inserting it, it will be visible in selection screen
in the app itself, like one of the polar file originally
inserted.
WARINING:
Use exclusively esa-YardPolar .txt file format (see
pg 21)
See website www.AstraYacht.com : Yard Polar
File (under: product, documentation)
pag. 19

-MAC system: connect esa Watch through usb
directly to the pc. Select from notification tent (go
home, swipe down the finger) connect as media
device MTP.
-N.B. if you find difficults to connect the device to
your Mac esa Smartwatch you must have
previously downloaded and installed the program
"File Transfer Android" available at:
www.android.com/filetransfer
Then select the file to insert polar, dragging it to the
folder "ships" from your Mac.
After inserting the file will appear in the data visible in
the selection screen within the program itself esa,
between polar and is selectable as a polar originally
Attachment 1: POLAR FILE UPDATE FROM FILE MANAGER (2/2)
pag. 20
between polar and is selectable as a polar originally
inserted
pag. 20
WARINING:
Use exclusively esa .txt file format (see pg 21)
.
See website www.AstraYacht.com : Yard Polar
File (under: product, documentation)
Other Astra Watch manuals