AstroLink 4 mini II manual - @2021 astrojolo.com
9
Rev. 1.0
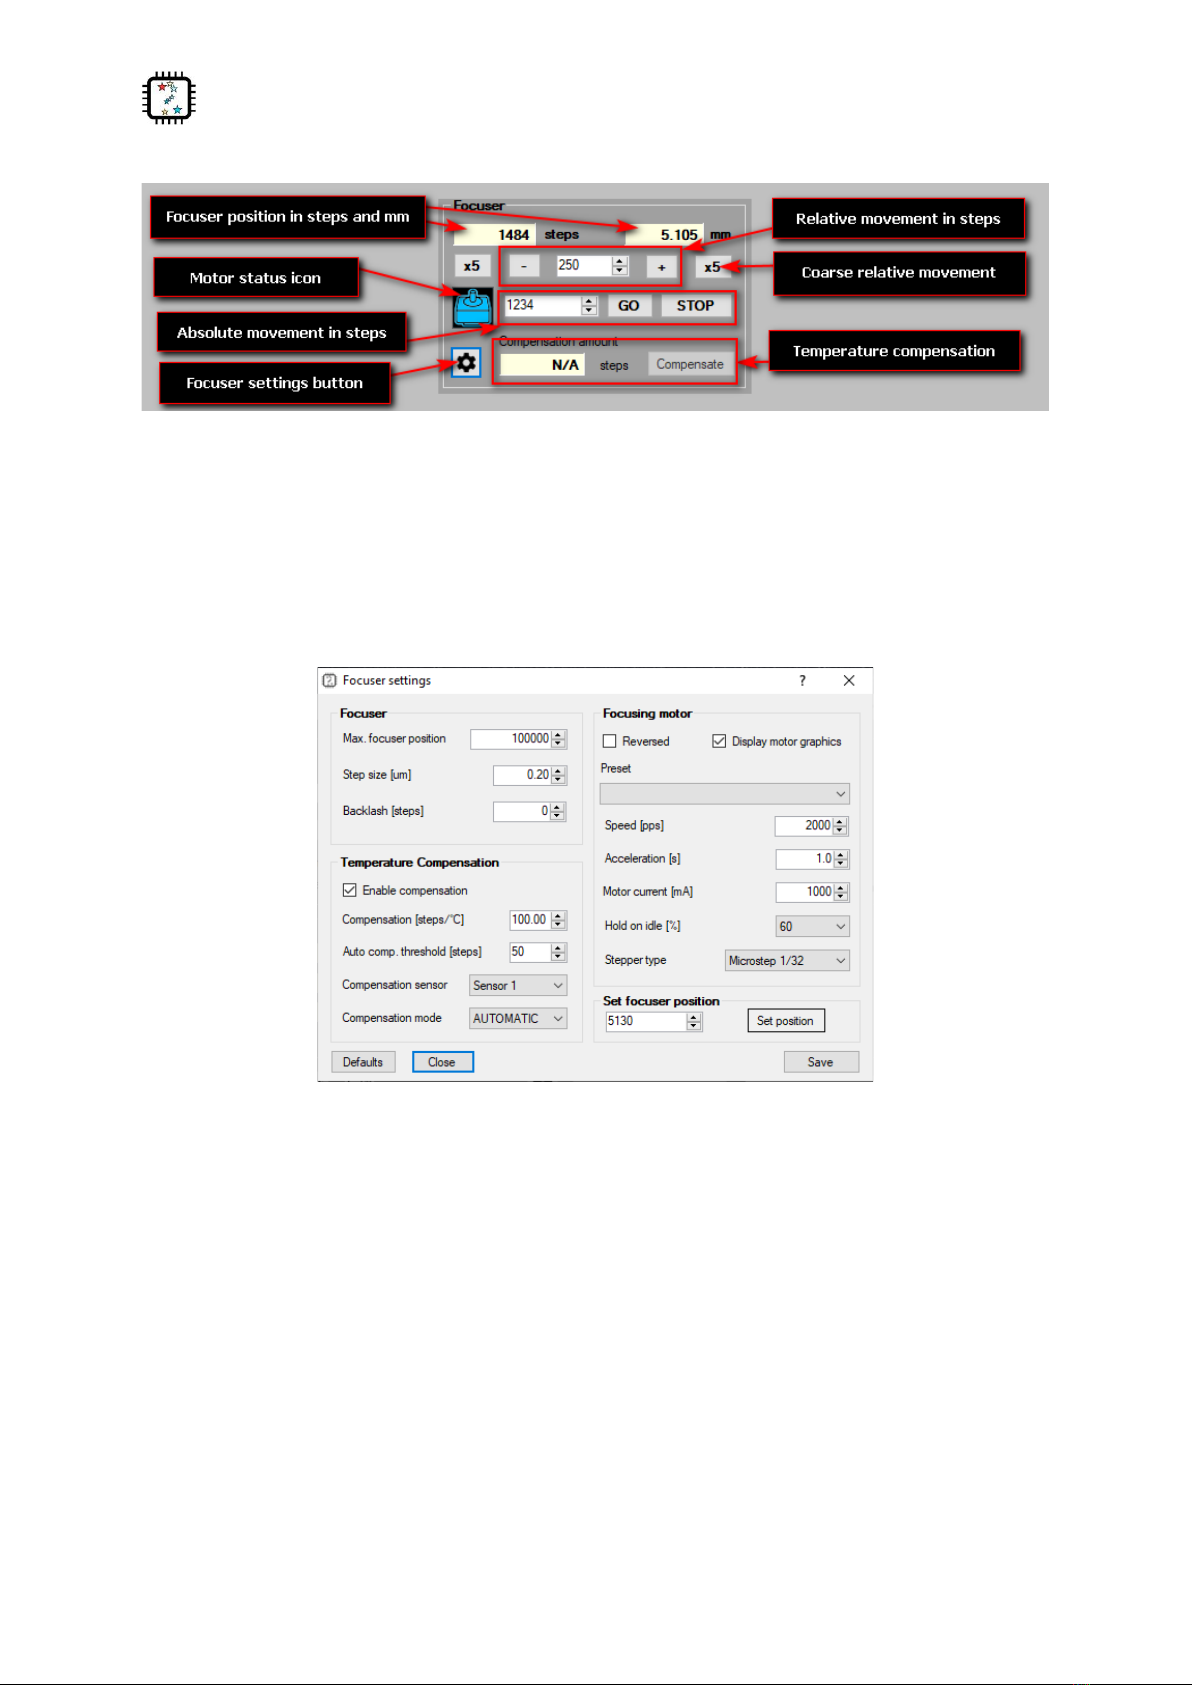
Preset –select any of the predefined settings for common motor parameters. Other fields at this tab
will be filled with values, but settings will be saved after the Save button is pressed.
Speed [pps] - focuser stepper speed in pulses per second. You need to select the appropriate value,
so the focuser will move with reasonable speed, but no steps will be lost during the move. For
popular unipolar stepper motors with a 7.5-degree step, it should be usually no more than 120-150.
Bipolar steppers with a 1.8 degree step usually can operate at a faster rate, up to 400-500pps. Micro-
stepping can operate at rates up to 2000pps.
Acceleration [s] - each time stepper starts to move, it accelerates to the speed selected in the field
Speed. Here you can enter the acceleration time. So for example, when you enter here one second,
then stepper motor will reach its maximum speed within one second. This value is also used for
manual stepper control, but acceleration is divided by 5 for this purpose, so it is possible to do small
manual corrections.
Motor current [mA] –this is the current limit set to the motor. Refer to your motor technical data to
set proper current. For 12V unipolar geared motors offered in shop.astrojolo.com set it to 400mA or
use preset.
Hold torque [%] - when this is selected to any value greater than zero, the stepper motor will be
powered when stopped. It can then provide additional holding torque to your focuser, however
more current will be drawn, and motor temperature will increase. Make sure the stepper motor you
use is designed to be powered constantly if you want to use this option.
Stepper type - can be selected between Unipolar (like Robofocus compatible) or Bipolar motor full or
half step motors. It can be also bipolar motor controlled with micro-steps –two options 1/8 and 1/32
stepping are available.
Enable compensation - switch compensation on or off
Compensation steps [steps/C] - this is the number of steps the focuser will move when the
temperature will change from the initial value. So if you put here 35 and the temperature will drop
2C, then the focuser will move 70 steps (outwards). This value usually must be determined
practically, so you can note focuser positions over long night session together with corresponding
temperatures, and then calculate this coefficient
Auto compensation threshold [steps] - when compensation mode is set to AUTO and the calculated
compensation error will exceed this value, then compensation will be automatically applied
Compensation sensor - here you can select the sensor that will be used for temperature
measurements for focuser compensation
Compensation mode. When set to MANUAL the calculated compensation will be displayed in
Compensation difference window, however, no compensation will be performed - it must be
triggered manually with the Compensate button (or using script - see Temperature compensation
section). When this option is set to AUTO then manual compensation will still work, but it will also be
performed automatically each time when calculated compensation error will exceed the Auto
compensation threshold value
Set focuser position - you can set any desired focuser position to calibrate it. Usually, it will be used to
set a zero position. For this case you need to move the focuser tube inwards as much as possible,
then enter 0 value into the field and press the Set position button